Penny Black Hello Spring Wagon

Hello! Today, I am sharing a CAS, spring-themed “Hello” card created with Penny Black supplies. I previously shared a Valentine’s Day card featuring the 51-646 Wagon Ride set here.

Penny Black Hello Spring Wagon

  • I created a horizon line on a 4 1/4″ square card base.
  • I cut the 51-646 Wagon Ride set from white, dark grey, brush silver, and kraft cardstock and assembled it.
  • I die-cut the flowers with the 51-596 Bird and Branch  and 51-618 Swinging sets from cardstock colored with Distress Inks, which I heat-embossed with clear embossing powder.
  • I cut the sentiment with the 51-638 Thanks & Hello set from yellow cardstock.
  • I adhered the sentiment and flowers to the card base.

Penny Black Hello Spring Wagon

Supplies:

Spellbinders April 2021 Clear Stamp Kit Club

Hello! Today I am sharing a brightly-colored, thank you card created with this month’s Clear Stamp of the Month Club at Spellbinders – “Around the Bend.”

Spellbinders April 2021 Clear Stamp Kit Club

I used the stamp set along with this month’s Large Die of the Month – “Universal Curved Border Set.”

Spellbinders April 2021 Clear Stamp Kit Club

  • I cut the orange and pink cardstock panels at the same time with a die in the Large Die of the Month set.
  • I heat-embossed the sentiment on the orange cardstock panel.
  • I stamped the vine and flowers on a white cardstock panel.
  • I adhered the orange and pink panels to the stamped panel and trimmed the sides.

Spellbinders April 2021 Clear Stamp Kit Club

Supplies:

Spellbinders April 2021 Large Die Kit Club

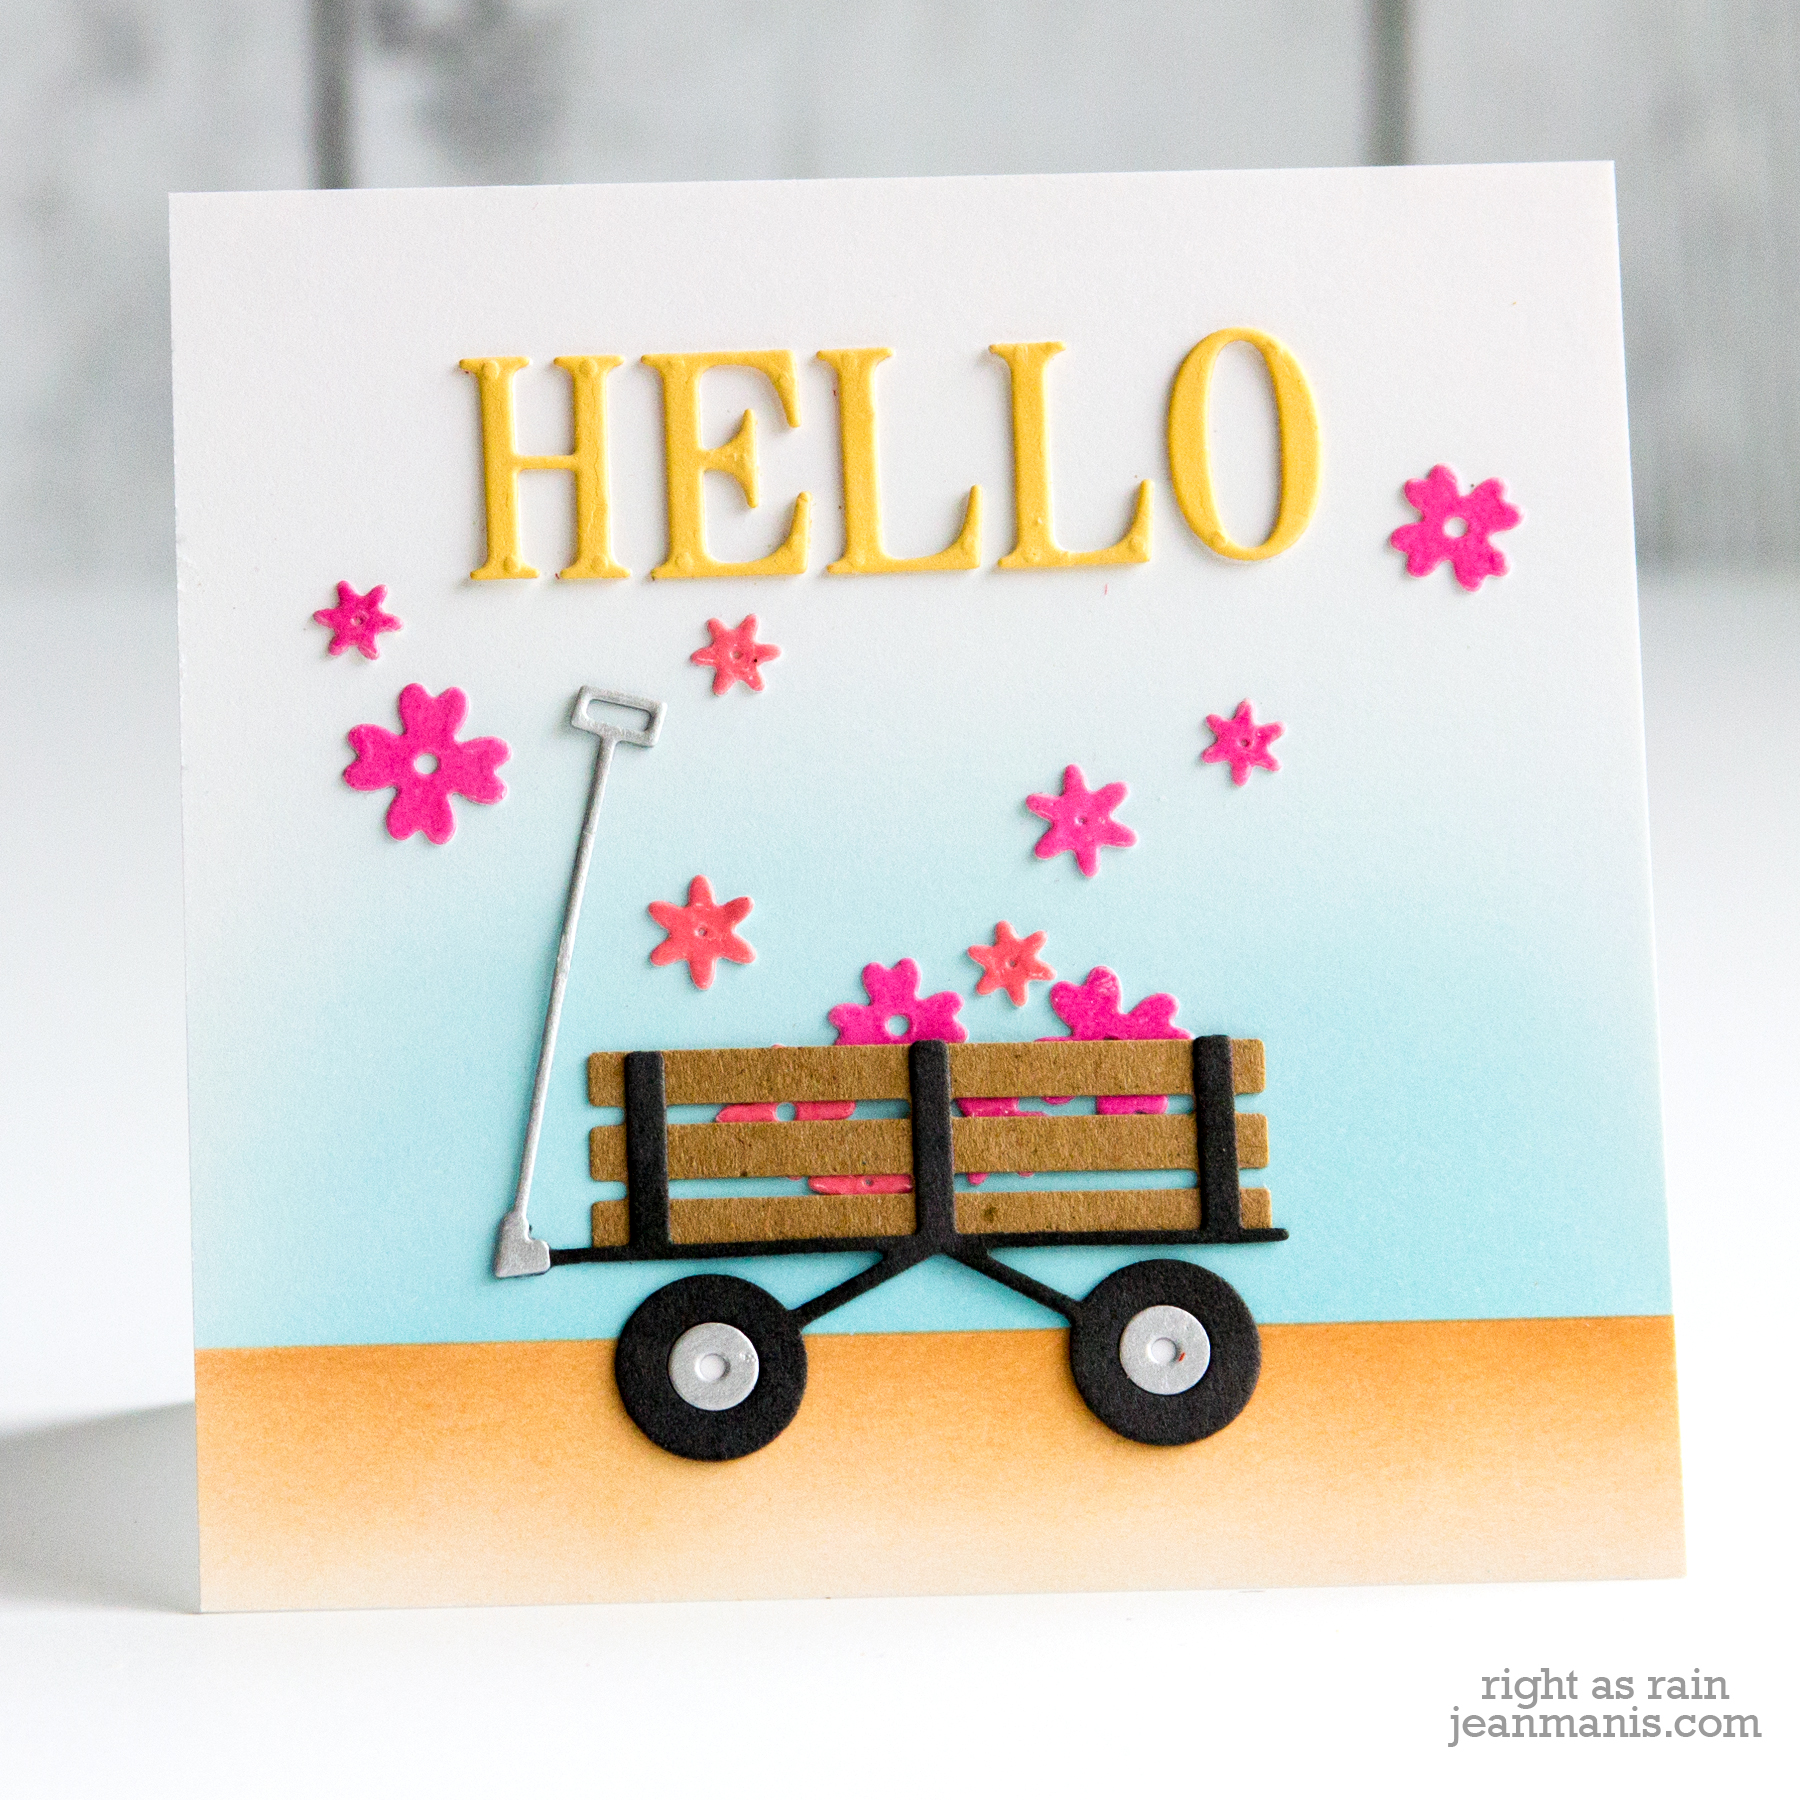
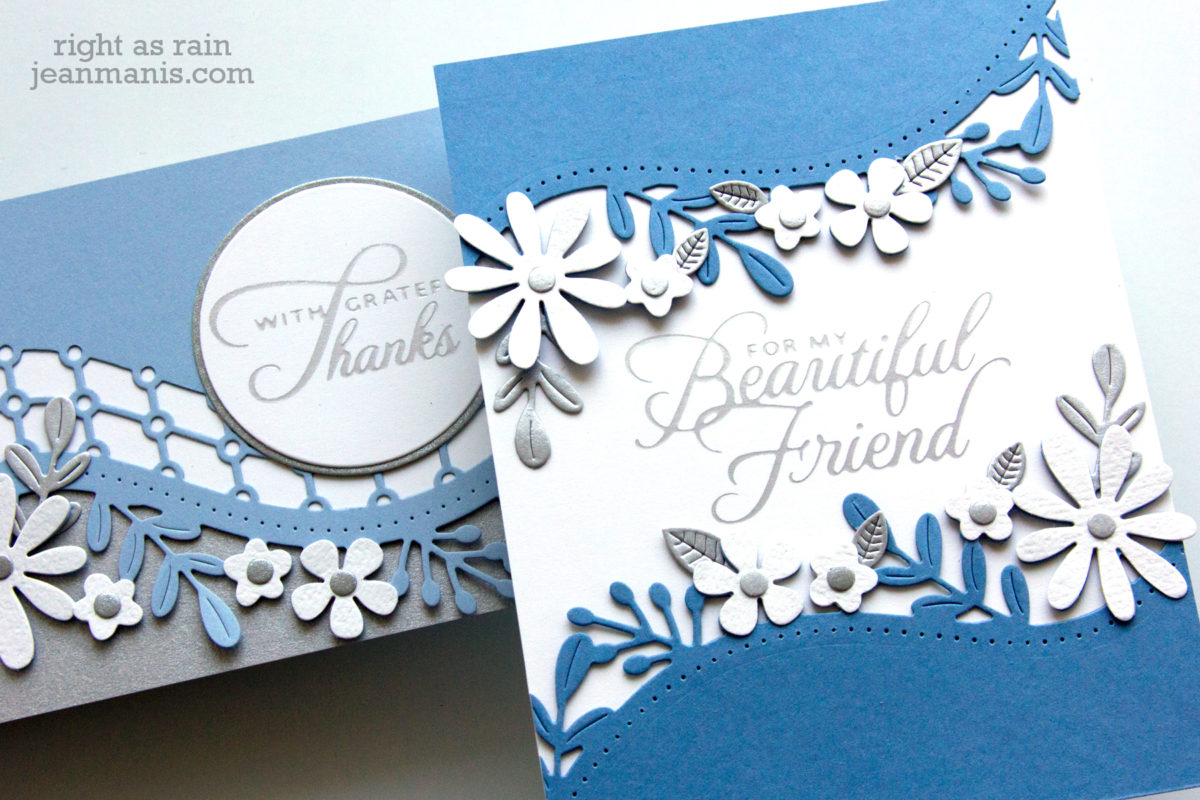
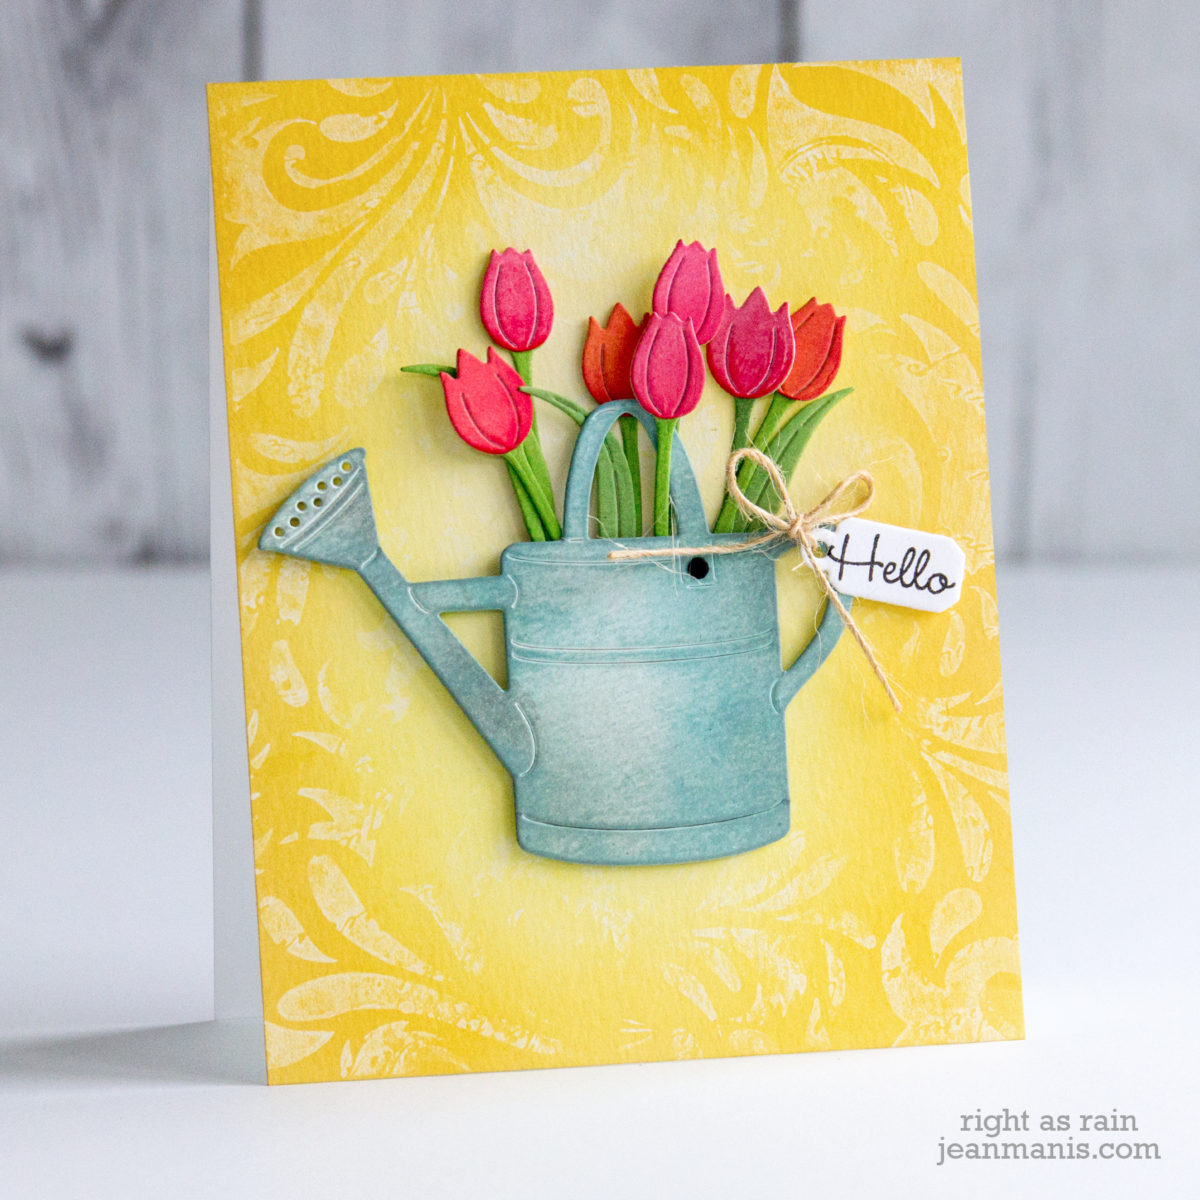
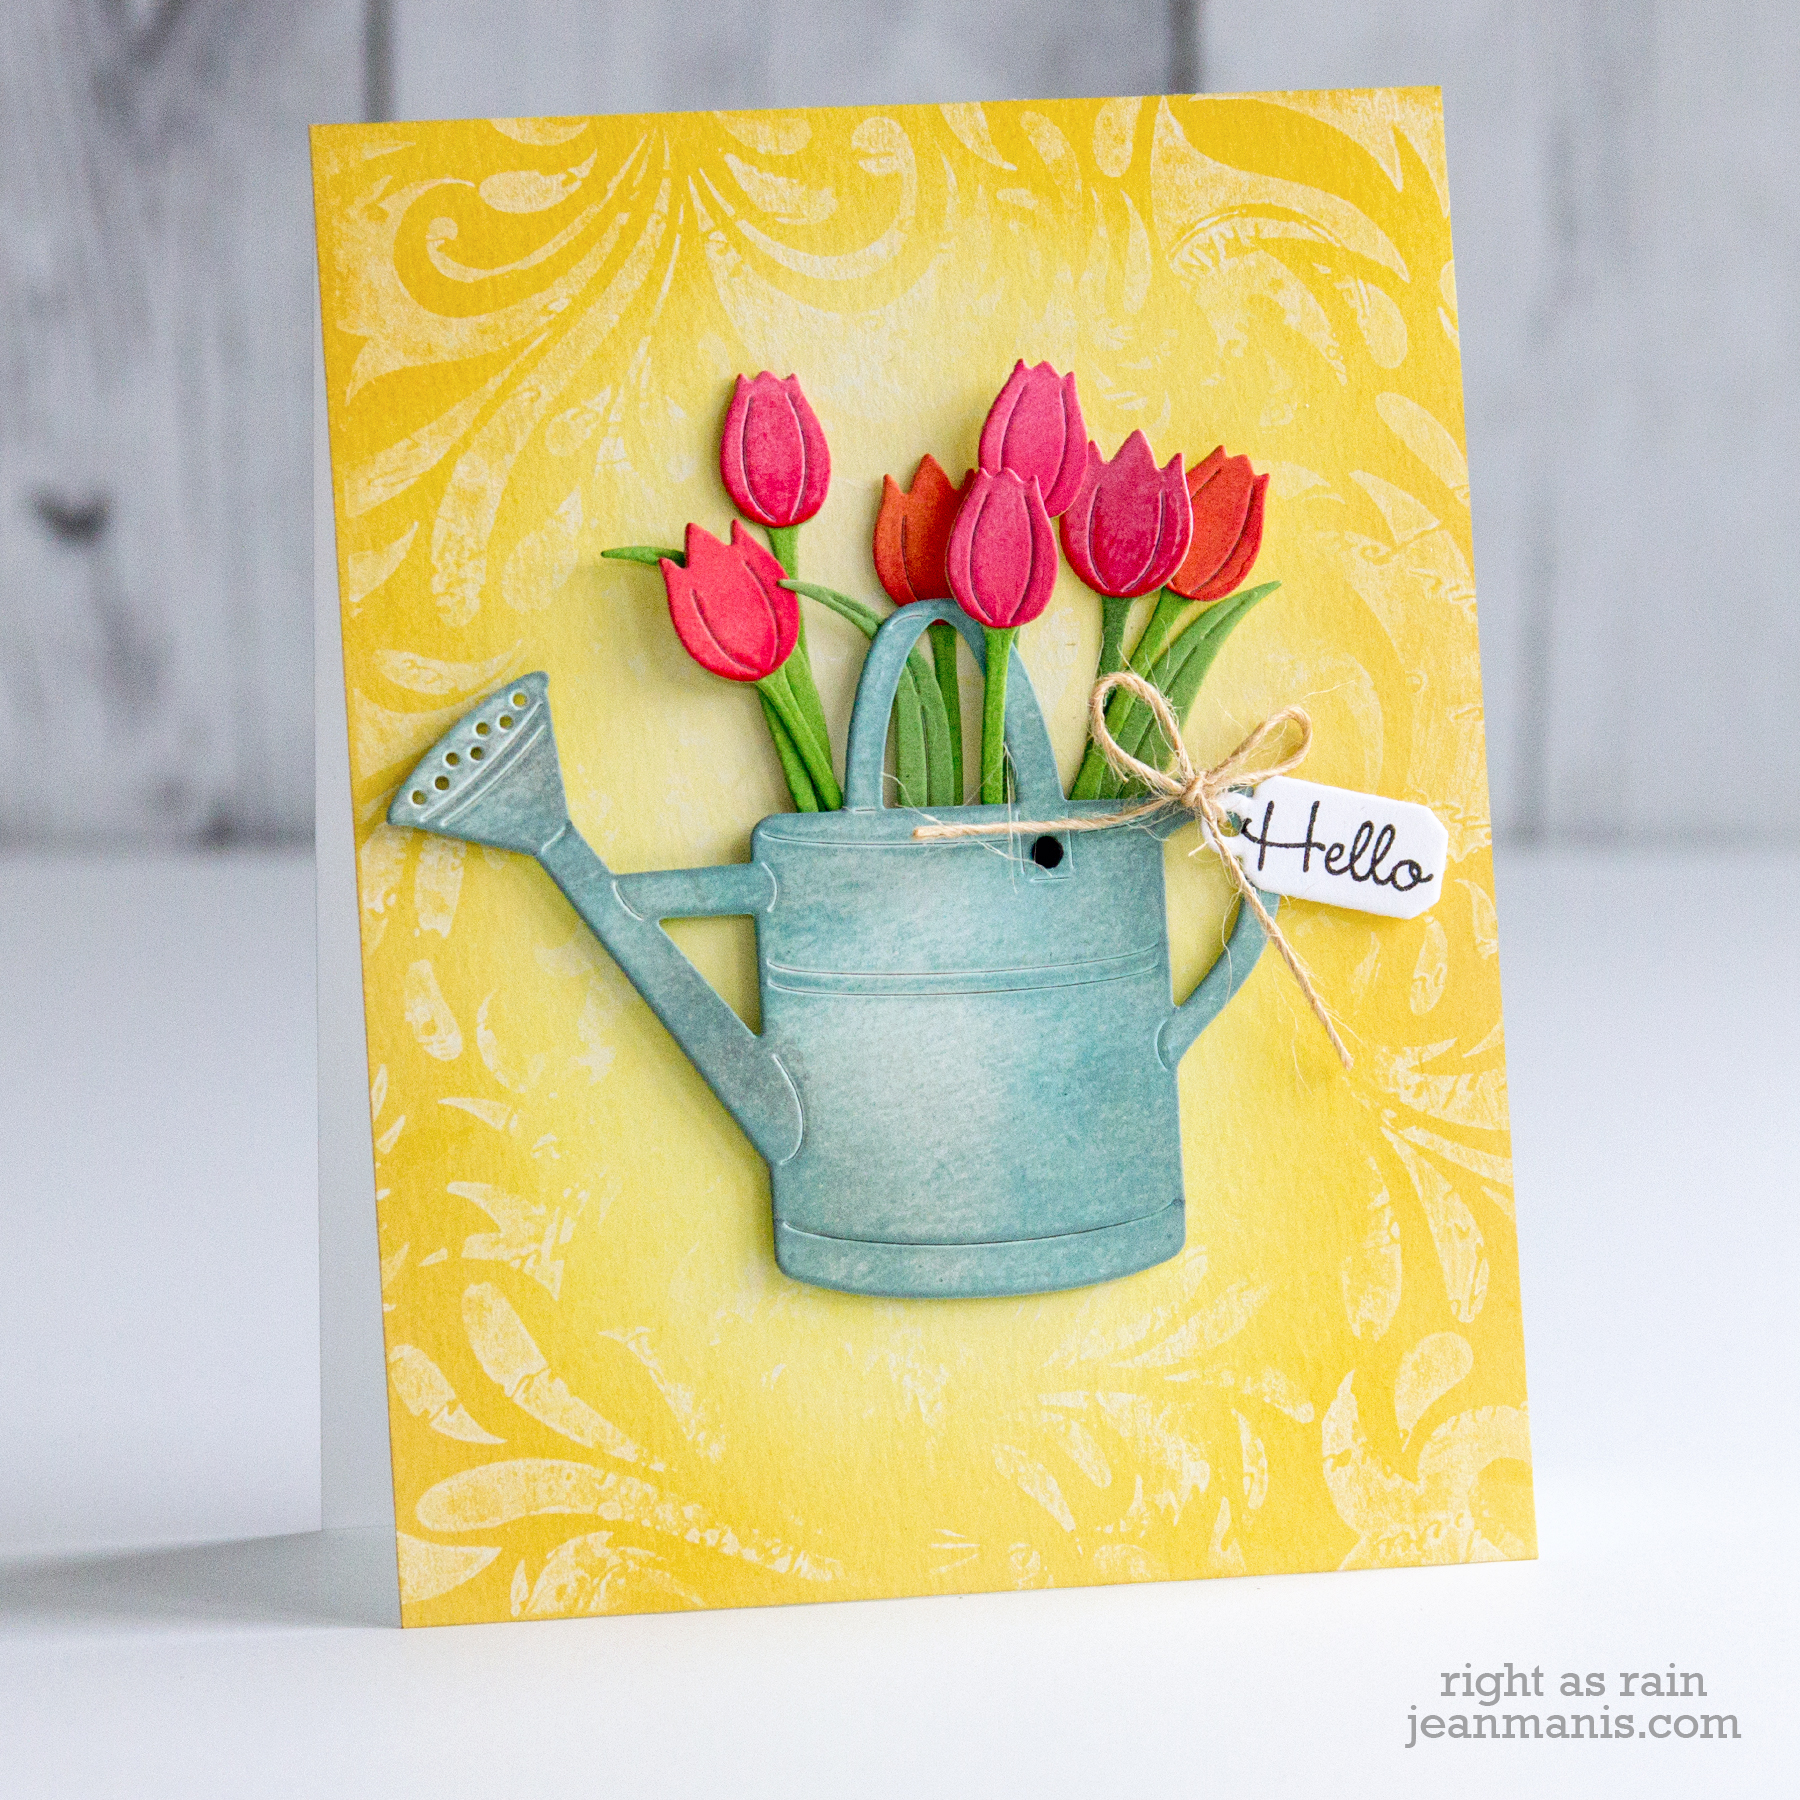
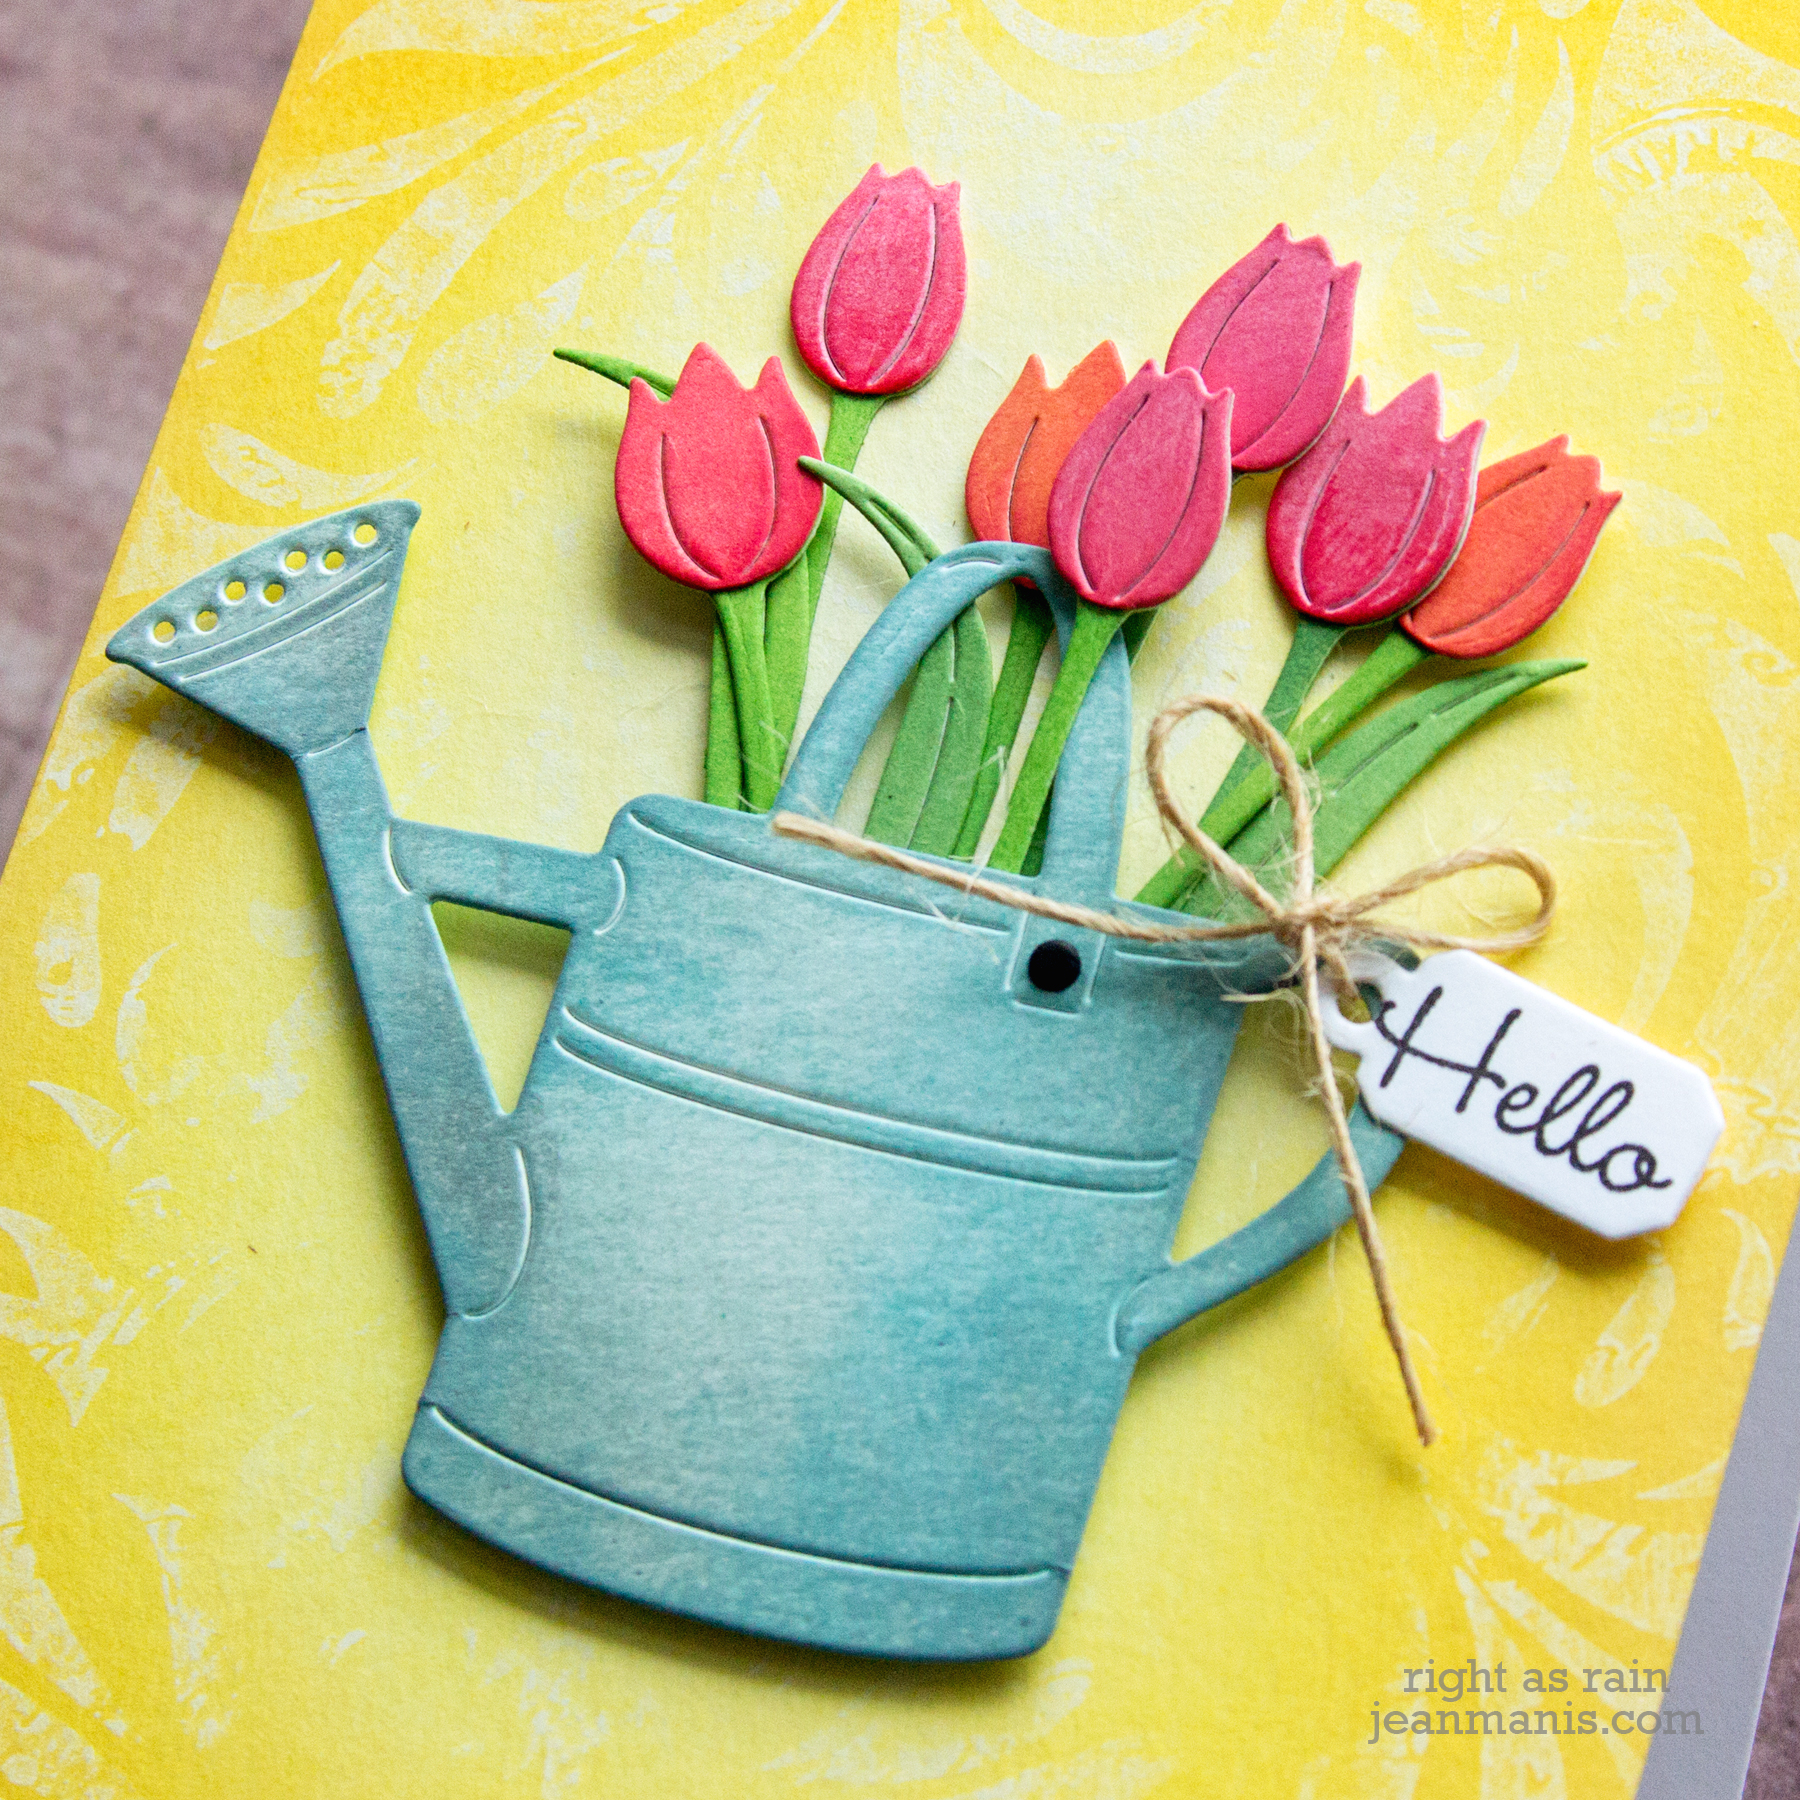
Hello crafty friends! Happy April! I’m delighted to share two projects created with the Spellbinders April 2021 Large Die of the Month – “Universal Curved Border Set.”

Spellbinders April 2021 Large Die Kit Club

The 11-piece set works on multiple card sizes including slimline and A2 for any number of occasions. I have created cards in both sizes. Let’s take a look!

Spellbinders April 2021 Large Die Kit Club

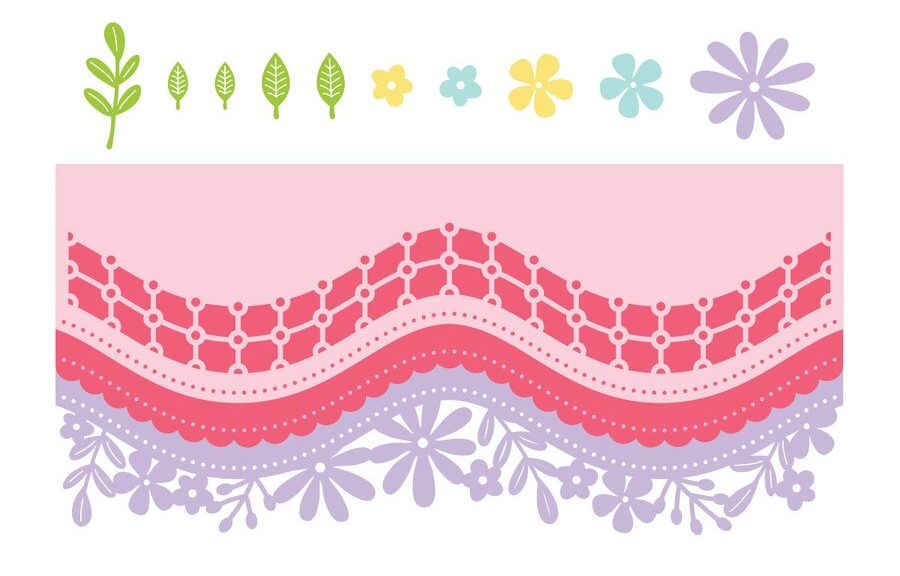
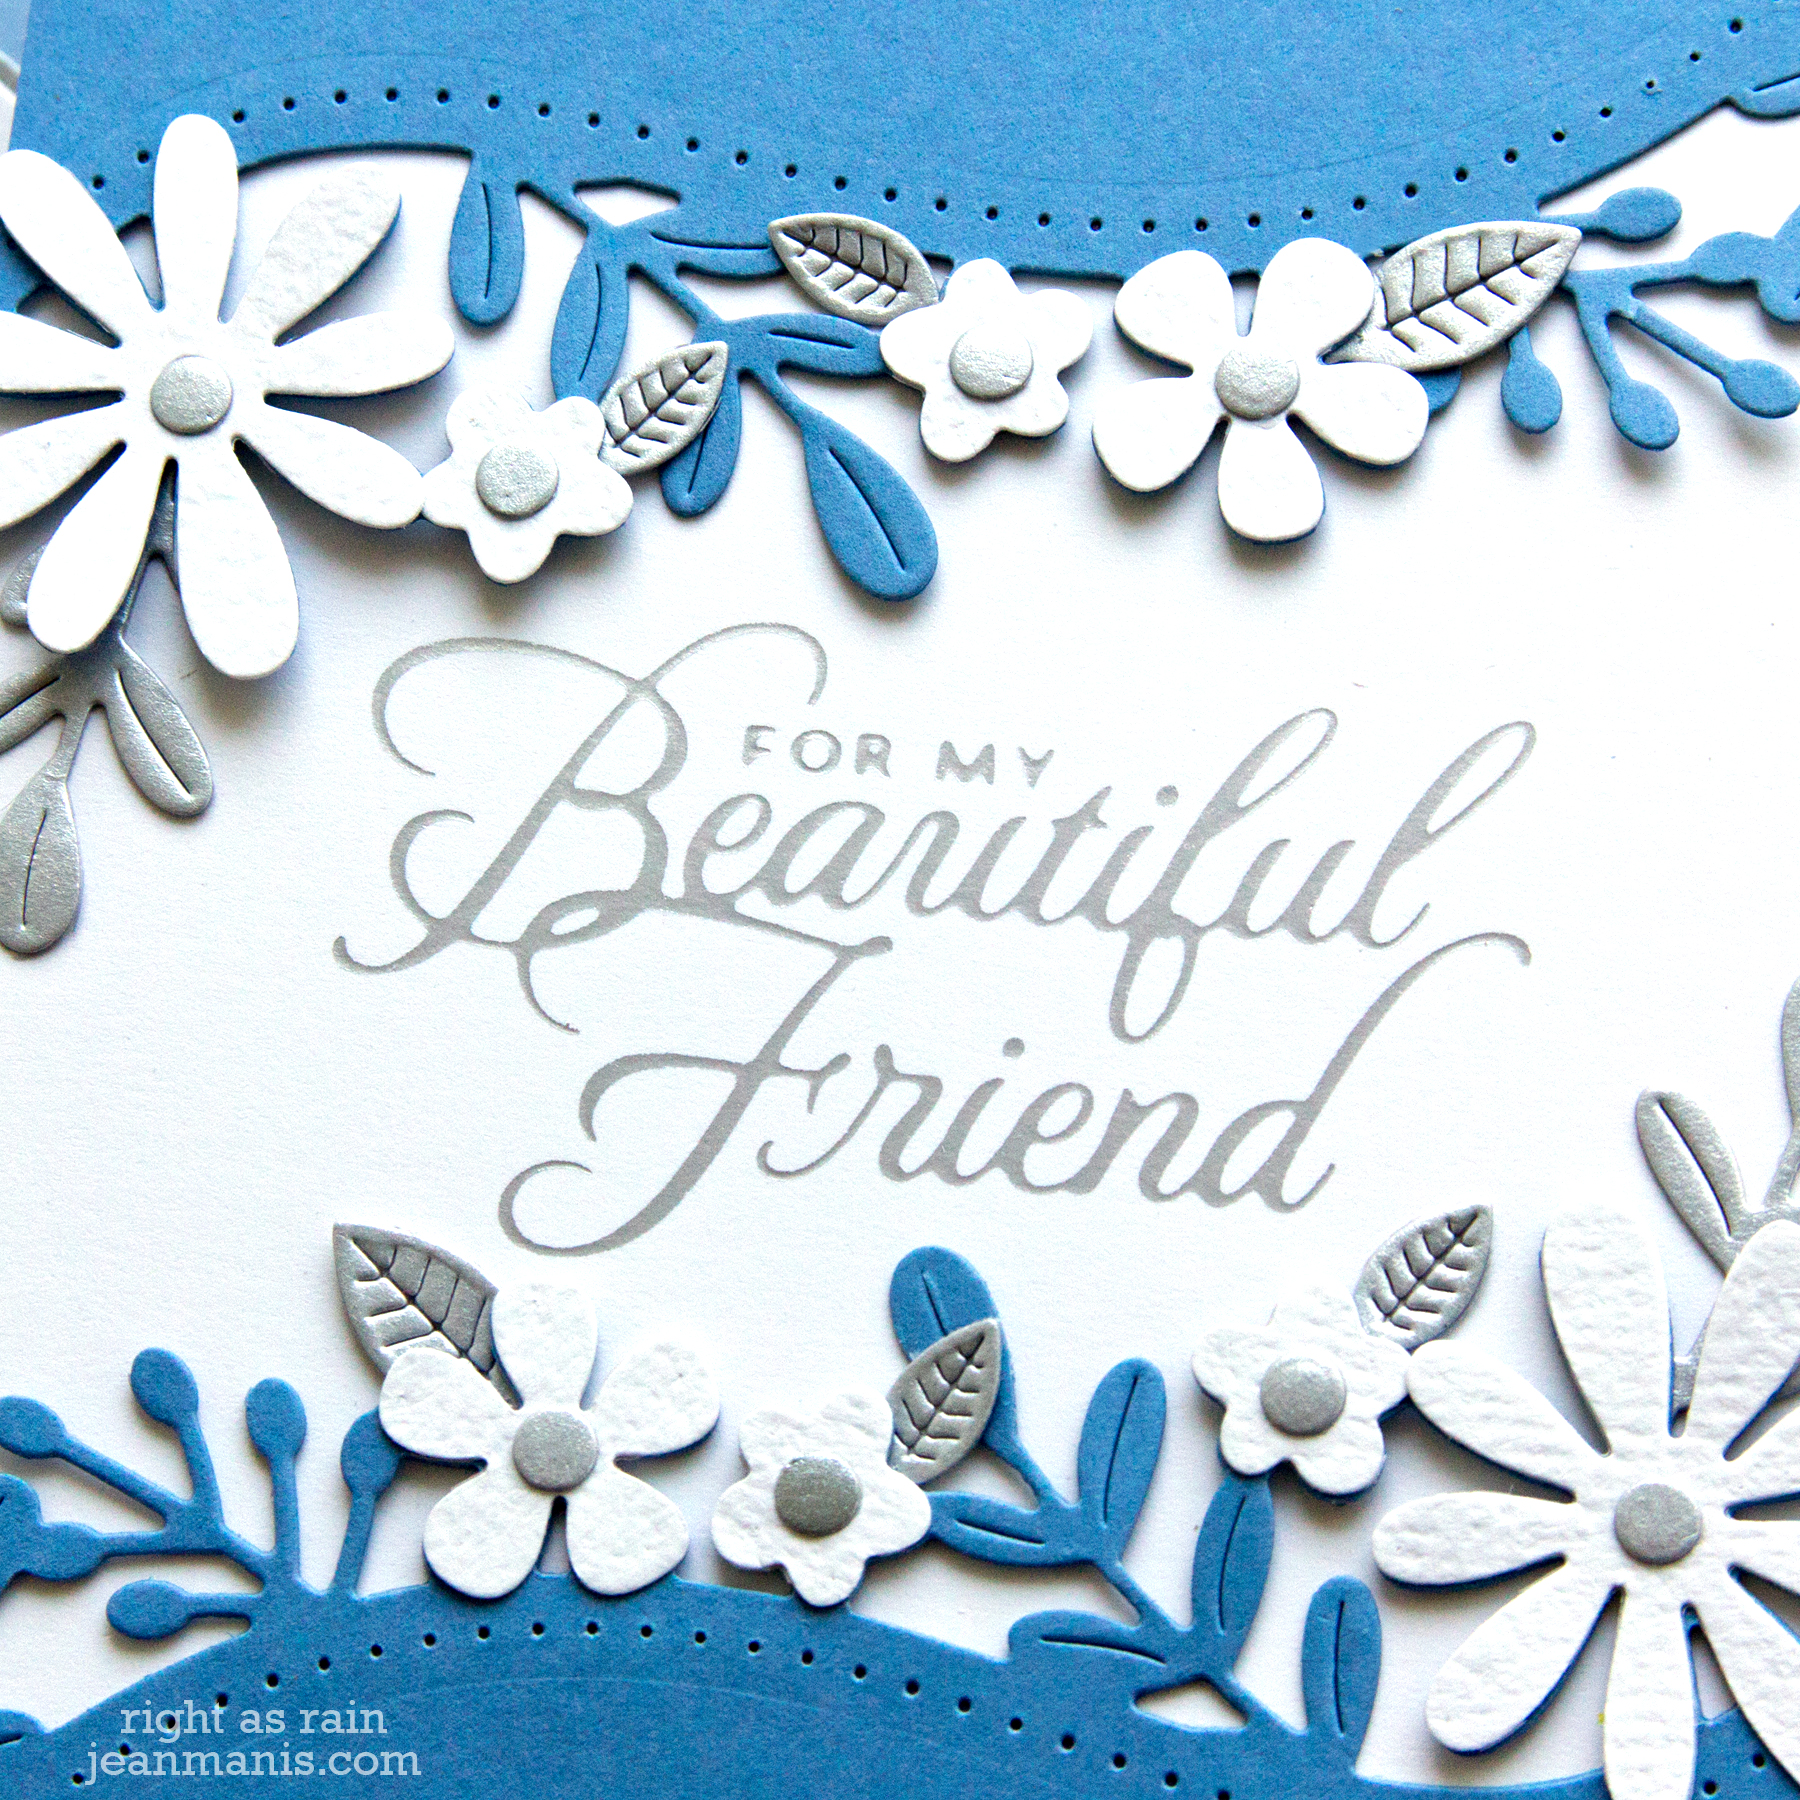
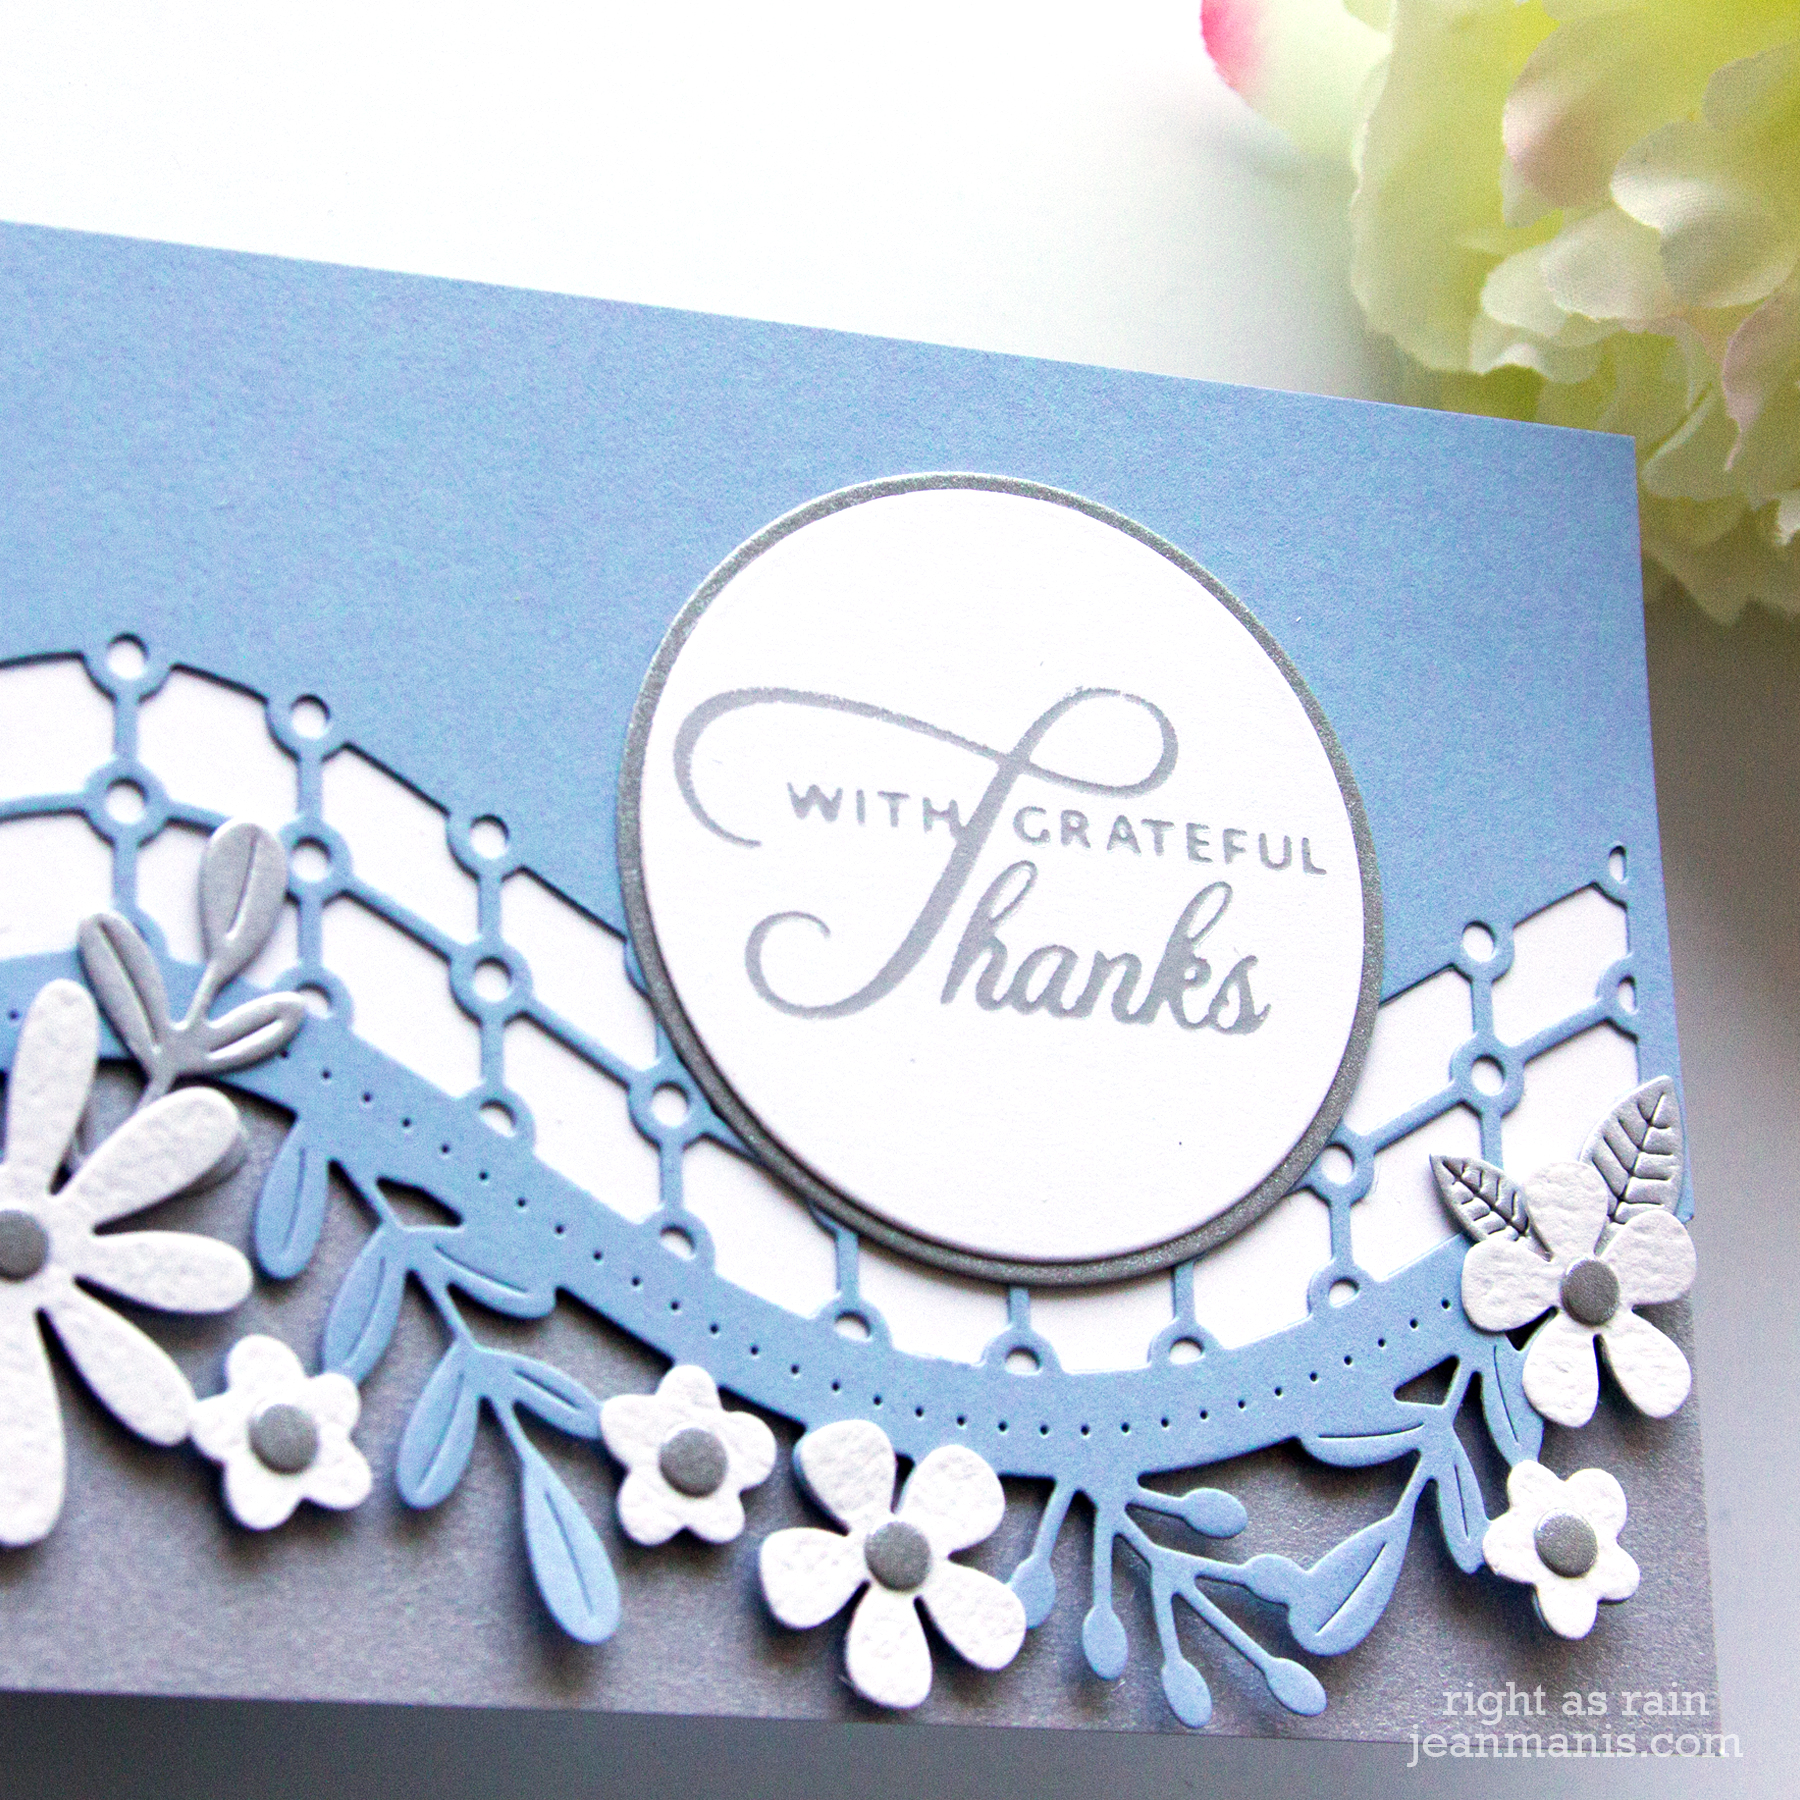
On the first card, I used the set’s floral border to decorate a friendship card.

Spellbinders April 2021 Large Die Kit Club

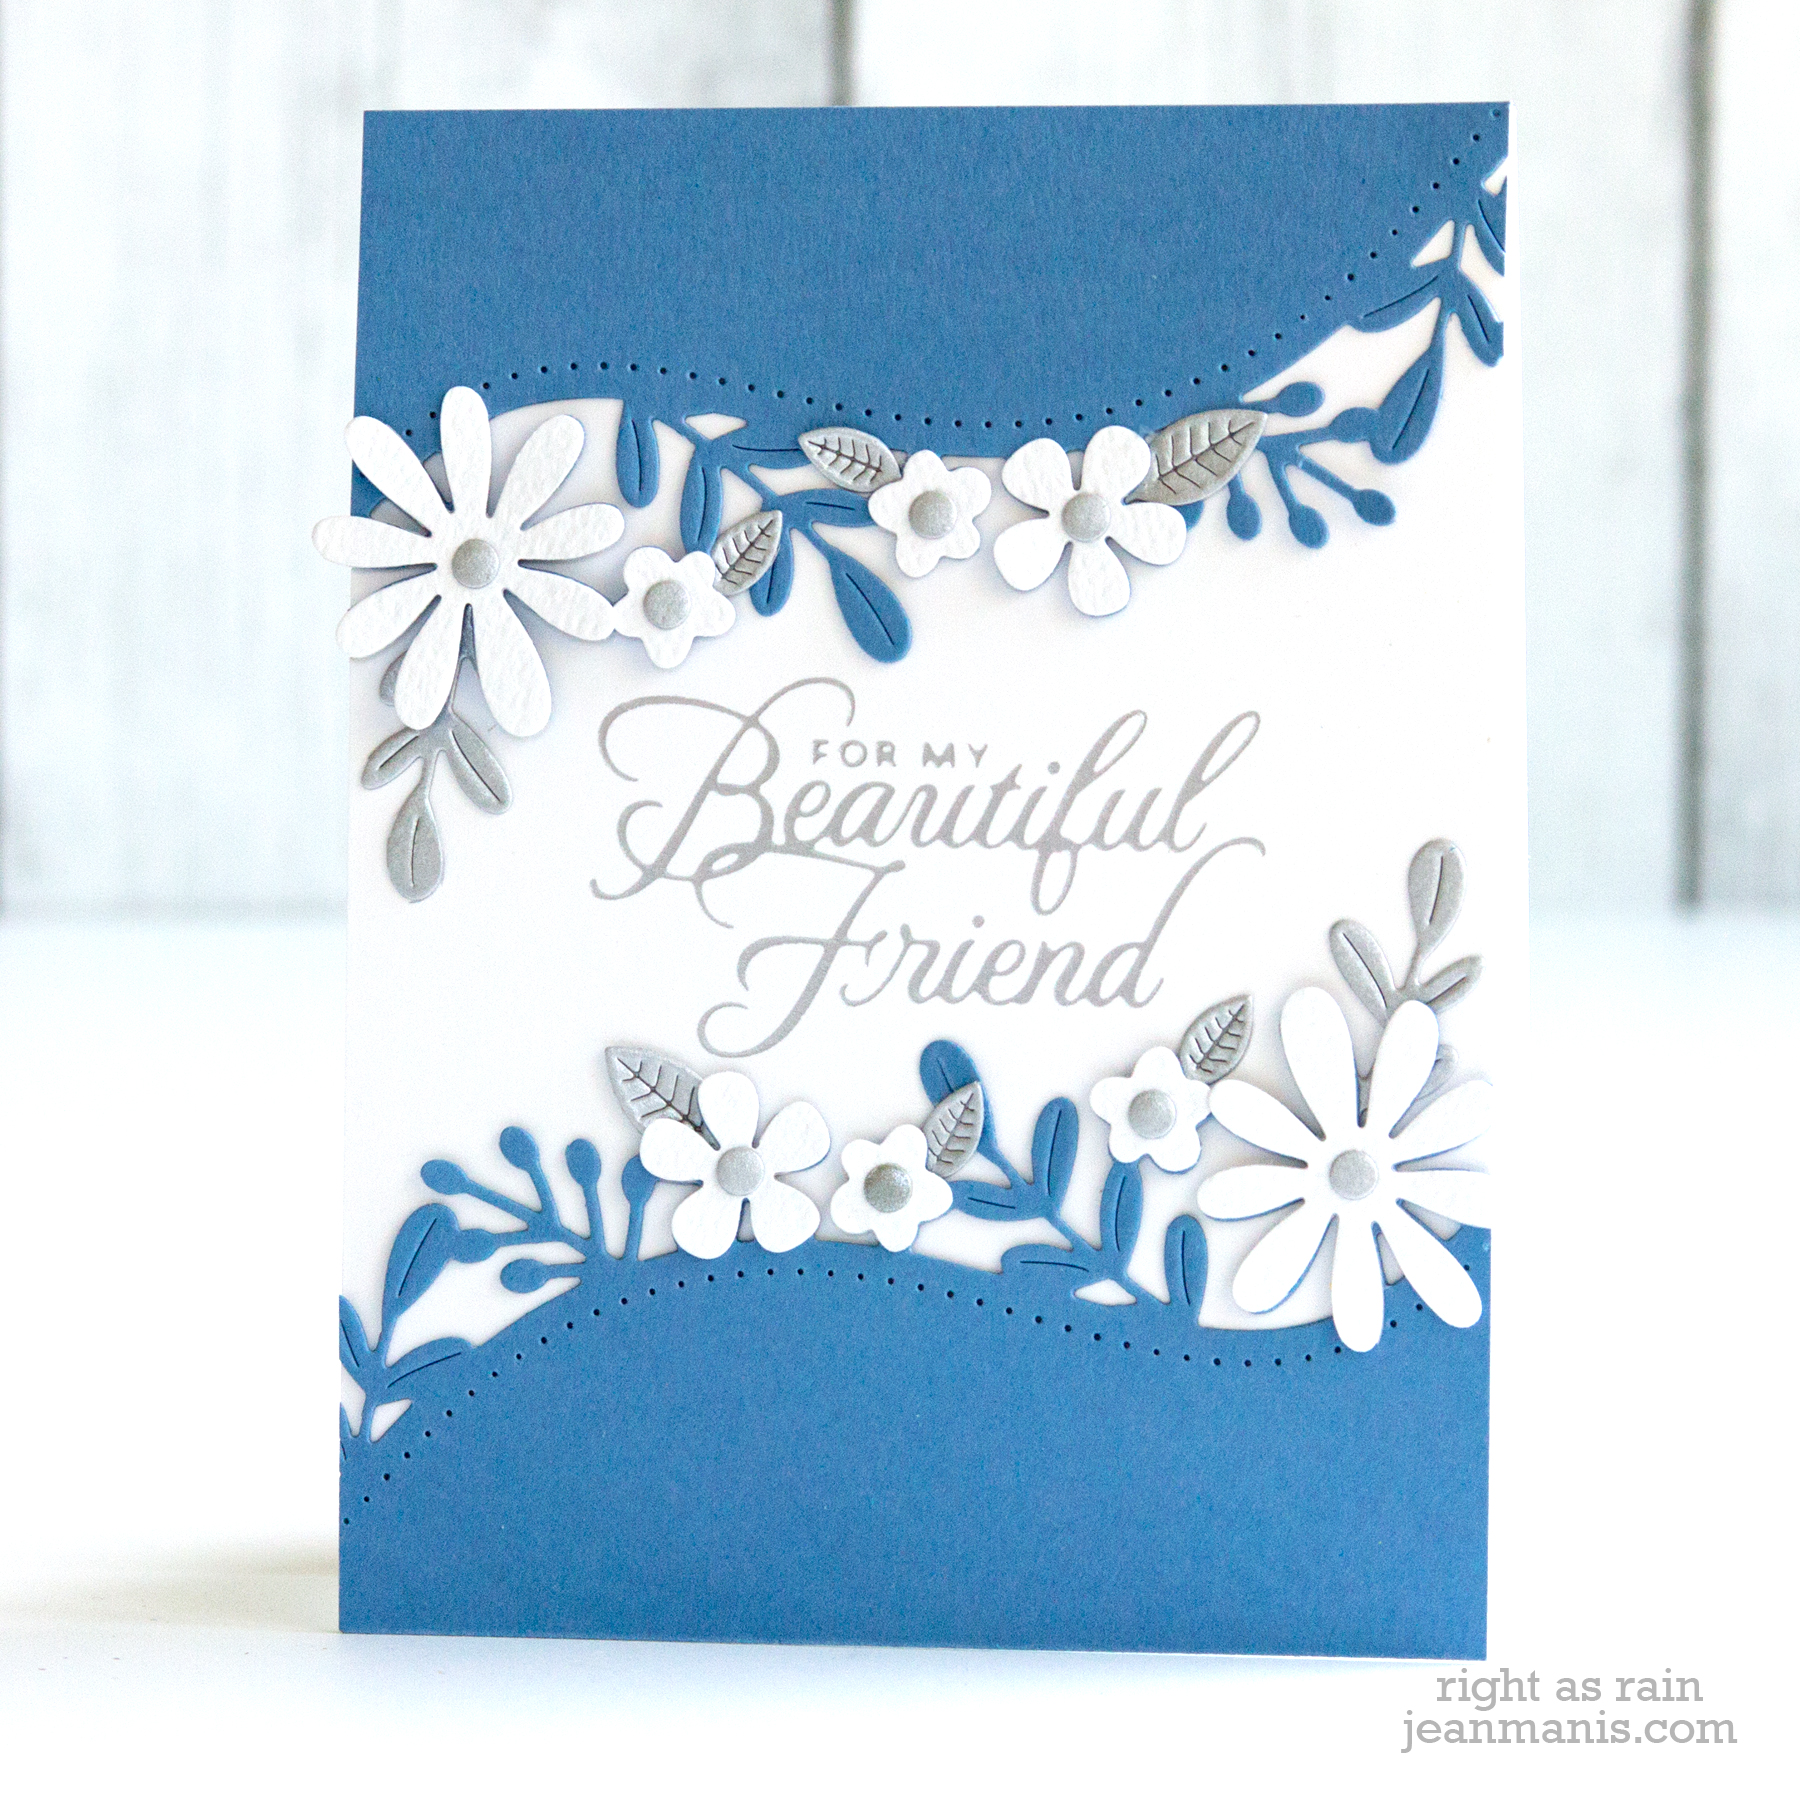
  • I cut the border twice for medium blue cardstock.
  • I glimmer-foiled the Heart Melt sentiment in Matte Silver on a Snowdrift cardstock A2-panel.
  • I adhered the border pieces on the top and bottom, trimming the sides.
  • I cut the florals and leaves from Snowdrift and Brushed Silver cardstock. (The flower centers were cut with a die in a Spellbinders Christmas set.)
  • I adhered the floral elements to the card.

Spellbinders April 2021 Large Die Kit Club

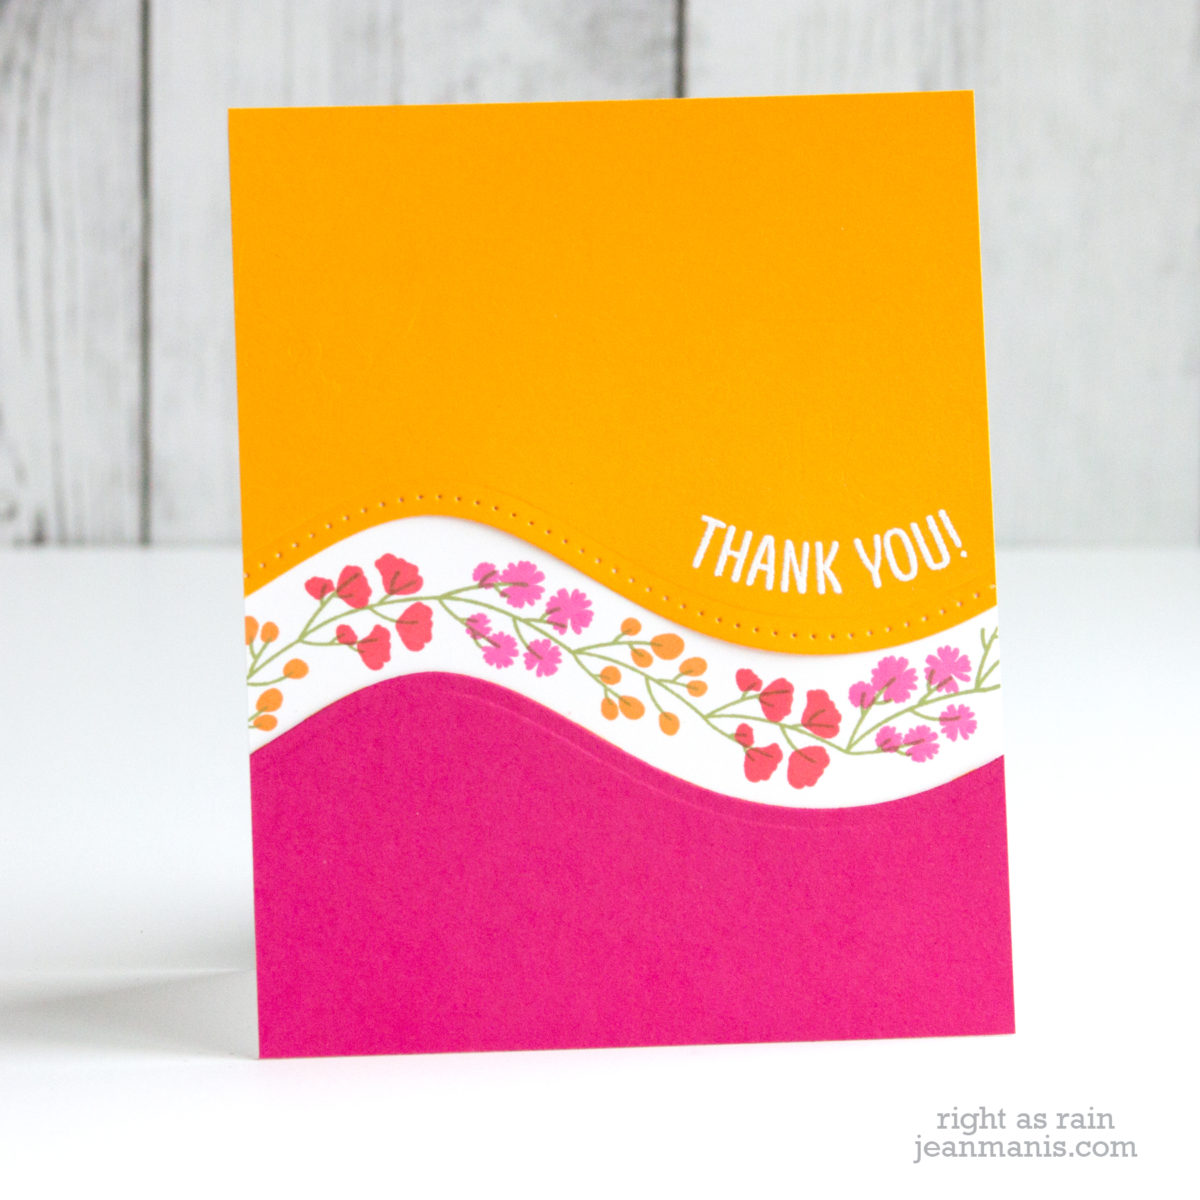
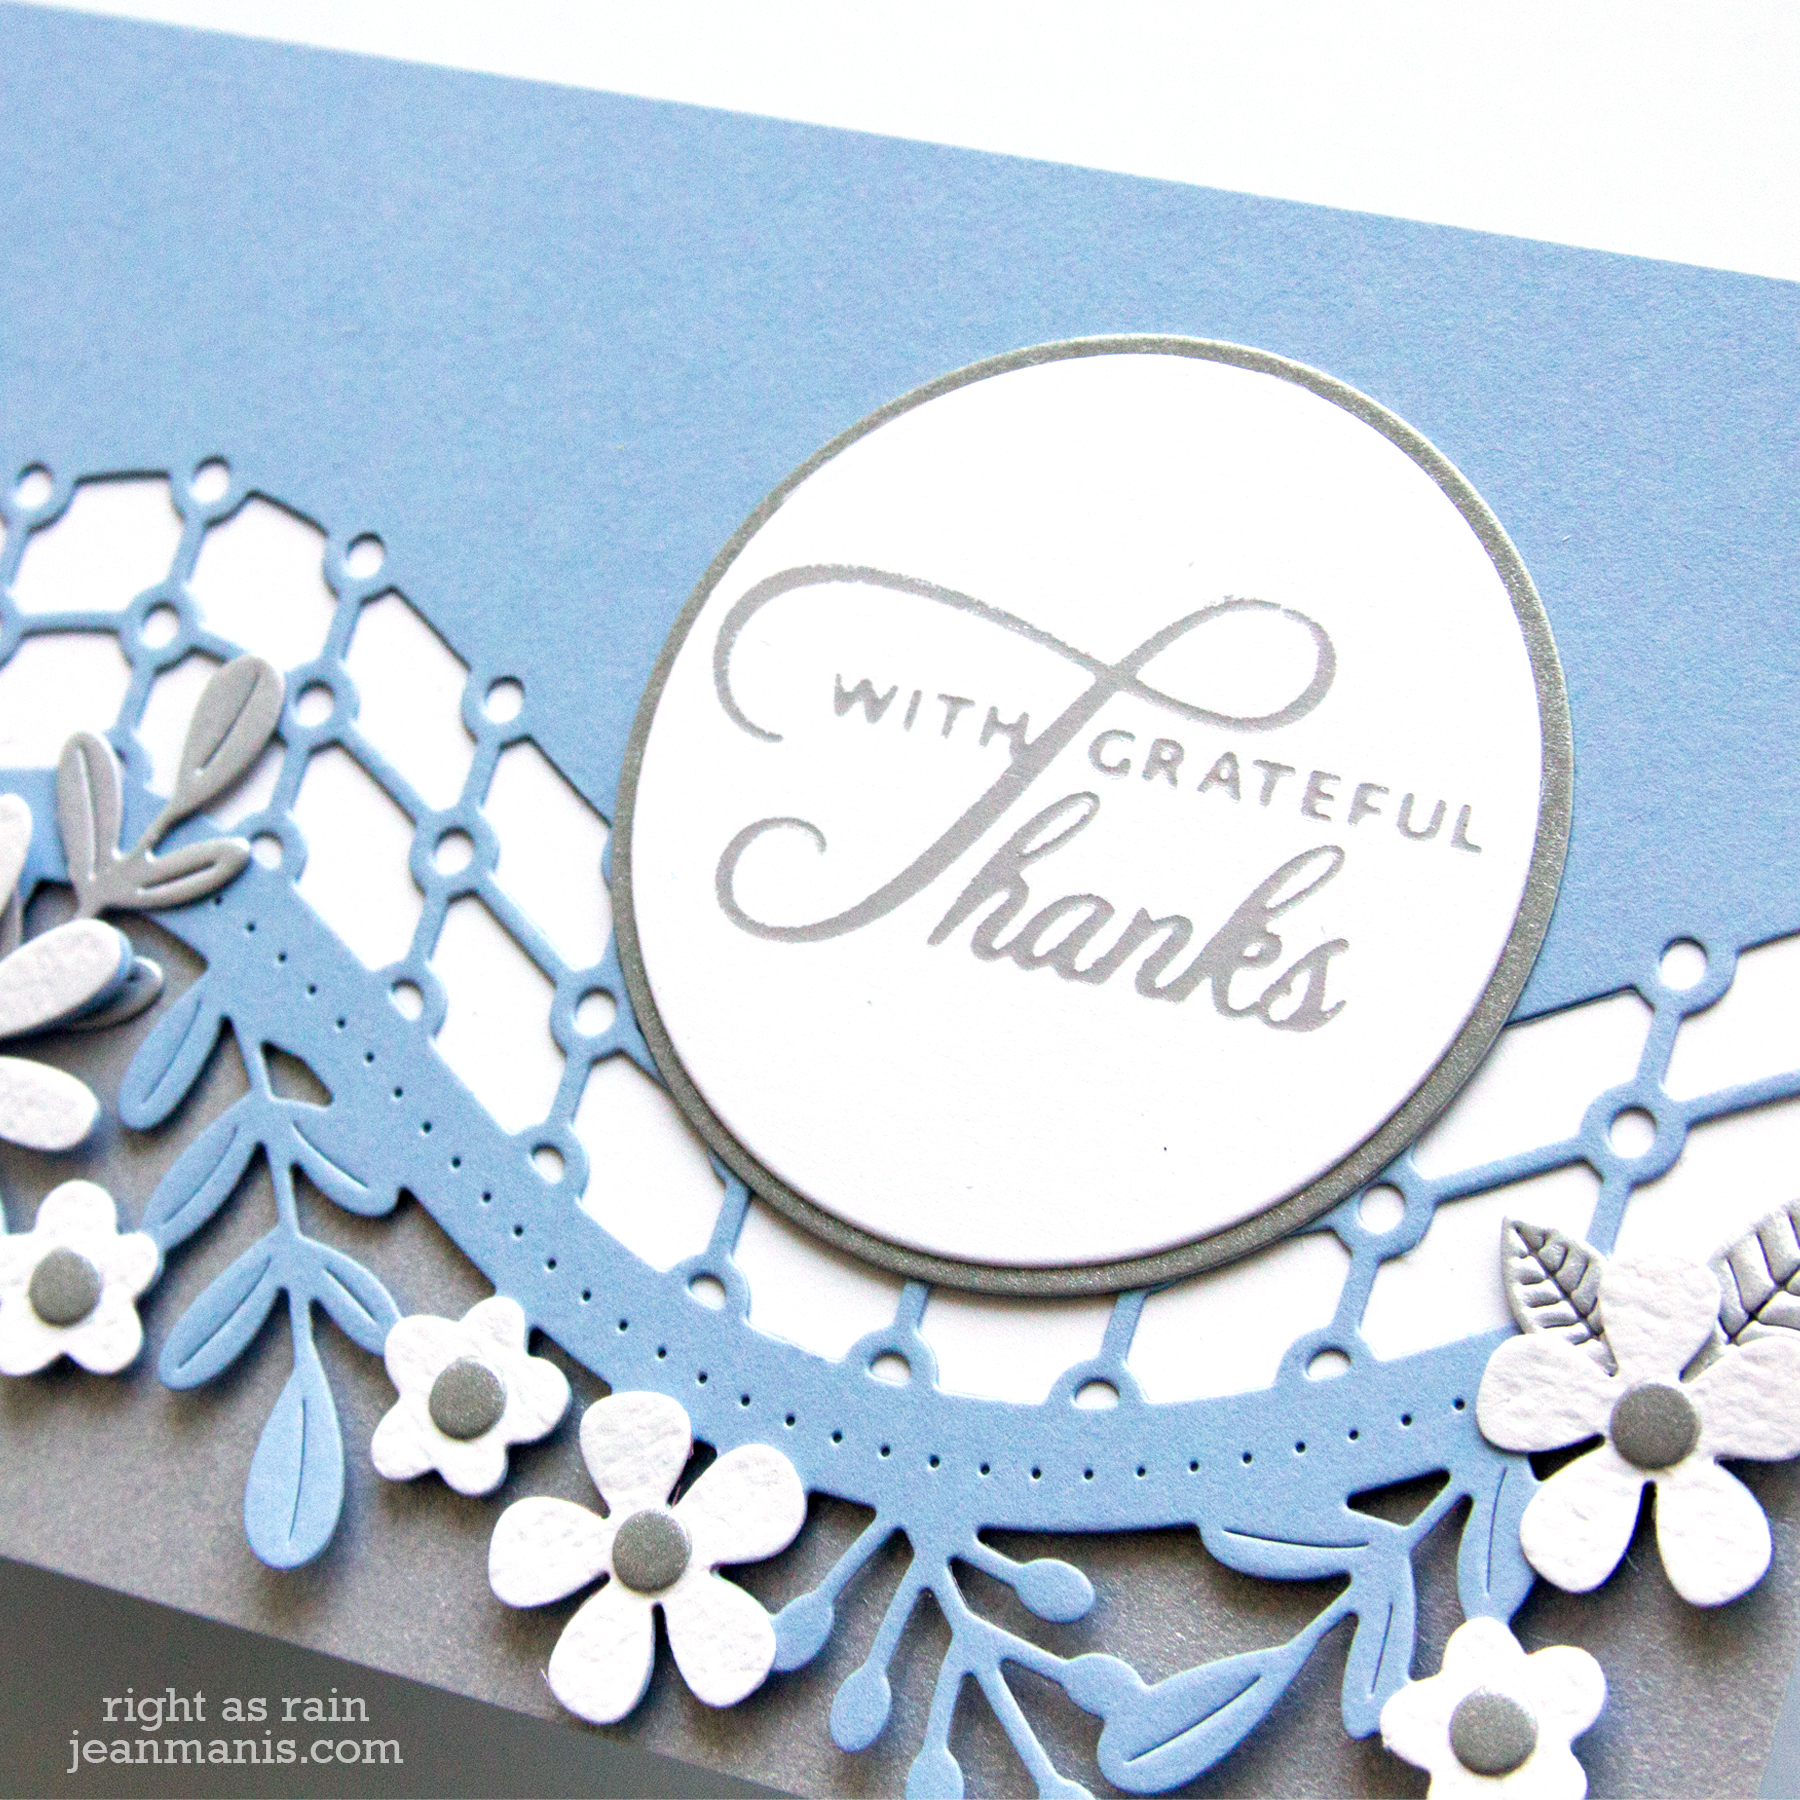
The second card showcases the set’s slimline capability and how the dies can be mixed-and-matched.

Spellbinders April 2021 Large Die Kit Club

  • I die-cut the net-like pattern and floral borders at the same time, nested together, from a light-blue cardstock (this is not the same color as the A2 card, however, it is similar).
  • I die-cut Snowdrift cardstock using the set’s simple curved border and adhered it to the back of the light-blue panel.
  • I adhered the assembly to a Brushed Silver slimline panel.
  • I glimmer-foiled the Heart Felt sentiment and cut it with a circle die. I matted the sentiment with a slightly larger circle cut from Brushed Silver cardstock.
  • I cut the florals and leaves from Snowdrift and Brushed Silver cardstock. (The flower centers were cut with a die in a Spellbinders Christmas set.)
  • I adhered the floral elements to the card.
  • Spellbinders April 2021 Large Die Kit Club

Spellbinders April 2021 Large Die Kit Club

Be sure to visit the product page to see more inspiration.
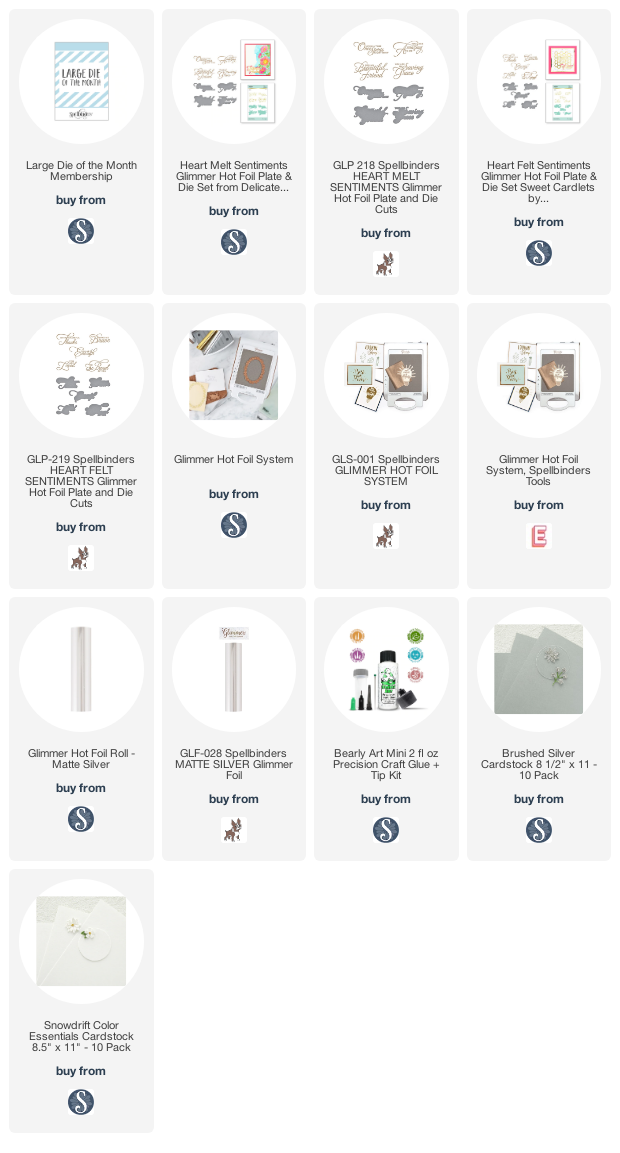
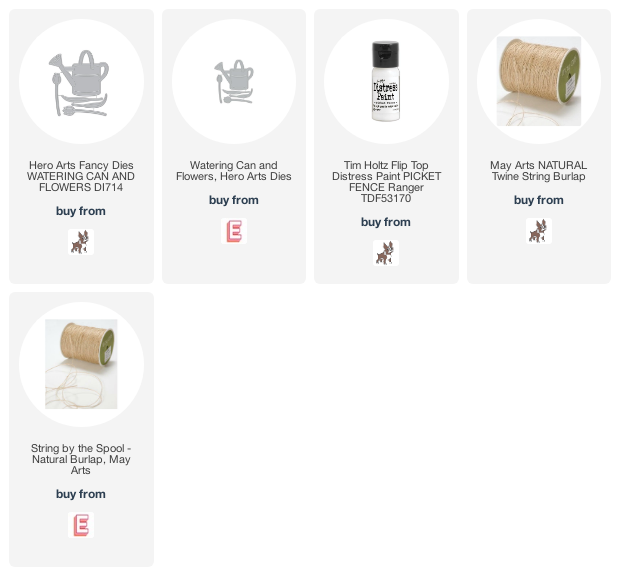
Supplies:

Hero Arts Spring “Hello”

Hello! Today, I am sharing a CAS spring-themed card created with Hero Arts supplies. Around here, we have decidedly spring days followed by ones, like today, that feel like winter!

Hero Arts Spring "Hello"

  • I die-cut the watering can and flowers from cardstock inked with Distress inks. I added additional ink to the cut pieces after cutting.
  • For the tulips, I pieced the blooms on to the stems.
  • I stamped the sentiment, from an old Hero Arts set, and cut it with a small tag die.
  • To create the background, I stamped an old Hero Arts background stamp with white paint. Once dry, I applied Distress inks in shades of yellow. The painted area resisted the ink.
  • I added the assembled can with flowers to the background with foam adhesive.

Hero Arts Spring "Hello"