Rubbernecker Die-cut Snowmen Card

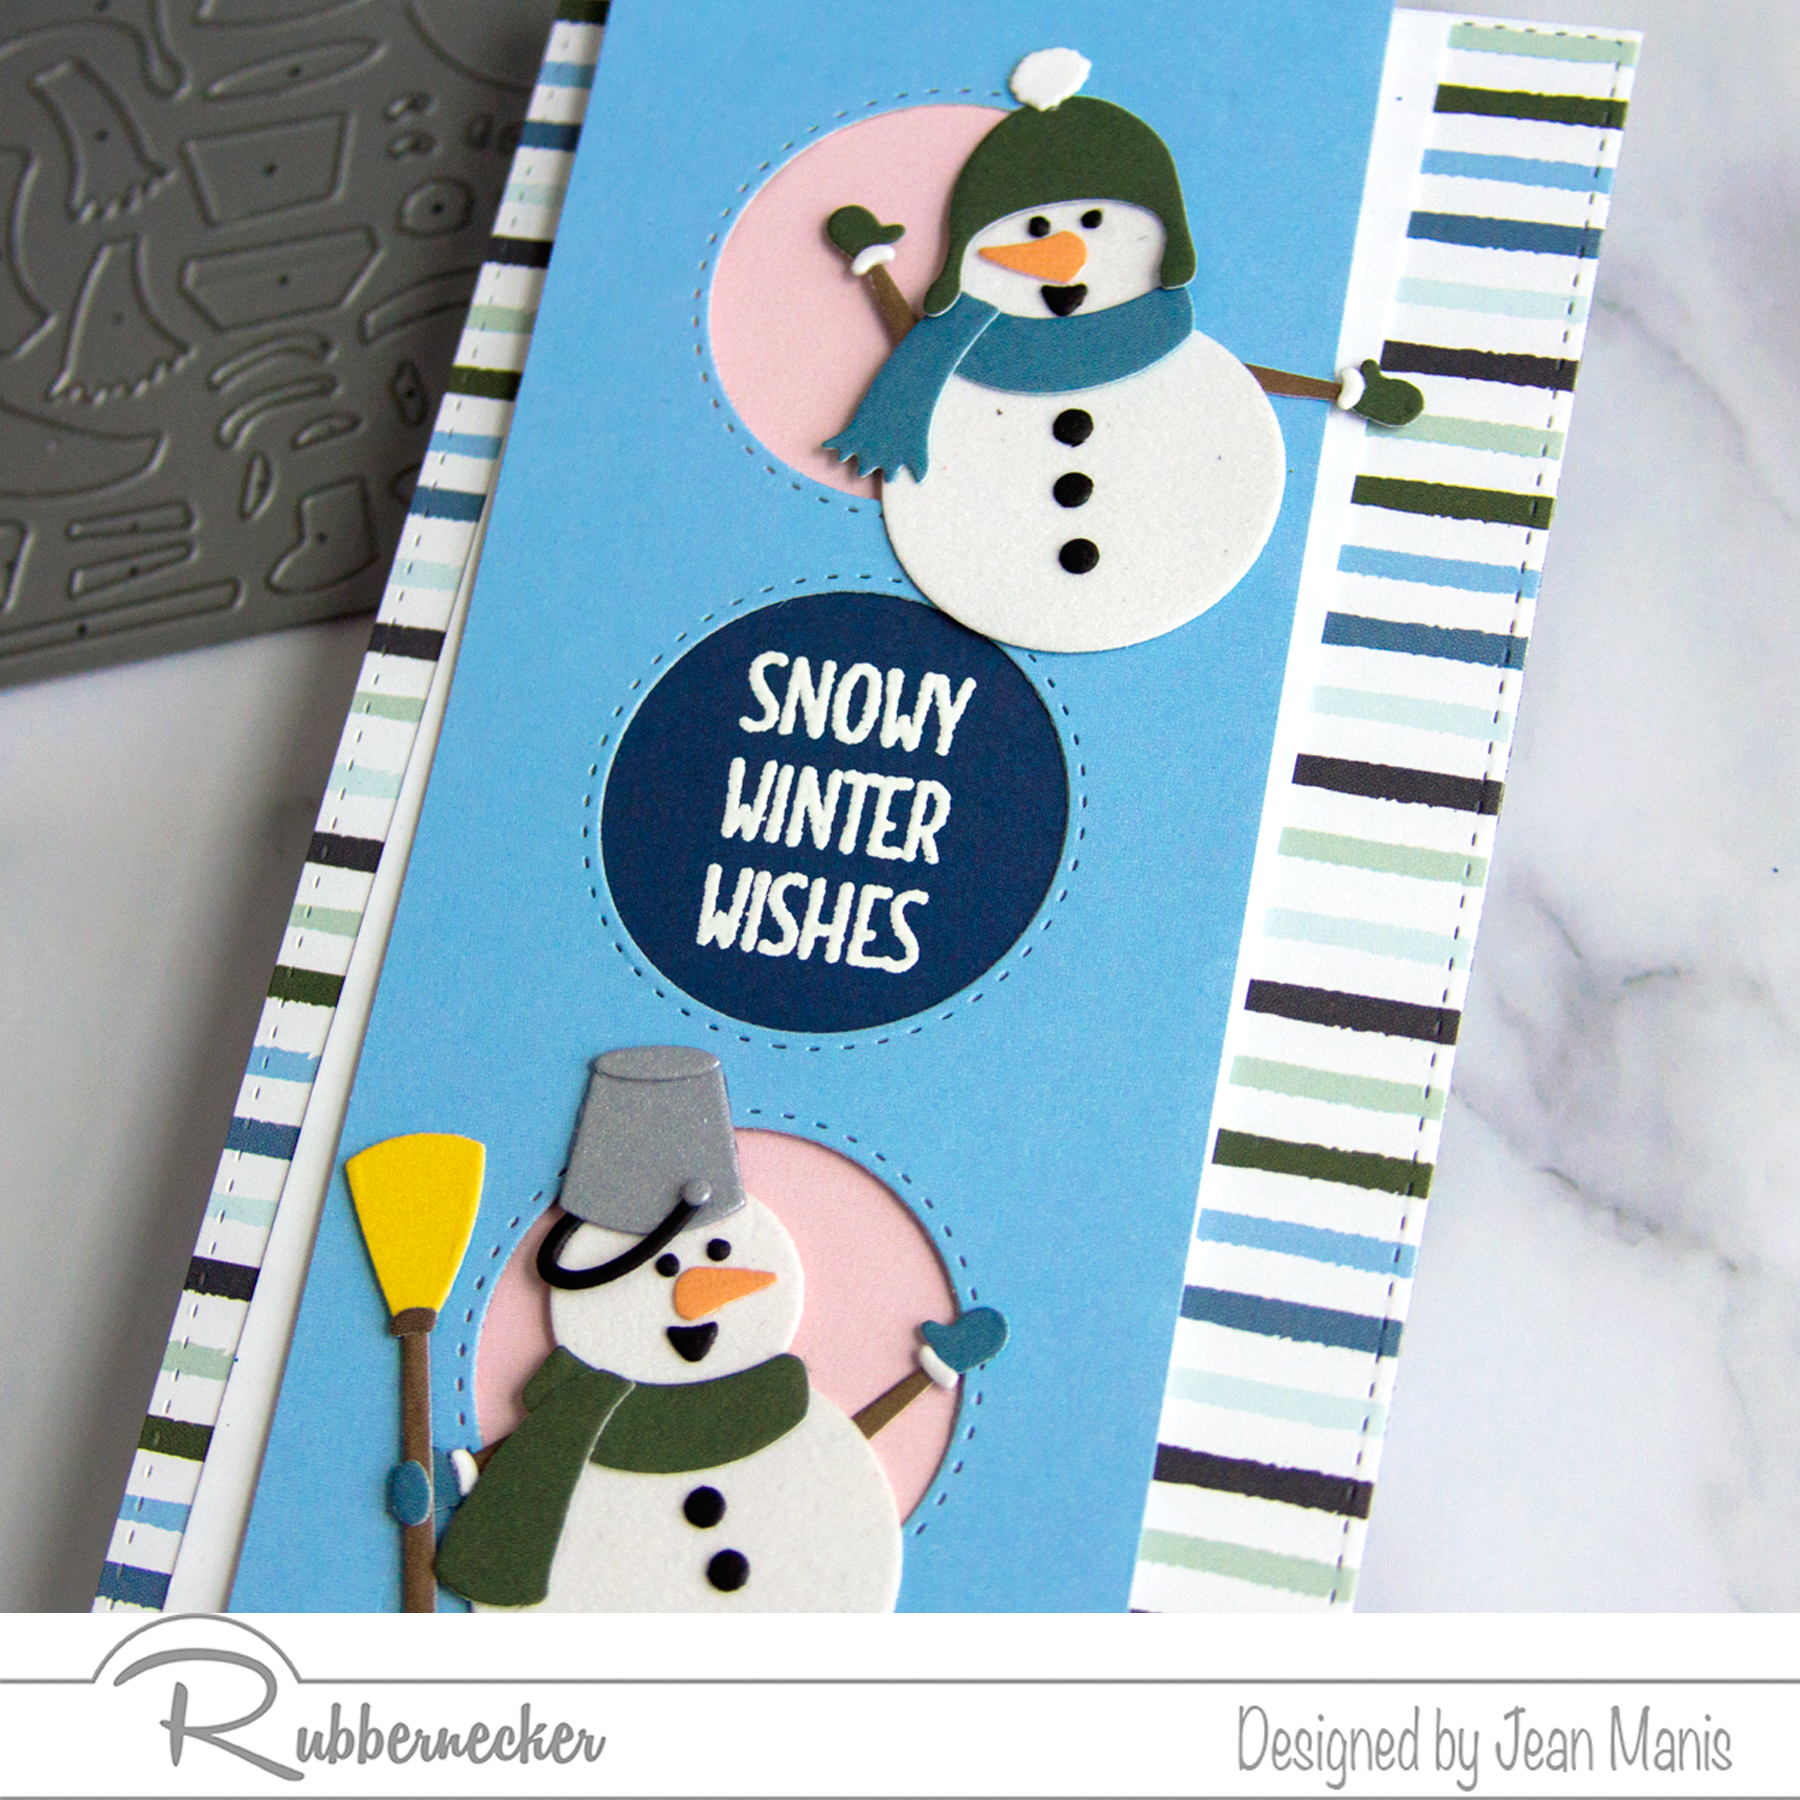
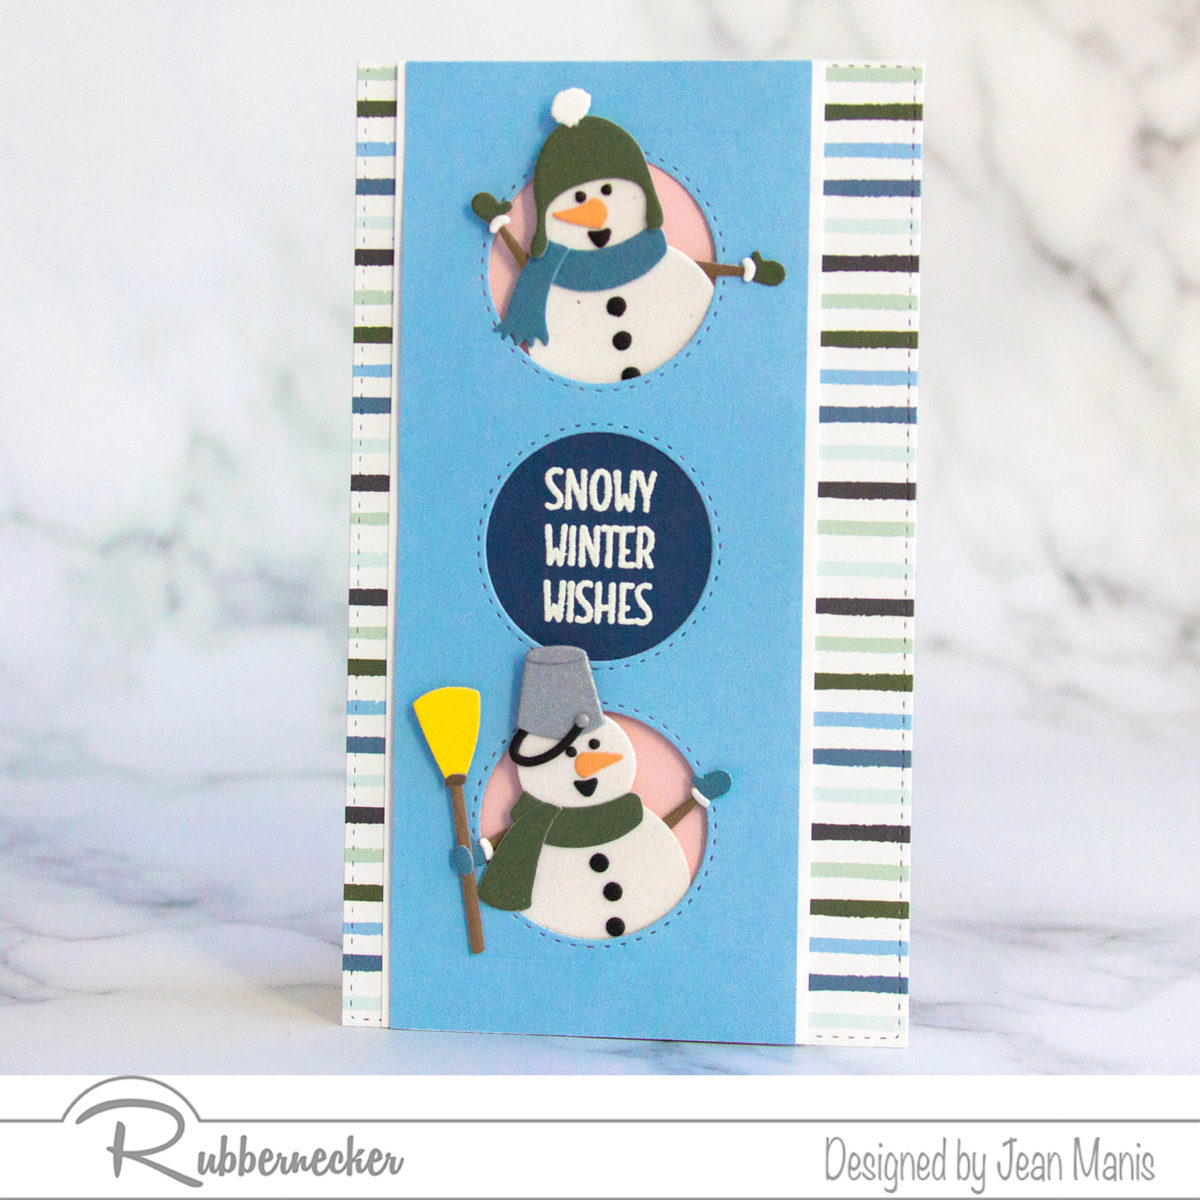
Hello! Today, I am sharing a winter-themed, friendship card featuring Rubbernecker die-cut snowmen. Just because the holidays are over, it doesn’t mean that winter-themed craft dies and stamps have to be stored away with the decorations. Use them to brighten up someone’s day! Of course, you can use these same supplies to create a Christmas card with a red-and-green color scheme.

Rubbernecker Die-cut Snowmen Card

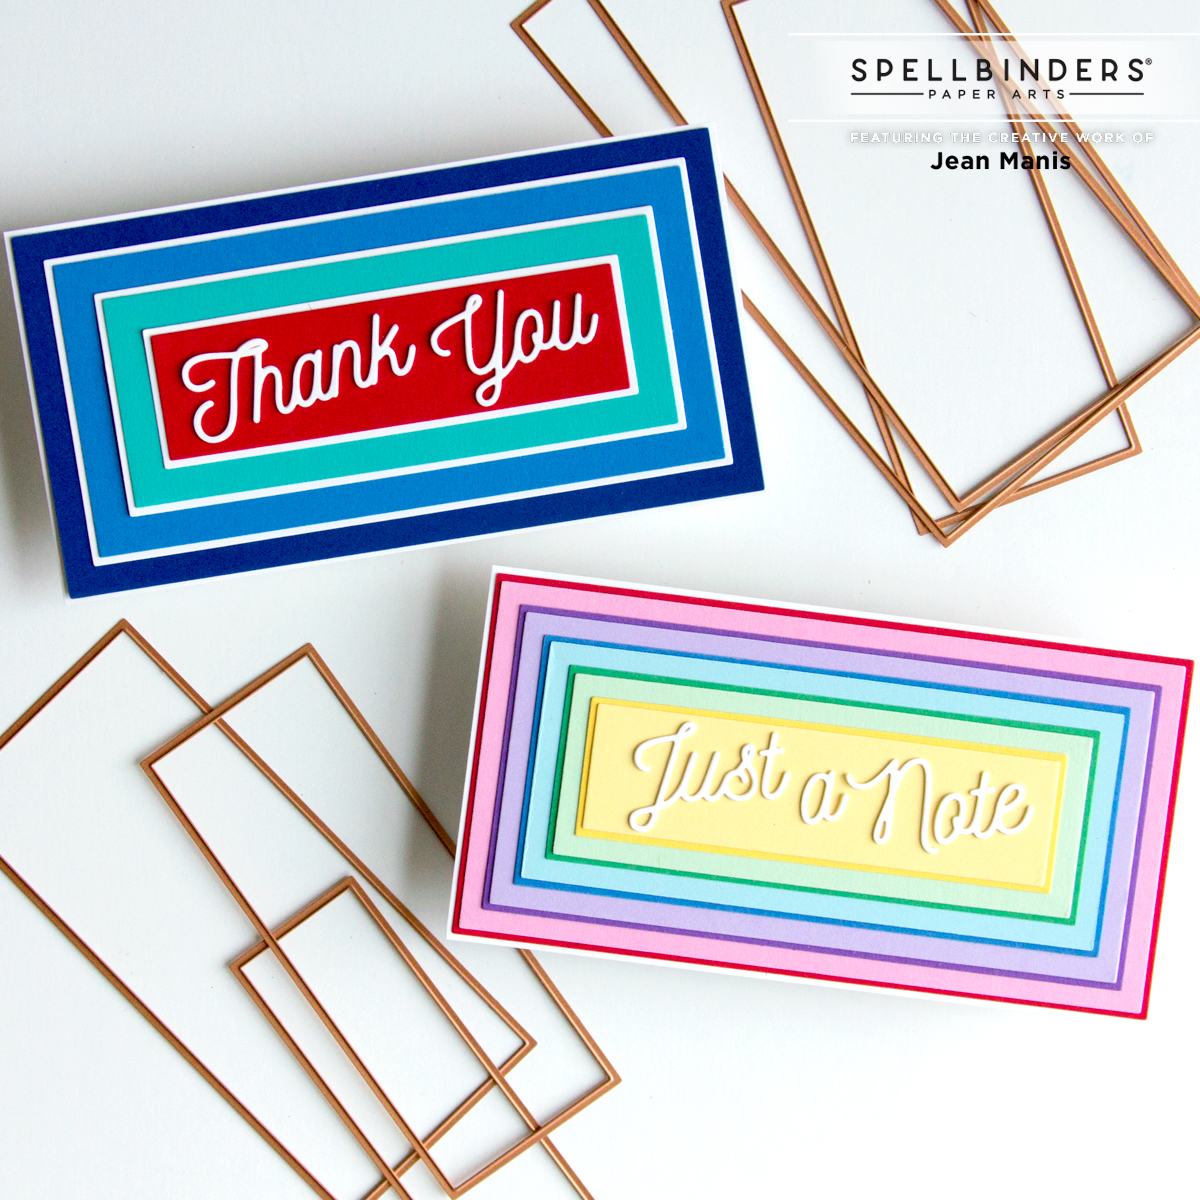
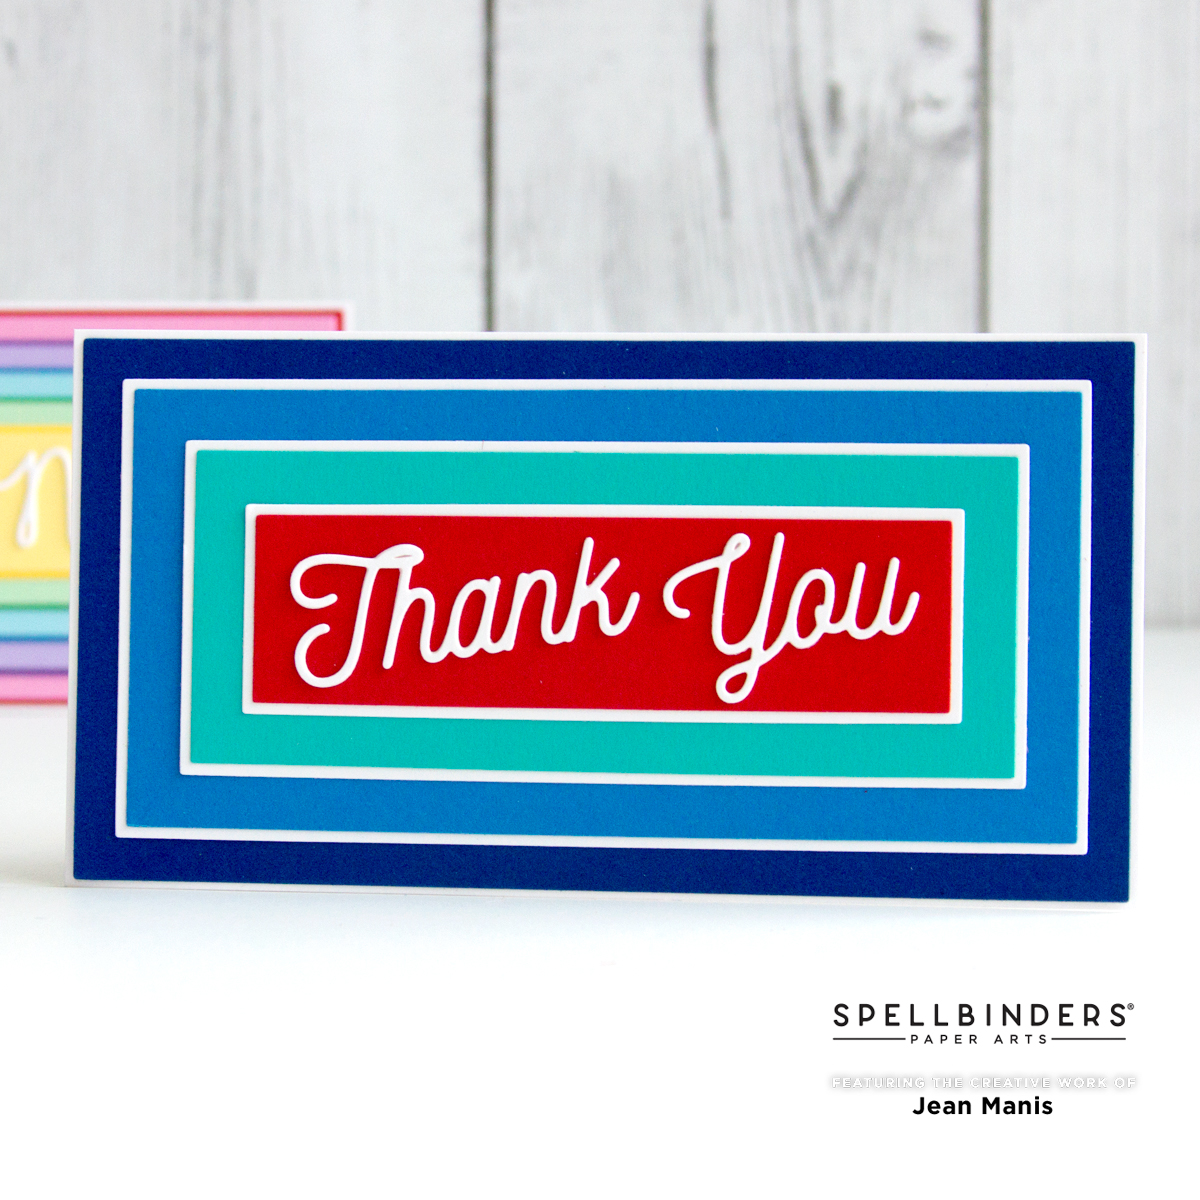
  • Create card background from patterned paper cut with the largest die in the Mini Slimline Nested with Stitch set, measuring 6 by 3 ½ inches.
  • Create a 6 by 3 inches rectangle from colored paper or cardstock. Cut with the Circles Stitch die in the center, using washi tape to secure the die to the paper. Trim ¼ inch from both sides (the larger original size provides more wiggle room).
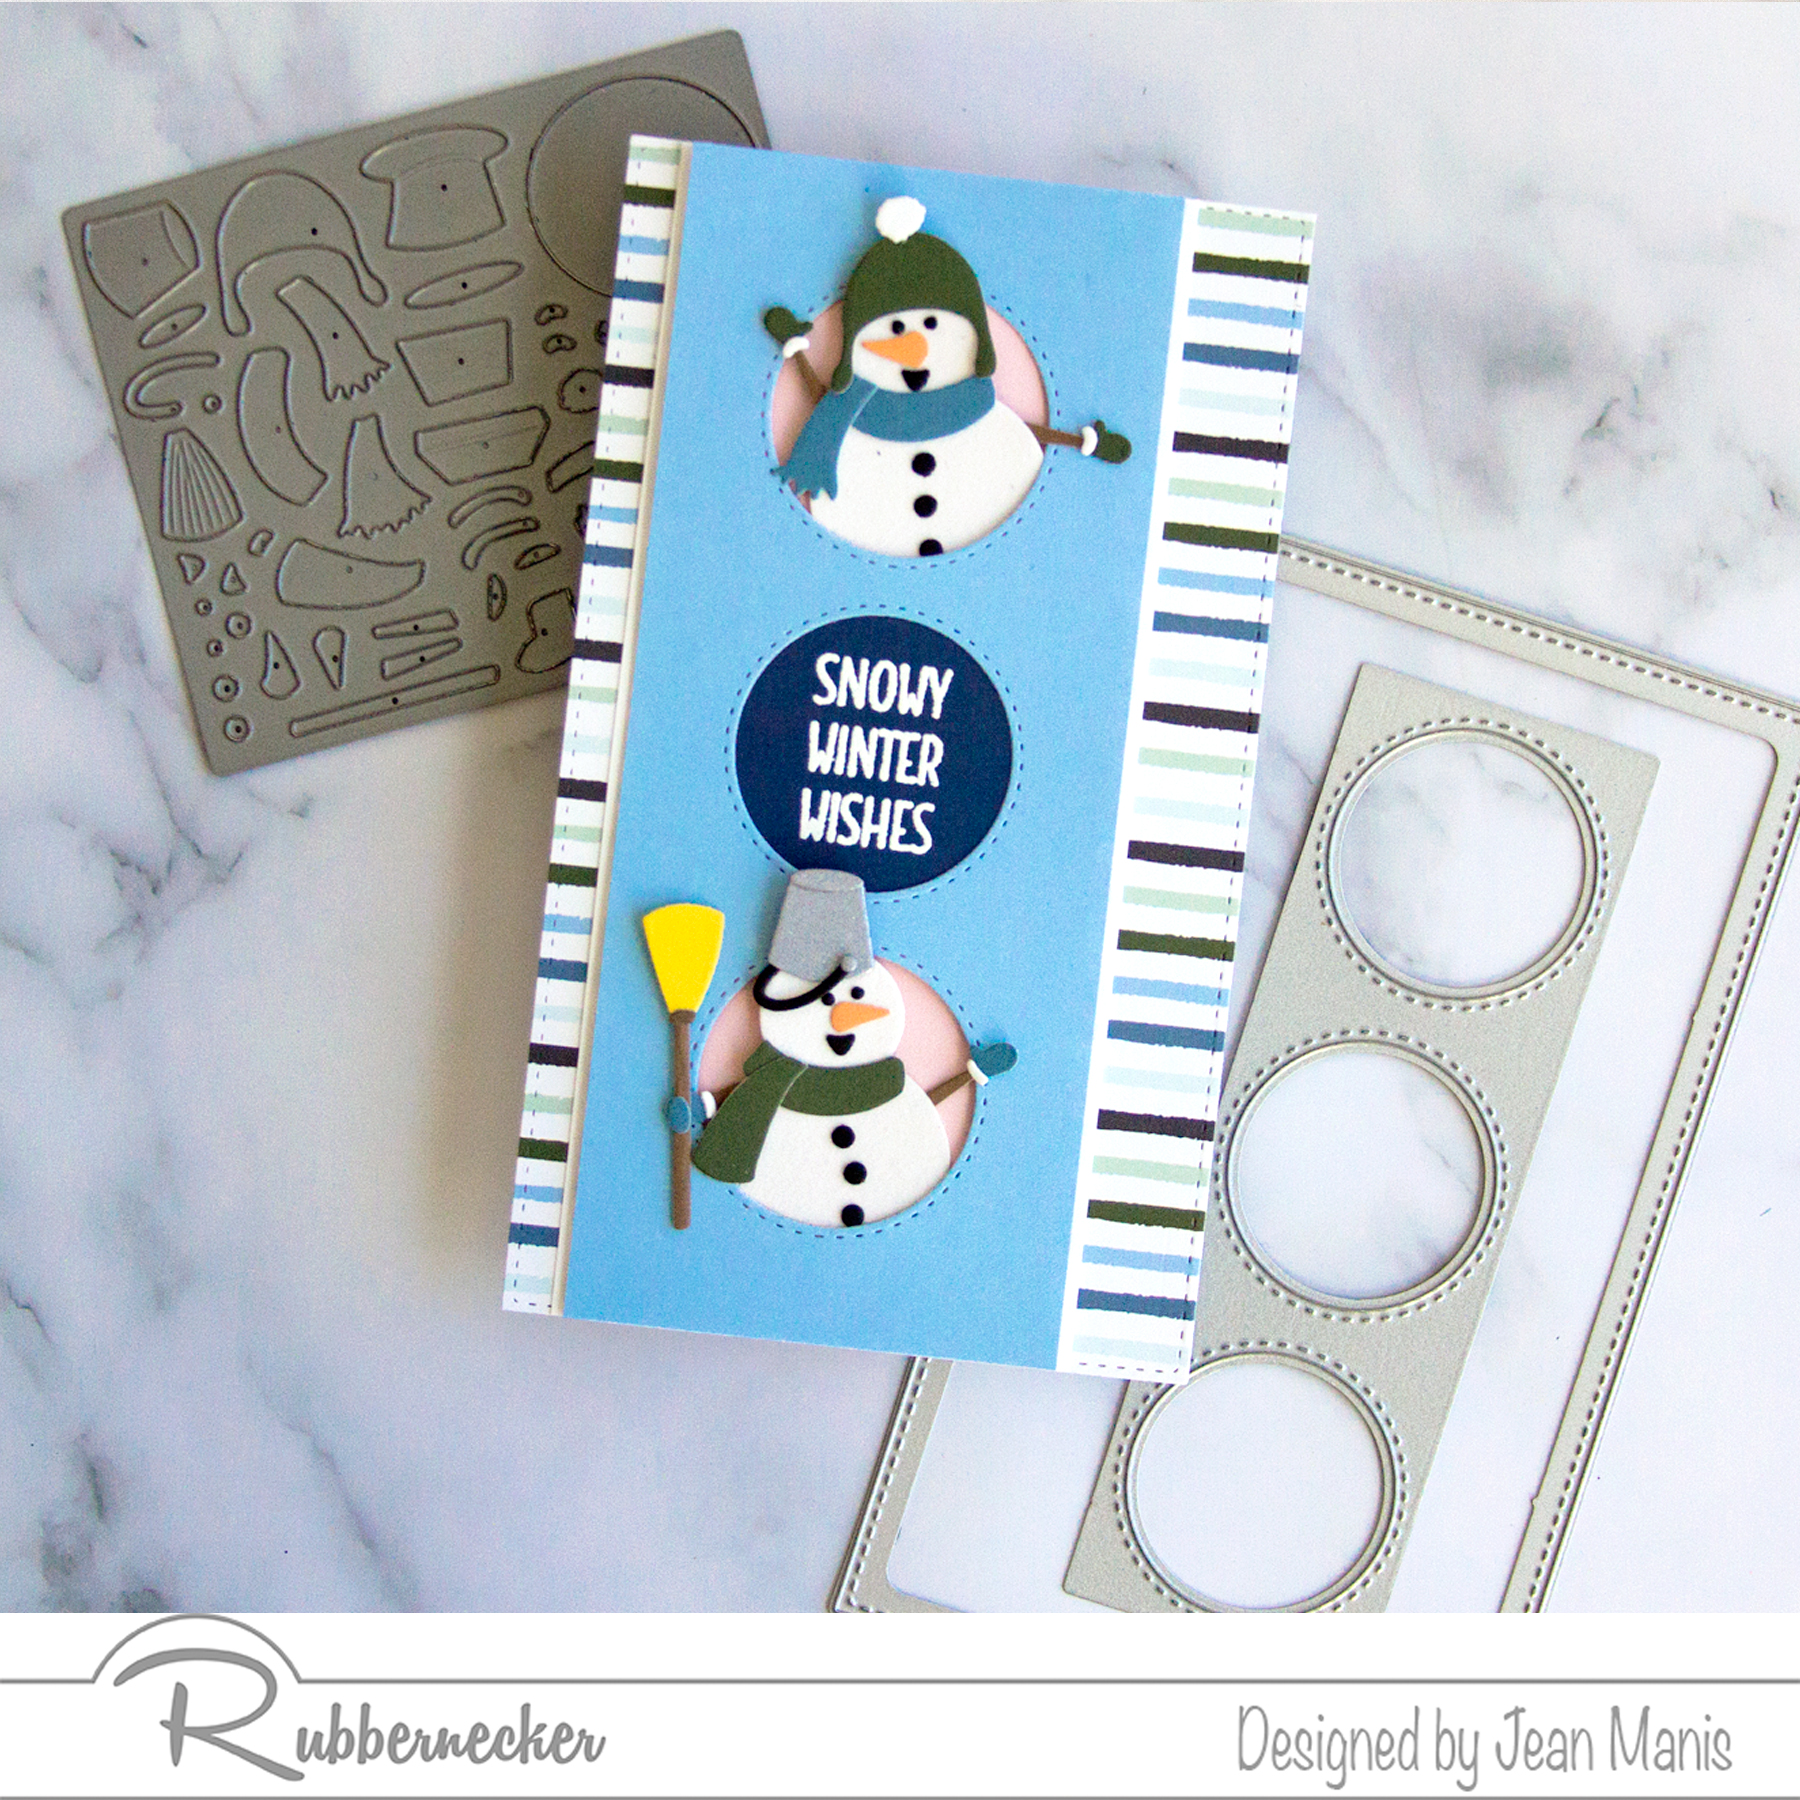
  • Die-cut snowmen from various colors of paper and cardstock with the Winter Snowmen set and assemble.

Rubbernecker Die-cut Snowmen Card

  • •With white powder, heat-emboss the Snowmen with Presents sentiment on dark blue paper. Trim heat-embossed panel to a size slightly larger than the die-cut circles.
  • From the back of the paper rectangle with the die-cut circles, attach the sentiment to show in the center circle.
  • Create a 6 inch by 2 ½ inches strip from pink paper and attach to the back of the die-cut circle strip.
  • To highlight the circle frame, attach white cardstock strip measuring 6 by 2 3/4 inches to the back of the die-cut circle assembly. Adhere to card background ¼ inch from the left edge. The asymmetry creates visual interest.
  • Position the die-cut Winter Snowmen in the top and bottom circles and adhere. (Photo below shows the die-cut pieces before final assembly.)

Rubbernecker Die-cut Snowmen Card


Spellbinders Be Bold – Color Block Love Take 2

Hello! I am sharing another CAS Valentine’s Day card created with the Be Bold Color Block Love You die set at Spellbinders. You can see my first card using the set here.

Spellbinders Be Bold - Color Block Love

On this card, I die-cut the “LOVE” letters from white glitter paper and inlaid die-cut pieces of red and shades of pink.

Spellbinders Be Bold - Color Block Love

I die-cut the “you” letters from white cardstock that I had heat-embossed with Gold Tinsel powder.


Spellbinders Mini Slimline Layering Basics

I am delighted to share two cards created with the recently released Mini Smiline Layering Basics sets – Precision Layering Mini Slimline A and B – at Spellbinders.

Spellbinders Mini Slimline Layering Basics

Both cards measure 3 1/8 x 6 1/8 inches. I die-cut the layers using the A and B dies. Each set contains 12 dies with which to cut spaced layers of 1/8 inch. When combined with the other set, you will achieve a 1/16-inch border.

On both, I die-cut sentiments from Snowdrift cardstock with the Smooth Lines die set.

Spellbinders Mini Slimline Layering Basics

Spellbinders Mini Slimline Layering Basics

Spellbinders Mini Slimline Layering Basics

Spellbinders Mini Slimline Layering Basics


Spellbinders Open House Spring

Looking for the Spellbinders Blog Hop post? Head here.

I am delighted to share two cards created with the most-recent addition to the Open House Collection at Spellbinders – Open House Spring!

Spellbinders Open House Spring

The first card, a mini slimline, combines the Open House Door Base, the Door Side Panel, the Sentiment Steps, and the Open House Spring set.

Spellbinders Open House Spring

  • Dry-emboss the background with the Scallops folder.
  • Die-cut and assemble the Open House sets.
  • Glimmer foil in gold a sentiment in the More Sentiments set on the middle step.
  • Attach Open House assembly to card background.
  • Embellish the wreath flower centers with the Spectrum AB Color Essentials Gems.

Spellbinders Open House Spring

The second card, A2-sized, combines the Open House Door Base, the Door Side Panel, the Open House Valentines set (envelope), and the Open House Spring set.

Spellbinders Open House Spring

  • Dry-emboss the background with the Scallops folder.
  • Die-cut and assemble the Open House sets.
  • Attach Open House assembly to card background.
  • Add bunny and balloon.
  • Embellish the wreath flower centers with the Spectrum AB Color Essentials Gems.

Spellbinders Open House Spring

Spellbinders Open House Spring