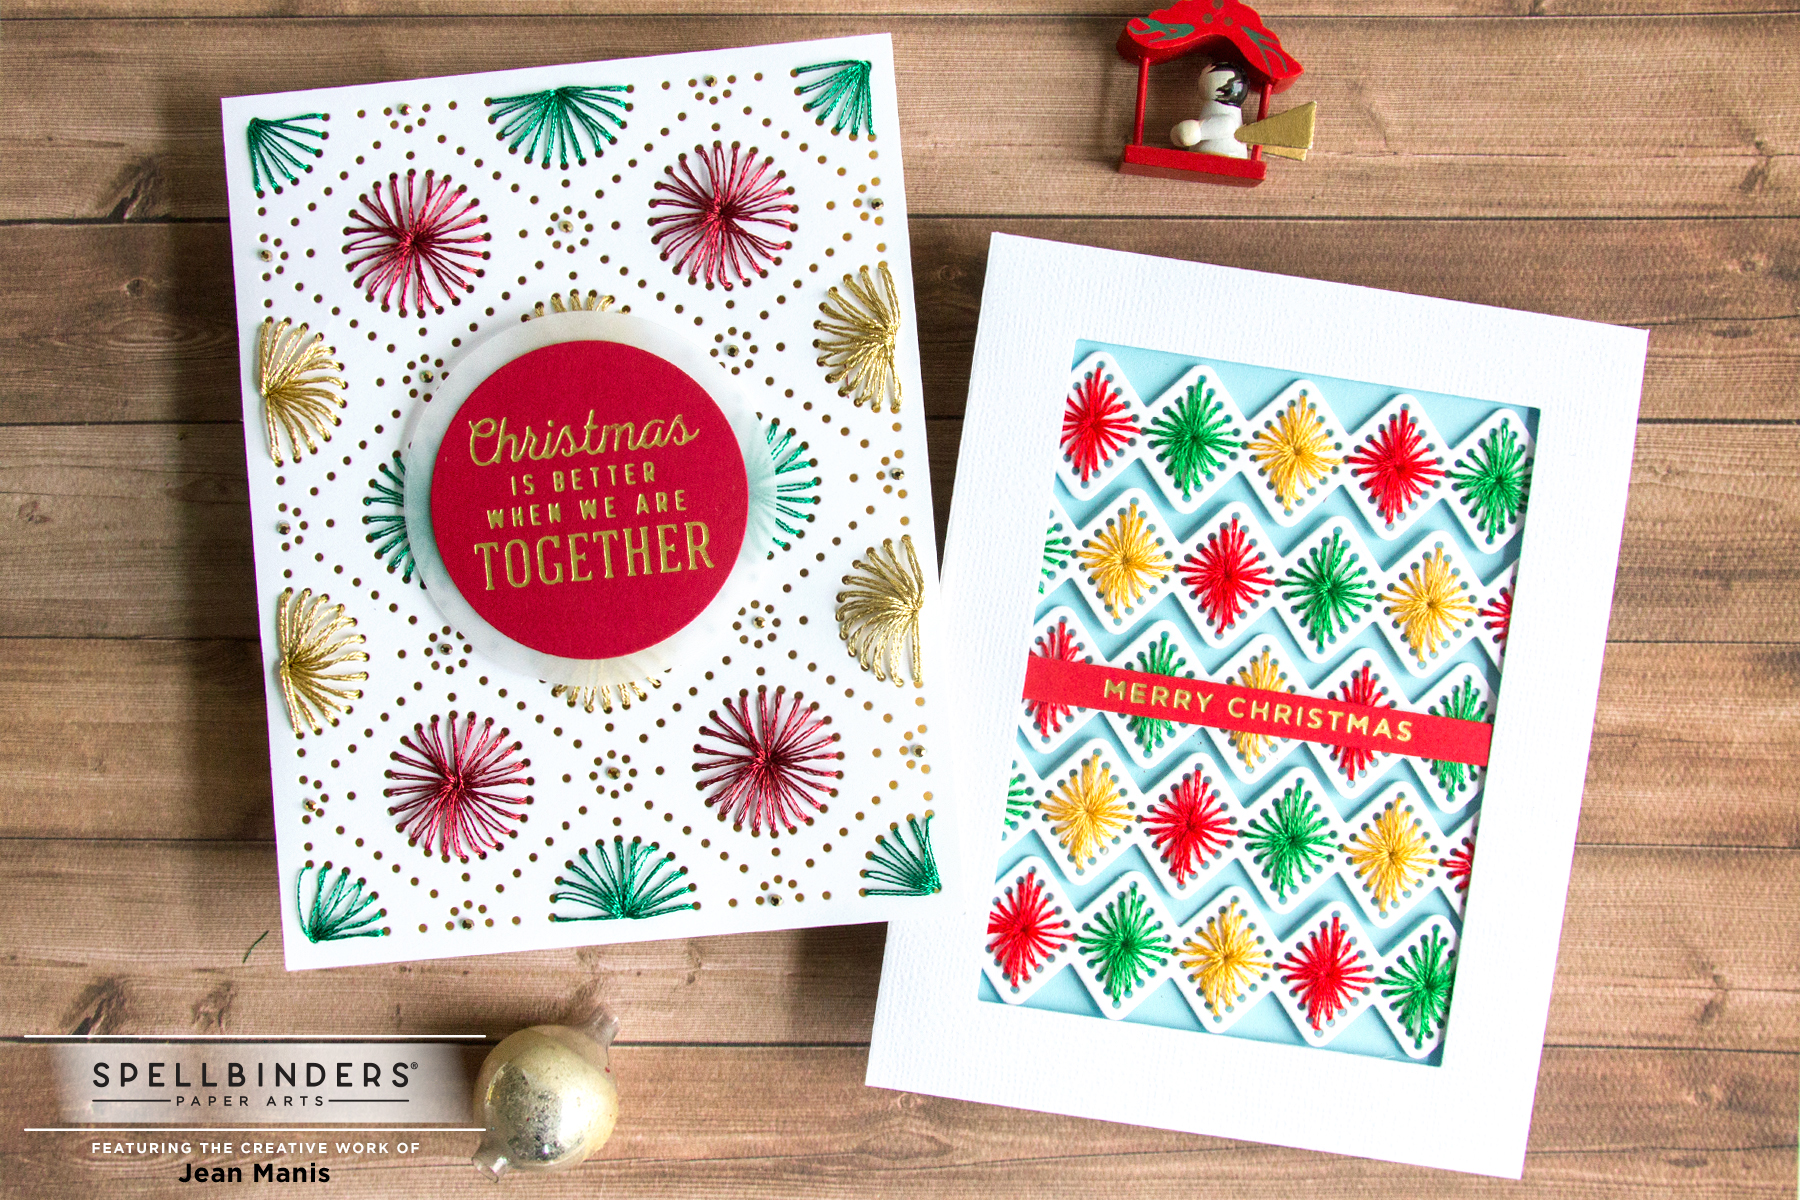
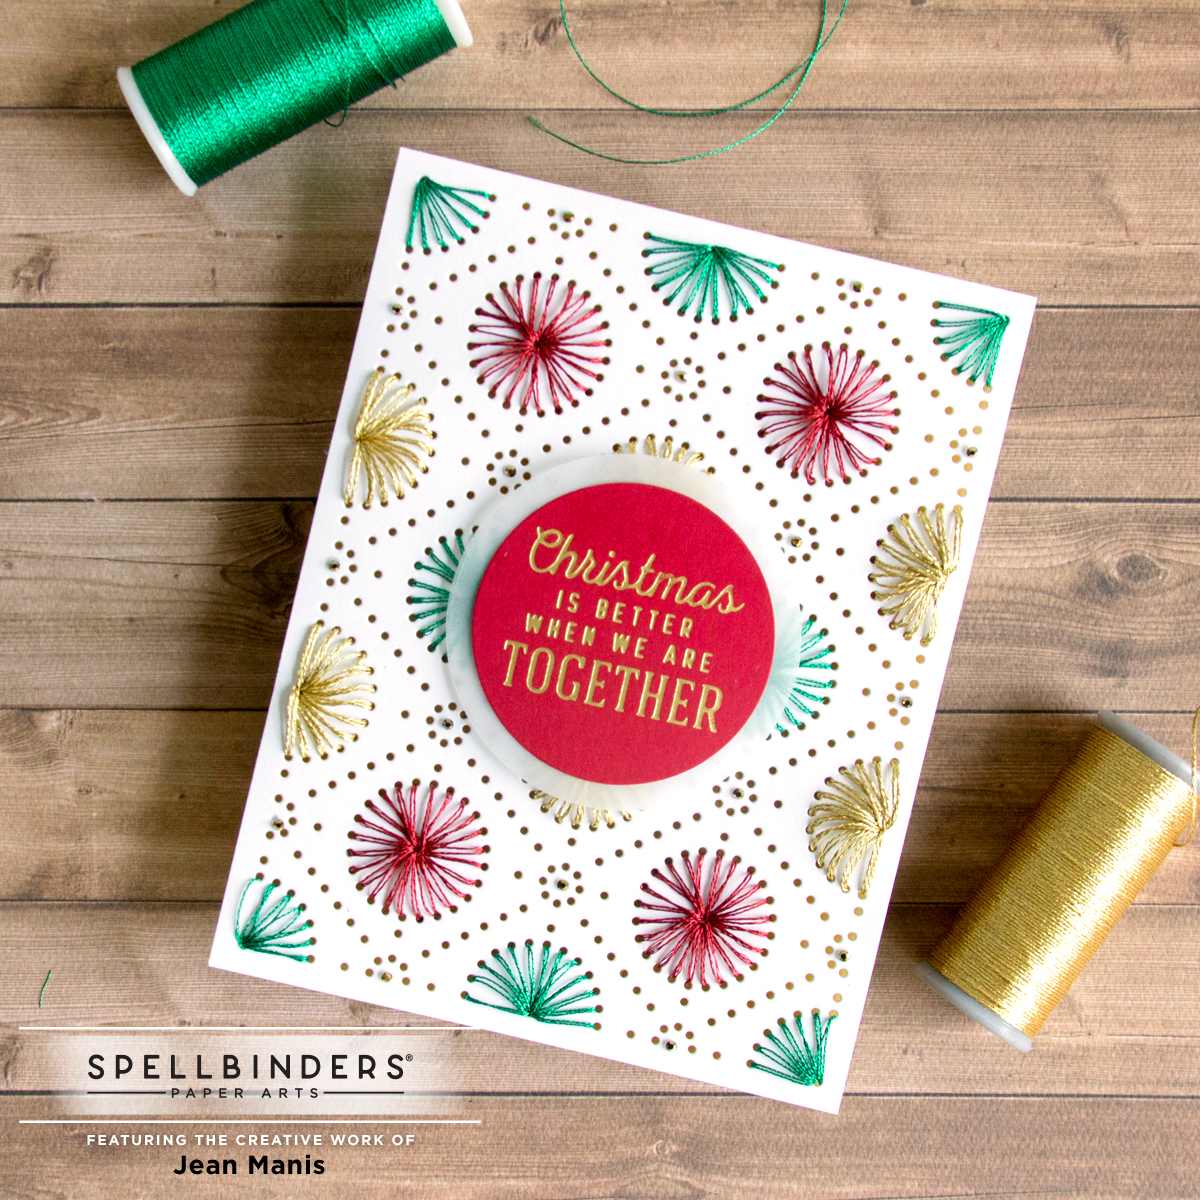
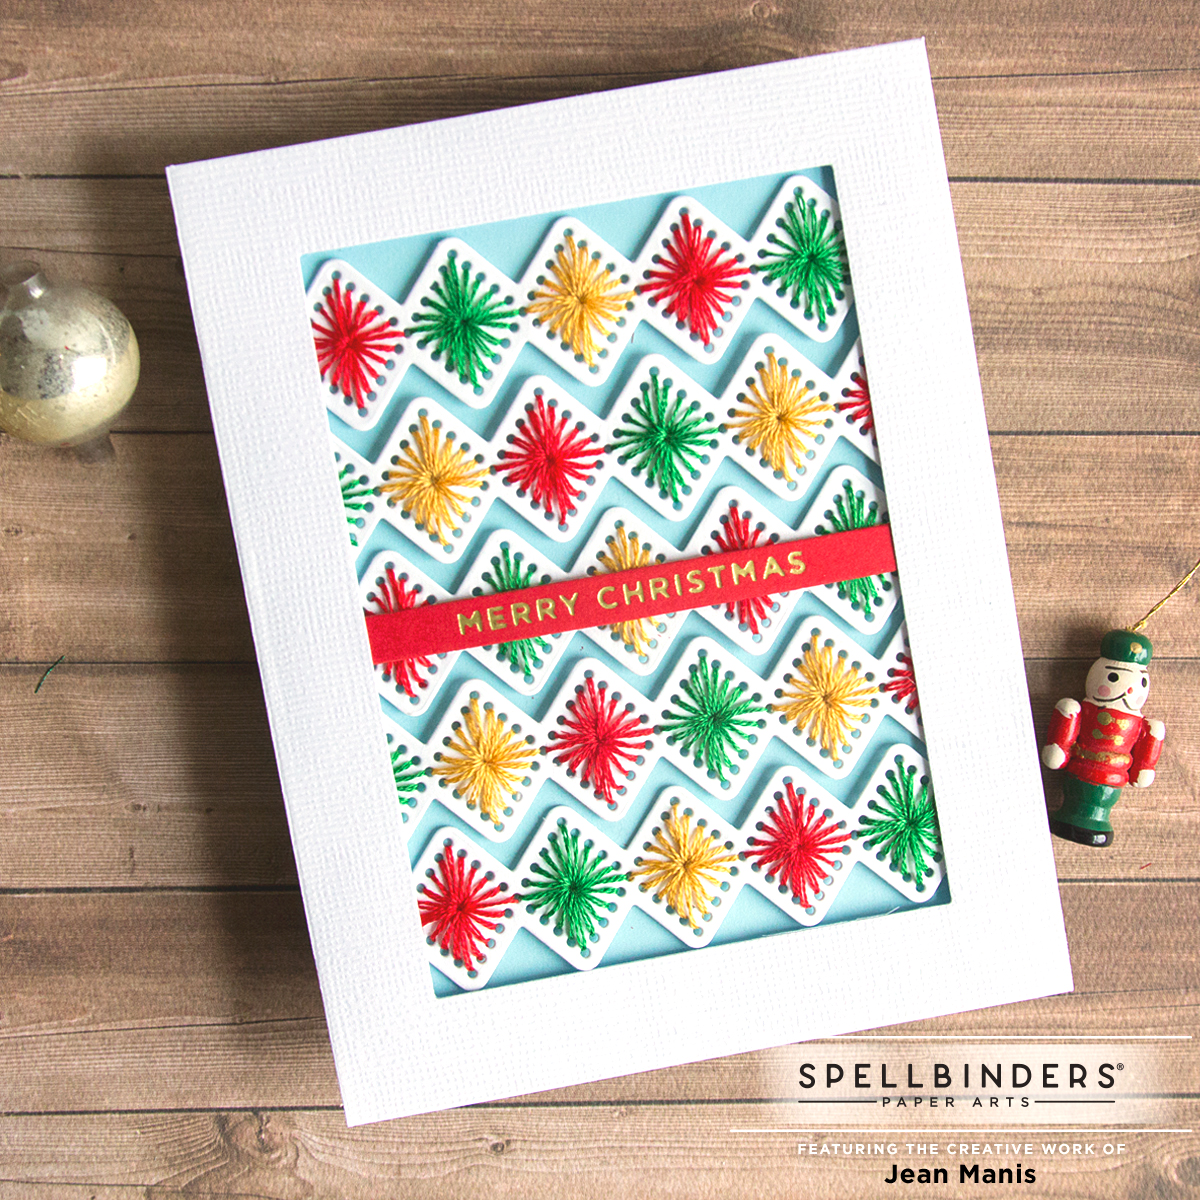
Hello! I was recently a guest on the Spellbinders blog sharing holiday cards created with the recently-released Merry Stitchmas Collection. I hope you will head on over to read more about the cards I created and leave a comment!
Category: die cuts
Spellbinders October 2021 Large Die Kit Club
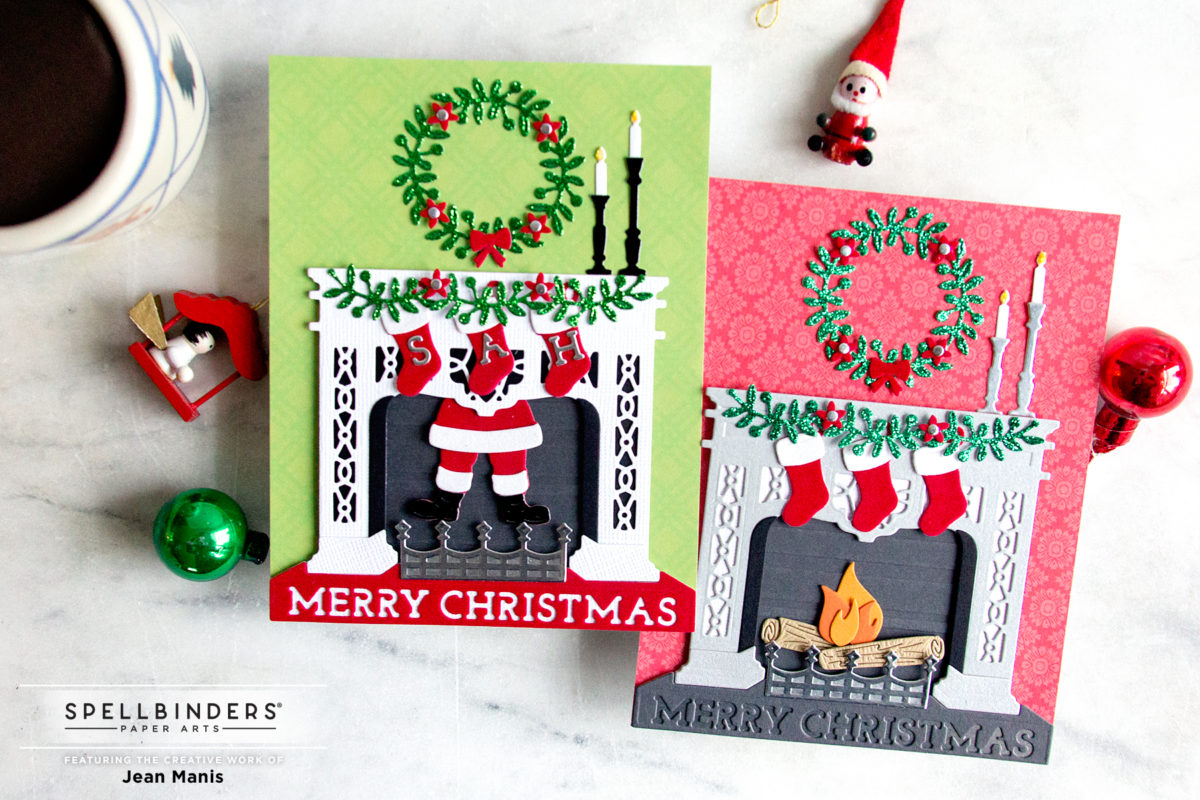
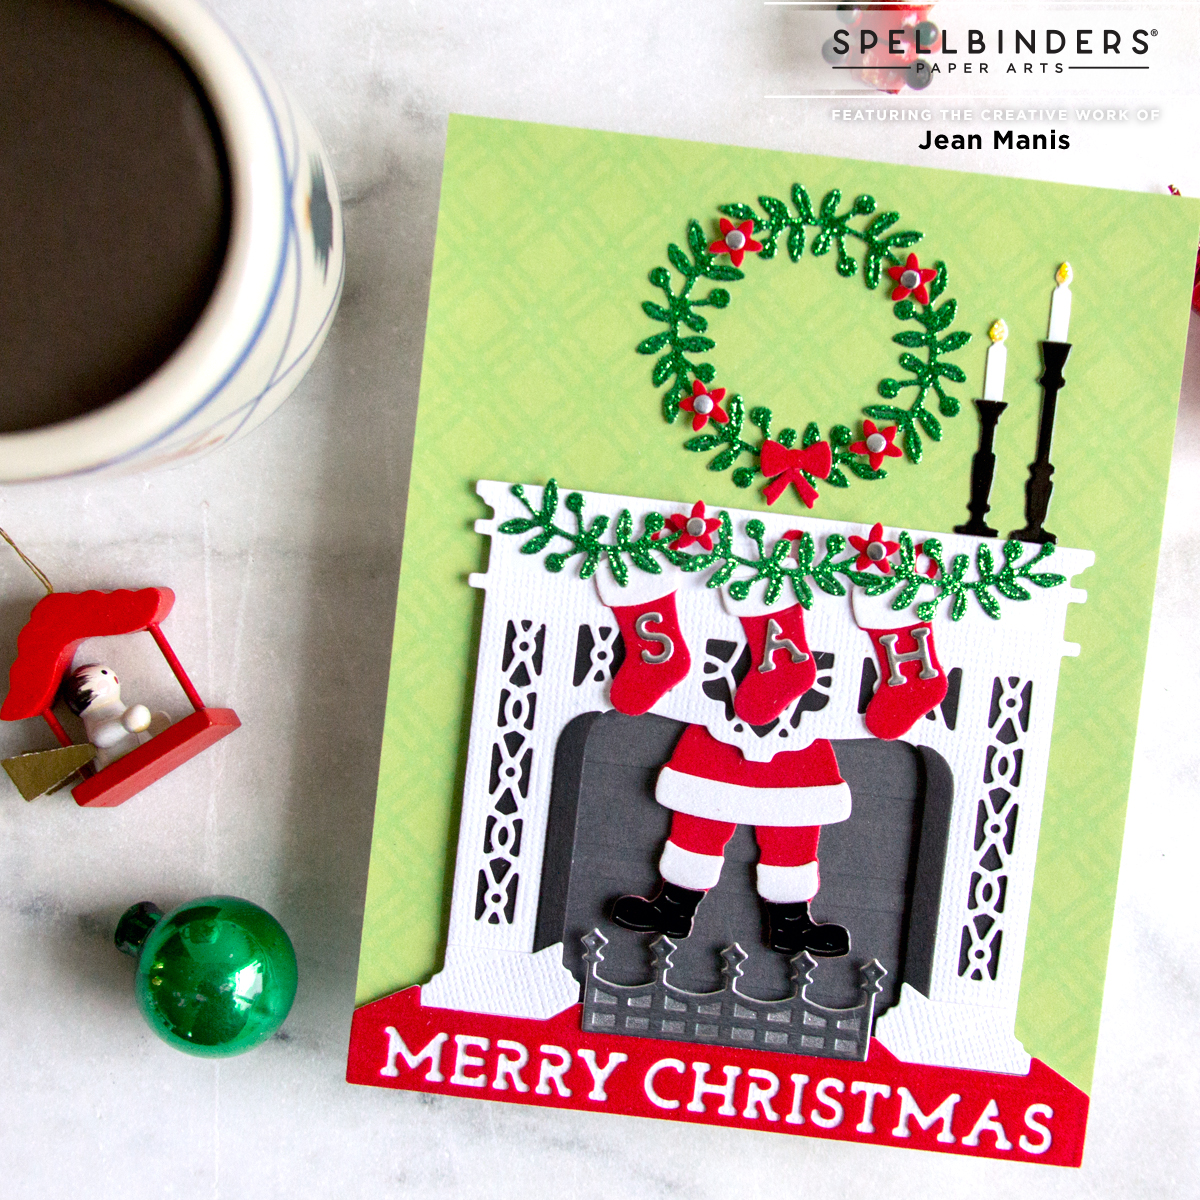
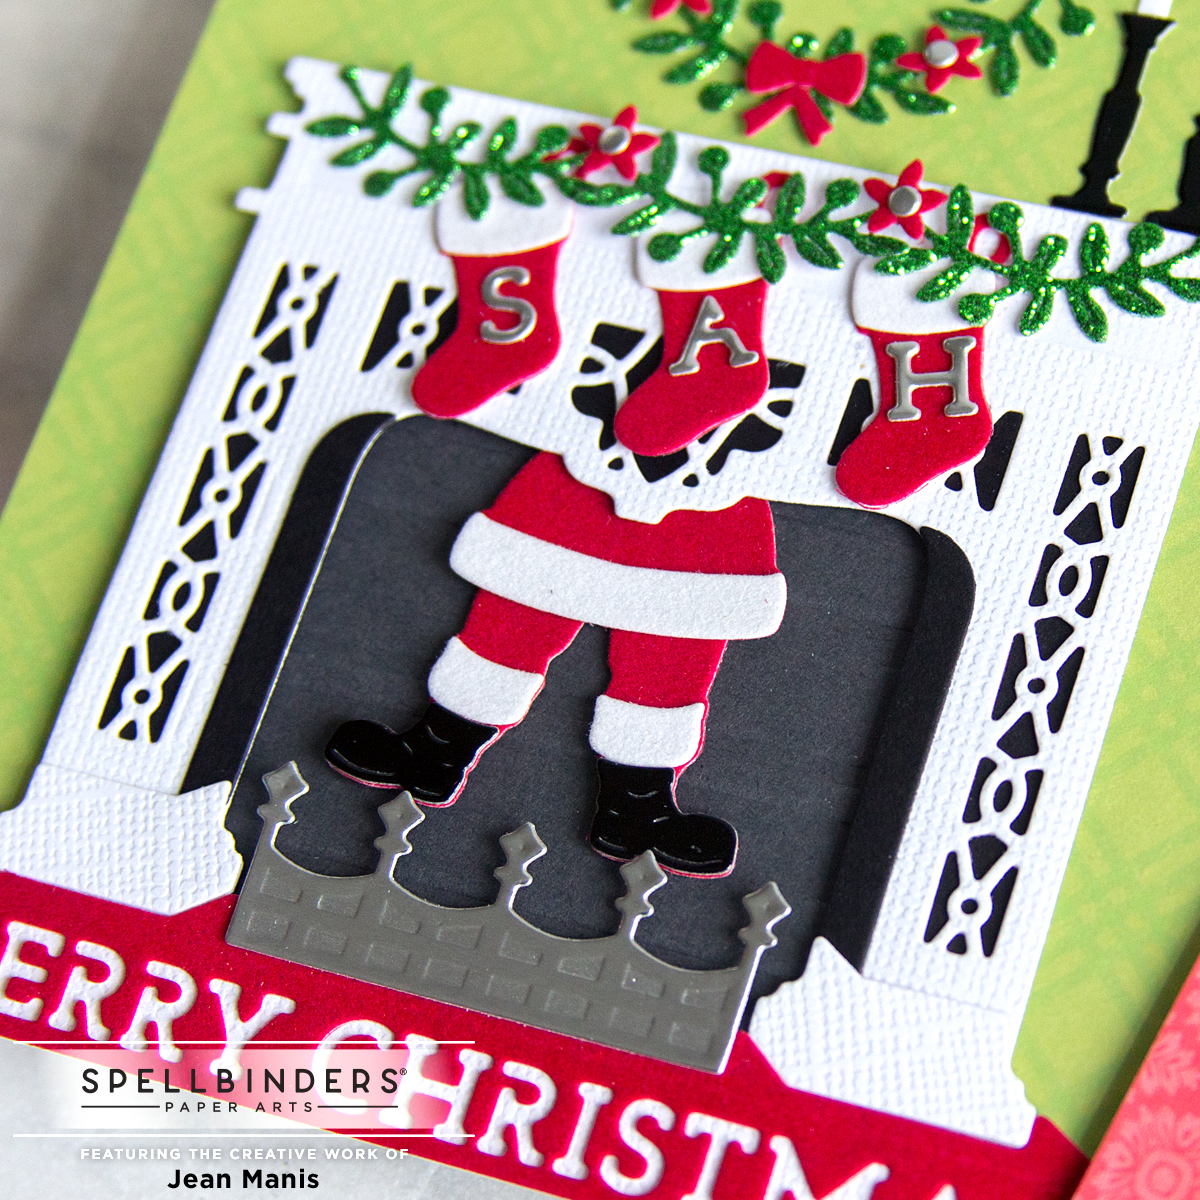
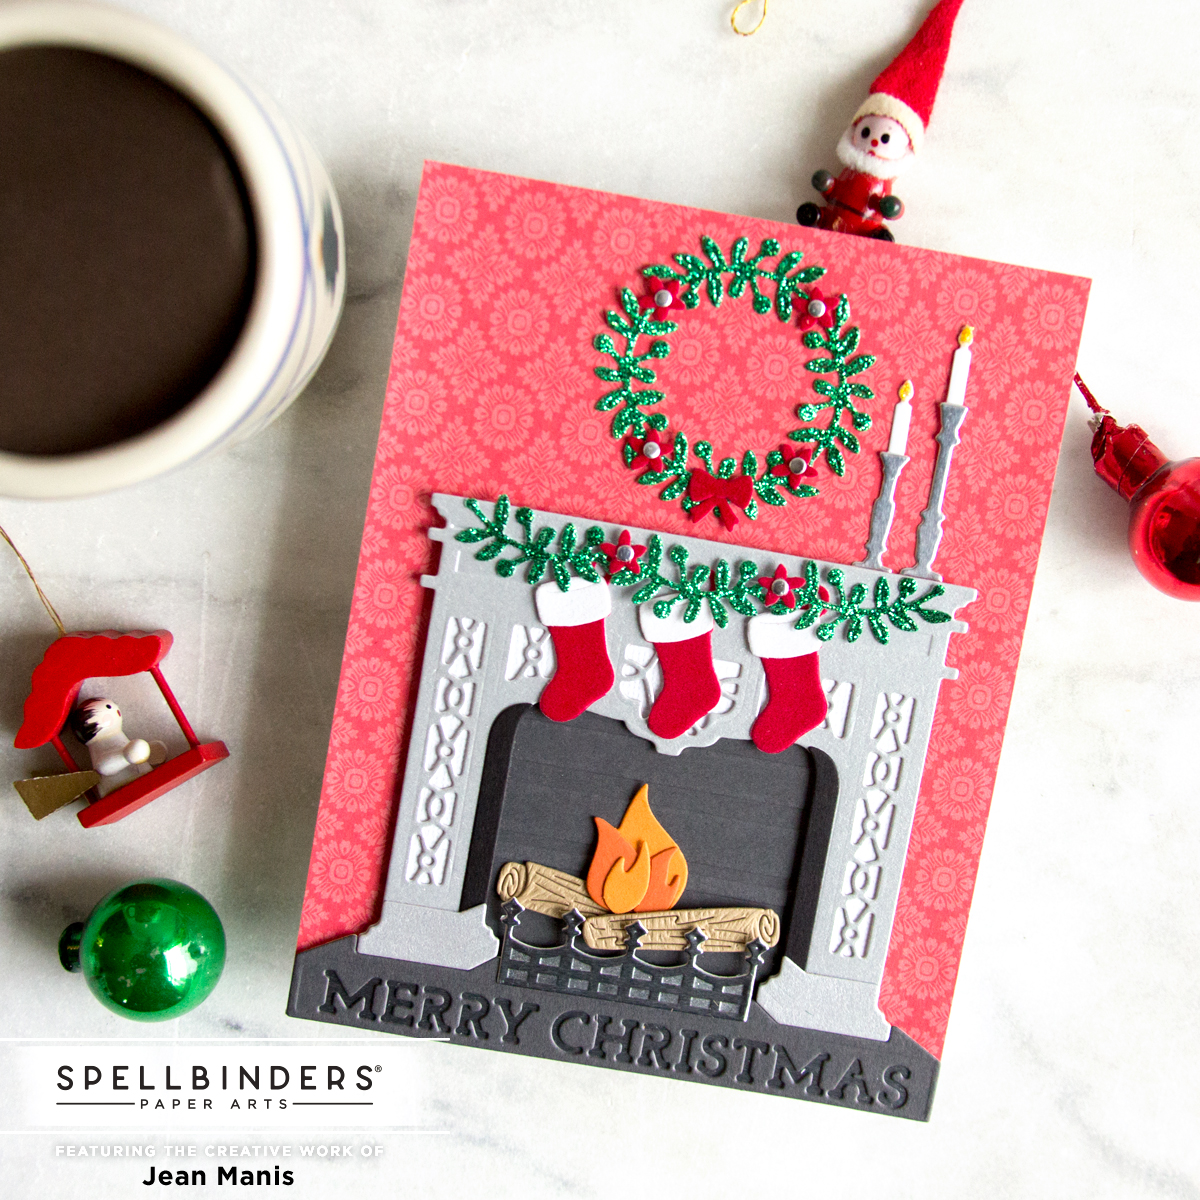
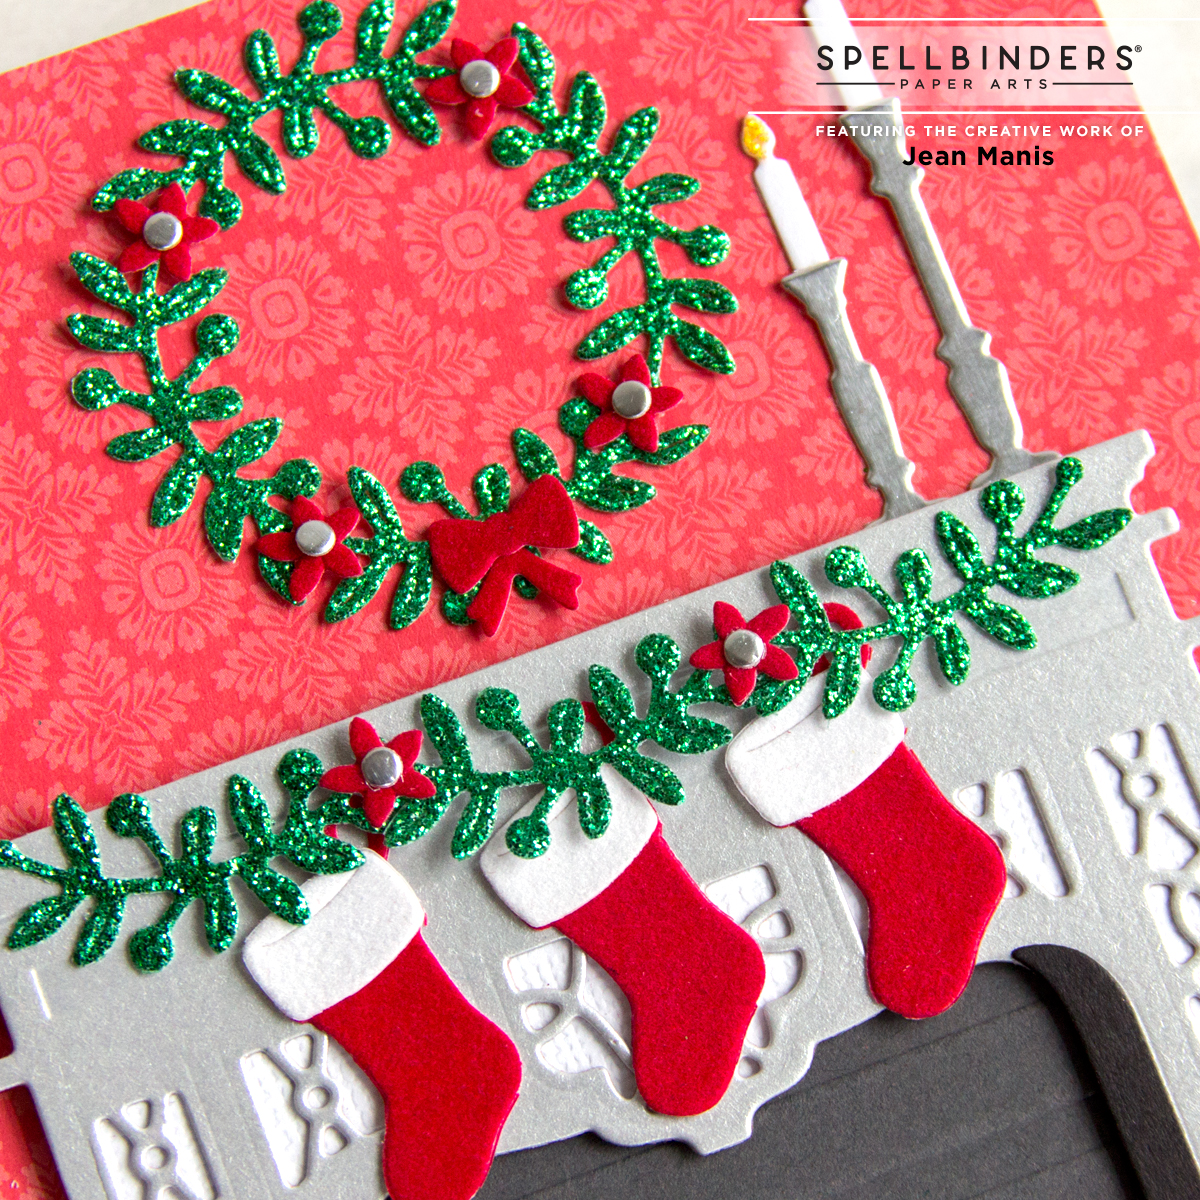
Hello crafty friends! I’m delighted to share two holiday cards created with the Spellbinders October 2021 Large Die of the Month “Santa’s Fireplace.” This jam-packed set includes dies to create the fireplace, add Santa and/or a fire, as well as accessorize with a wreath, stockings, and/or candlesticks. There are a variety of sentiments that can be included as part of the fireplace hearth. Find out more about this set here.
- On both cards, I created card backgrounds with patterned paper in the Christmas Traditions pad.
- I dry-embossed the firebox area with the Striped Slimline folder.
- I die-cut the Large Die of the Month pieces from a variety of cardstocks including red and white flocked paper, textured white, brushed silver, silver foil, black foil, woodgrain, and green glitter.
- On the first card, I used the knock out of the sentiment hearth die to personalize the stockings.
Penny Black – Bring on the Snow
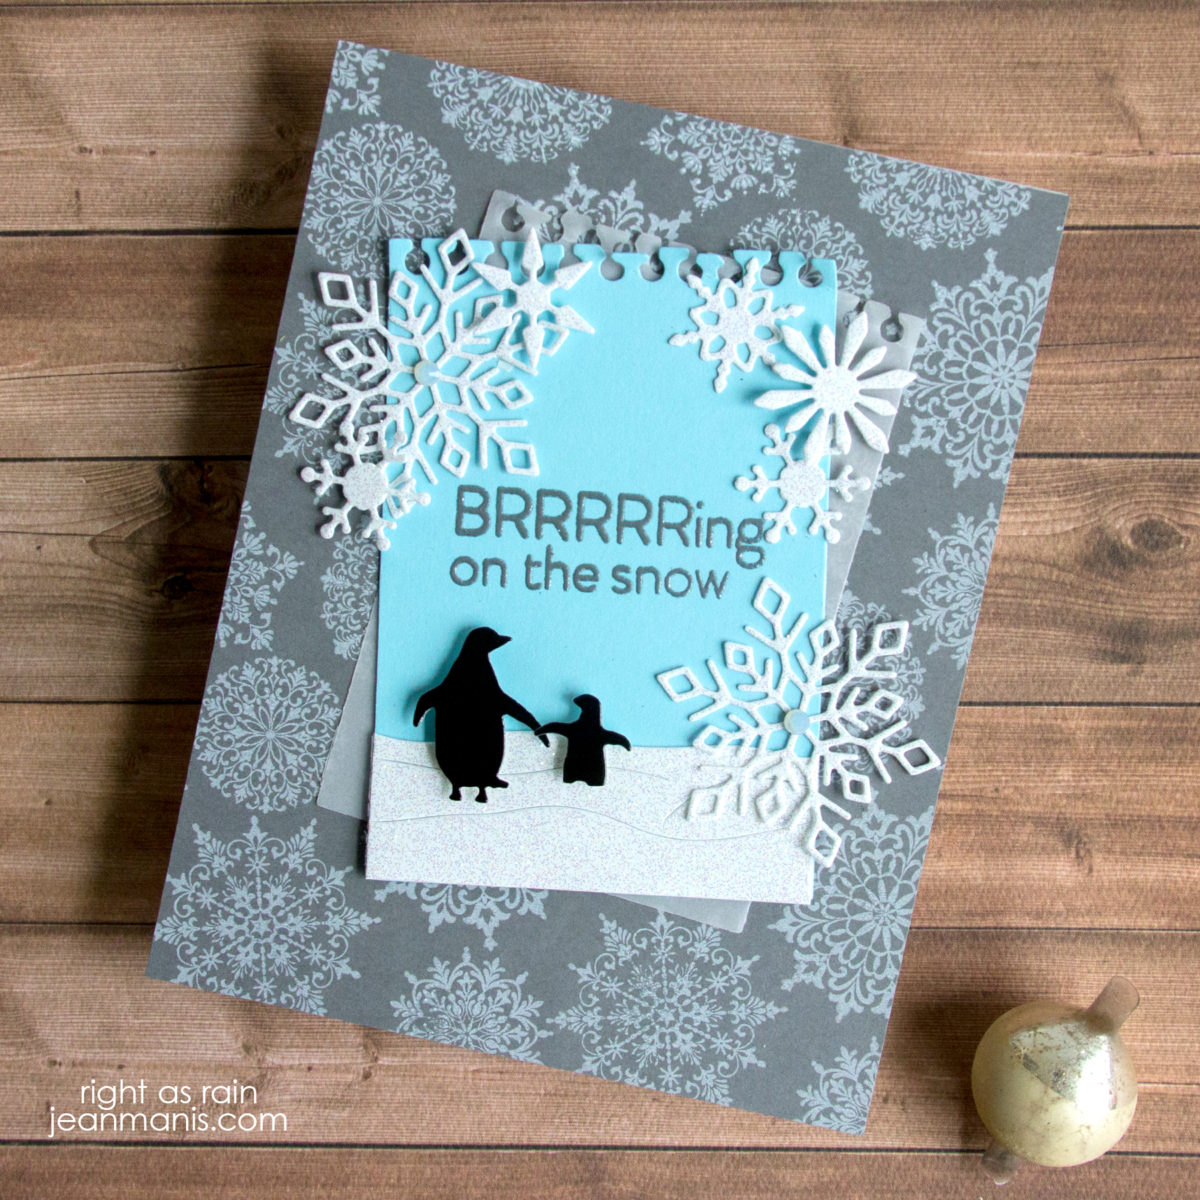
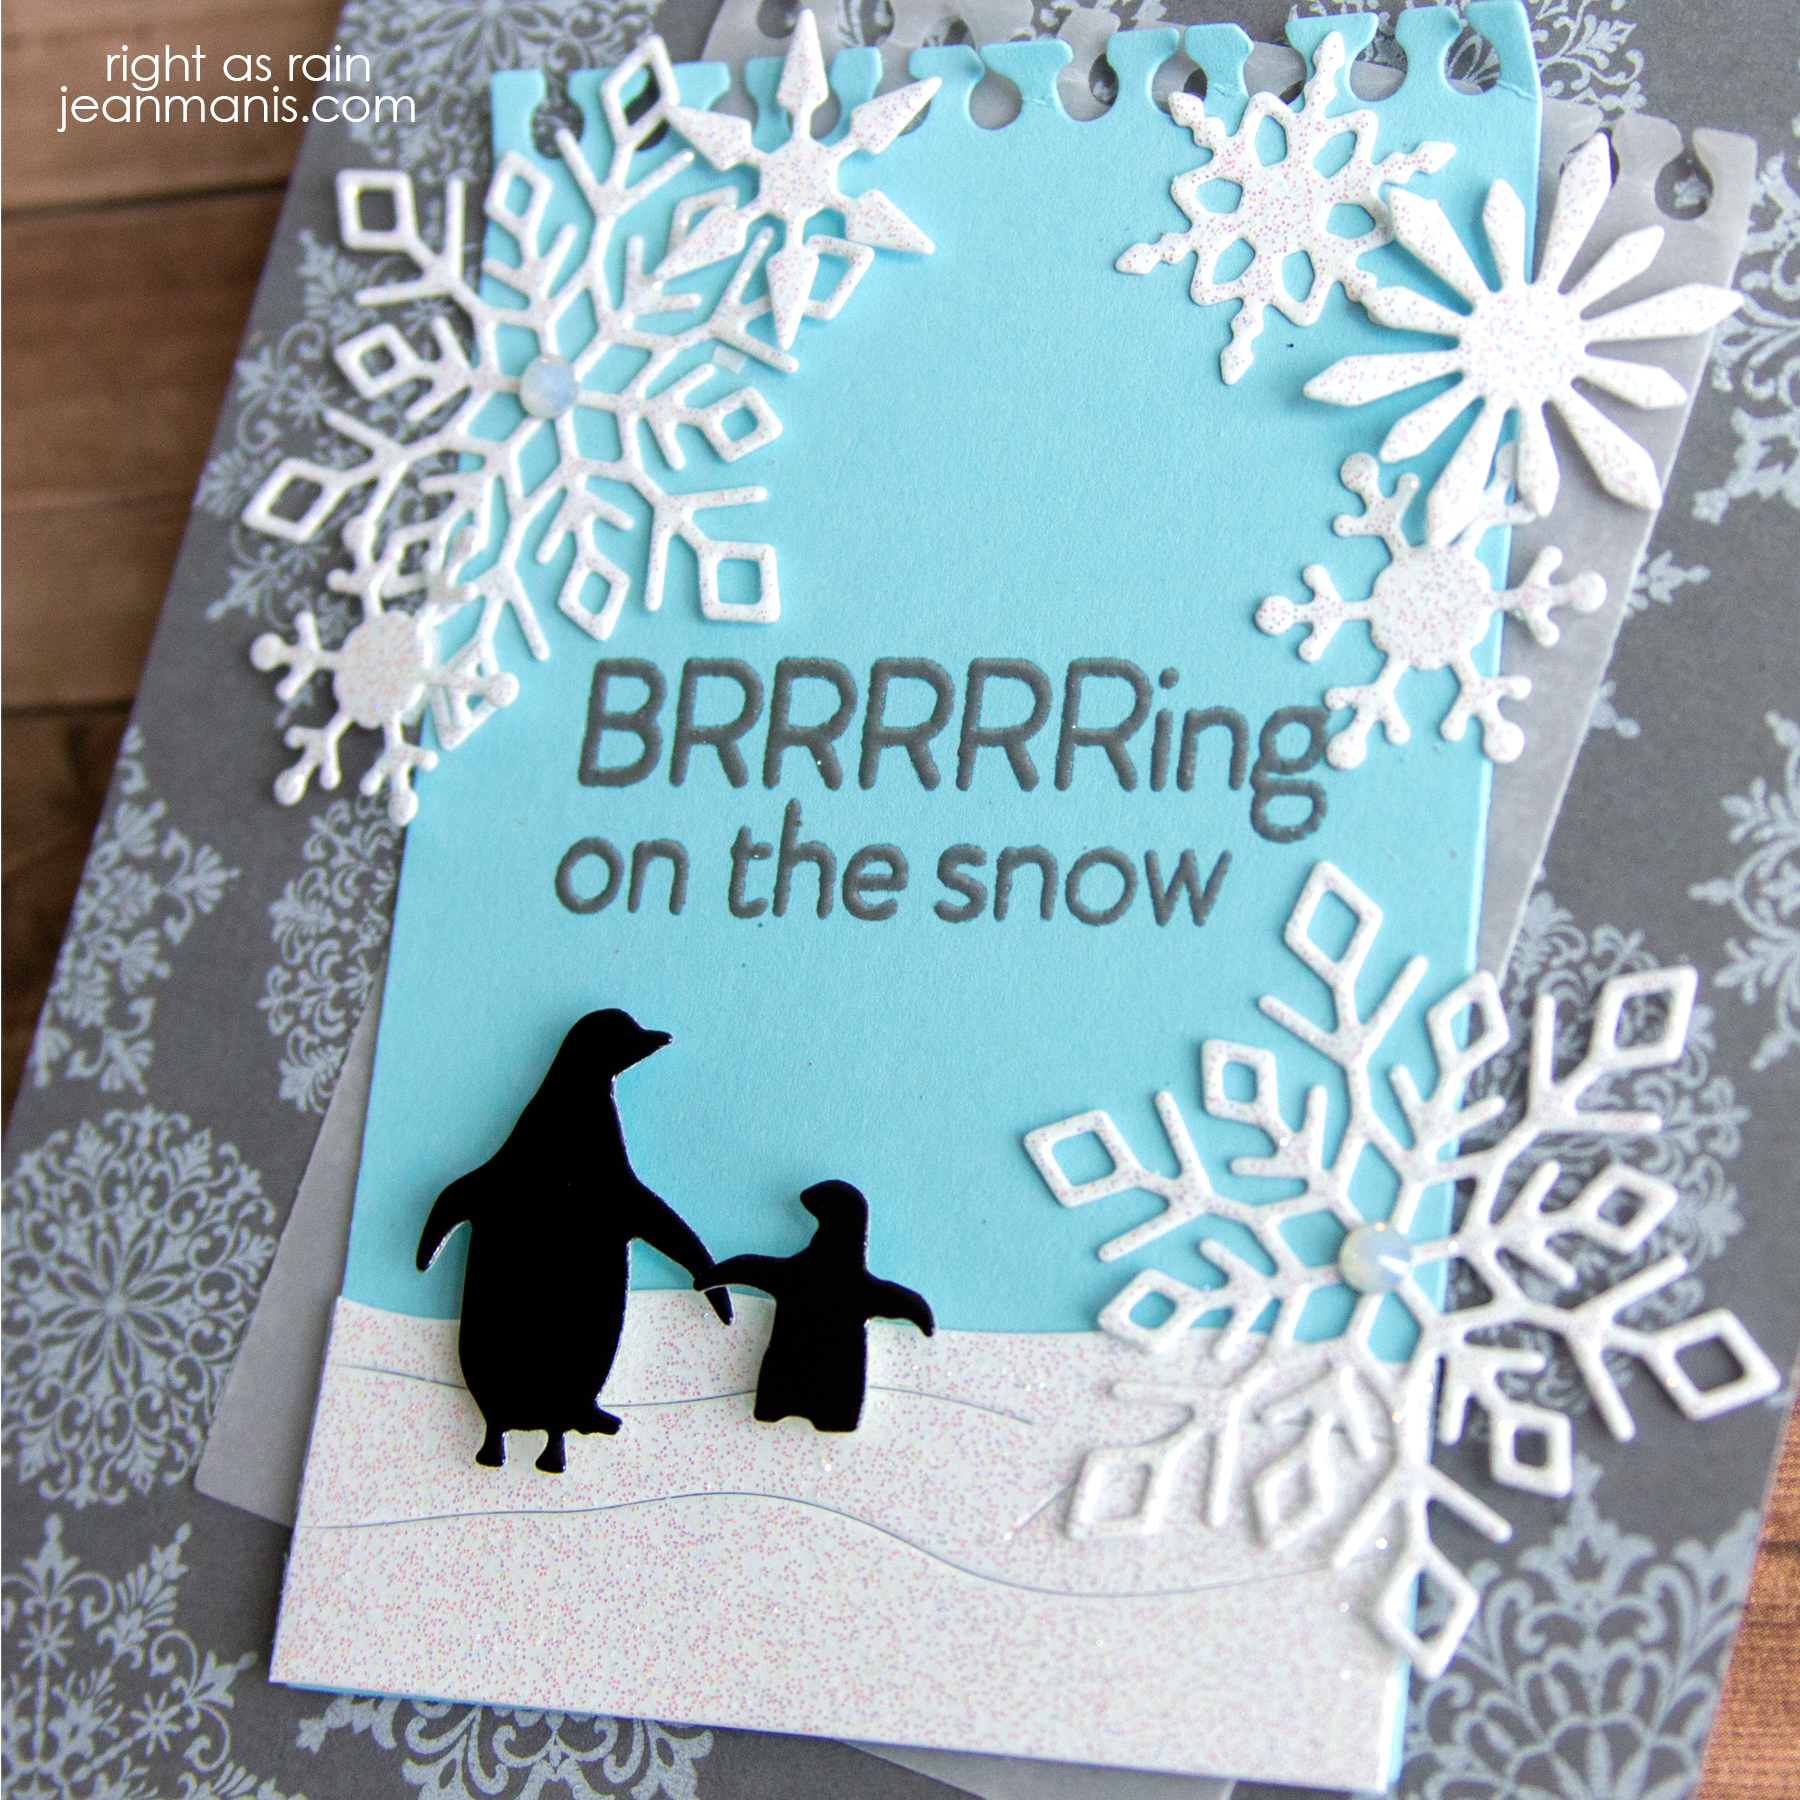
Hello! Today I am sharing a winter-themed card created with a new Penny Black sentiment set 30-852 Fresh Snow paired with additional die sets. I used the same design on a card here.
- For the background, stamp 40-706 Snowflake Pattern in white ink on Taylored Expressions Earl Grey cardstock.
- Heat-emboss the sentiment in silver 30-852 Fresh Snow on light blue cardstock and cut with the 51-053 A Pocket Full die. Use same die to cut vellum.
- Cut penguin and snowbank with the 51-668 Festive Family die set. I used the same set on this card.
- Die-cut snowflakes with the 51-708 Dancing Snowflakes set.
- Add sentiment panel, vellum, penguins, snowbank, and snowflakes to card base.
Spellbinders – Festive Christmas Cars
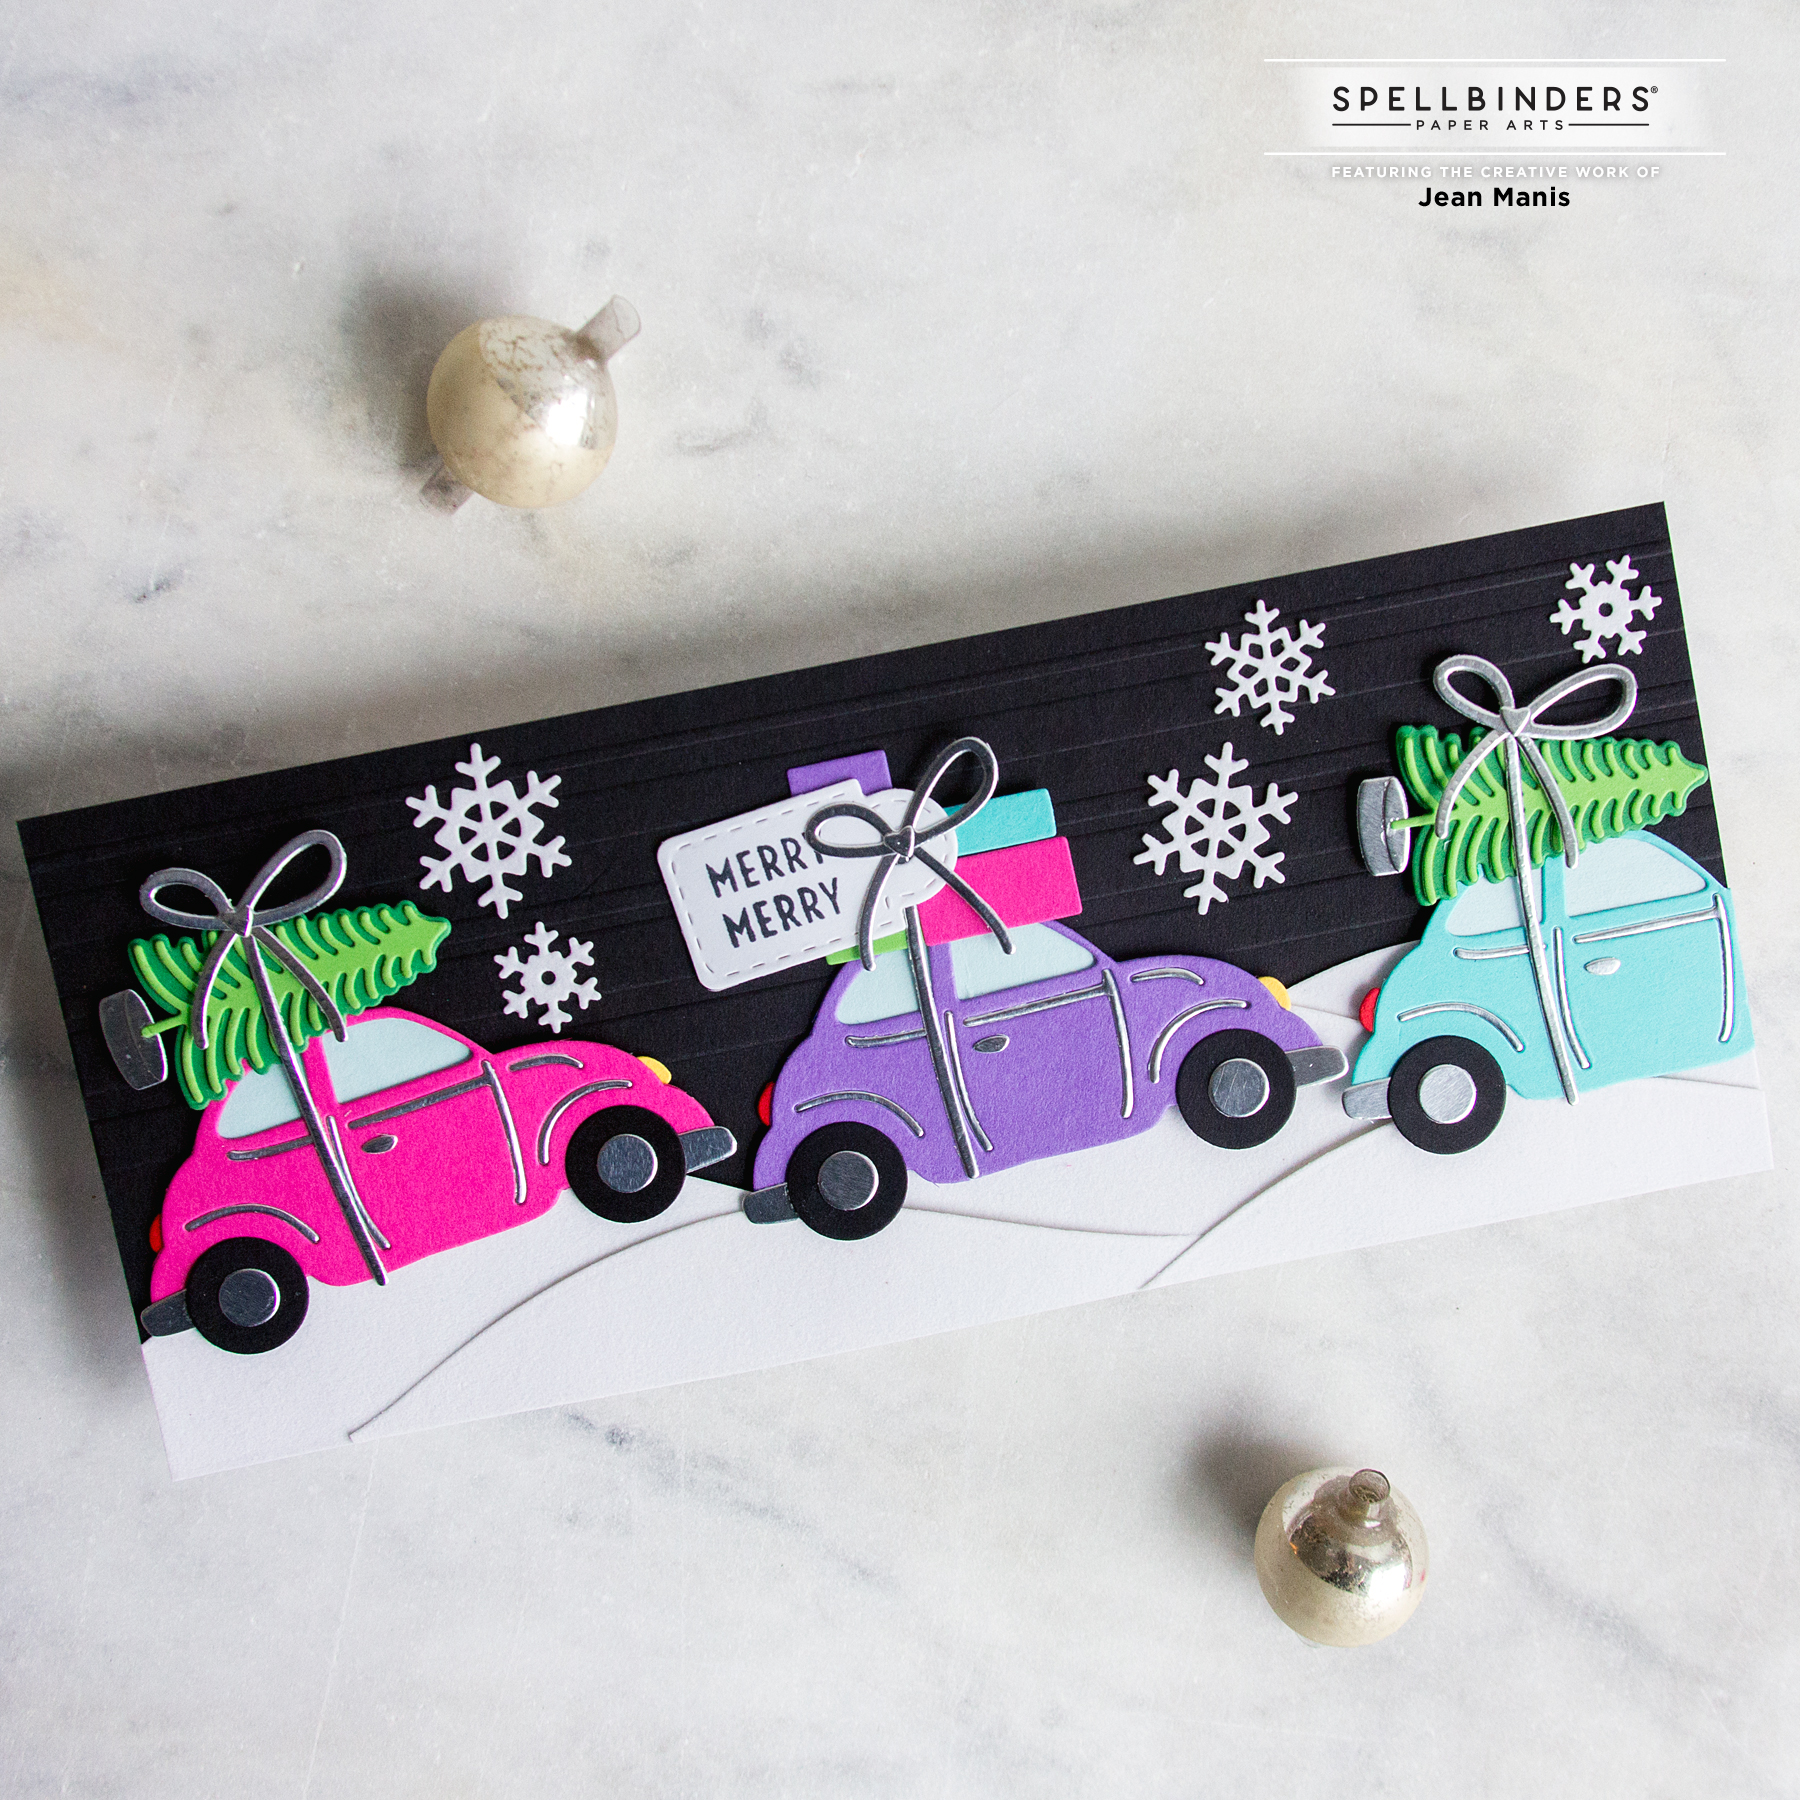
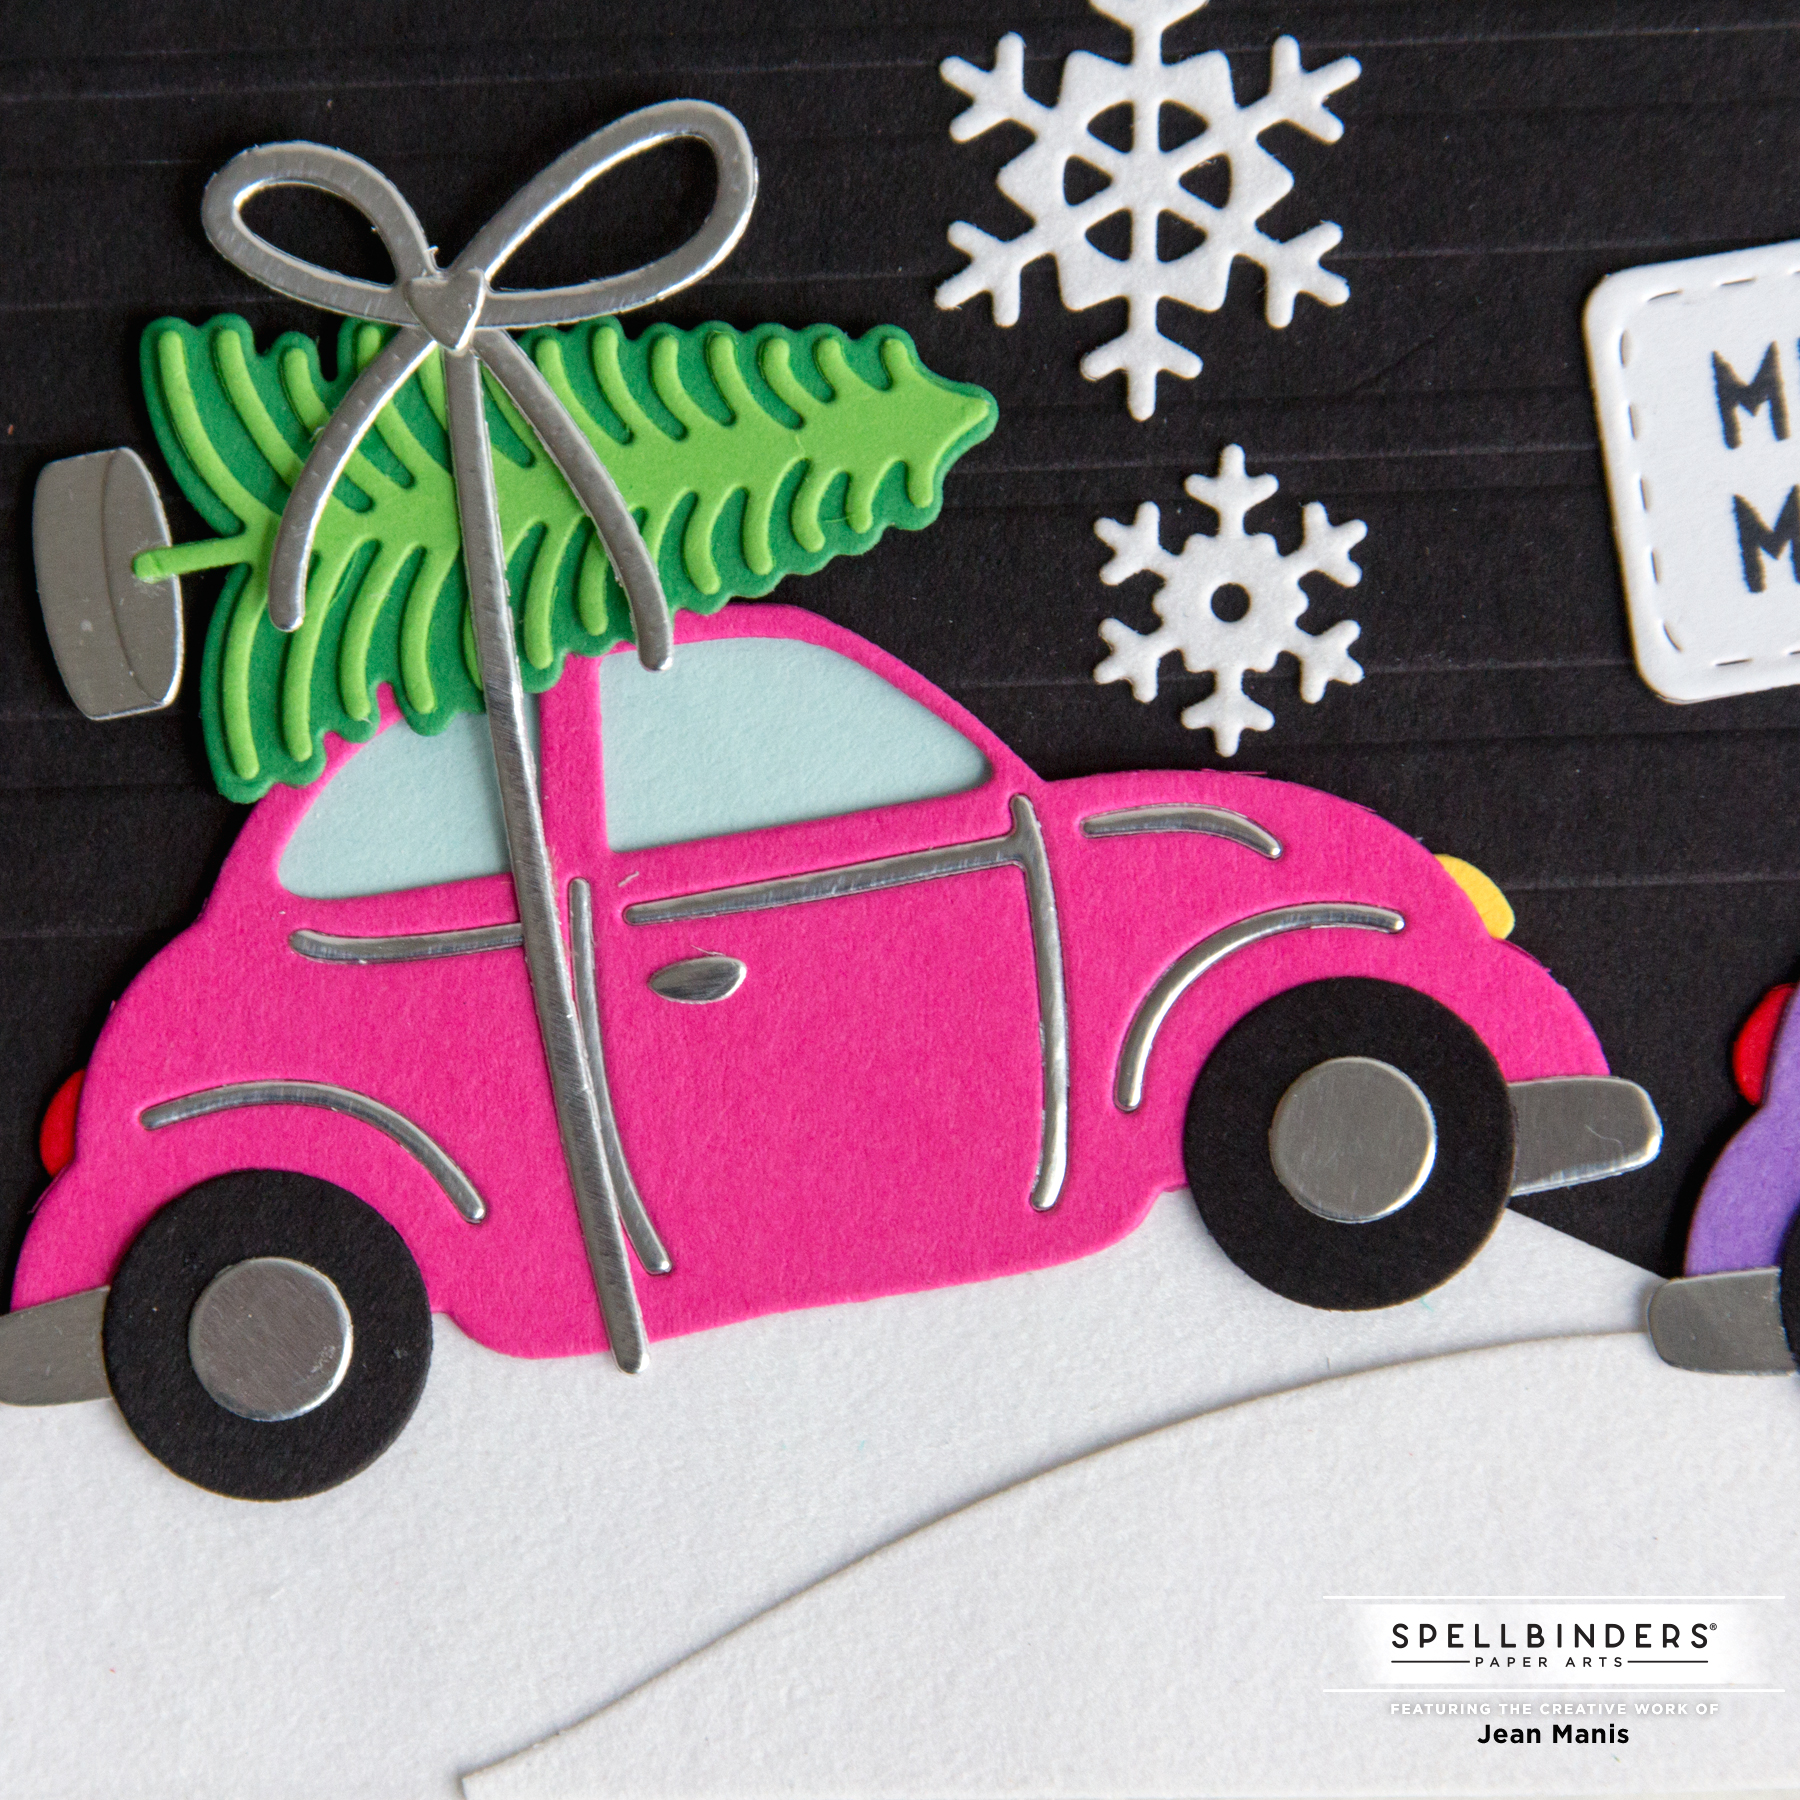
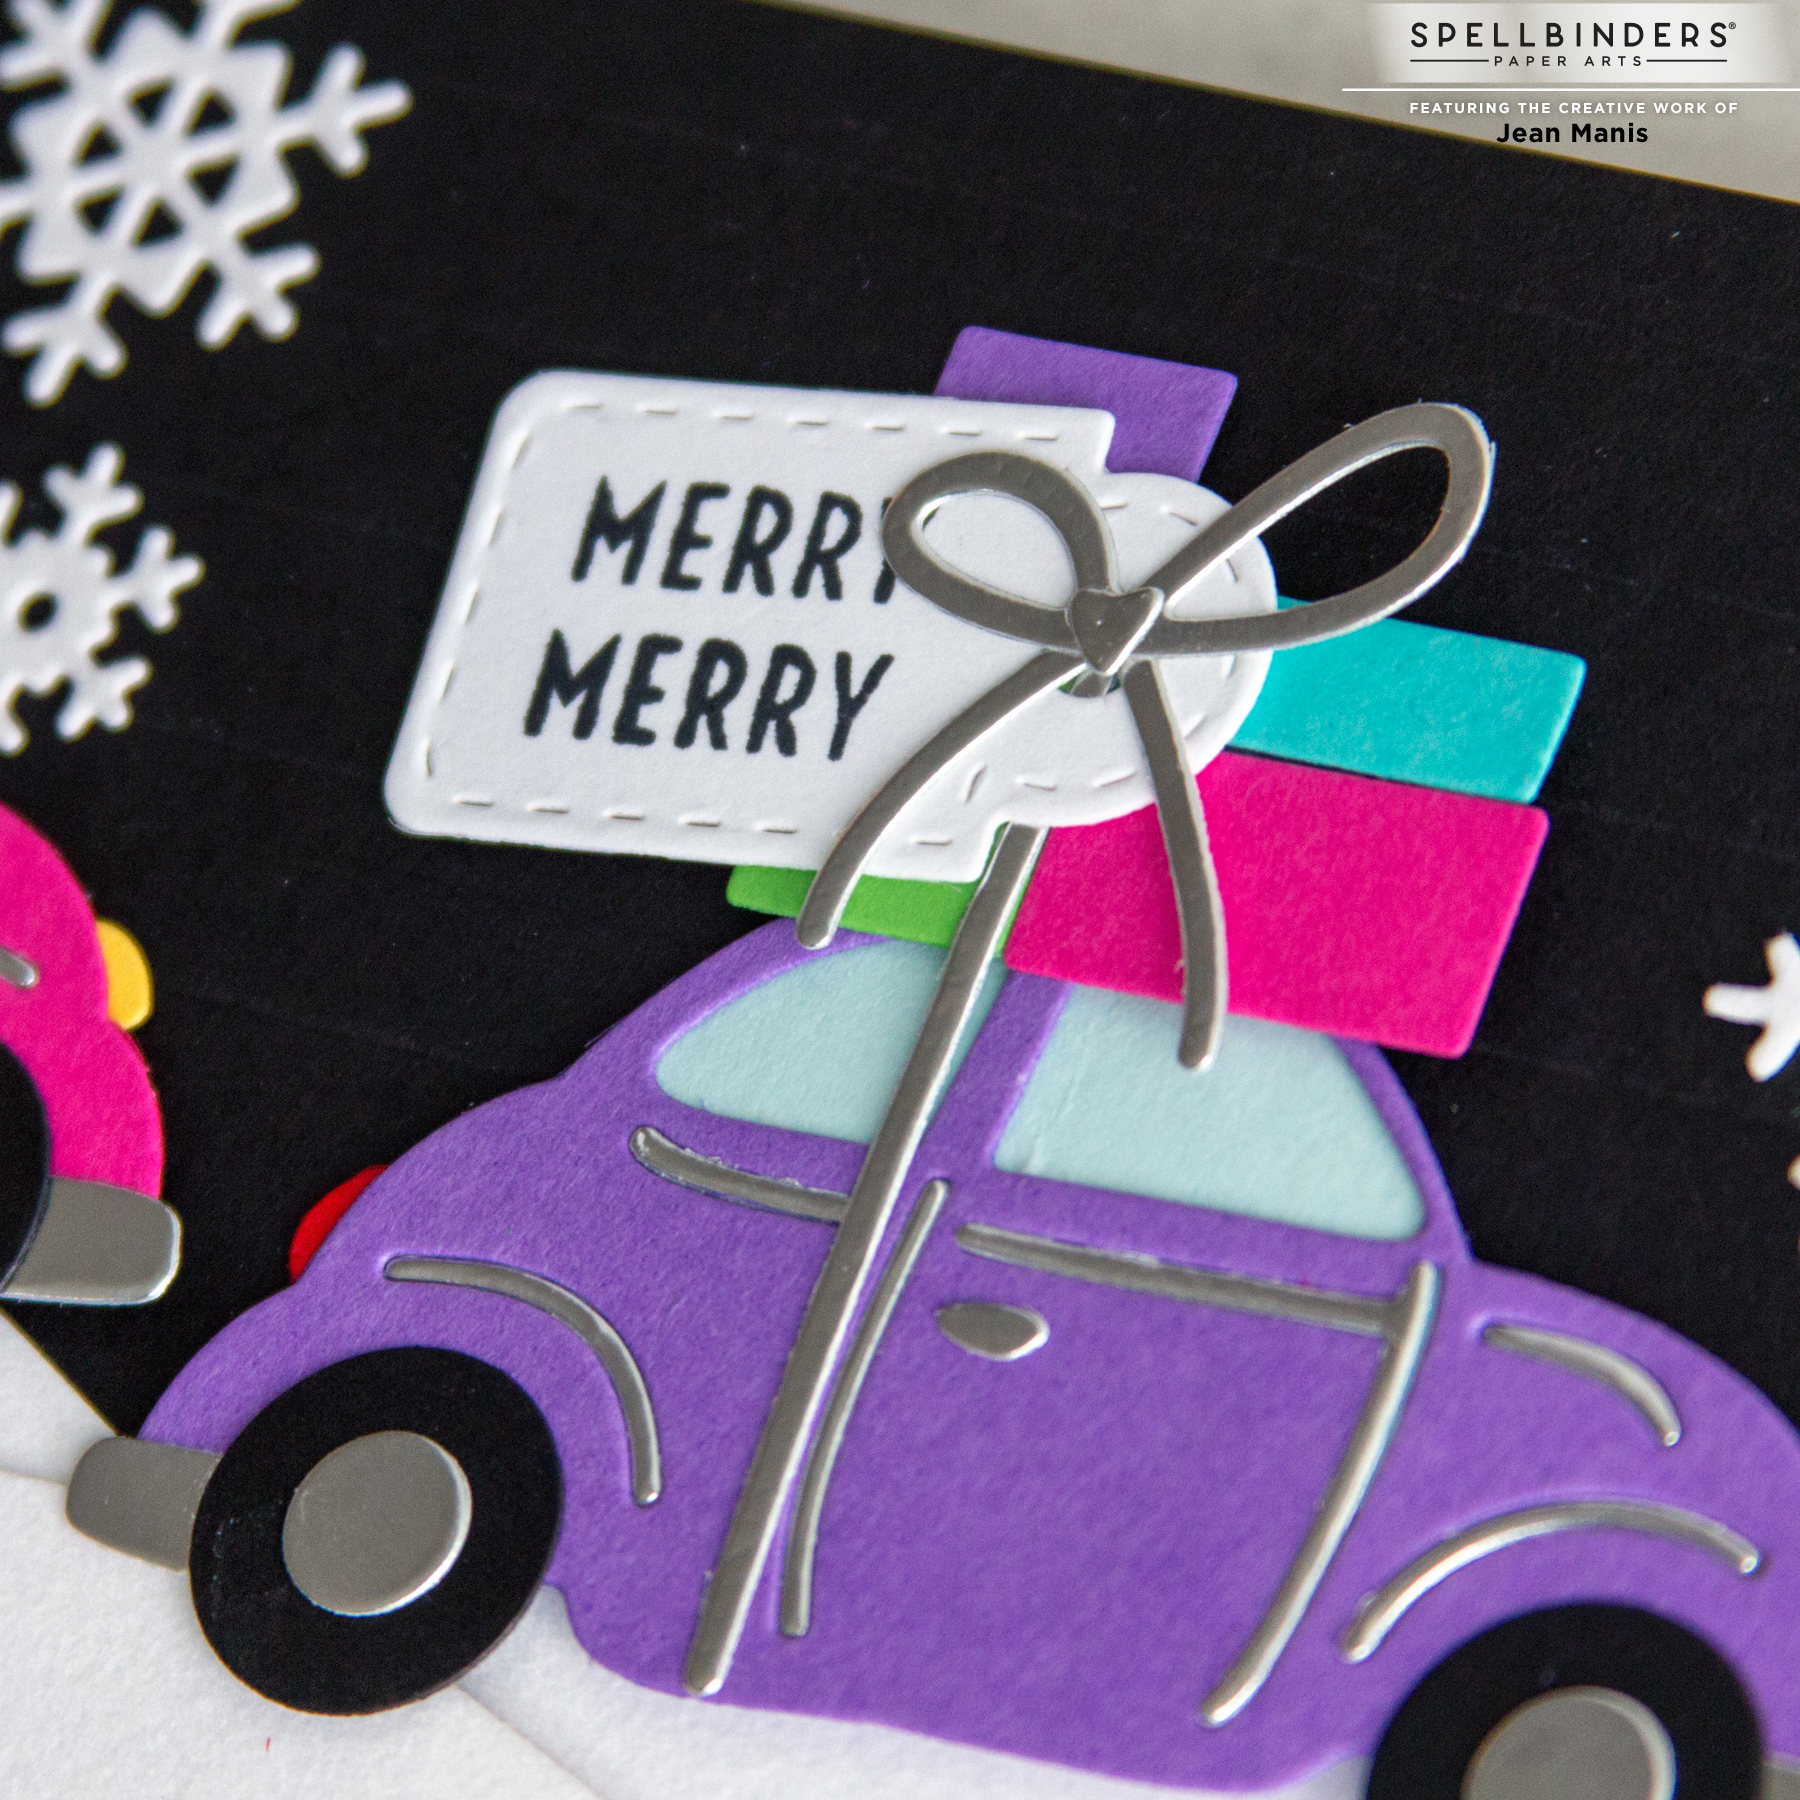
Today, I am sharing a slimline Christmas card featuring products from Spellbinders. If it looks familiar, it is because I designed a similar one a couple of months ago, which you can see here.
- Create a slimline card background by dry-embossing Onyx cardstock with the Striped Slimline folder.
- Die-cut snowy hills from white velvet cardstock (Stampin’ Up) with the dies in the Color Block Scenic Scape set.
- Die-cut the vehicles with the Special Delivery die set; they were assembled with the inlay technique.
- Add trees to the top of two of the vehicles created with the Bottle Brush Trees set and packages to the center car using the Shopping Spree set.
- Stamp the sentiment using the All-Occasion Sentiments set on to a tag cut with a die in the Party Cupcake Pocket set. Add tag to the middle vehicle with the packages.
- To embellish, add snowflakes cut with dies in the Holiday Decorations set.
Spellbinders – Halloween Village Scene
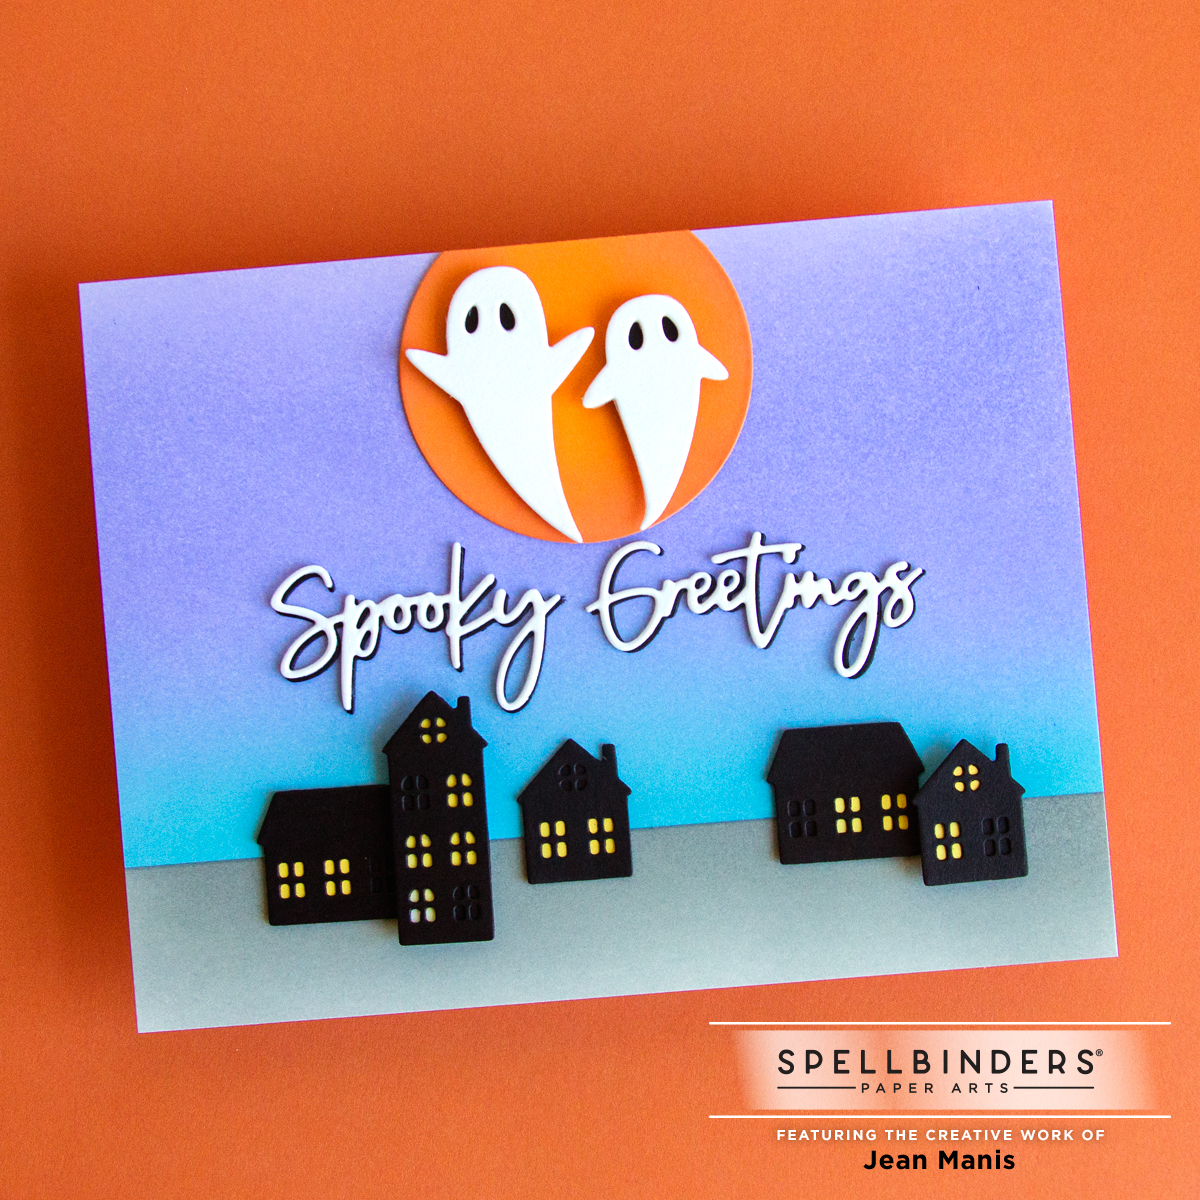
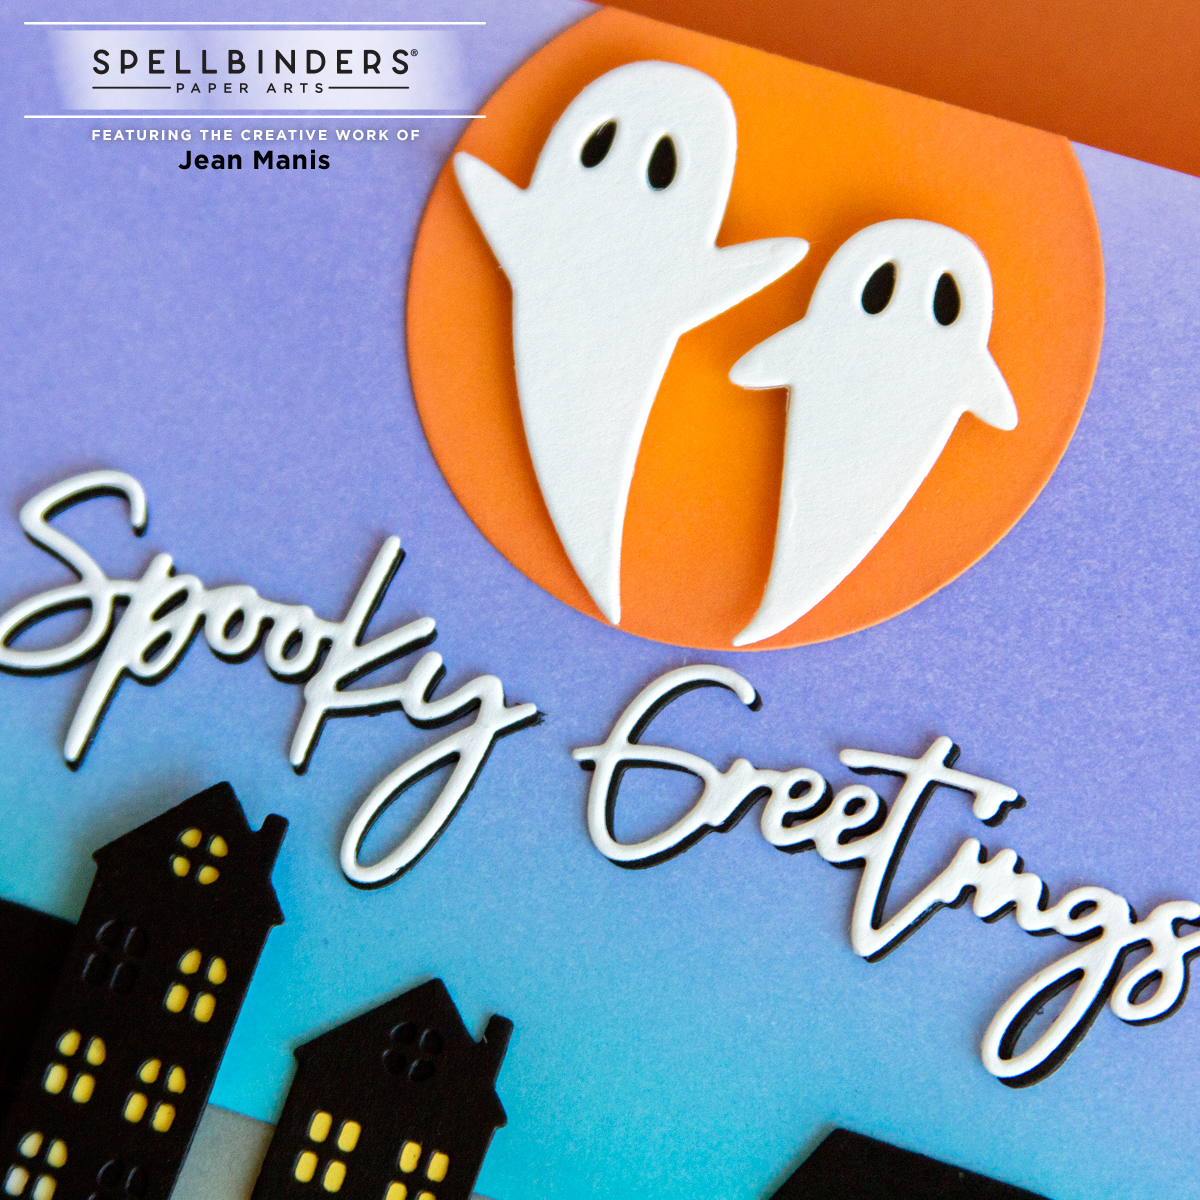
Hello and happy almost equinox! Around here, in the Pacific Northwest, we have chillier temps early morning, spider webs on the plants, and leaves changing colors. Halloween is one of my favorite holidays, about which I have talked before. I put together several Spellbinders die sets to create a Halloween village scene.
- I created the card base with Shaded Lilac, Broken China, and Hickory Smoke inks using vellum to mask.
- I cut a 2 inch circle from orange cardstock and added Spiced Marmalade to it. I trimmed the circle and added it to the card base.
- I used dies in the Silent Night Make a Scene set to cut the village houses Onyx cardstock. I added cardstock behind the windows. Some were added to the base with foam adhesive.
- I die-cut the ghosts with dies in the Open House Boo! set, backing their eyes with Onyx cardstock. I used the same set to create the sentiment. The ghosts were added with foam adhesive.