Lawn Fawn | Gnome + Home

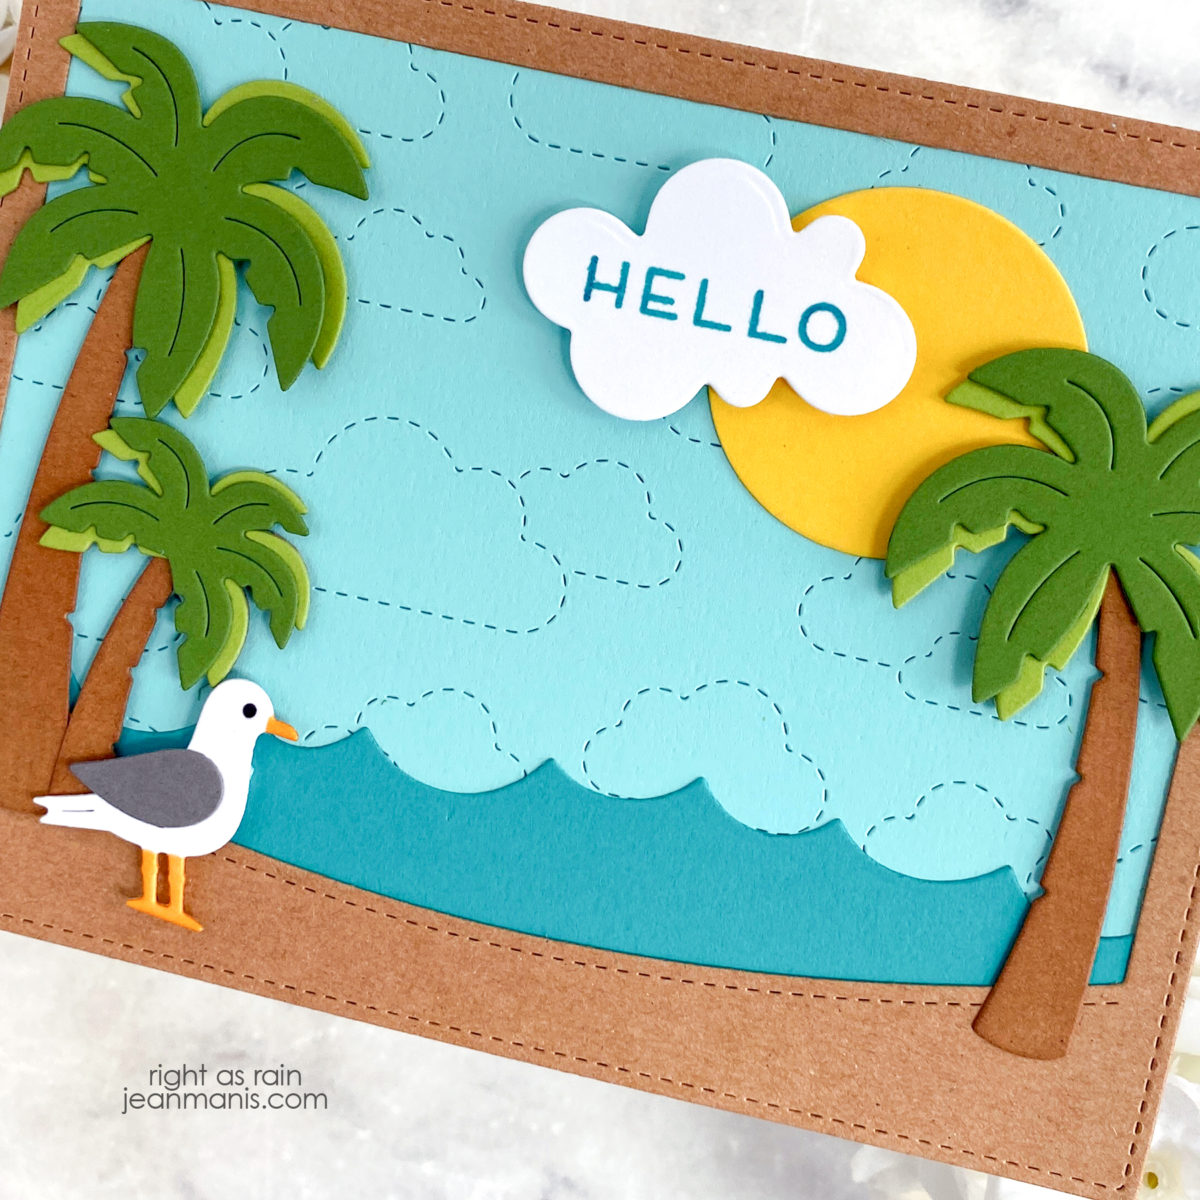
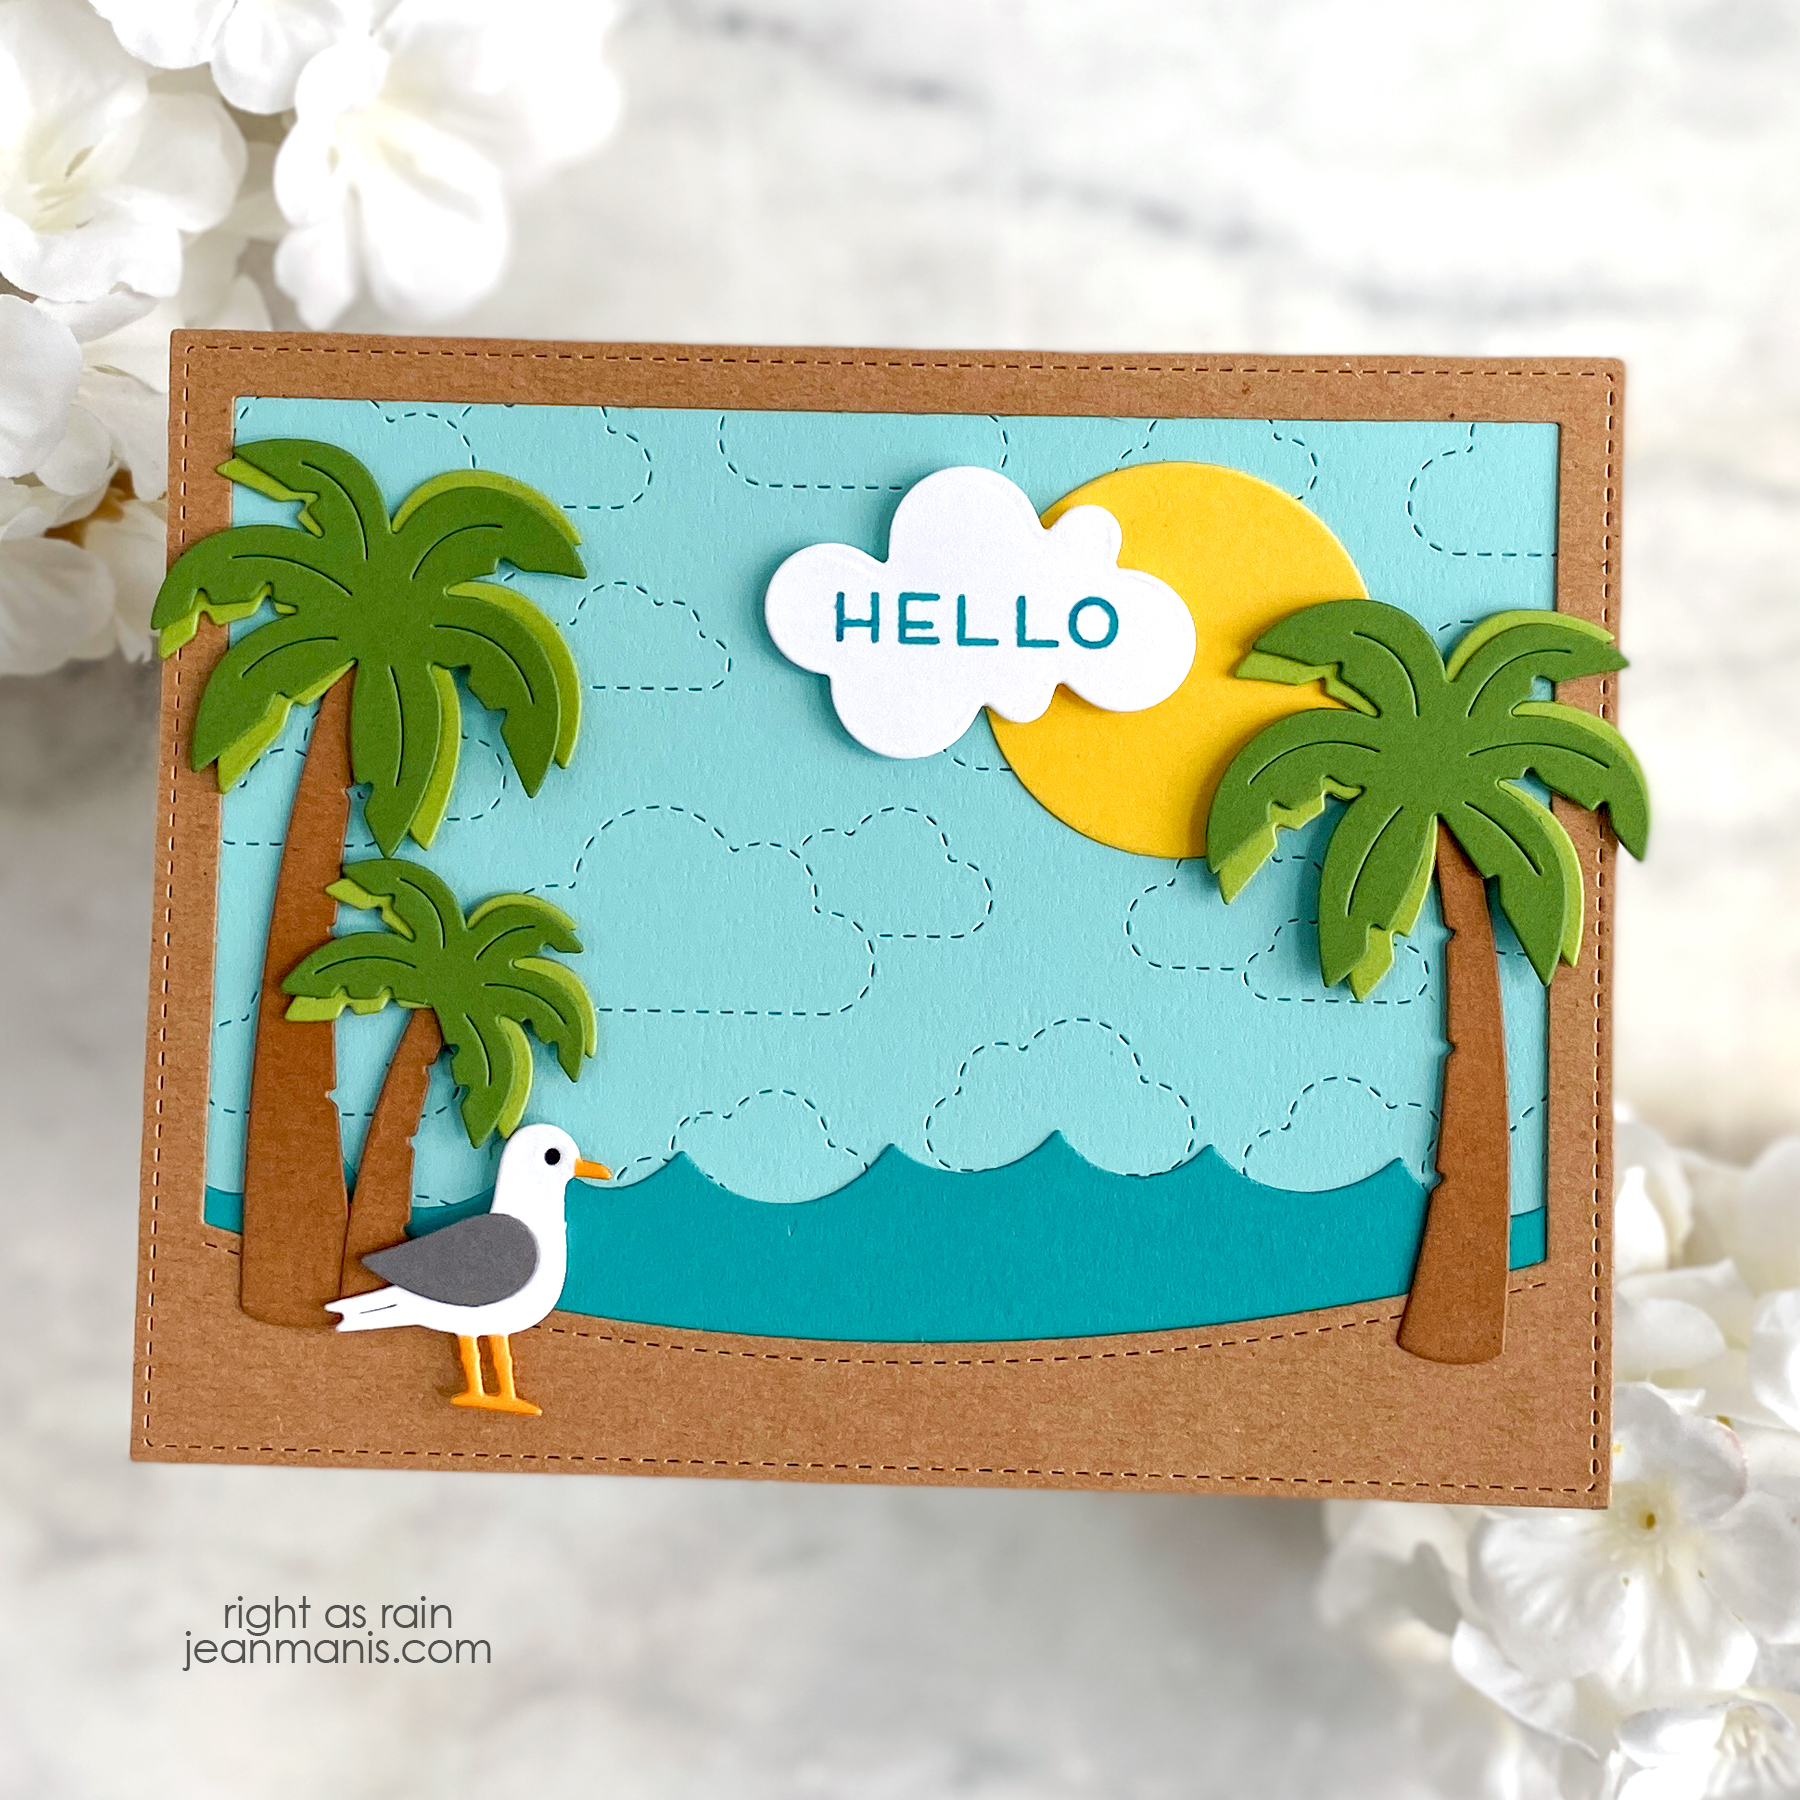
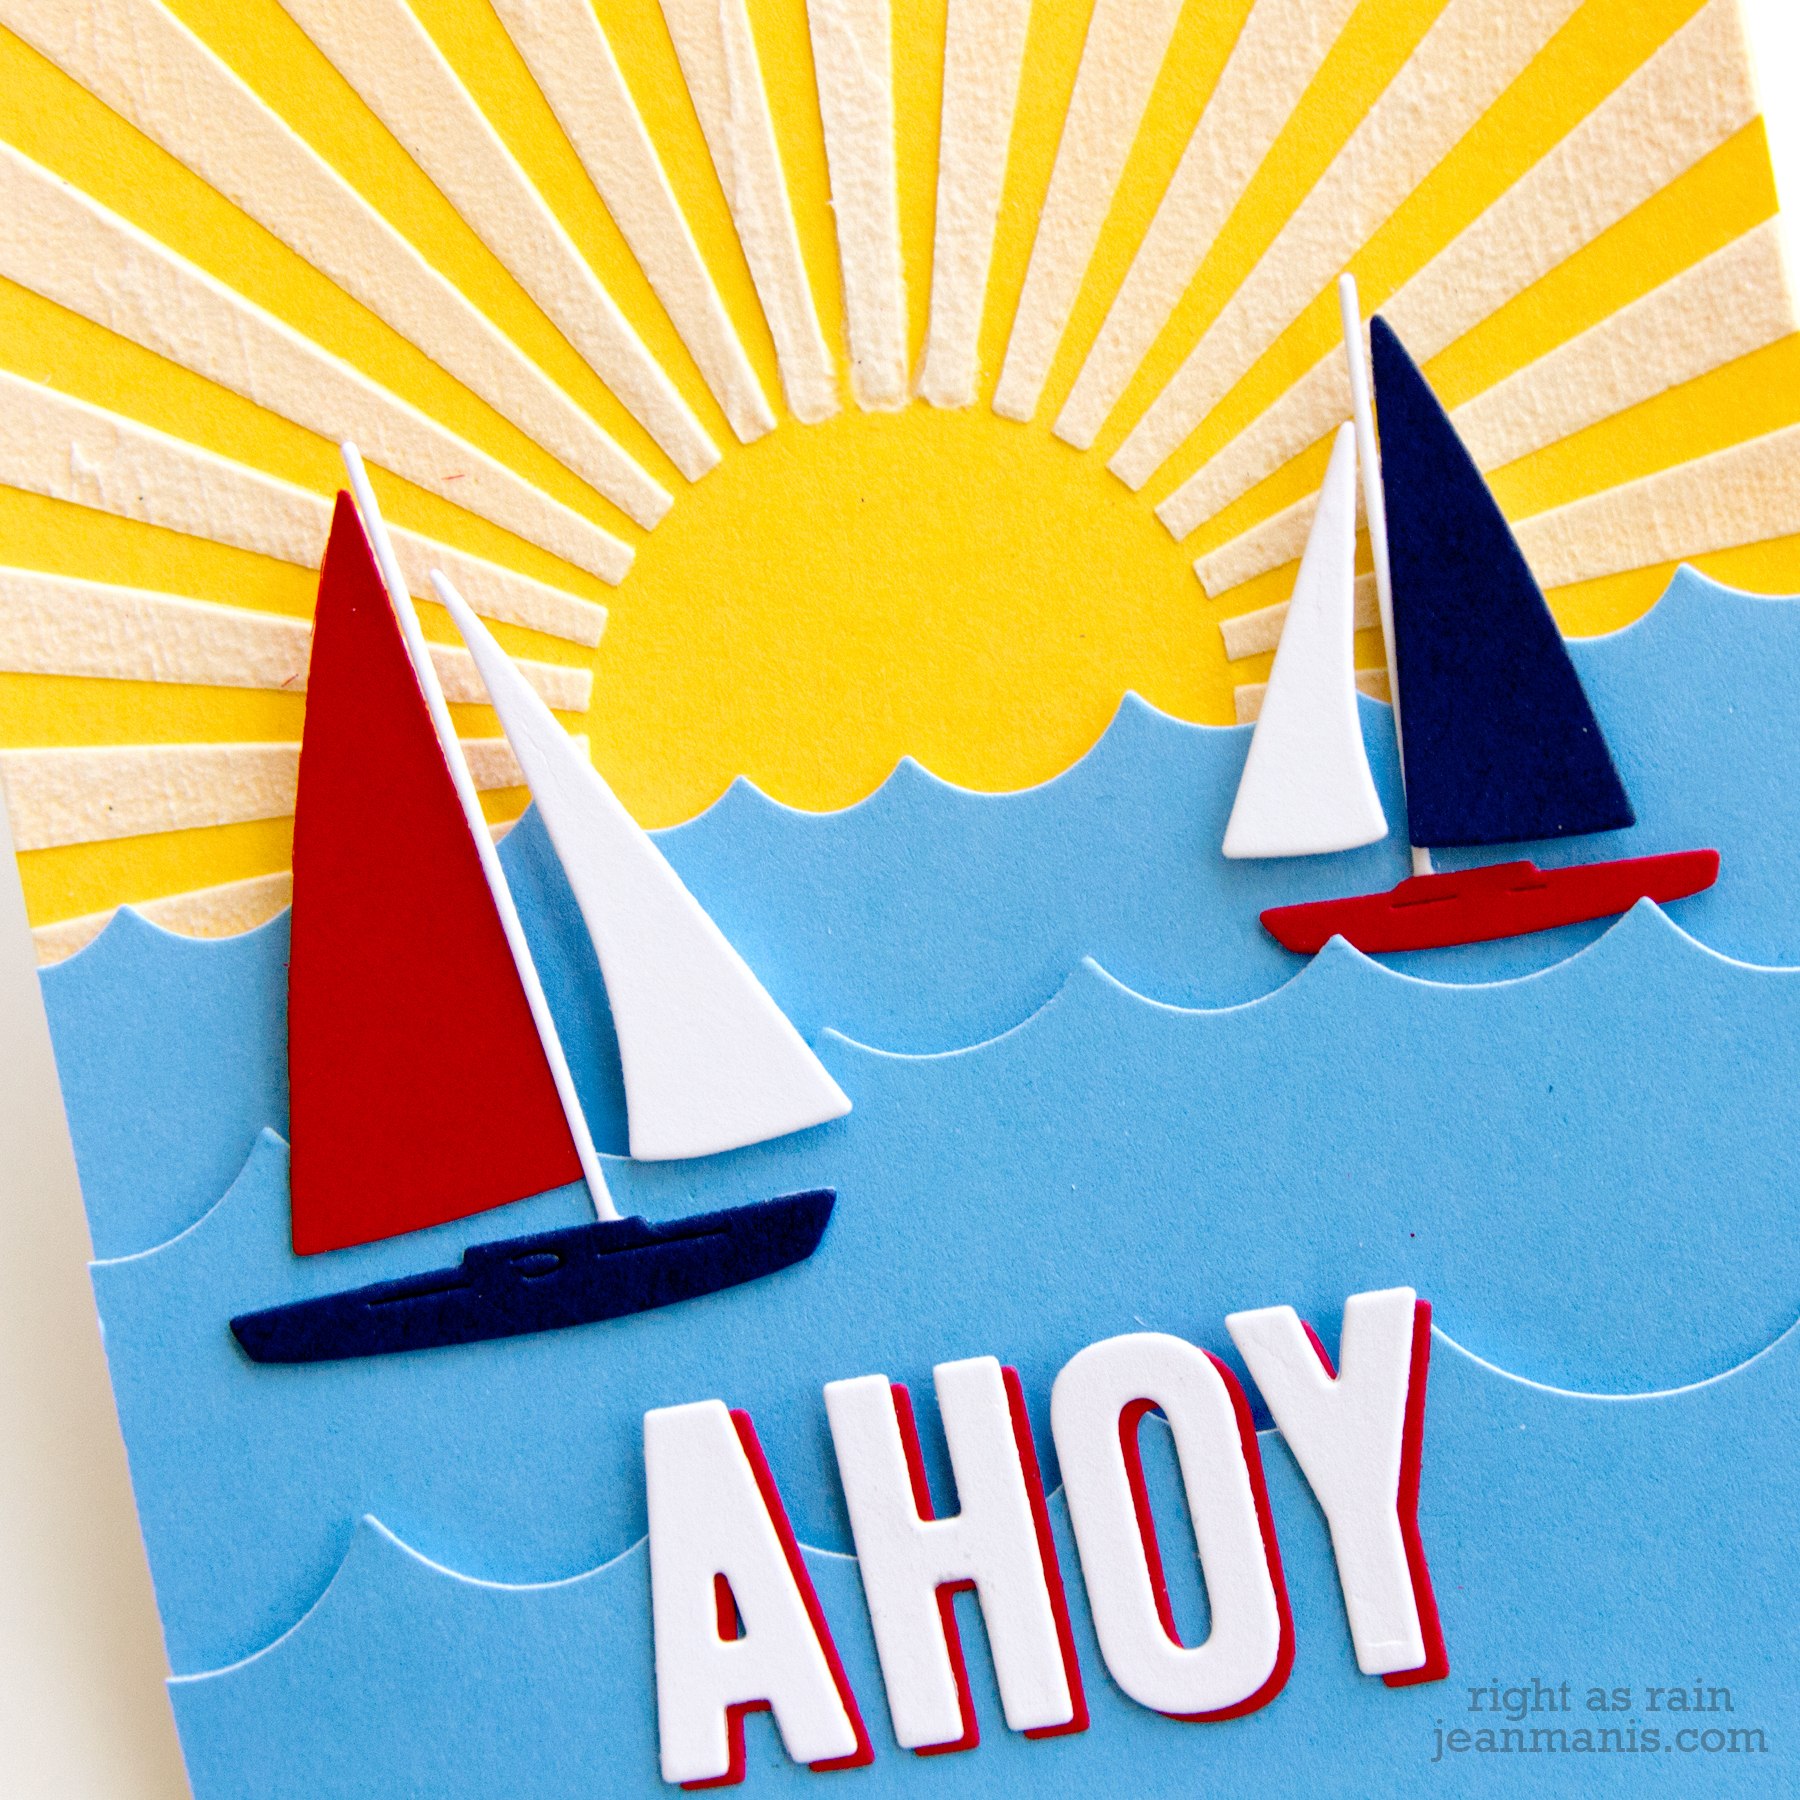
Hello cardmaking friends! Today I am sharing a cute die-cut scene featuring several Lawn Fawn die sets and a favorite stamp set.

Lawn Fawn | Gnome + Home

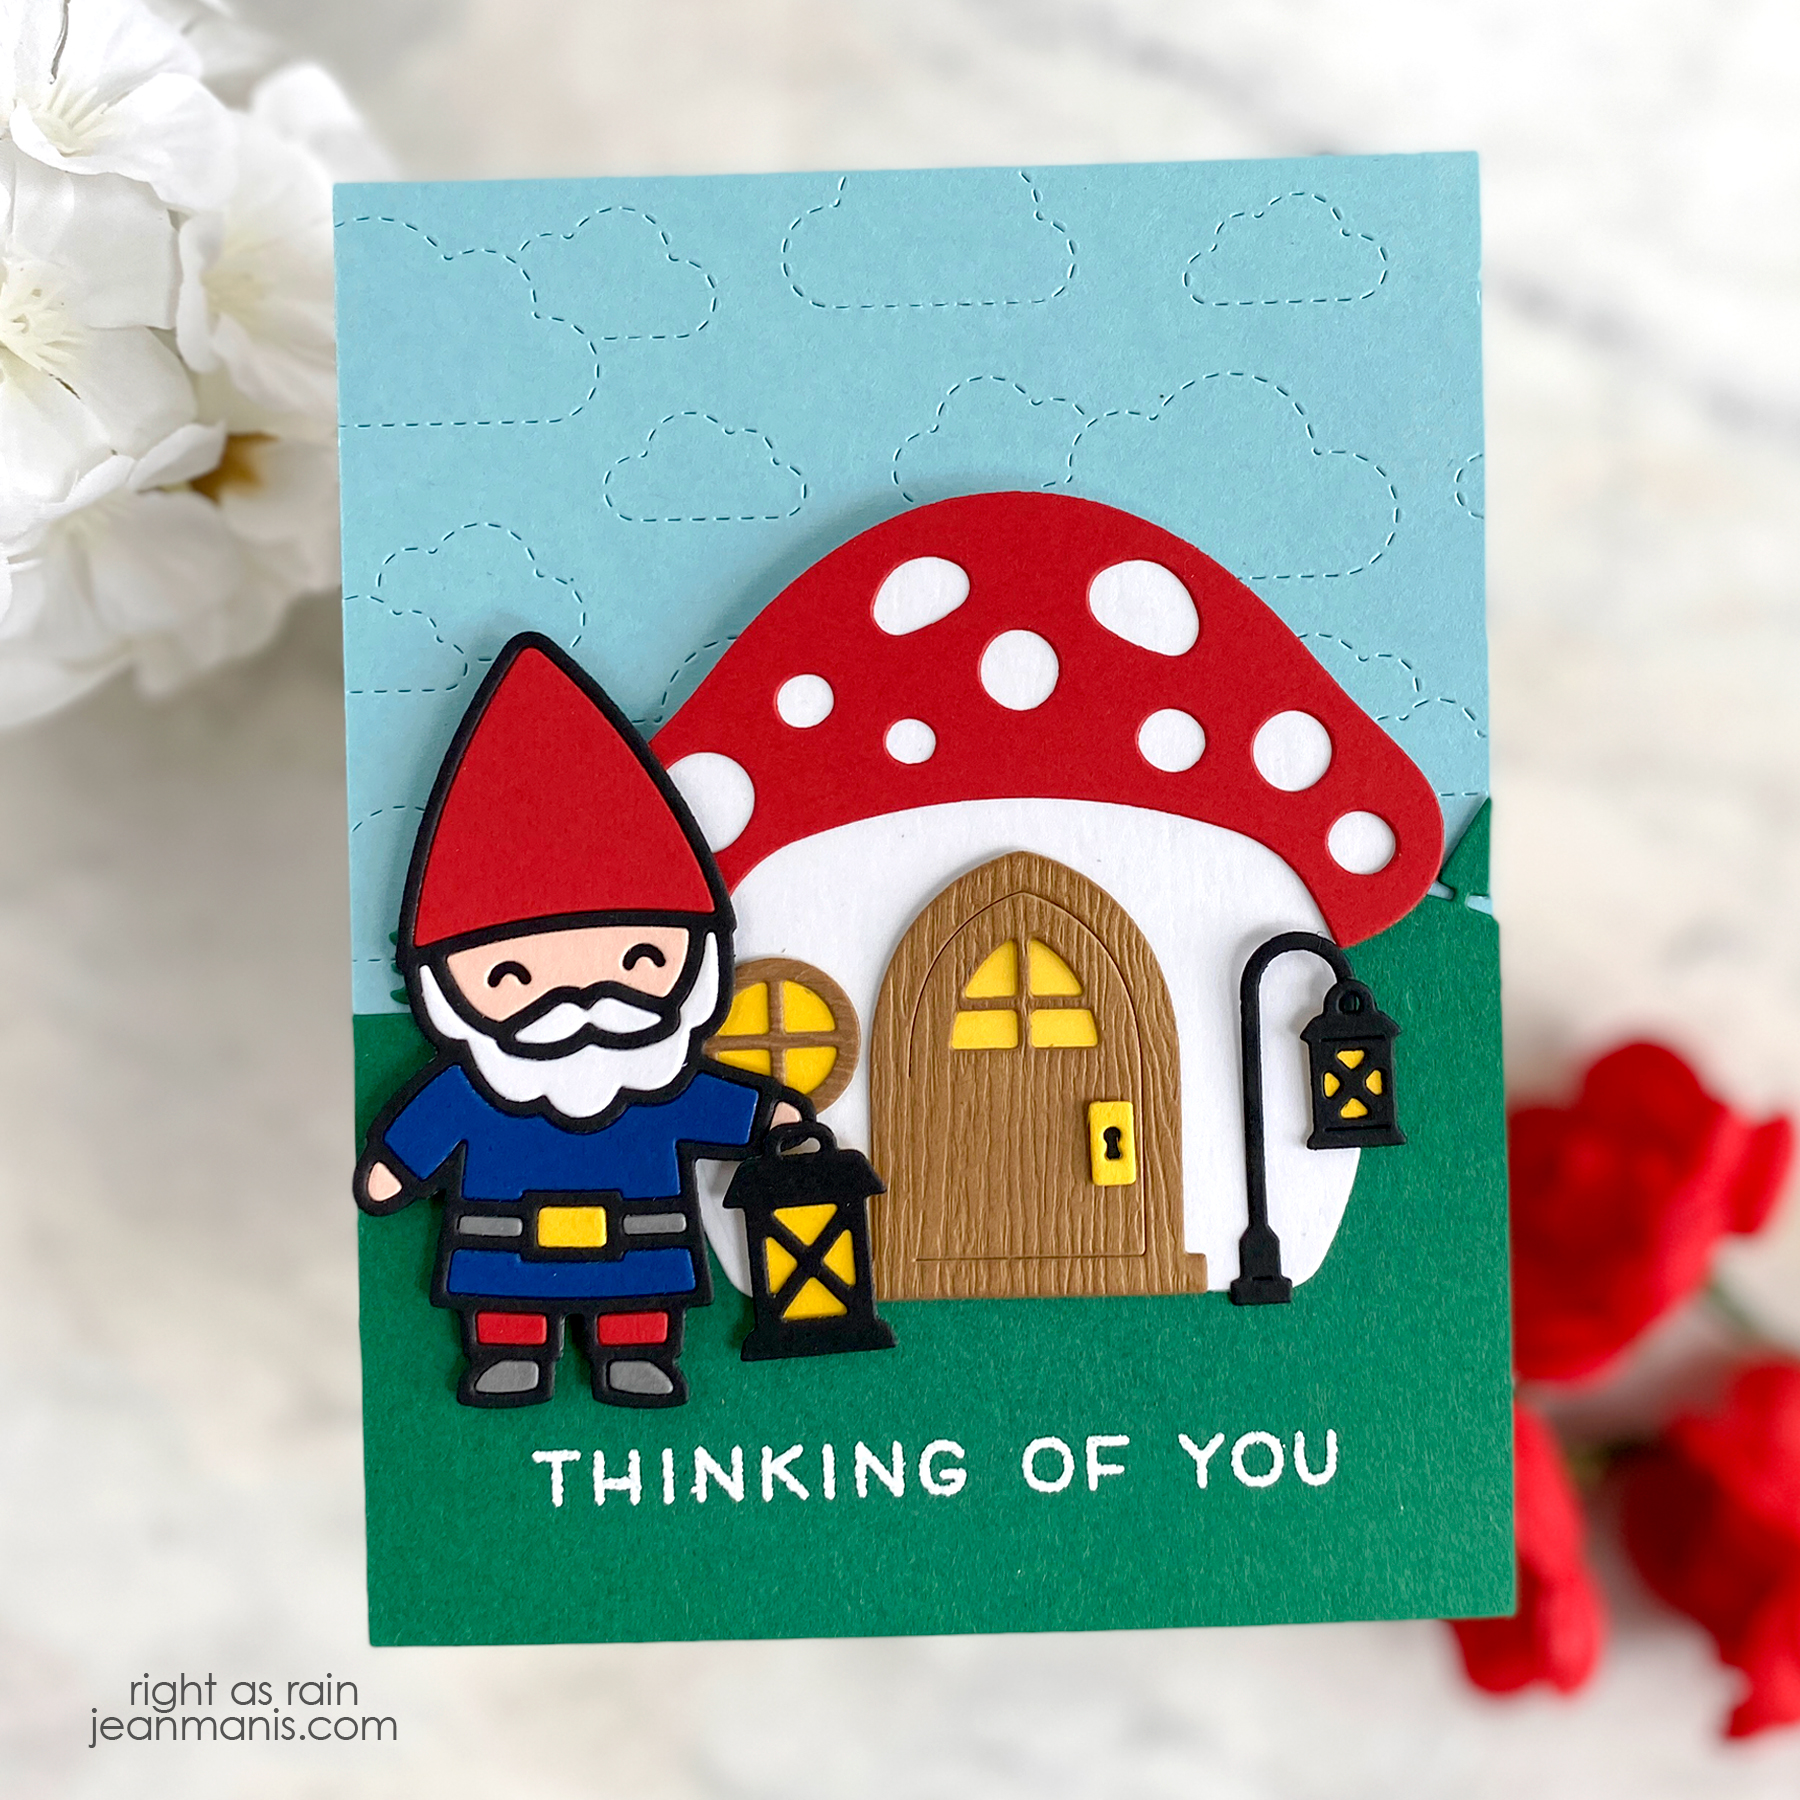
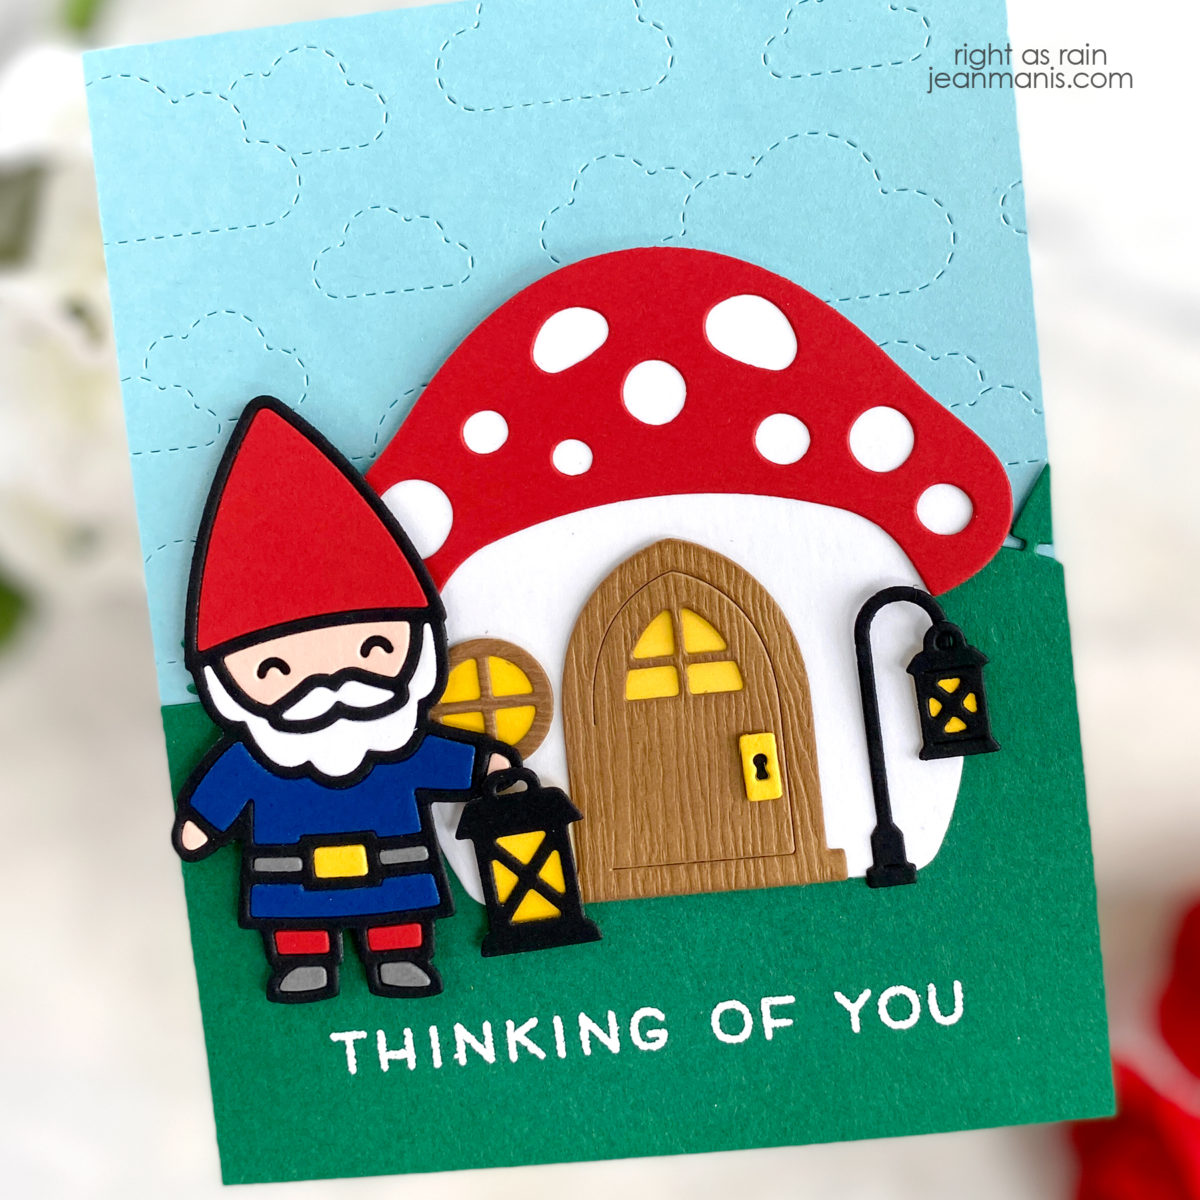
  • With the Stitched Cloud Backdrop Landscape or Portrait die, die-cut the card background. Since the card is a Portrait, either die works. Add to A2-size card base.
  • Heat-emboss sentiment from the Simply Sentiments set on green cardstock and die-cut with the Forest Border die. Add to card background.
  • Die-cut the Mushroom House from cardstock and assemble. I used Light Brown Woodgrain cardstock on the door and window. Add house to scene with dot adhesive.
  • Die-cut the Garden Gnome from cardstock and assemble. This die set is easy to work with as there is a solid die for the back and an outline die. Add the gnome to the scene with foam adhesive.

Lawn Fawn | Gnome + Home

Thanks so much for stopping by!


Lawn Fawnatics Challenge 128 – Christmas in July

Hello! Today, I am sharing a Christmas card that I created for the Lawn Fawnatics Challenge 128 – Christmas in July. I enjoy house scenes and often create them. I particularly like the pairing of the large house with the small village border.

Lawn Fawnatics Challenge 128 – Christmas in July

  • Create blue A2-size card base.
  • Stamp Simply Winter Sentiments sentiment on white cardstock and cut with the Little Town Border. Back house windows with yellow cardstock. Add to card base.
  • Cut house pieces with the Build-A-House and Christmas Add-On die sets. Add glitter glue to light pieces. Assemble when dry and add the decorated house to the card.
  • Embellish with snowflakes cut with dies in the Mini Snowflakes set.

Lawn Fawnatics Challenge 128 – Christmas in July

Lawn Fawnatics Challenge 128 – Christmas in July


Lawn Fawn | Tea-rriffic

Hello! Today I am sharing a friendship card created with Lawn Fawn die and stamp sets. I used a summer color palette.

Lawn Fawn | Tea-rriffic

  • Create card background from patterned paper and add to A2-size card base.
  • Cut three cups, including flowers, spoon, and sugar cubes, with the Stitched Teacup die set from colored and white cardstock. Add assembled cups to background with dot and foam adhesive. Decorate cups with flowers. Add spoon to scene.
  • Heat-emboss the Tea-rrific Day sentiment in Red Geranium. Cut with die in the Extra Sentiment Banner set and add to card.

Lawn Fawn | Tea-rriffic


Lawn Fawn | Die-cut Beach Scene

Hello! Today I am sharing a die-cut, beach scene, “Hello” card created with a variety of Lawn Fawn supplies.

Lawn Fawn | Die-cut Beach Scene

  • Cut cloud background from light teal cardstock with the Stitched Cloud Backdrop. Add to A2-size card base.
  • Cut Tropical Background frame from kraft cardstock and the palm trees from kraft and two shades of green cardstock. Add ink to palm trunks so that they stand out against the kraft frame. Add palm tree pieces to frame.
  • Cut seagull with dies in the Treat Box Beach House set; assemble. Use Copic marker to color legs and beak.
  • Cut wave with Ocean Wave Borders die from dark teal cardstock.
  • Stamp Simply Sentiments “Hello” (with masking) in teal ink on white cardstock. Cut with Simple Puffy Cloud die.
  • Cut sun with circle die from yellow cardstock.
  • Slip wave behind frame, trim as required, and attach to cloud background. Add sun. Add cloud and seagull with foam adhesive.

Lawn Fawn | Die-cut Beach Scene


Nautical-themed Die-cut Card

Hello (or should I say ahoy?)! I am always enthusiastic about crafting anything nautical-themed. I’ve been interested in all things nautical my entire life, even though I didn’t spend my childhood anywhere near the water.

Today’s card features the Memory Box Marina Sailboats. I chose a favorite color scheme of red, white, and blue for the boats.

Nautical-themed Die-cut Card

  • I cut the sailboats from red (SU Real Red), white, and navy (SU Night of Navy) cardstock. I trimmed pieces in order to change the color of the hulls.
  • To create the background, I applied white embossing paste to SU Daffodil Delight cardstock through the MFT Radiating Rays stencil. I used Dreamweaver white embossing paste, which I can no longer find online. I’m looking for a replacement and welcome any suggestions!
  • I created the sentiment by cutting the letters twice, once in white and once in red (SU Real Red), with the Cole’s ABCs dies. I offset the letters when I adhered them.
  • I used the Lawn Fawn Ocean Wave Borders to cut the ocean from Memory Box cardstock. The wave die set includes three wave patterns (three different sizes of the waves); I used all three.

Nautical-themed Die-cut Card

SUPPLIES