Art Impressions | Watercolored Blooming Window

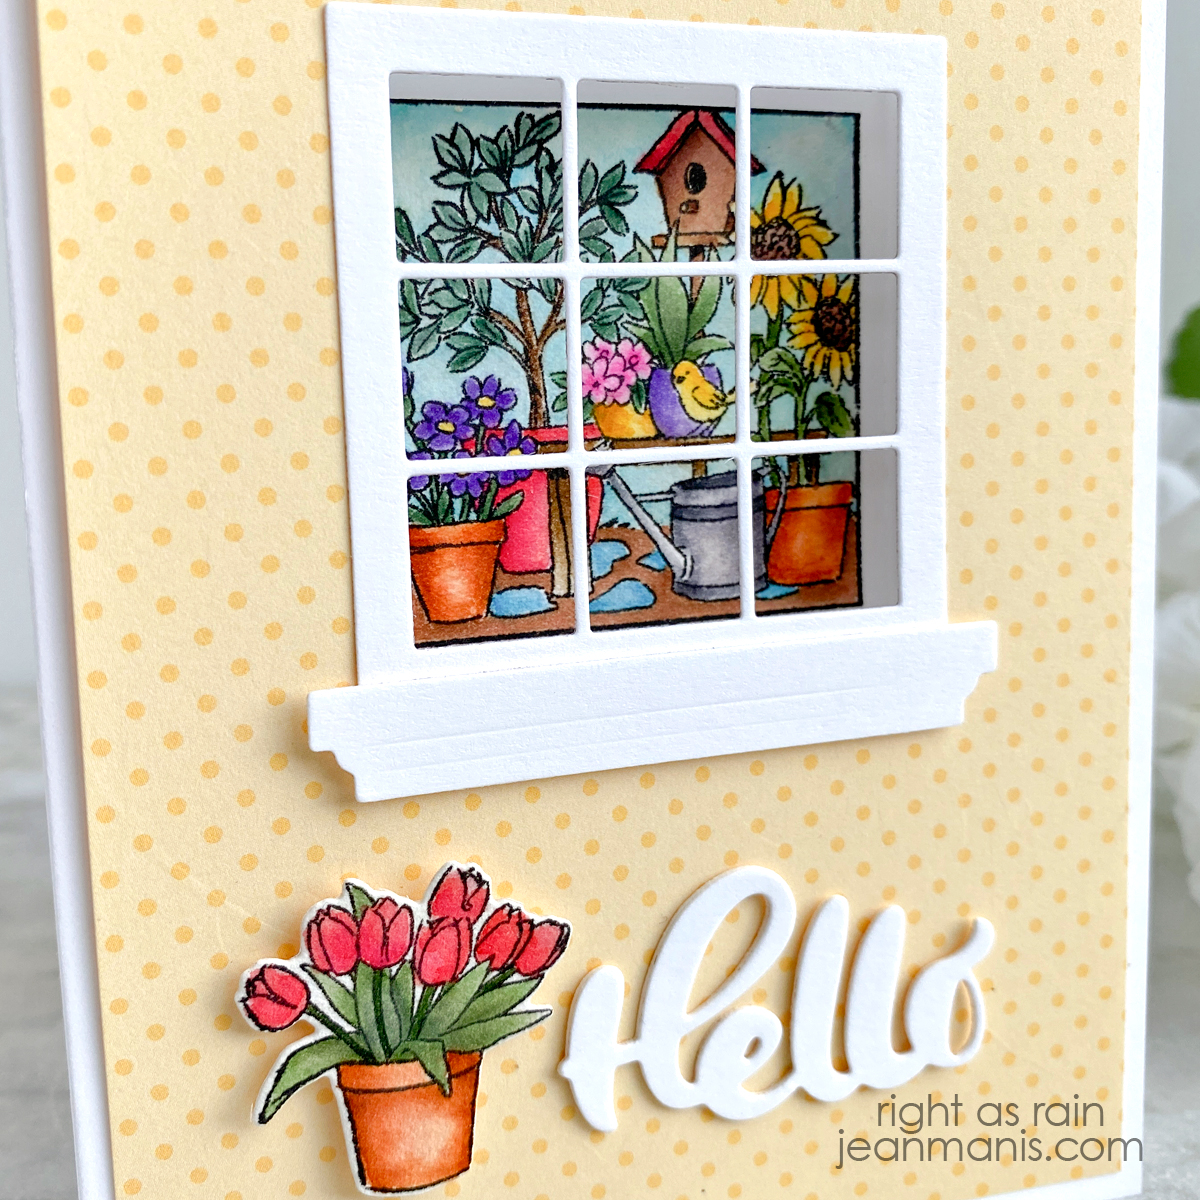
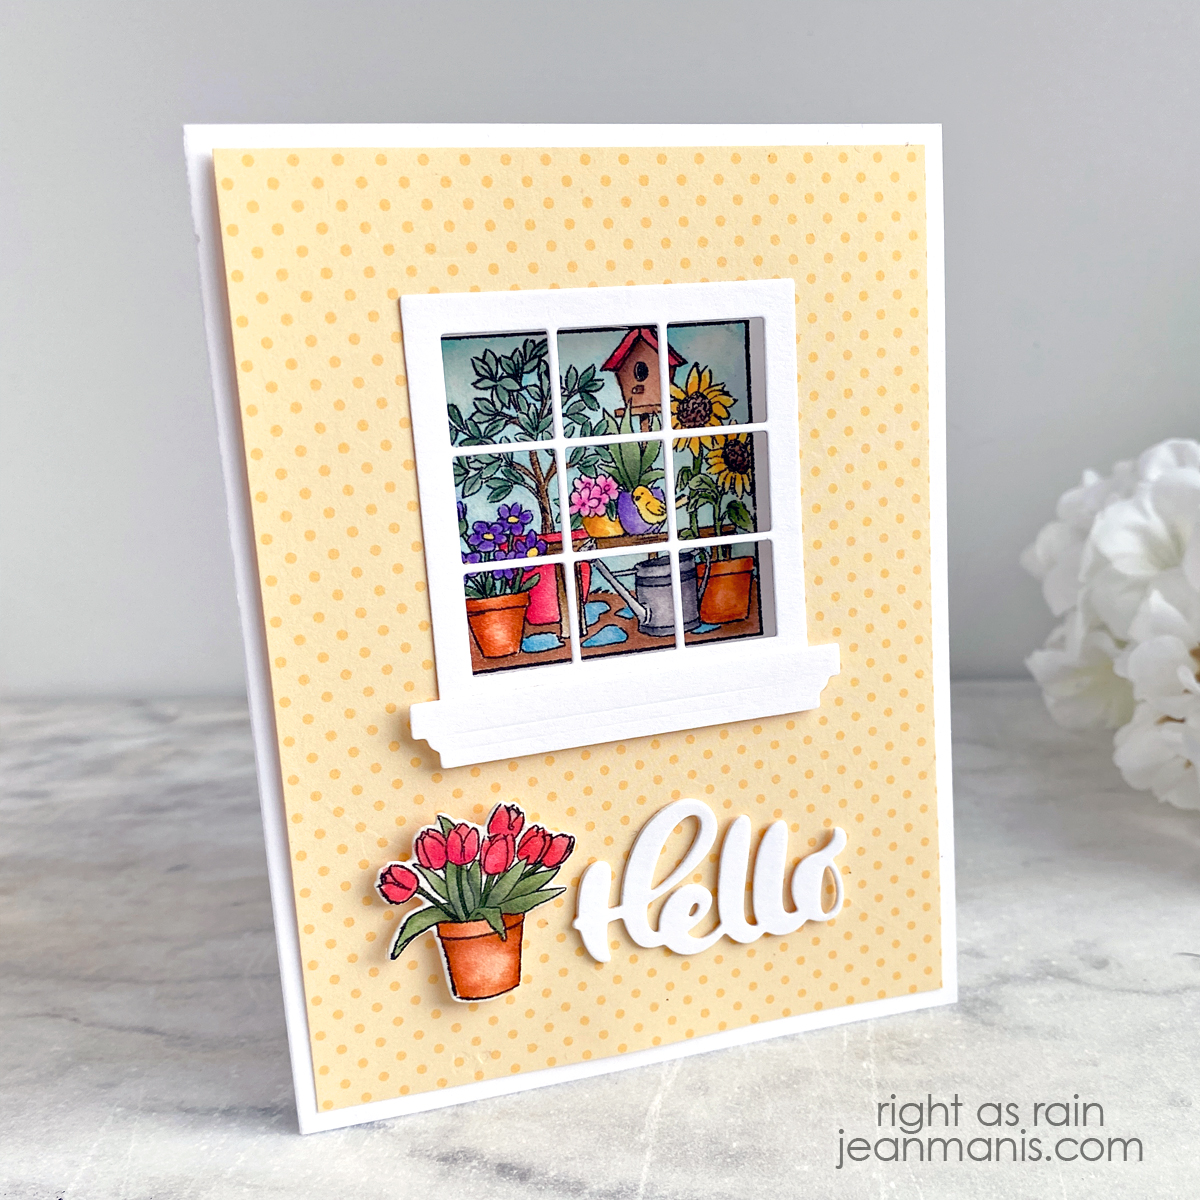
Hello! Today I am excited to share a “Hello” card created with the Art Impressions Blooming Window and ShadowBox Window Die sets featuring a window looking out onto a beautiful spring garden scene. I used watercolors to bring the garden to life. Let’s take a look at the details of the supplies I used and how I created it.
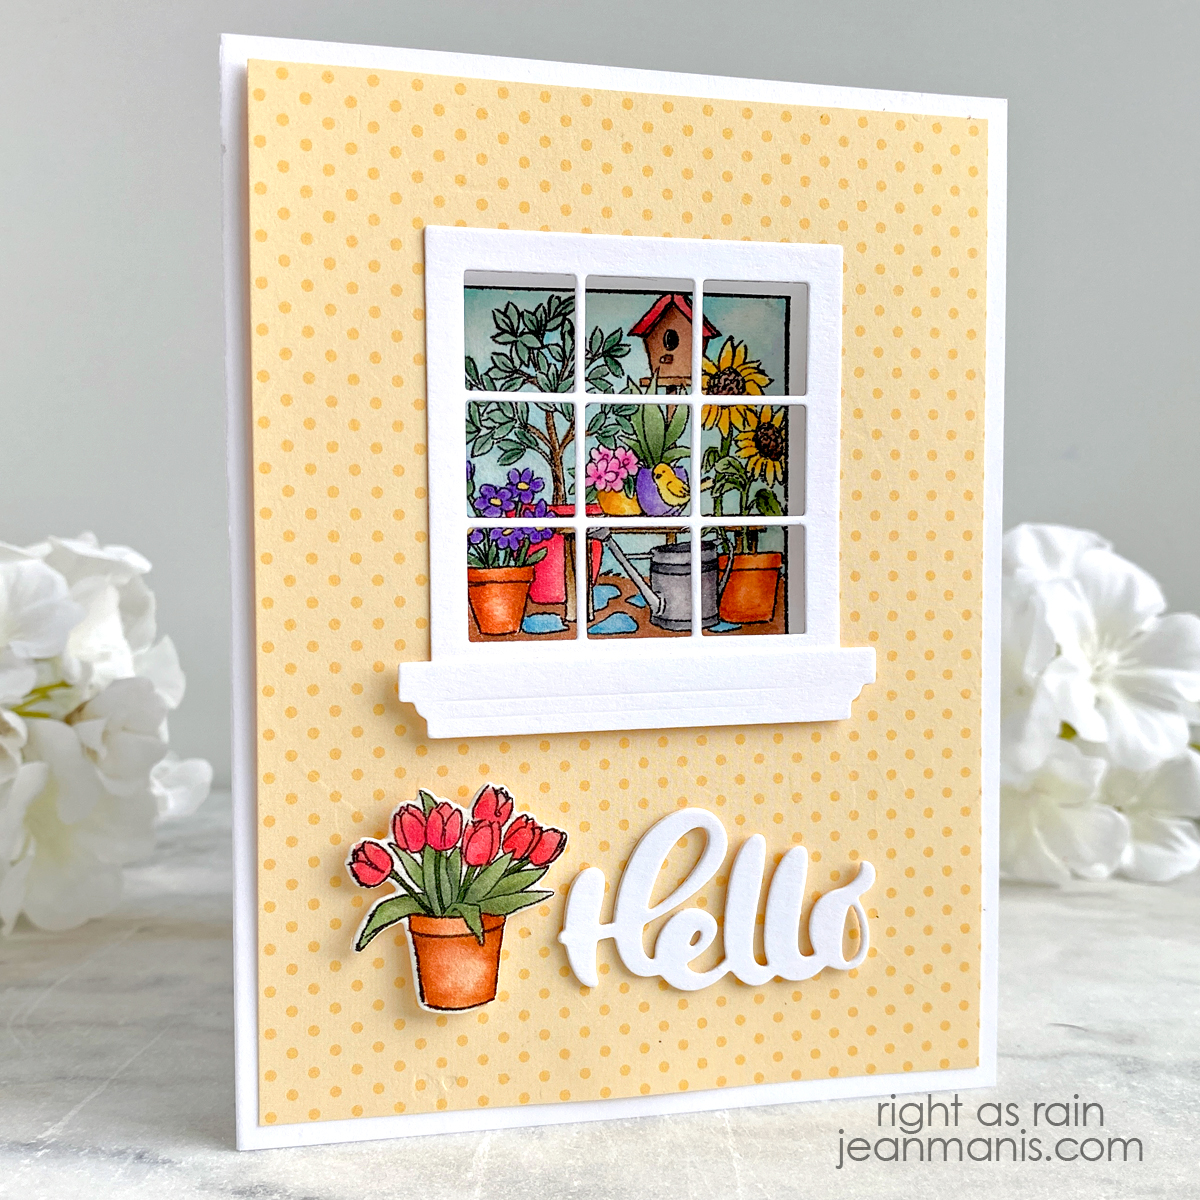
Art Impressions | Watercolored Blooming Window

Art Impressions | Watercolored Blooming Window


Spellbinders | Bibi’s Hummingbirds Collection

Hello! Today, I am sharing a card created with the stunning Spellbinders Delicate Floral Hummingbirds die set, part of Bibi’s Hummingbirds Collection. The design covers an A7 size (5 inches by 7 inches) card front.

Spellbinders | Bibi’s Hummingbirds Collection

  • Using the Delicate Floral Hummingbirds rim die, cut base from Teal Topaz cardstock.
  • With the Delicate Floral Hummingbirds rim and insert dies, cut the background from watercolor paper. Watercolor with Zig markers in Light Green and May Green. (It took several applications to achieve the colors on my card.) Once dry, add to card base.
  • With the Delicate Floral Hummingbirds set, cut hummingbird pieces, floral pieces, and leaves from watercolor paper. Watercolor with Zig markers: Hummingbirds: Light Pink, Pink, Light Violet, Violet, Deep Violet; Leaves: May Green, Deep Green; Flowers: Bright Yellow, Orange, Light Violet; Small Flower Centers and Stamen: Bright Yellow.
  • Assemble elements and adhere to watercolored background.
  • Stamp one of the Hummingbird Sentiments on card interior.

Spellbinders | Bibi’s Hummingbirds Collection

Spellbinders has a 15% off $125+ sale available in the US through April 16th.

Spellbinders Bonus


Penny Black | Watercolored Floral Birthday

Hello! Today I am sharing a watercolored birthday card featuring stamp sets from the most recent Penny Black release – Cherished.

Penny Black | Watercolored Floral Birthday

  • Stamp Sweetly with VersaFine ink on Arches Cold Press watercolor paper. Set ink with heat gun.
  • Color floral image with mediums of choice. Set aside to dry.
  • Stamp image on to Masking Magic Sheets and fussy-cut. Apply mask to dry image and ink the background with Tumbled Glass Oxide. Add May Green ink to small stems. (This color worked with the greens I used to color the leaves. Ideally, you have a marker with a small enough tip to color the small stems that matches the greens used for the other stems and leaves.)
  • Remove masking and stamp Delightful Day sentiment in upper-left corner. Trim panel to A2-size and add to card base.

Penny Black | Watercolored Floral Birthday


Art Impressions | Tool Box Matchbook

Hello! Today I am sharing a project created with Art Impressions supplies. I have been familiar with the company for years, but I have never before crafted with their products; I re-discovered them while doing my recent deep dive into watercoloring. Their blog, Facebook page, and YouTube channel are full of inspiration, and their customer service is fantastic!

Art Impressions | Tool Box Matchbook

The Matchbook series has many different options. You can see an intro video here. The Tool Shed, with which I created, was released this year. I like the small size – it allows me to practice watercoloring with markers, learn the colors of the markers, and finish a watercoloring project in a relatively short amount of time. I am looking forward to crafting more of these projects. The series offers sets for Halloween, Christmas, birthdays, cat lovers, gardeners, …

Art Impressions | Tool Box Matchbook

  • Stamp Tool Shed images in VersaFine ink on Arches Cold Press watercolor paper.
  • Watercolor the images with color medium of choice. I used a combination of Tombow and Zig markers.
  • Once dry, cut the images with the dies included with the Tool Shed set. Stamp sentiment on white cardstock and cut with coordinating die.
  • Cut matchbook from patterned paper with the MB Template. Add Tool Shed elements.


Penny Black | Watering Can and Blooms

Hello! Today I am sharing a spring-themed card created with Penny Black supplies, new and old. As I mentioned in this post, featuring a card of the same design, I have been watching the video series created by Jill Foster for Penny Black, which has been incredibly instructive.

Penny Black | Watering Can and Blooms

  • Using the two largest Stitched Frames dies, cut frame from white cardstock. (This set cuts on the inside and creates a cut pattern on the outside. By using the two dies together, I get a frame with the cut pattern on the frame.)
  • Ink white cardstock panel with Tumbled Glass and Mowed Lawn. Stamp Flower Teddy sentiment with VersaFine Onyx ink. Trim panel and adhere frame to top. Add assembly to yellow card base.
  • Cut Watering Can elements and tulips from Arches Cold Press watercolor paper. Color with watercoloring medium and colors of choice (some of the markers that I used to color the watering can and tulip blooms are listed below). I used the May Green Pitt Artist Pen to color the greenery and stems. Trim tulips as needed and add to inside of the watering can.
  • Add assembly to card with foam adhesive.

<img class="aligncenter size-full wp-image-22404" src="https://jeanmanis.com/wp-content/uploads/2023/03/JeanManis-PennyBlack-WateringCanandTulips-3.jpg" alt="" width="1200" height="1200" />