Spellbinders | Stampendous Sweet Song

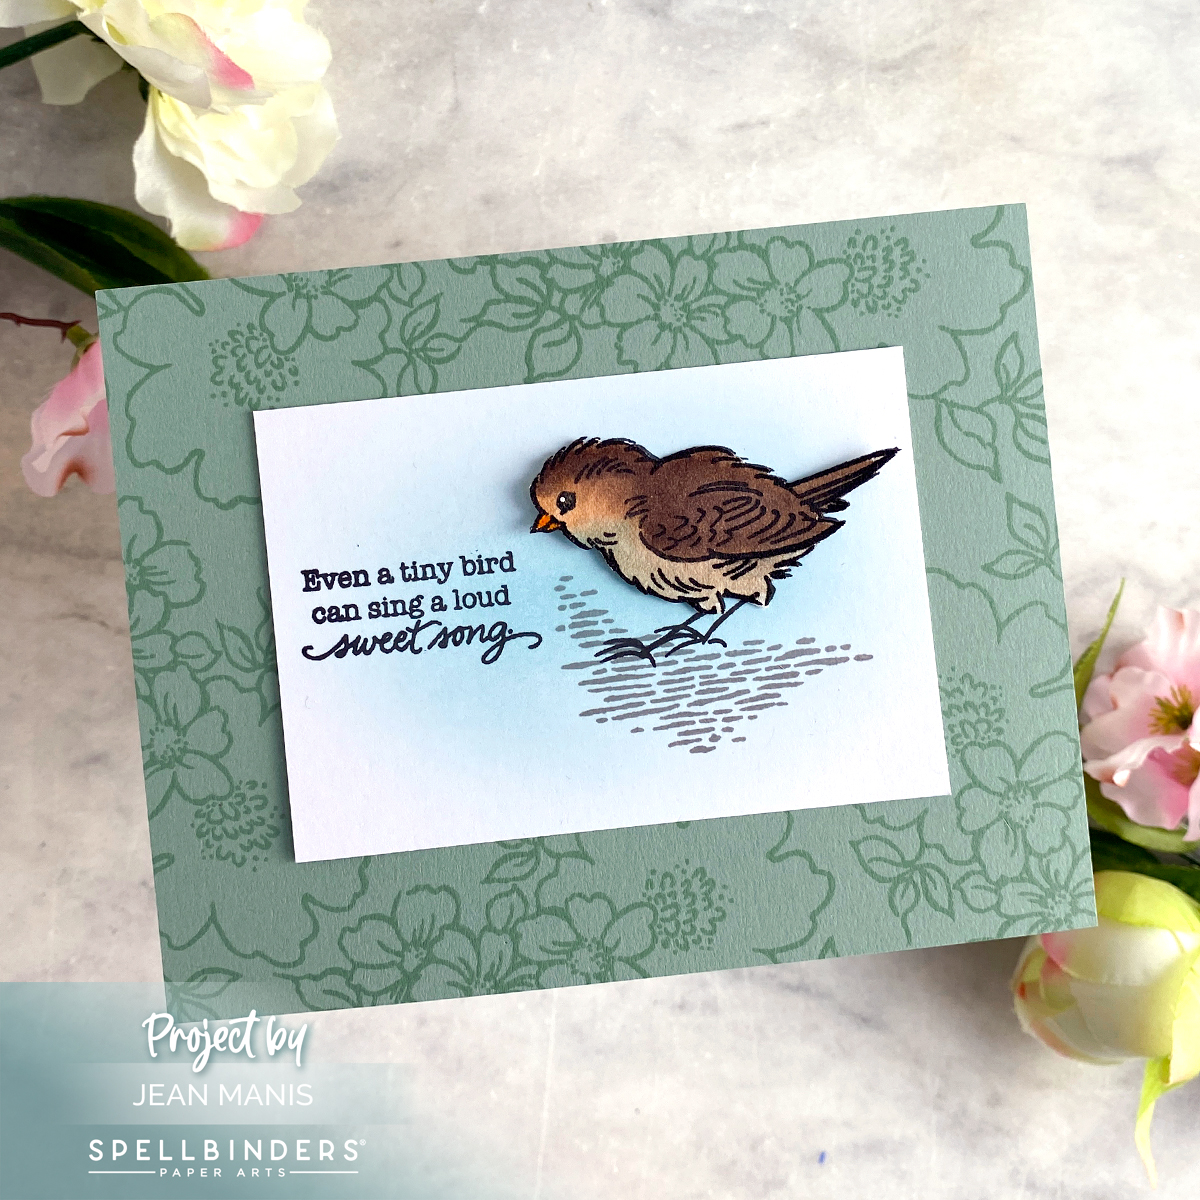
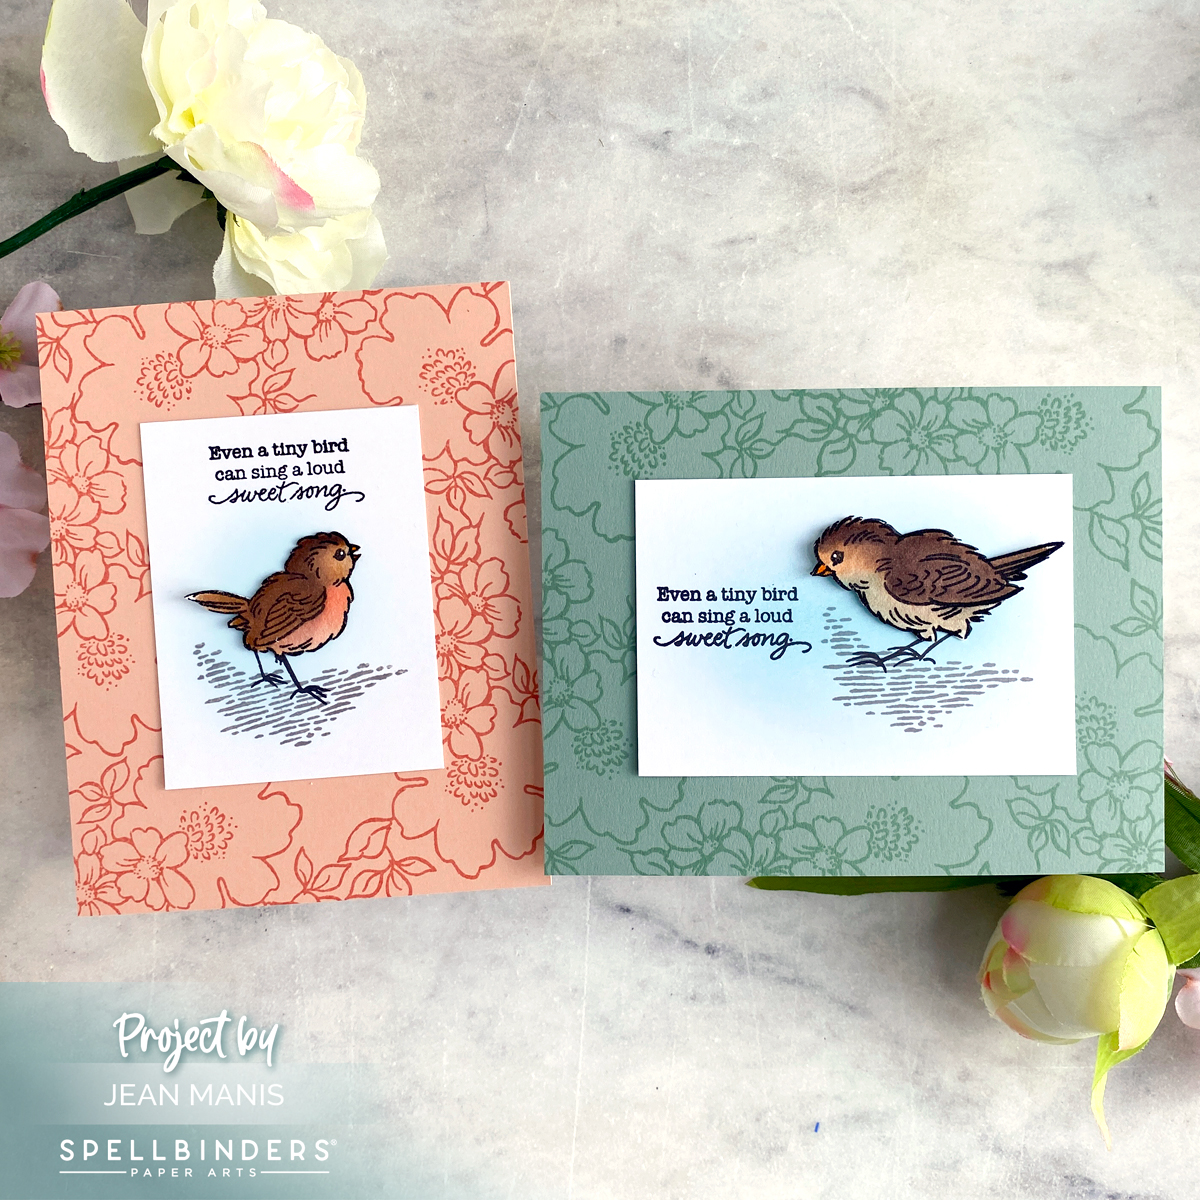
Hello! Today I am sharing two spring-themed cards featuring the Stampendous Sweet Song stamp set, part of the Stampendous Spring Collection at Spellbinders. The instructions for the two cards are essentially the same, with the key difference being the color of the cardstock background.

Looking for the March 2023 Clubs Inspiration Blog Hop? Head here.

Spellbinders | Stampendous Sweet Song

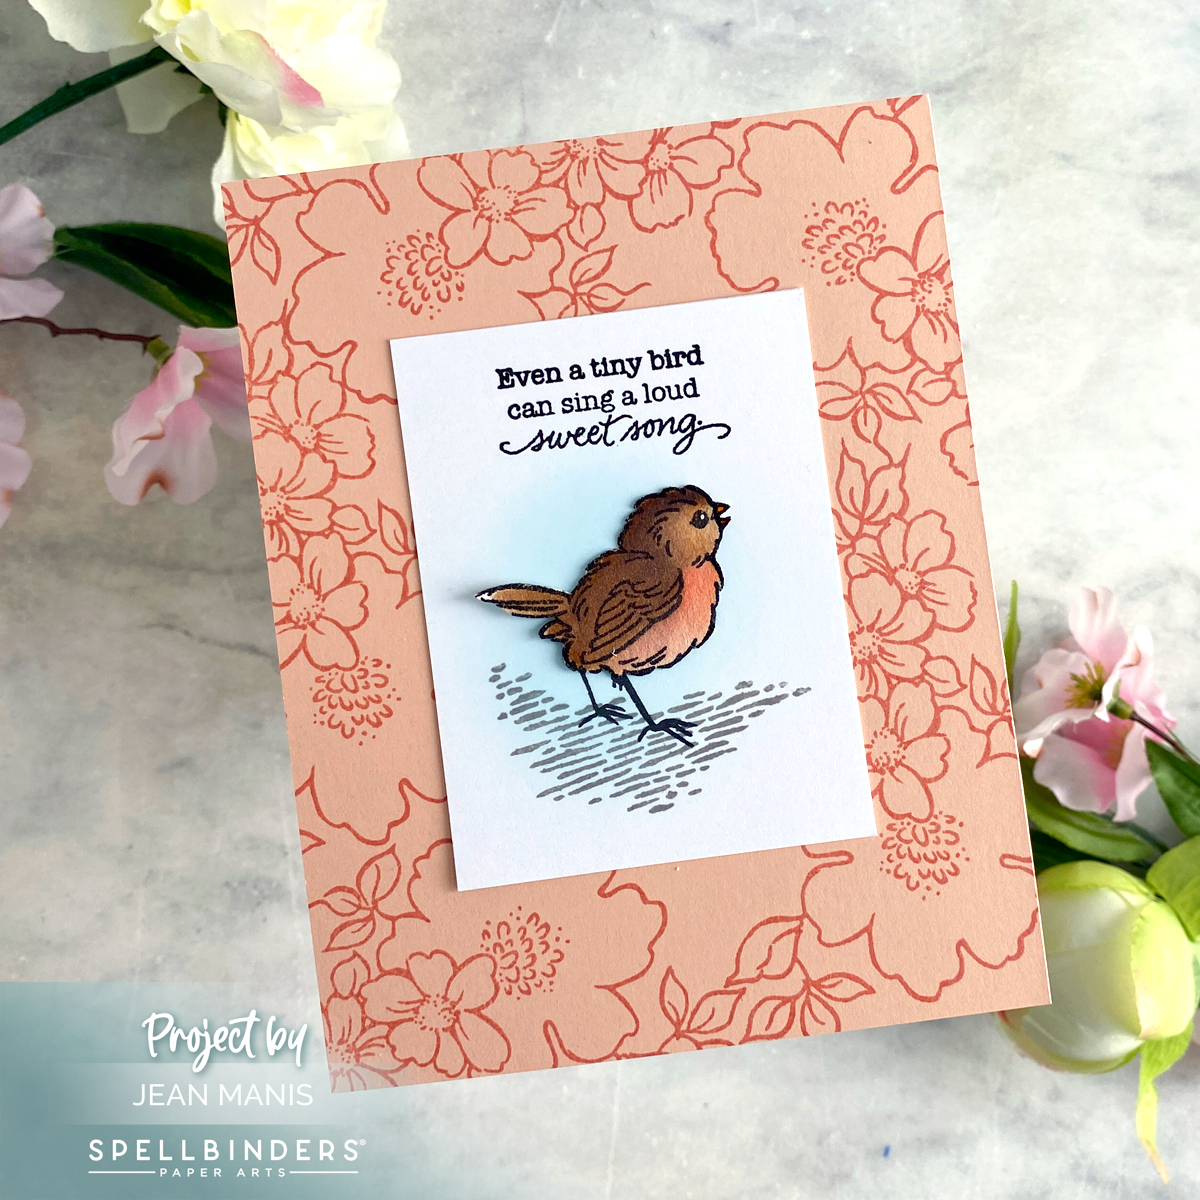
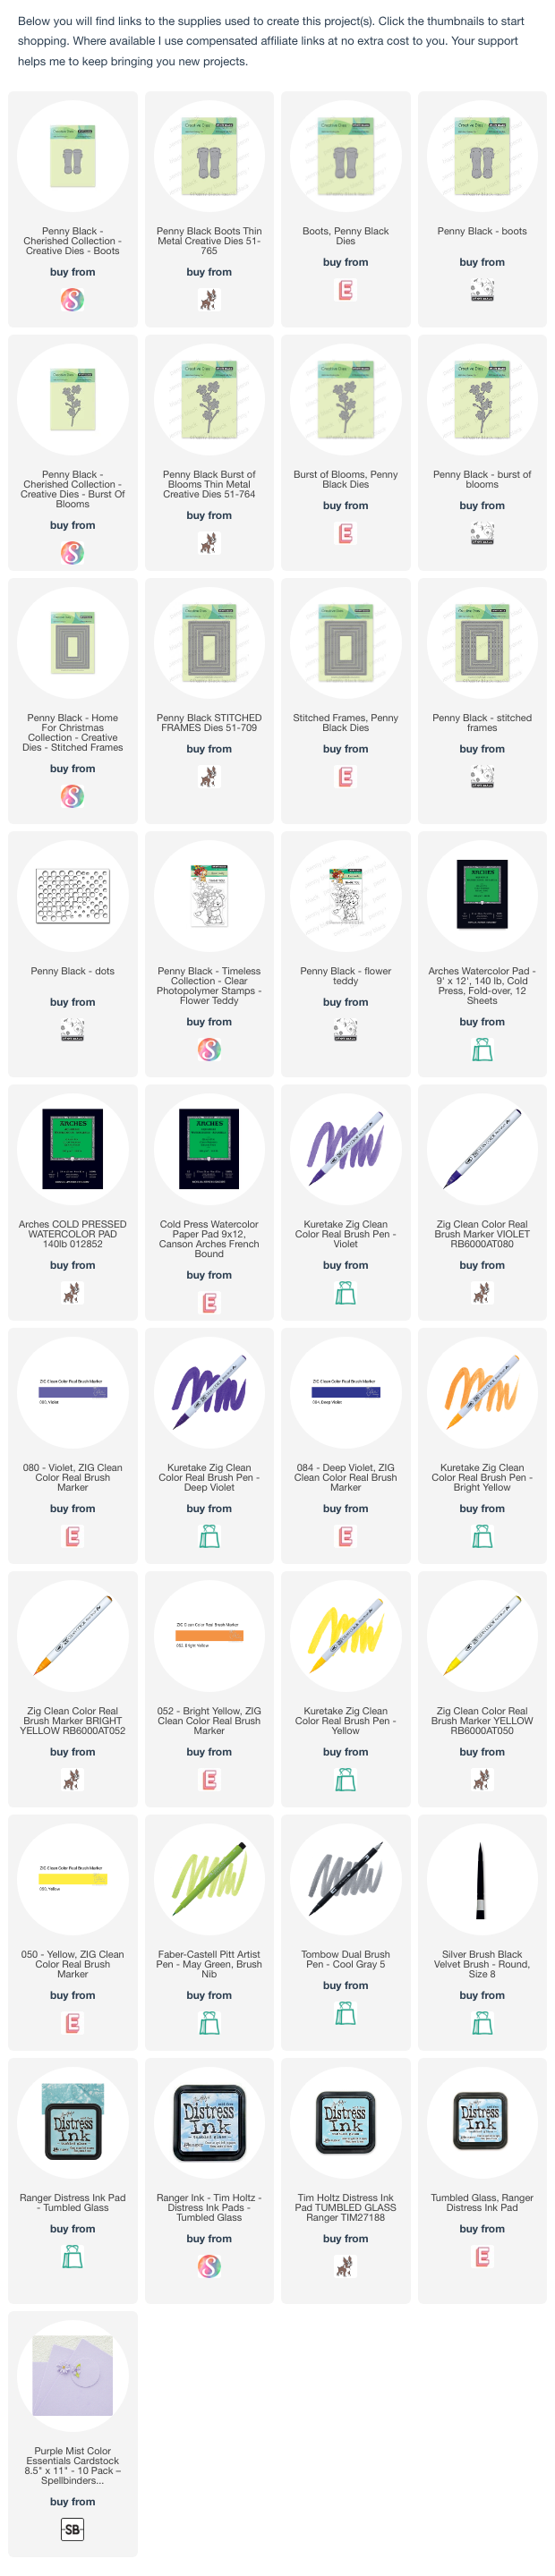
  • Stamp Sweet Song floral corners multiple times on Peach Sorbet cardstock (new cardstock color that will be available next month) with similar ink color for a tone-on-tone background. (I rotated the stamp to create a more random pattern.) For the second card, repeat process with Sage cardstock. Trim panels as necessary and add to card bases.
  • Stamp Sweet Song small and medium birds in VersaFine Onyx ink on Arches Cold Press paper; heat set and watercolor with medium of choice. (I listed below the watercolor markers I used.) Once dry, add white acrylic ink to eyes and fussy-cut.
  • Ink Snowdrift cardstock with Tumbled Glass ink. Stamp panel with Sweet Song lines (in Morning Mist ink), sentiment and bird (in Onyx). Trim and add to floral background. Add fussy-cut bird. Repeat for second card.

Spellbinders | Stampendous Sweet Song


Spellbinders | March 2023 Clubs Inspiration Blog Hop

Hello! I am delighted to be participating in a blog hop celebrating the Spellbinders March 2023 Club Subscriptions. You should have reached me from the blog of Daniel West. (The entire list of participants is included at the end of my post.) For the hop, I created a card showing a different way to use the March 2023 Large Die of the Month. As designed, the set creates a three-dimensional card, which I showed here.

Spellbinders | March 2023 Clubs Inspiration Blog Hop

Spellbinders is giving away a $25 gift certificate to three lucky blog readers – selected from the comments on the Spellbinders blog. Giveaway closes on Sunday, March 26, 11:59 pm MST. The winner will be announced in the blog hop post the following Wednesday. The winner is responsible for shipping cost, duties and taxes. Please note, store credit (gift certificate) cannot be applied to Club Subscriptions; store credit can be applied to shop past Club products, Club extras, and regular releases.

Create a spring-themed friendship card with the Large Die of the Month using watercolored paper for the die-cut elements.

Spellbinders | March 2023 Clubs Inspiration Blog Hop

  • Apply reinkers and watercolor marker ink to watercolor paper. Once dry, cut tree base, flowers, and leaves from the watercolor paper using dies in the Large Die of the Month set.
  • Adhere leaves and flowers to tree. Cut flower centers from Snowdrift cardstock and adhere. Trim tab from bottom of the tree (the tab is needed for the 3D application of the die set).
  • Using watercolor paper to which Mowed Lawn reinker has been applied, cut hill with die in the Color Block Scenic Scape set. For background, apply Tumbled Glass ink to Snowdrift cardstock. Trim and add to card base. Add hill to background and trim as needed.
  • Add tree to scene with foam adhesive. Cut bird from watercolored paper using dies in the Sweet Birds on a Branch set. Assemble and add to tree with foam adhesive.
  • Stamp sentiment with stamp in Seasonal Motif set. Cut with die in the A Cut Above the Rest Sentiments Stamp & Die Set. Add to card below the tree.

Thanks for visiting! Head next to the blog of Jennifer Kotas. Scroll for the full blog hop list.


Spellbinders Blog

Yana Smakula

Sandi MacIver

Annie Williams

Daniel West

Jean Manis <–You are here

Jennifer Kotas

Lydia Fiedler

Bibi Cameron

Heejung Hunsberger

Rebecca Keppel

Mindy Eggen

Inge Groot

Jumi Baek

Penny Black | Boots and Blooms

Hello! Today I am sharing a spring-themed card created with Penny Black supplies, new and old. I have been watching the video series created by Jill Foster for Penny Black, which has been incredibly instructive.

Penny Black | Boots and Blooms

    • Cut Boots from Arches Cold Press watercolor paper and color with markers. (I colored by scribbling a mat with the marker color and picking it up with a wet Round Size 8 brush. I did not apply the marker directly to the watercolor paper.)
    • Cut Burst of Blooms from Arches Cold Press watercolor paper (twice) and color with markers. Use the May Green Pitt Artist Pen to color the stems (this was one of the many tips shared by Jill in the videos). Once dry, adhere centers cut from white cardstock with the Dots die. Trim stems, fussy-cutting as necessary, and place blooms into the boots.
    • With two largest Stitched Frames dies, cut frame from white cardstock. (This set cuts on the inside and creates a cut pattern on the outside. By using the two dies together, I get a frame with the cut pattern on the frame.)
    • Ink white cardstock with Tumbled Glass ink, applying more ink at one end. Stamp with Flower Teddy sentiment. Trim panel to fit behind frame and adhere.
    • Create card base from Purple Mist cardstock. Add frame and sentiment panel. Add assembled boots with foam adhesive.

Penny Black | Boots and Blooms


Lawn Fawn | Mixed Media Birthday Card

Hello! Today I am sharing a birthday card, featuring Lawn Fawn products, that I am entering into the Lawn Fawnatics Challenge #144 – All Things Birthday. This is not a card I just whipped up. It took time to watercolor the images and foil the background and letters! I learned a lot along the way.

Lawn Fawn | Mixed Media Birthday Card

  • Stamp images from the Wild for You and Party Animal sets in VersaFine ink on Arches Cold Press watercolor paper; heat set ink. Color images using Zig and Tombow markers. Once dry, cut with coordinating dies.
    Fox: Zig Brown, Zig Oatmeal; Alligator: Tombow Sap Green, Zig Deep Green; Mouse: Tombow Chocolate; Elephant: Zig Dark Gray; Giraffe: Zig Brown, Zig Light Brown, Tombow Peach.
  • Cut Party Balloons from watercolor paper and color with markers (Zig Persian Blue, Tombow Warm Red, Zig Bright Yellow). Die-cut strings from white cardstock and attach to dried balloons.
  • Foil Iridescent foil to toner sheet. Cut sentiment from foil with Cole’s ABCs. Cut same letters from Silver Glitter Foam and glue to the back of the foiled letters (glitter side down). (Any foam that can be die cut would work.) Cut Matte Black cardstock 1 1/2 inches by 5 1/2 inches and adhere letters to strip.
  • Apply Therm O Web Blanco Transfer Gel through the straight Skinny Stripes stencil on Sea Glass cardstock. Once dry, foil with Rainbow Deco Foil. (Notice that the stripes of the rainbow go from left to right, not top to bottom.) Trim panel to A2-size and add to card base. Adhere Vellum to panel with double-sided tape along the bottom which the sentiment strip will cover.
  • Add sentiment strip to background, attach balloons to background, and attach animals with foam adhesive. Glue can be added to the vellum behind the items to help secure it to the foiled background.

Lawn Fawn | Mixed Media Birthday Card


Newton’s Nook | Mixed Media Birthday Card

Hello! Lately, I have been practicing a number of techniques including watercoloring and foiling with a laminator. I have used both on this birthday card that features supplies from Newton’s Nook. While I intend to use the card for a birthday, the image, sentiment, and background would work for other occasions.

Newton's Nook | Mixed Media Birthday Card

  • To create focal image, stamp Sky High Celebrations image with VersaFine ink on Arches Cold Press watercolor paper. Heat set and watercolor with markers (markers linked in the supply list, colors used below). Once dry, cut image with coordinating die.
    Balloons + Bird: Tombow Warm Red, Zig Orange, Tombow Process Yellow, Zig May Green, Zig Persian Blue, Zig Cobalt Blue, Zig Deep Violet
    Dog: Tombow Burnt Sienna, Tombow Light Sand, Tombow Lamp Black
    Cat: Zig Warm Gray 5, Tombow Lamp Black, Tombow Pale Pink
  • To create background, apply Blueprint Sketch, Mermaid Lagoon, and Salvaged Patina Distress inks to white cardstock. Apply the same inks again with one of the Balloon stencils in place (the set contains two stencils).
  • Apply Therm O Web Transfer Gel to panel using the other Balloon stencil. (I masked the balloons in the lower-right corner where I wanted to stamp the sentiment.) Set aside to dry.
  • Apply White Latte flock to the stenciled panel. (I used a Minc Mini set on 5 and allowed to heat for at least 15 minutes.) Stamp the Sky High Celebrations sentiment in lower-right corner with VersaFine ink. Trim panel, attach to card base, and add watercolored Sky High Celebrations image with foam adhesive.

Newton's Nook | Mixed Media Birthday Card