The wait is over! REVERSE CONFETTI has just released FIVE stamp sets, SEVEN Confetti Cuts and “Spring Fling” Quick Card Panels!! There’s something for everyone in this release – whether you’re working on Easter cards, gift packaging, friendship or encouragement cards, …
The hop started on the Reverse Confetti blog, and you should have made it here from Lisa’s blog. It would be worth your while to start at the beginning of the hop, so you don’t miss a thing. We have tons of inspiration for you to see using all the new Reverse Confetti stamp sets and dies!
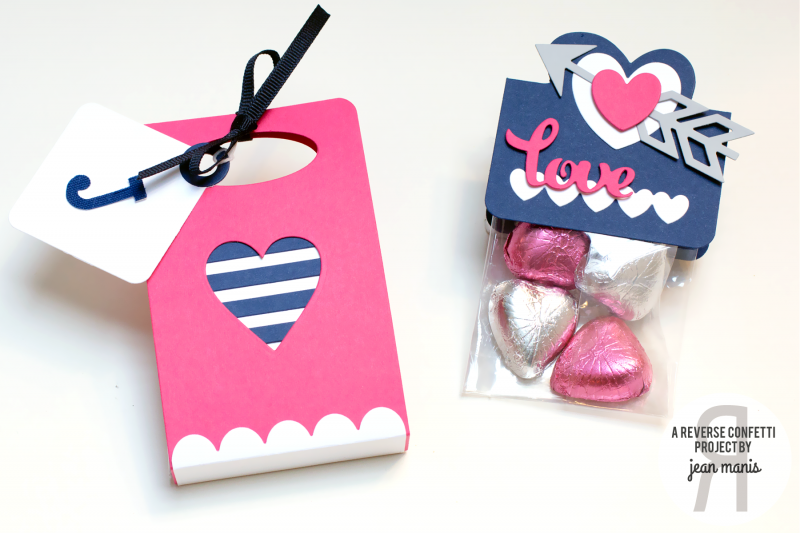
There are so many wonderful packaging products included with this release! I created an Easter-themed bag with the Treat Tote Confetti Cuts. Before assembling, I trimmed off the edge of the tote top and added the Double Edge Wonky Scallop Border Confetti Cut (which I cut twice). I played up the rabbit theme by using the colors of a carrot for the bag.
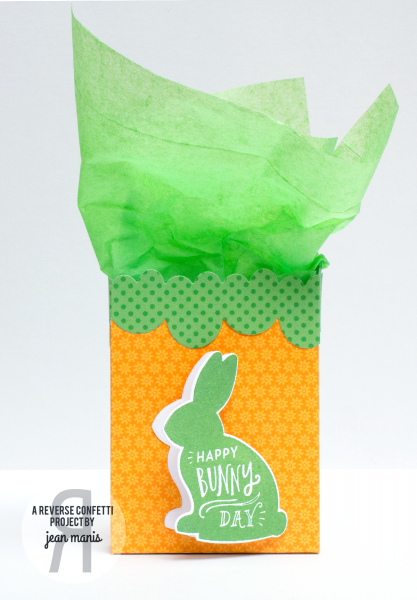
To make the tag, I did a partial cut using the More Than Jellybeans Confetti Cuts set. To the tag front, I added a bunny stamped with the More Than Jellybeans stamp set, which I also cut with the coordinating Confetti Cuts.
Next, I’m sharing a CAS card created with the Sun ‘n Clouds Confetti Cuts and the Shine Bright stamp set.

I stamped and heat-embossed the sentiment on a bright cardstock panel into which I cut a circle, so that the blue sky and sun could peek through.
Here’s a card I created quickly with a Quick Card Panel, along with die cuts cut with the Sun ‘n Clouds Confetti Cuts set and flowers from The Tweet Life Confetti Cuts set.
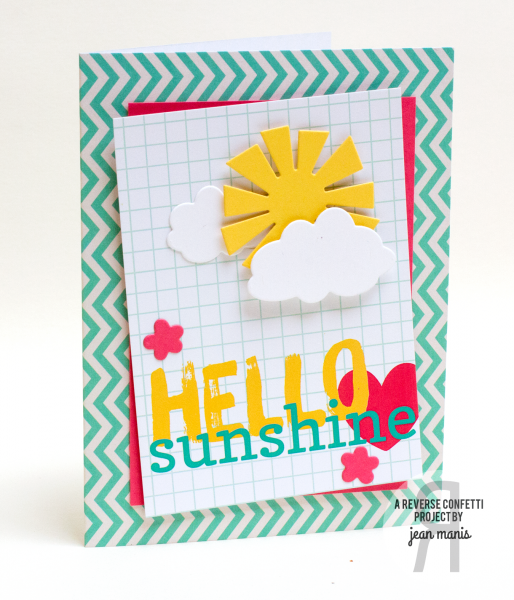
After adhering the sun, clouds and flowers to the panel, I added the panel to a card base, along with an off-axis solid piece of cardstock.
I hope you’ve enjoyed hopping with us today. Be sure and hop with us on the 8th of EVERY MONTH for more REVERSE CONFETTI inspiration! Now it’s time to hop on over to Kathy’s blog. If you get lost along the way, you can find the hop order and list of all the participating designers over on the Reverse Confetti blog.