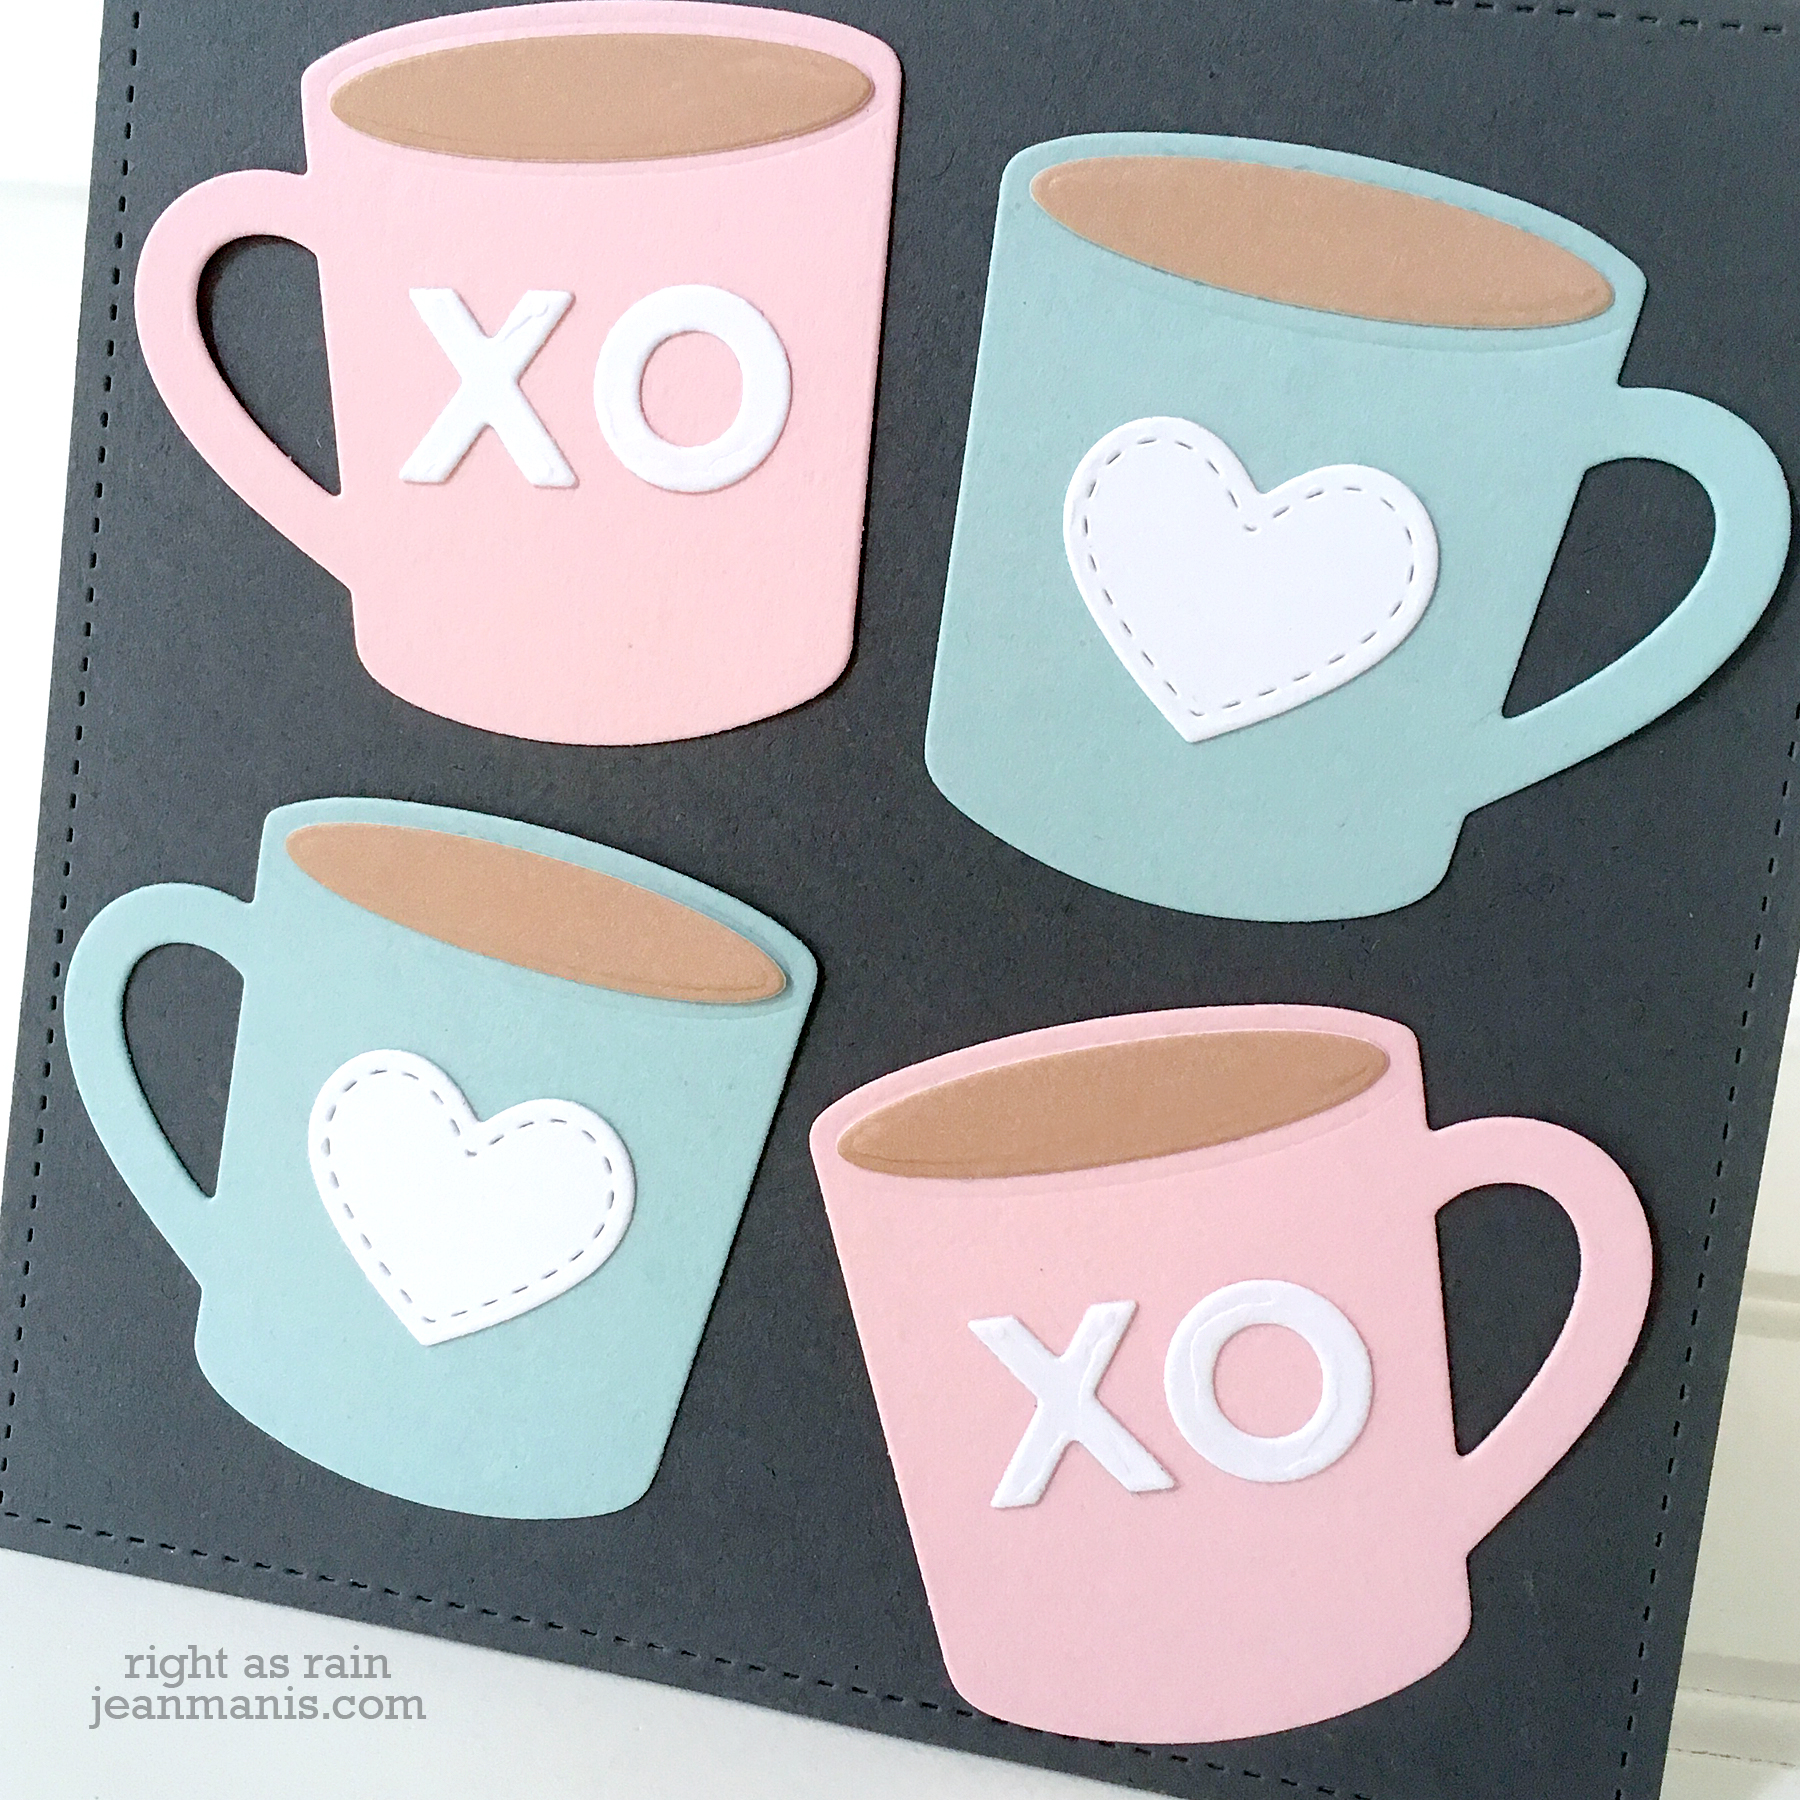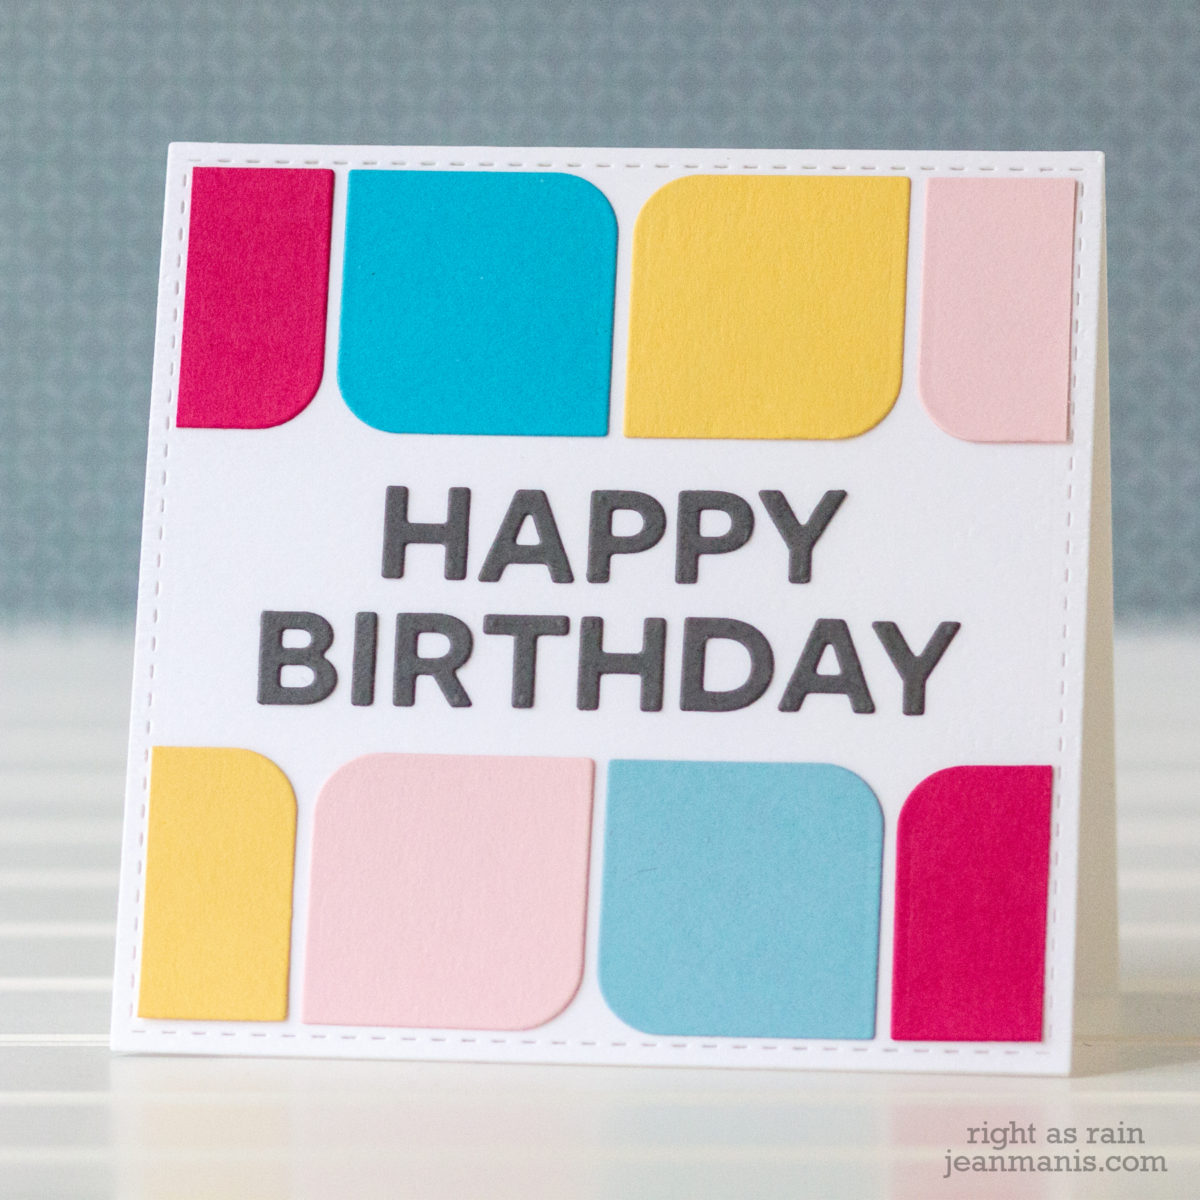
Hello! Today, I am sharing a CAS birthday card created with dies. I have been looking at quilt patterns lately. I don’t quilt, but it’s a craft I have considered taking up. Although this card isn’t quilt-themed, I used color and repetition (used a lot in quilting) in its design.
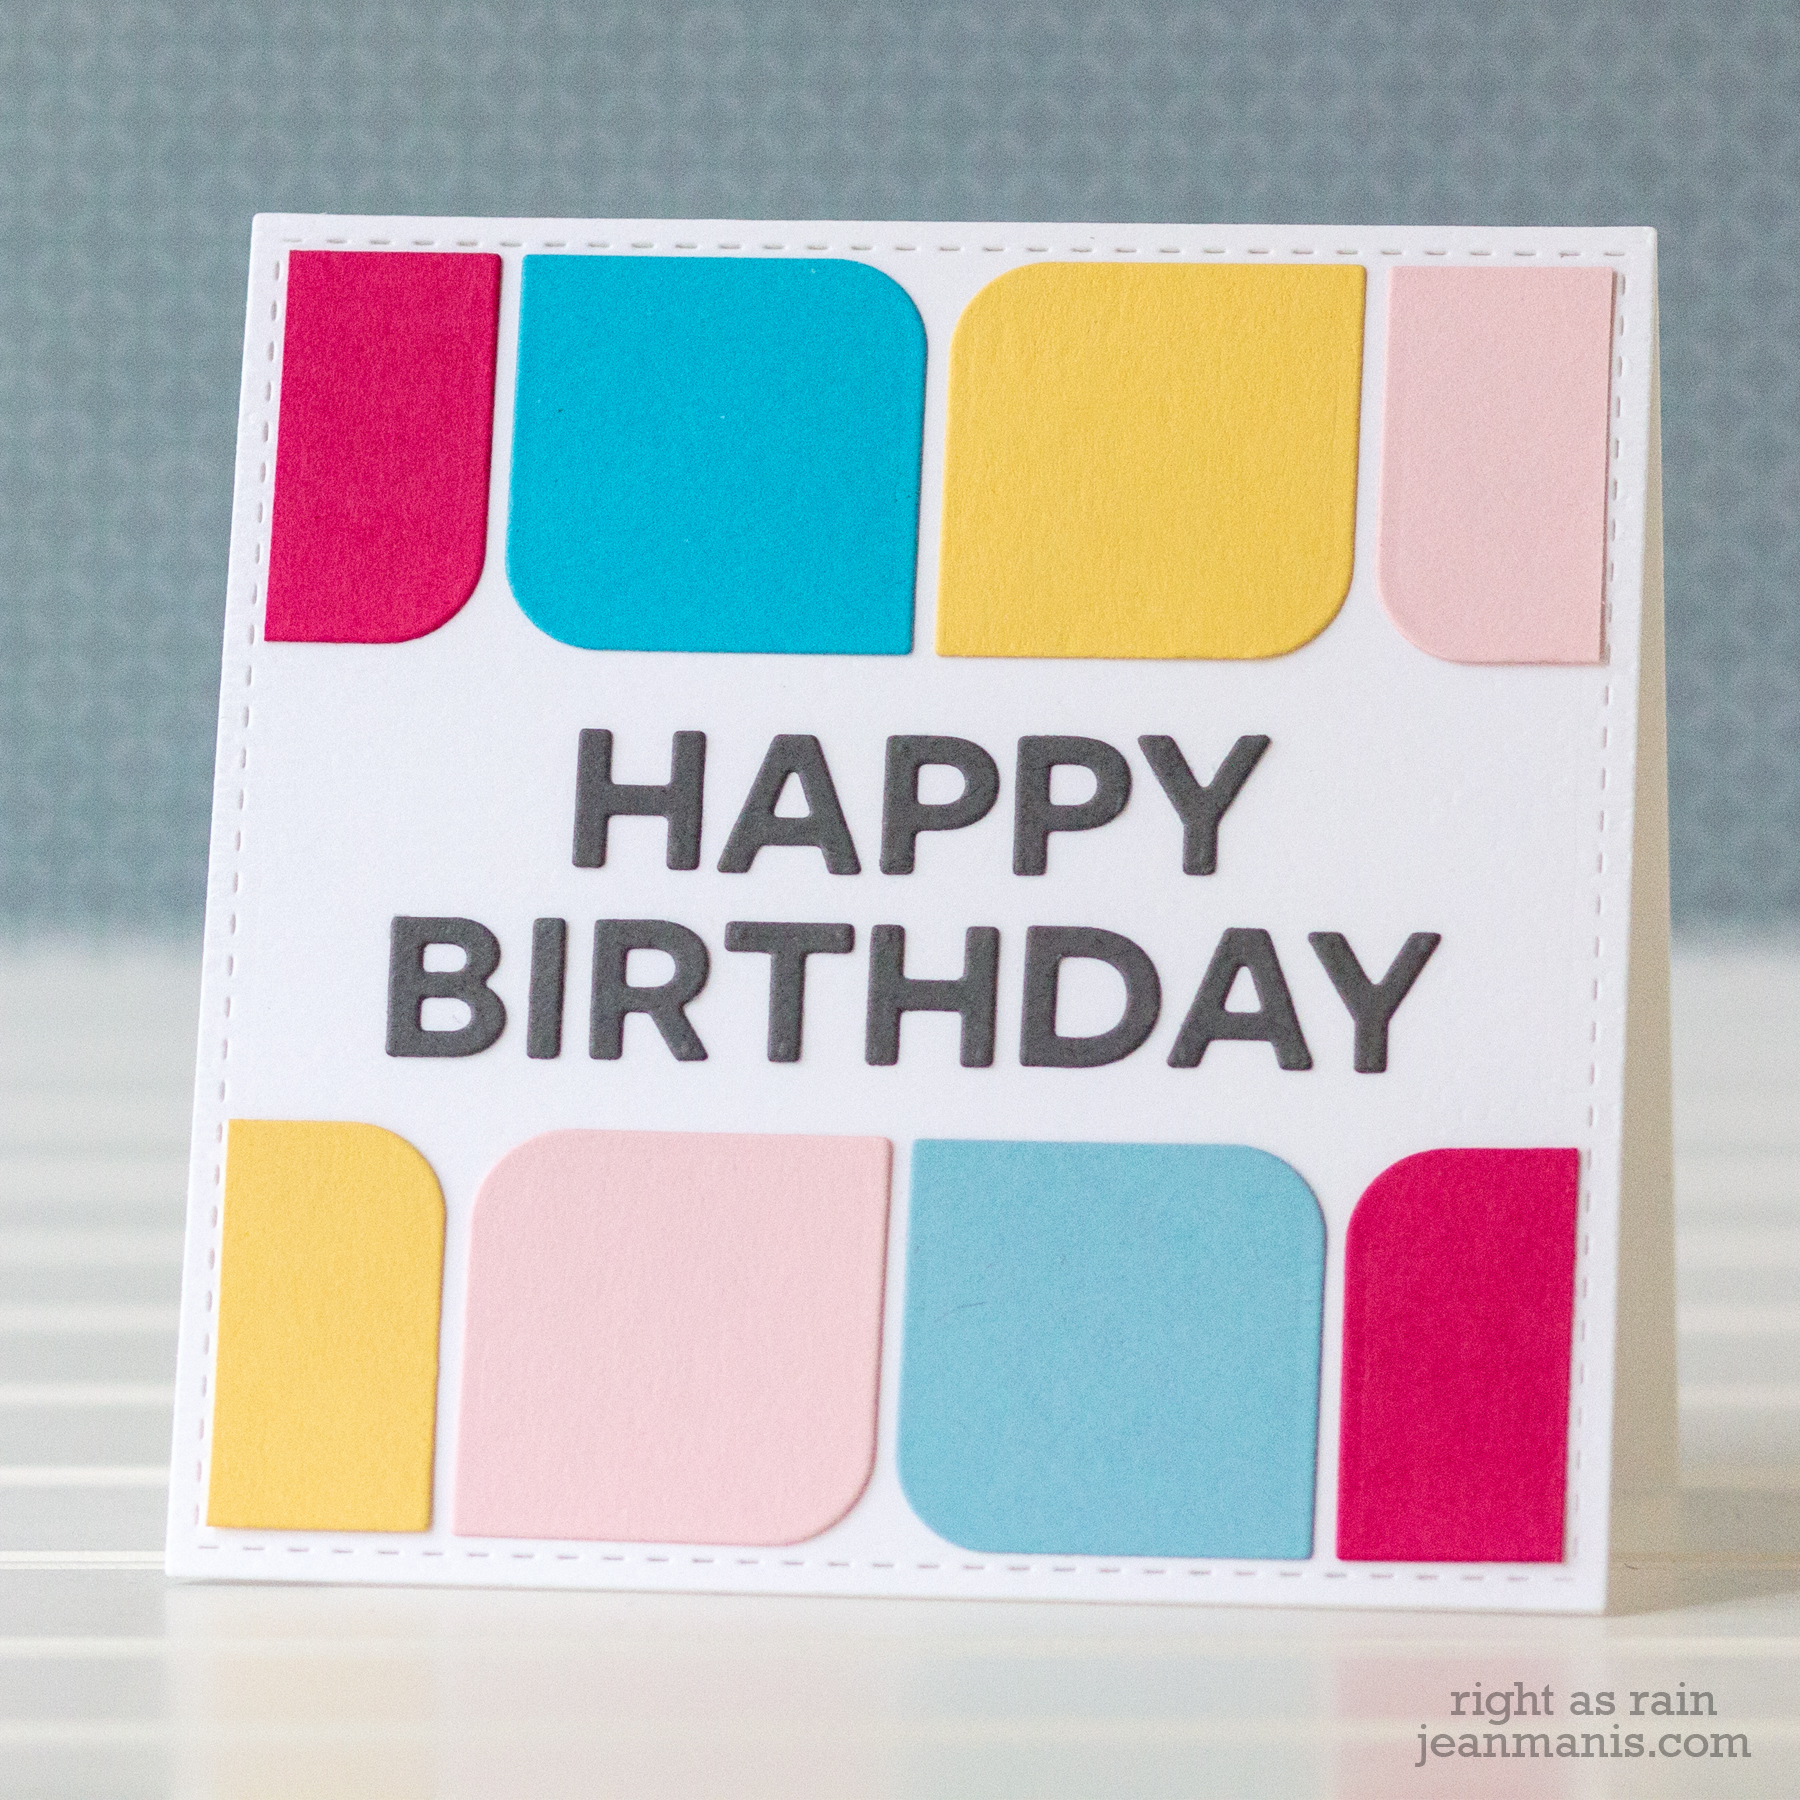
- For the background, I cut white cardstock with the Lil’ Inker Designs 4.25″ square die and dry-embossed the square with the Subtle Dynamic Textured Impressions Embossing Folder from Stampin Up’.
- I cut the My Favorite Things Block Happy Birthday sentiment from Stampin Up’ cardstock and adhered the letters to the square with glue.
- I used a now retired Avery Elle die to cut the rounded diamond shapes from Stampin Up’ colored cardstock. I cut the shapes in the corners in half. I adhered the pieces to the card base with Scotch Dot Roller adhesive.
Supplies: