The wait is over! REVERSE CONFETTI has just released FIVE stamp sets, SIX Confetti Cuts and “Weather or Dot {and Stripes}” Quick Card Panels.
The hop started on the Reverse Confetti blog, and you should have made it here from Lisa’s blog. It would be worth your while to start at the beginning of the hop, so you don’t miss a thing. We have tons of inspiration for you to see using all the new Reverse Confetti stamp sets and dies!
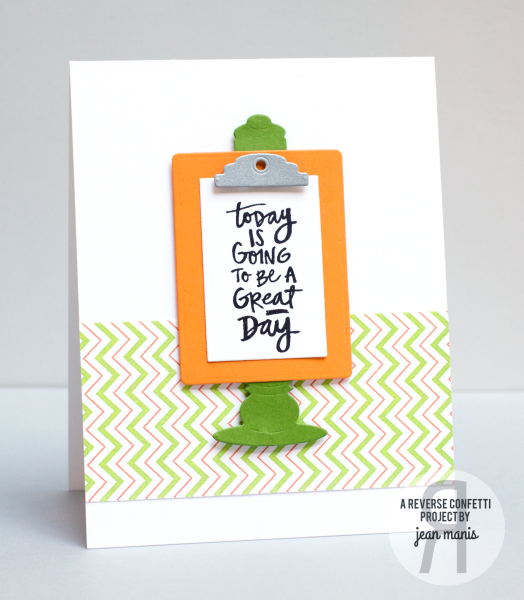
My CAS project highlights the just released Posted Note Confetti Cuts set with a sentiment from Posted Note Sentiments. I die cut the note stand out of three colors of cardstock (choosing colors to match the Quick Card Panel I used to ground the stand). I stamped the sentiment on white cardstock that I cut with a rectangle die. The sentiments from Posted Note Sentiments look just as if they were penned by hand – so fun and versatile!
I hope you’ve enjoyed hopping with us today. Be sure and hop with us on the 8th of EVERY MONTH for more REVERSE CONFETTI inspiration! Now it’s time to hop on over to Kathy’s blog. If you get lost along the way, you can find the hop order and list of all the participating designers over on the Reverse Confetti blog.