I’m over at the Penny Black SIMPLICITY at its best site today with a CAS card using Penny Black stamps and dies. I hope you’ll head over to look.

Cardmaking and Scrapbooking with Jean Manis

I’m over at the Penny Black SIMPLICITY at its best site today with a CAS card using Penny Black stamps and dies. I hope you’ll head over to look.
Today, I’m sharing two Easter-themed CAS cards made with Reverse Confetti Confetti Cuts and stamped sentiment. For both cards (same design, different colors), I die cut the eggs with the More Than Jellybeans Confetti Cuts set and nestled them into the Easter basket (cut on my Silhouette). The sentiment from Carton Cuties was stamped onto a partially cut banner from the Tag Me Confetti Cuts set.
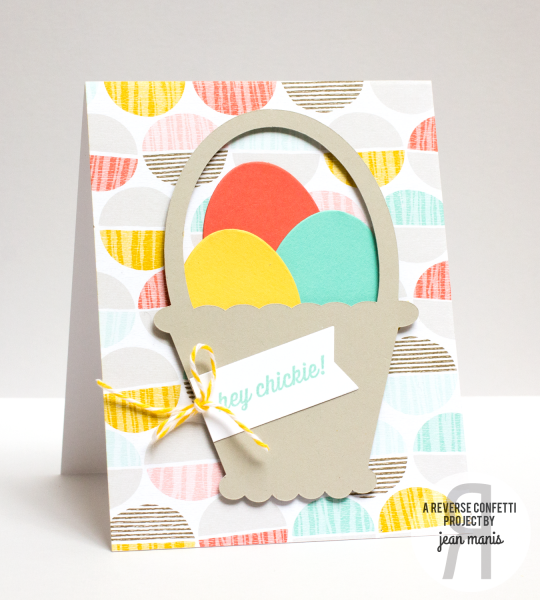
For the first card I used a patterned paper background to add variety and cut the eggs from matching cardstock colors.
For the second card, I used the smooshing ink technique to create marble-colored eggs.
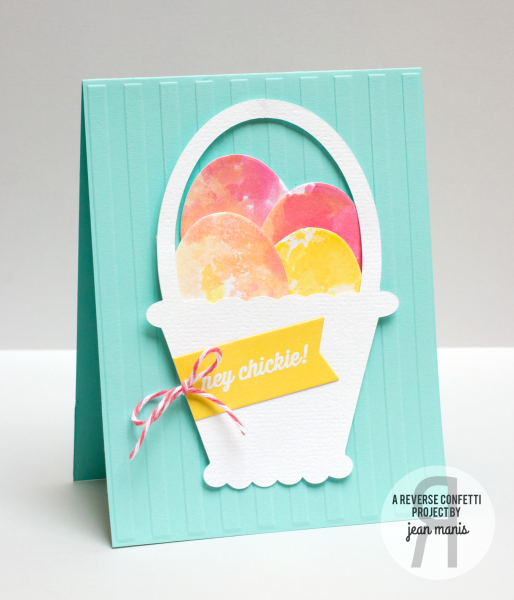
I dry-embossed the background to give some texture to the card. Because the basket was white, I heat-embossed the sentiment on colored cardstock.
Today I’m sharing a card inspired by one that Karolyn Loncon showed in the Online Card Classes Stretch Your Dies class. Karolyn had a different set of dies and stamps than mine, but the main idea was using a die to dry emboss the cardstock after masking the card off with the same shape.
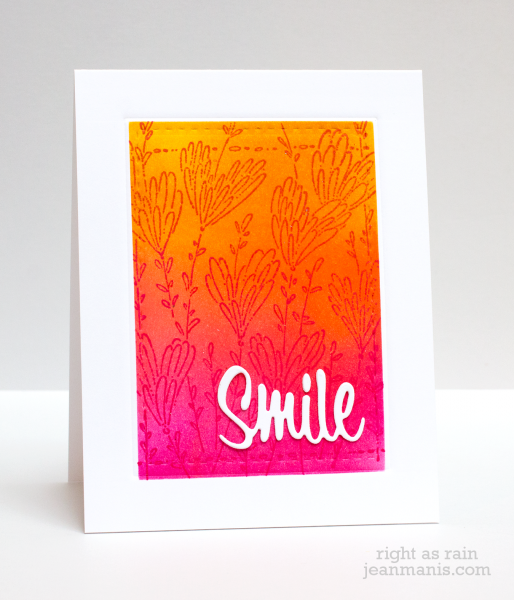
I masked off a rectangular shape and applied Distress Inks – Wild Honey, Worn Lipstick, Picked Raspberry – to the heavyweight cardstock card front. I then stamped the rectangle with Penny Black’s 40-379 Applause inked with Picked Raspberry and Barn Door Distress Inks. After inking and stamping, I removed the mask and dry embossed with the same rectangle die (there’s a stitched edge that may or may not be visible). To finish the card, I added a sentiment die cut with the 51-038 Hooray set. I will definitely be using this technique again. I’m really enjoying some time to work through the class lessons!
Today, I’m sharing a card based on one shown by Jennifer Rzasa in the Online Card Classes Stretch Your Dies class. The idea of today’s class is to use smaller dies effectively on a card.
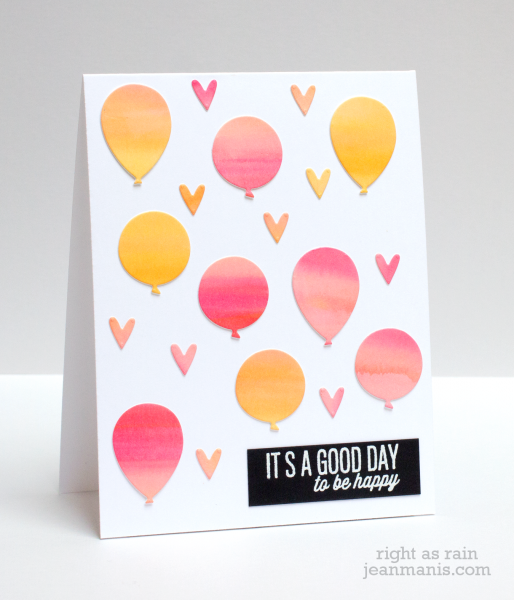
I cut the balloons and heart from Ranger watercolor paper colored with Distress Inks. This is definitely a technique I’ll be using again! These colors make me happy.
Supplies:
Have you seen this month’s SFYTT at Reverse Confetti?

I’m playing along with a spring-themed card featuring a sentiment from Love Blooms and a bouquet made with Confetti Cuts, cut with the Love Blooms and Petals ‘n Posies sets.
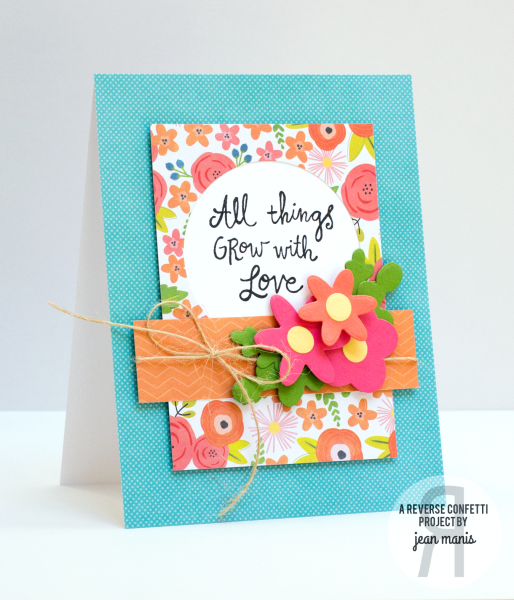
I hope you’ll play along! Head on over to link up your card on the Reverse Confetti Blog for your chance to win a $20 Reverse Confetti gift certificate and the title of ‘Fetti Fave!


