My Favorite Things – Birthday Cake Take Two

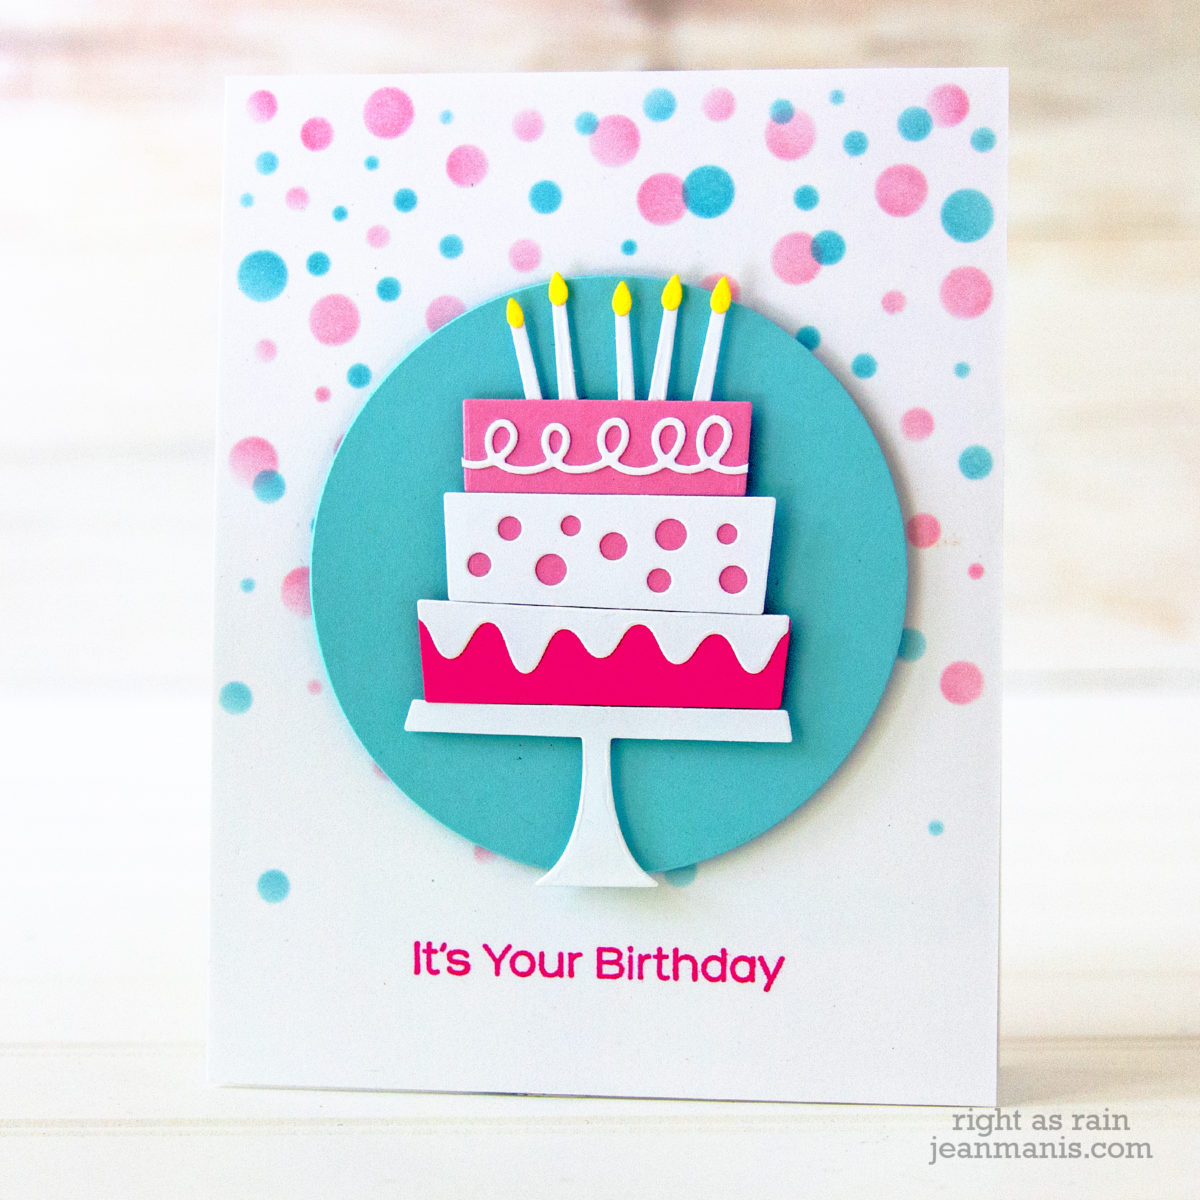
Hello! Today I am sharing a second card featuring the My Favorite Things Birthday Cake die set. On this card, I incorporated the My Favorite Things Confetti stencil set. You can see the first card I created with this die set here.

My Favorite Things - Birthday Cake Take Two

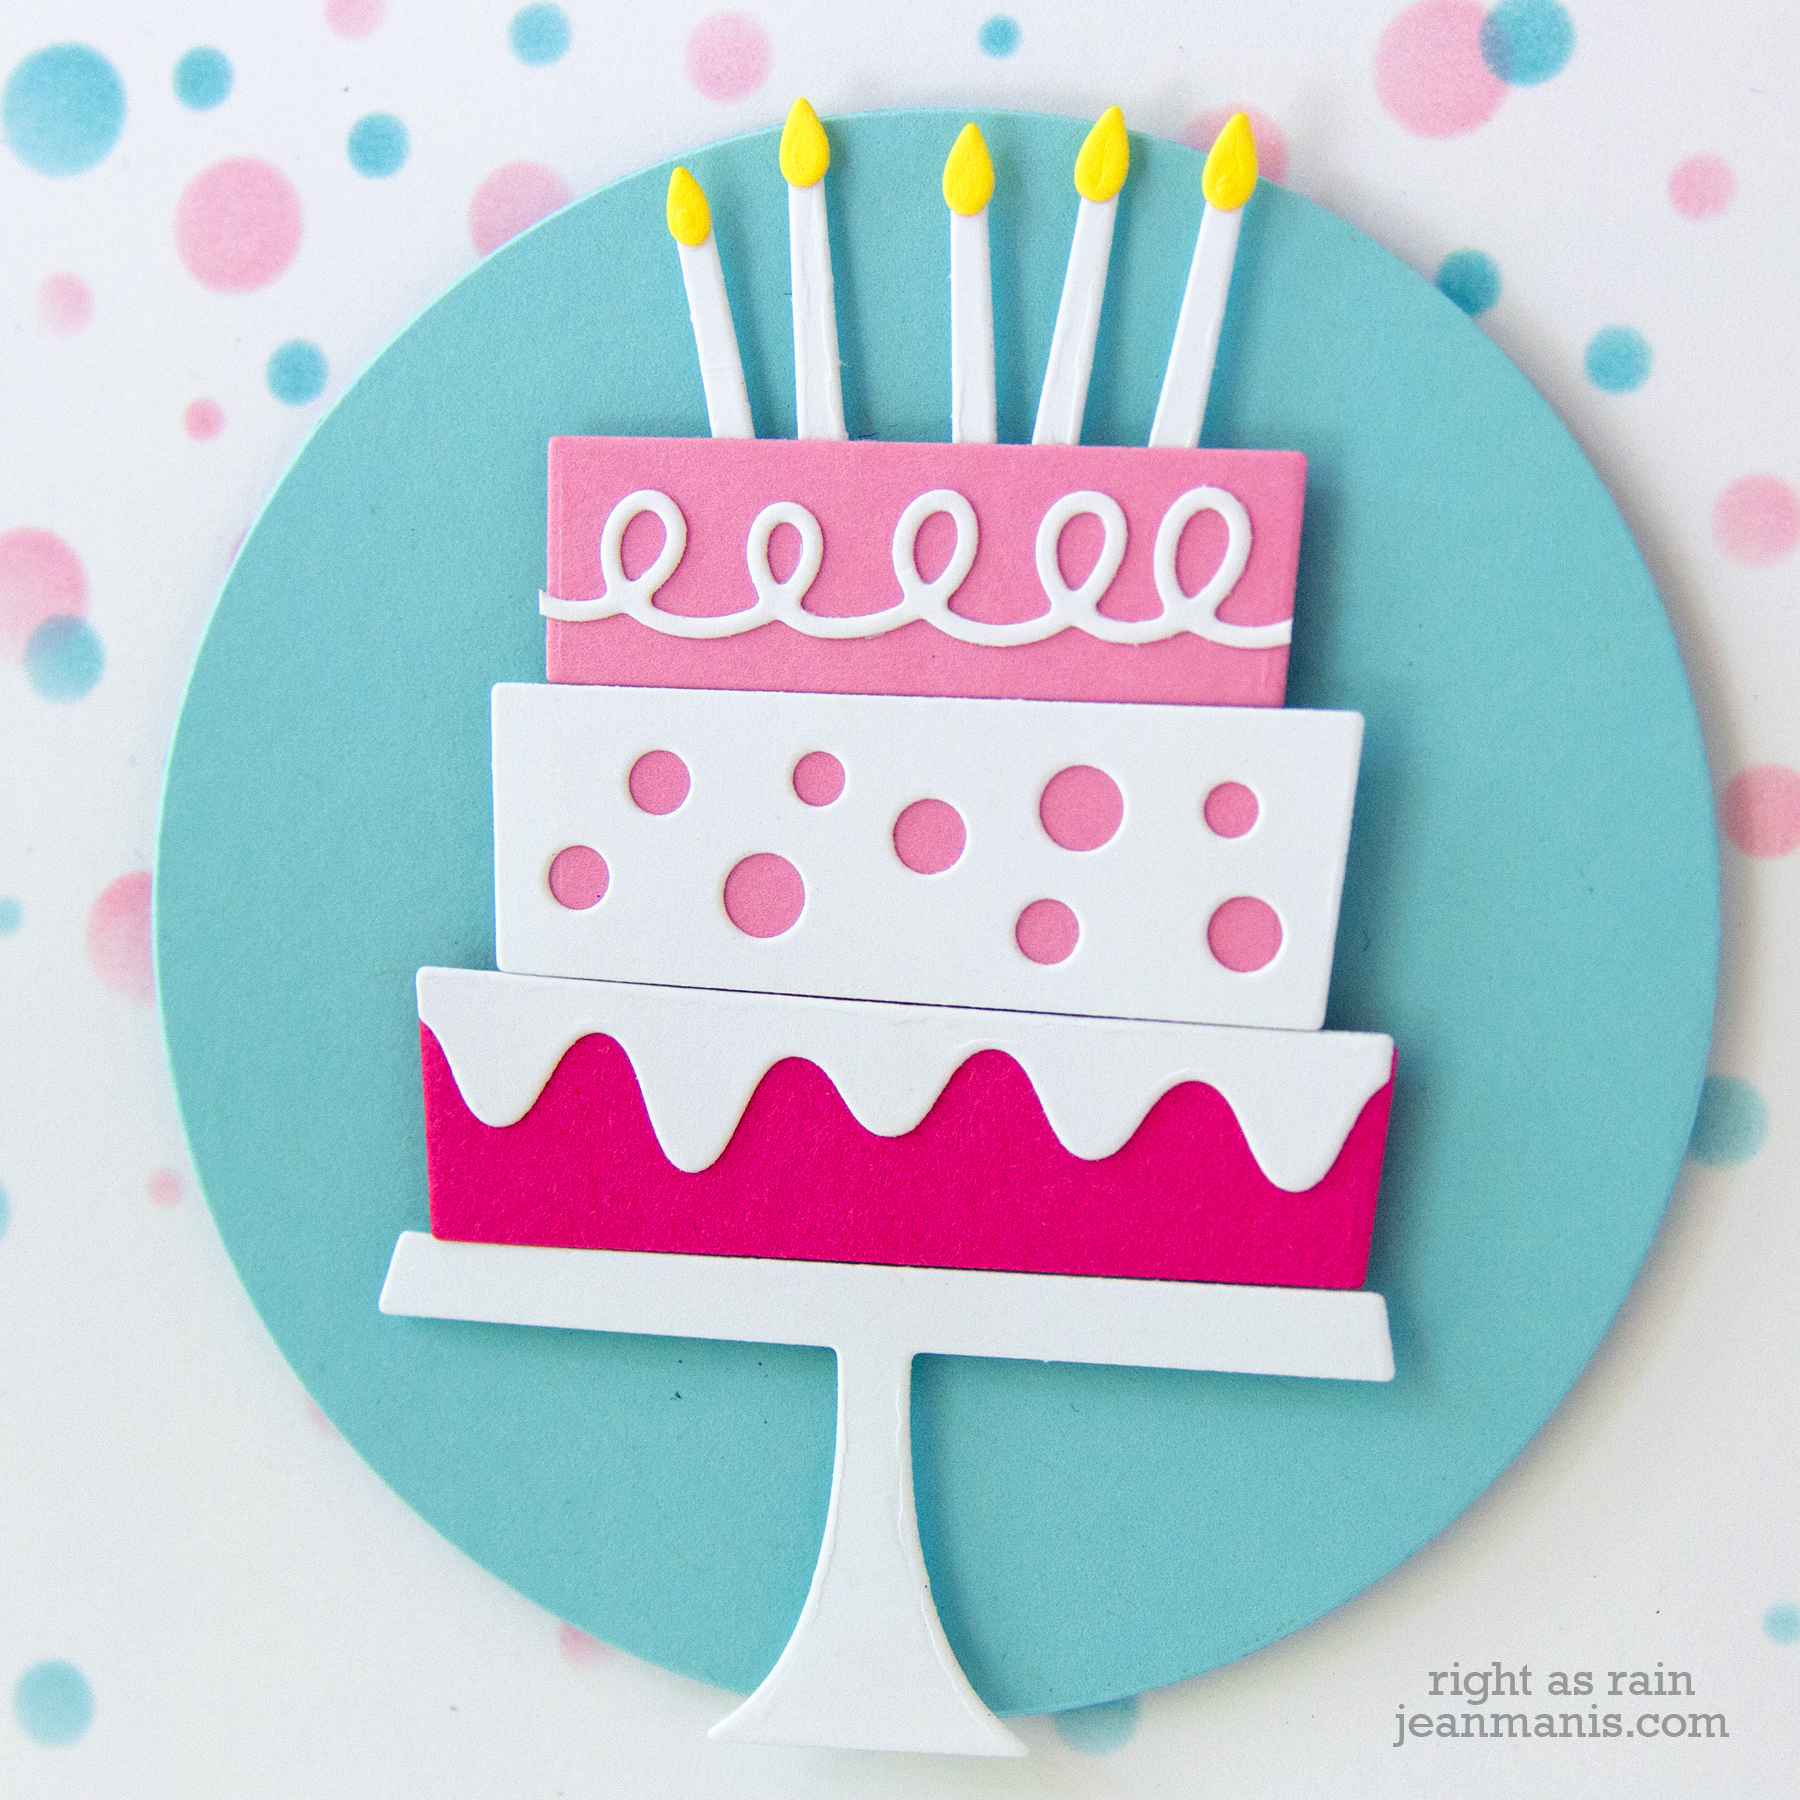
  • I cut the cake layers, cake plate, and decorations from white, yellow, and pink cardstock. The decorative pieces were glued. I assembled the cake stack by taping the layers together on the back.
  • I stenciled the confetti in Spun Sugar and Tumbled Glass inks. The set contains two stencils.
  • I stamped the sentiment (from the You Wow Me stamp set) with Picked Raspberry ink on the stenciled panel.
  • To help the cake stand out from the stenciled background, I die-cut a circle.
  • The assembled cake was added to the circle with foam adhesive. The circle was added to the card base with foam adhesive.

My Favorite Things - Birthday Cake Take Two

Supplies:

CAS Thanks Card – Two Takes

Hello! Today I am sharing two CAS Thanks cards (slightly different designs) featuring the My Favorite Things Simply Thanks sentiment die paired with the Flower Explosion stamp from Simon Says Stamp.

CAS Thanks Card - Two Takes

When I designed these cards, I envisioned wedding Thank You notes using the colors from the wedding (there is no significance to the gold and teal, it’s just a combination I like). One of my favorite things to do is look at wedding mood boards; I love to see the different color combinations and themes. The colors for my own wedding, a small affair held outside at someone’s home, were Cornflower blue and yellow.

CAS Thanks Card - Two Takes

For the first card, I stamped and heat-embossed the Flower Explosion background stamp with gold embossing powder on Robin’s Egg cardstock. I created a band on which to adhere the gold letters. I used the negative piece from diecutting the letters as a guide.

CAS Thanks Card - Two Takes

On the second card, I stamped and heat-embossed the Flower Explosion background stamp on Audrey Blue cardstock. I die-cut the panel the sentiment from the panel and taped the gold letters into the knockout (inlaid technique). I added the panel to a card base.

One of the reasons I chose this particular background stamp is that it doesn’t have a strong direction, (up and down or side to side), which meant that I didn’t have a strong vertical or horizontal on which I had to line up the letters. Die-cutting directly into the panel was stressful enough!

Supplies:

Paper Smooches Water Wise – Take Two

Hello! Today I am sharing another card featuring the Paper Smooches Water Wise die set combined with a sentiment from the Simon Says Stamp Vacation Time set. Last week I shared a card with the Water Wise dies and a card with the same Vacation time sentiment.

Paper Smooches Water Wise - Take Two

  • I created an ink blended background with Distress Oxide inks.
  • I cut the fish from cardstock to which I had applied Distress Oxide inks.
  • I stamped the sentiment and cut it out with a circle die.
  • I cut the circle frame from cardstock to which I had applied Distress Oxide ink.
  • I added the fish to the circle with foam adhesive and adhered the circles to the card base.

Paper Smooches Water Wise - Take Two

I’ve got just about all of my supplies packed for my upcoming move. I have not packed up my Distress Oxide inks or my white cardstock. Those will be the last thing I pack!

Supplies:

Simon Says Stamp – Time for a Break

Hello! Today, I am sharing a CAS friendship card featuring Simon Says Stamp products – the Abstract Triangle stencil and a sentiment from the Vacation Time set.

Simon Says Stamp - Time for a Break

  • I applied Distress Oxide inks through the Abstract Triangle stencil.
  • I cut the stenciled panel with a 4″ square die at an angle to the pattern.
  • I heat-embossed the sentiment and cut it with a skinny die in the A-2 Matting Basics set.
  • I added the panel to a square card base and popped the sentiment up with foam adhesive.

Simon Says Stamp - Time for a BreakThanks for visiting!

Supplies:

Paper Smooches – It’s O-fish-al!

Hello! Today I am sharing a CAS friendship card on which I’ve combined the recently released Paper Smooches Water Dies with a computer-generated sentiment.

Paper Smooches - It's O-fish-al!

  • I cut the fish, air bubbles, and waves from colored cardstock.
  • I printed out the sentiment on white cardstock, which I trimmed.
  • I added dry-embossed cardstock (created with the retired Lifestyle Crafts Tide embossing folder) at the top and bottom of the panel.
  • I added the waves and air bubbles with liquid adhesive and popped the fish up with foam adhesive.

Paper Smooches - It's O-fish-al!

Thanks for stopping by!

Supplies: