Welcome to the Reverse Confetti Pretty Packaging Blog Hop! The Reverse Confetti designers are sharing a whole range of packaging ideas.

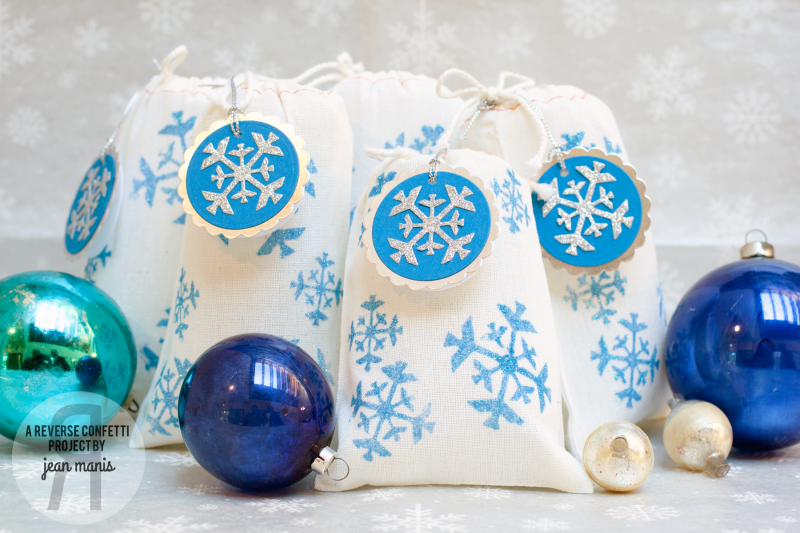
For the hop, I created glitter-stenciled muslin treat bags using the Let It Snow Confetti Cuts. Let’s take a look at the process.
To begin, cut a 4″ x 5″ piece of freezer paper (cut to the size of the muslin bag front) with the Let It Snow Confetti Cuts. I ran the freezer paper through the Big Shot first with all three snowflakes and again with the two smaller snowflakes.
Remove the cut out snowflakes from the panel. Iron the freezer paper panel (shiny side down) onto the muslin bag. The iron should be set on medium heat.
Apply glue to the open snowflake areas. I spread Aleene’s Jewel-It Embellishing Glue with a foam brush.
Shake glitter onto the open areas, covering generously. I used Martha Stewart blue iridescent glitter. Allow the glitter to dry, shake off excess and remove stencil.
To create matching gift tags: Make a tag base with a circle die. Cover the tag front with a scallop piece cut from silver foil, using a die in the Circles ‘n Scallops Confetti Cuts set. Attach a blue cardstock circle embellished with a glitter snowflake, cut with the Let It Snow Confetti Cuts.
Stamp and heat emboss (using silver embossing powder) the inside of the tag with a sentiment from Seasonal Sentiments. Punch the finished tag and string with metallic twine.
Fill treat bags with whatever your heart desires – chocolates, caramels, small toys, nail polish, soaps, …

super clever…love these Jean!
Sooooo pretty! Love the glittery snowflakes. What a great way to give a gift this season.
So pretty!!!
These are amazing! Thank you for showing us how!
You are so creative Jean!! I always love what you make!!
Wonderful idea, so pretty. You are so creative and I am happy that you share.
Your treat bags are so cute. Thanks for the tutorial on them.
Love those glittery snowflakes on the bags!
These are gorgeous … I love your sparkly snowflakes!
These are soooo cute!!! Great technique!
So cute – love the snowflakes.
isoscia at aol dot com
Thanks for sharing a wonderful idea. The bags are beautiful and will be something to keep after the present is taken out.
I just learned something new! Never knew about using freezer paper. Love your treat bags! Thanks for the tutorial.
These bags are adorable. Wish I had time to make them for the luncheon I’m hosting tomorrow.
Your bags are amazing!!!
What a wonderful project! I love the pretty blue glitter for the snowflakes. Never knew you could use freezer paper!
Very cute! Thanks!
I haven’t used glitter in quite some time. Maybe it’s time for me to add a little sparkle to my Christmas presents! Great job!!
Fantastic bags!!!
Holy cow Jean, you worked hard on these adorable little treat bags and it shows! Love those glittery snowflakes!
So pretty–thanks for explaining how you made these.
I love the blue and the sparkly glitter. Such a cute idea and so practical too. I appreciate the how-to information. Thanks!