Hello! Happy May! Today, I am sharing two CAS projects created with this month’s Small Die of the Month die set “Enjoy the Ride” from Spellbinders.
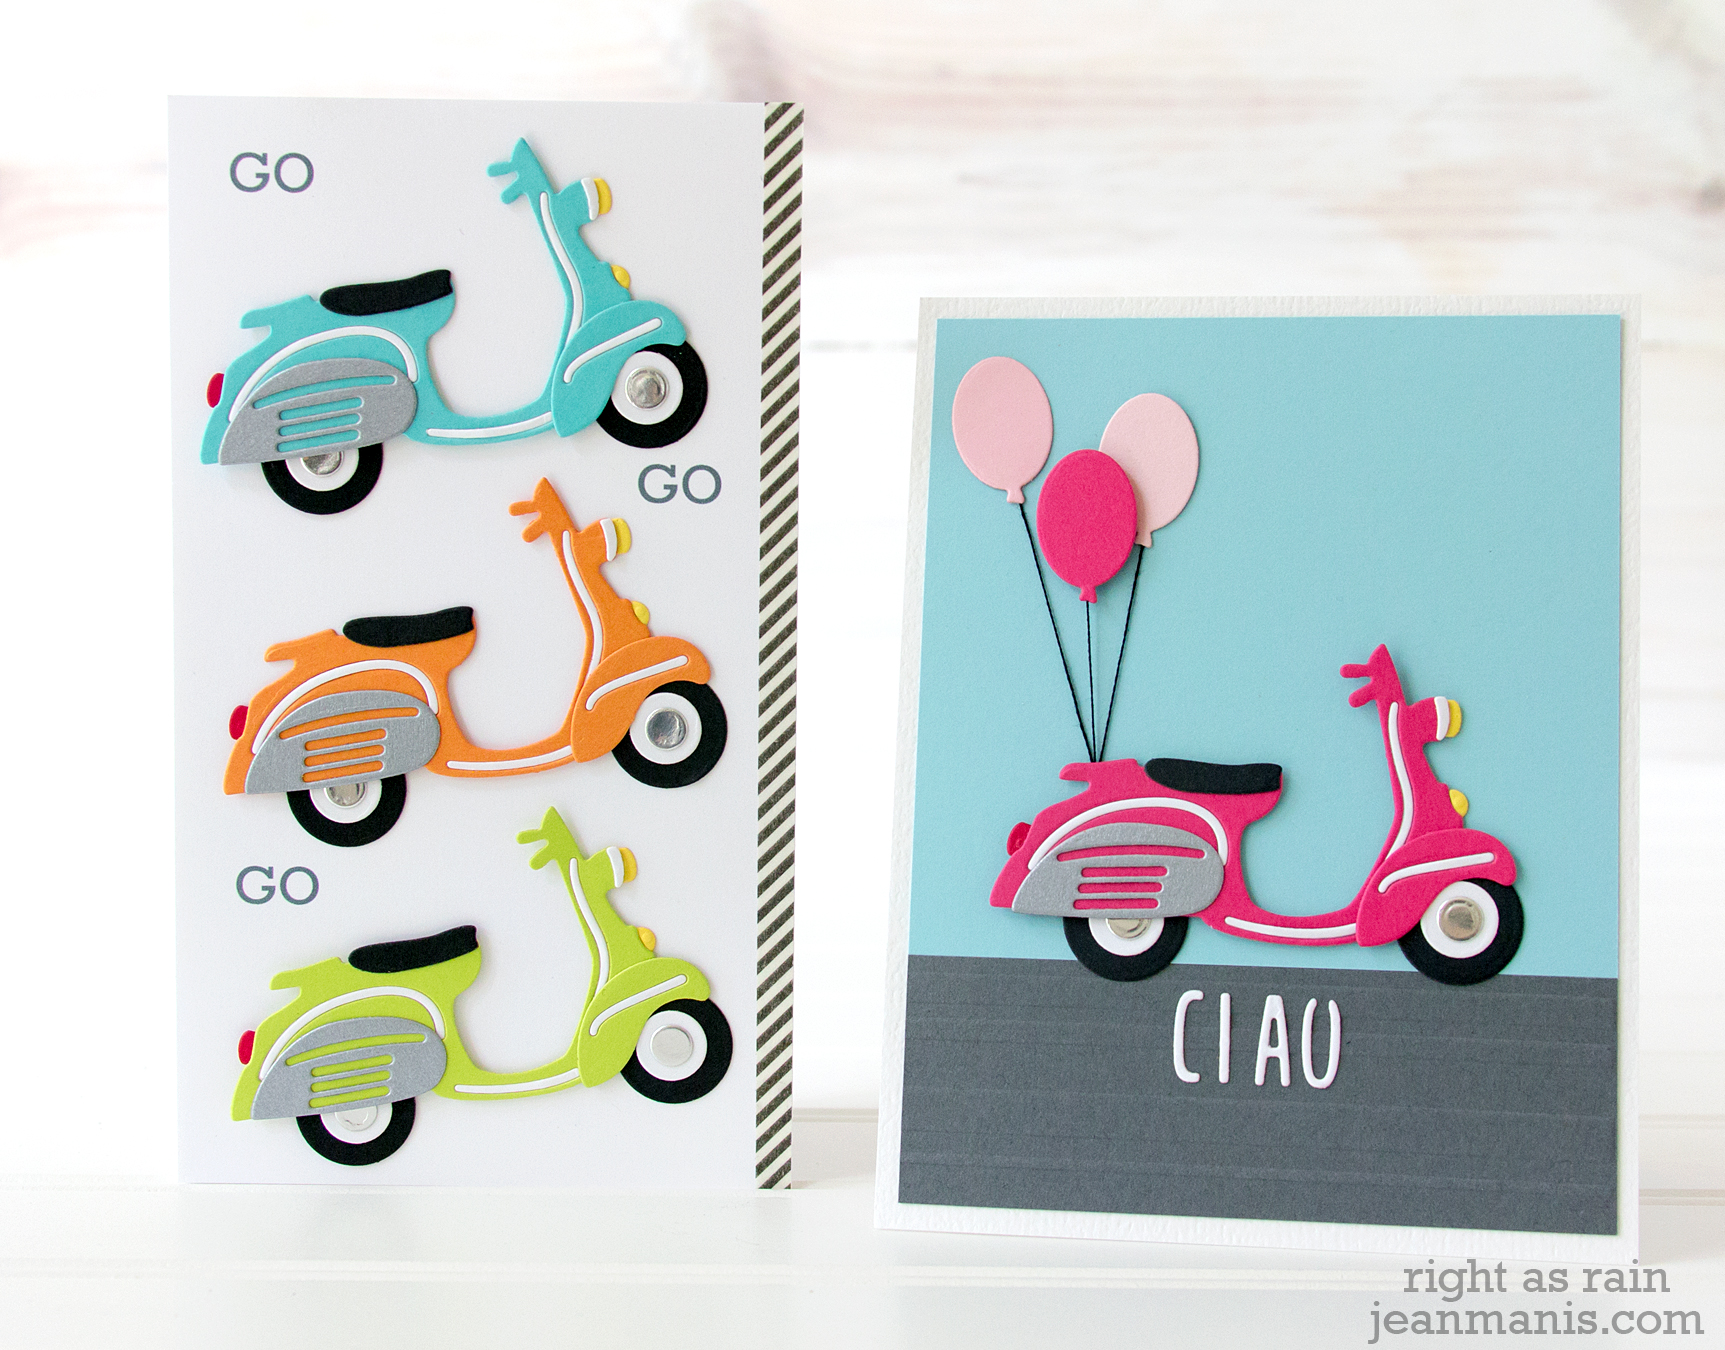
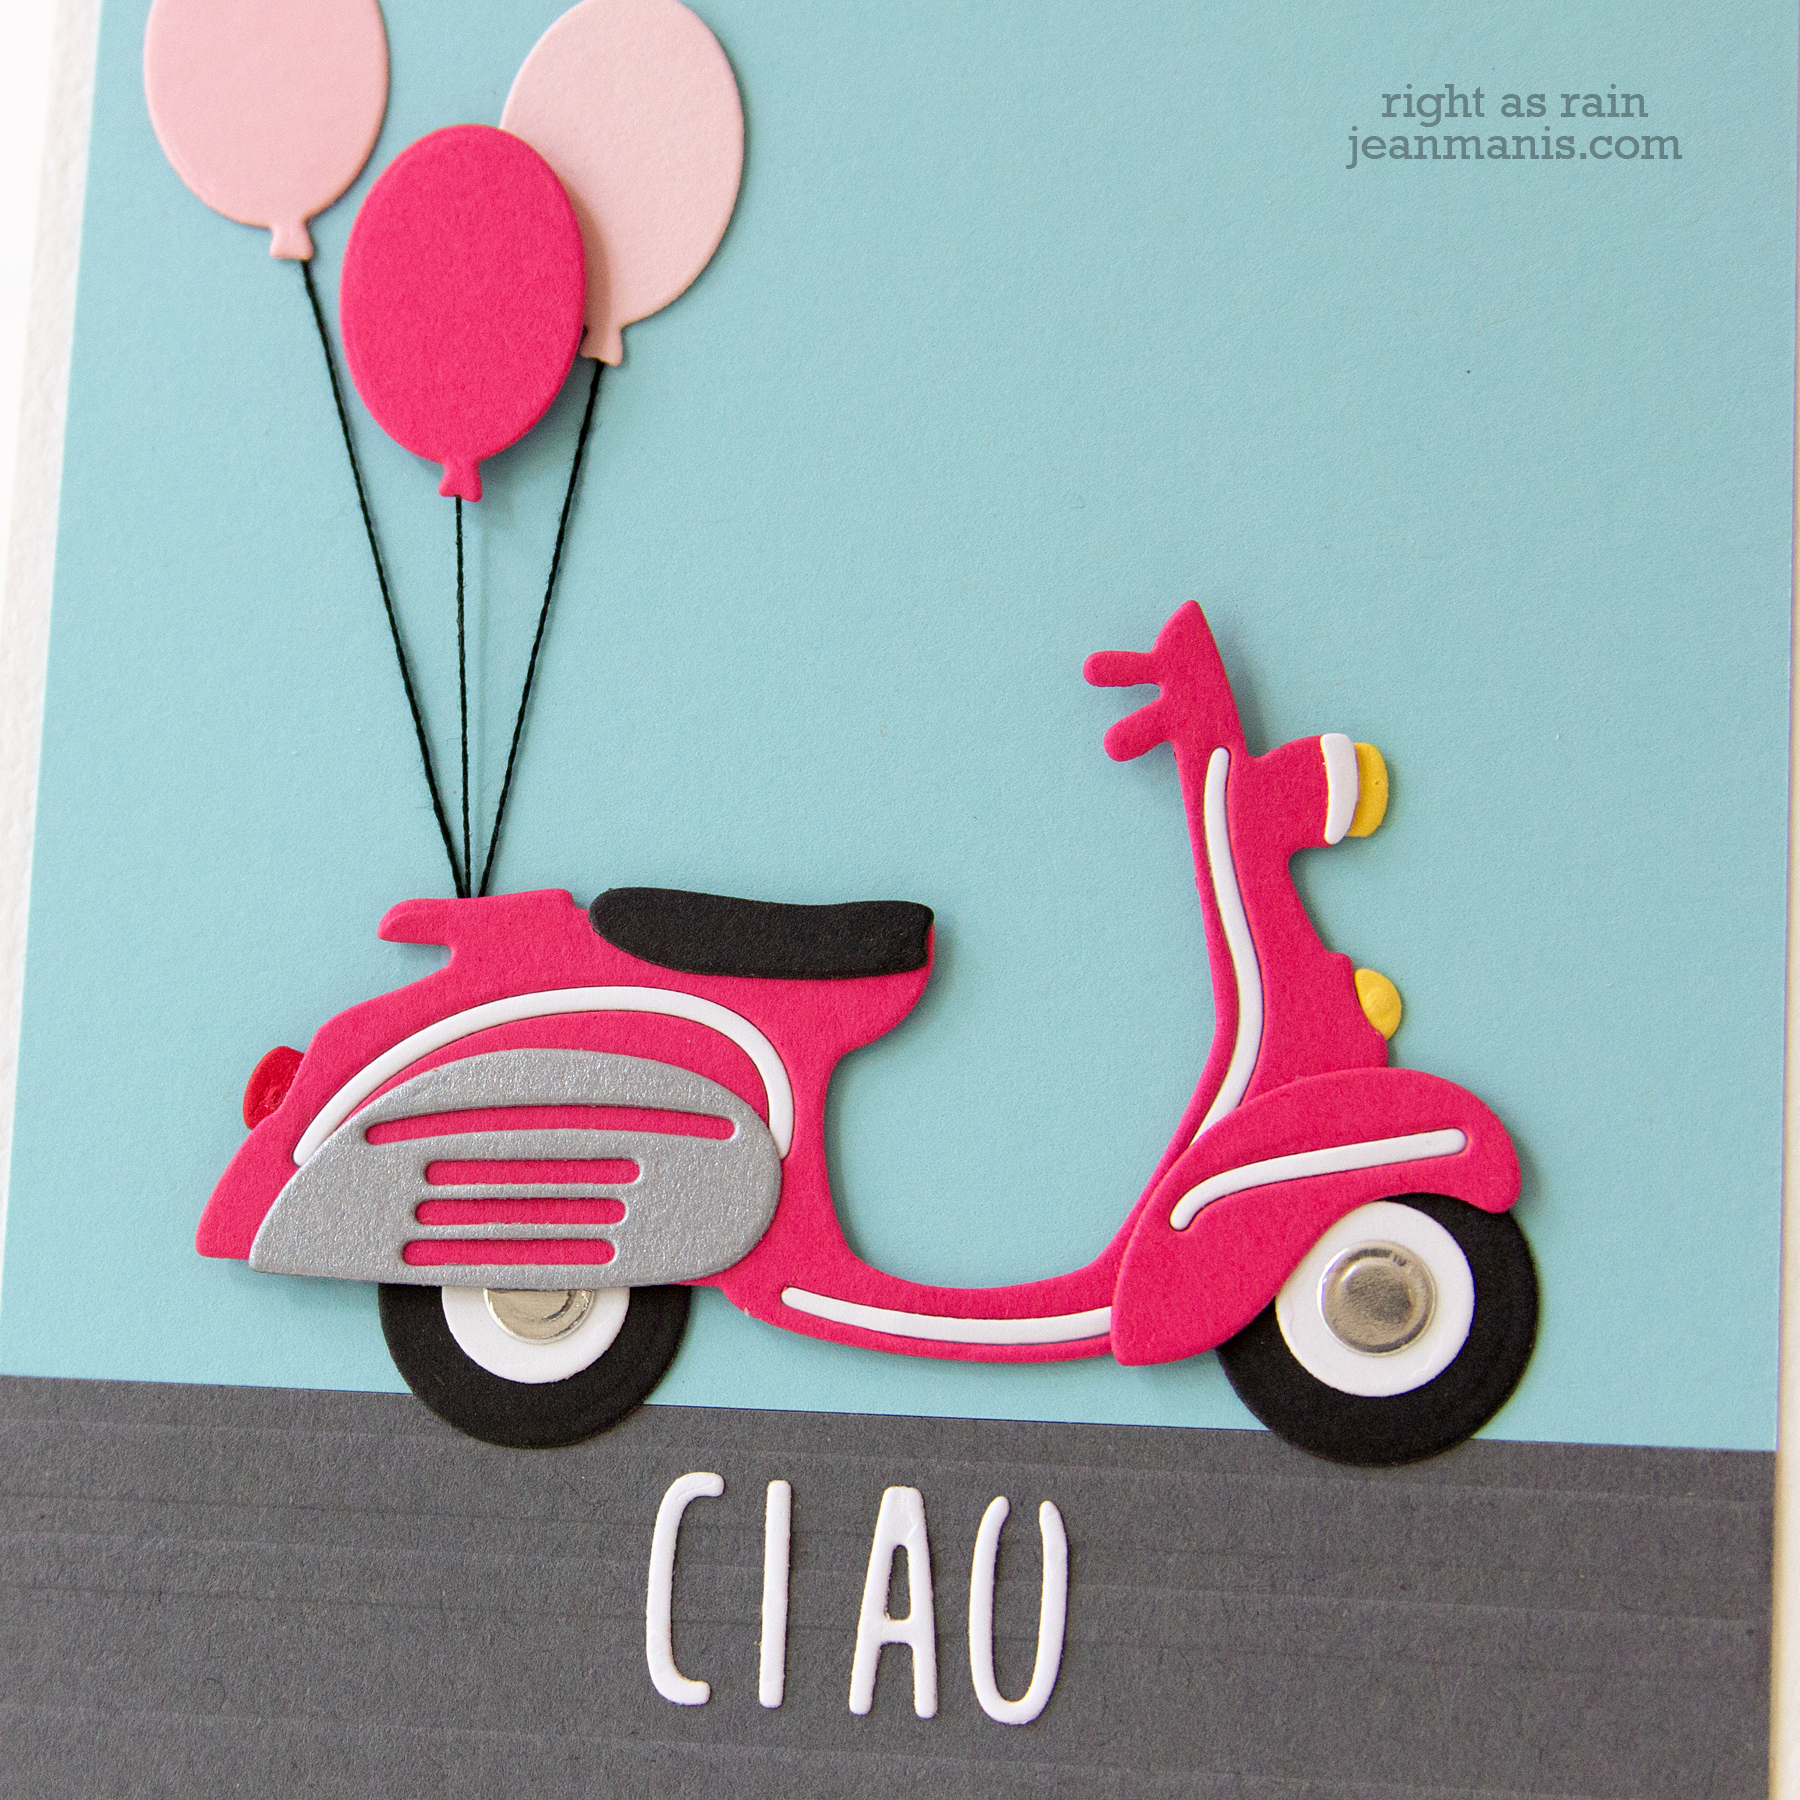
For my first card, I created a sky/road scene with a pink scooter using letters in the set for the “Ciao” sentiment and balloons (die in the set) tied to the back of the scooter.
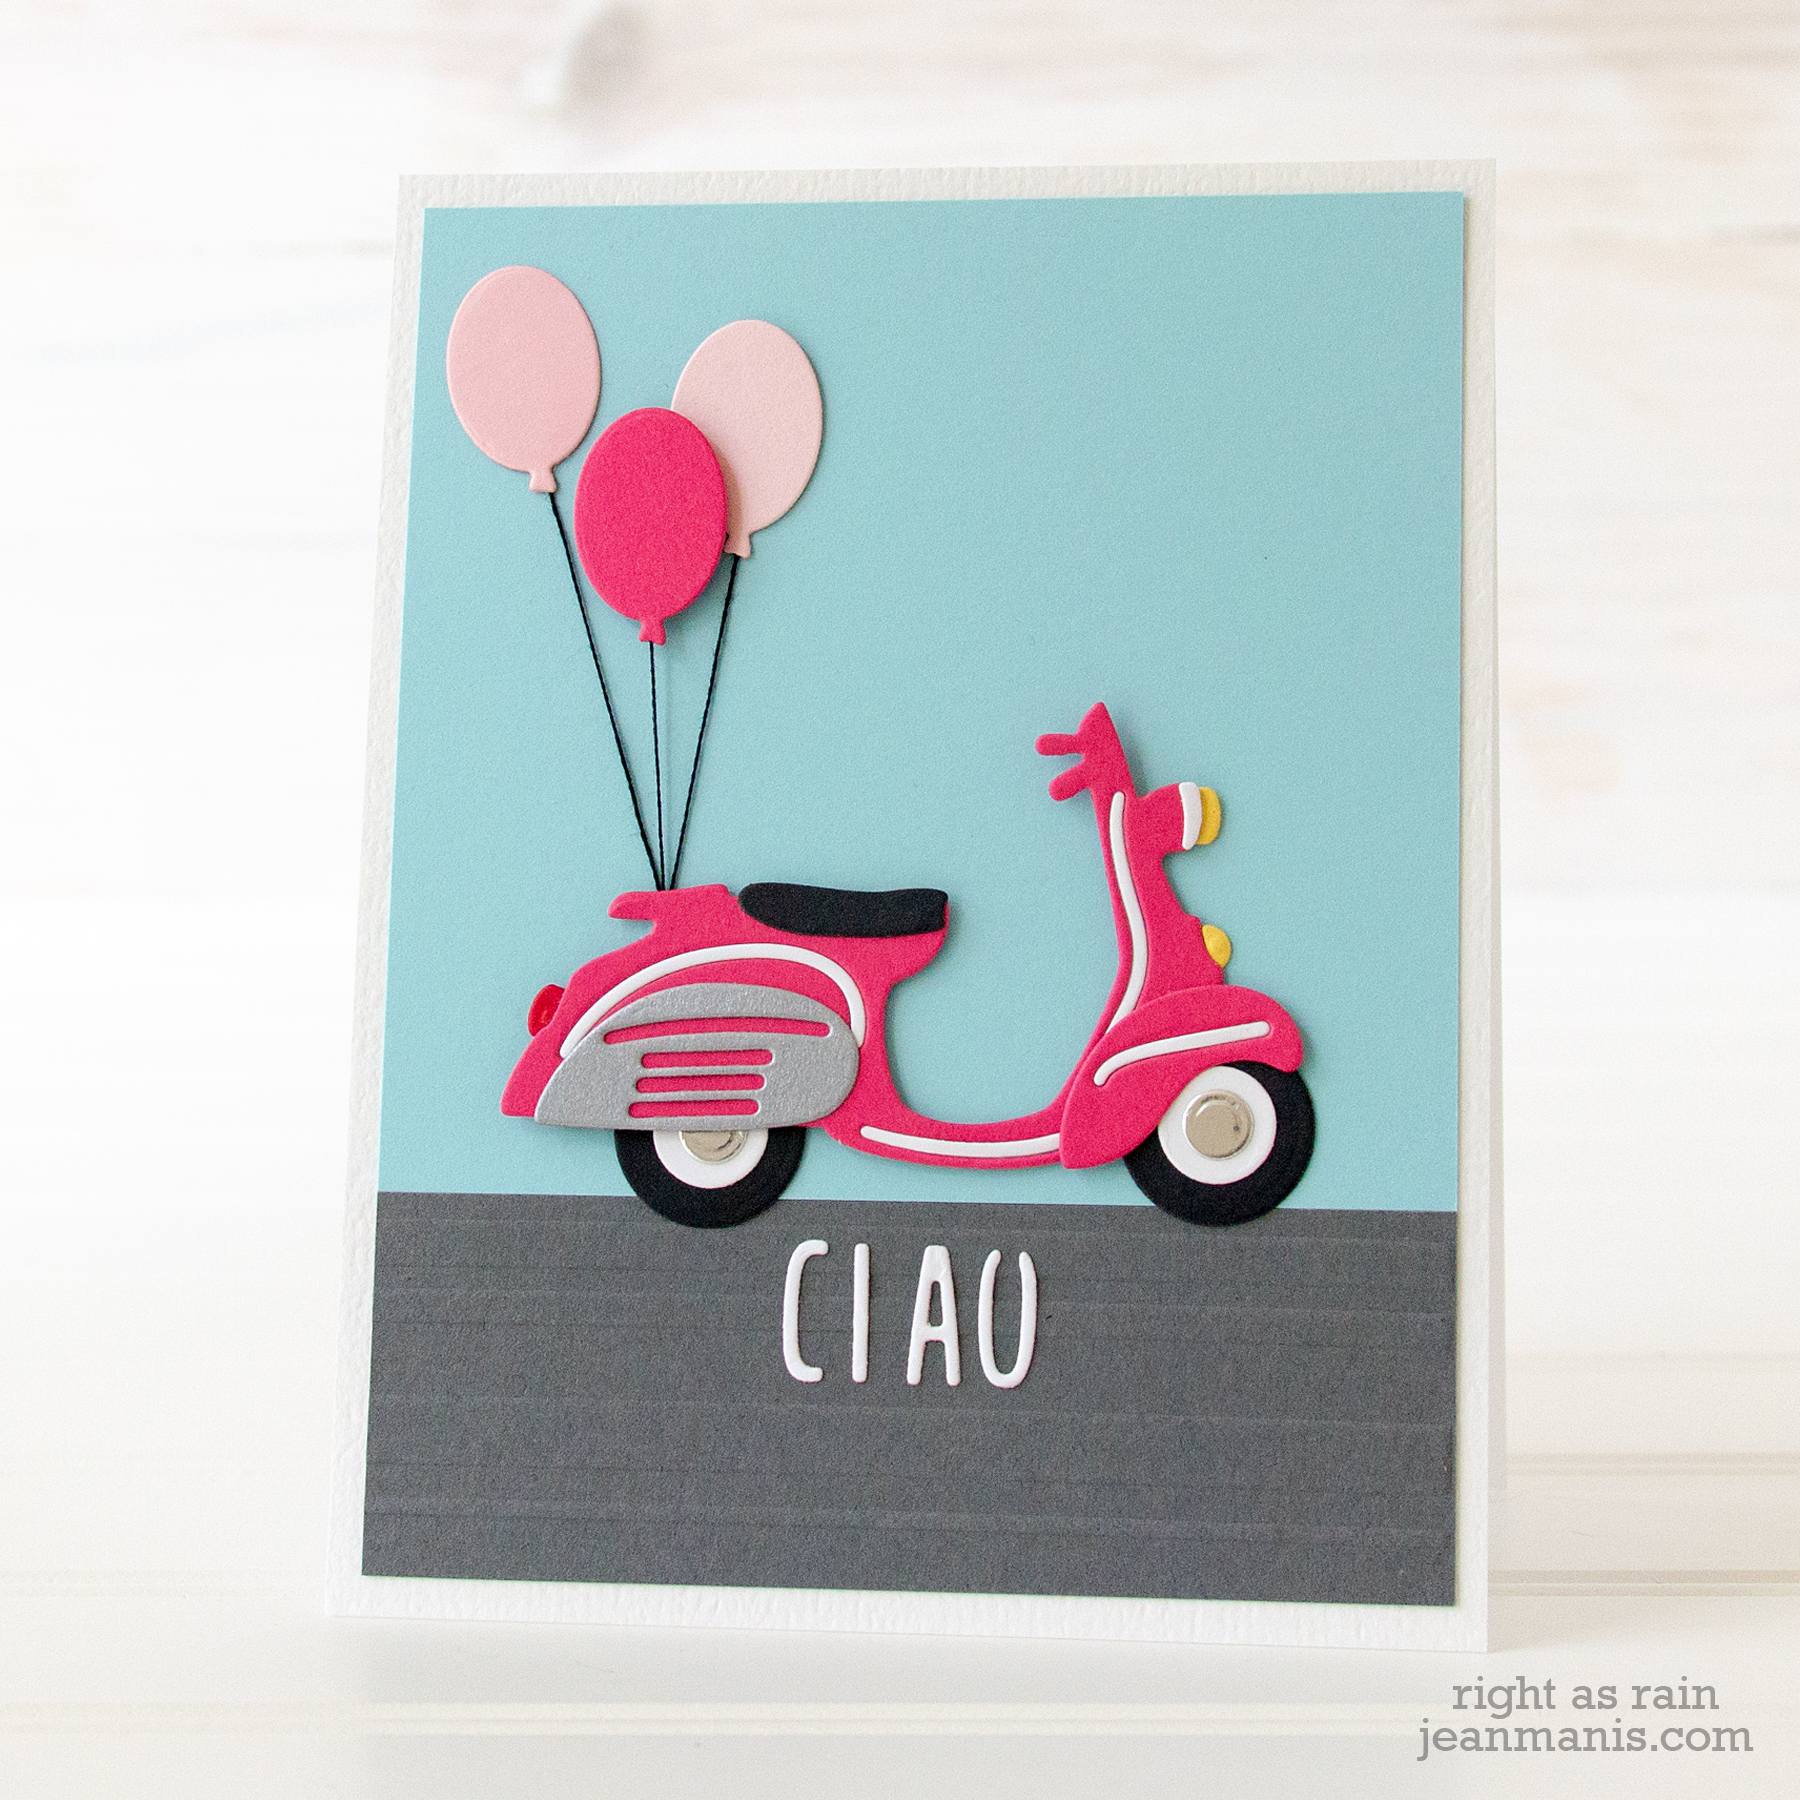
- I dry-embossed the roadway piece (gray cardstock) with the Beach Towel Embossing Folder.
- I cut the “Ciao” sentiment from white cardstock and adhered it to the roadway with liquid adhesive using the dry-embossing lines as a guide for the letters.
- I cut the scooter out and assembled it with liquid adhesive and tape.
- I added embroidery floss to the balloons, cut from several shades of pink, and attached them to the sky background with dot and foam adhesive. I taped the strings to the sky background making sure that they would be covered by the back of the scooter. I attached the scooter to the scene with dot adhesive.
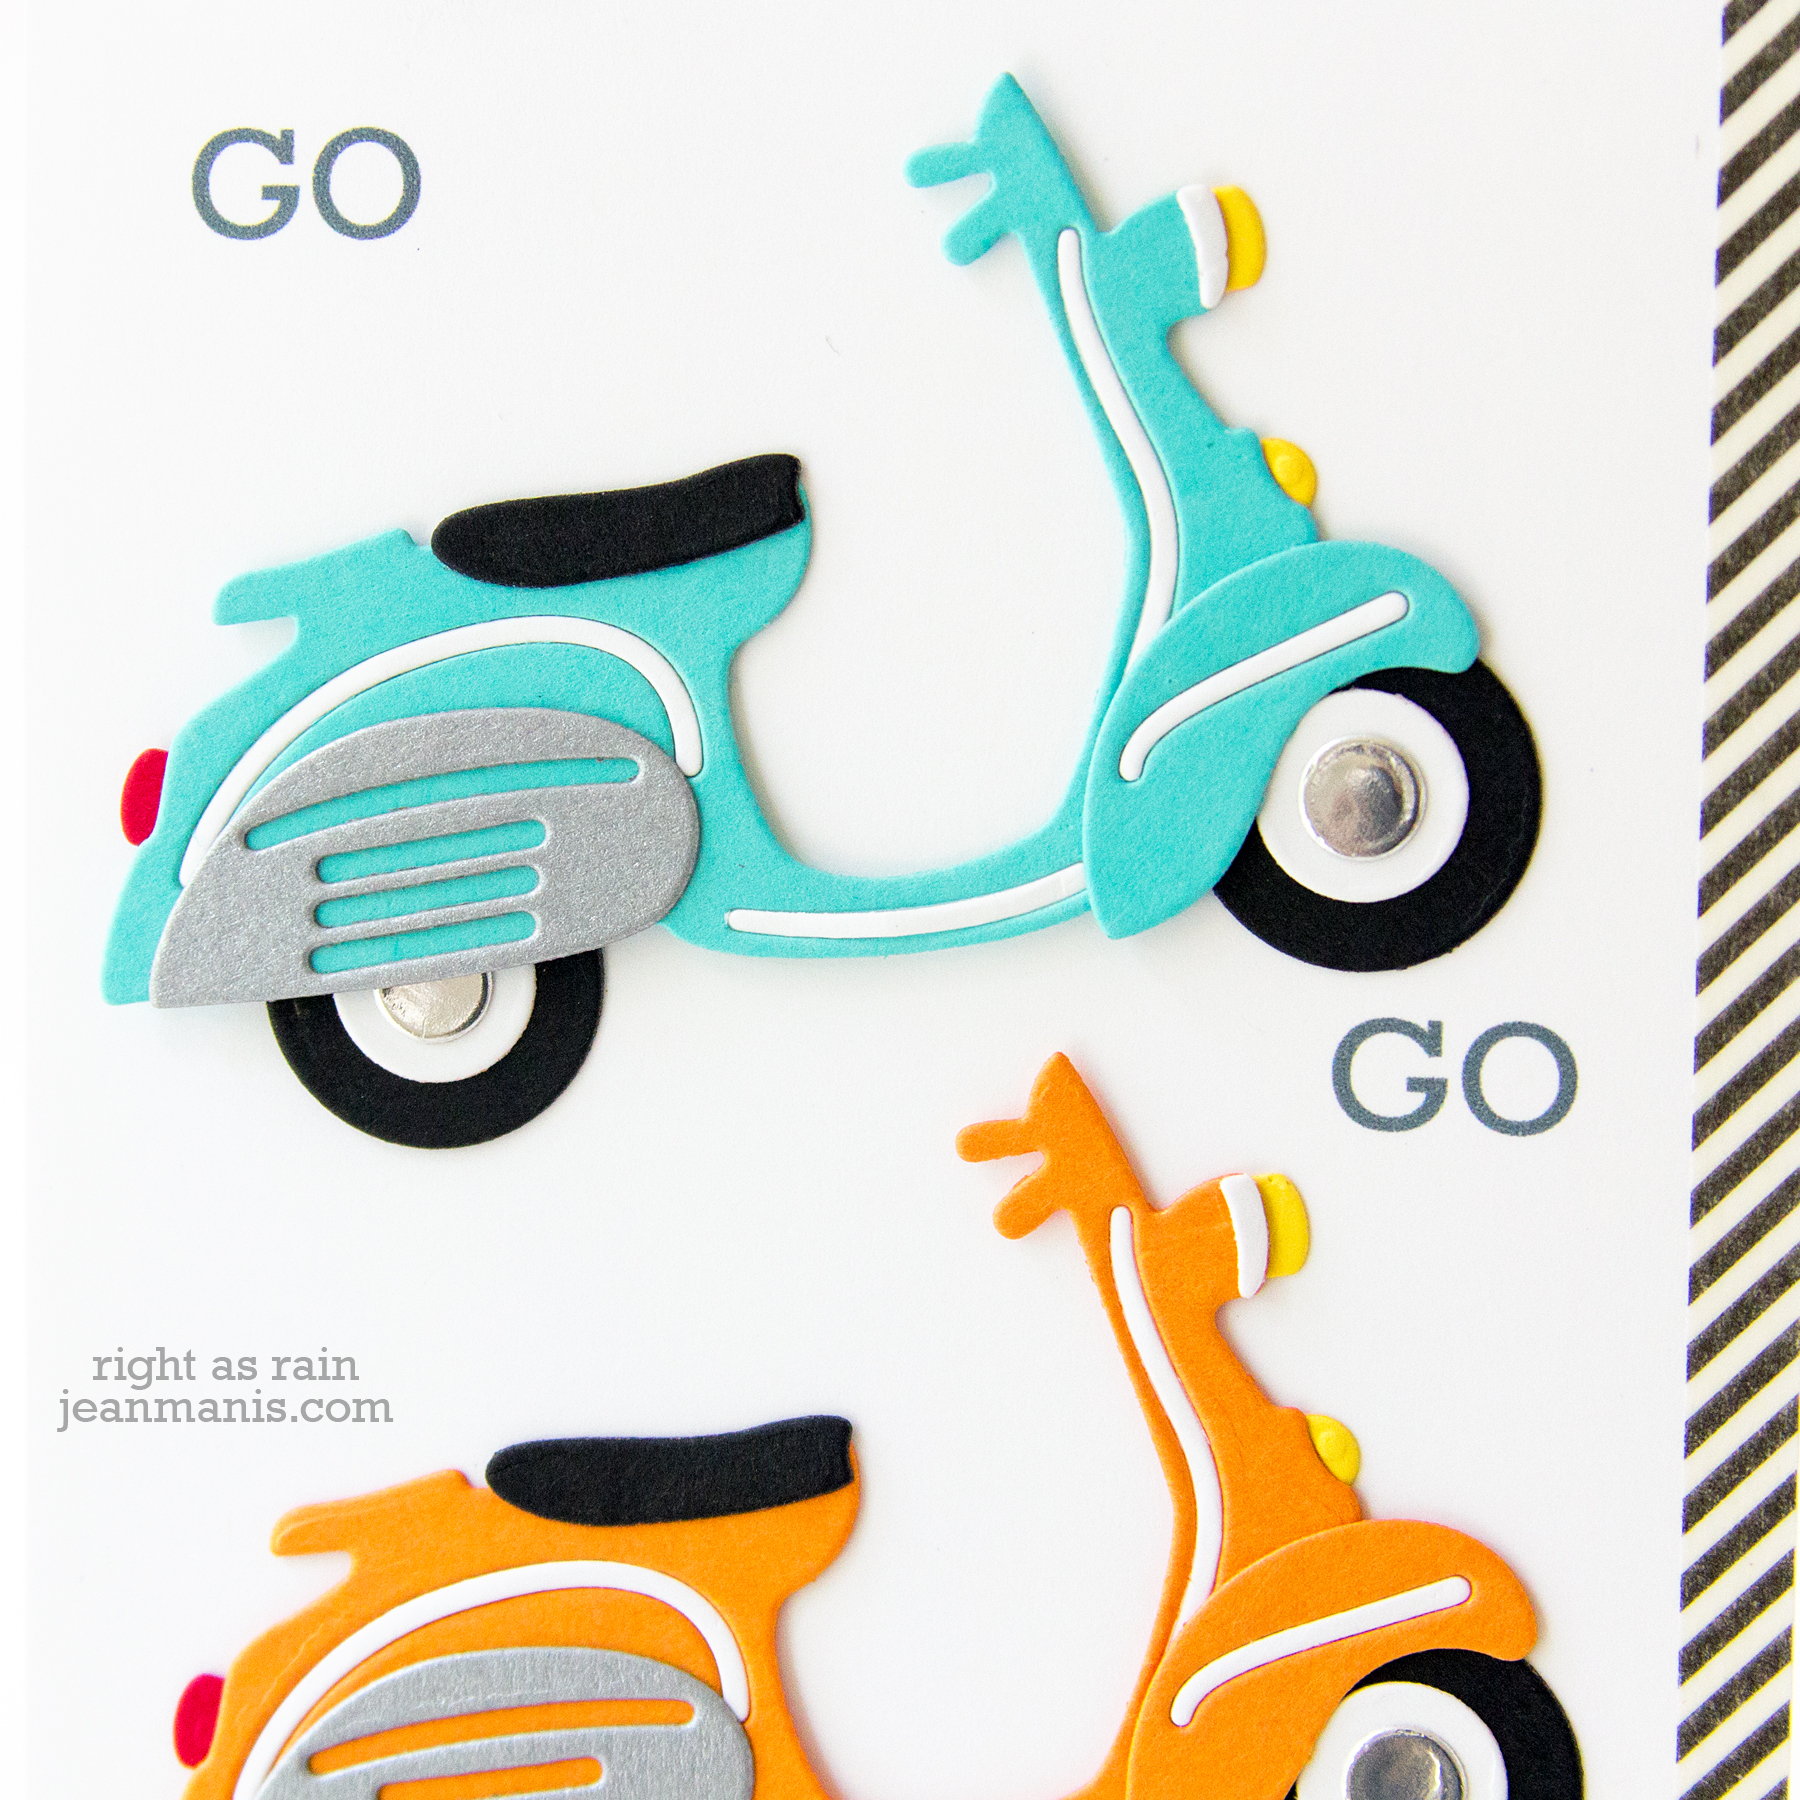
I love using color and repetition on card designs, so for my second project, which measures 6 1/2″ x 3 3/4″, I created three scooters in bright colors.
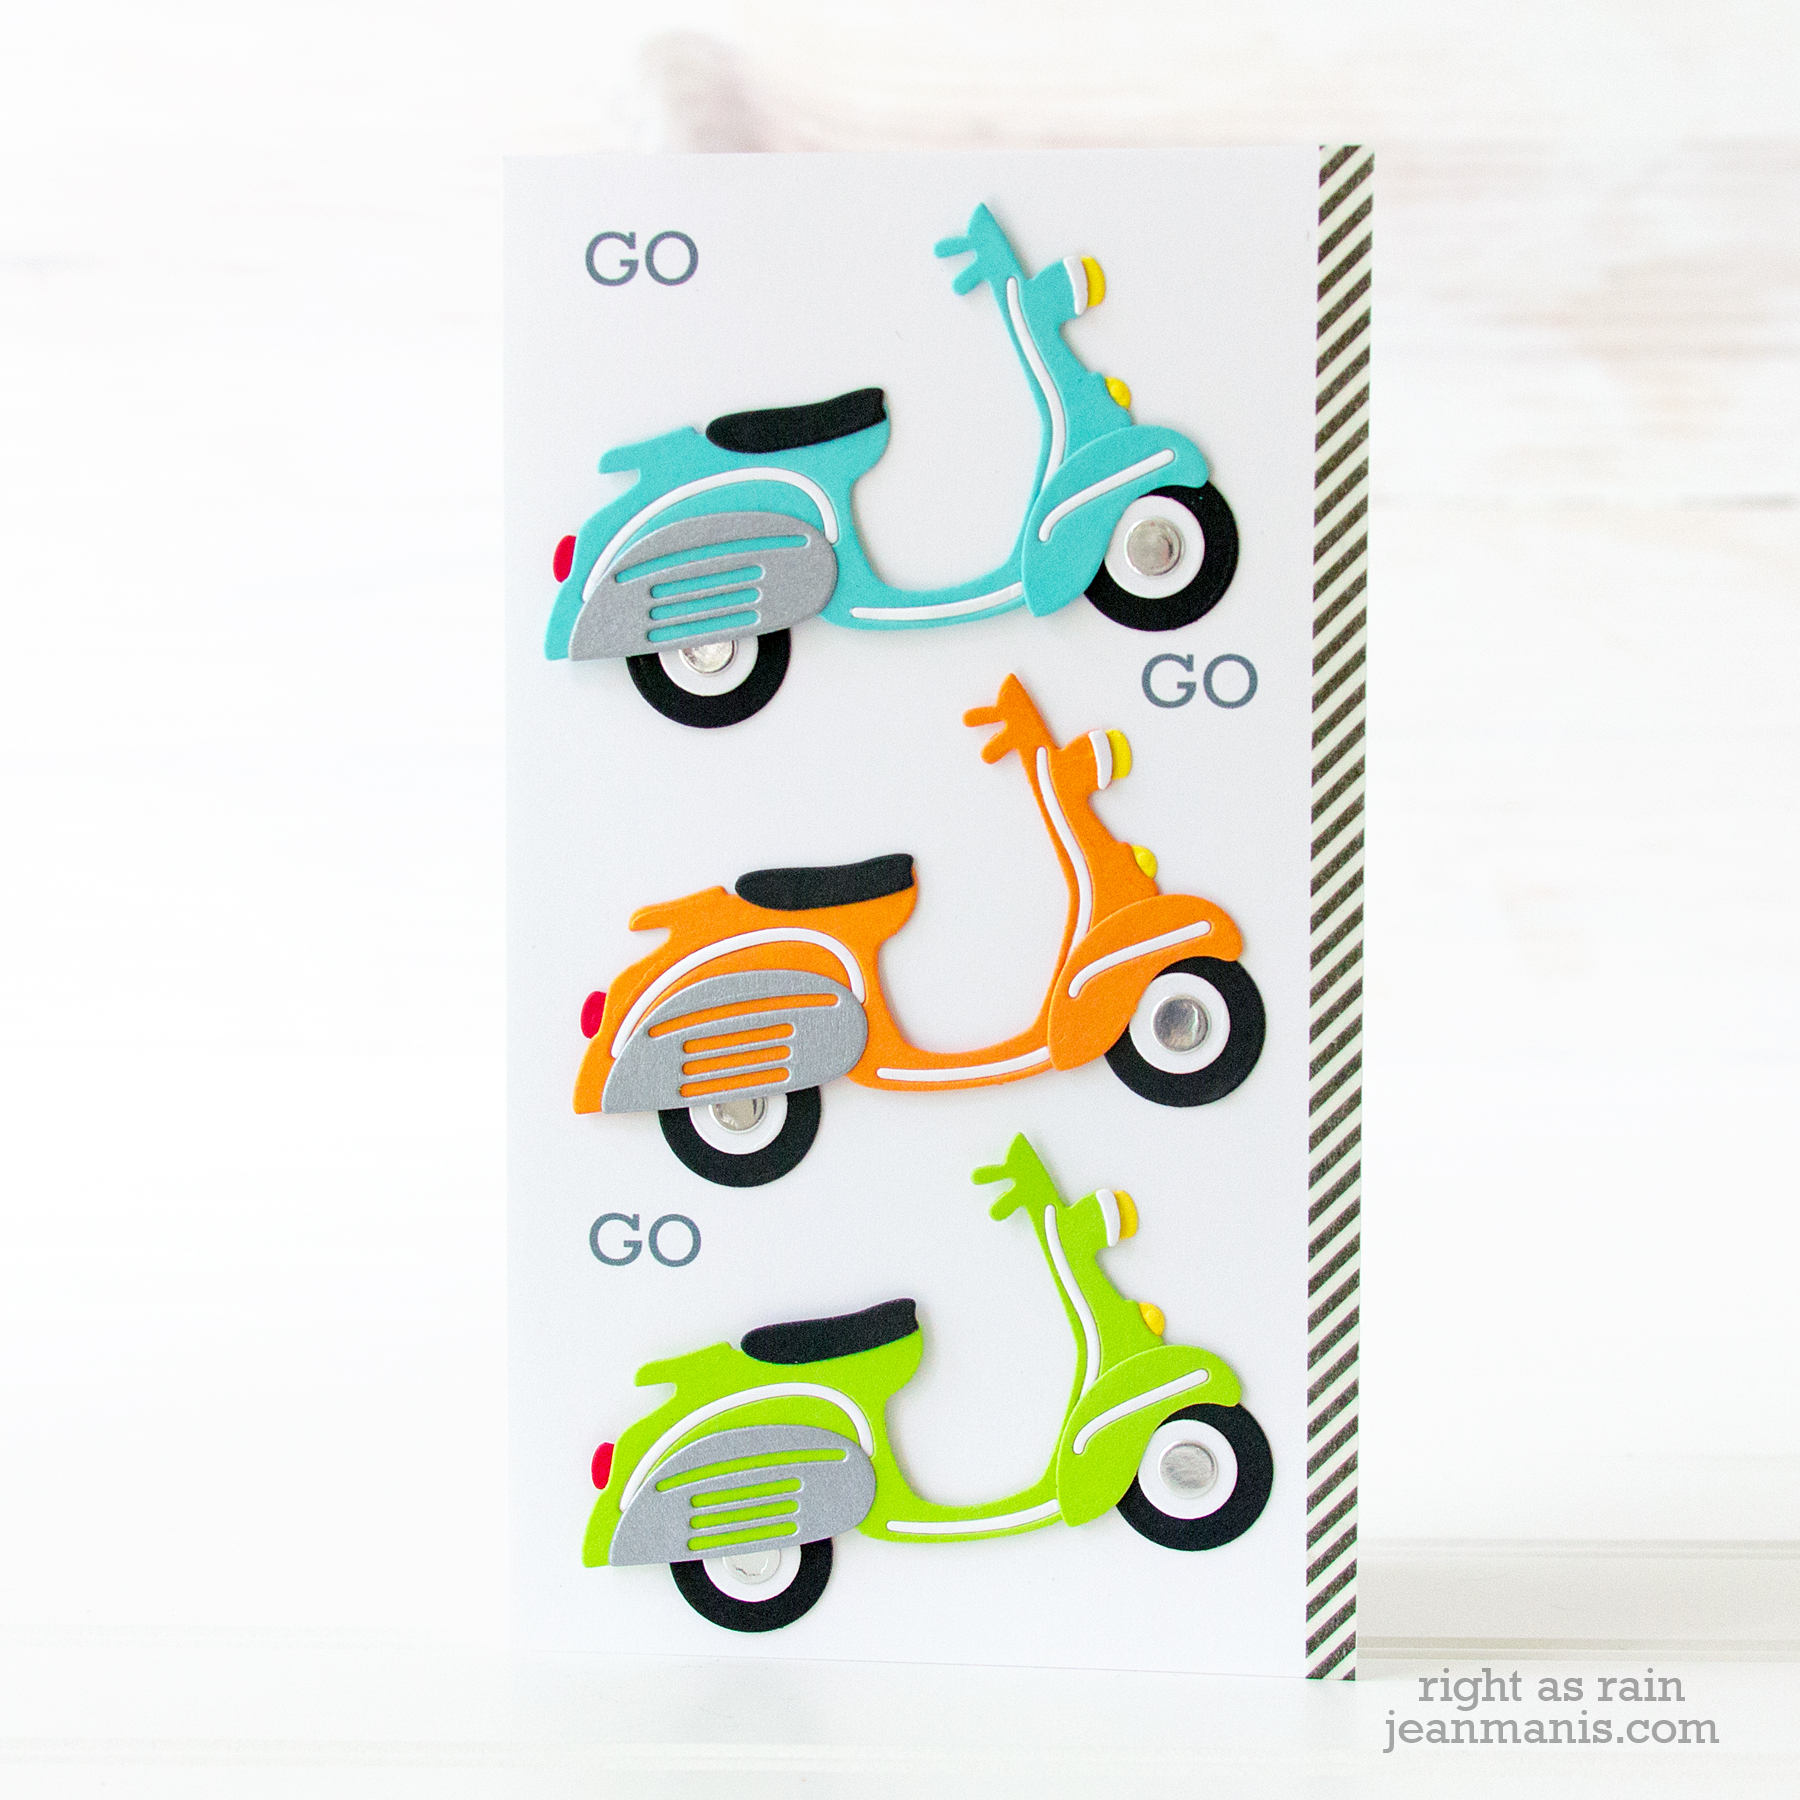
- I created the Go sentiments on my computer and printed them on white cardstock.
- I cut and assembled the scooters from brightly colored cardstock.
- I added a strip of washi paper to the right side of the card base to emphasize the road/transportation theme.
- I adhered the scooters to the scene with dot adhesive.
Thanks for stopping by! Vroom!


 Supplies: