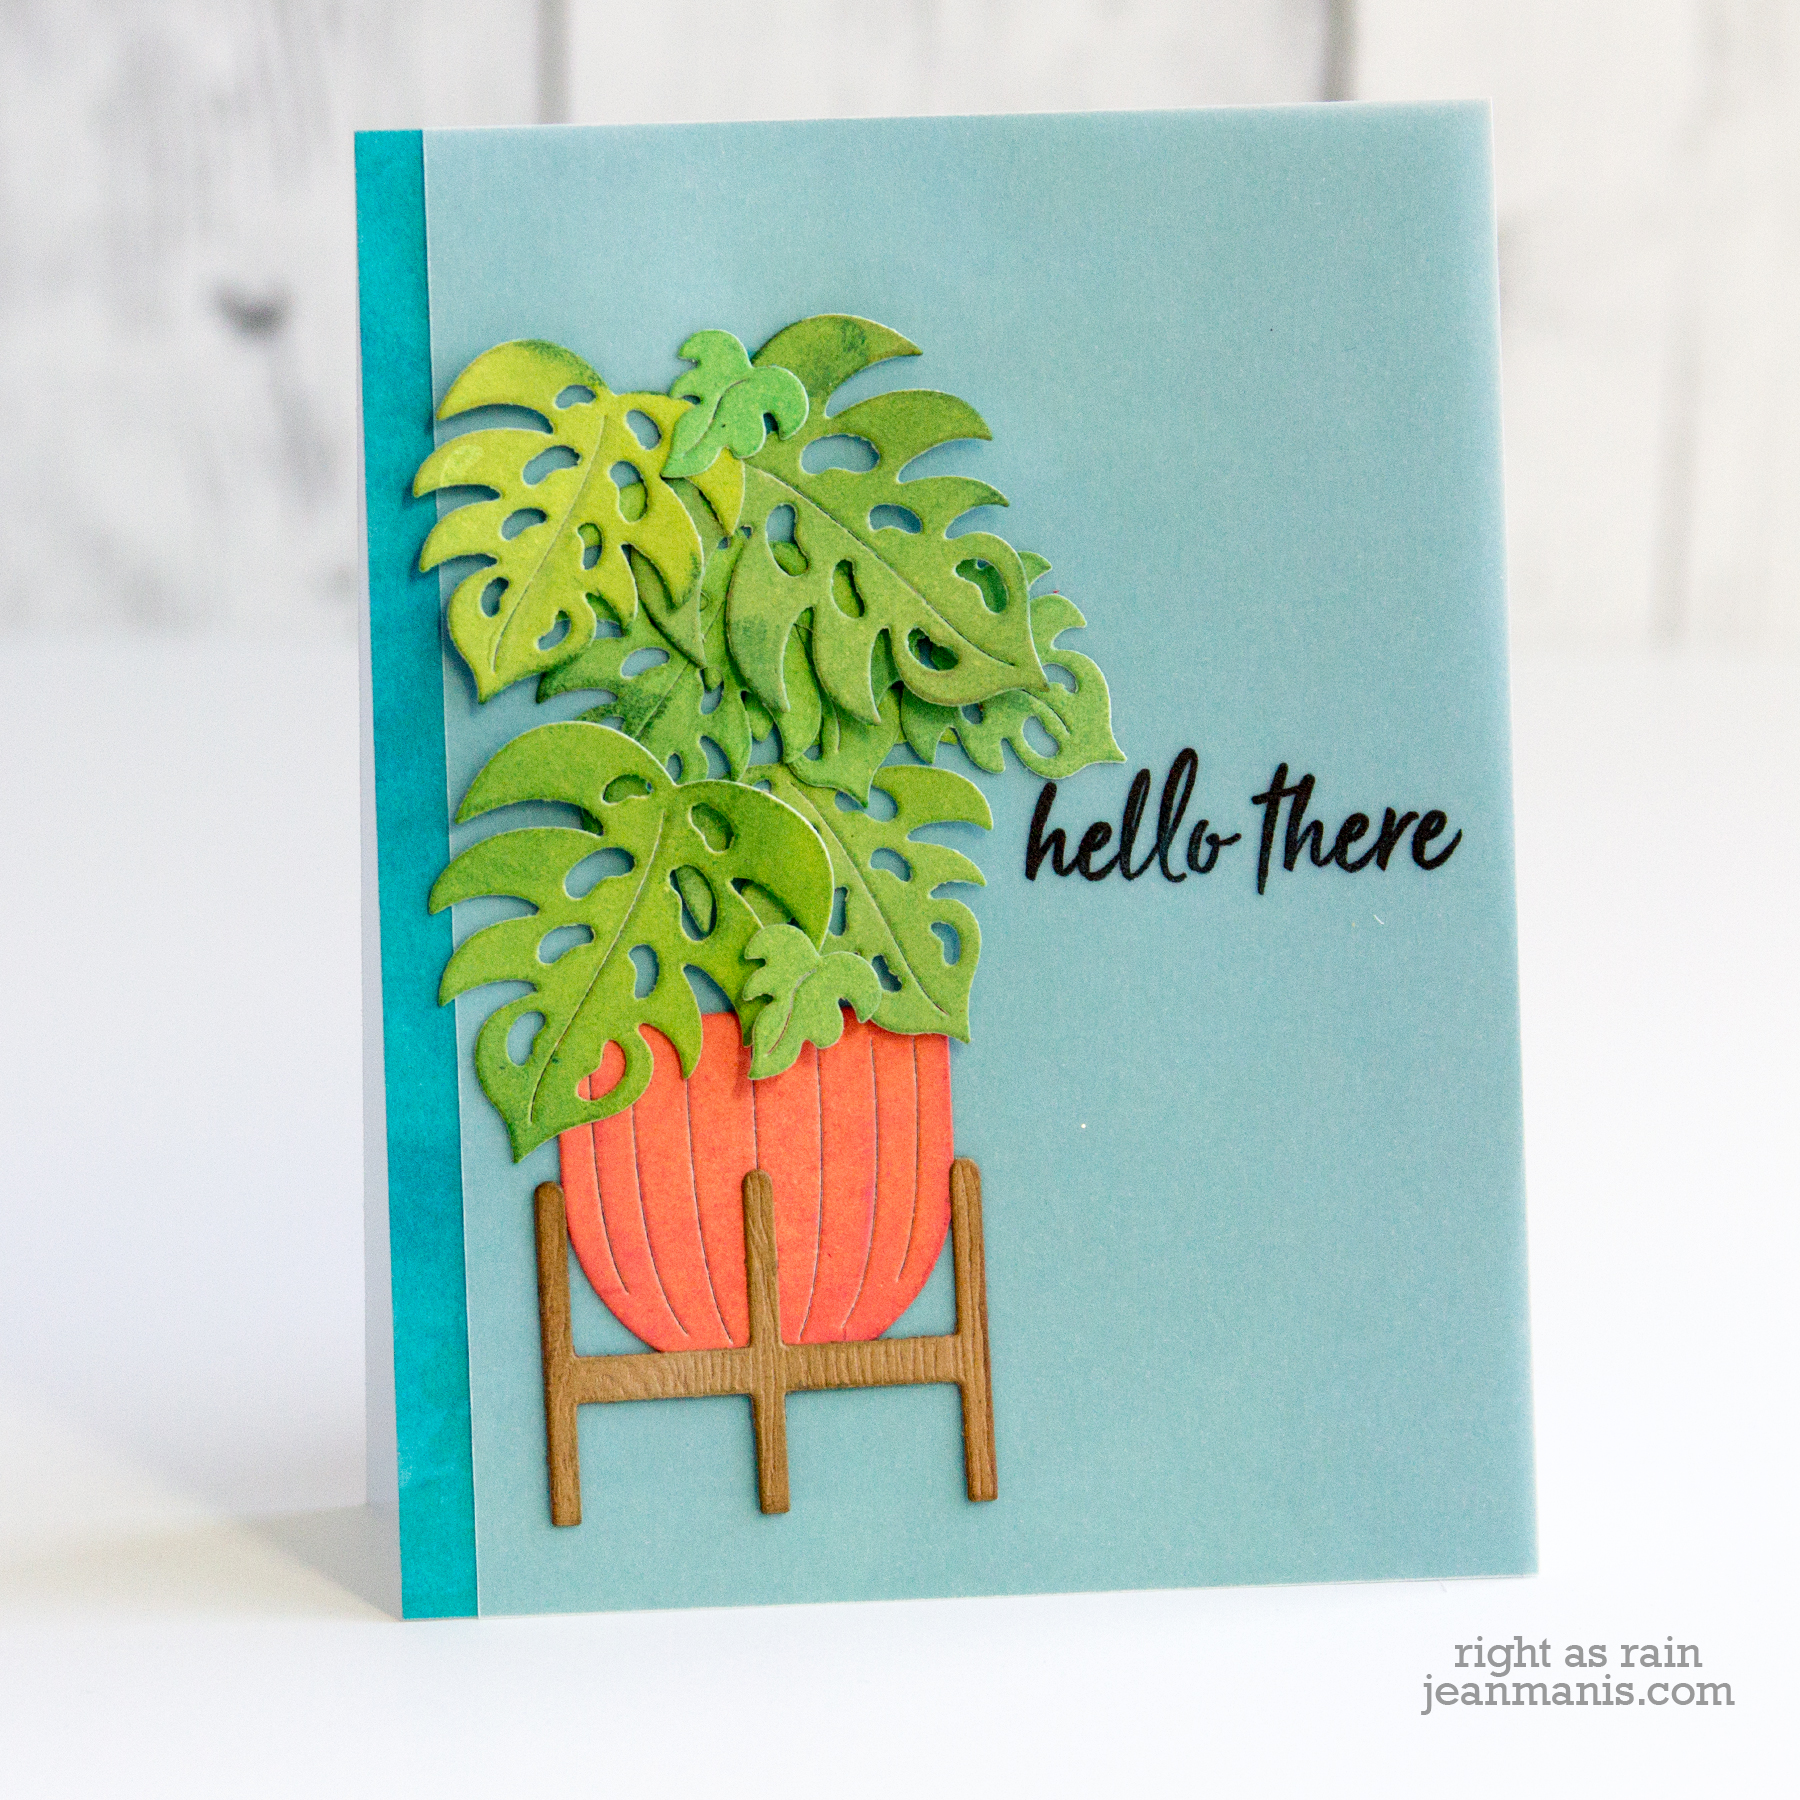
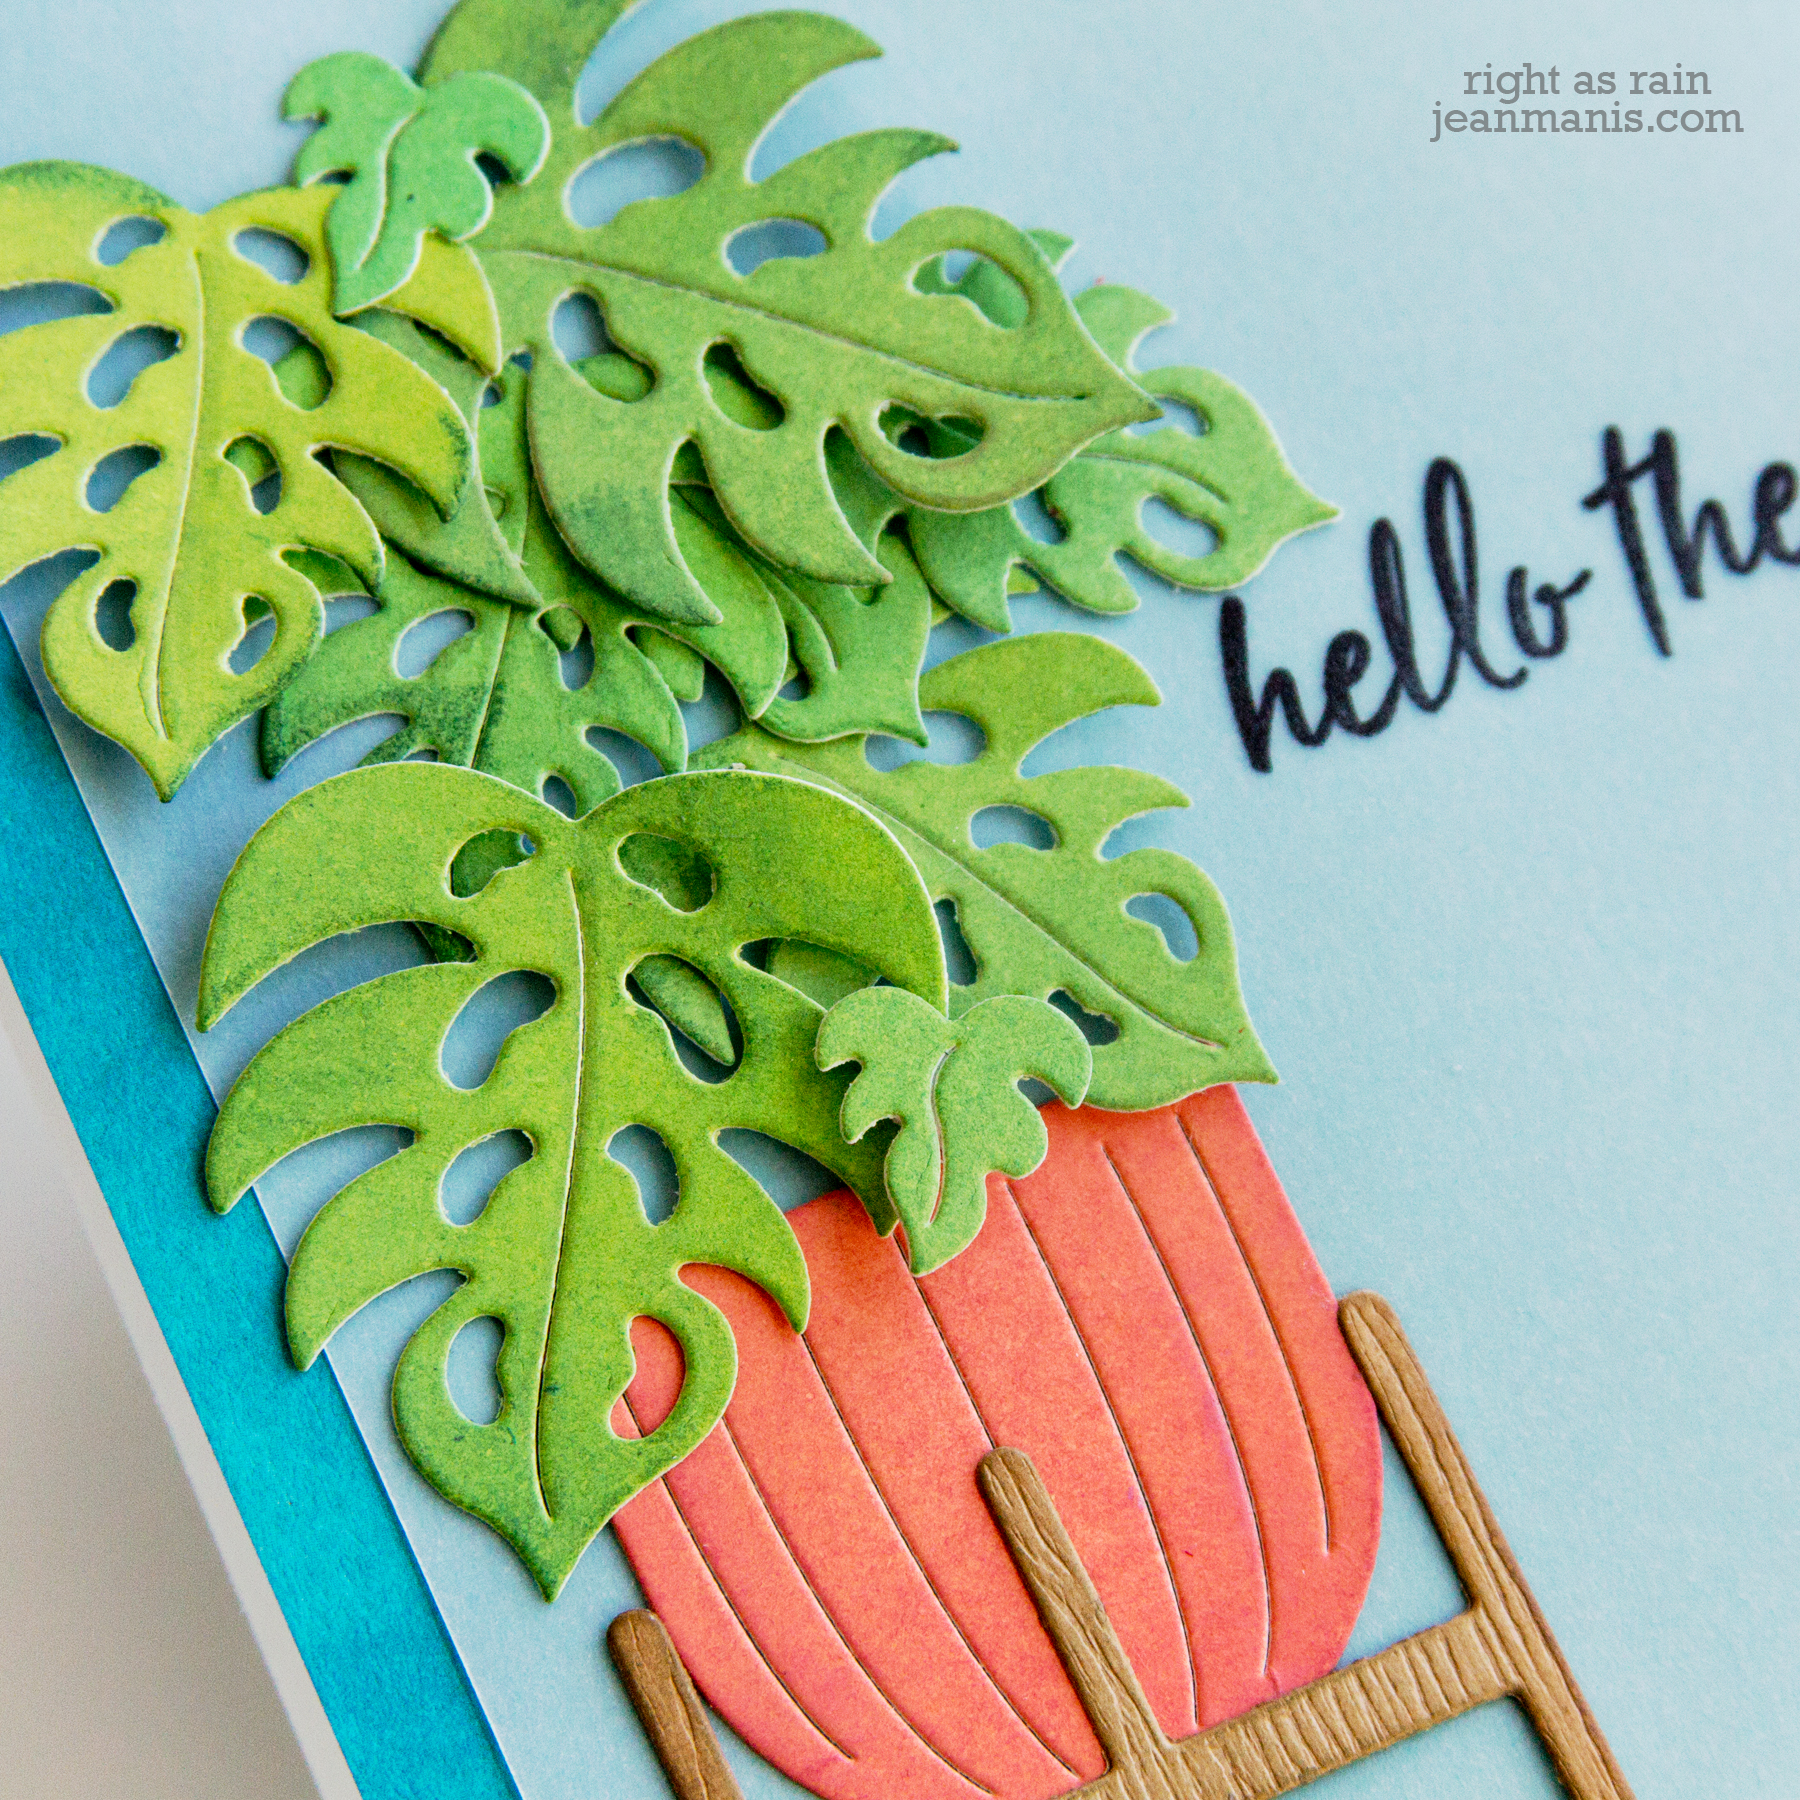
Hello! Today, I am sharing a CAS mixed-media card created with Tim Holtz supplies including a die set, embossing folder, and stamp set.
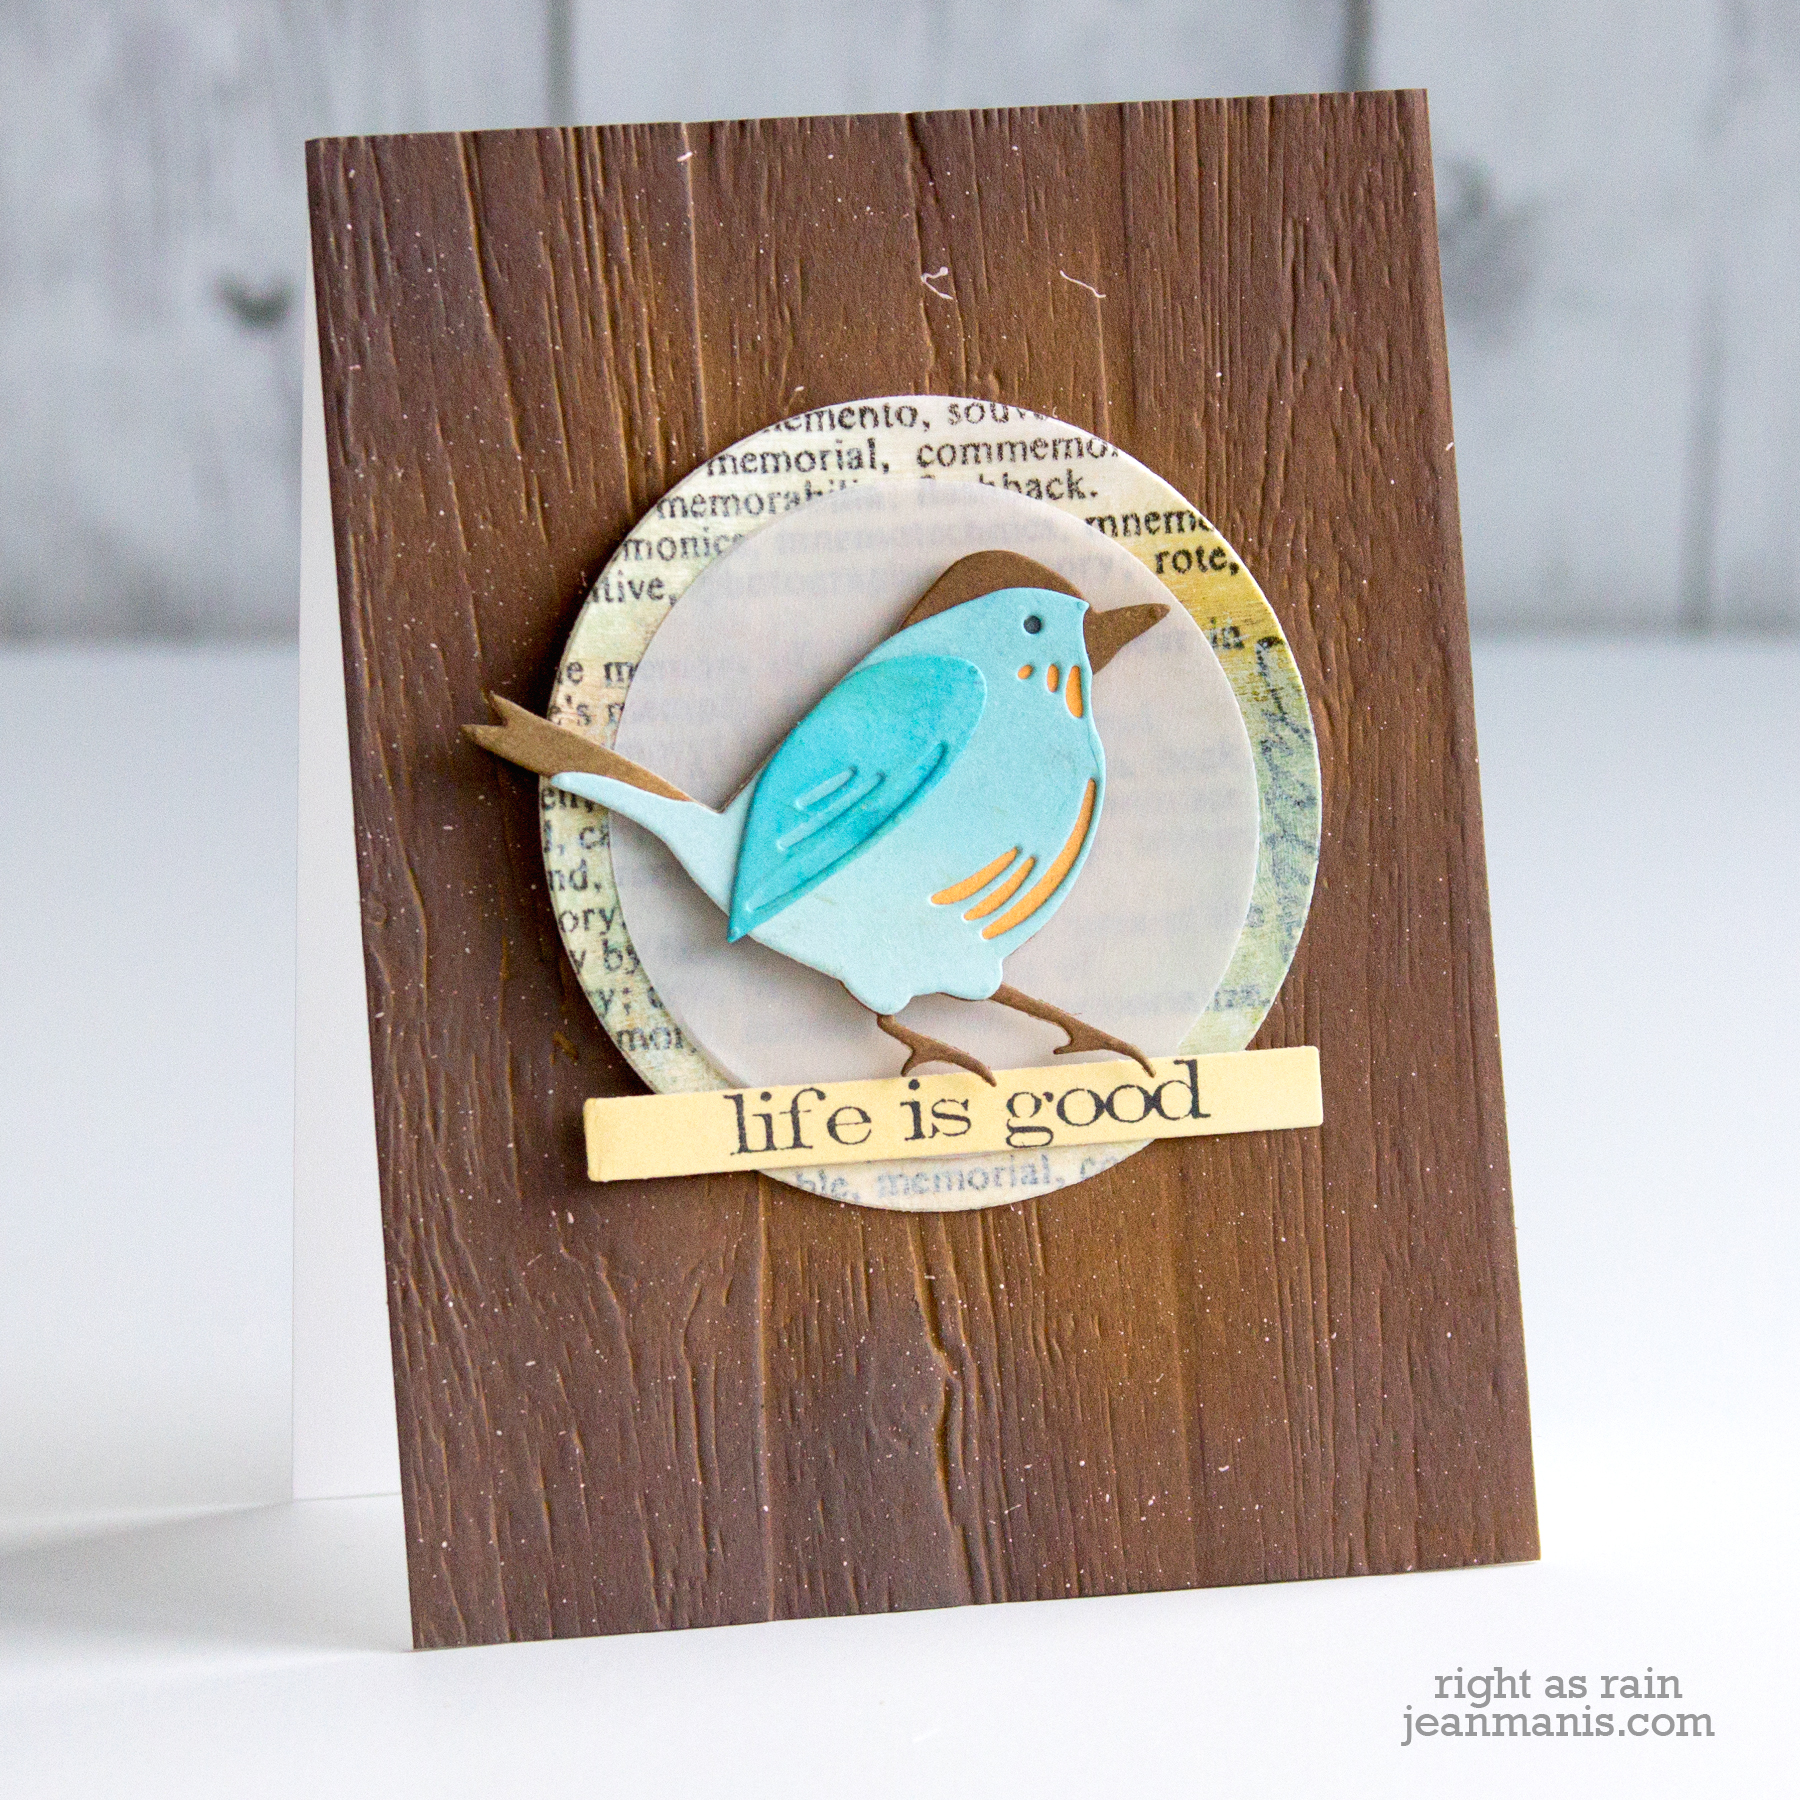
- I cut the Feathered Friends bird from Bristol, which I colored before cutting with Distress Oxide inks. I also added color to the pieces after I cut them.
- I matted the bird with a vellum circle and a circle cut from a panel, which I collaged with collage paper and added Distress Crayons.
- I stamped the Simple Sayings sentiment on to cardstock colored with Distress Oxide ink and cut it with a banner die.
- I dry-embossed the background with the Lumber folder and added inks to the panel, as well some Picket Fence paint.