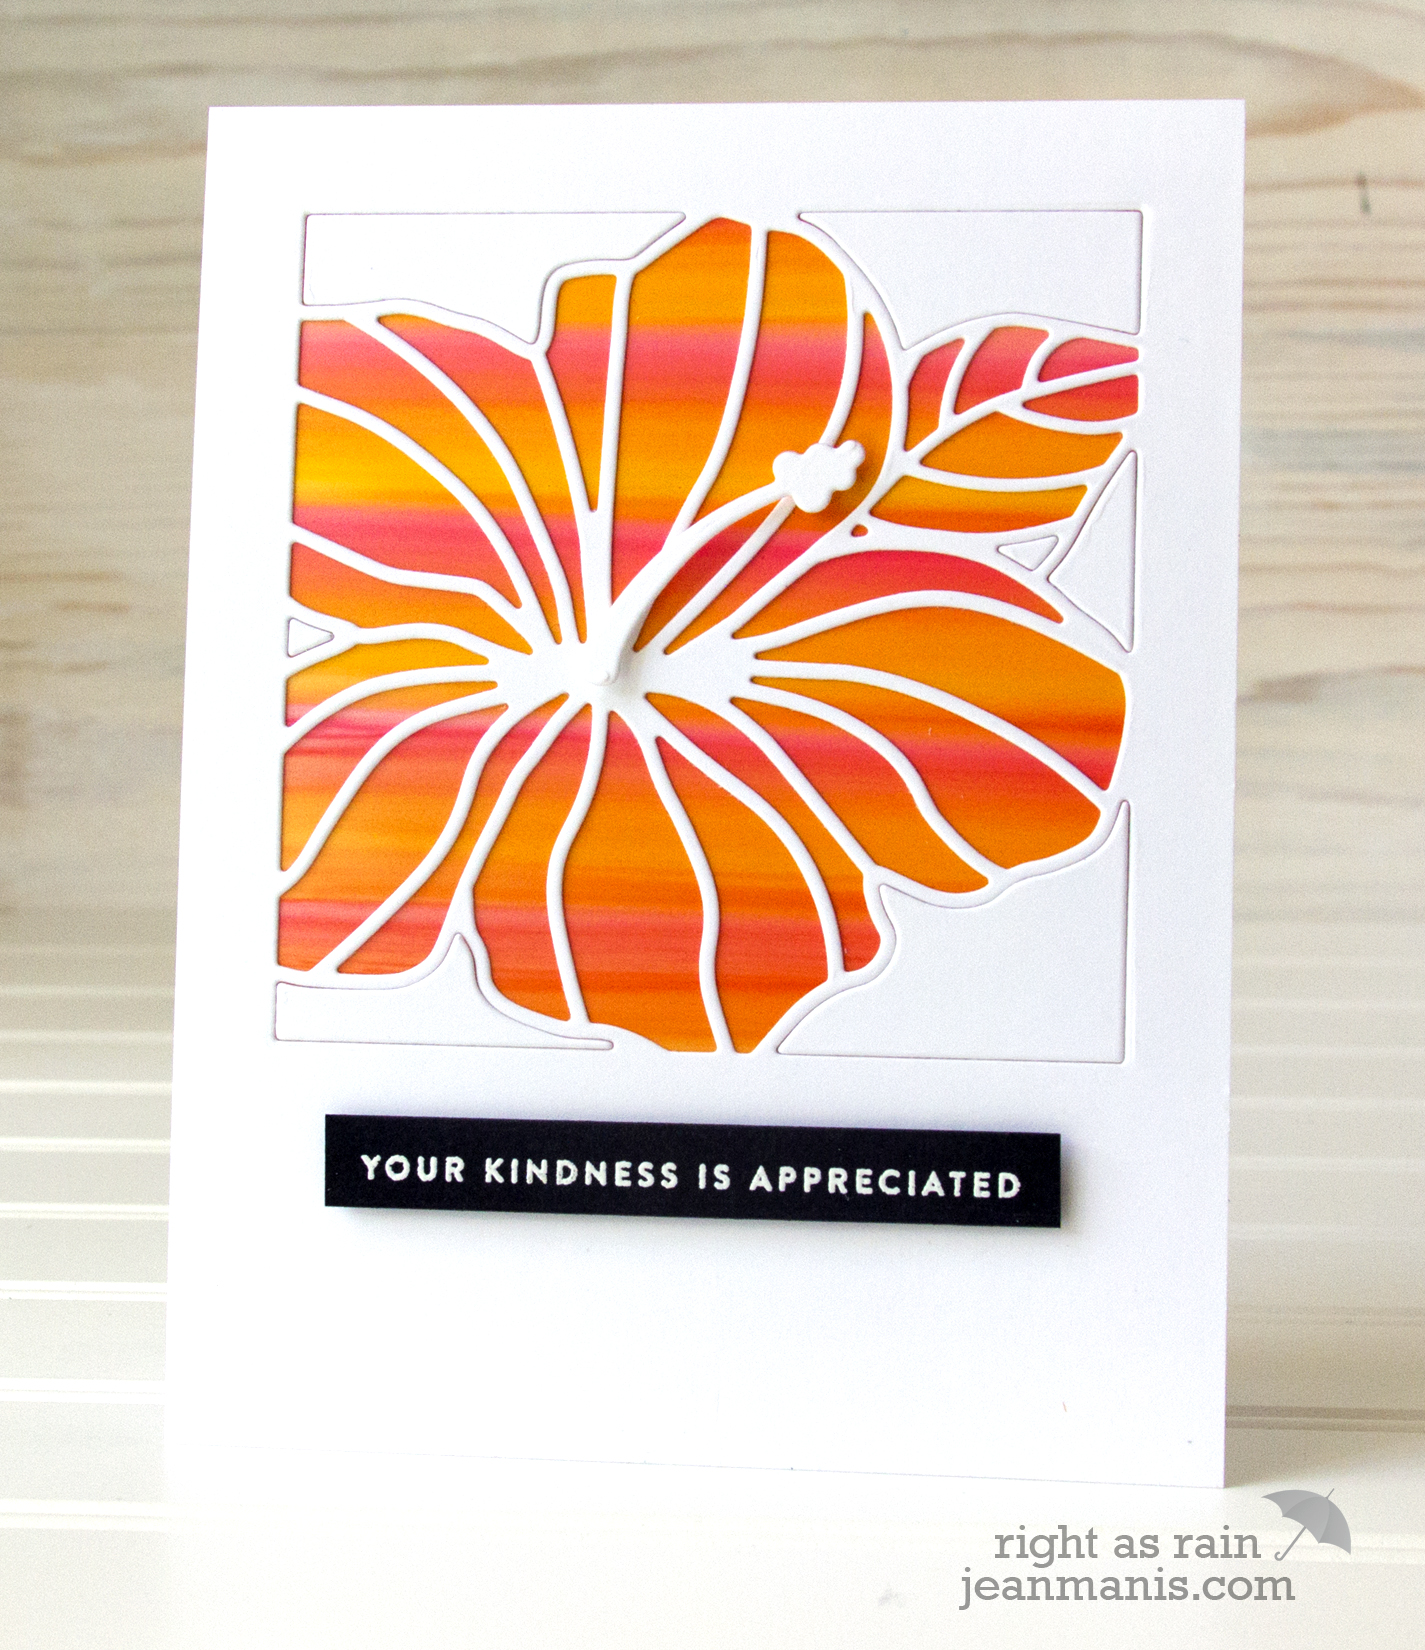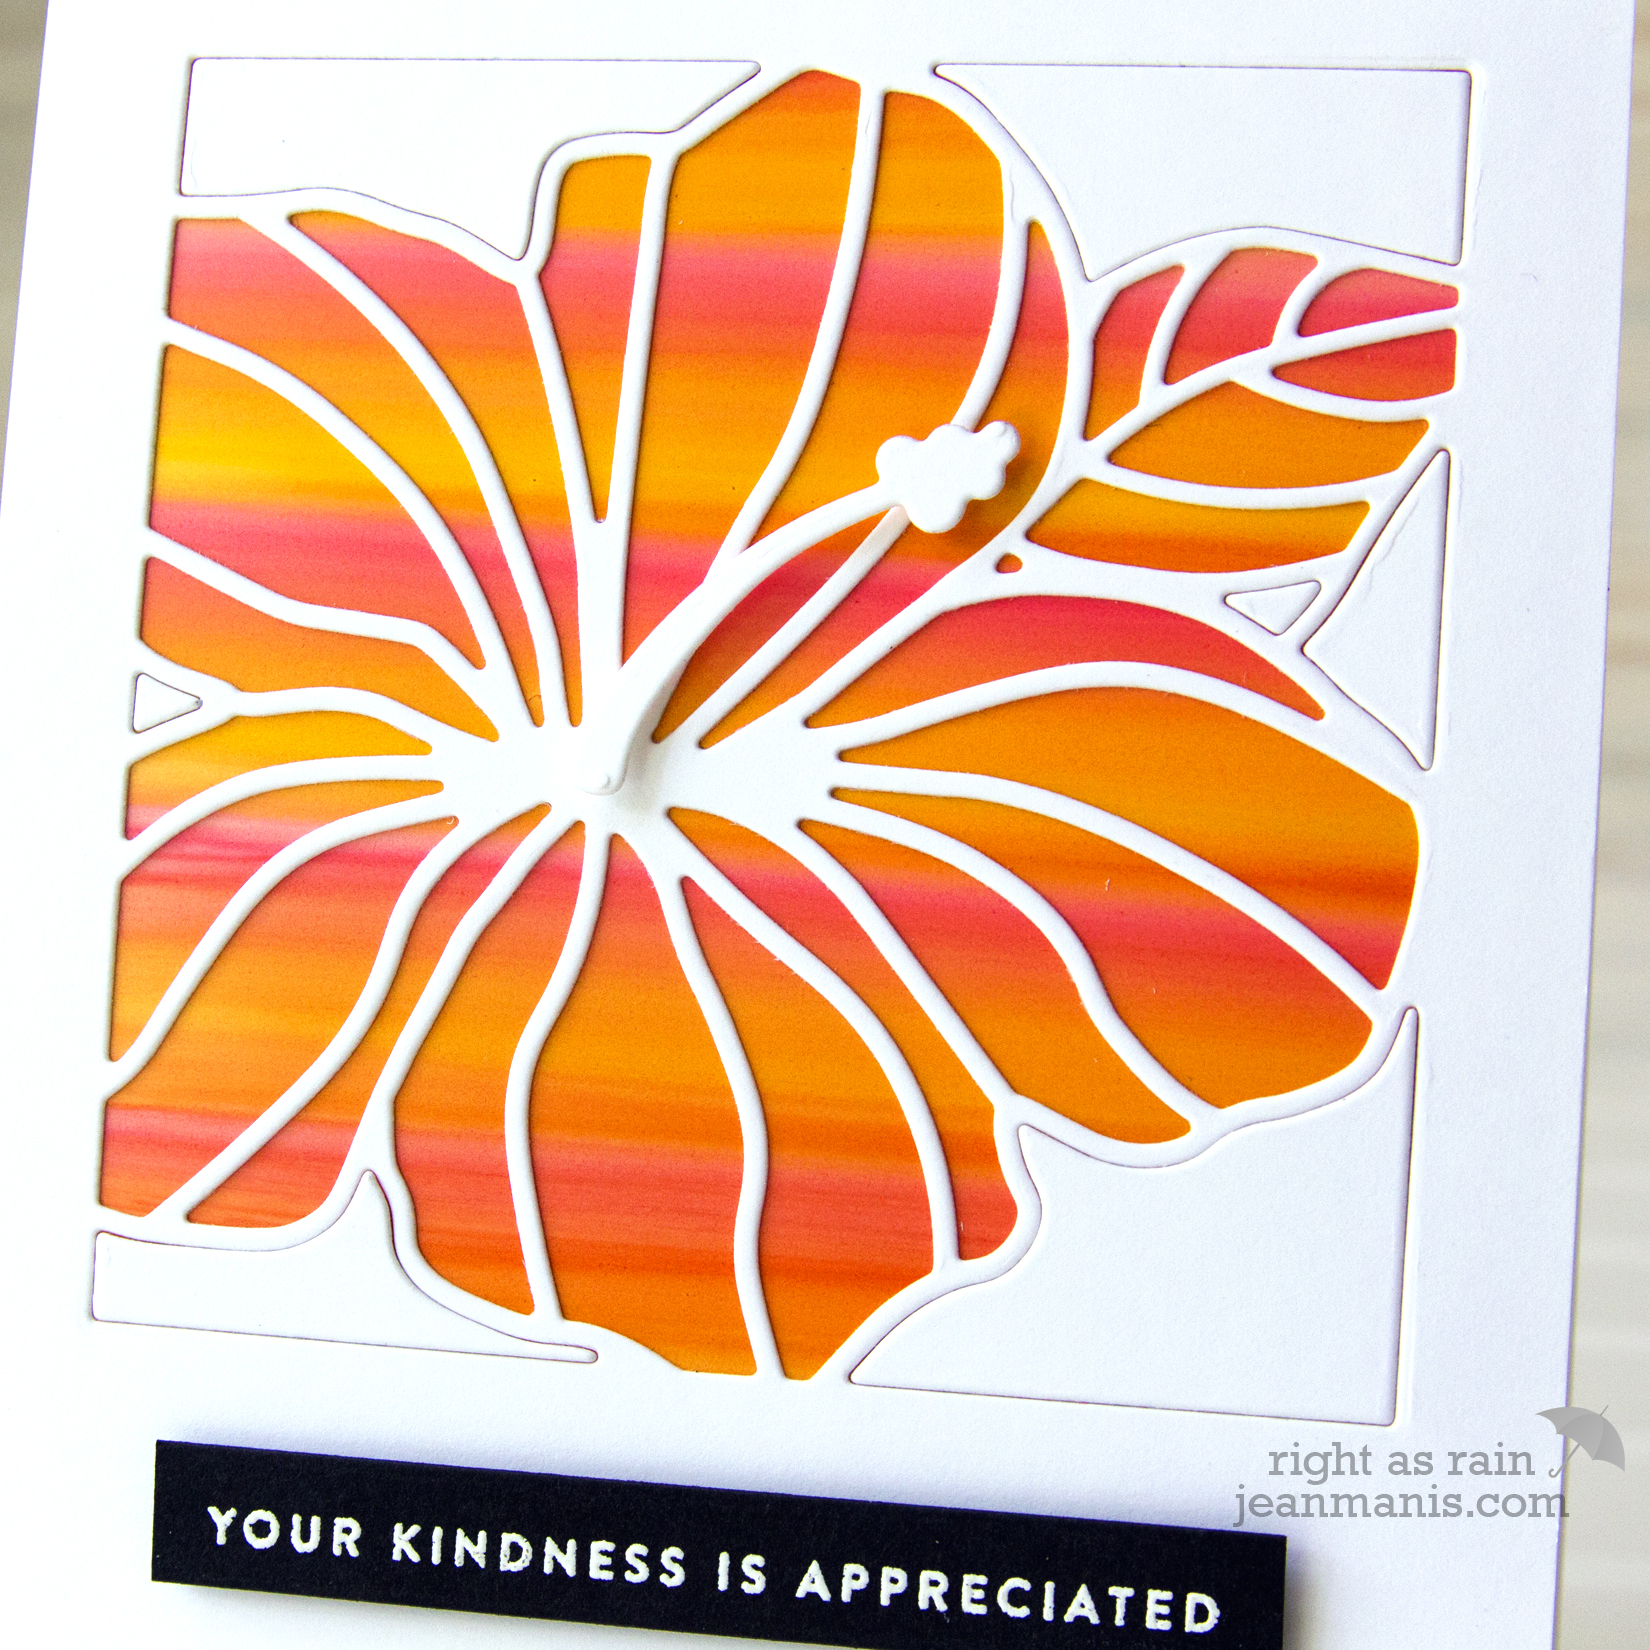
Hello! I am playing along with the Freshly Made Sketches #345 Challenge.
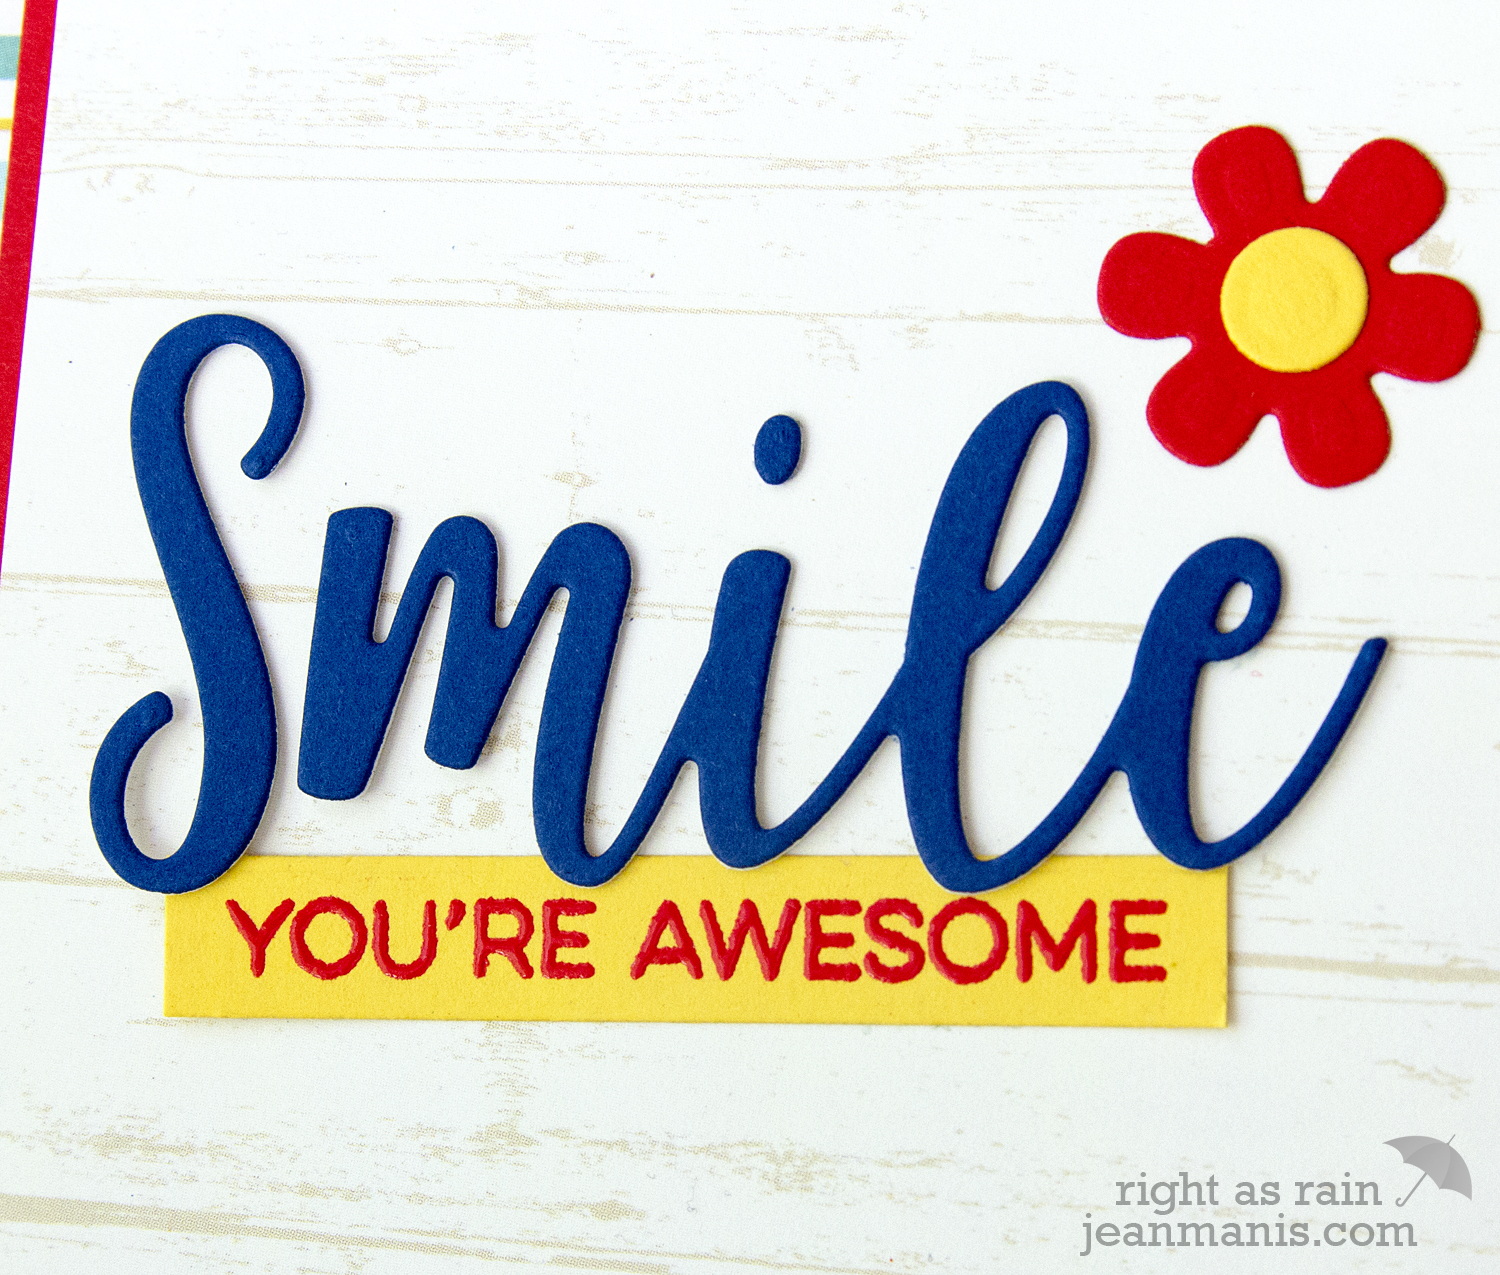
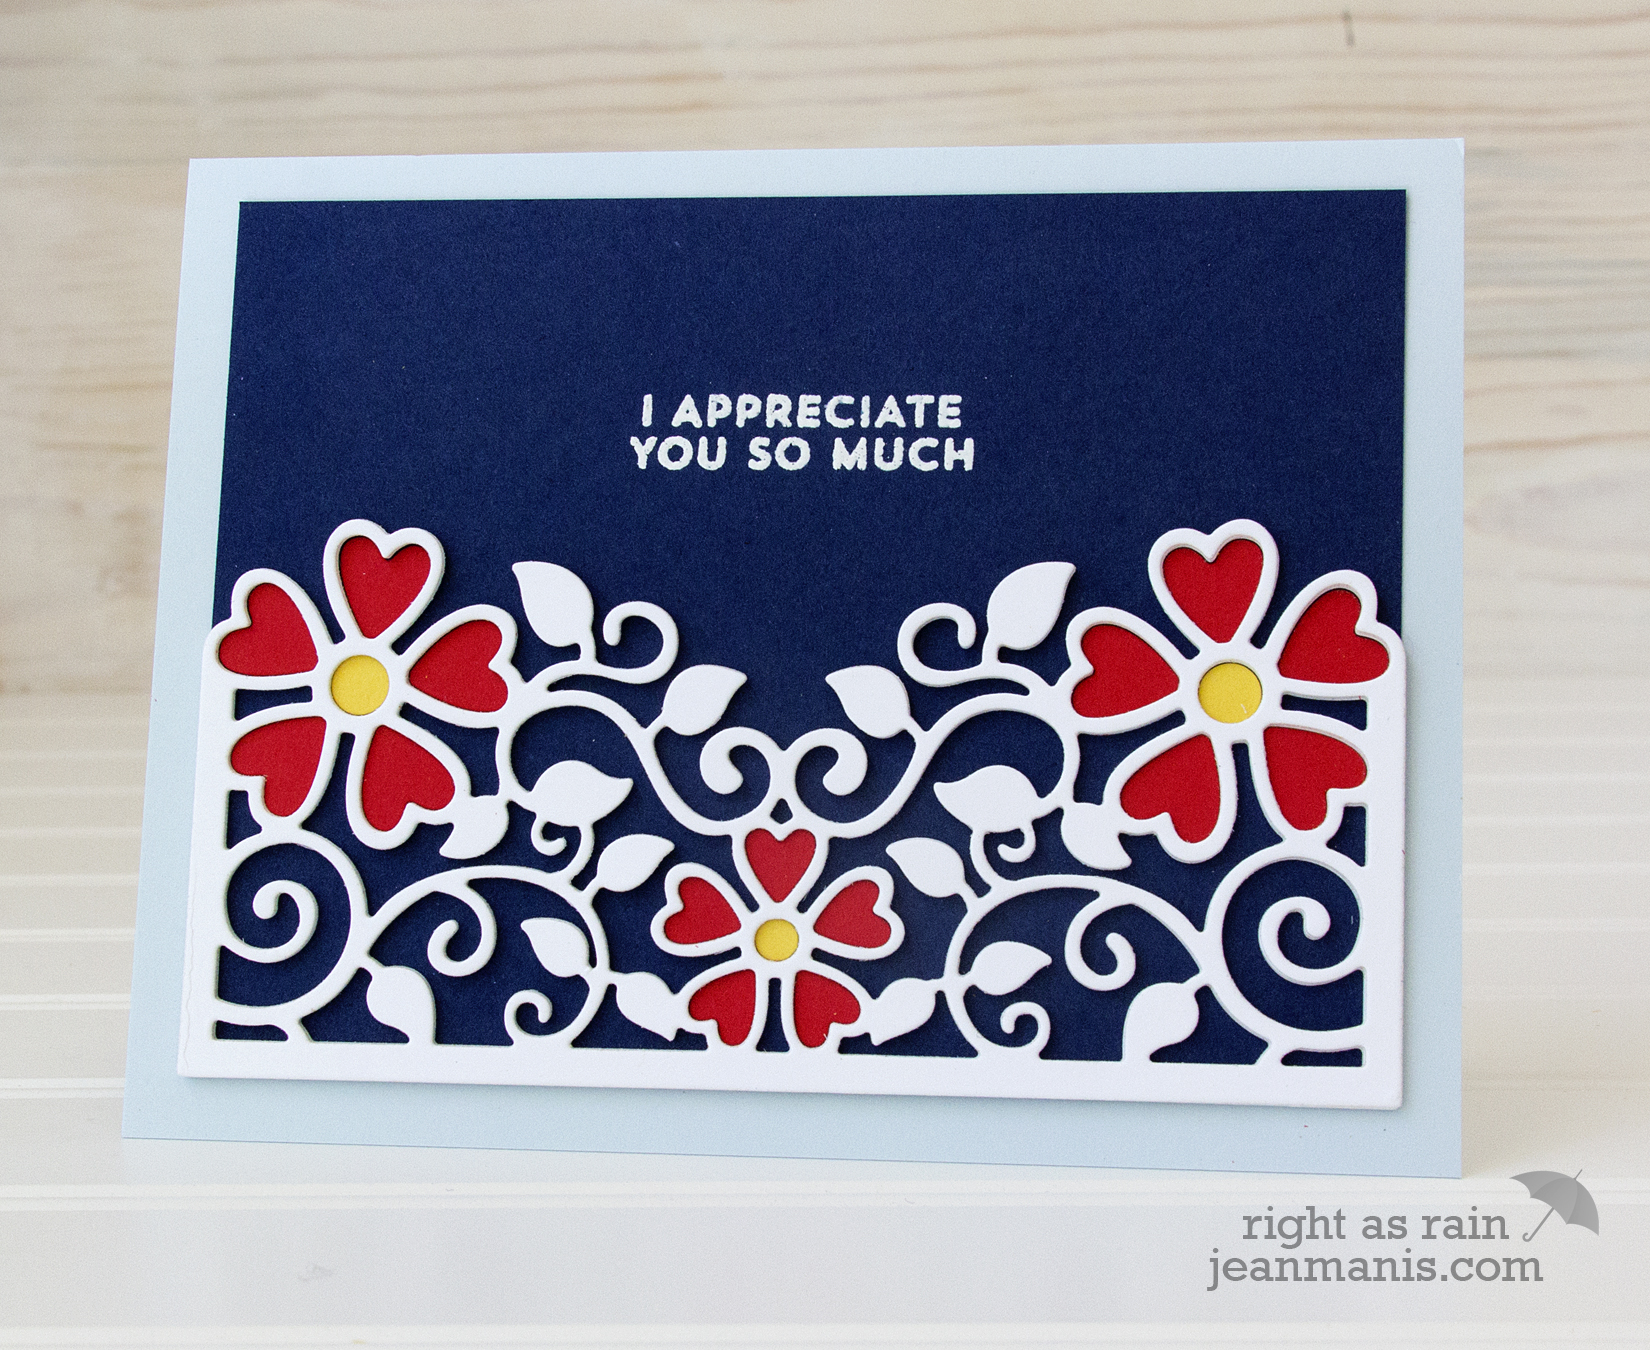
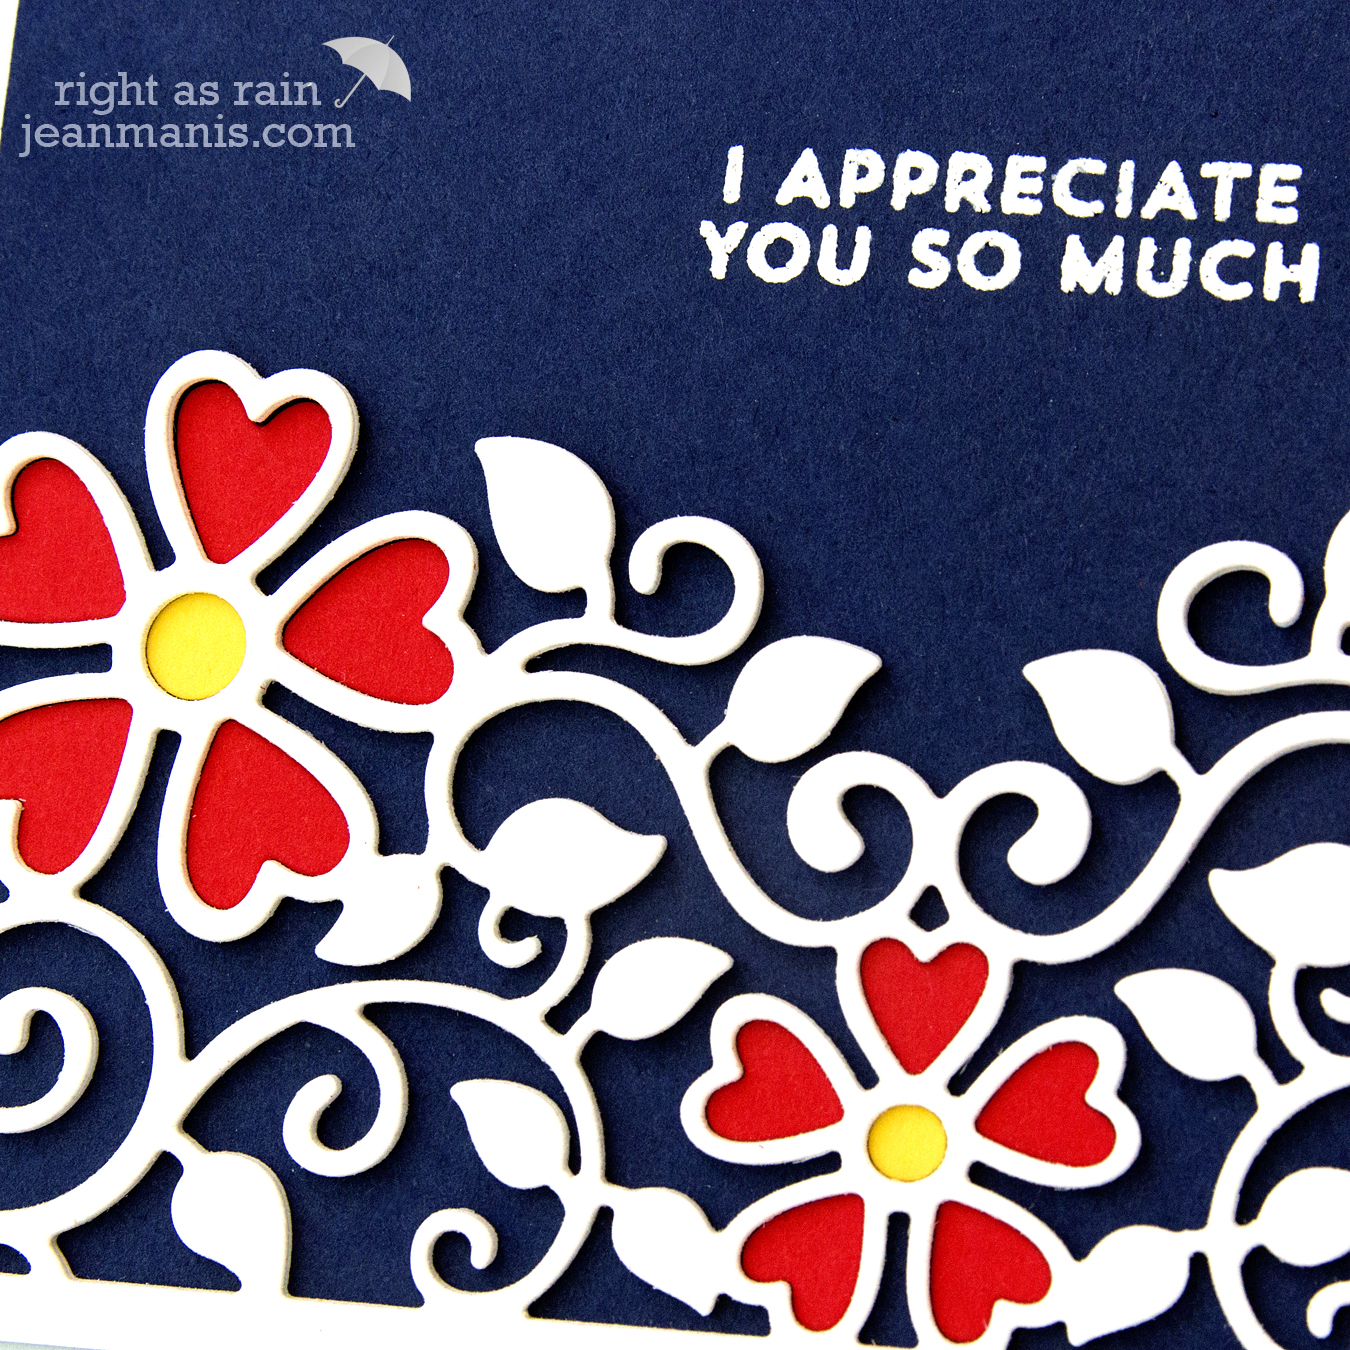
For my CAS card, I combined a My Favorite Things die and stamp set (Die-namics Double the Smiles and All Smiles) with Carta Bella patterned paper and a Spellbinders flower (from the Die D-Lites Daisy set). I heat-embossed the sentiment from the All Smiles set with Ranger Red embossing powder.
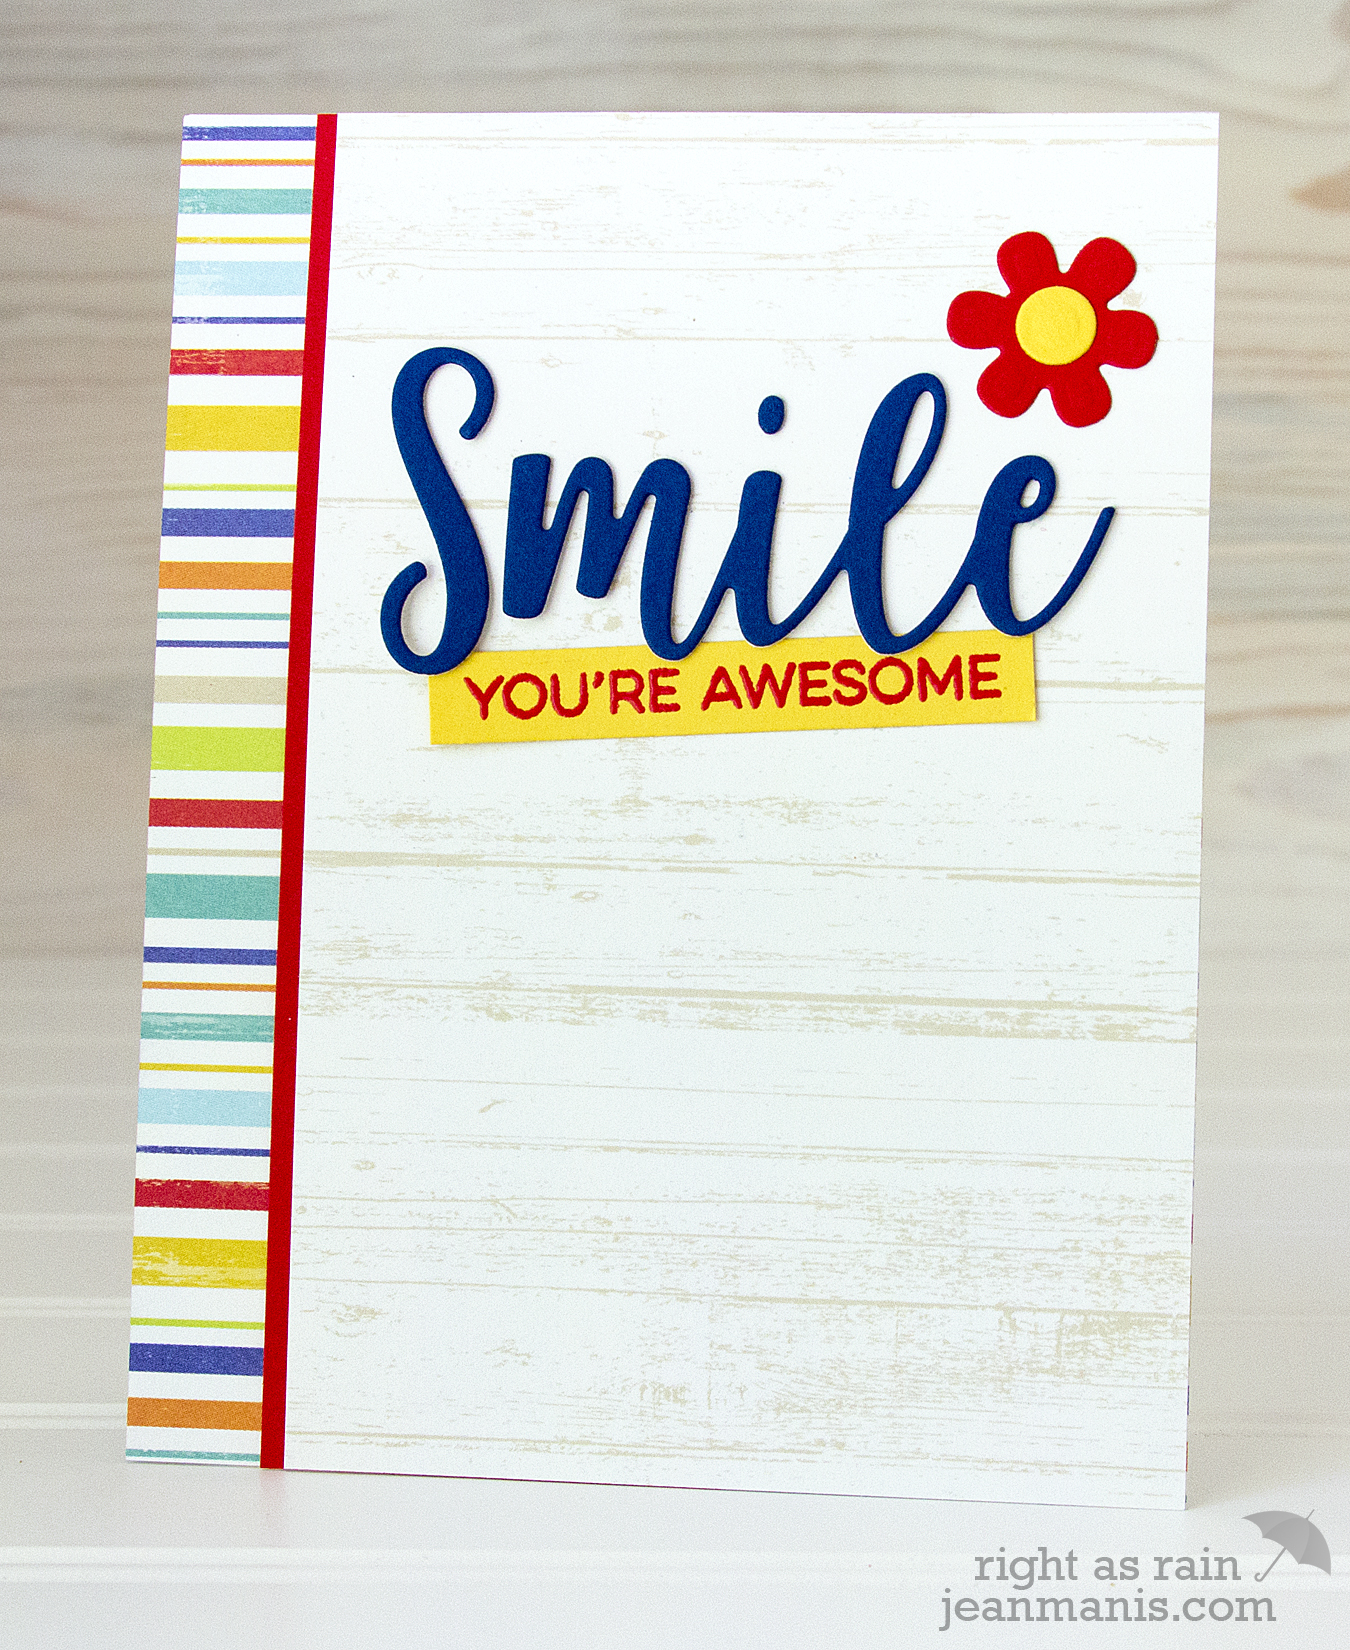
On CAS cards, I tend to start out with the mindset of “Oh, this won’t take any time at all”! I quickly realize that because there are so few items on the card, the choices have to work just right. I obsessed a lot over the colors and patterned paper with this card.