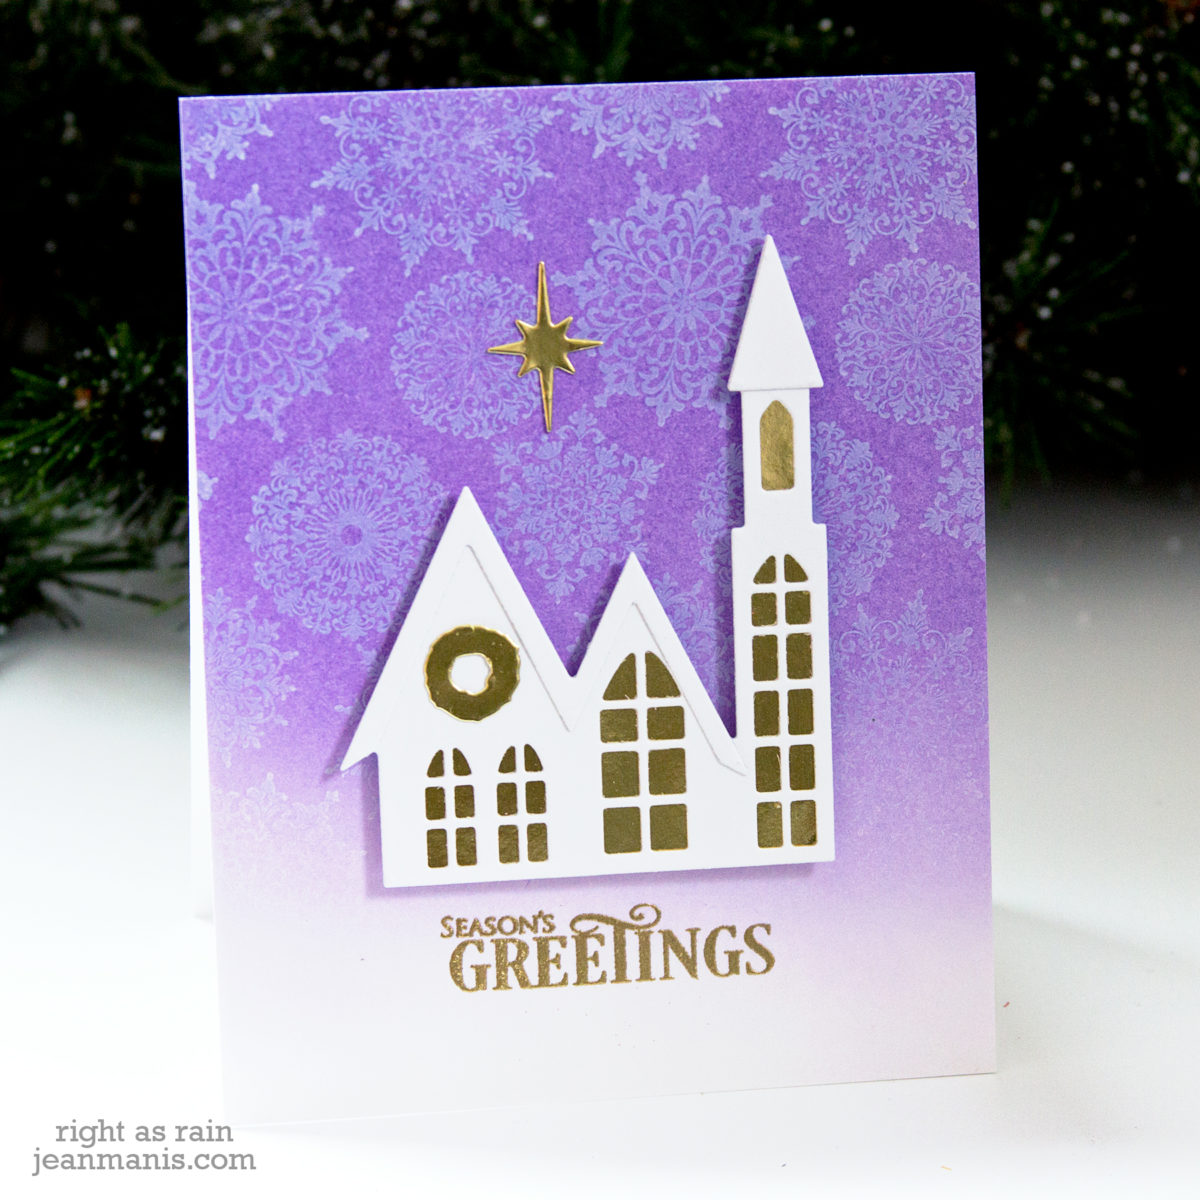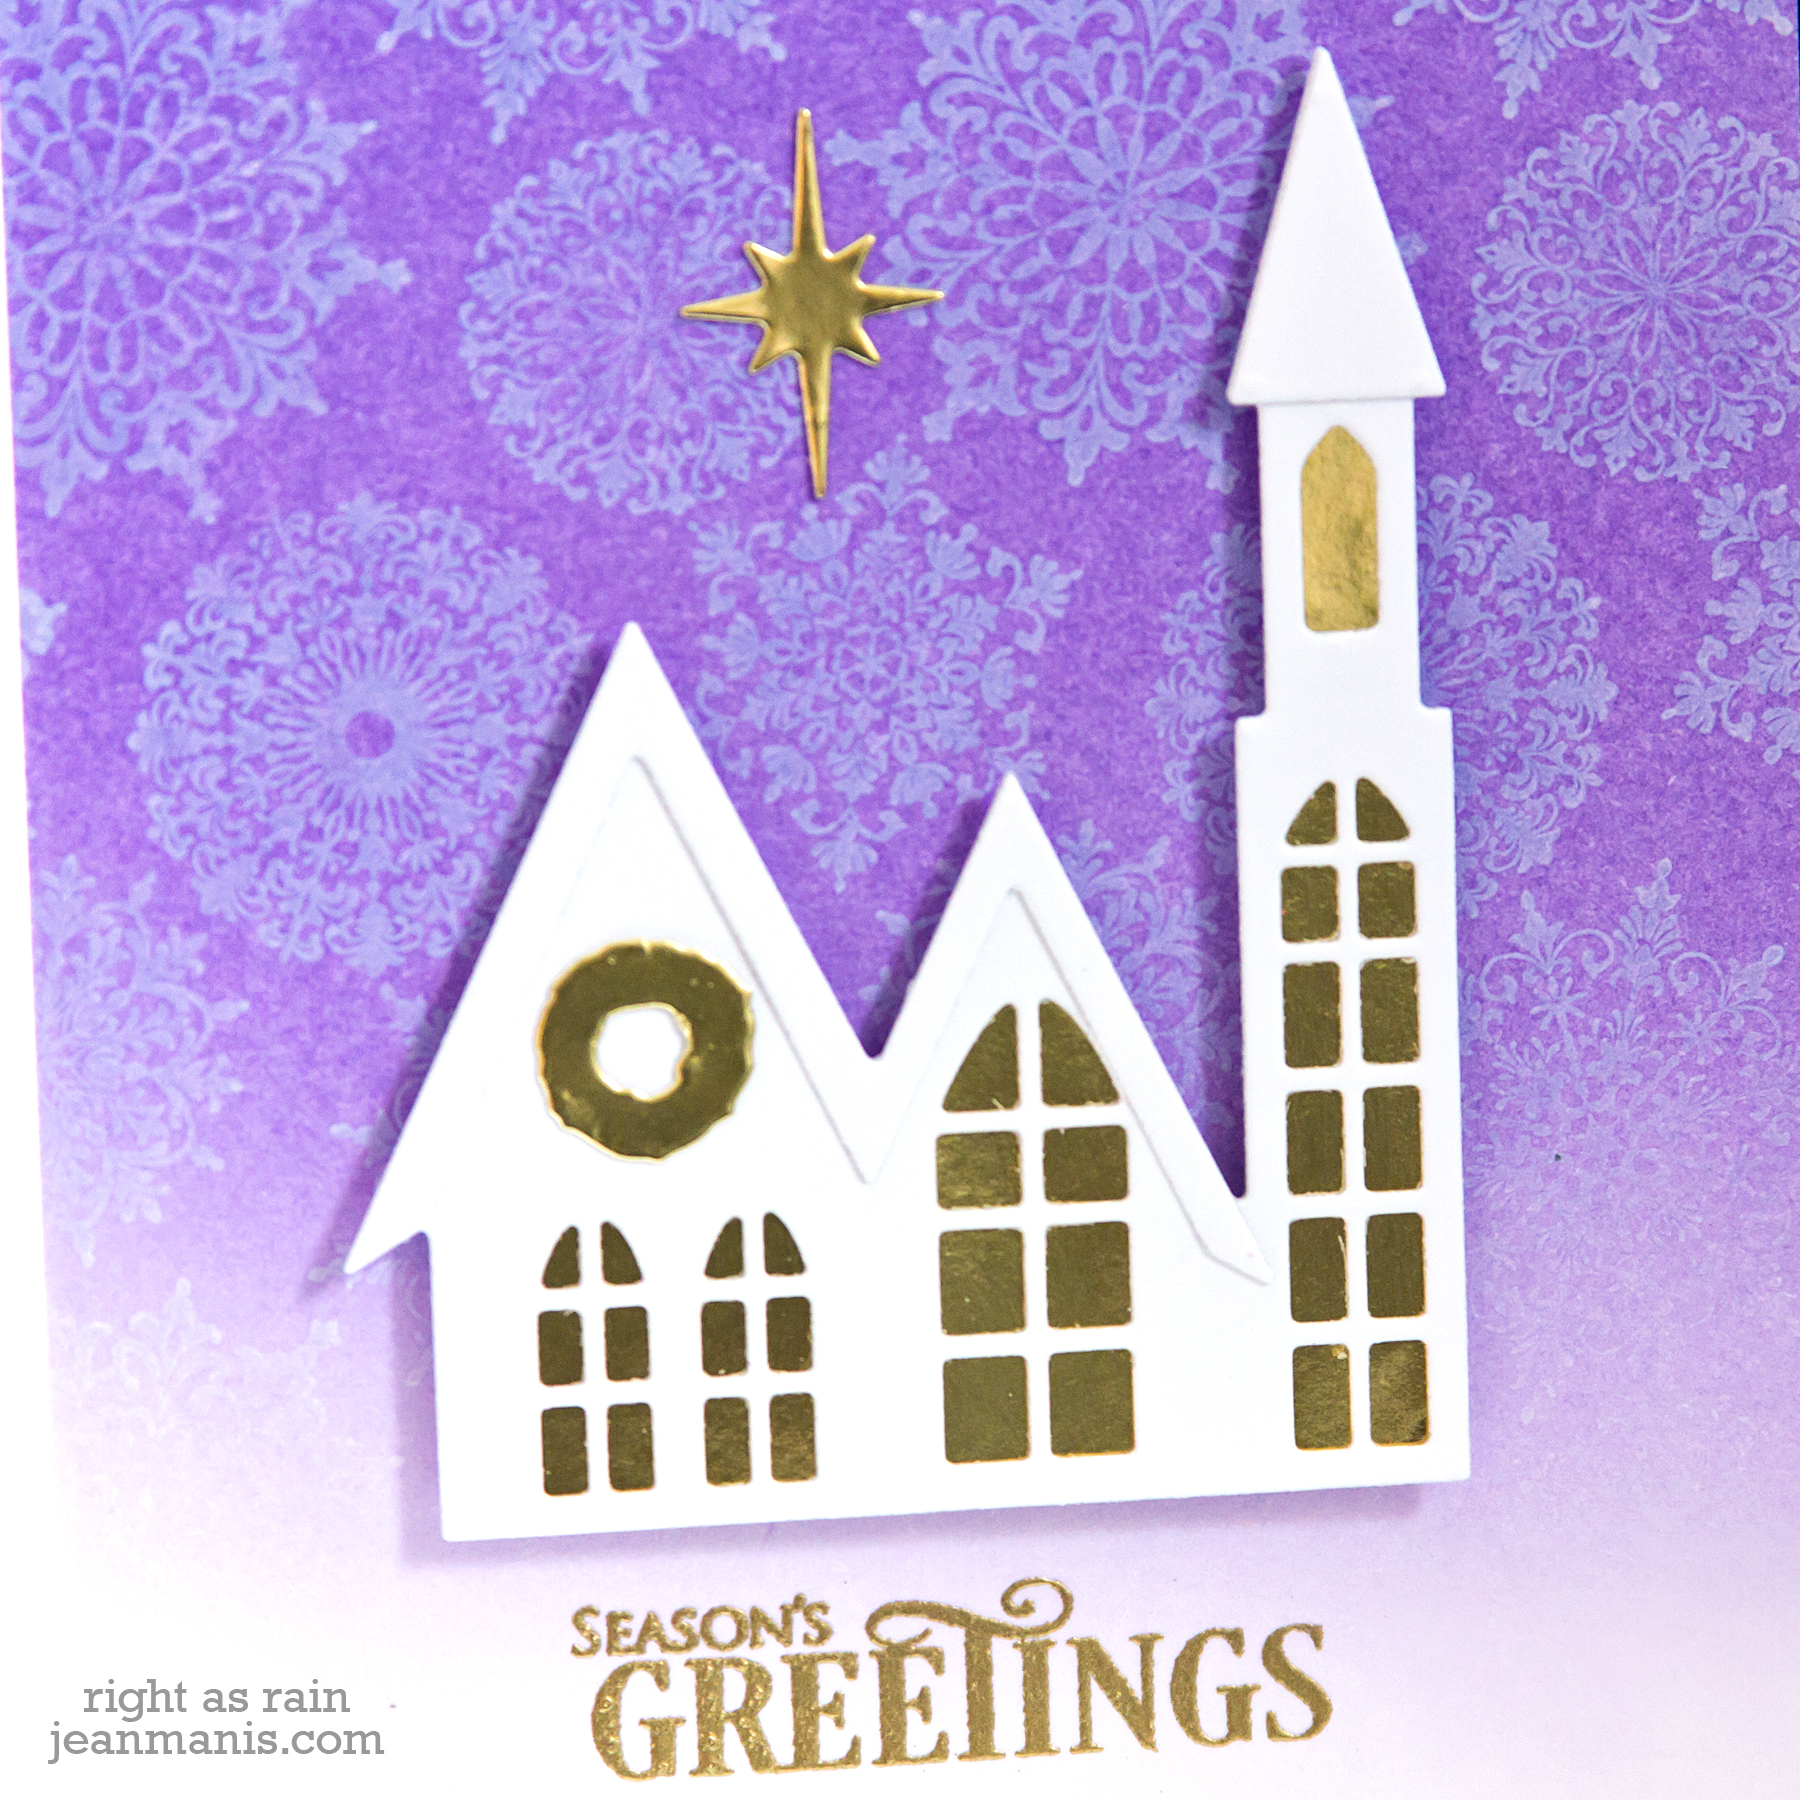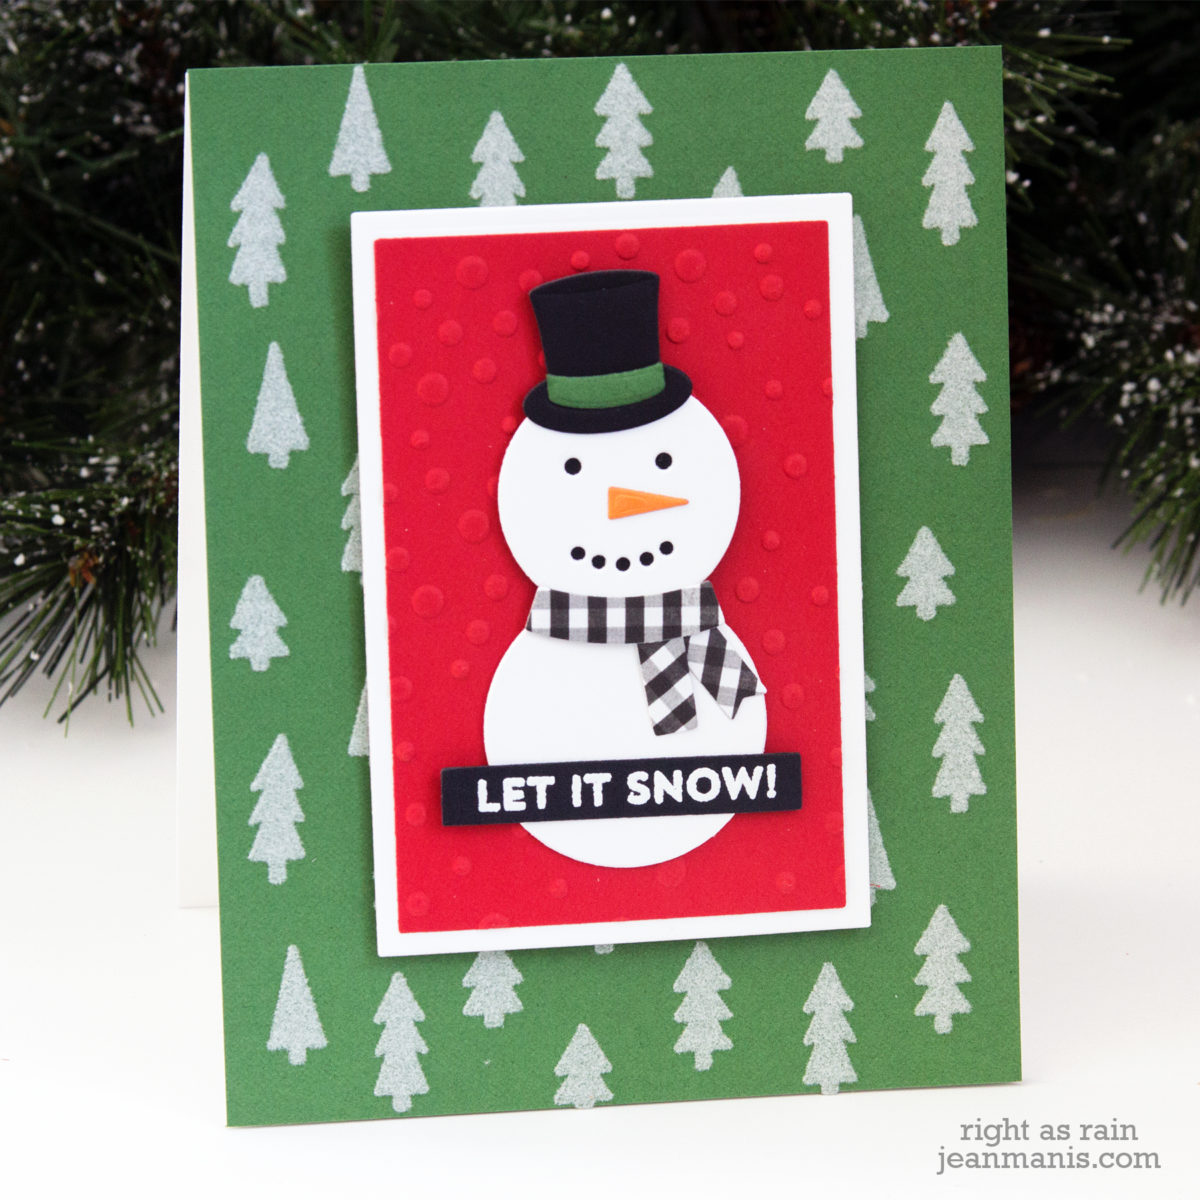
Hello! Today I am sharing a CAS snowman-themed card created with a combination of My Favorite Things products, including the recently released Pine Tree Forest stencil.

- To begin, I applied Transfer Gel through the Pine Tree Forest stencil on to the A2-sized green cardstock panel. Once dry, I ran the panel through my Minc with white flock. This is the first time I’ve used the flock product and found it incredibly easy to use.
- I cut the snowman with the Joy Filled Die-namics set. Once assembled, I added him to a panel dry-embossed with a Taylored Expressions embossing folder. I added a white mat behind the red rectangle, as the transition from the red to the green was too harsh.
- I heat-embossed the sentiment strip and added it to the card front.
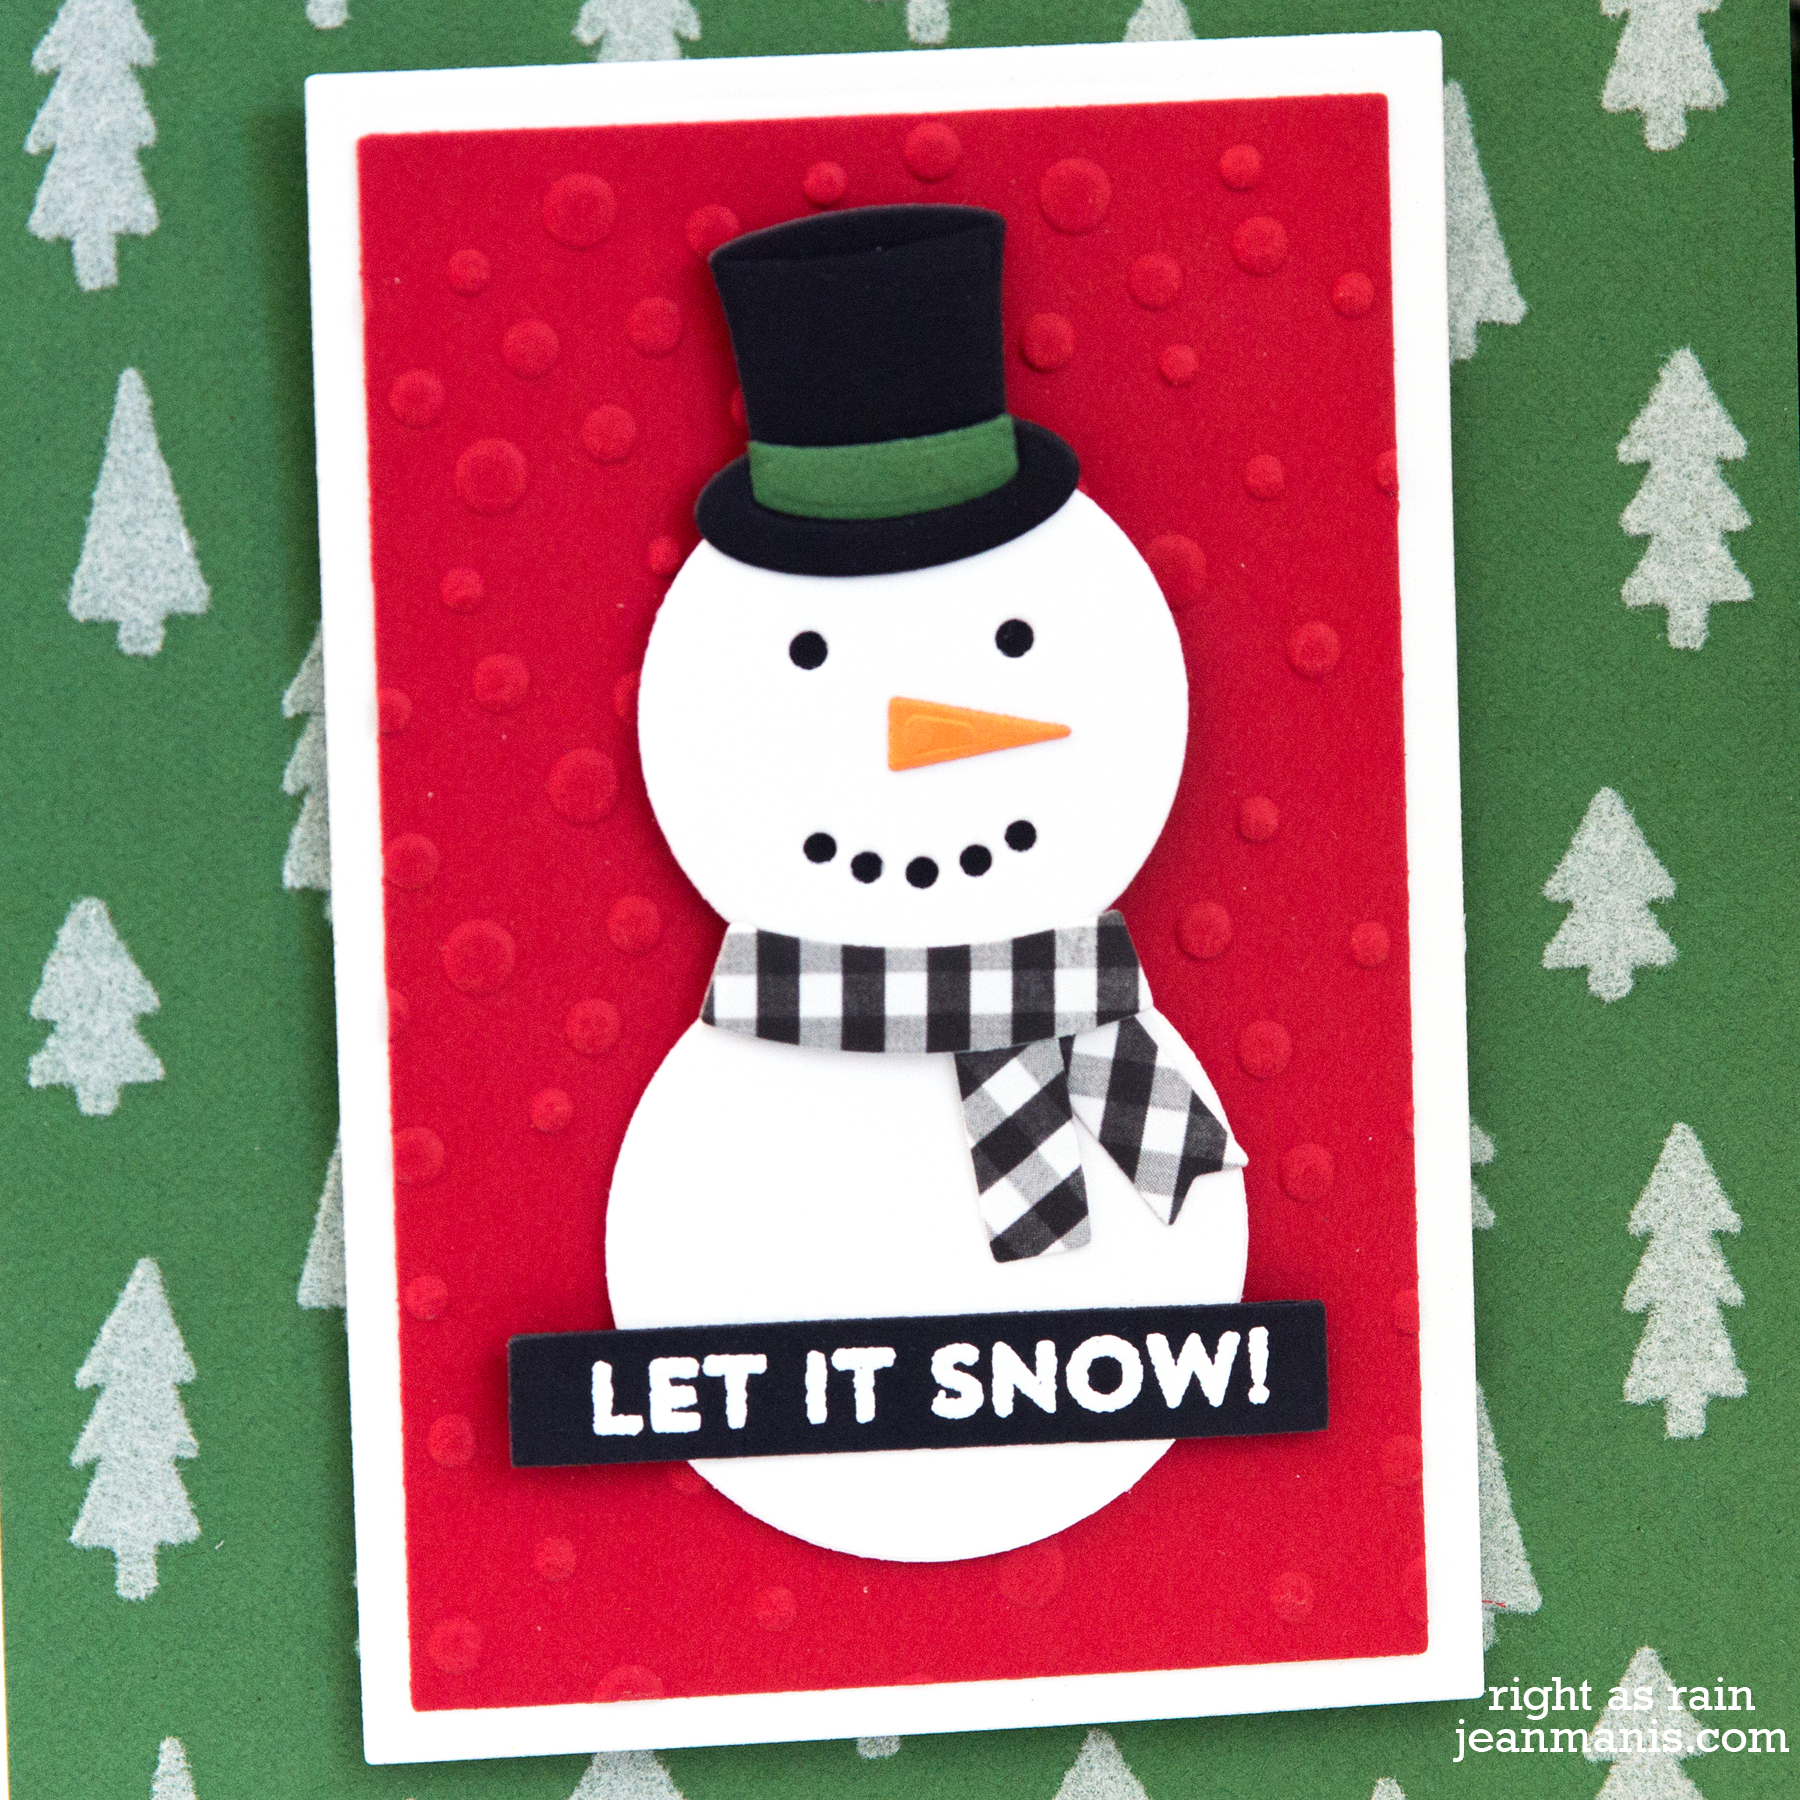
While I used traditional Christmas colors – red and green – it would be easy to make this a friendship, winter-themed card by changing out either the green or the red, or both! Or to reinforce the Christmas theme, I could have used a more Christmassy sentiment rather than “Let It Snow.”
Supplies: