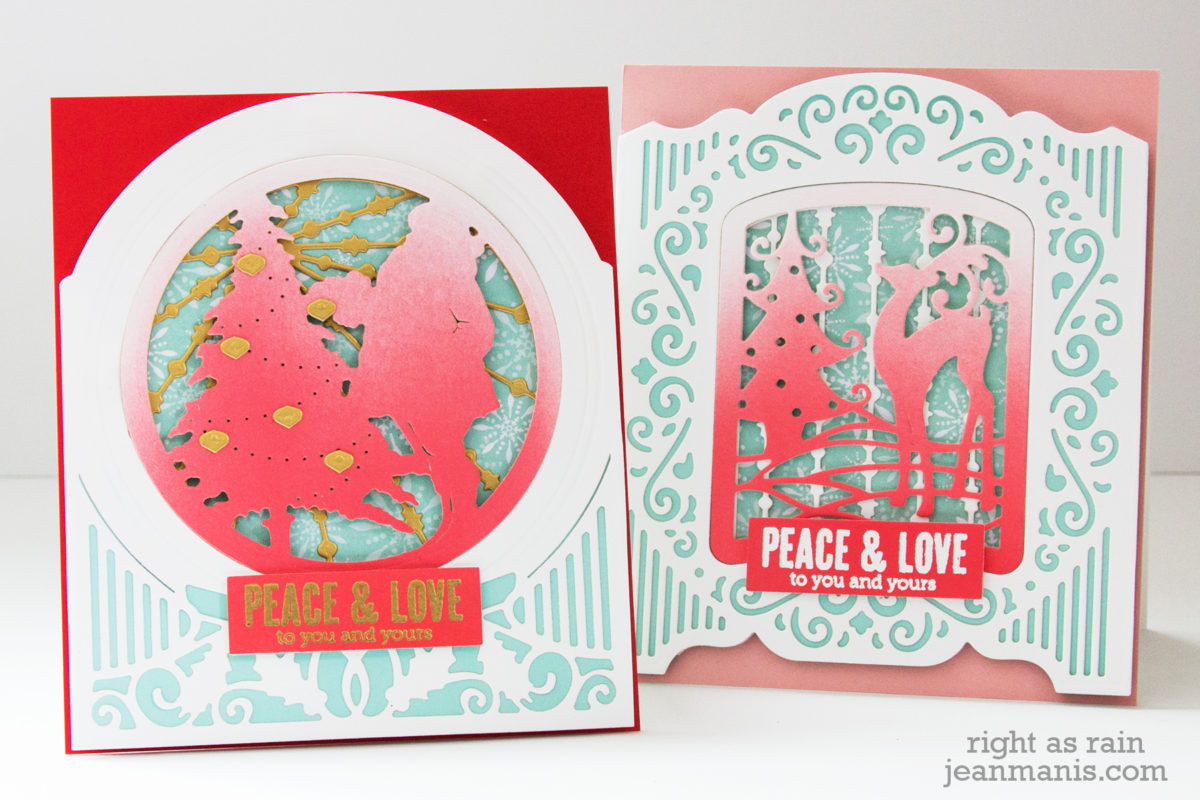
Hello! I am on the Spellbinders blog today sharing two CAS Christmas cards created with die sets from the Sharyn Sowell Holiday Collection. I share tips and tricks in the blog post. I’d love for you to head over and take a look!


Supplies:
Cardmaking and Scrapbooking with Jean Manis

Hello! I am on the Spellbinders blog today sharing two CAS Christmas cards created with die sets from the Sharyn Sowell Holiday Collection. I share tips and tricks in the blog post. I’d love for you to head over and take a look!
Supplies:
Giveaway is now closed.
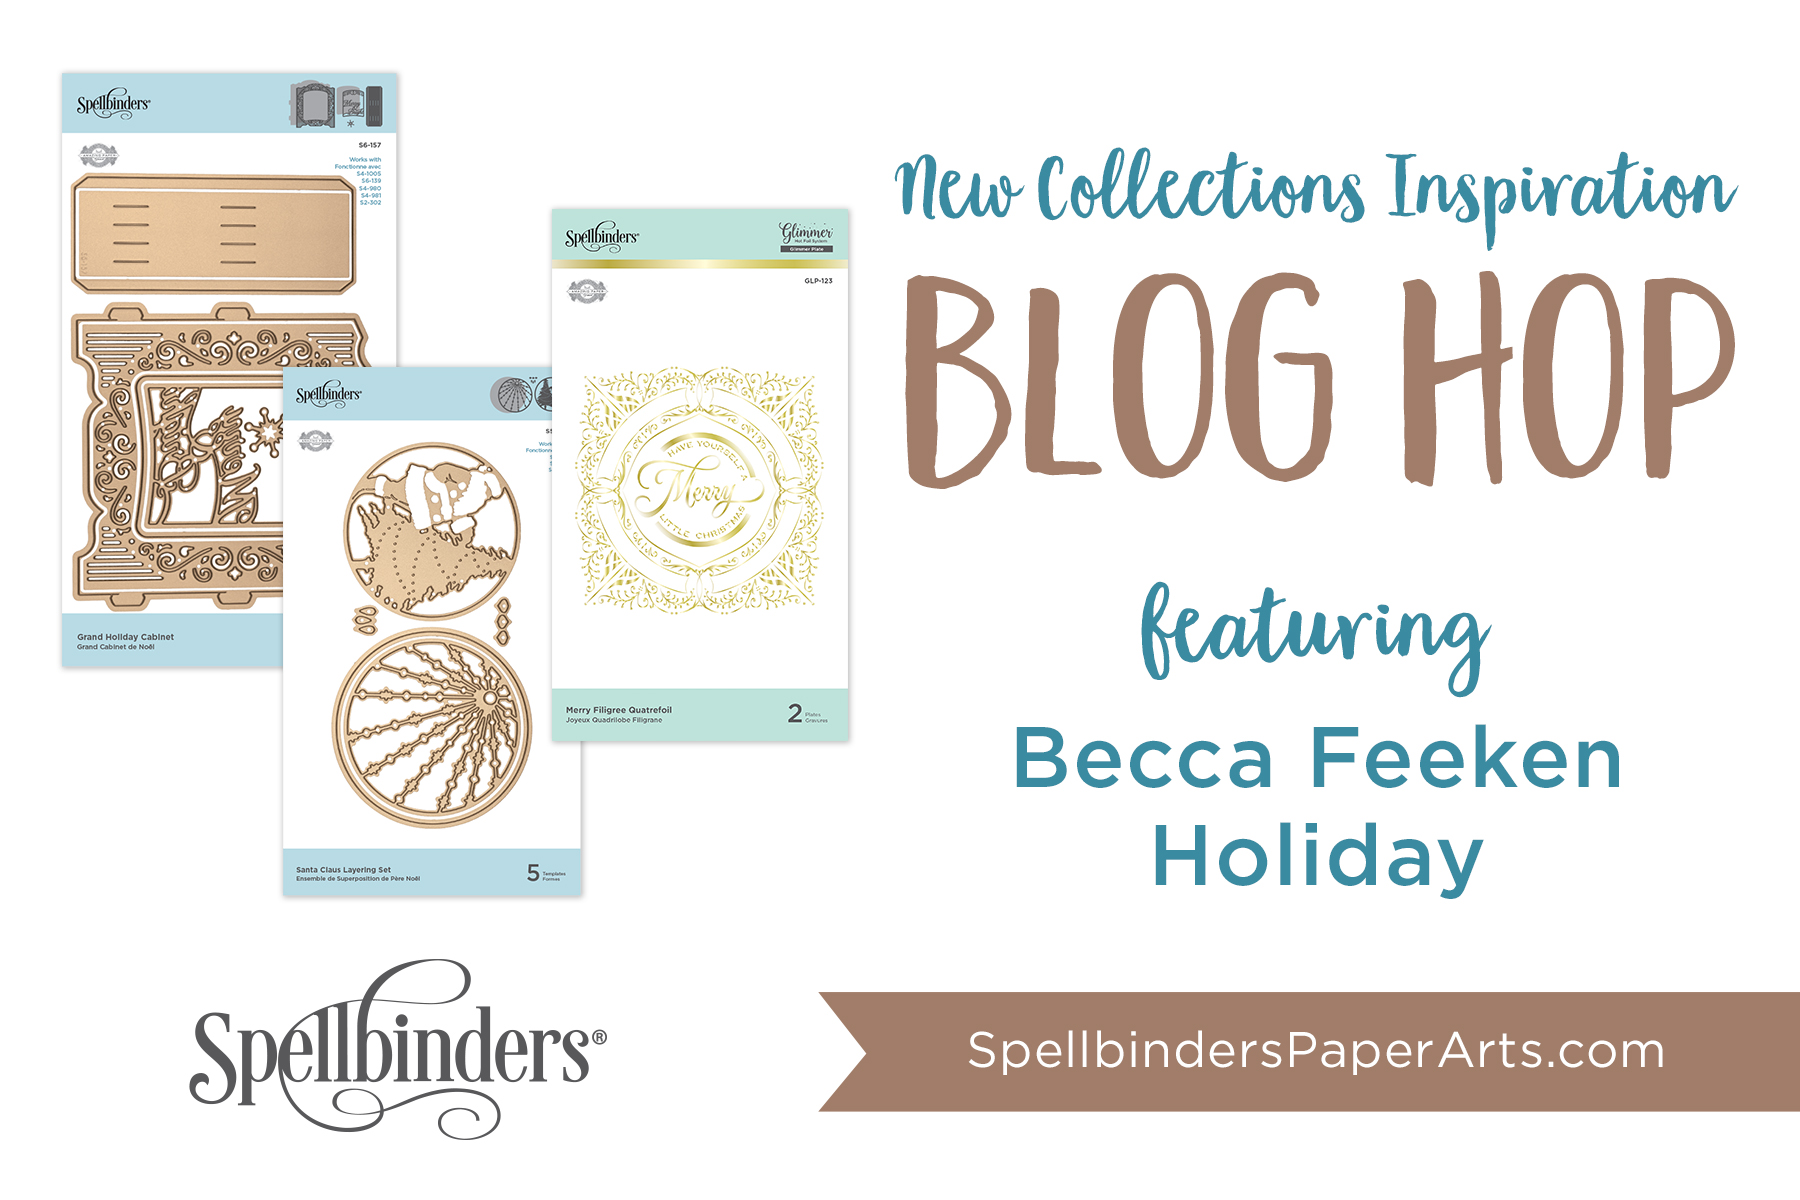
Hello! I am delighted to be part of the Spellbinders Holiday 2019 Blog Hop showcasing products by Becca Feeken. My projects showcase products from 3D Holiday Vignettes. You should have reached me from the blog of Amy Rysavy. I’ve included a full list of participants at the end of my post.
As part of the blog hop, Spellbinders is giving away a $50 gift certificate to one lucky blog reader to be selected from the comments across all of the blogs in the hop. Giveaway closes on Sunday, September 1st, 11:59 pm EDT. The winner will be announced in the blog hop post the following Tuesday. The winner is responsible for shipping cost, duties and taxes.
My cards use similar designs and the same color scheme. The cards measure 4 1/2″ wide by 5 1/4″ tall. The Becca Feeken dies do all of the heavy lifting in these projects – their detail is just amazing!

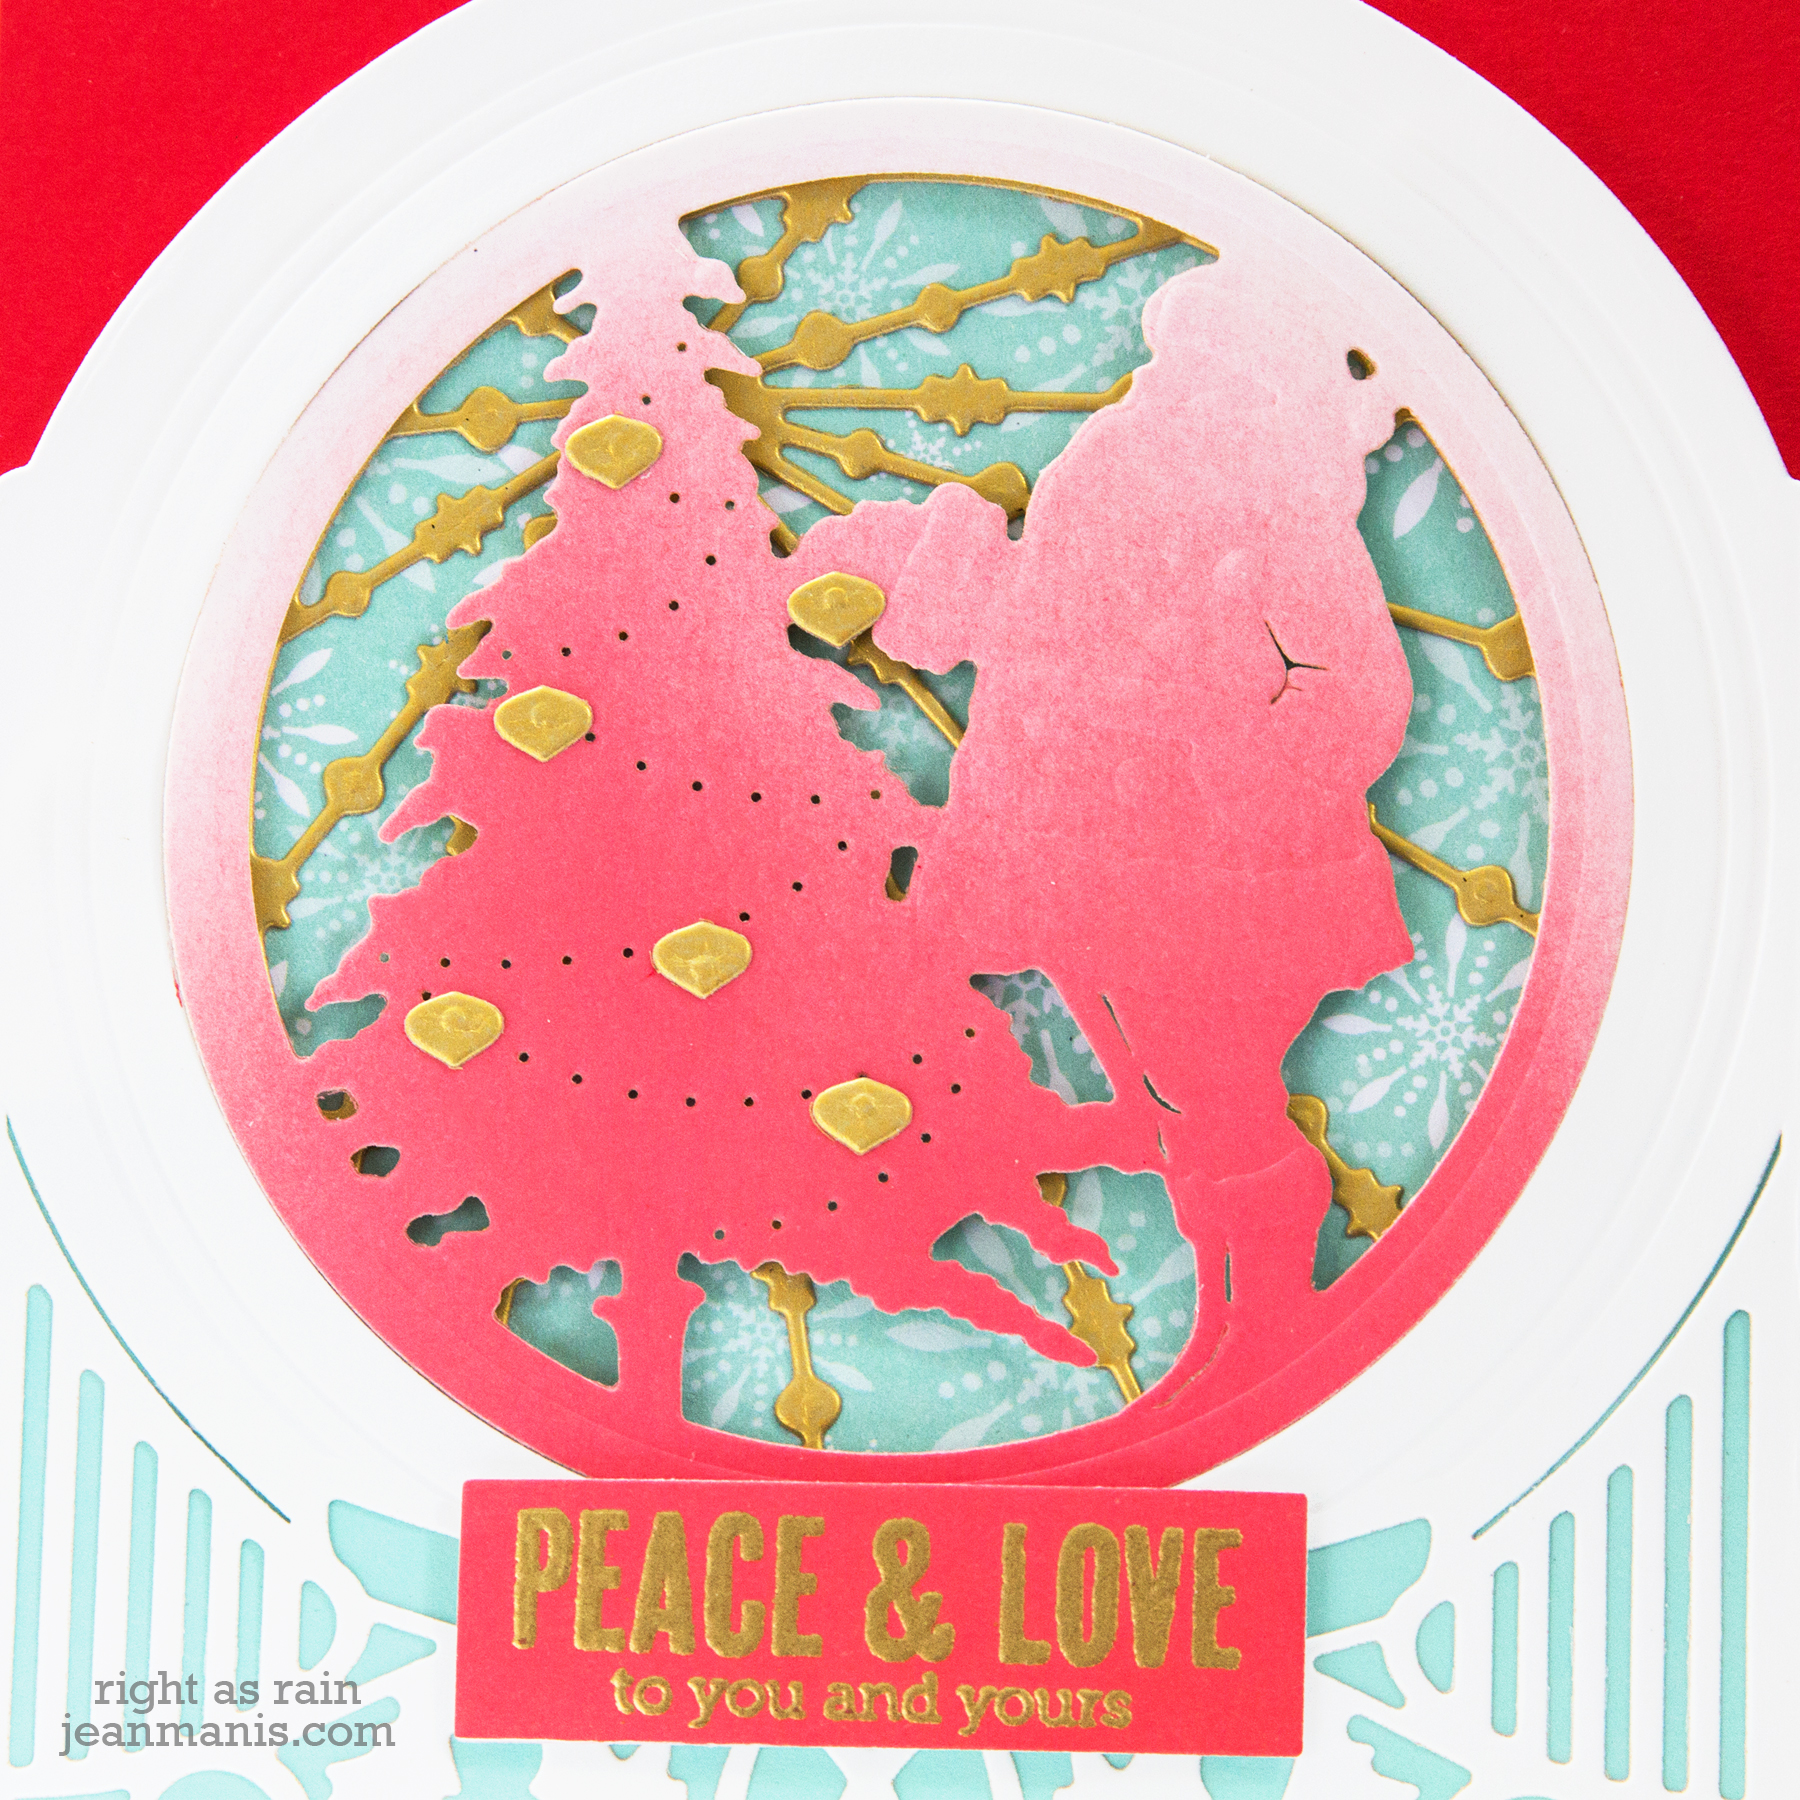
On my first card I’ve paired the Santa Claus set with the Grand Snow Globe.
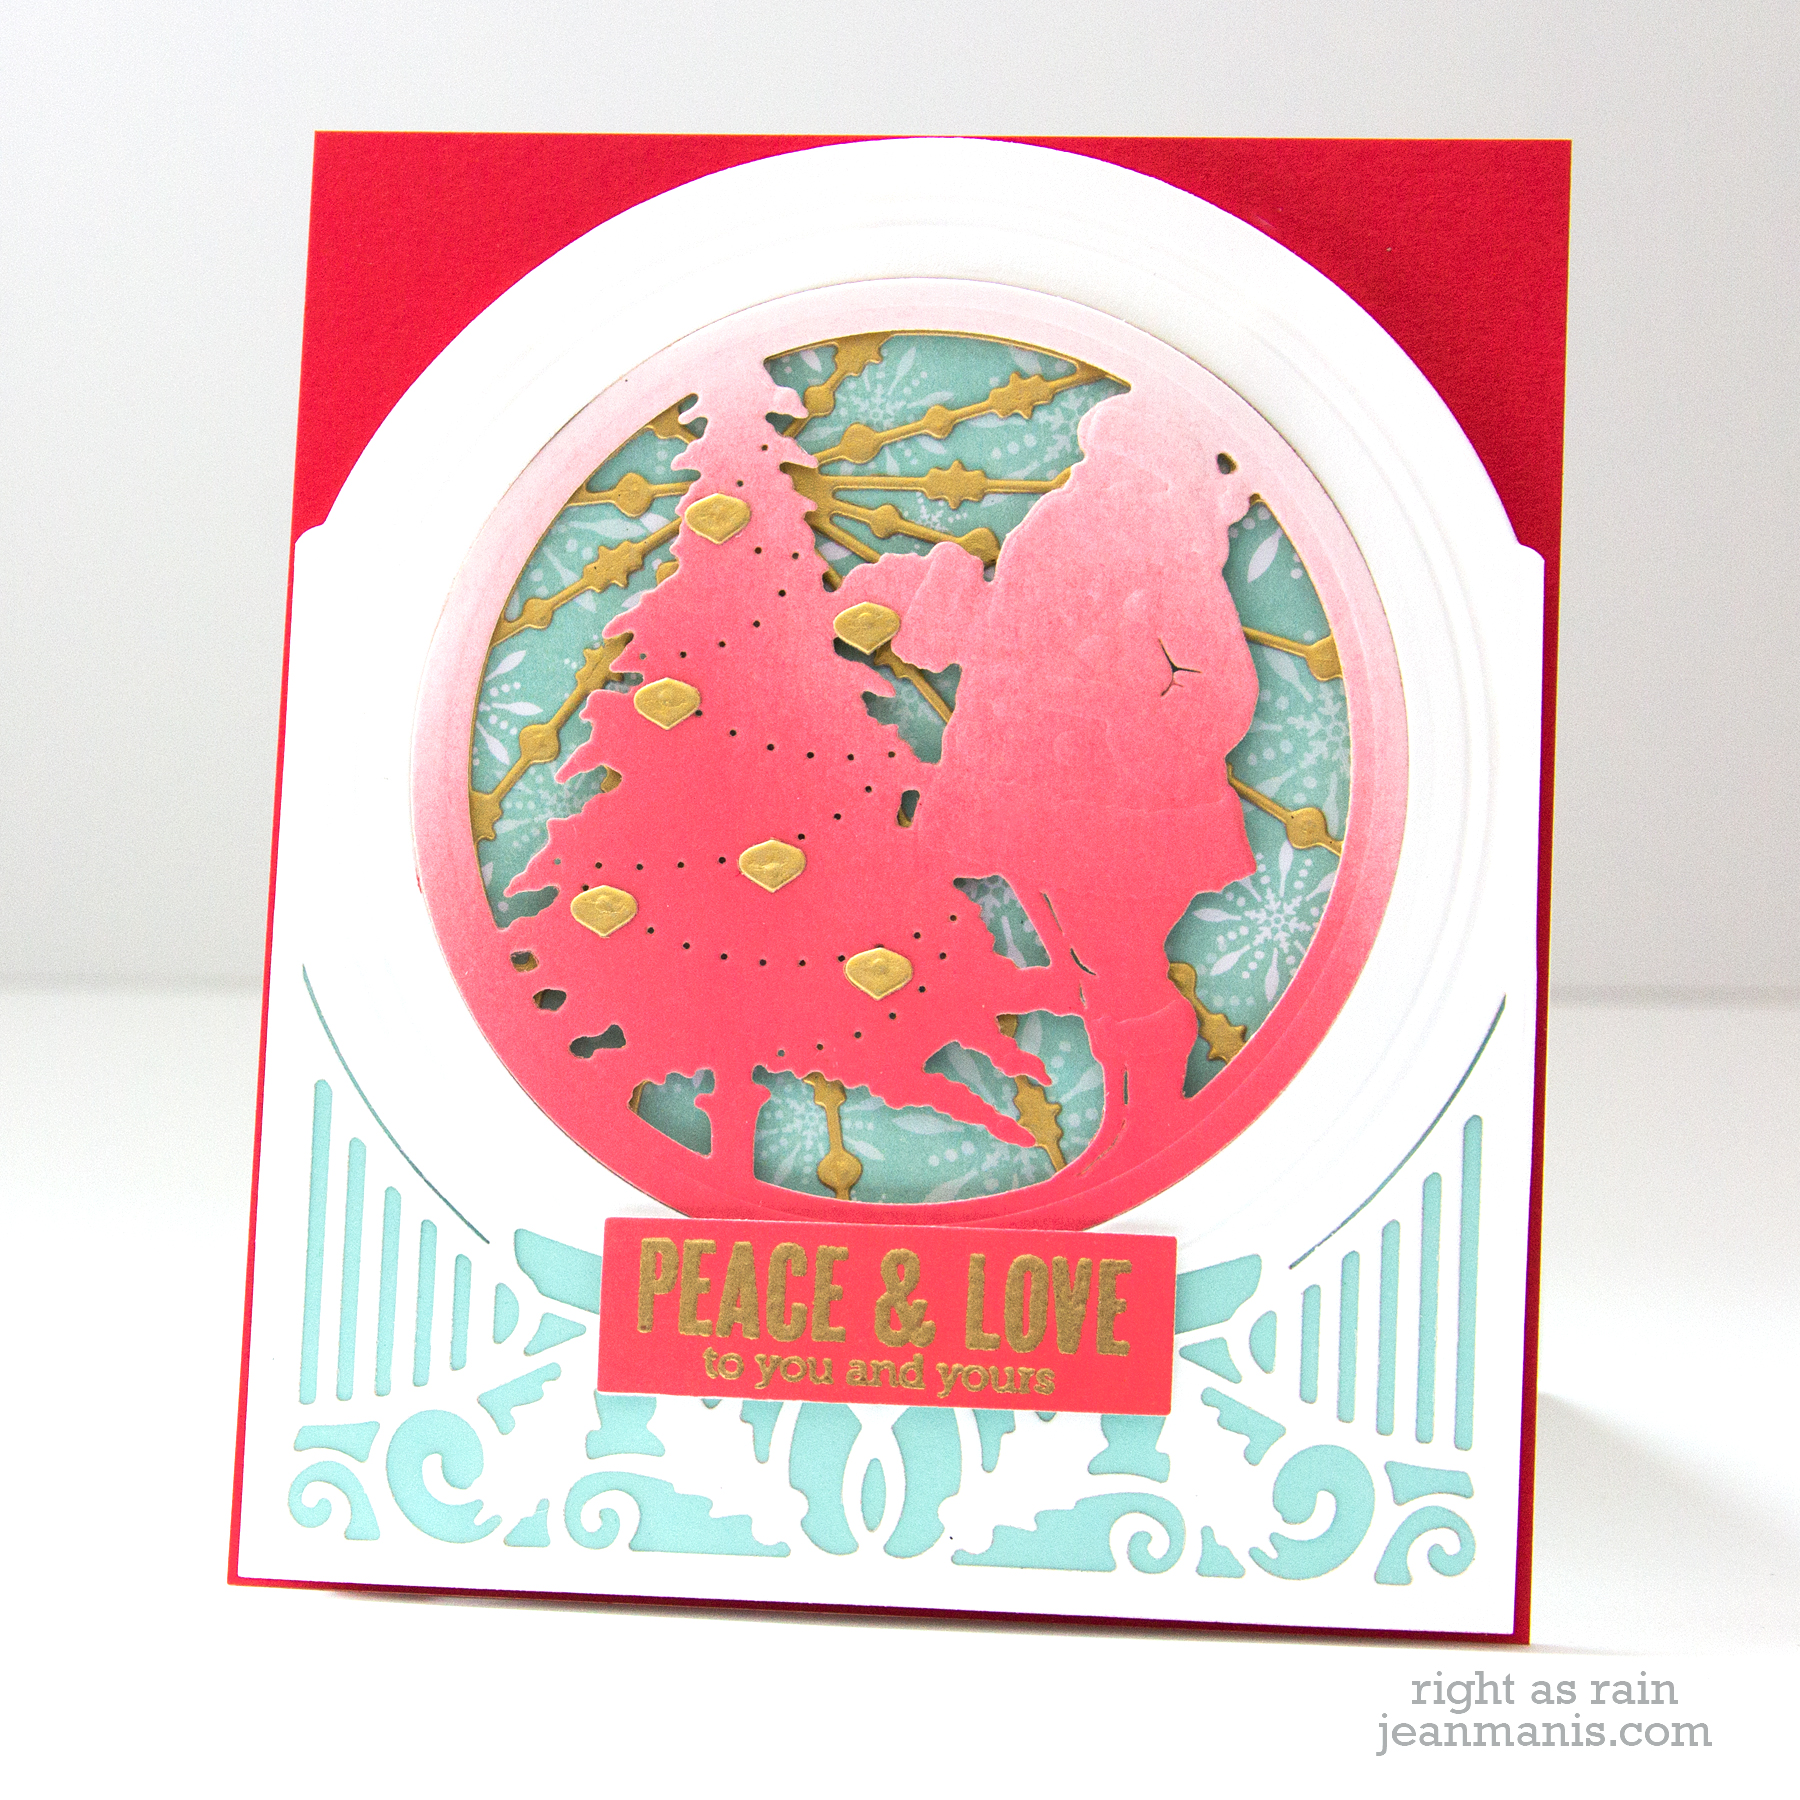
I cut the Grand Snow Globe frame from Whip Cream cardstock and backed it with light blue cardstock. I used the Grand Snow Globe pieces as a frame for my card, rather than to create a 3-D object; I trimmed the tabs from the sides.
I cut the front panel of the Santa Claus from Whip Cream cardstock to which I had applied Festive Berries Distress Oxide Ink.
I cut the star garland and ornaments from Brush Gold cardstock.
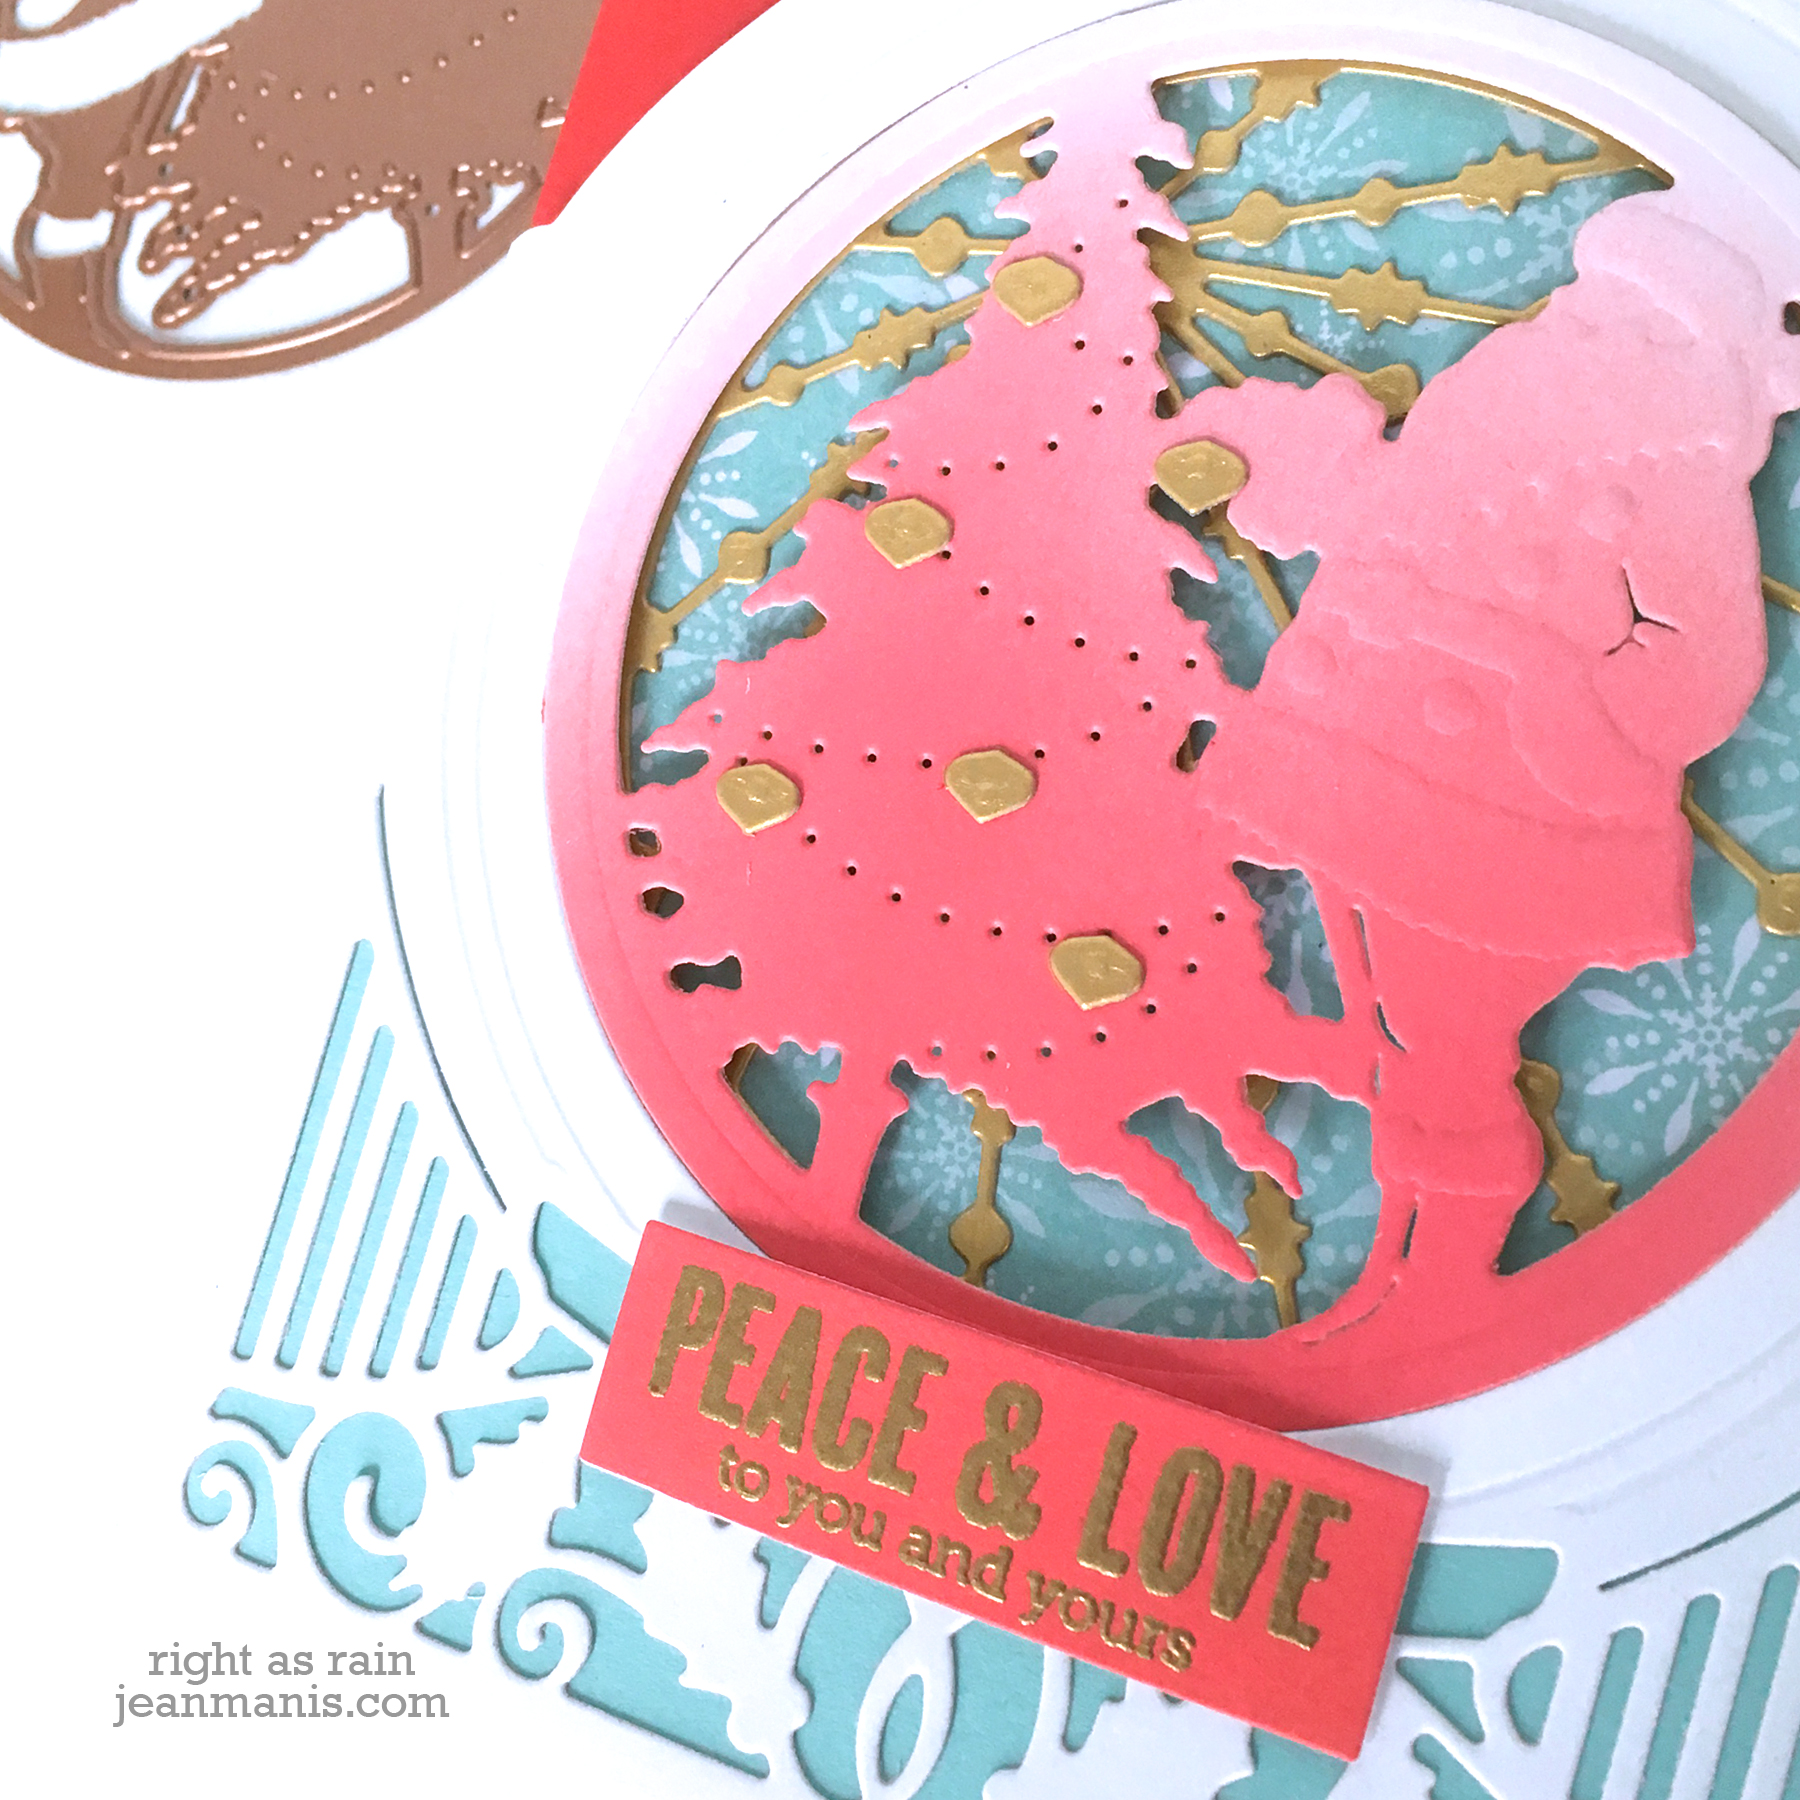
I heat-embossed with gold powder a sentiment on to cardstock colored with Festive Berries Distress Oxide Ink.
I placed the Santa piece into the Grand Snow Globe opening and taped it from behind.
I added the star garland piece to patterned paper, which I cut with the circle die in the set, and adhered them to a back panel.
I adhered the front panel to the back with foam adhesive and added the entire assembly to a card base. I then added the ornaments and sentiment.
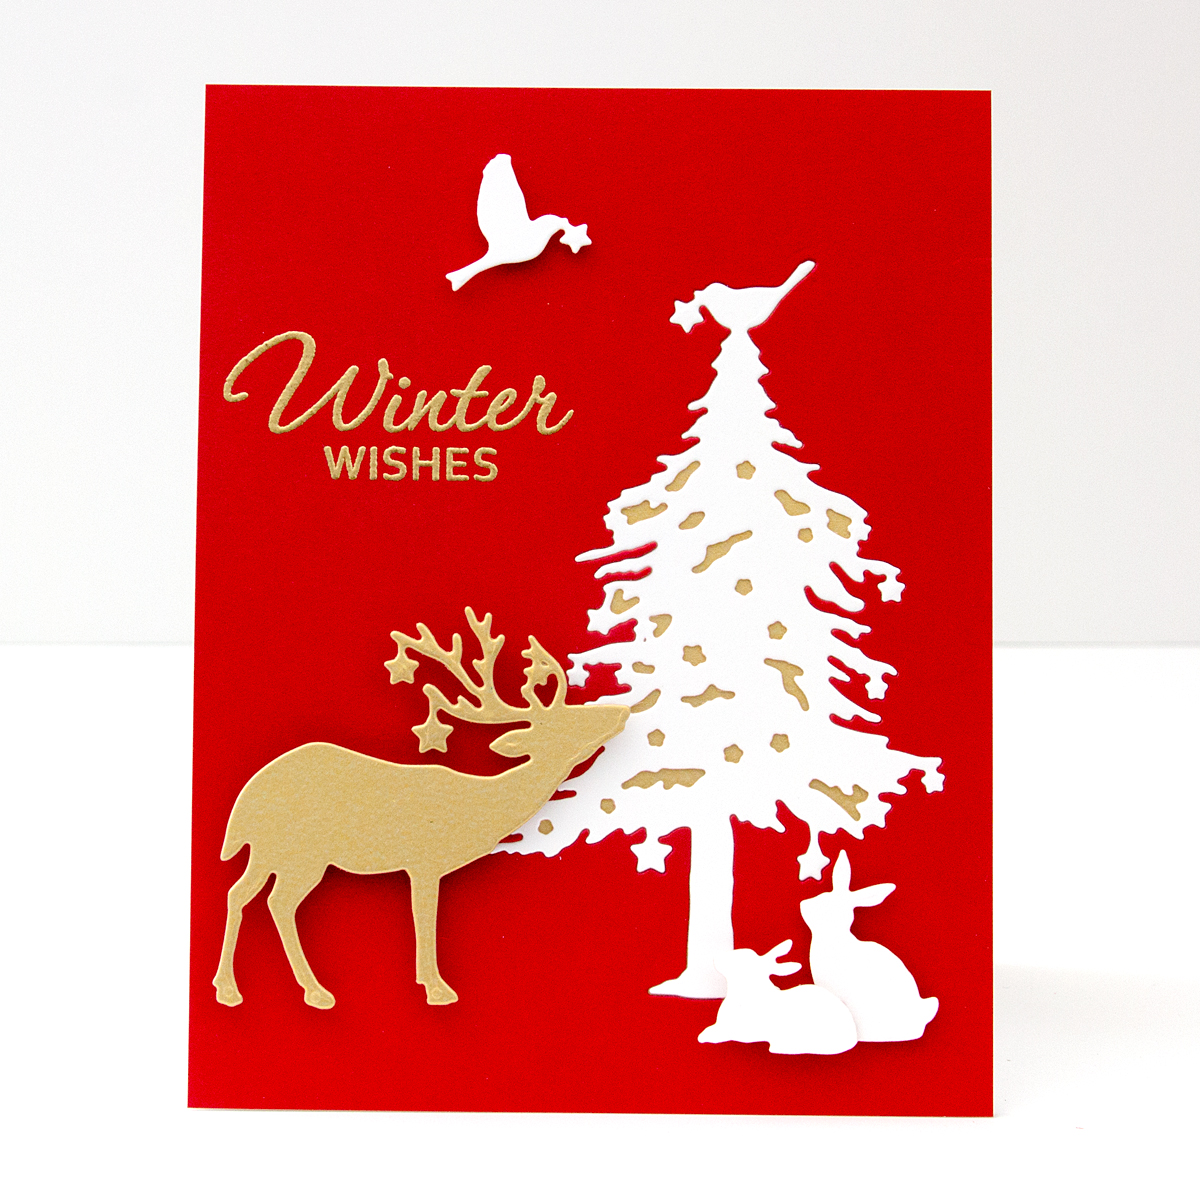
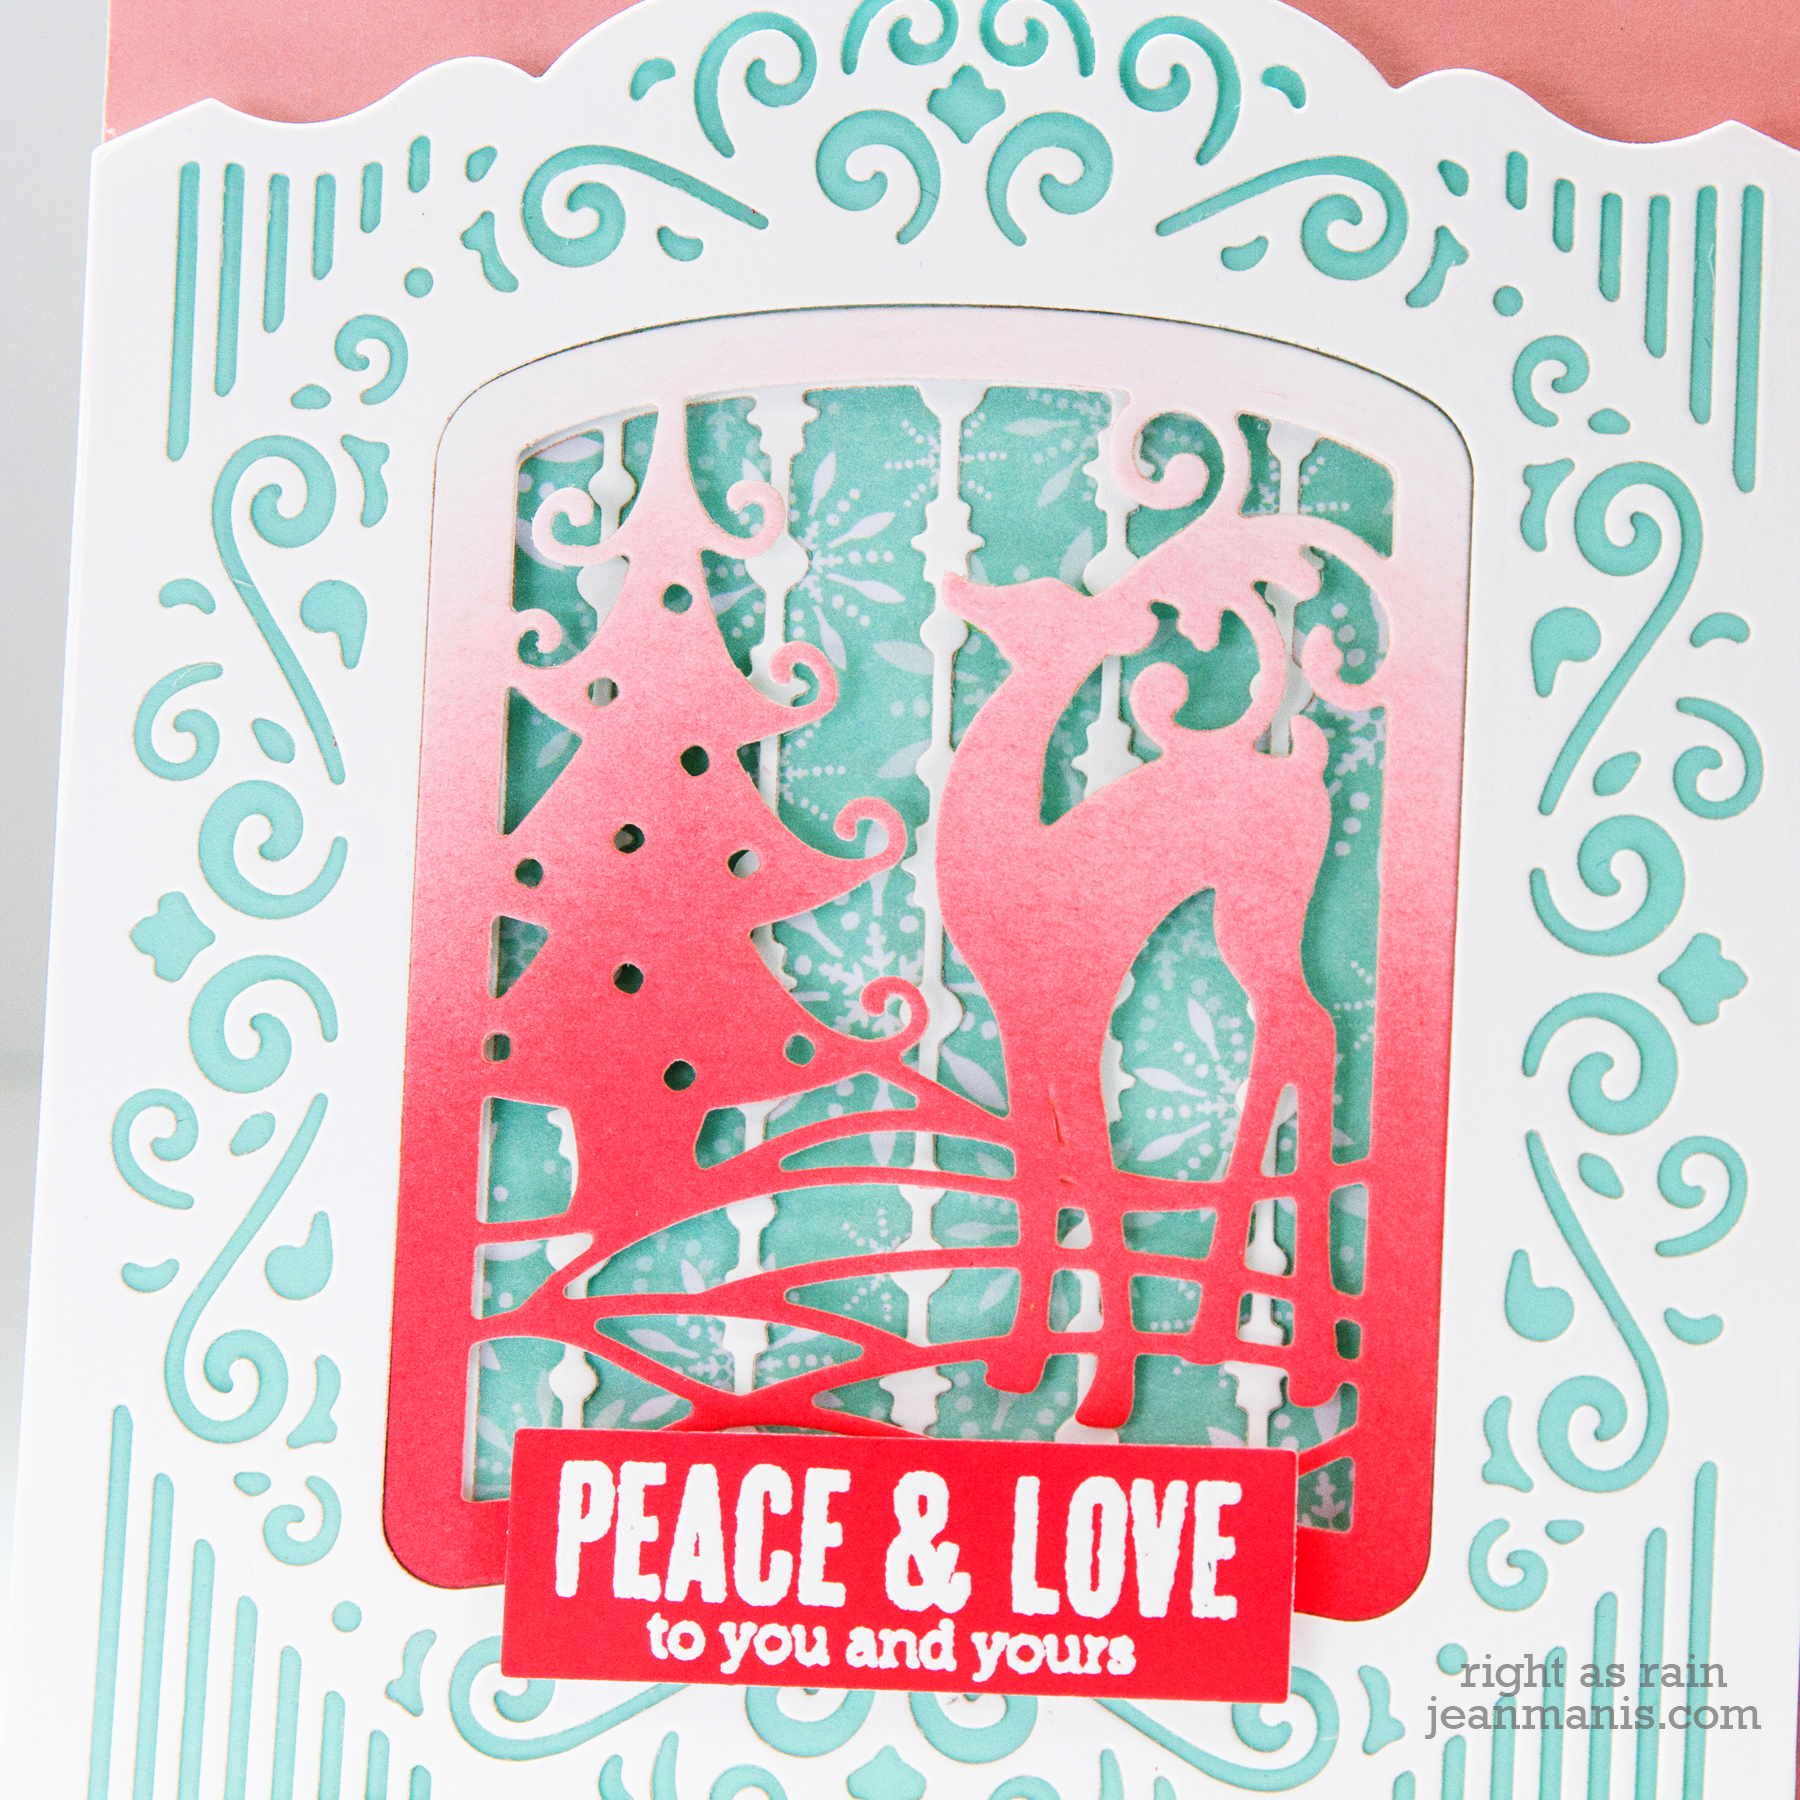
My second card pairs Reindeer Prance with the Grand Holiday Cabinet.
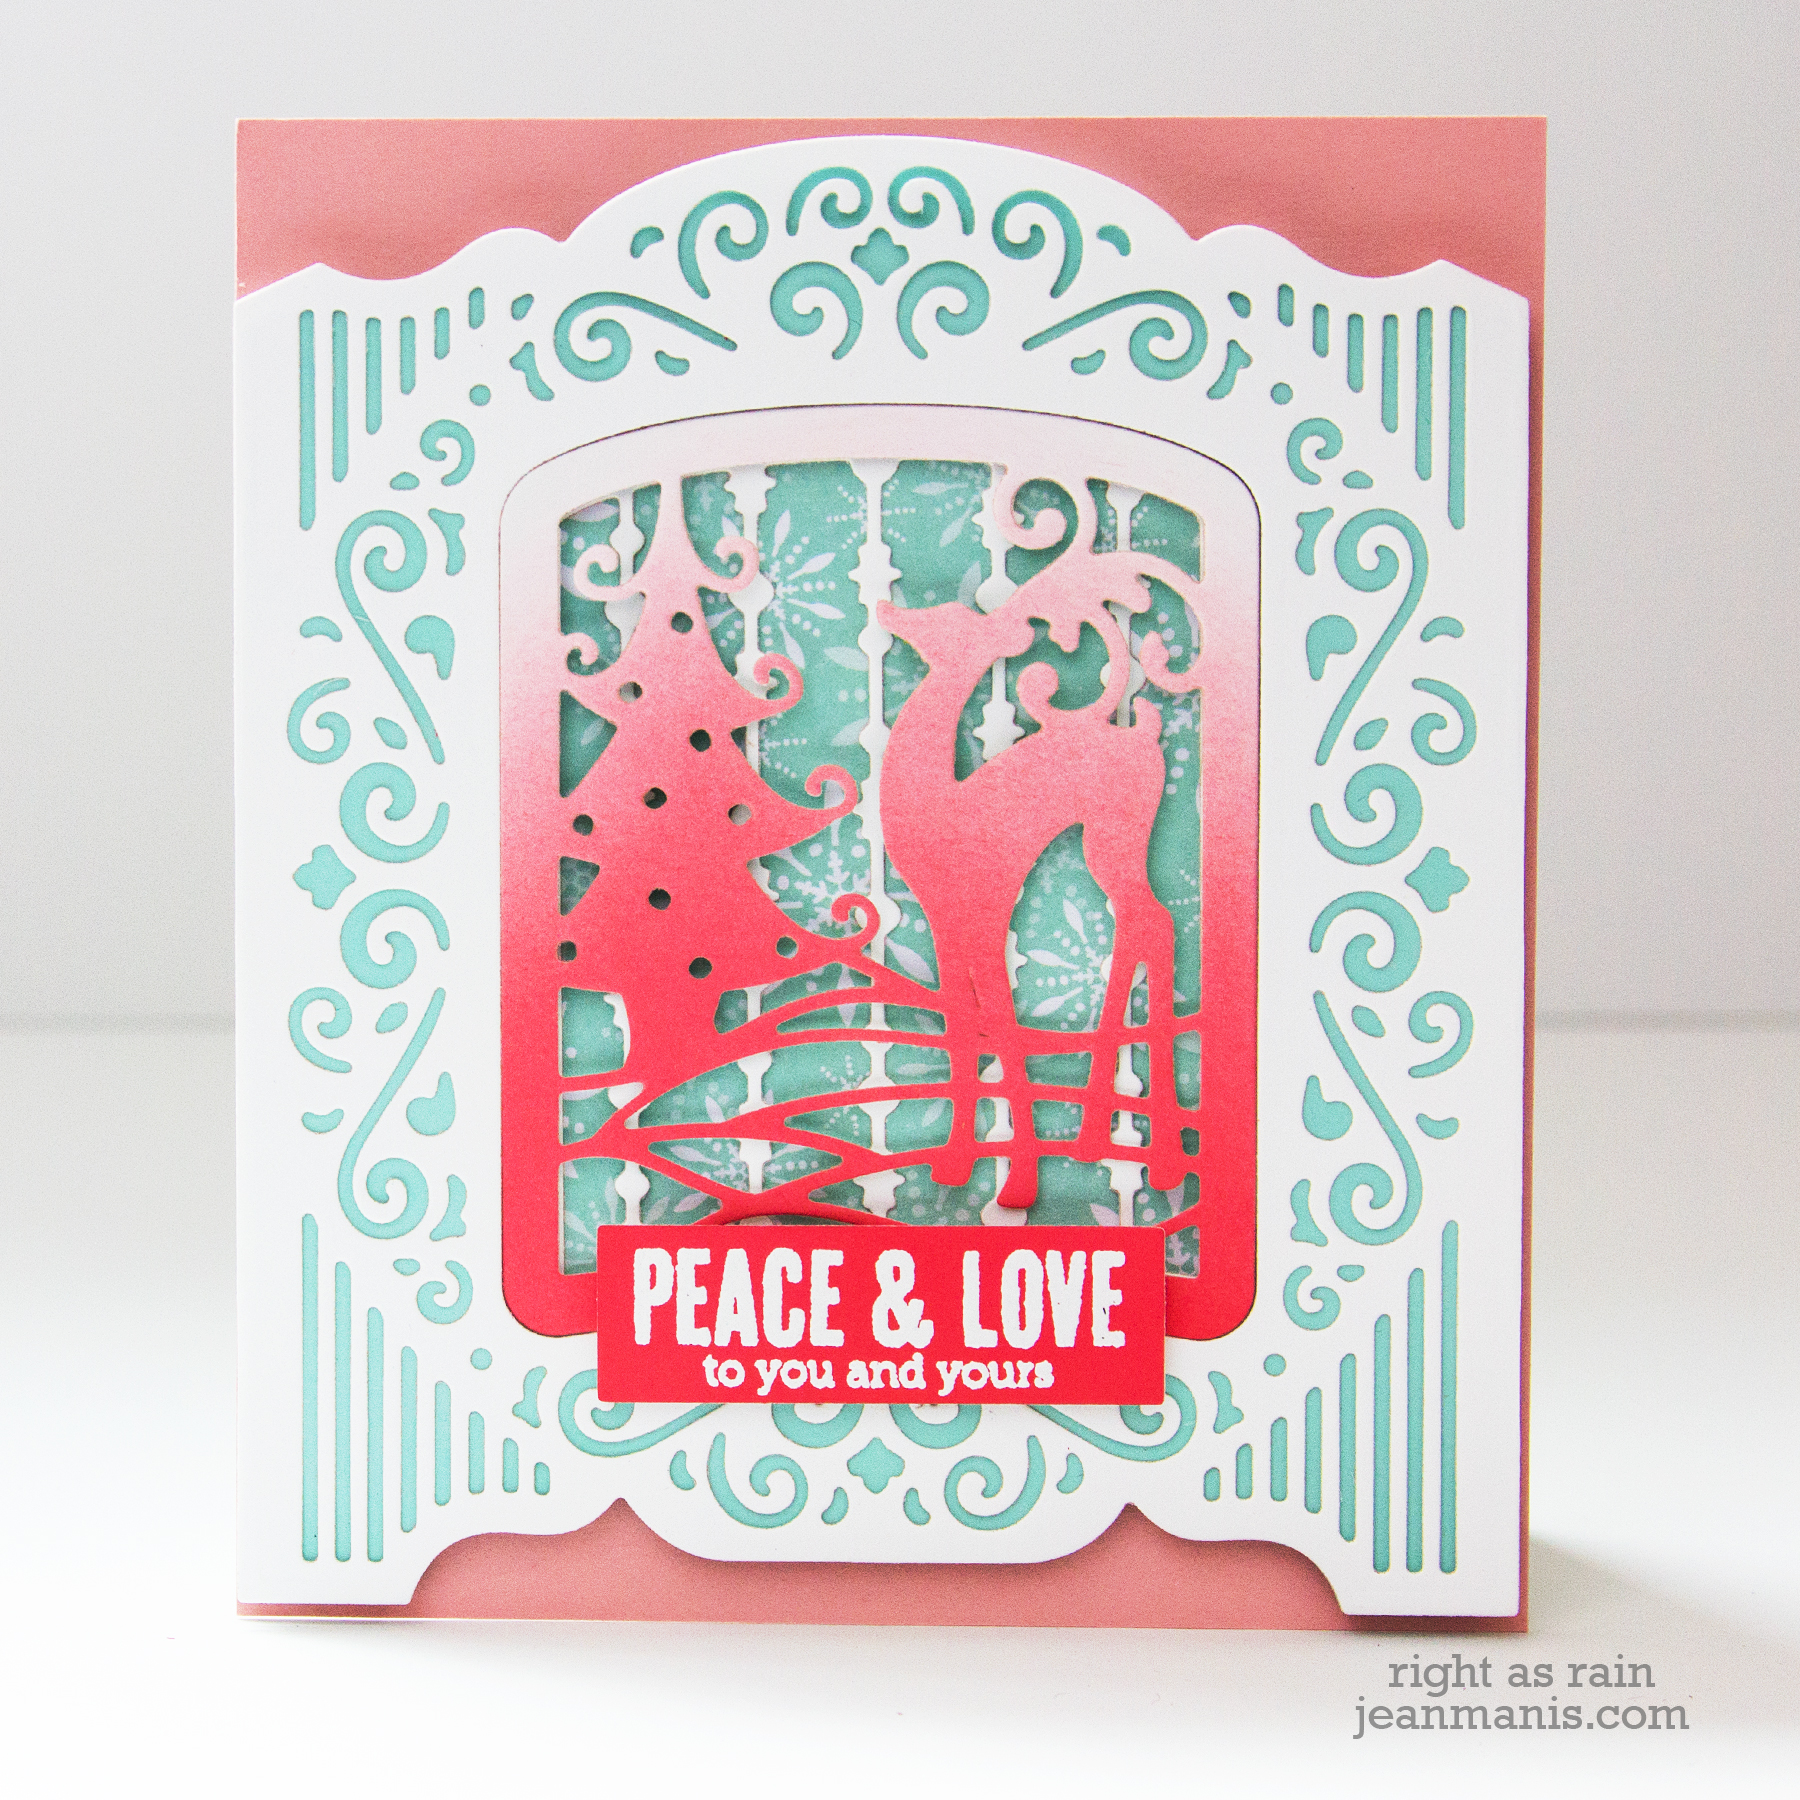
I cut the Grand Holiday Cabinet from Whip Cream cardstock and backed it with light blue cardstock (cut with the outline die in the set). I used the Grand Holiday Cabinet pieces as a frame for the card; I trimmed off the tabs that are used if making a 3-D object.
I cut the front panel of the Reindeer Prance from Whip Cream cardstock to which I had applied Festive Berries Distress Oxide Ink.
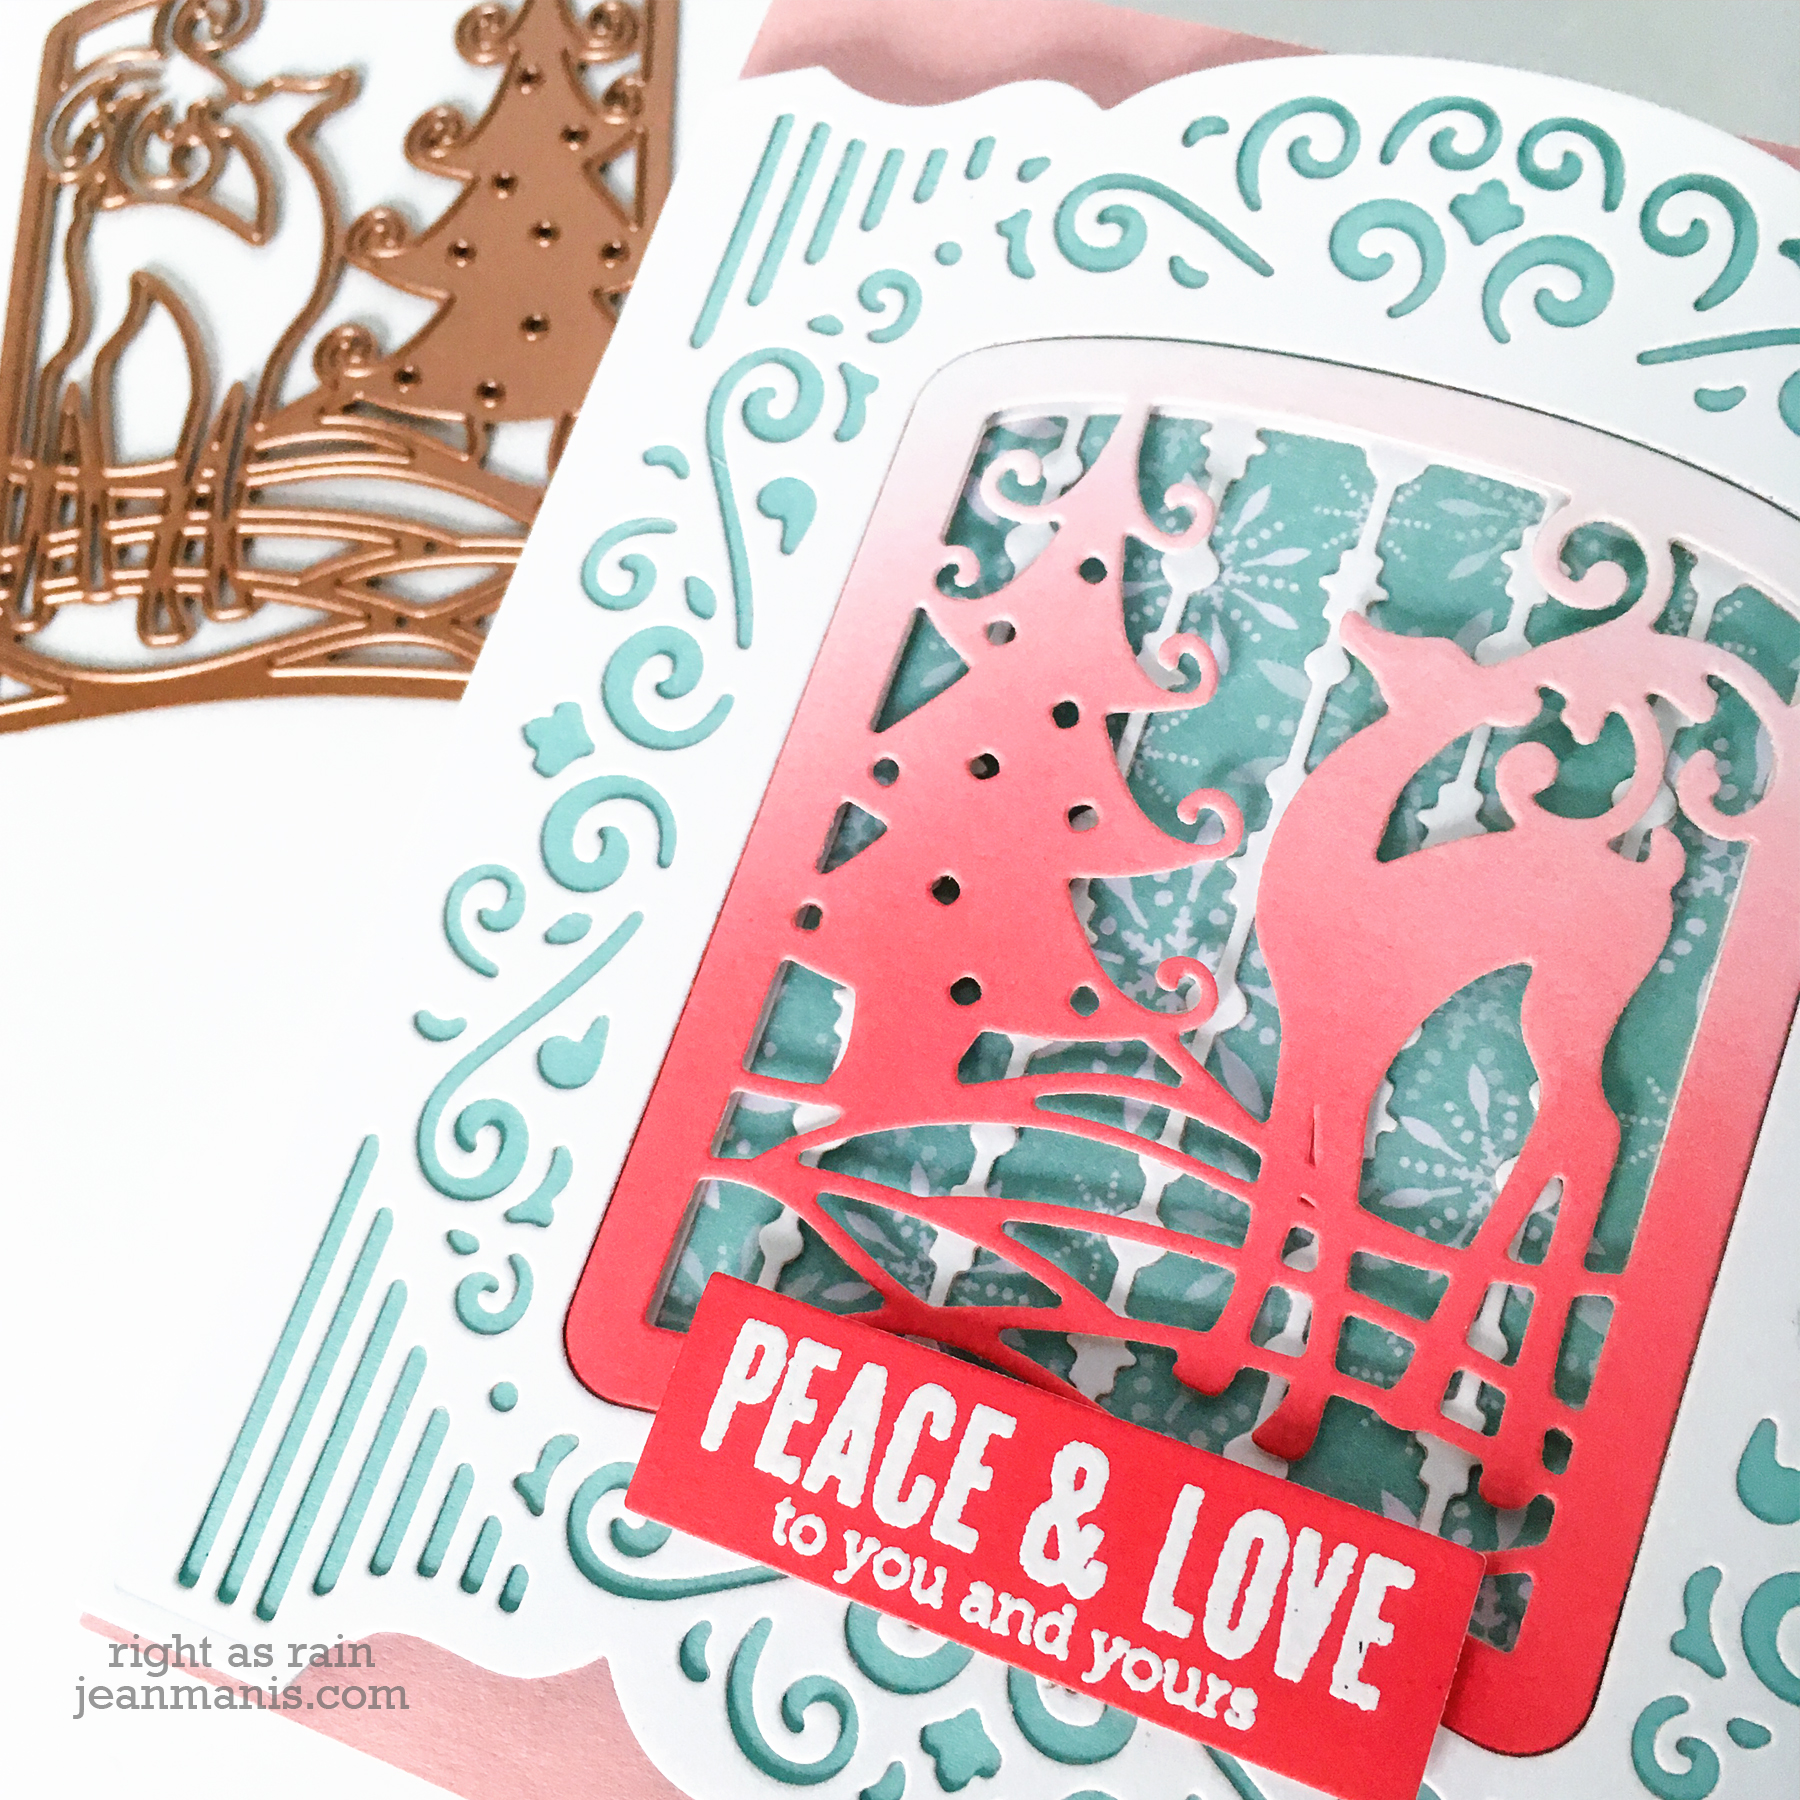
I heat-embossed with white powder a sentiment on to cardstock colored with Festive Berries Distress Oxide Ink.
I placed the Reindeer front piece into the Grand Holiday Cabinet opening and taped it from behind.
I added the snow/icicle/star garland piece to patterned paper, which I cut with the circle die in the set, and adhered them to a back panel.
I adhered the front panel to the back with foam adhesive and added the entire assembly to a card base. I then added the sentiment.
Thanks so much for dropping by! The next stop on the hop is the blog of Varada Sharma. I’ve included the entire list of blog hop participants at the end of the post.
Supplies:
Blog Hop Participants:
Spellbinders
Becca Feeken
Hussena Calcuttawala
Bibi Cameron
Amy Rysavy
Jean Manis
Varada Sharma
Pam Sparks
Melody Rupple
Karin Åkesdotter</a
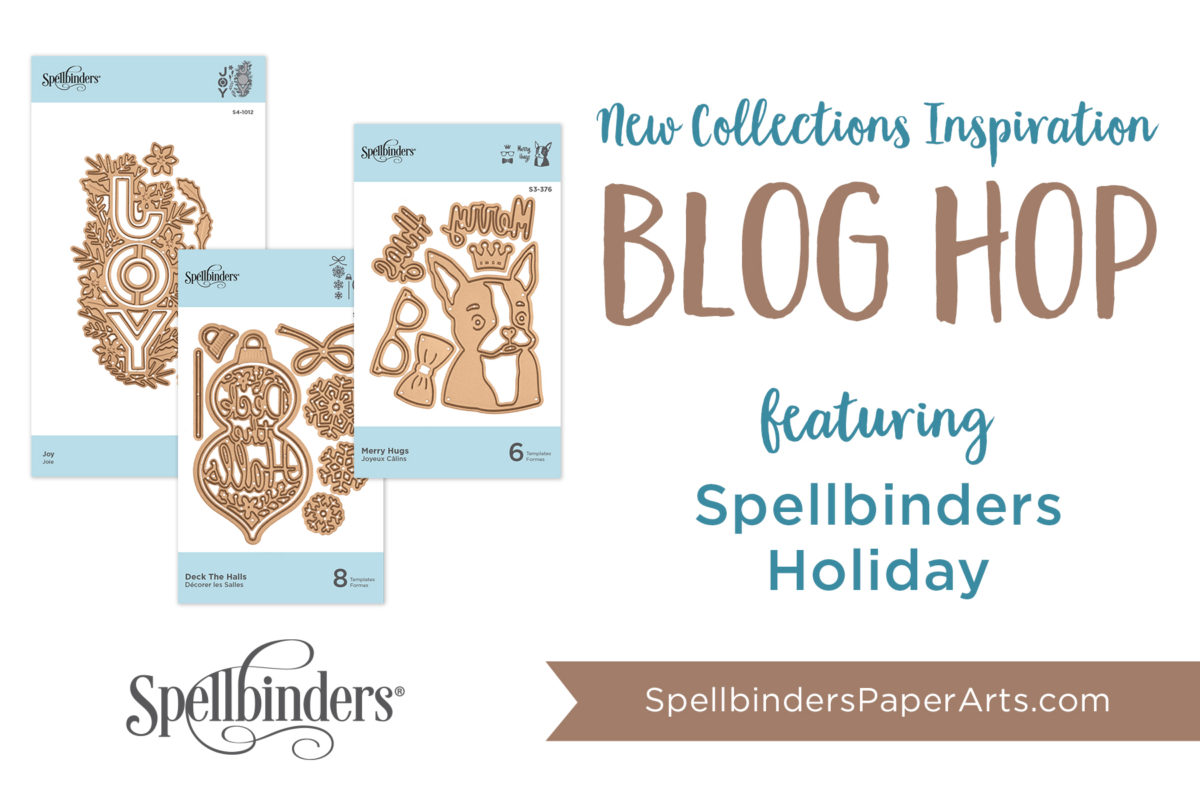
Hello crafty friends! I am delighted to be participating in a blog hop celebrating the Spellbinders Holiday 2019 Release! You should have reached me from the blog of Wanda Guess. I’ve included a full list of participants at the end of my post.
To celebrate this release, Spellbinders is giving away a $50 gift certificate to one lucky blog reader – selected from the comments across all of the blogs in the hop. Giveaway closes on Sunday, August 25th 11:59 pm EDT. The winner will be announced in the blog hop post the following Monday. The winner is responsible for shipping cost, duties, and taxes.
I’m sharing projects created with three die sets in the new collection. Let’s take a look.
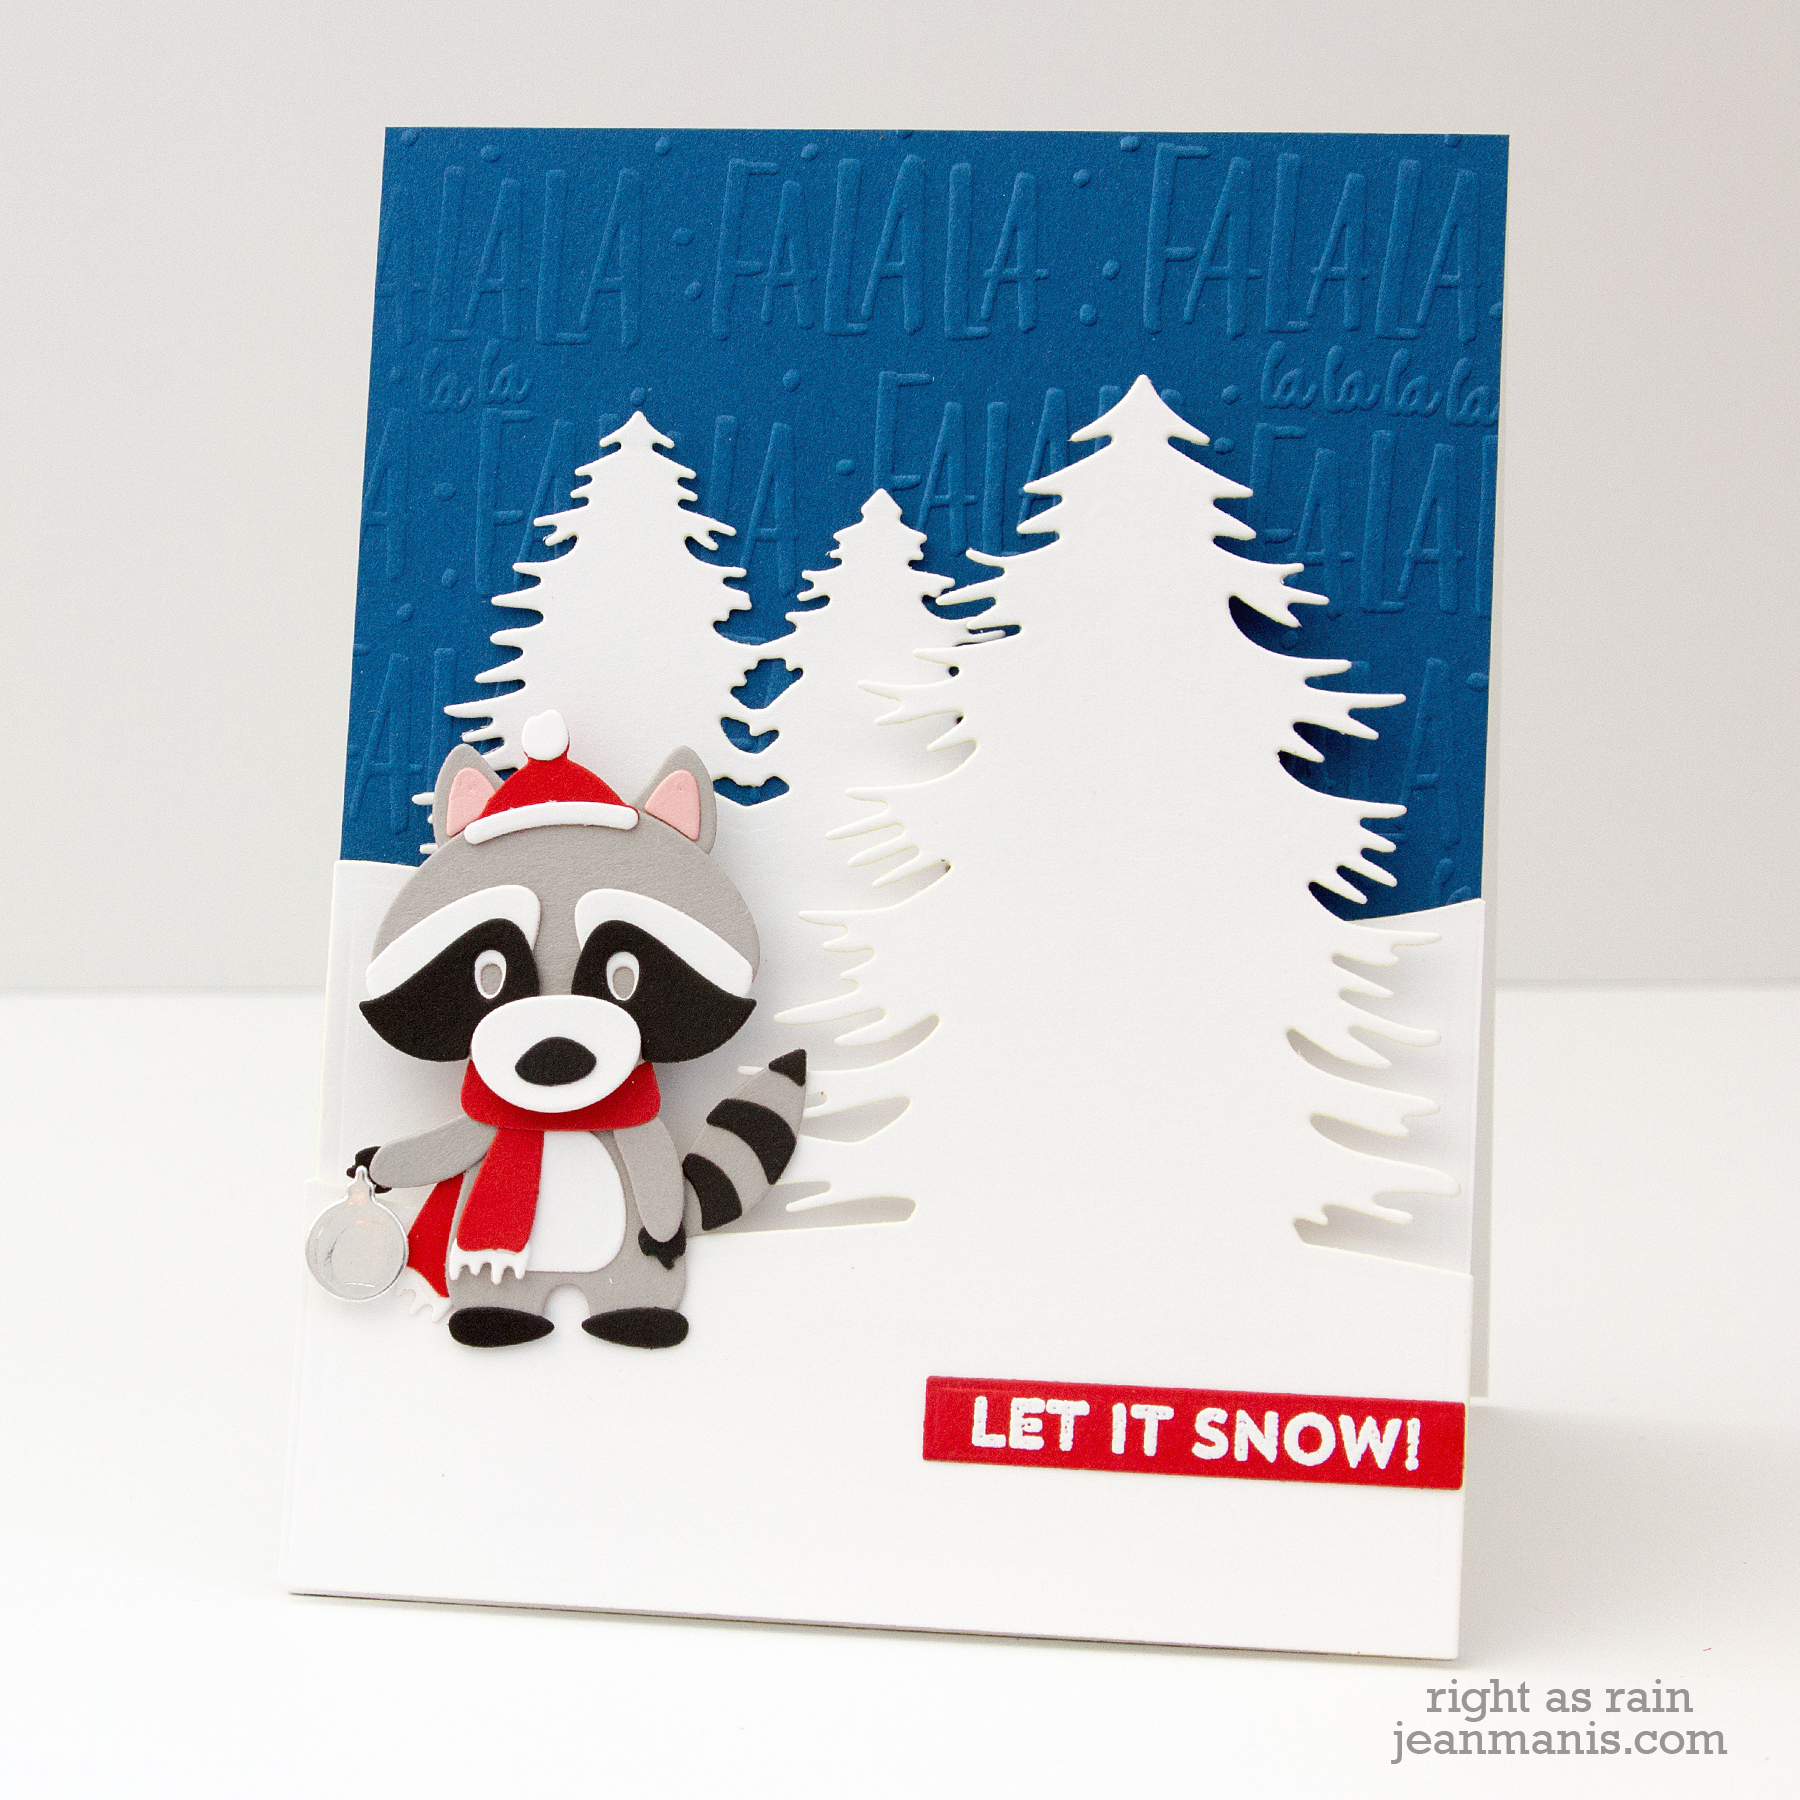
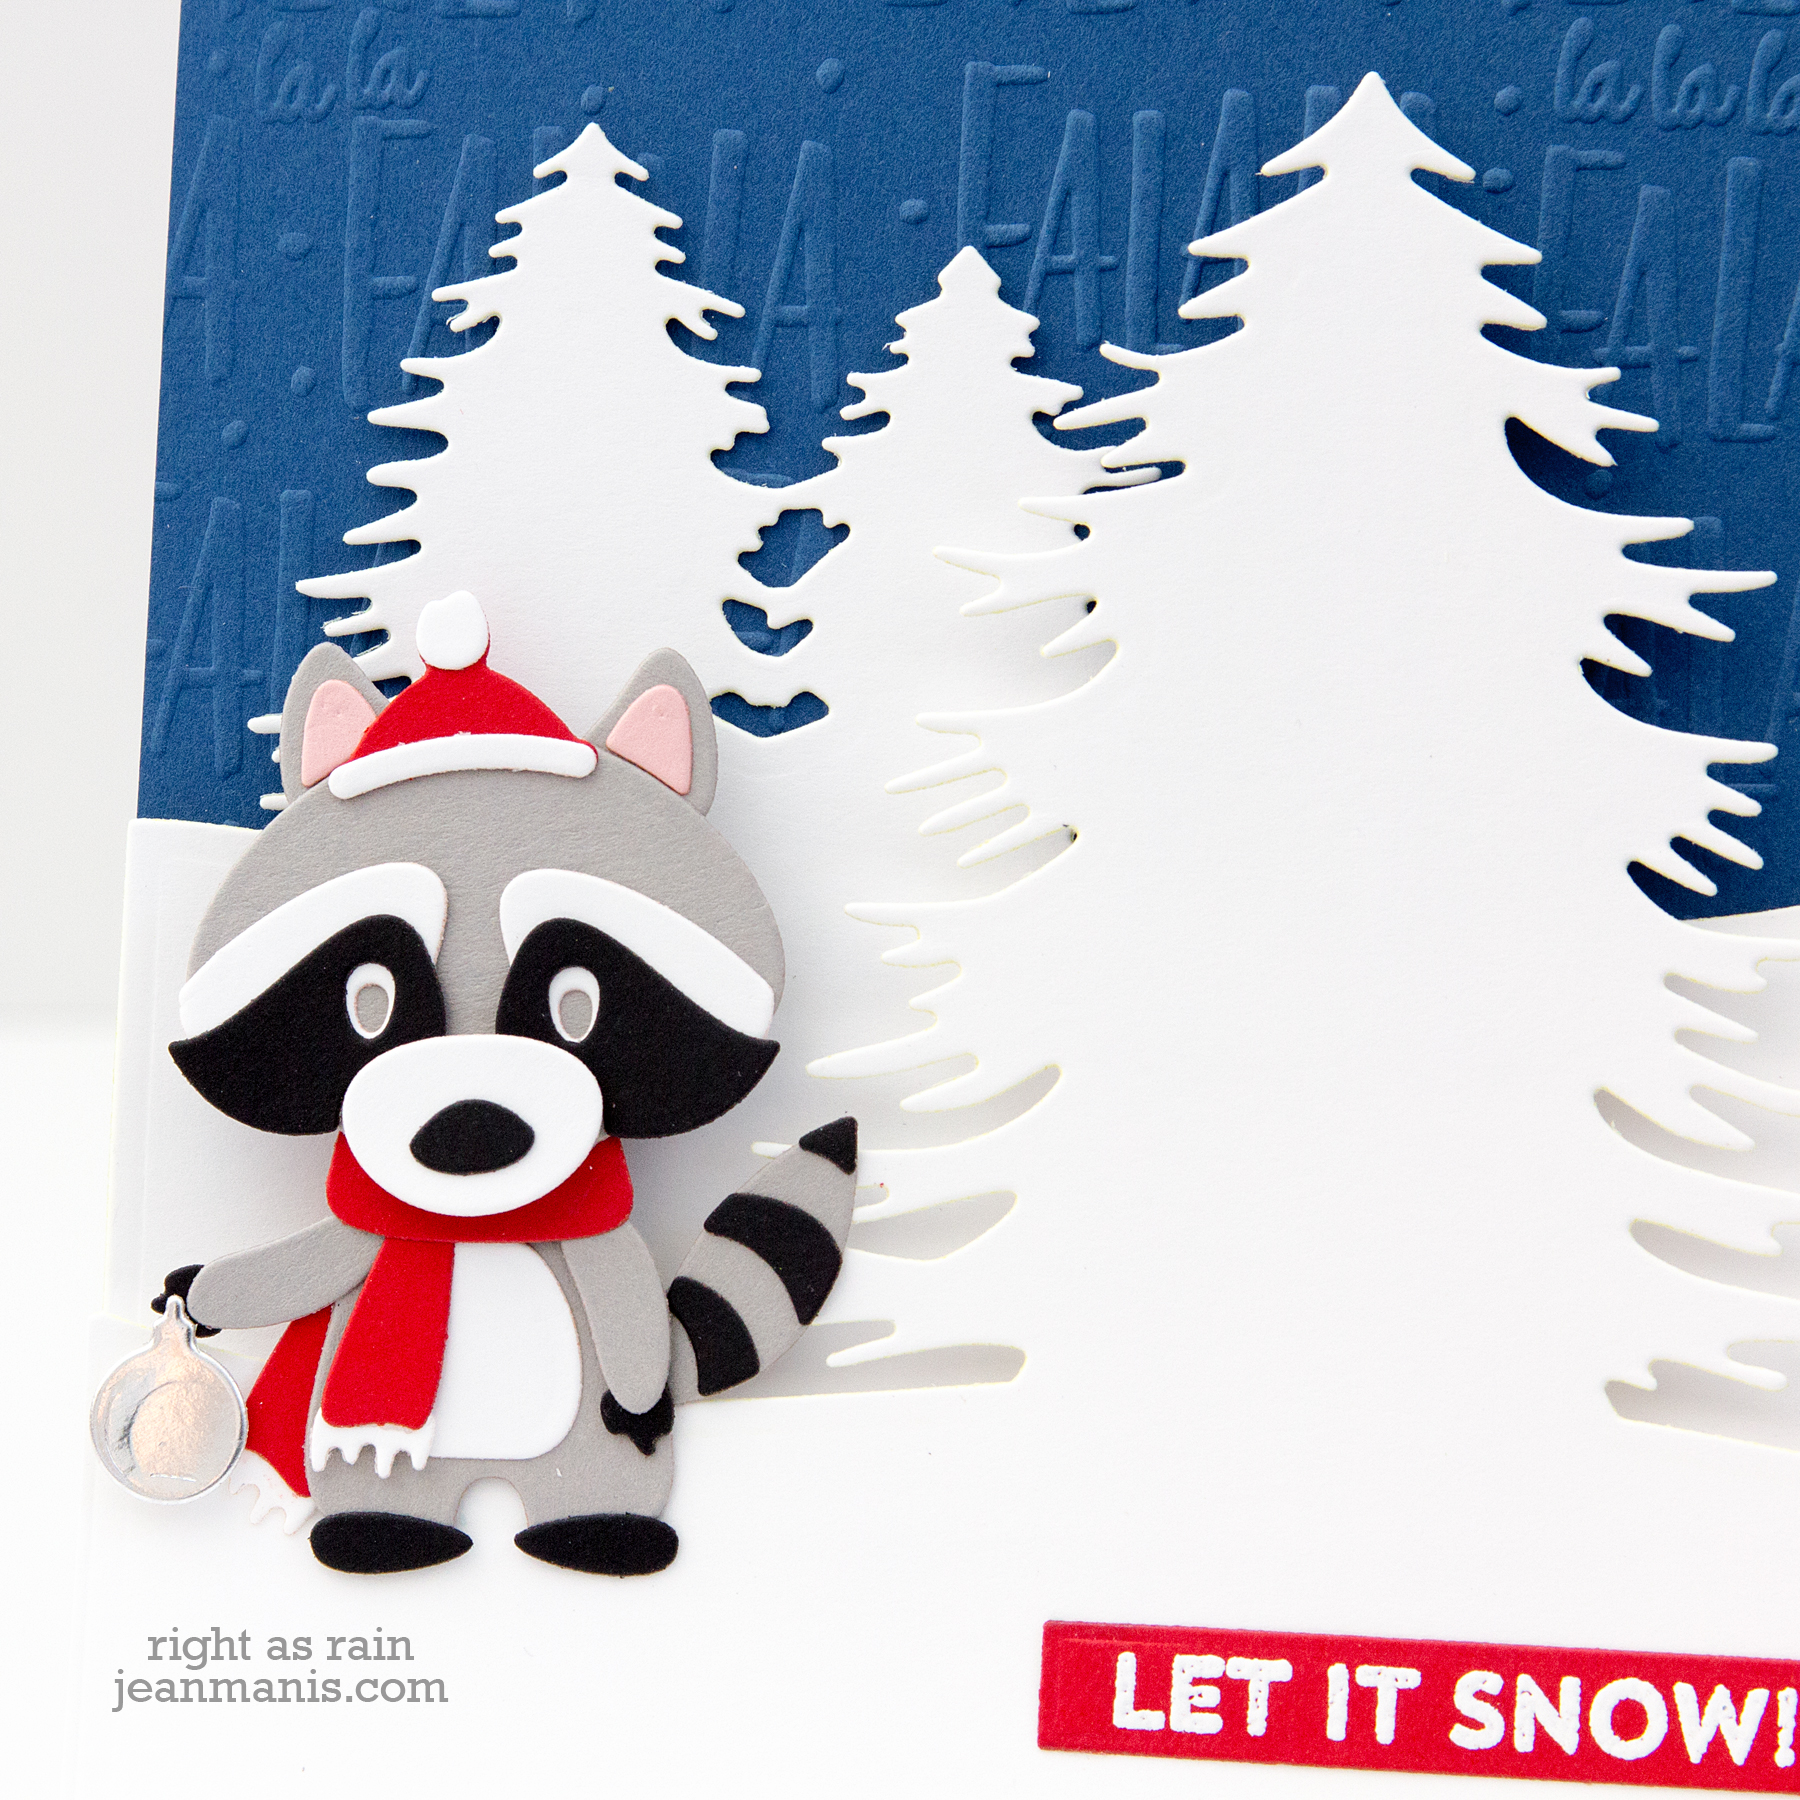
My first project showcases the Christmas Bandit die set. I’ve set the bandit into a snow-covered scene.
One of the great things about this collection is there’s something for everyone. Case in point, the Laurel & Bows Cut and Emboss folder.
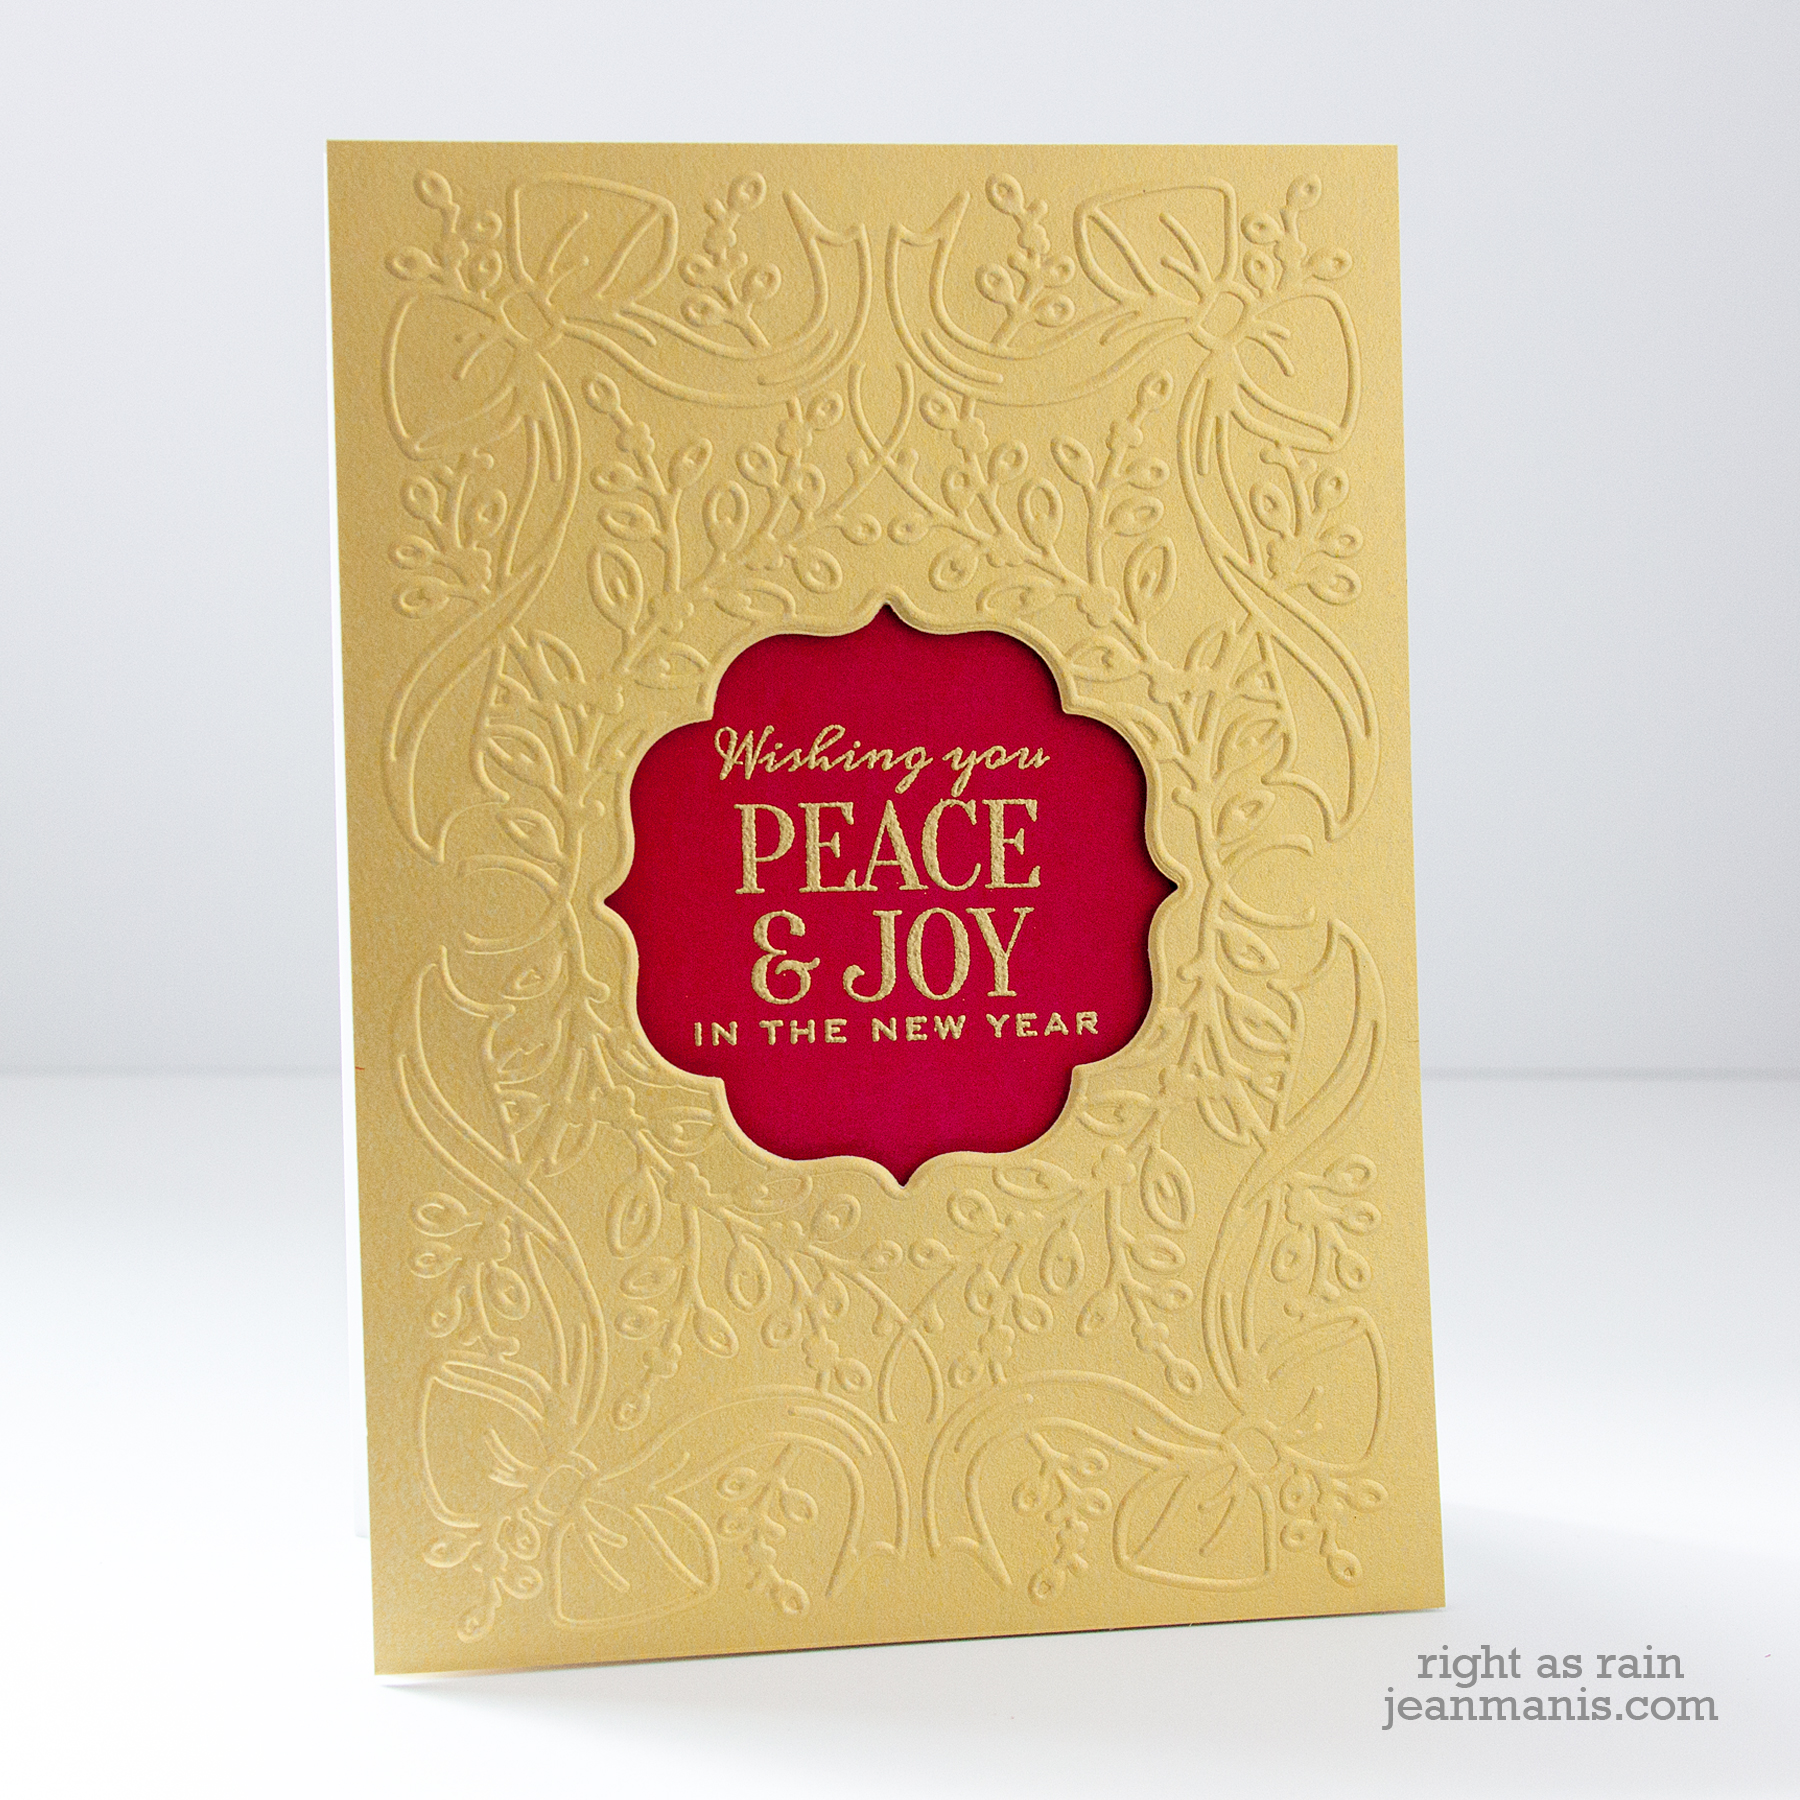
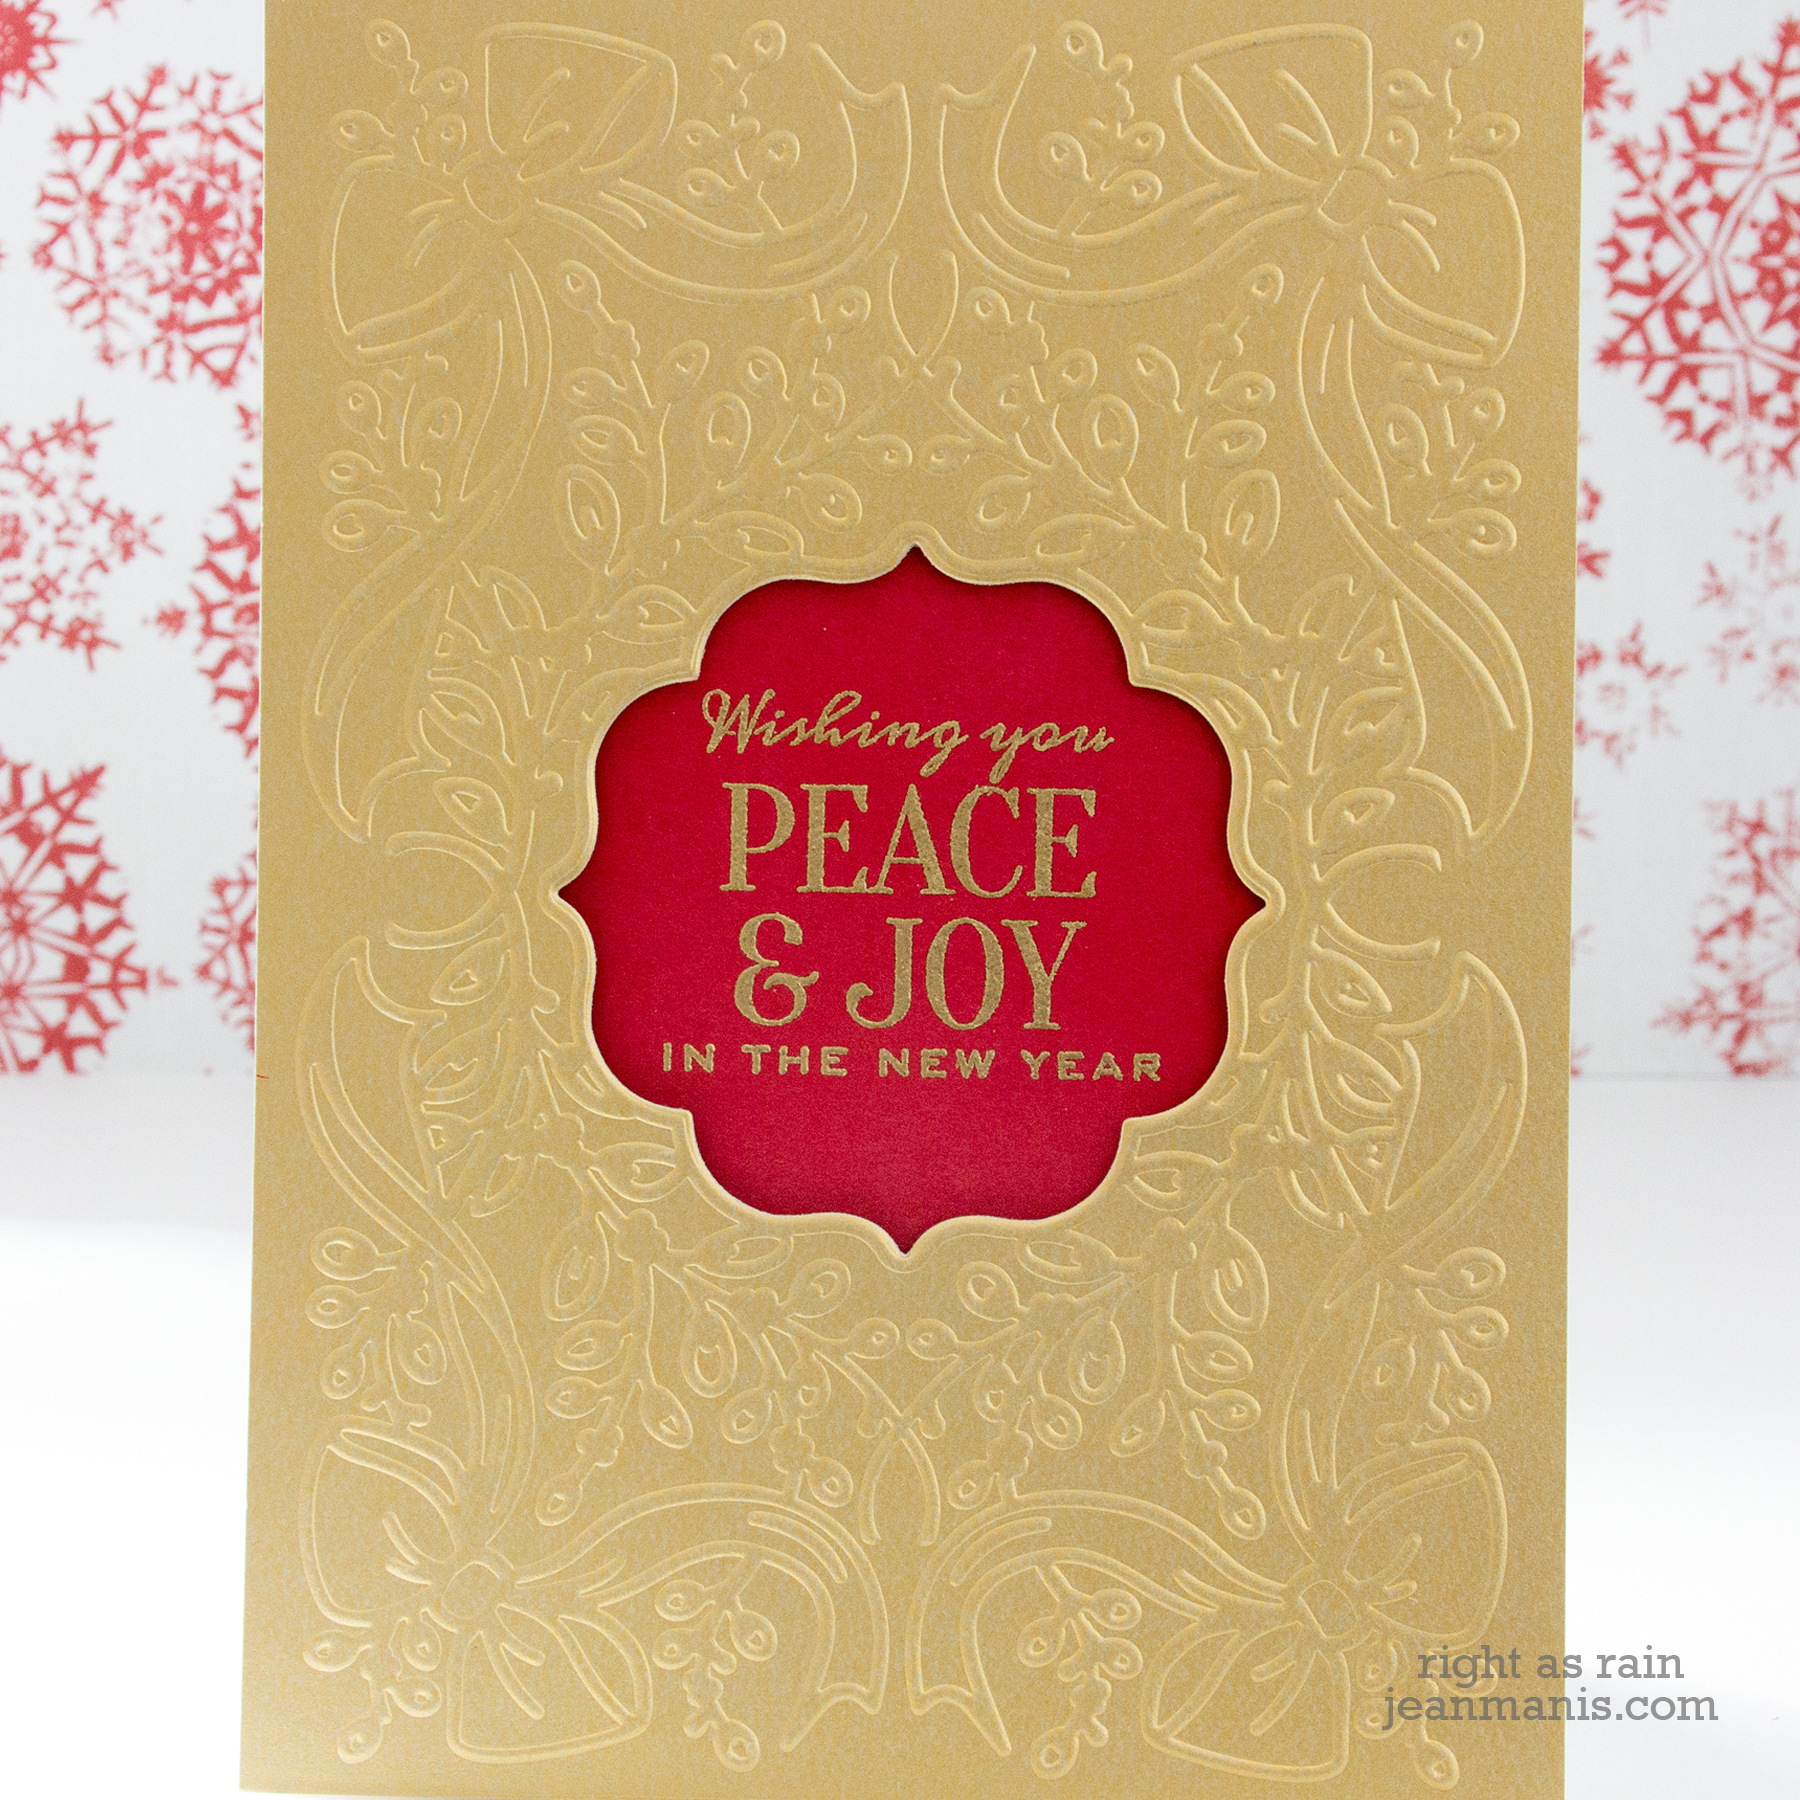
Quick, easy, and elegant – perfect for mass production!
My final projects use the Shapeabilities Joy die set. There are so many options available with this set! And again, the set is completely adaptable to one’s own style. My projects reflect my CAS style.
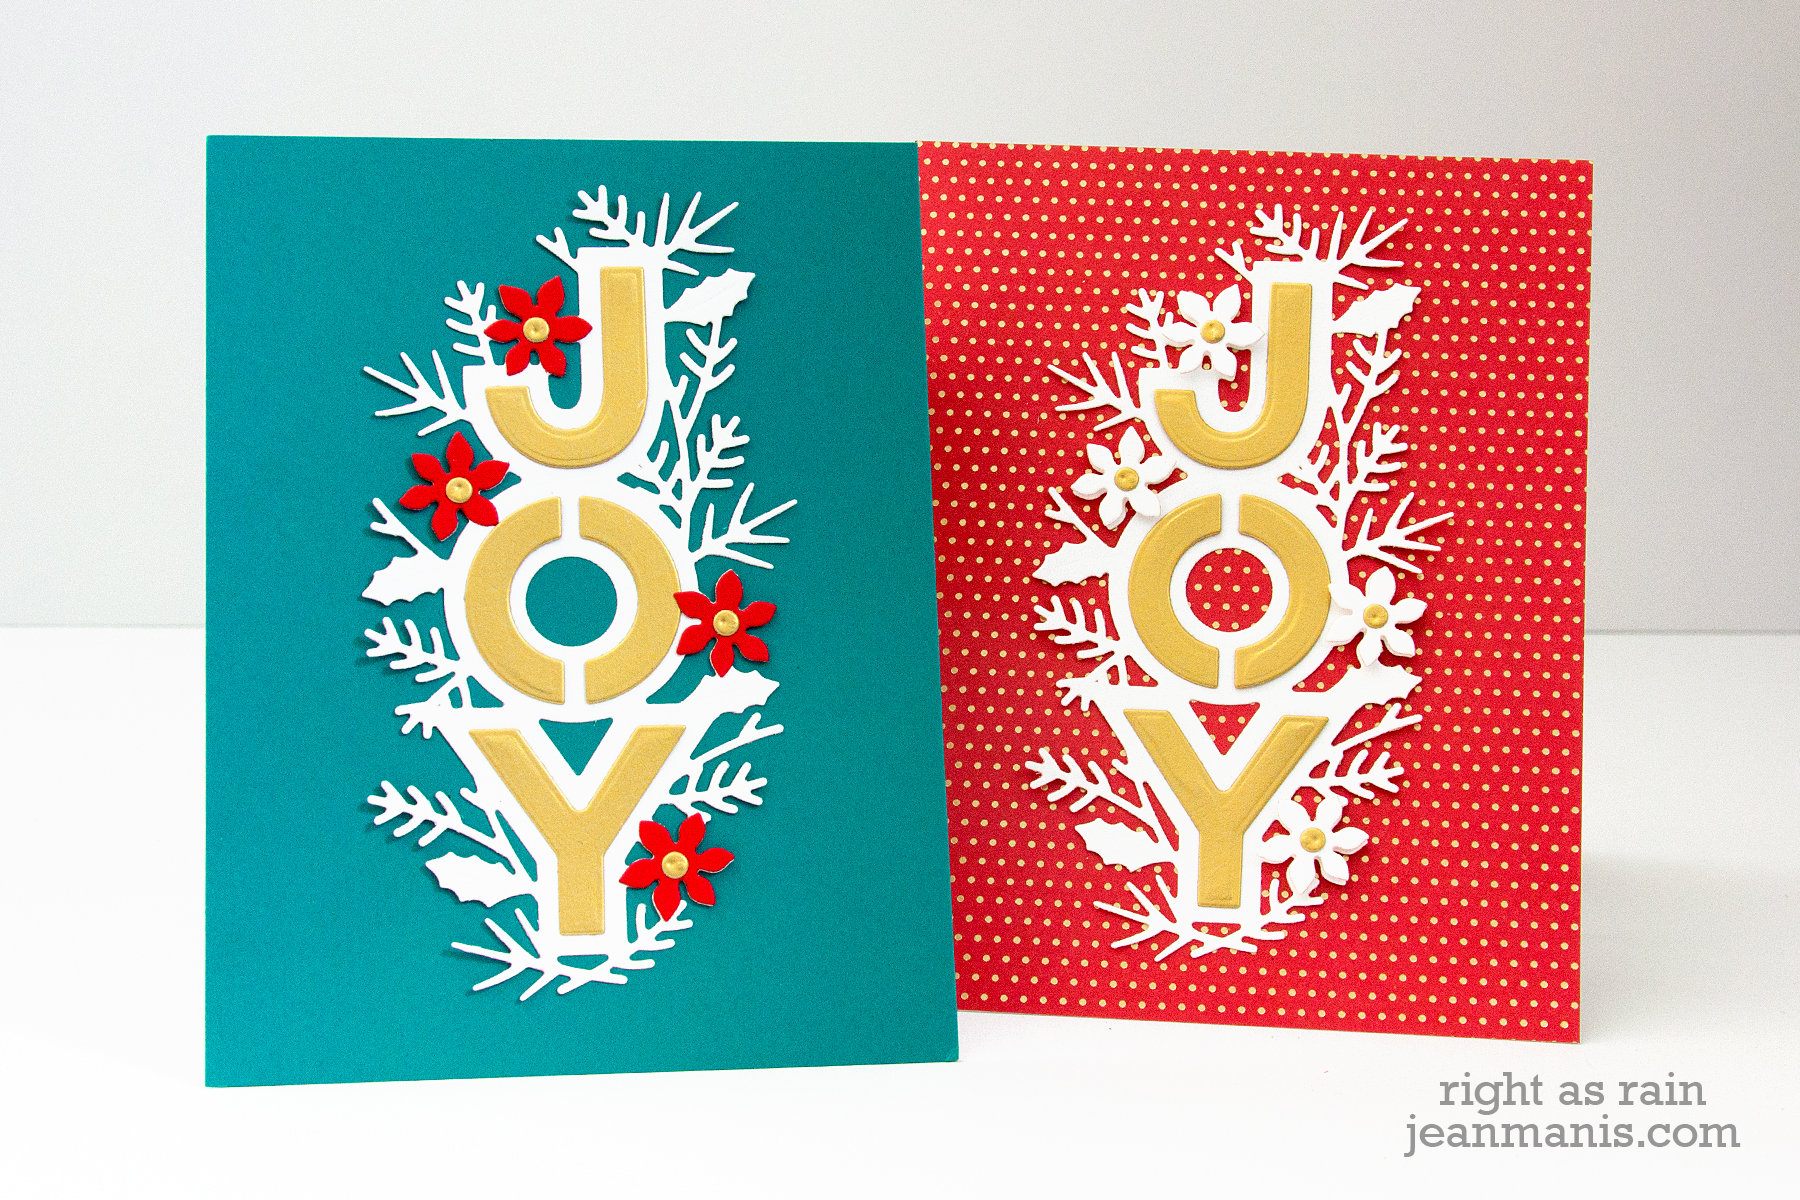
I created card backgrounds from teal solid cardstock, patterned red paper, and green solid cardstock. For all three cards, I cut the poinsettia blooms with the included die and added them to the JOY back panel with foam adhesive. The back panel for the letters does not cut the center of the “O” but the die set includes a die with which to do so.
For the holidays, I like to add metallic accents. For the teal and red background cards, I cut the letters from Brush Gold cardstock. I cut the flower centers on all of the cards from the gold cardstock.
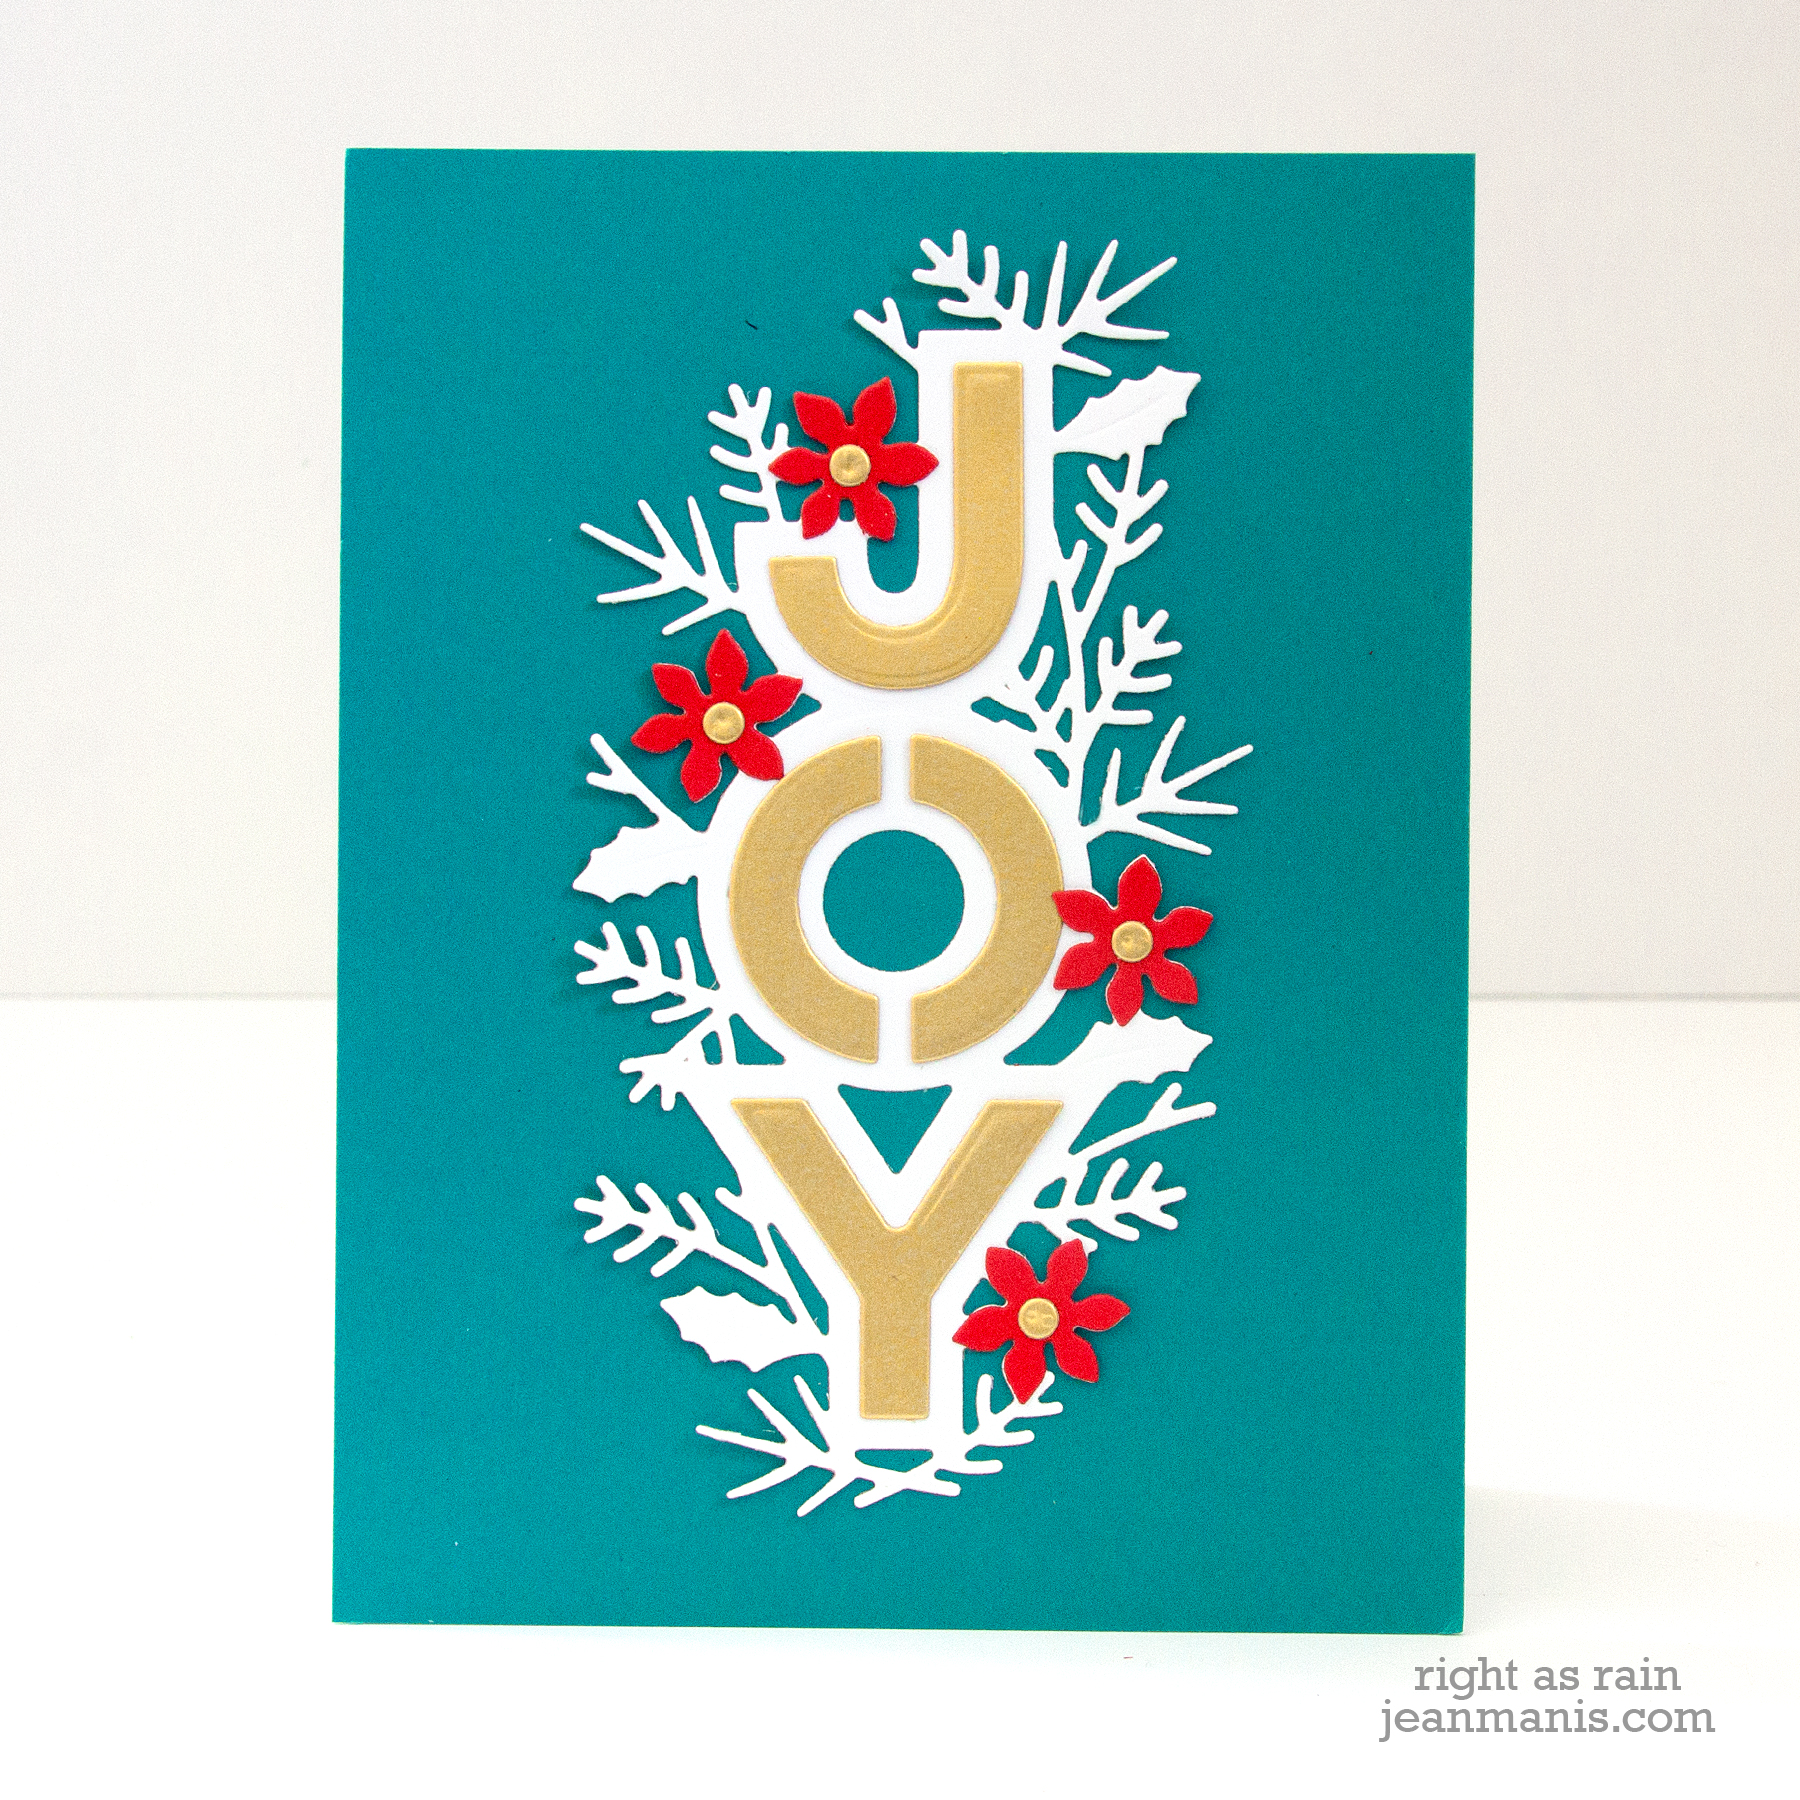
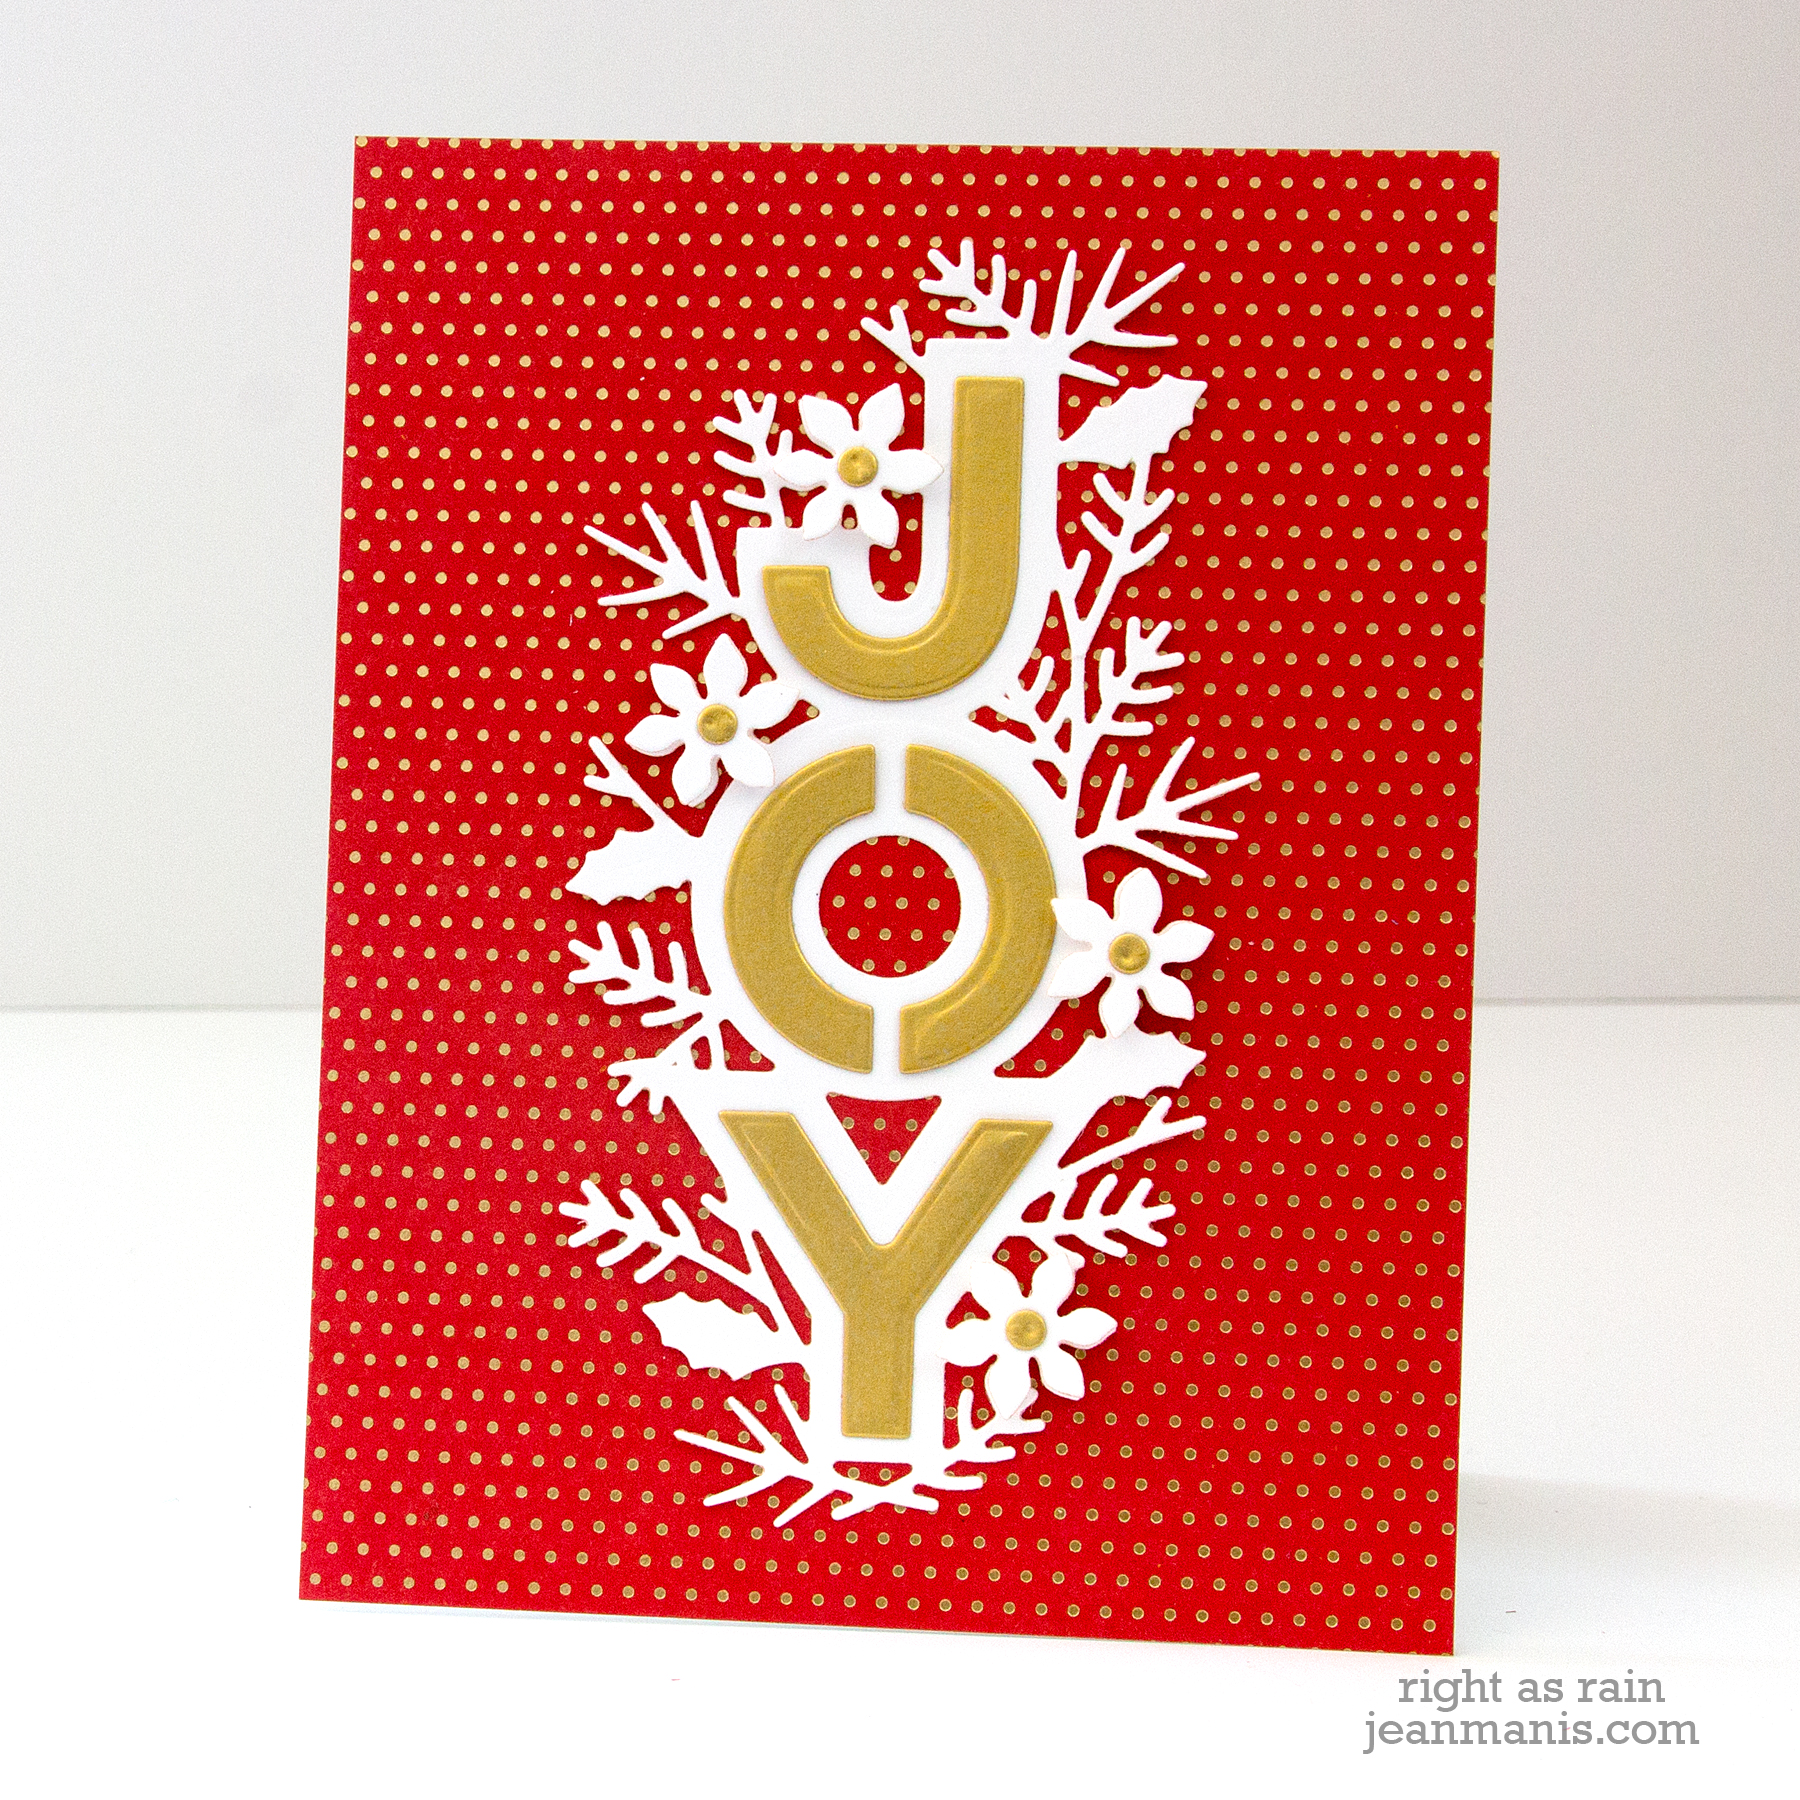
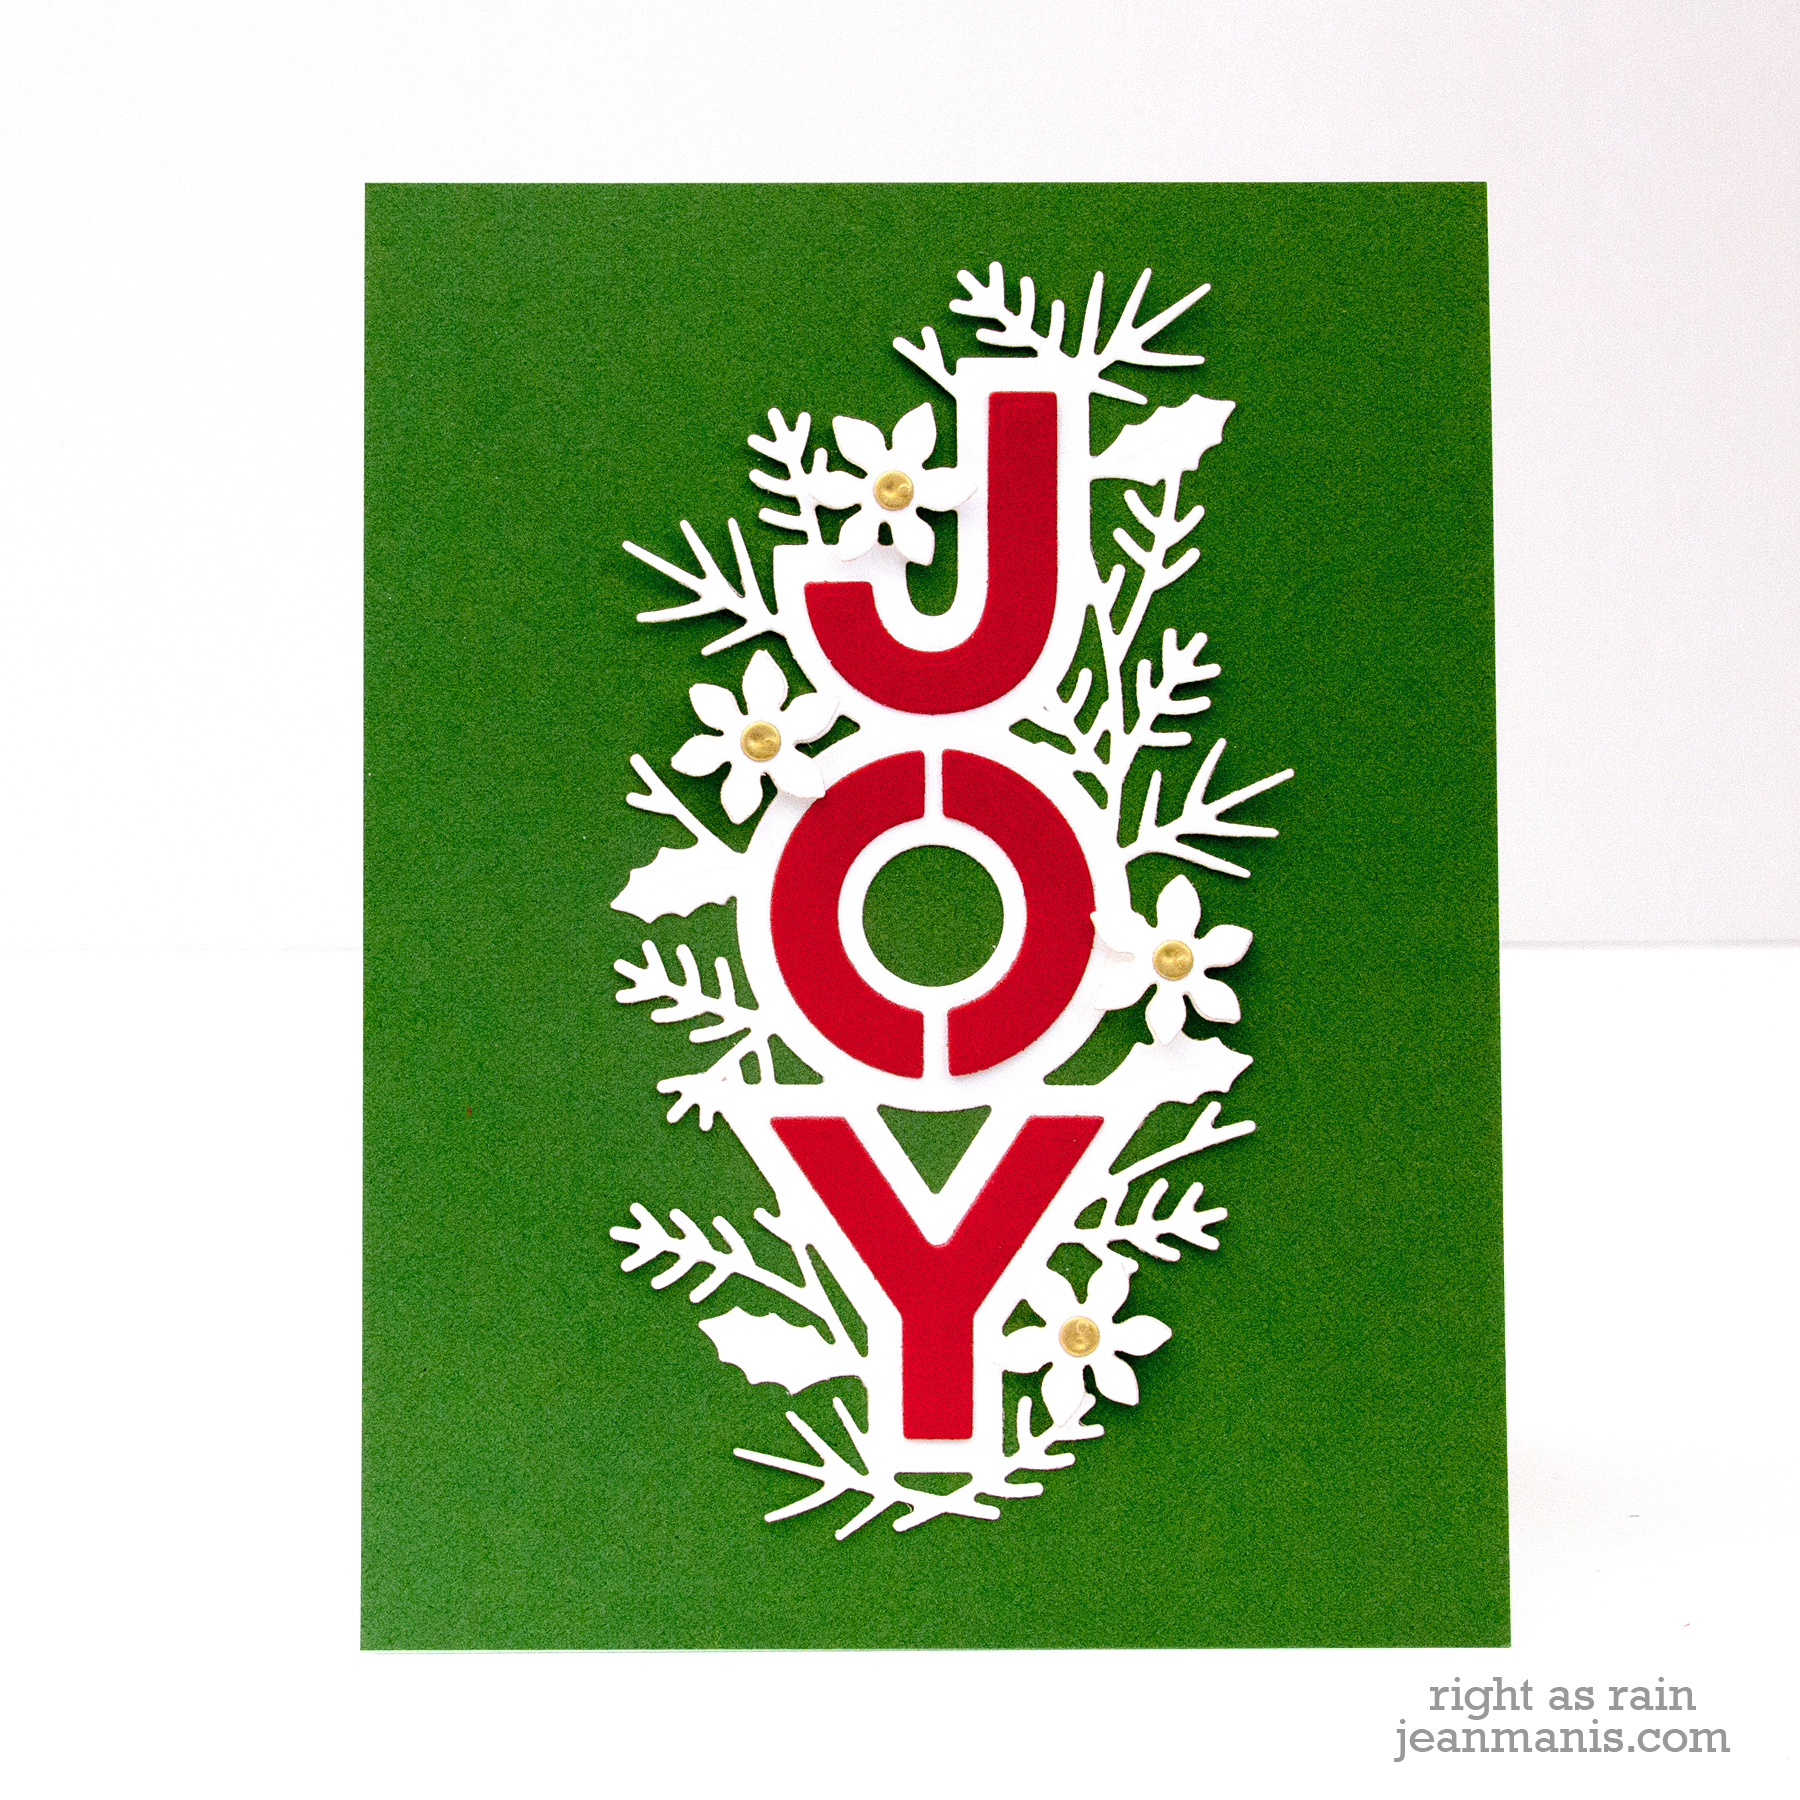
There really is no limit to the possibilities with this set! I could have cut the greenery pieces, dry-embossed the card base, used glitter or shiny cardstock for the letters, …. You get the idea!
Now it’s time to head to the blog of Keeway Tsao. The entire blog hop list is included at the end of the post. Thanks for stopping by!
Supplies:
Blog Hop List:
Spellbinders
Jennifer Mcguire
Debby Hughes
Yana Smakula
Nichol Spohr
Wanda Guess
Jean Manis
Keeway Tsao
Svitlana Shayevich
Mindy Eggen
Marie Heiderscheit
Zsoka Marko
Laurie Willison
Karin Åkesdotter
Nina-Marie Trapani
Mindy Baxter
Amy Rysavy
Betty Wright
Daniel West
Amanda Korotkova
Mayline Jung
Varada Sharma
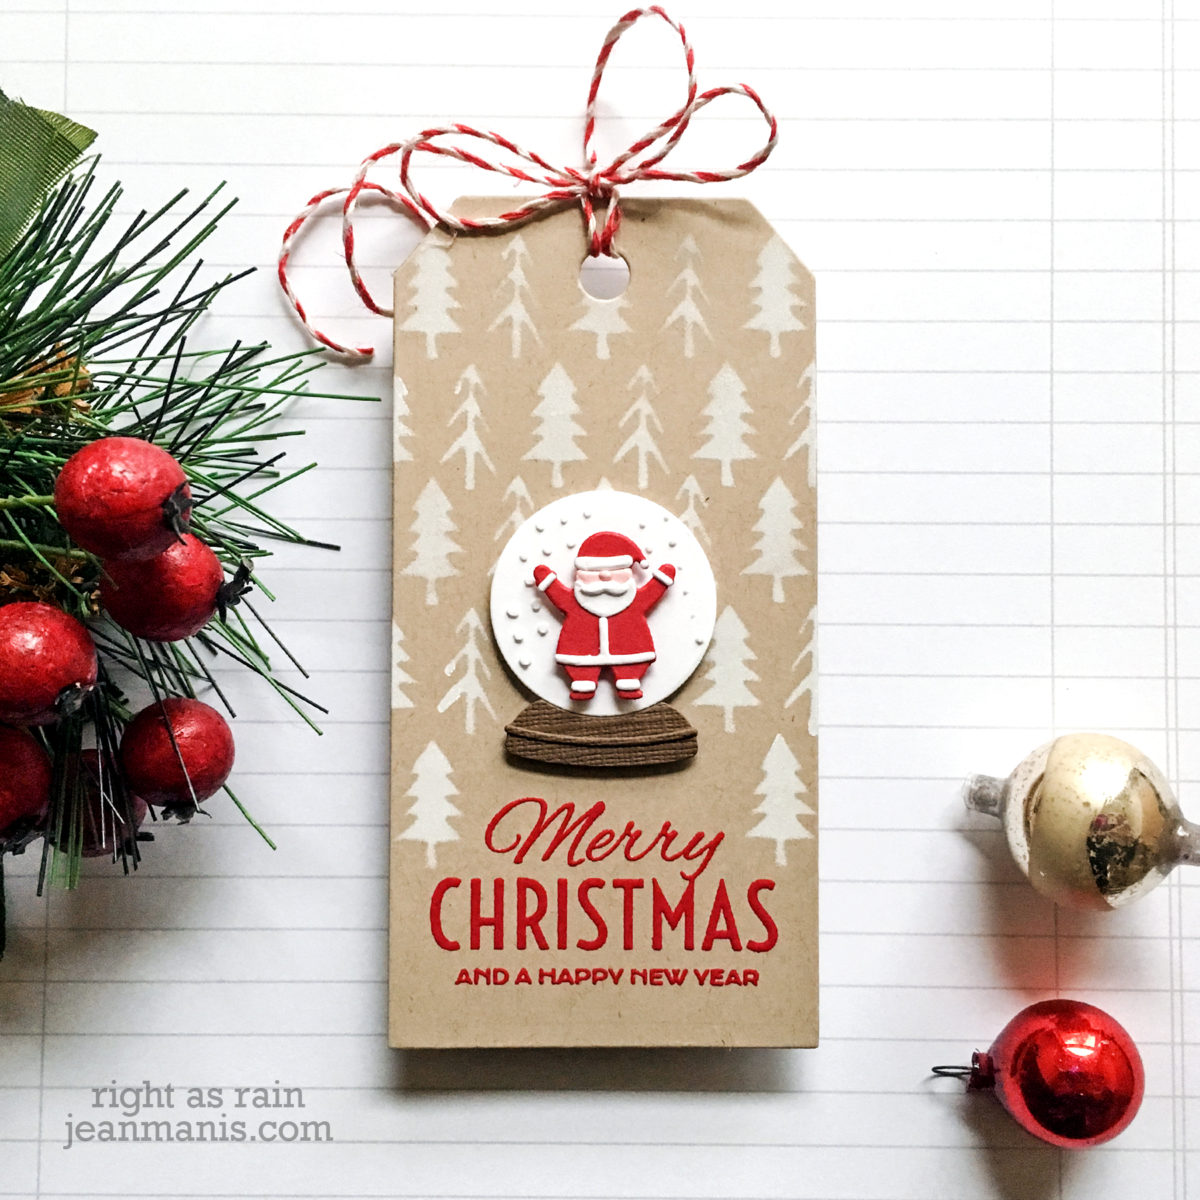
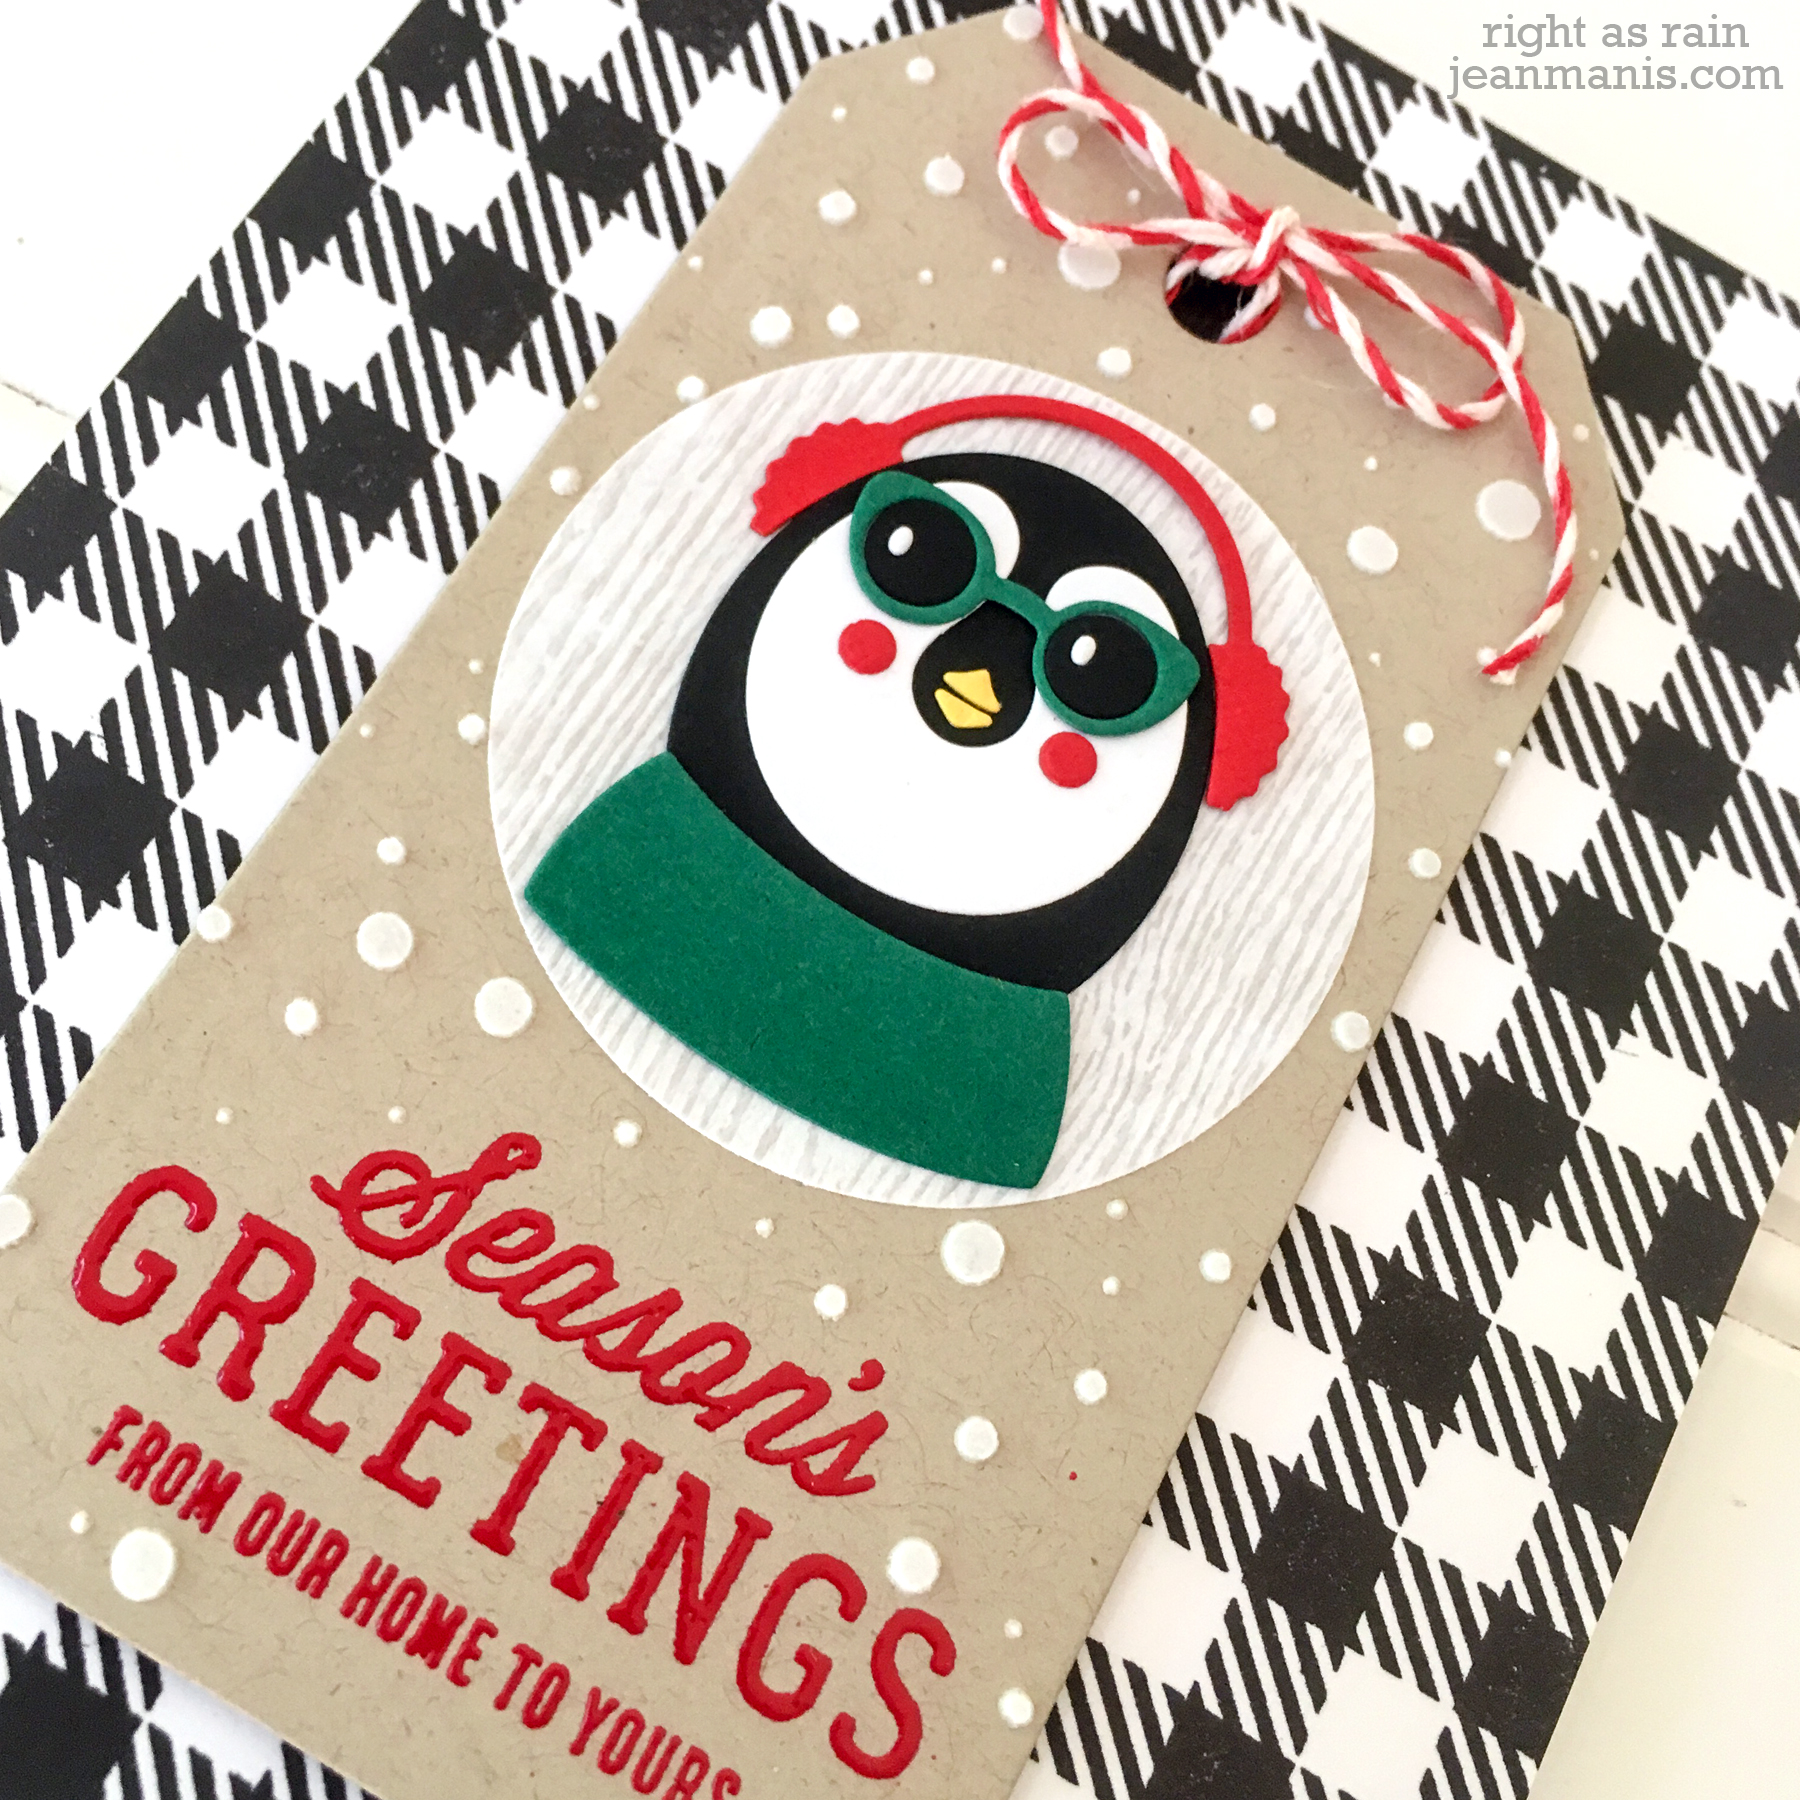
Hello and Merry Christmas! This is my final Christmas card for the season. I have so many more ideas, but between shopping, baking, and so forth, I just don’t have the time to turn those ideas into cards.
For this last card, I am showcasing the recently released Cool Yule die set designed by Tim Holtz, using a design similar to this tag. I am combining some of my favorite cardmaking things: stamped graphic background, die-cutting, stenciling, and heat-embossing.

Thanks so much for visiting!
Supplies:
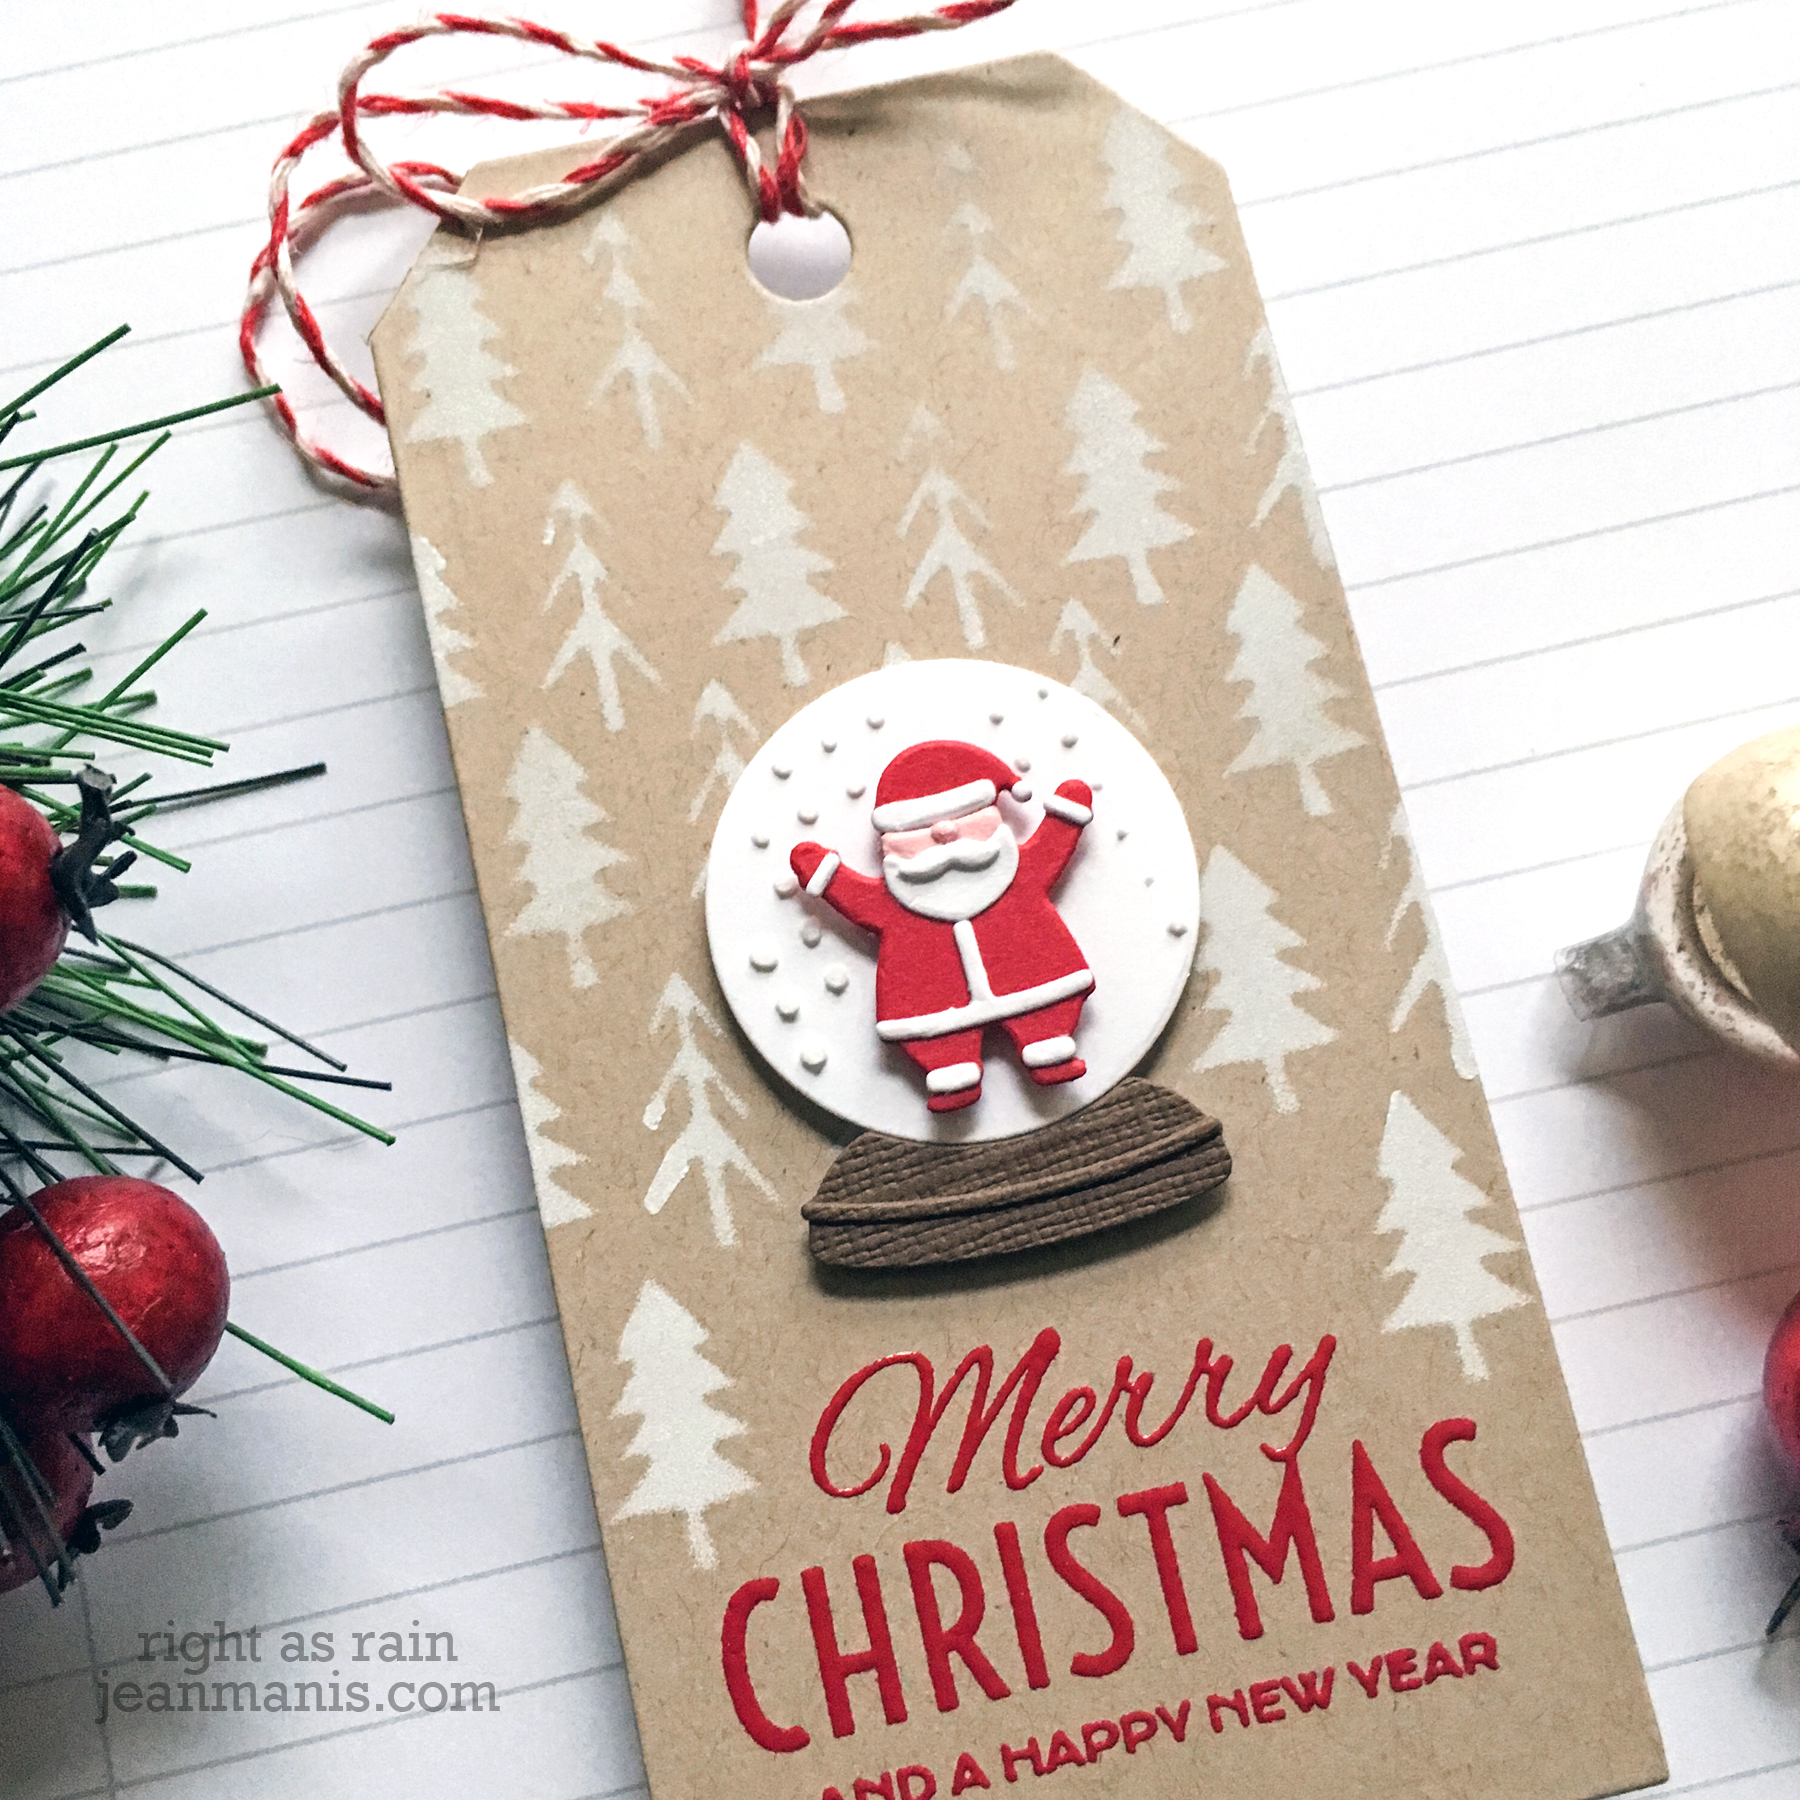
Hello! I couldn’t resist playing along with the Simon Says Stamp challenge with a CAS tag in one of my favorite color combinations – kraft, white, and red – using my favorite papercrafting techniques – diecutting, heat-embossing, and stenciling! The challenge features holiday wrapping projects created with Tim Holtz products. I used Tim Holtz dies, stamps, and stencils on my project. Let’s take a look.

Supplies: