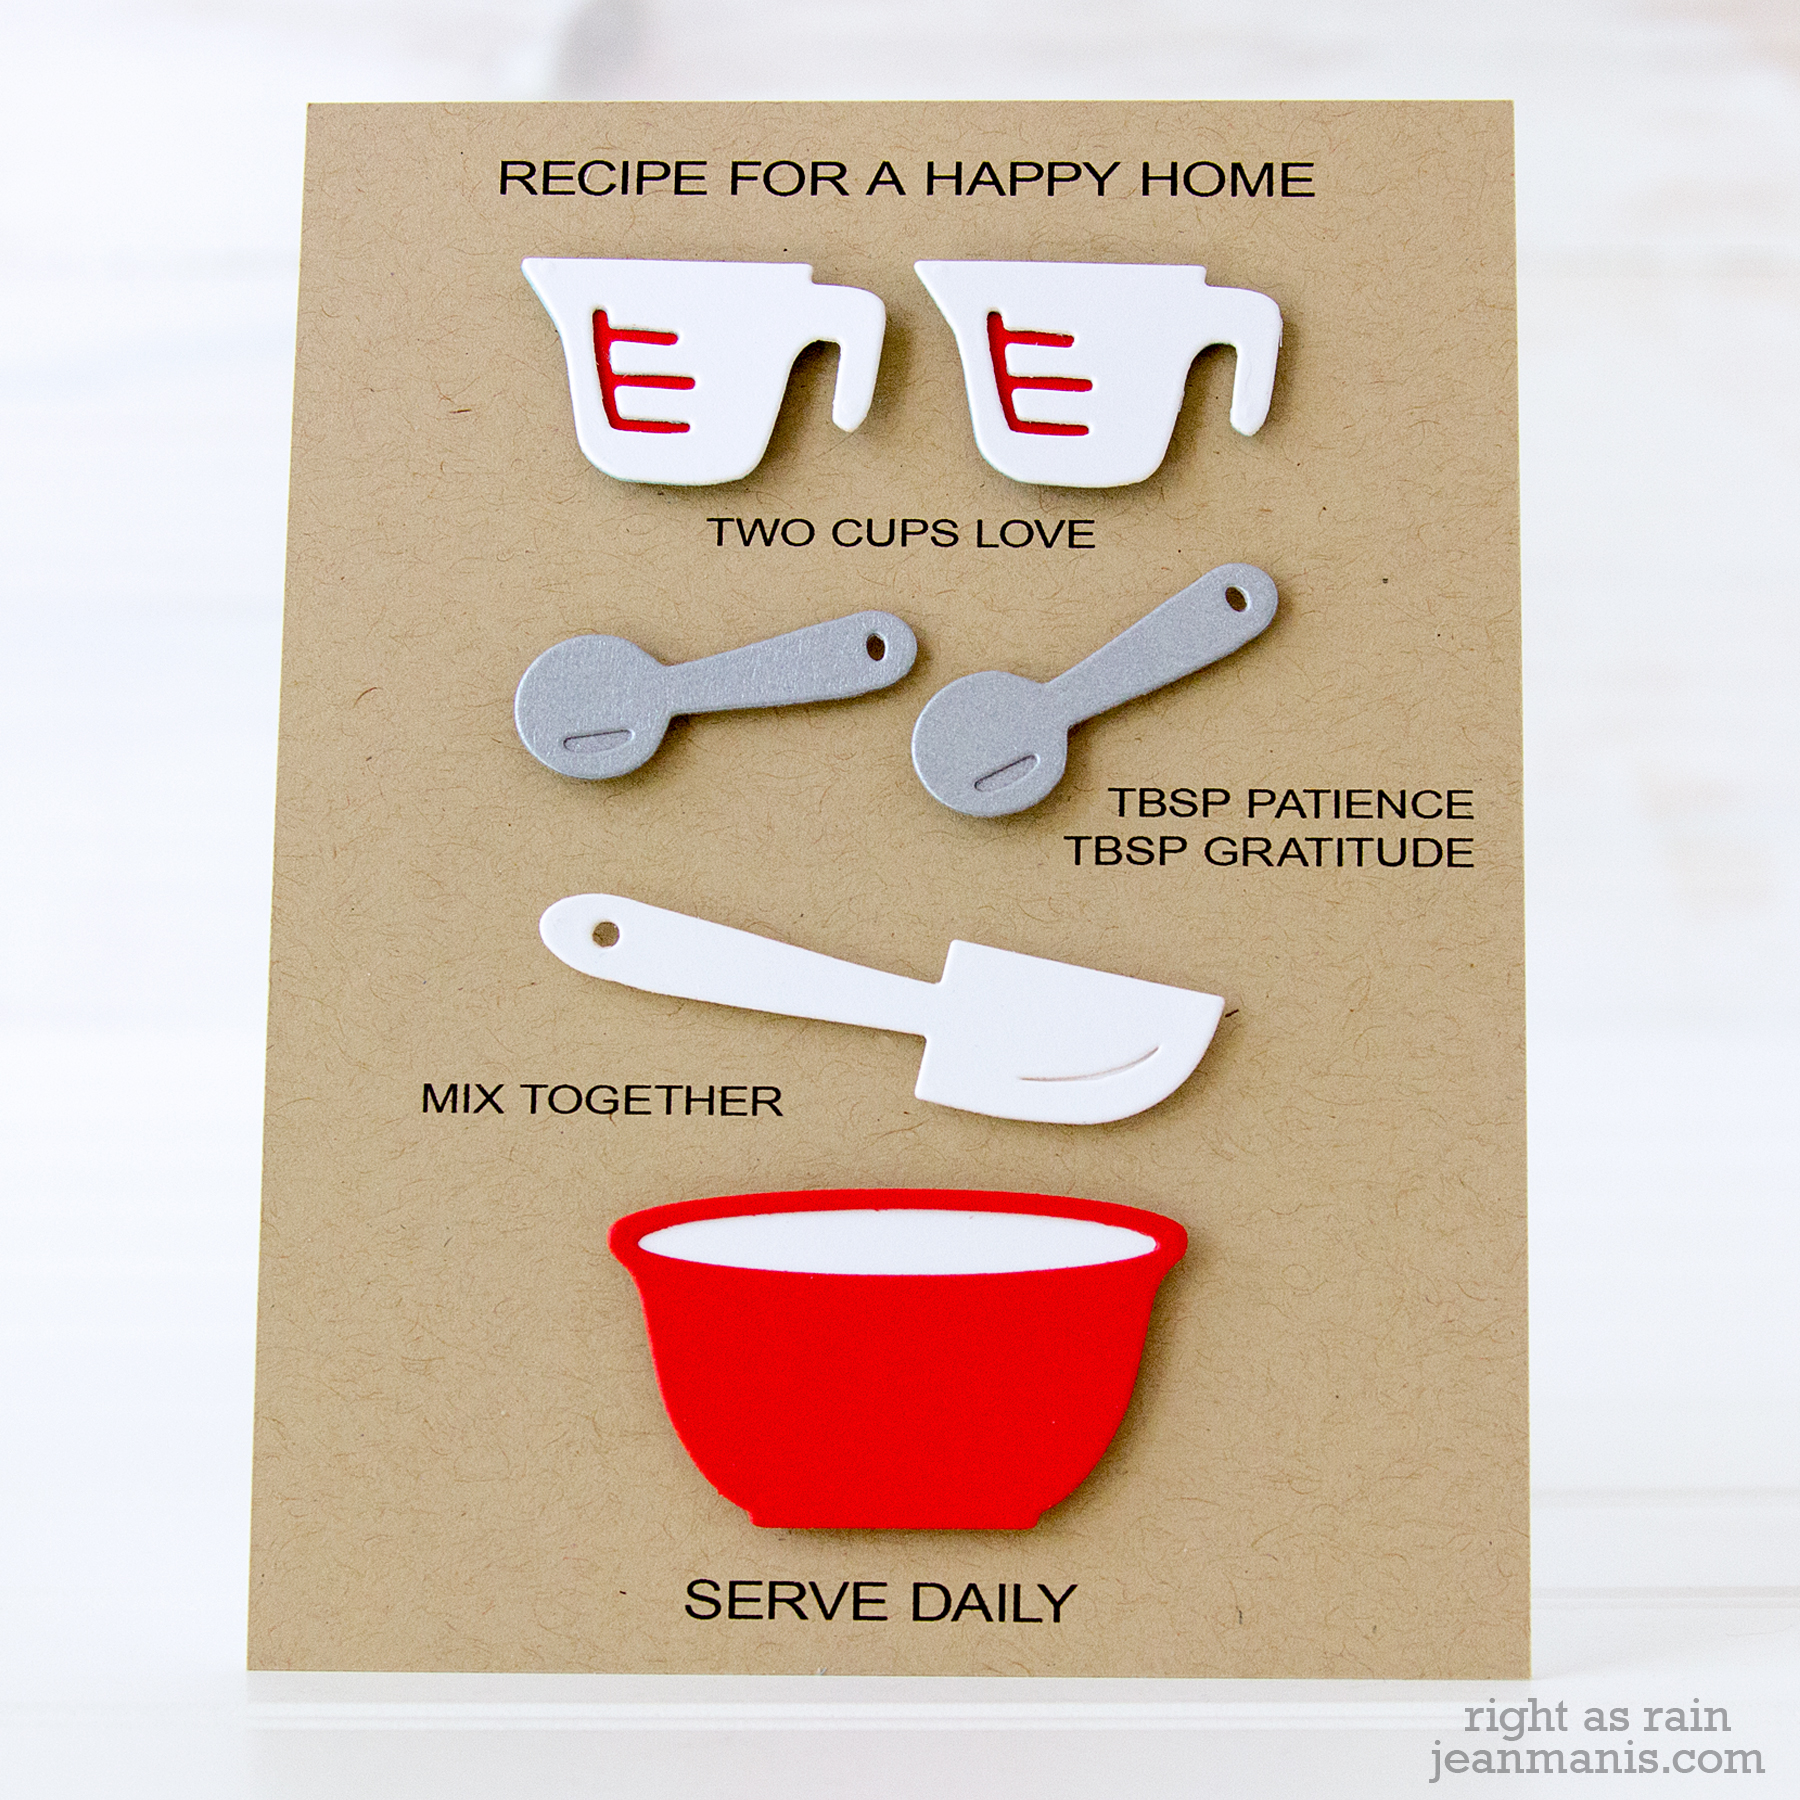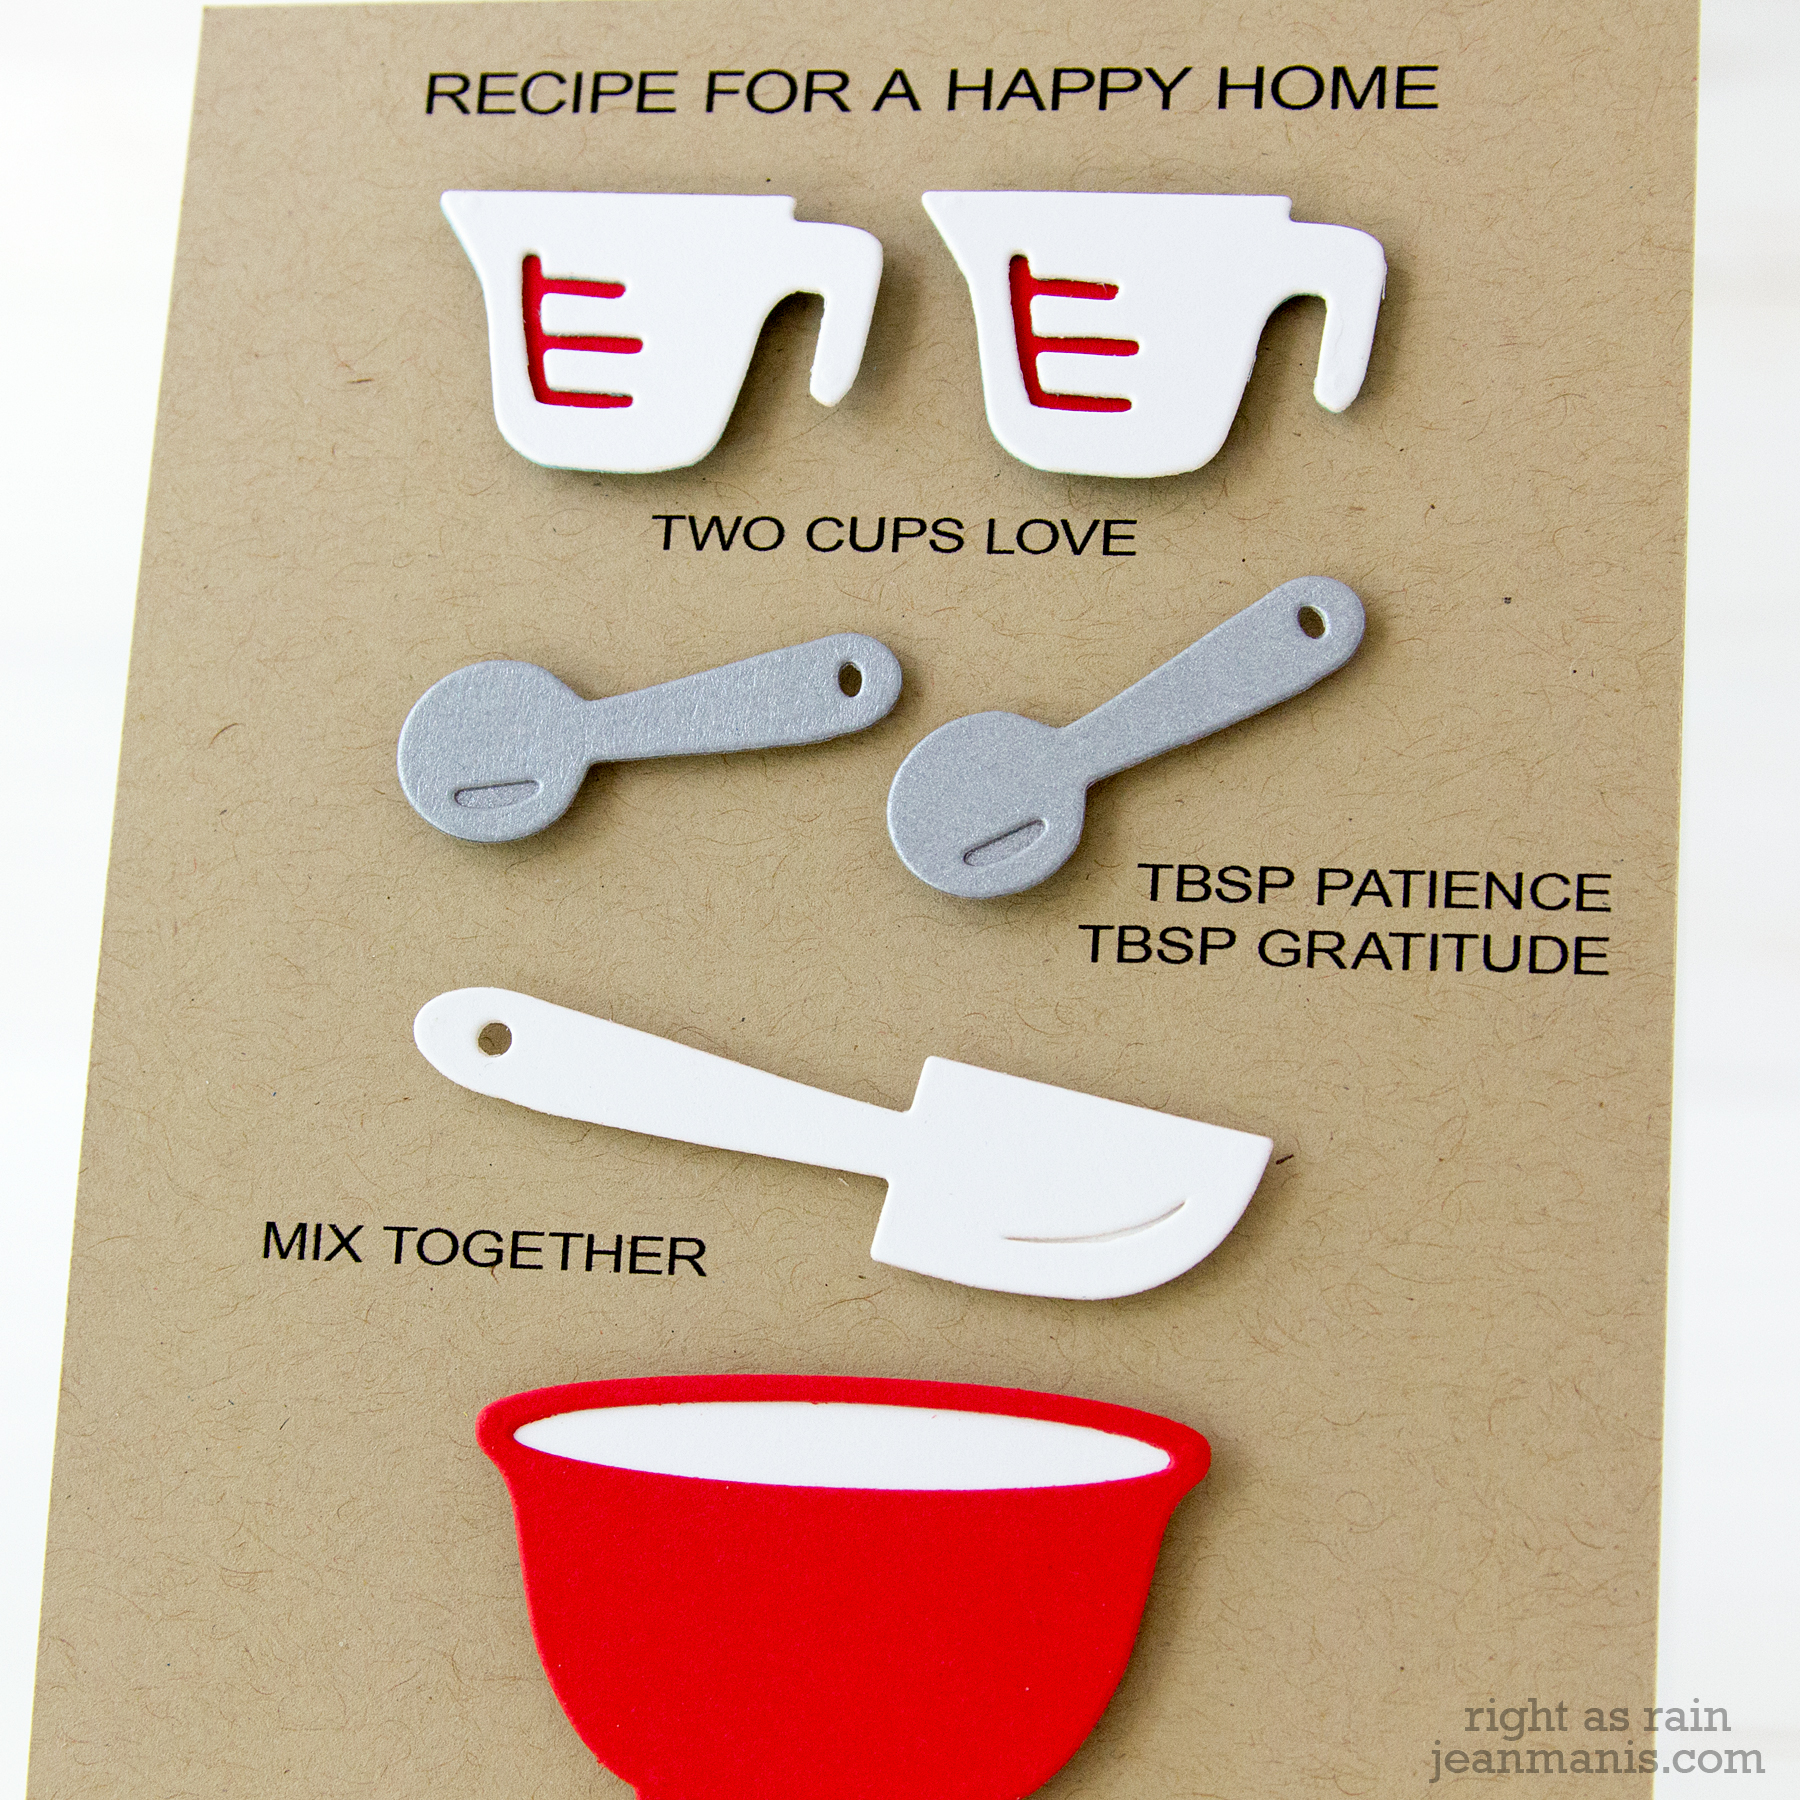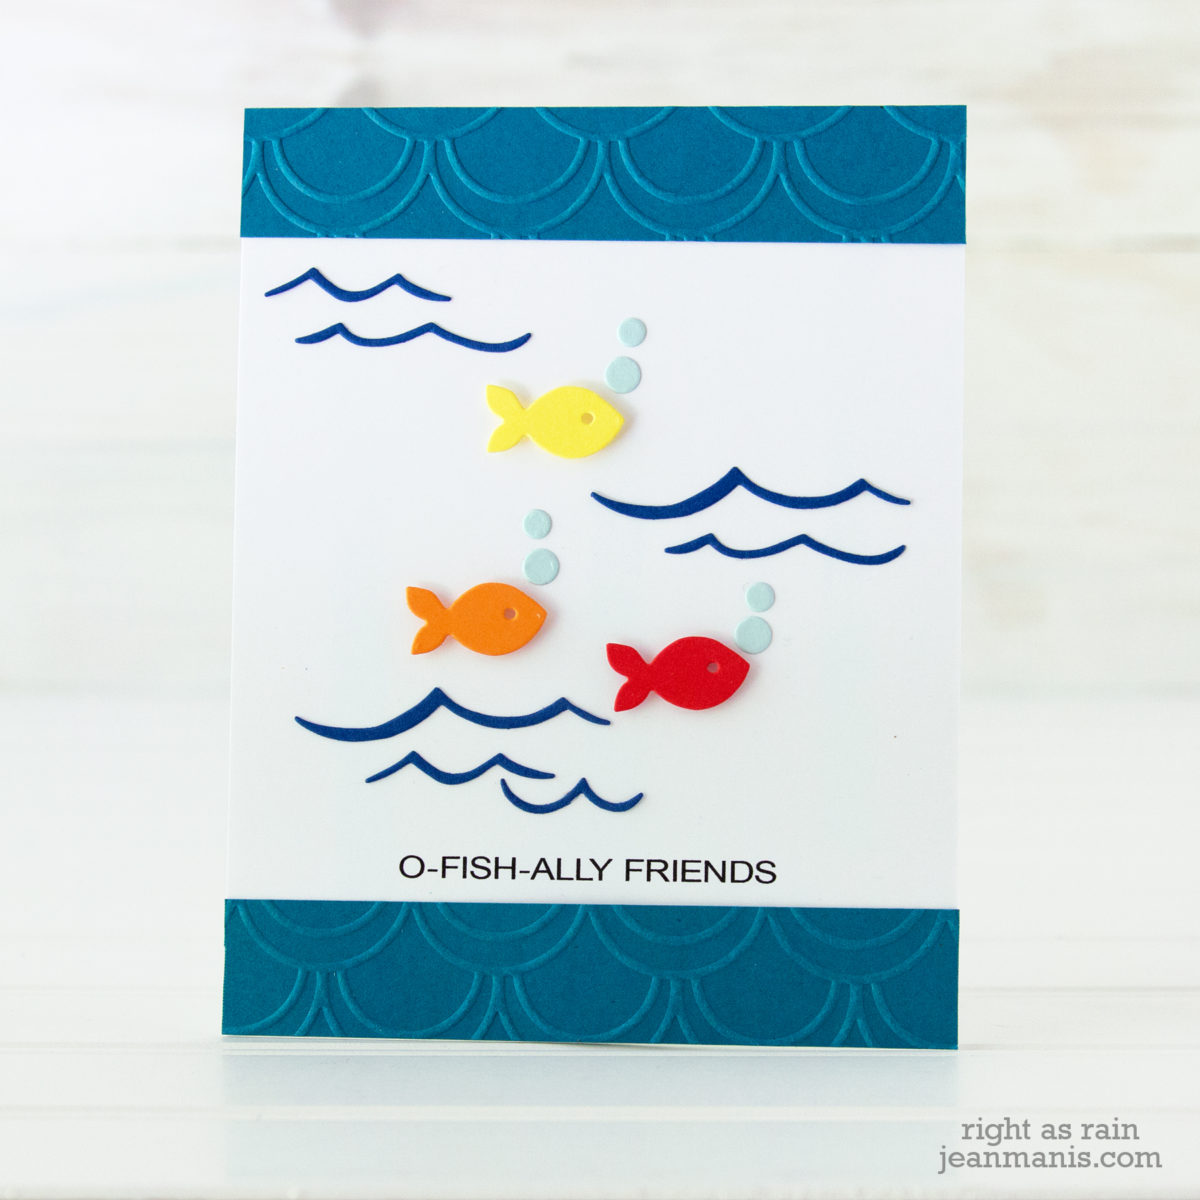
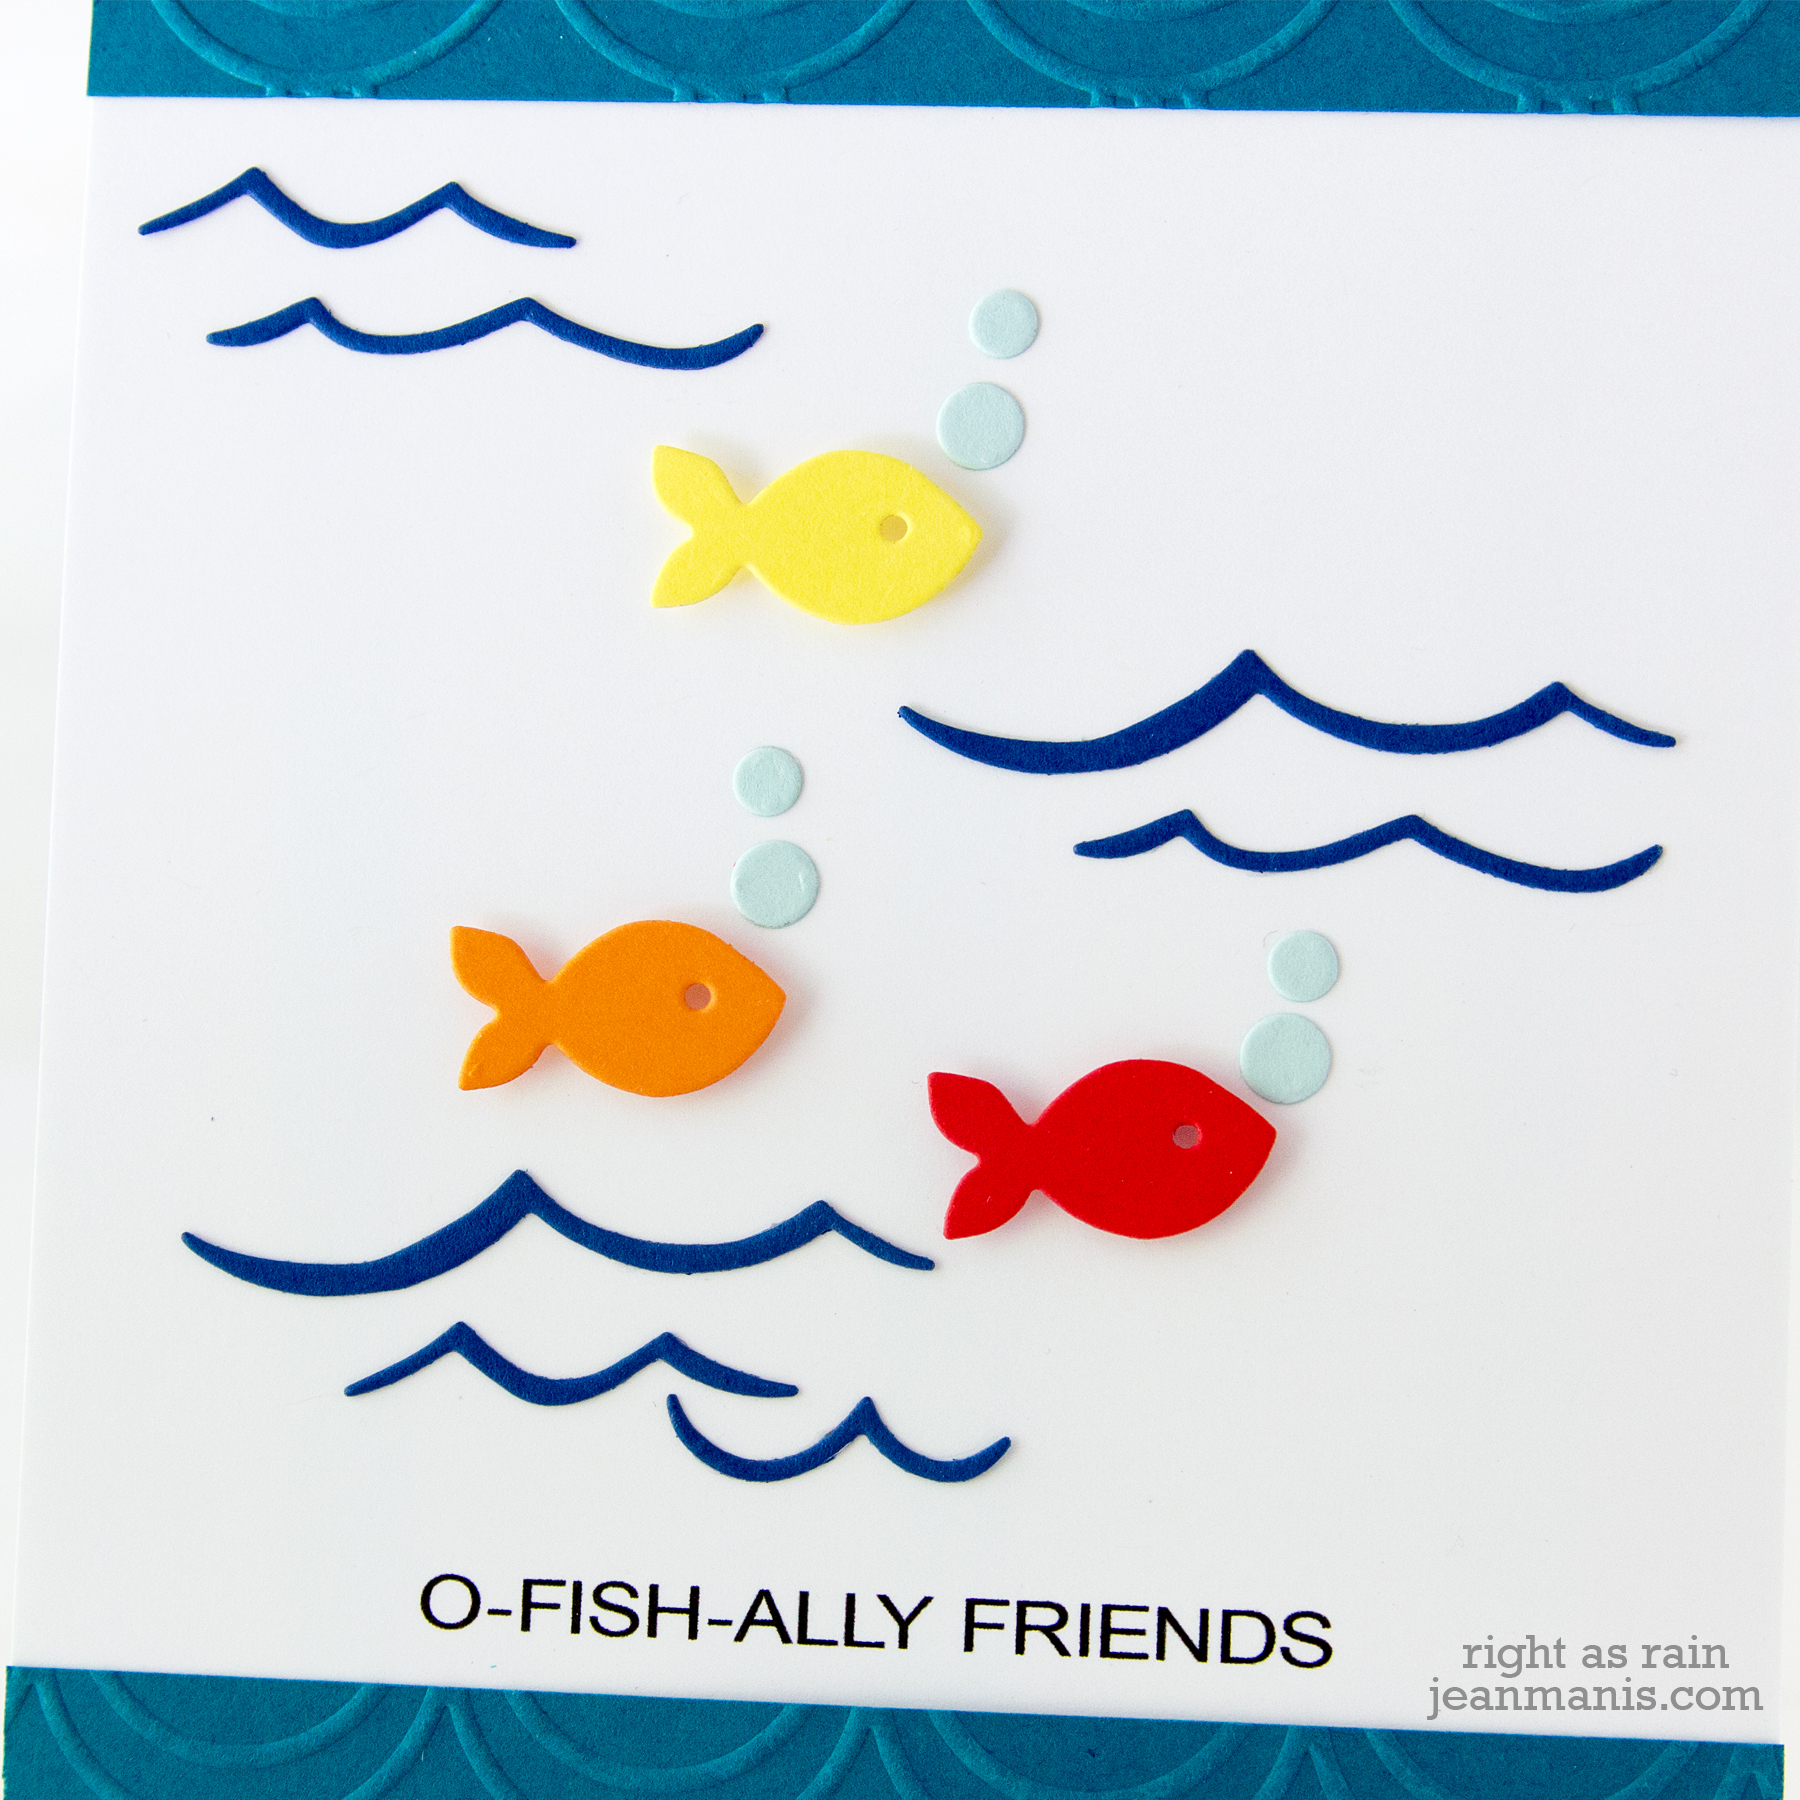
Hello! Today I am sharing a CAS friendship card on which I’ve combined the recently released Paper Smooches Water Dies with a computer-generated sentiment.
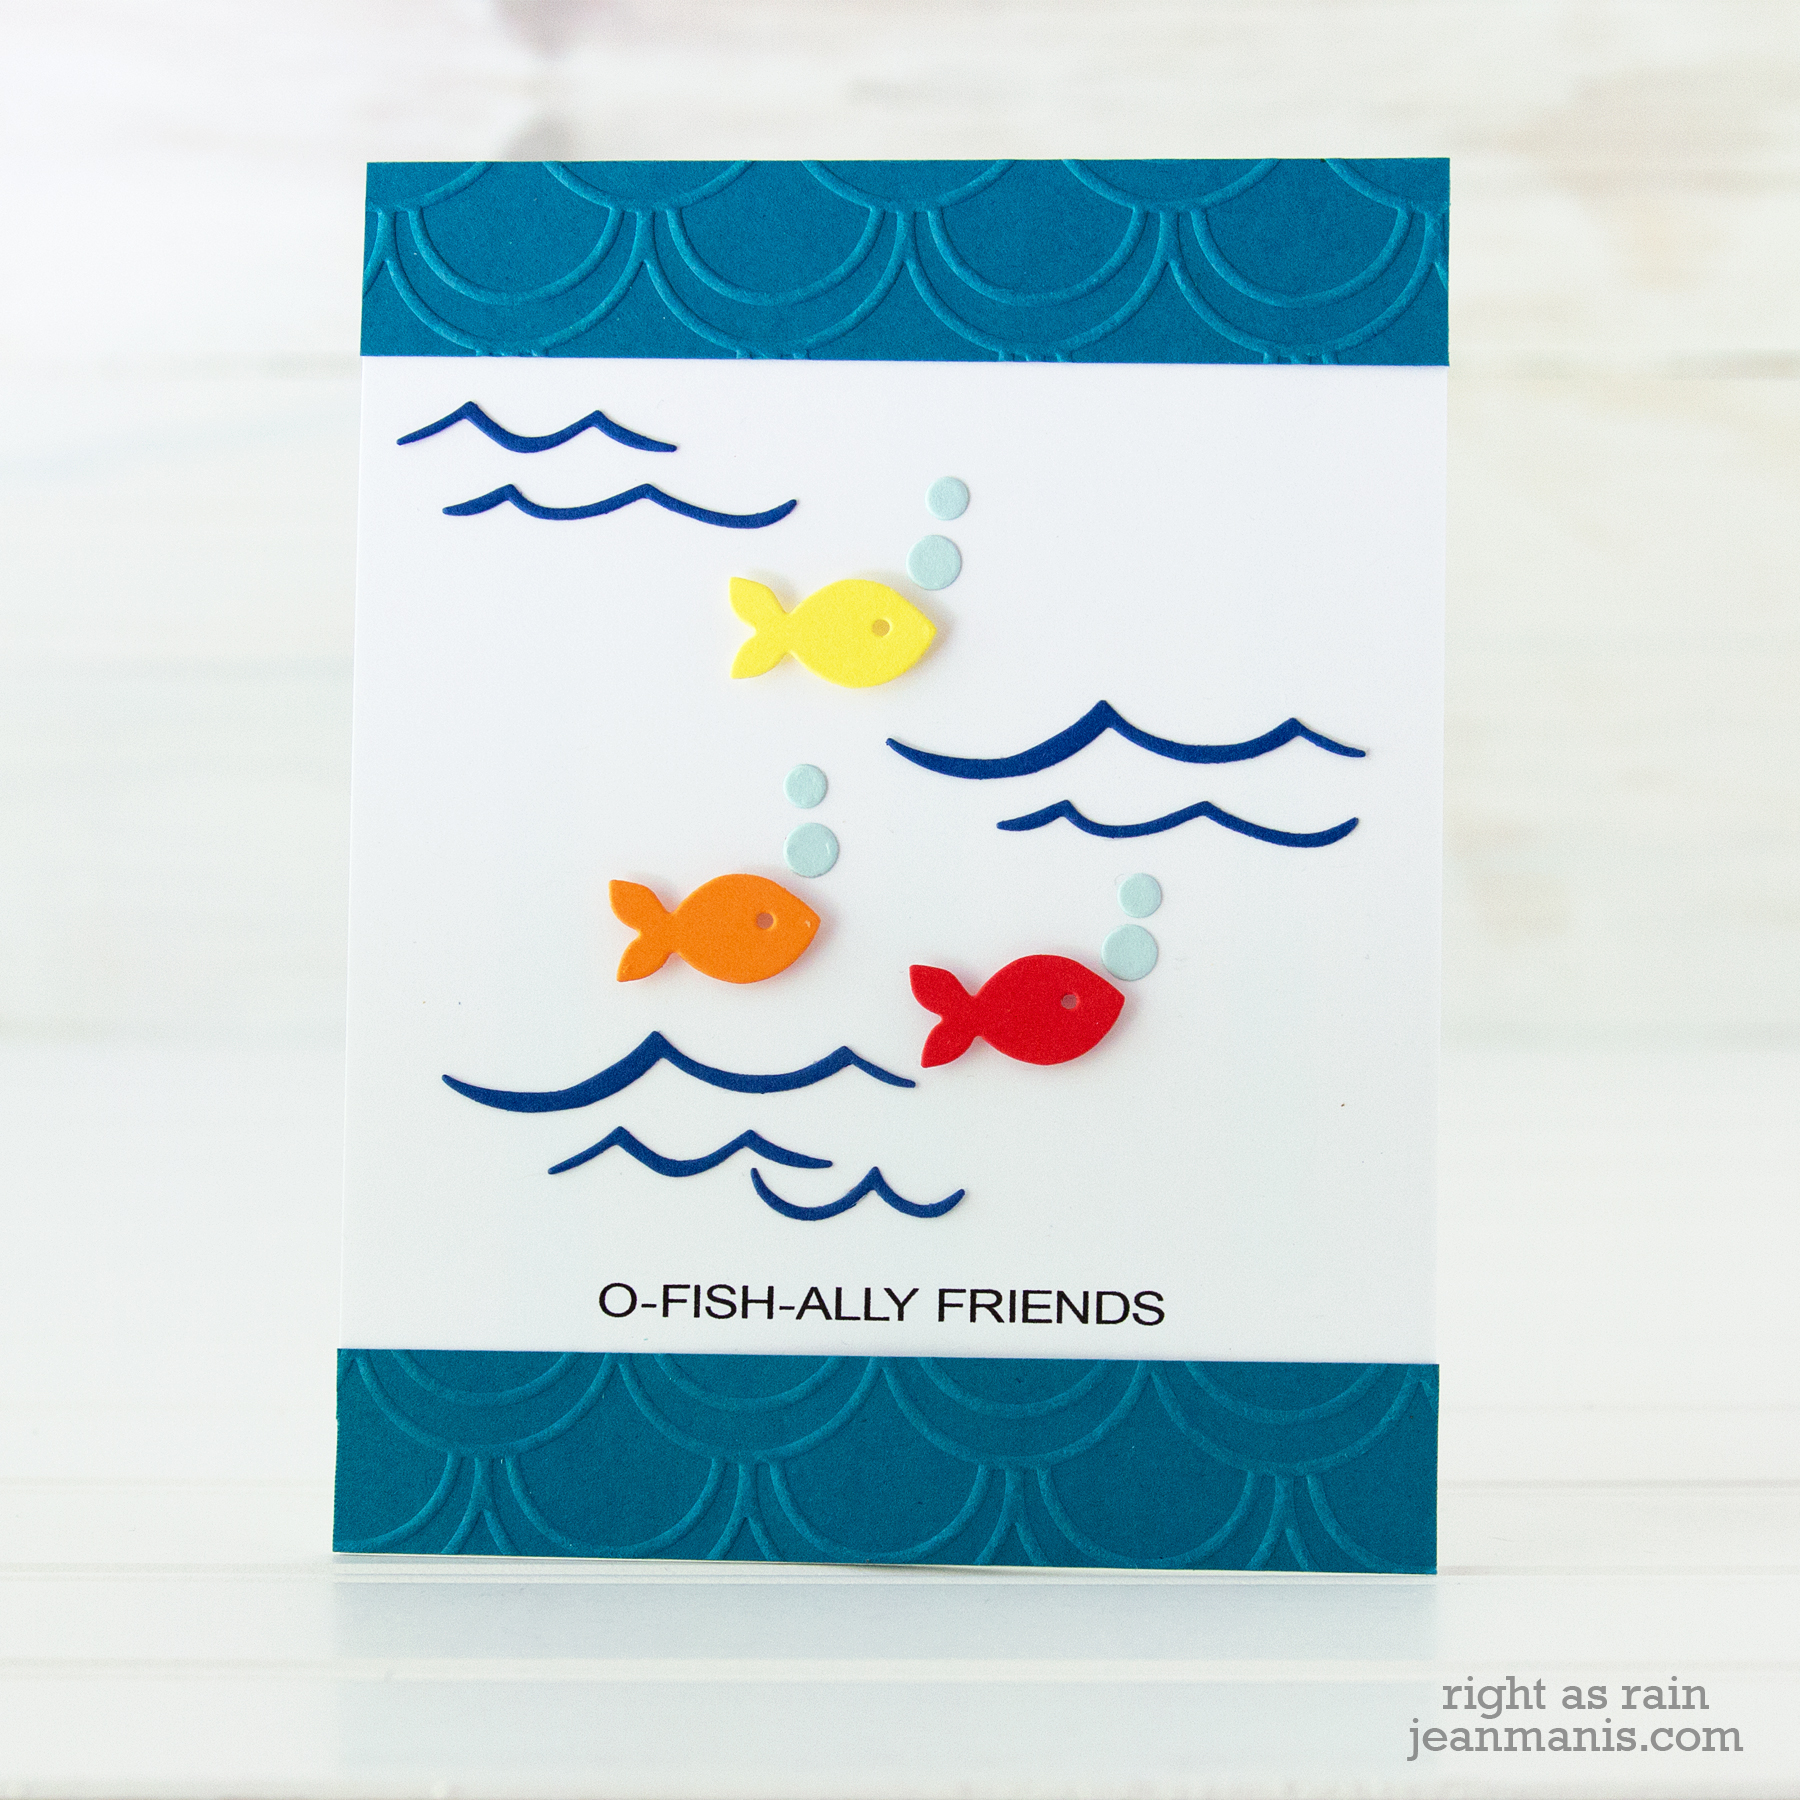
- I cut the fish, air bubbles, and waves from colored cardstock.
- I printed out the sentiment on white cardstock, which I trimmed.
- I added dry-embossed cardstock (created with the retired Lifestyle Crafts Tide embossing folder) at the top and bottom of the panel.
- I added the waves and air bubbles with liquid adhesive and popped the fish up with foam adhesive.
Thanks for stopping by!
Supplies: