Welcome! If you’ve been hopping along on the Poppystamps & The Twinery Blog Hop, you should have arrived at my blog from the blog of Stacey Schafer.
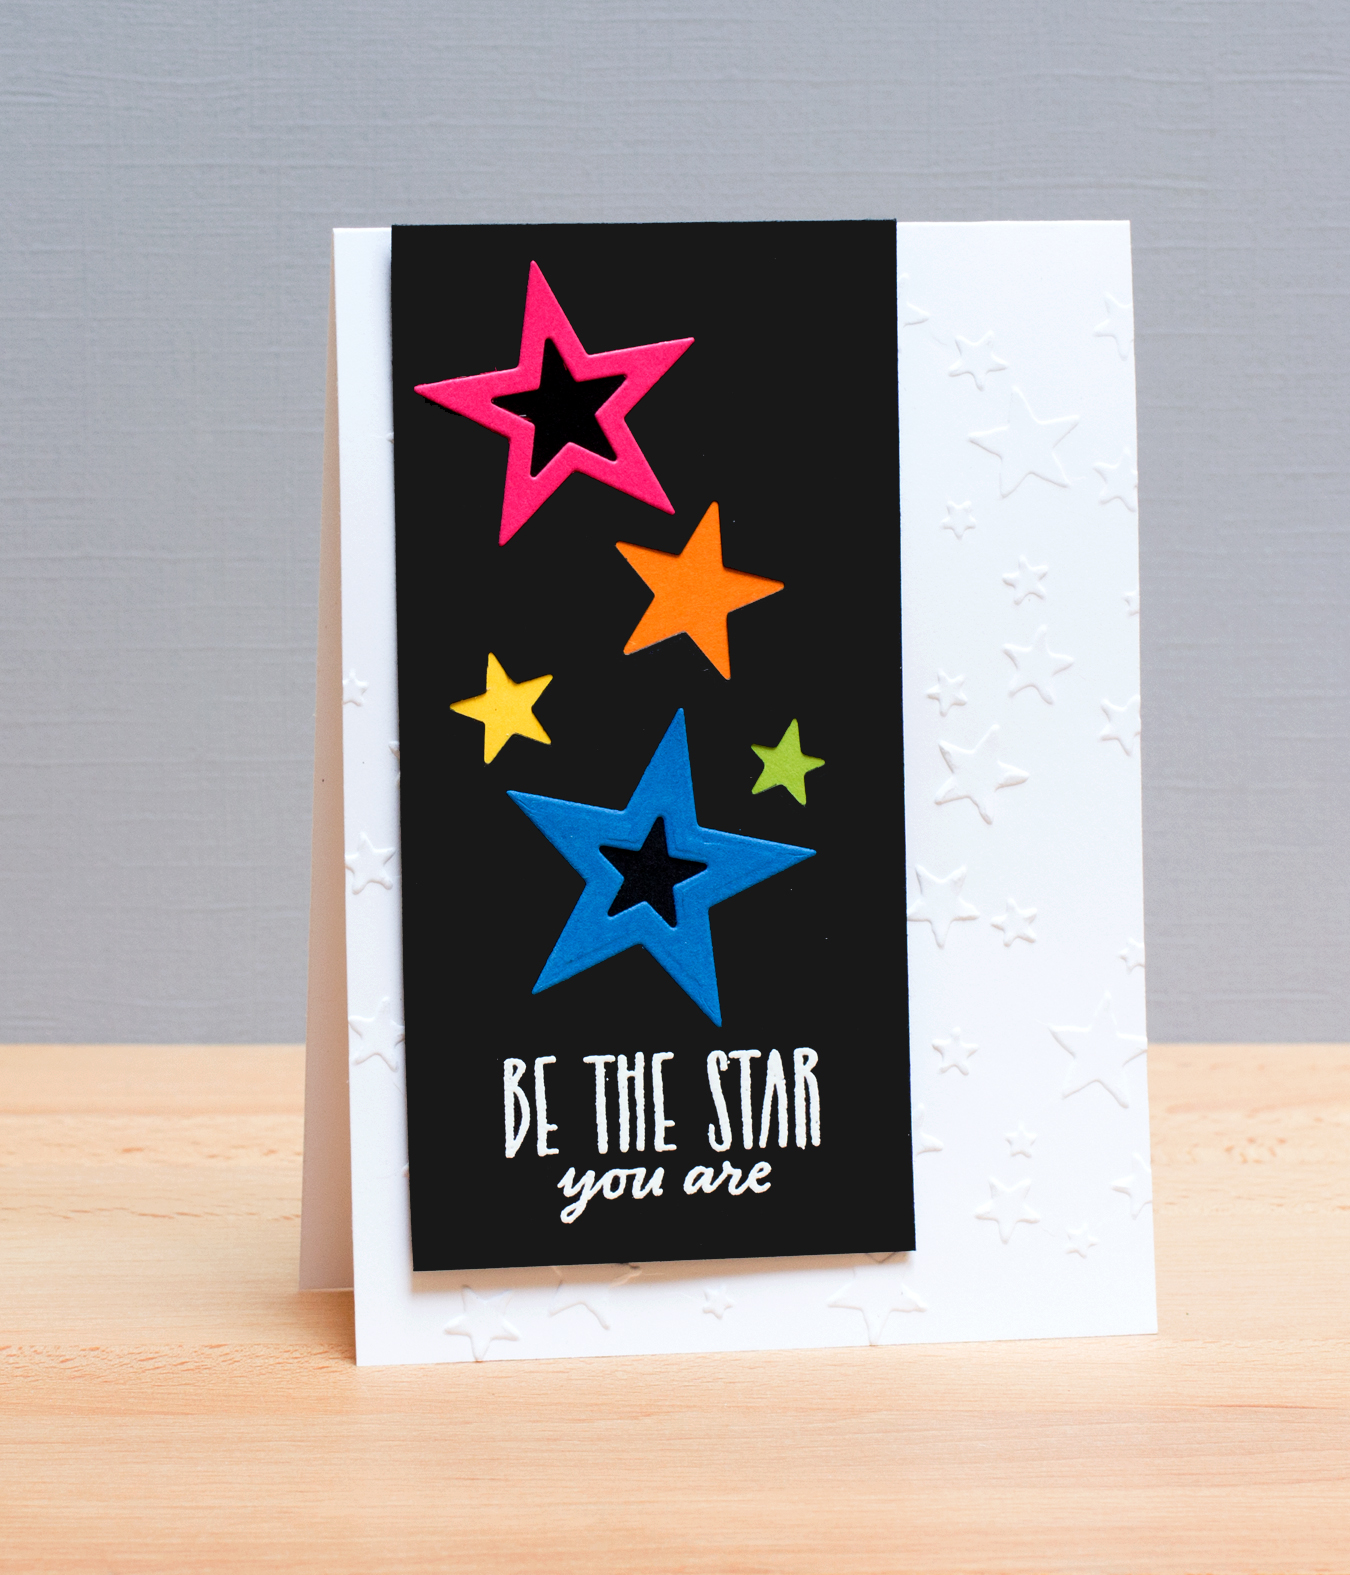
Here’s my card combining a Poppystamps die and twine from The Twinery.
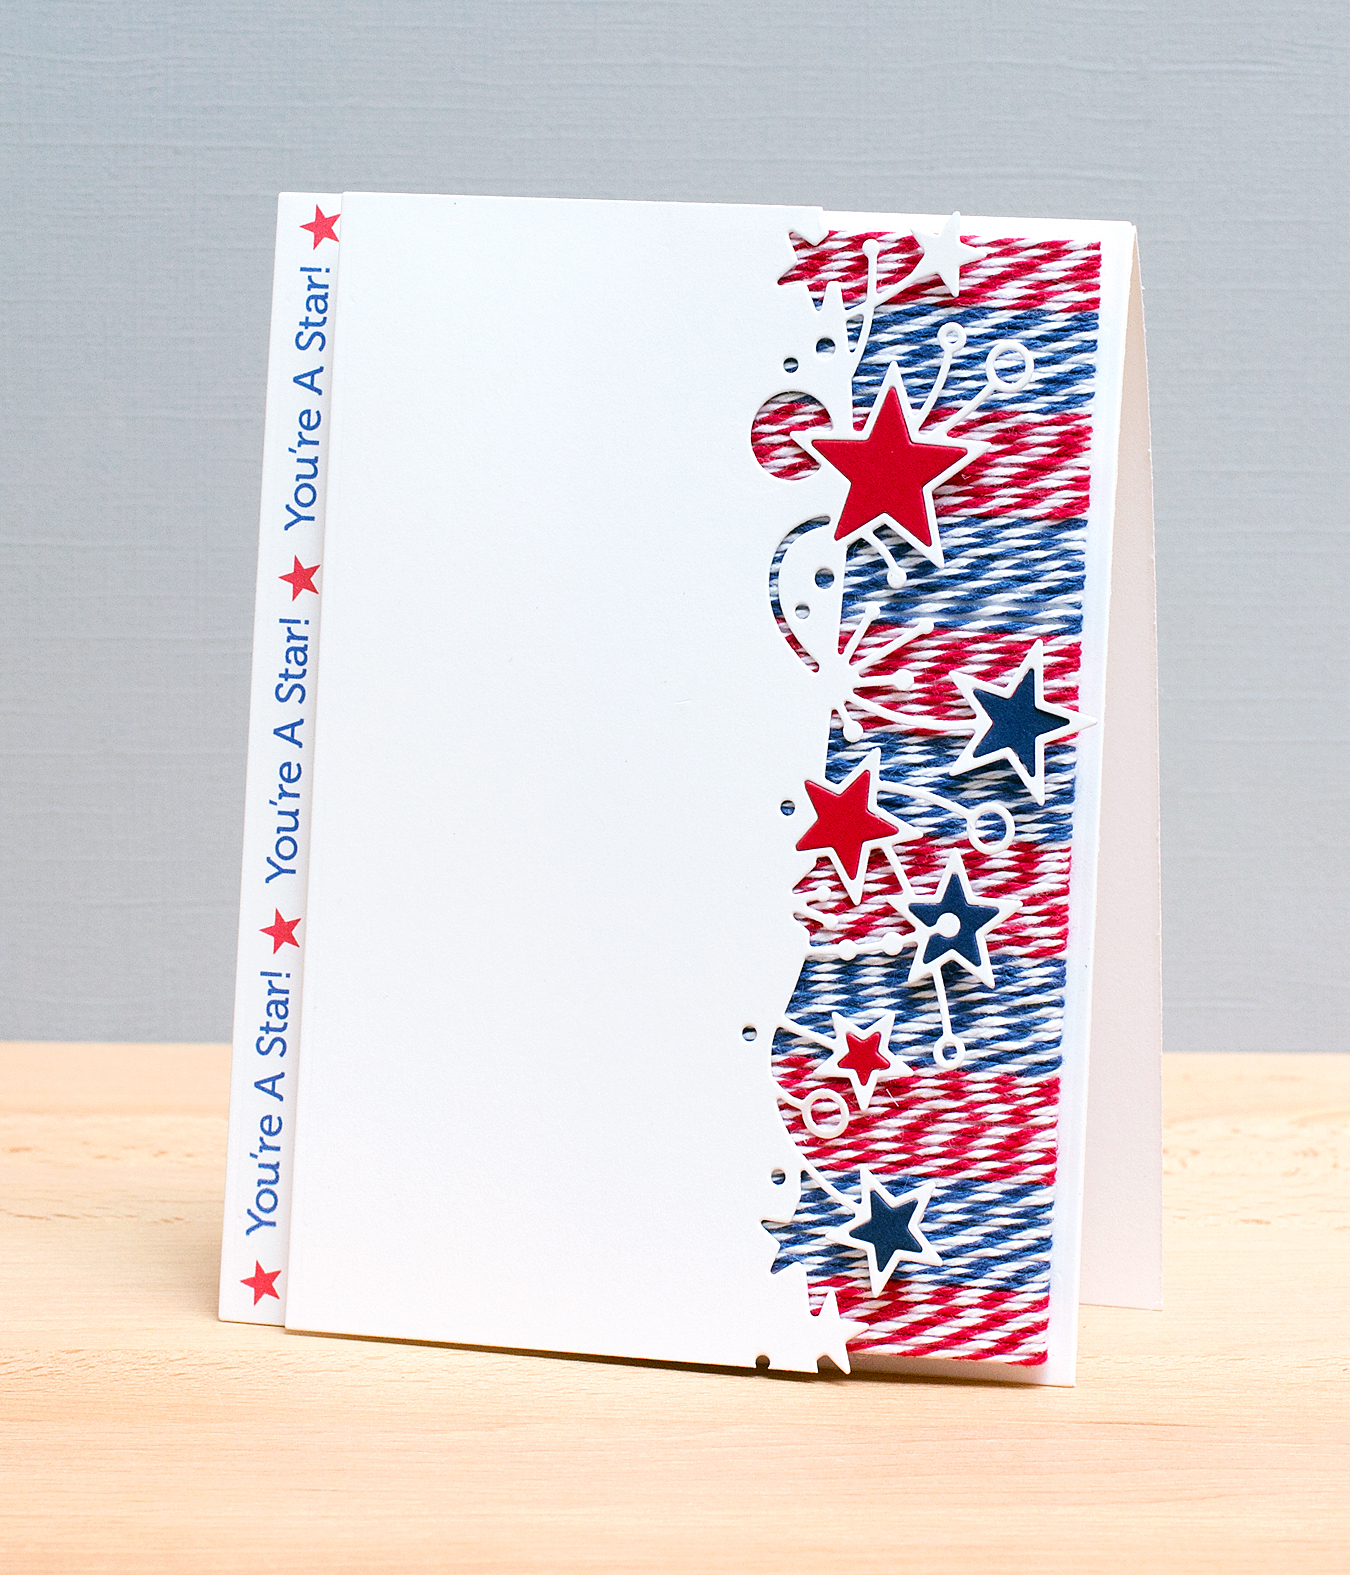
I paired the Poppystamps Superstar Border with twine in Maraschino Stripe and Midnight Blue from The Twinery. I cut the Superstar Border in white, red, and blue cardstock, replacing the stars in the white border with red and blue ones. The border section sits on top of a cardstock strip around which I wrapped the red and blue twine. The sentiment was created on my computer. It is printed onto the card base to which I attached the wrapped twine panel and die cut border.
Next on the blog hop list is the blog of Melyssa Connolly.
There are prizes! The Twinery is offering a Metallic Sampler Pack ($32 retail value ). Poppystamps is giving away the Frozen Flakes and the Elsa Butterfly Branch dies ($26.50 retail value). For details on how to enter to win, visit
The Twinery and Poppystamps.