The giveaway is now closed – thanks for all of the wonderful comments. The winner is announced on this post.
Welcome to the Essentials by Ellen Winter Release 2015 Blog Hop! I’m showcasing the Wish Big and Fancy Thanks stamp sets along with the Mini Windows and Folk Hearts die sets on my post today!
I get to give the Wish Big stamp set to a lucky someone! Just leave a comment to enter my giveaway!
There is also a Grand Giveaway in the CLASSroom! To enter, leave a comment there and at every stop along the hop by March 2nd; winners will be announced March 4th! The full list of hoppers is included at the end of this post.
Let’s get started! For my first project, I used the Wish Big stamp set and the Mini Windows die set for a birthday card.
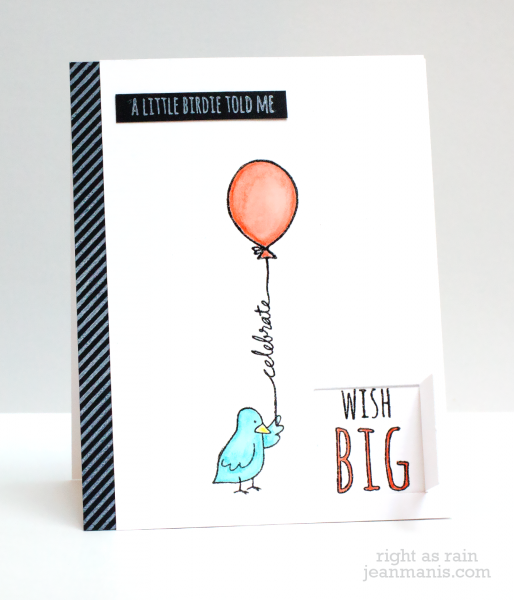
To begin, I cut a window in the lower-right side of a watercolor paper panel with a die from the Mini Windows die set. (The die cuts three sides of the square, creating a window for the card’s recipient to open.) Next, I stamped and heat embossed the bird, the balloon string, the balloon and the “Wish Big” sentiment and watercolored using pencils. (The sentiment was stamped on a separate piece of watercolor paper from the other images.) The black-and-white strip was stamped with a background stamp. To finish, I taped the “Wish Big” sentiment behind the window and adhered the watercolor panel and black-and-white strip to a white card base.
With the same stamp set, I created a buckle card, a card design I learned to make from Julie Ebersole. I used the square die from the Mini Windows set to create a flap on the card front that works as a buckle.
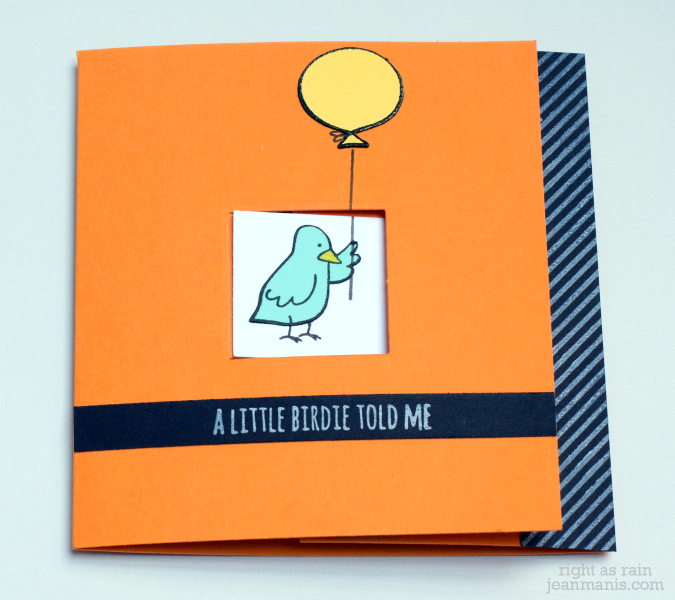
When you open the flap, the hippo is revealed! The bird is adhered to a square, which is the same size as the flap and slides into the flap to secure the card.
For this card, I stamped and heat-embossed the hippo, bird, balloon and party hat onto colored cardstock. I then fussy-cut the items and adhered them over the image stamped directly onto the card base and square. The black-and-white striped strip was created in the same manner as the previous card; you can get several strips out of a single stamped background. I drew the balloon string by hand. When folded, this card is 4 1/4″ square.
Now let’s look at some cards created with the Fancy Thanks stamp set and Folk Hearts dies.
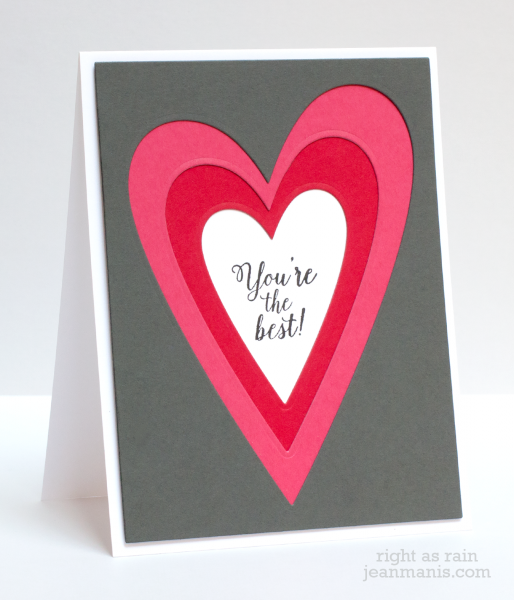
To create the nested hearts, I began by placing the largest heart in the Folk Hearts set inside the rectangle die in the MFT Blueprints 1 set to cut the gray panel in my Big Shot. I then took a panel of the pink cardstock and put the next size smaller heart die on it, using the previously cut panel as a guide for placement so that the hearts would line up. I removed the gray panel before running the pink panel through my Big Shot. I cut the red cardstock panel in the same manner. To finish, I stamped the sentiment onto white cardstock and adhered the nesting heart panels one layer at a time to a white cardstock base.
For my final projects, I created two square cards featuring the large “Thanks” sentiment from the Fancy Thanks set. I had the upcoming “bridal season” in mind for these designs.
I heat-embossed the sentiment from Fancy Thanks onto both white and Robin’s Egg cardstock. With a heart die from the Folk Hearts set I cut the heart. For the first card, the heart is a negative die cut and on the second one, it’s a positive die cut.
Supplies:
Here’s the full list of designers hopping today.


