Spellbinders – Halloween Candy Container

Hello, crafty friends! Today, I am sharing a Halloween candy container created with the Spellbinders Hexagon Petal Box from the Blooming Garden Collection by Marisa Job. The set contains eight dies to create a six-sided box.  While I kept my Halloween-themed container simple, there are many variations possible with this set (as you will see on the product link).

Spellbinders - Halloween Candy Container

Spellbinders - Halloween Candy Container

I used one of the set’s dies to cut the base from orange cardstock, another die to create the side pieces (also from the orange cardstock), and a third die to cut the decorative pieces (cut from the polka dot paper). I applied the decorative pieces before attaching the side pieces to the base. The side piece die scores and cuts, making the creation of the box extremely easy! Trick or Treat!

Reverse Confetti – CAS One-Layer Halloween card

Hello! I love Halloween and with fall in the air here in the PNW, I am happily preparing for the event (getting out my various Halloween-themed crafting supplies). I pulled out two Revere Confetti stamp sets to create a CAS one-layer Halloween card.

Reverse Confetti CAS One-Layer Halloween Card

The sentiment is from the Spooky Sentiments set and the witch’s boots are from the Spooky Cuties set (both are now retired). I stamped the boots with Hero Arts black dye ink and the sentiment with Stampin’ Up Pumpkin Pie ink. Without a stamp positioner, I would never have been able to make this card!

Taylored Expressions – Colorful Halloween

Hello! Today, I am sharing another Halloween card created with Taylored Expressions supplies. I created two cards for the Taylored Expression blog using color combinations with the new release colors – Eggplant and Sweet Potato Pie. You will find color combination suggestions and a free color inspiration download on that post. While I had the Halloween supplies out, I thought “How about another card?!”

Taylored Expressions Halloween

  • I cut the Ghost Town Border from  Eggplant  cardstock. I backed the windows with Cookie Monster and Candy Corn cardstock.
  • For the background, I stamped the Bare Trees Background in Lime Zest ink on Lime Zest cardstock.
  • I cut the BOO sentiment from Candy Corn cardstock and adhered it to the scene with foam adhesive.
  • I cut a frame from Sugar Cube cardstock and adding the panel to a Cookie Monster background.

Taylored Expressions Halloween

Supplies:


TE August 2018 Release Sneak Peeks – Scary and Sweet

Hello and welcome to Day 1 of the Taylored Expressions August 2018 Release Sneak Peeks. The new release features Halloween and fall-themed stamps, dies, and other supplies including stencils, patterned paper, and two new TE colors! Today, my projects have a Halloween focus. The August 2018 release products being sneaked this week will be available Thursday, August 2 @ 7 AM PDT!

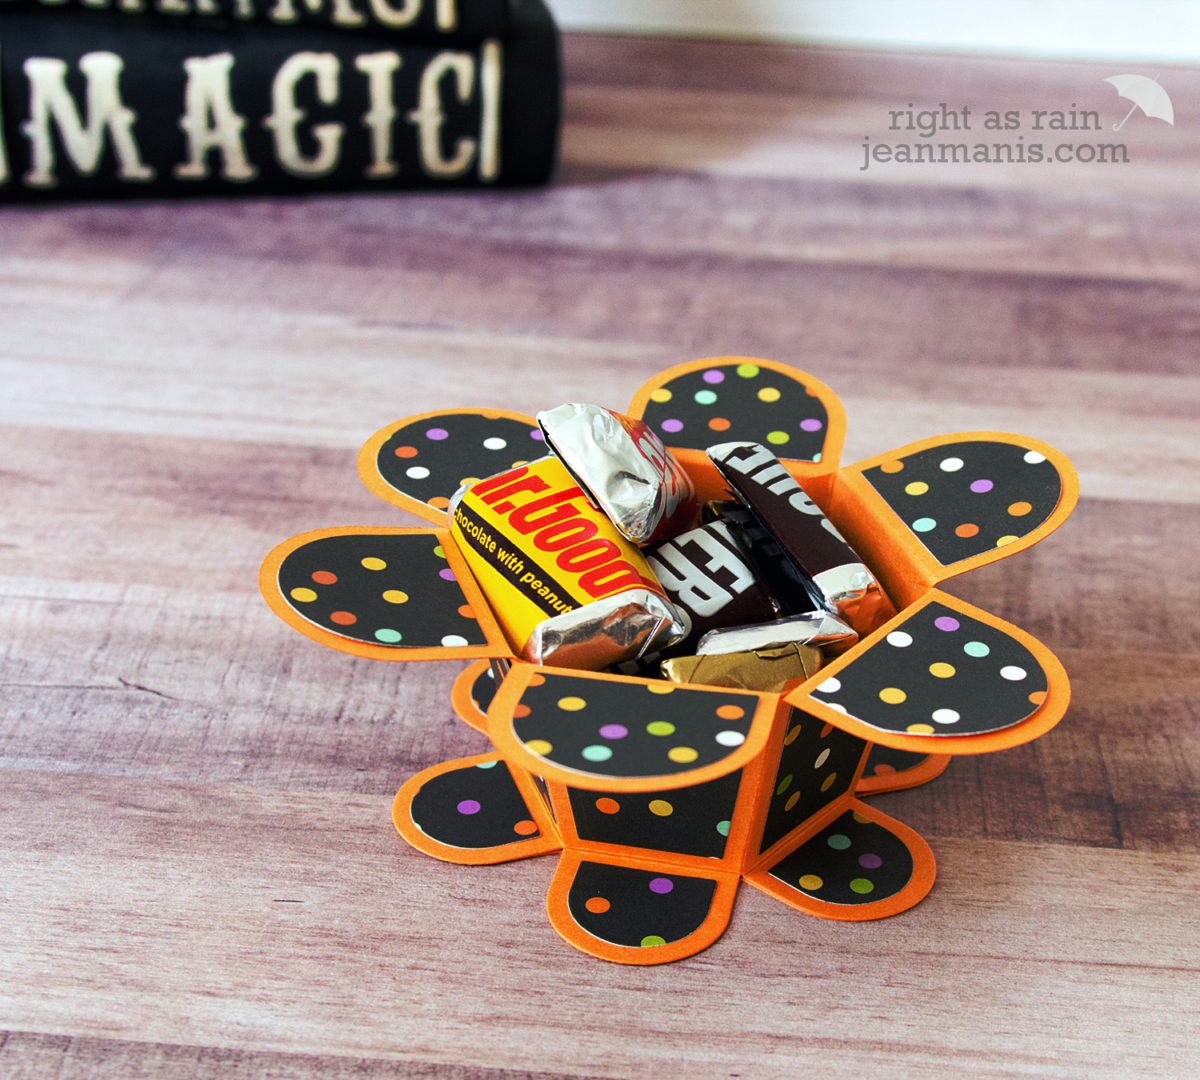
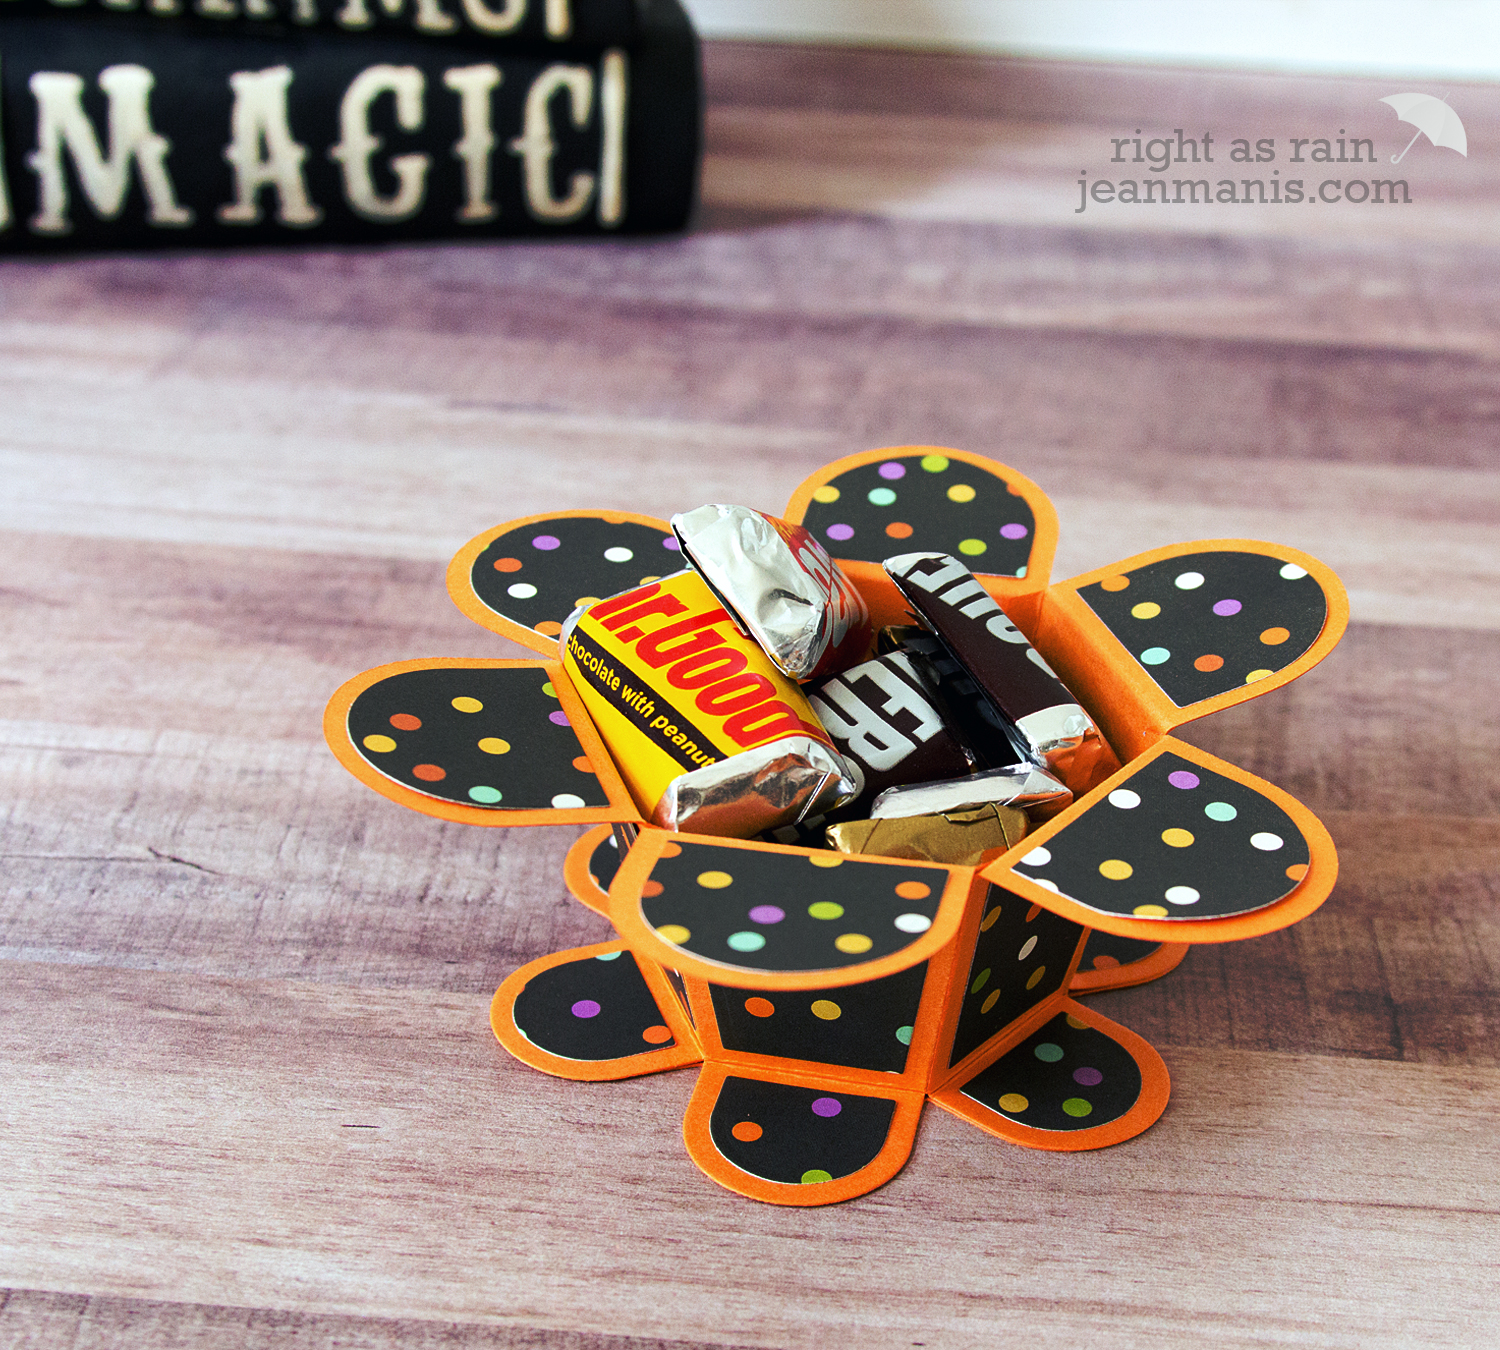
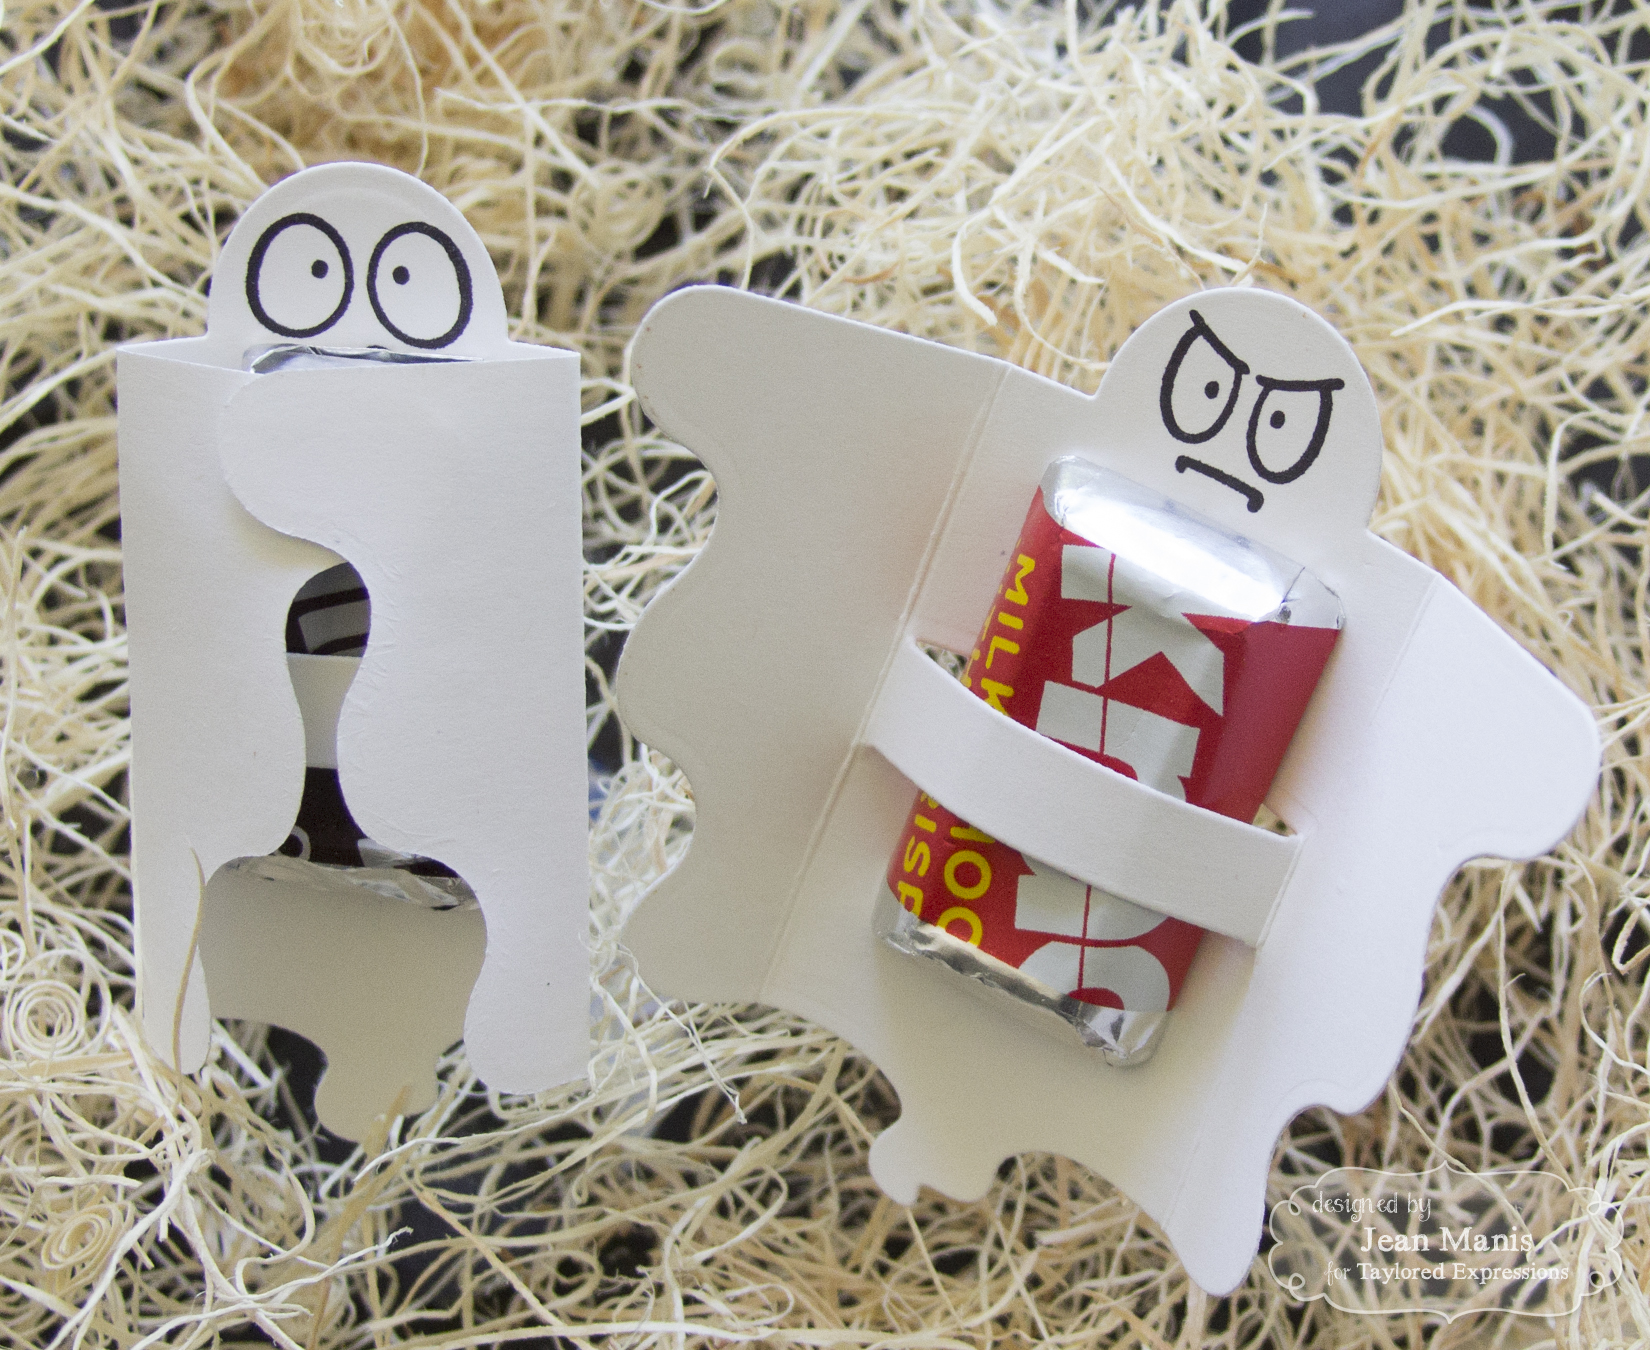
My first projects showcase the Under Wraps – Vampire and Under Wraps – Ghost sets. These sets are a fun way to package Halloween candy!

TE August 2018 Release

I stamped the faces from the the Under Wraps – Vampire set and then die-cut the body, adding the die-cut hair and shoes (too cute!) The set includes a die to cut a strip in to which you can slip the candy.

Similarly, for the ghosts, I stamped the faces from the Under Wraps – Ghost set and cut the bodies with the die.
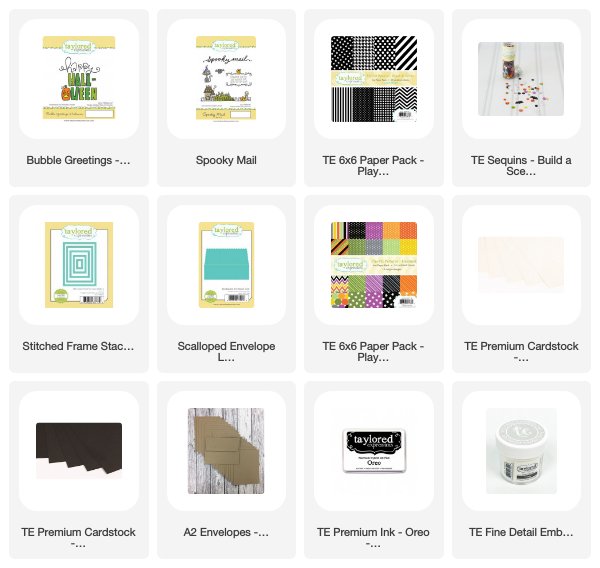
TE August 2018 Release

TE August 2018 Release

Supplies:

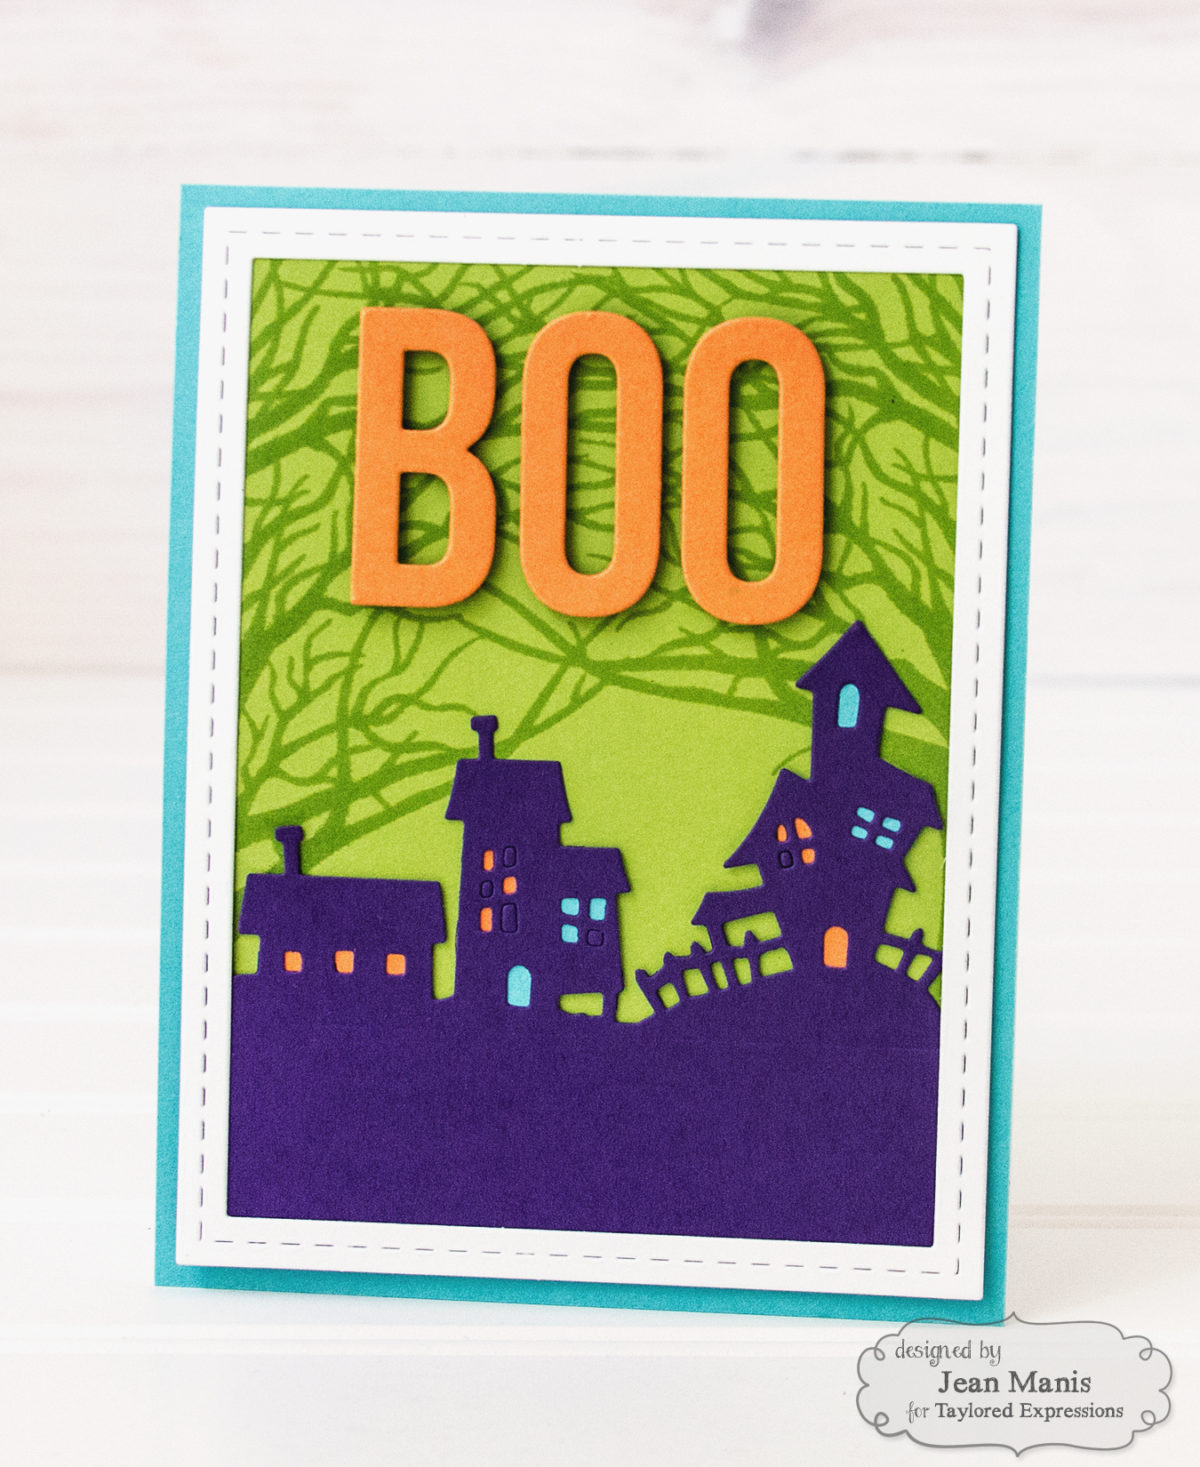
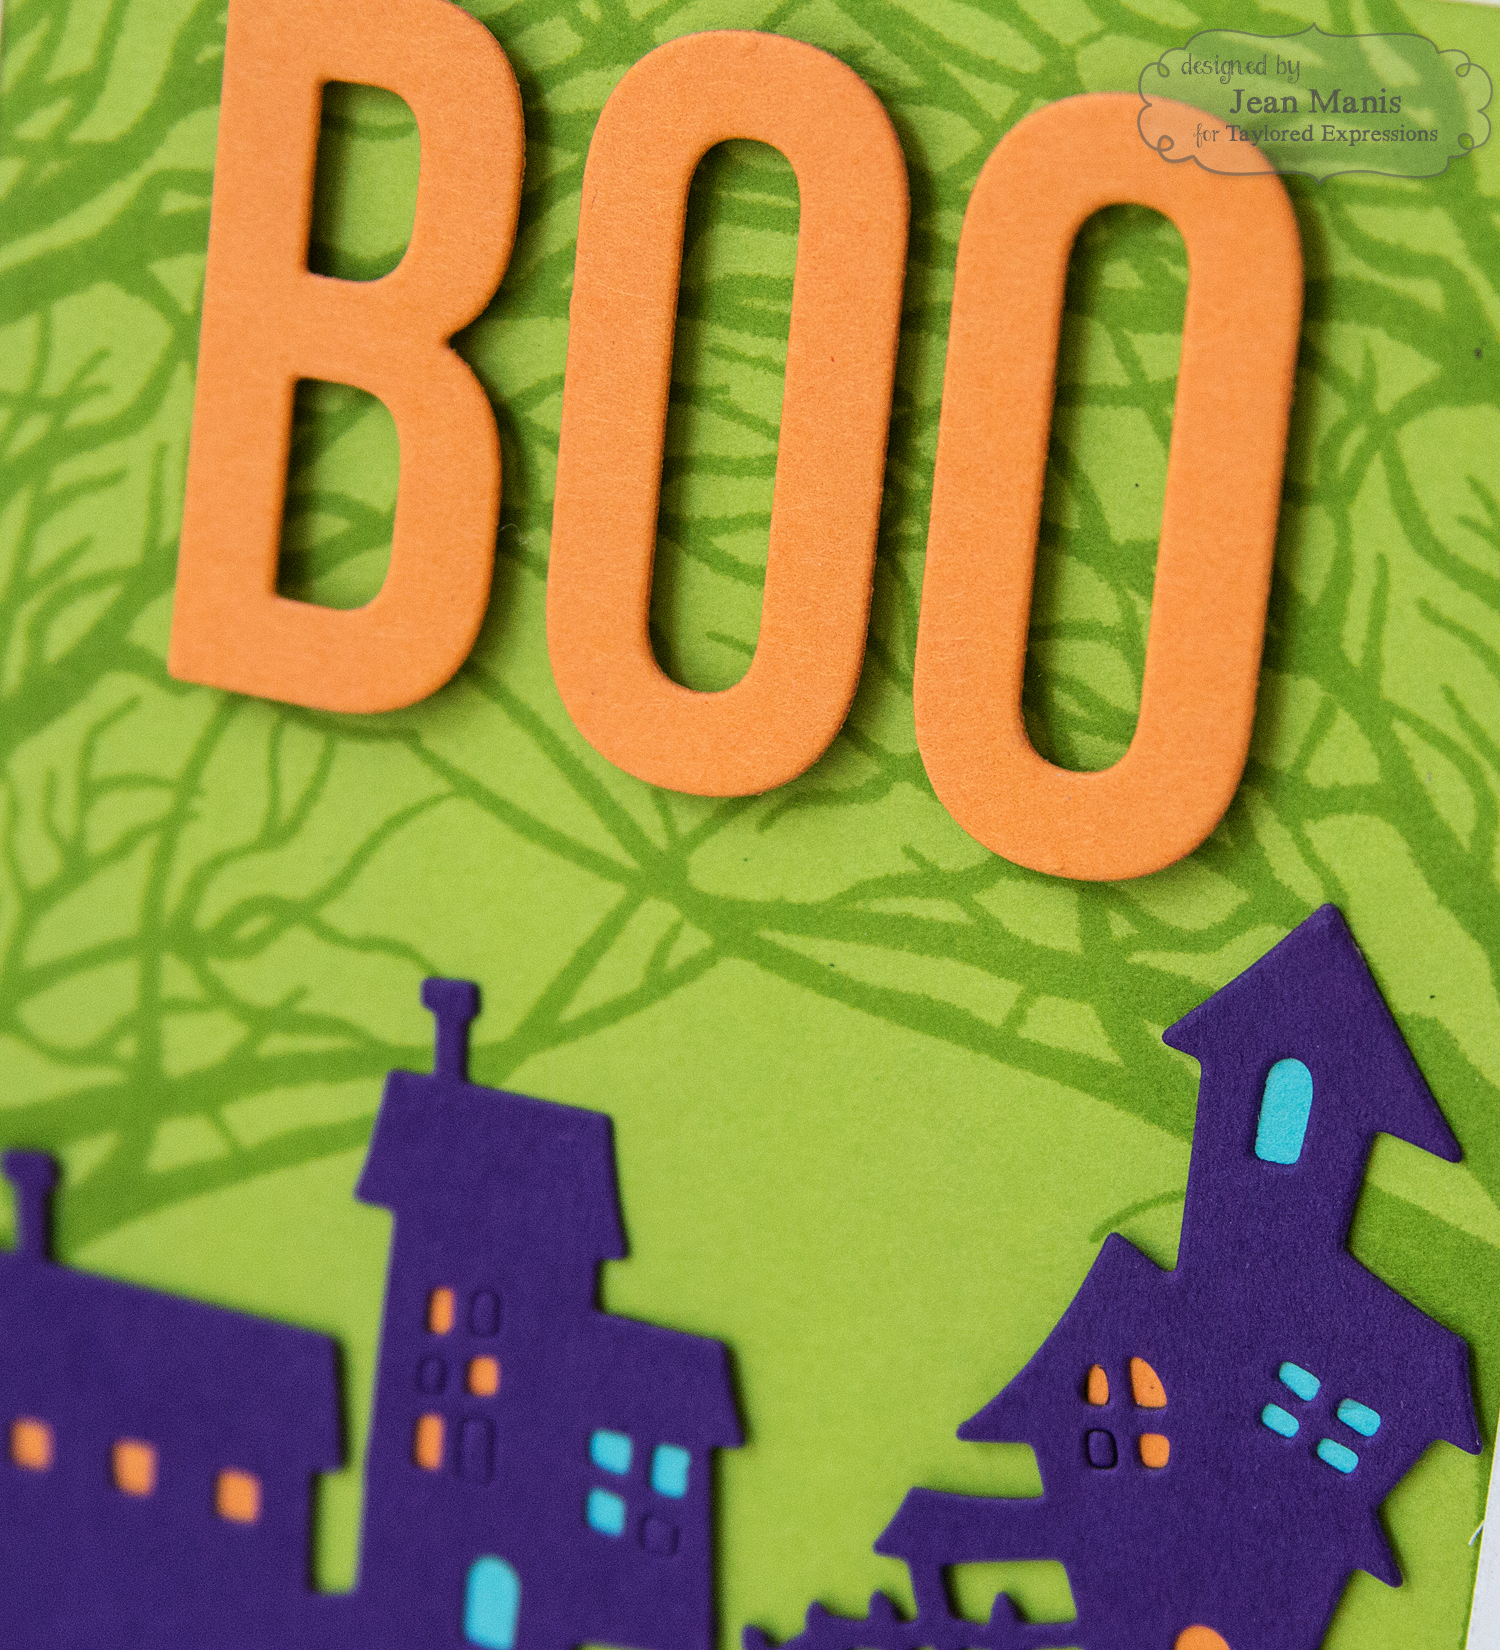
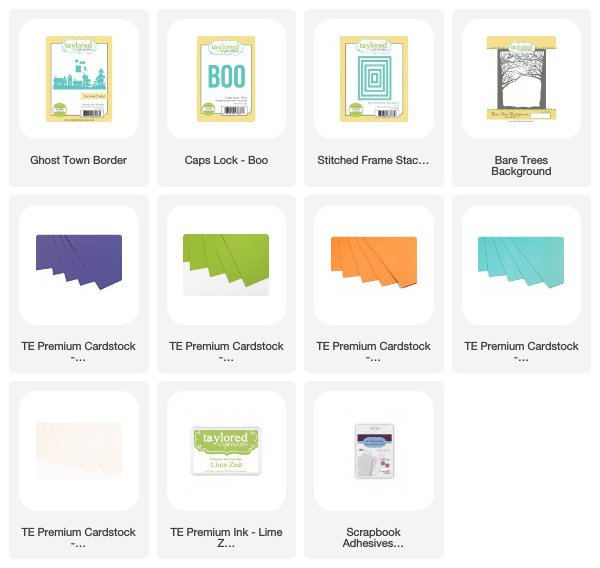
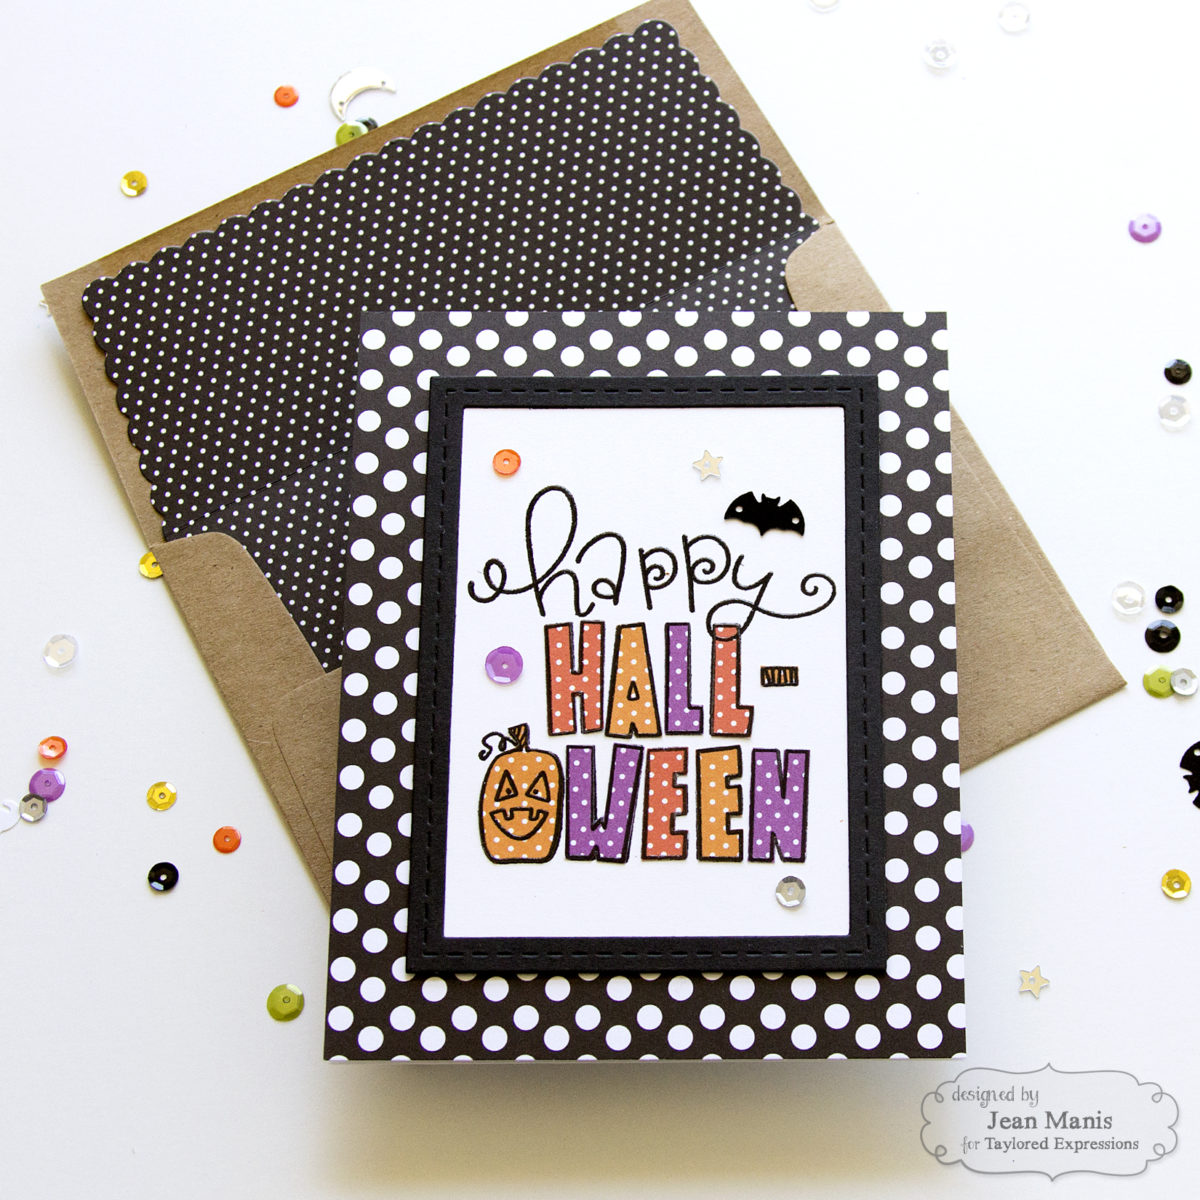
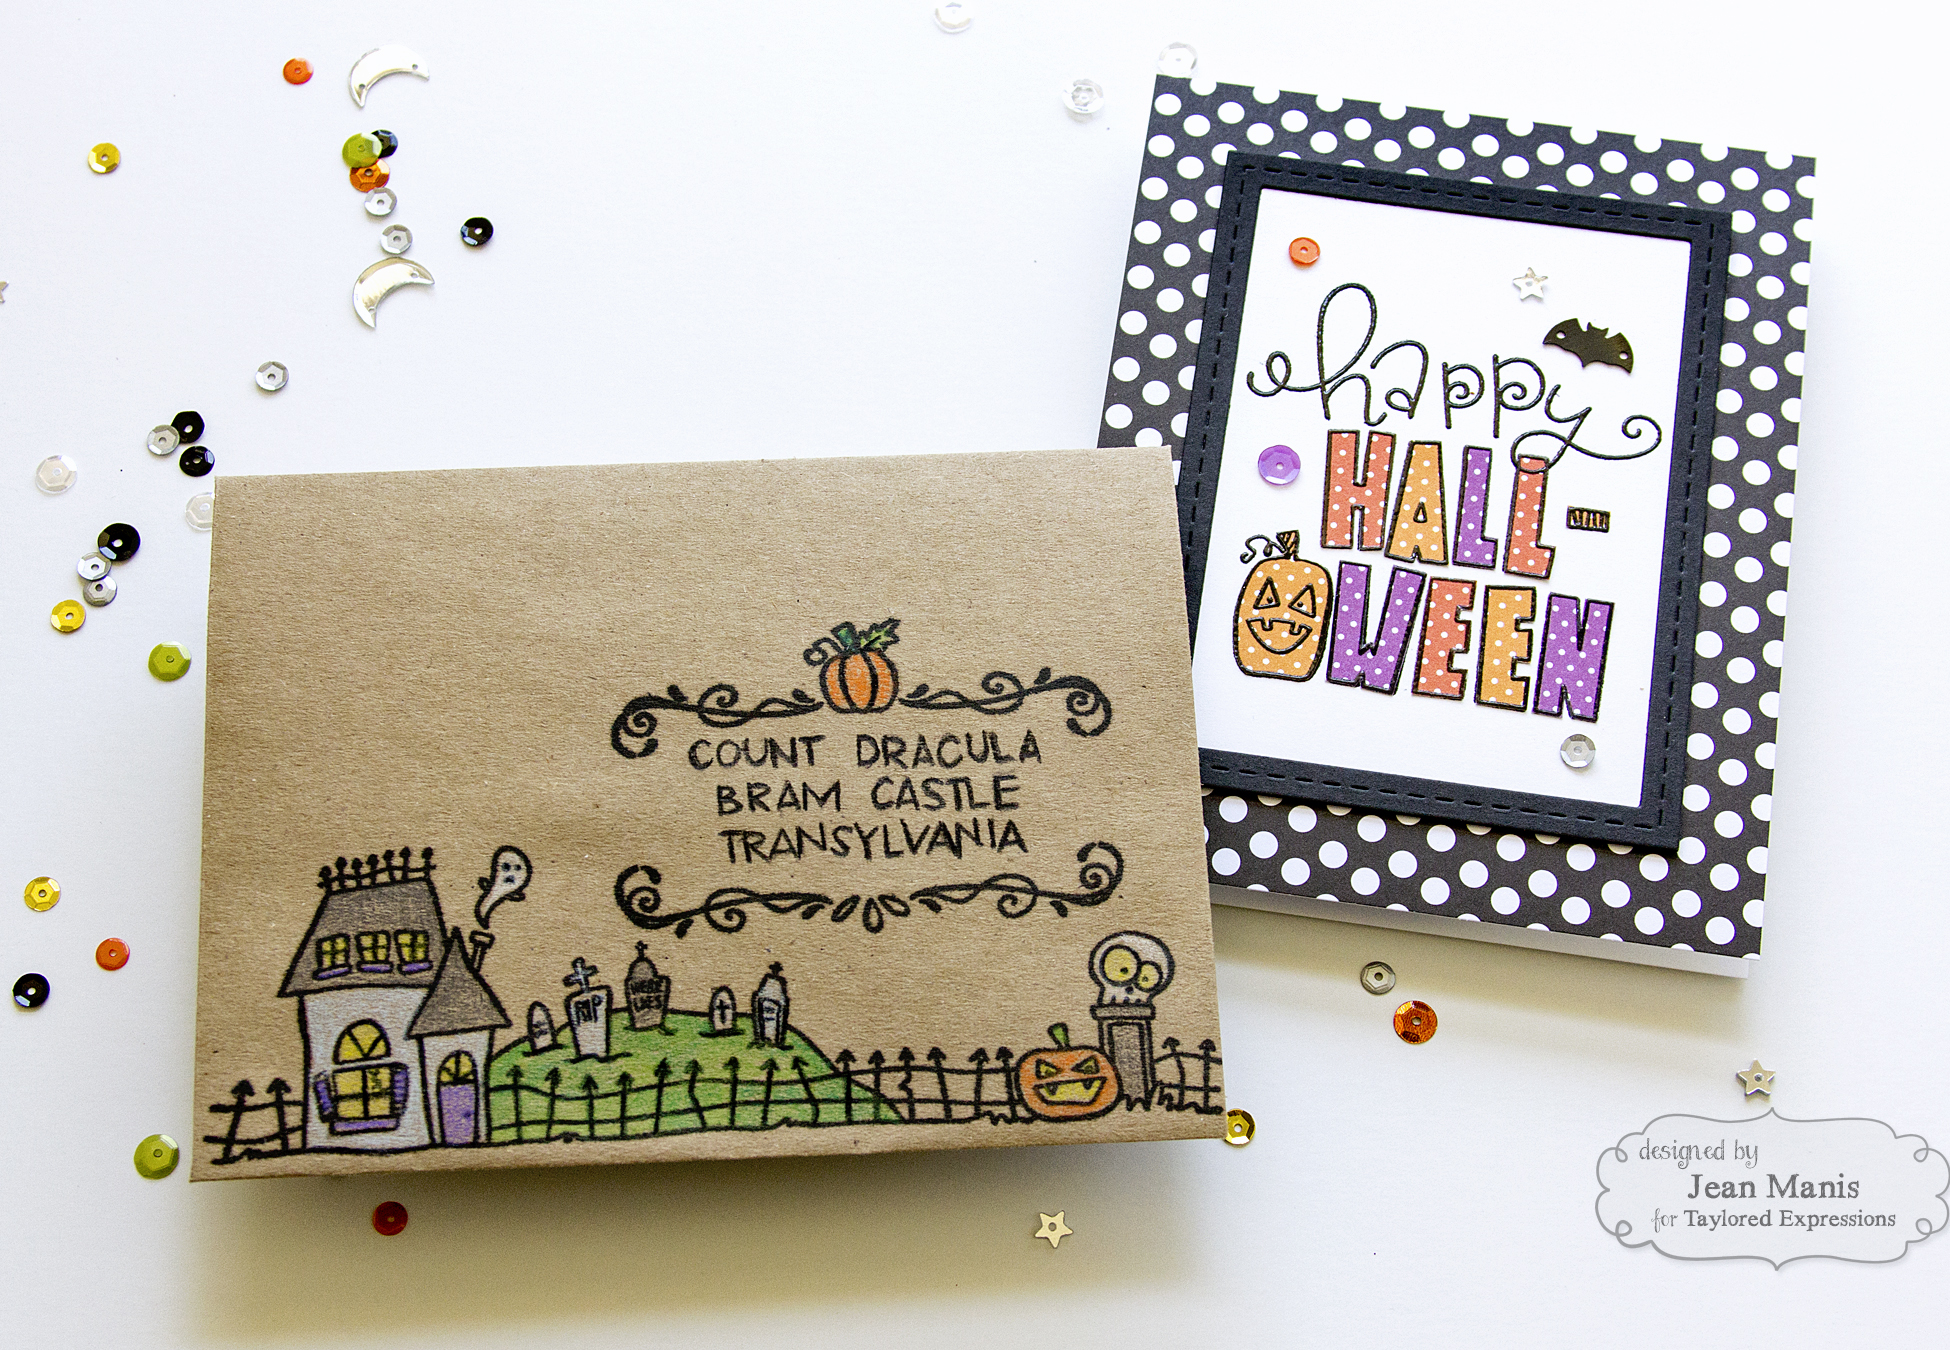
Who doesn’t like to receive fun mail?! My second project is a Halloween card created with the Bubble Greetings – Halloween set and a Mail Art envelope stamped with the Spooky Mail set.

TE August 2018 Release

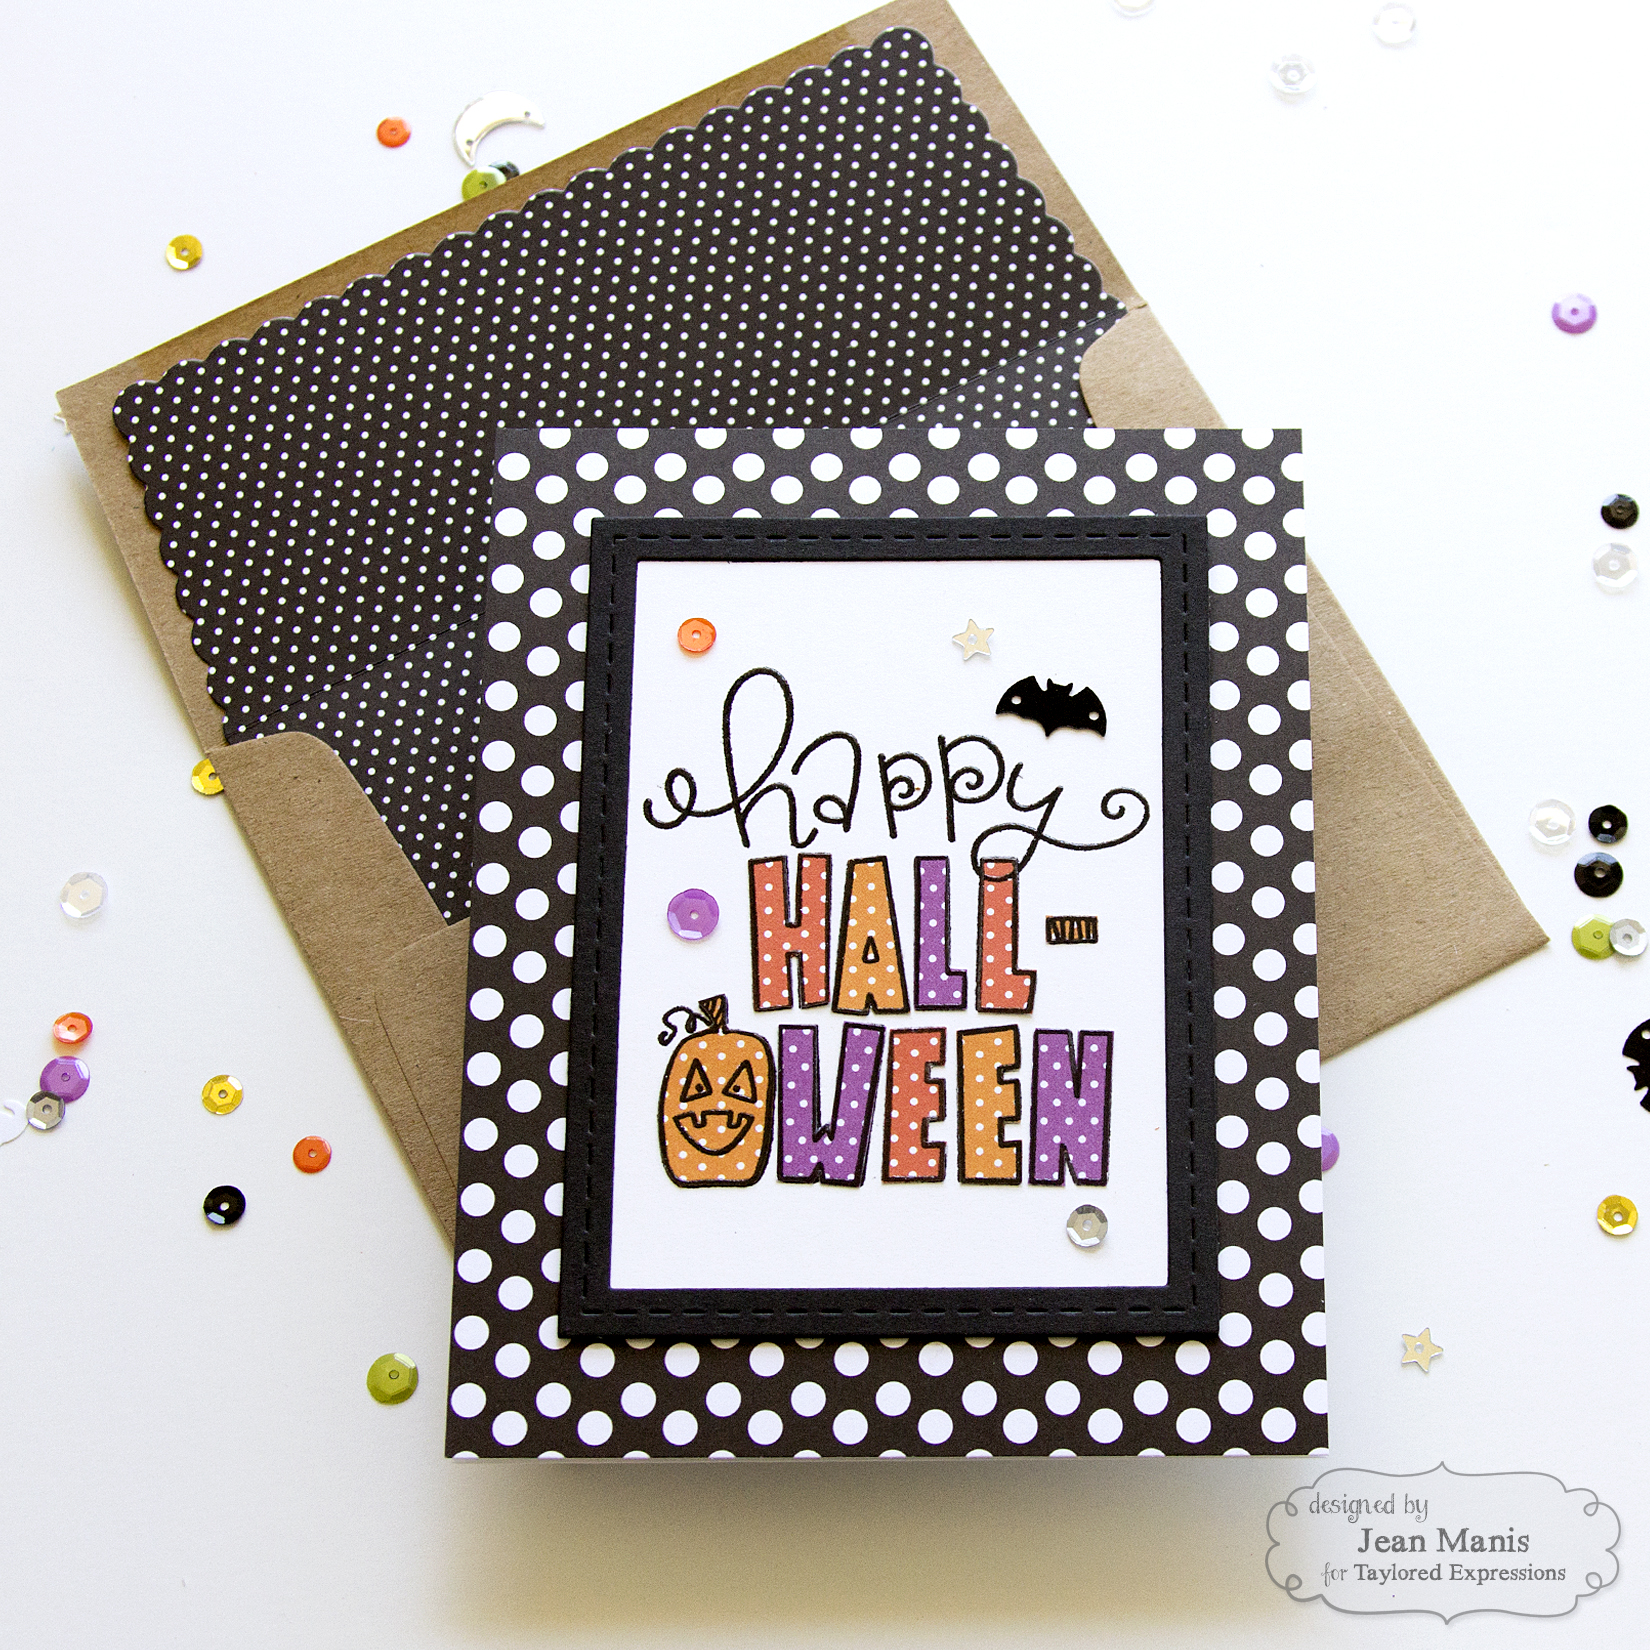
  • I heat-embossed the Bubble Greetings-Halloween on Sugar Cube cardstock. I heat-embossed the stamp again on Playful Patterns – Haunted patterned papers, which I fussy-cut and adhered to the panel.
  • I added a frame cut from Oreo cardstock with the Stitched Frame Stacklets 1 set.
  • I created a card base with paper in the Playful Patterns – Black & White set to which I added my panel.
  • To add sparkle and color, I adhered Build a Scene Halloween Sequins to the panel.
  • I stamped the Spooky Mail images on to a Toffee envelope and colored the images with colored pencil.
  • To dress up the envelope, I cut a liner from the Playful Patterns – Haunted patterned paper with the Scalloped Envelope Liner.

TE August 2018 Release

Supplies:

Taylored Expressions is celebrating Release Week with a giveaway during each day of sneak peeks! Visit the TE Blog to answer Taylor’s Question of the Day for a chance to win one of the latest products before you can buy it!

Thanks for visiting! On the TE Blog you will see more projects and product information, as well as a complete list of participating designers.

Vintage Style Halloween

Hello! Today I’m sharing two “vintage” CAS Halloween cards crafted with supplies from several different manufacturers.

For the first card, I used the emboss-resist method on patterned paper in my stash.

Halloween Vintage Style

I clear heat-embossed the Hero Arts Leaf and Floral background and then applied Distress Oxide Black Soot to the paper. The areas covered by the clear embossing were not colored. It is a great way to change the look of patterned paper.

I stamped a sentiment from Hero Arts Ghostly Greetings on to another piece of patterned paper, which I cut with a circle die and added die-cut bats (from a now retired Memory Box set).

The second card uses a Memory Box wood stamp sentiment with the die-cut Memory Box Meadow Bird and older patterned paper.

Halloween Vintage Style

While vintage isn’t my “usual” cardmaking style, it’s fun to dabble in it every now and again.