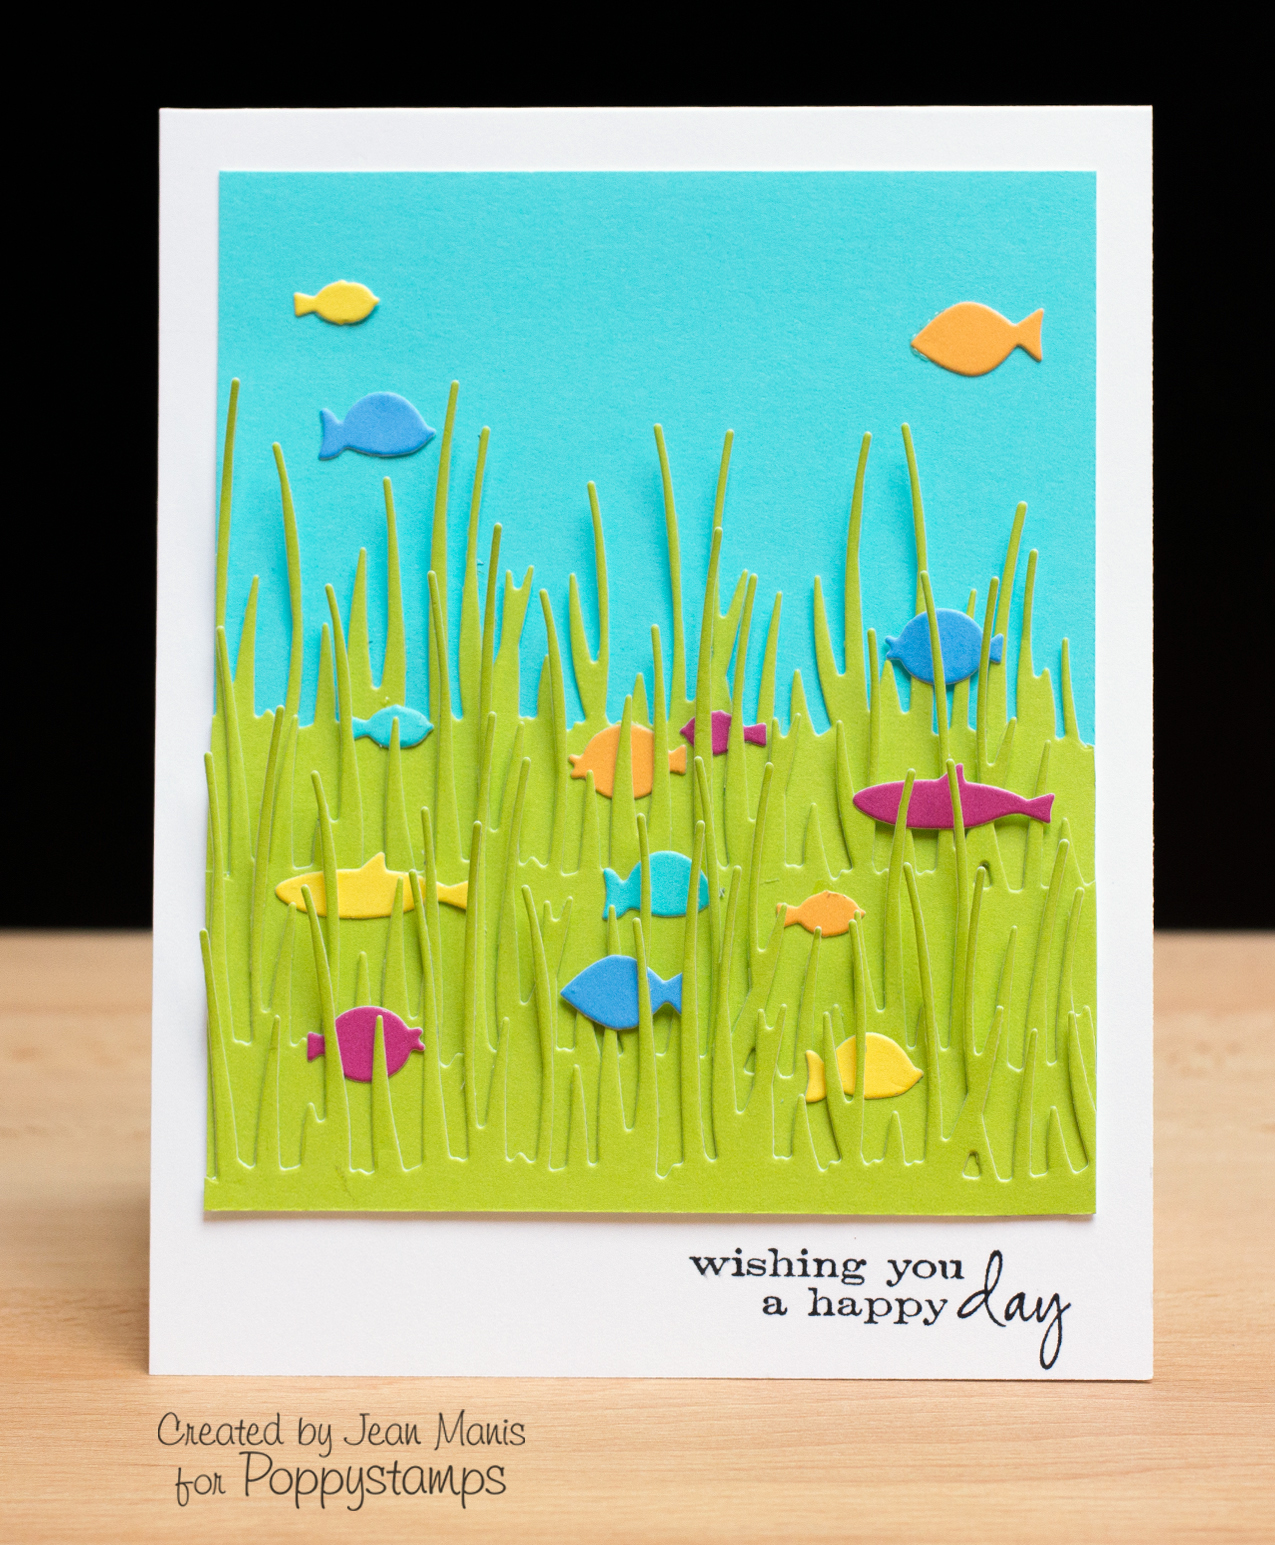
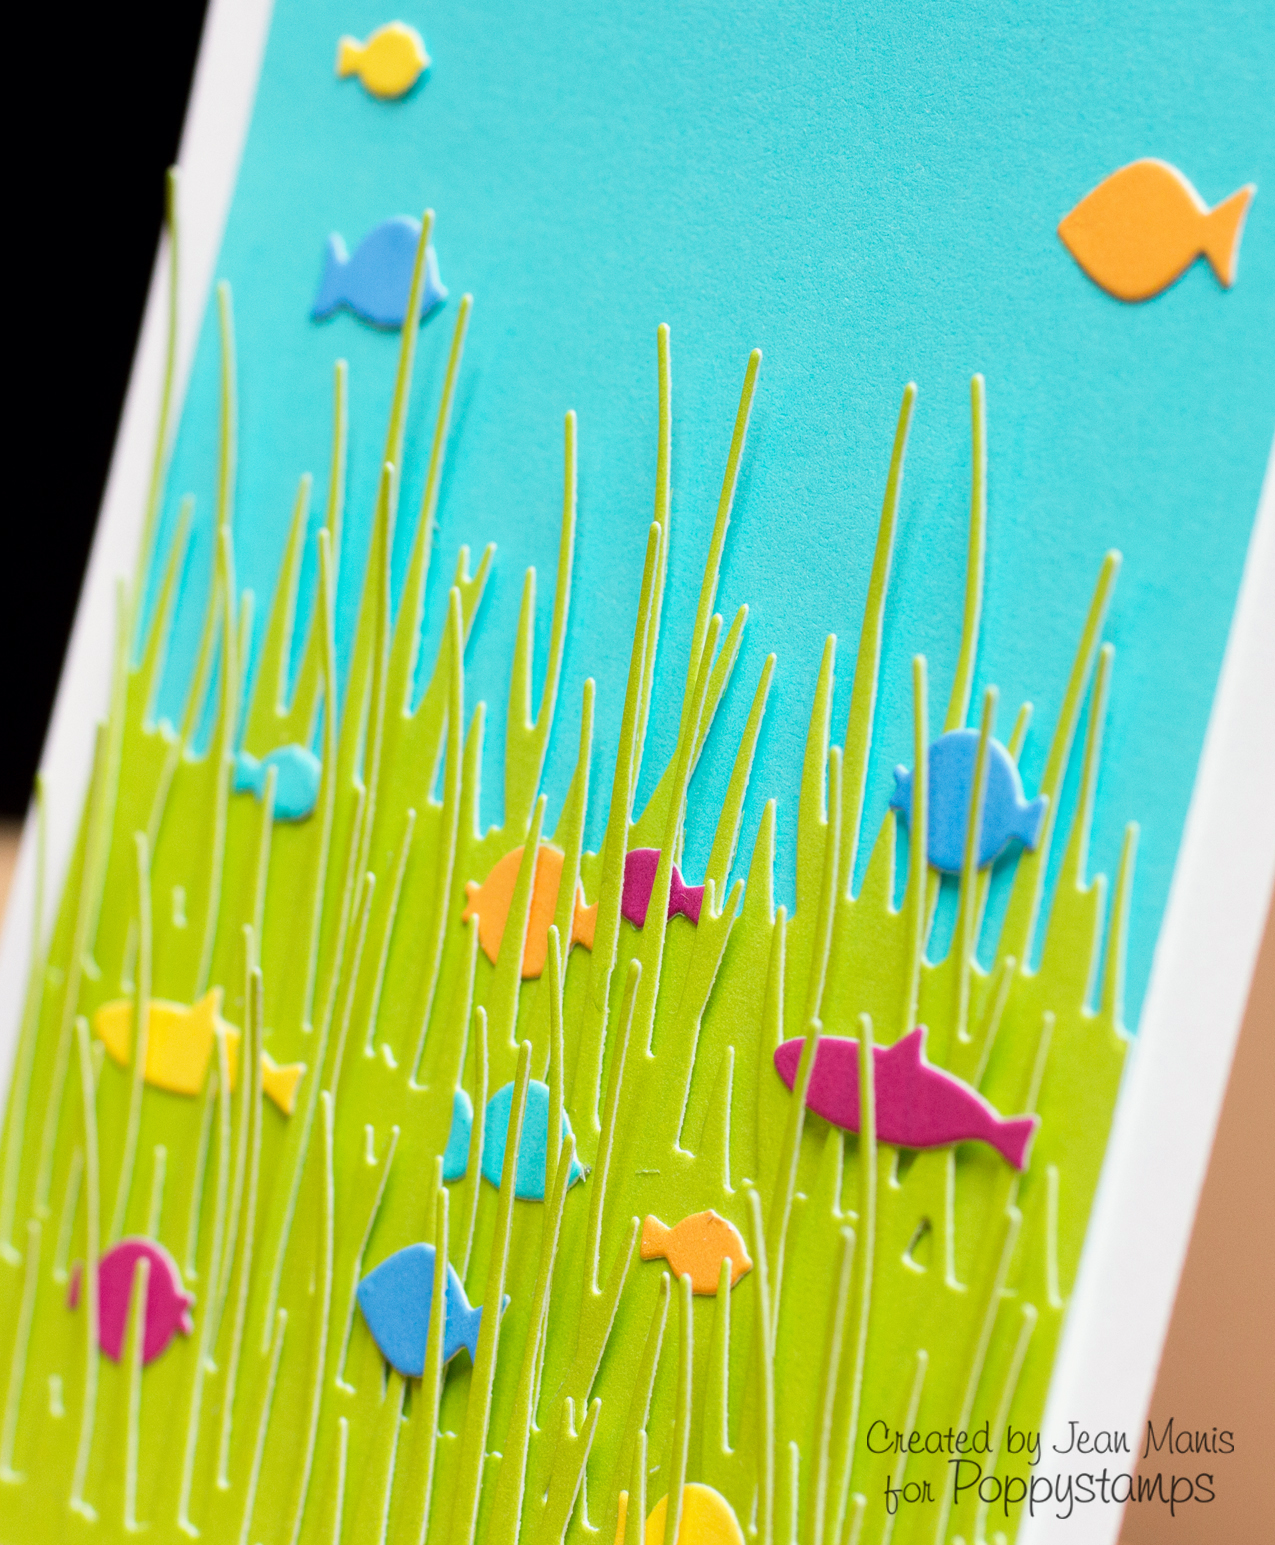
Out the Window: A Poppystamps Project

Today, I’m sharing a card created for Poppystamps. Even though the season is about to change, I’m still clinging to this last month of summer (those of you in the Southern Hemisphere are probably ready for spring!). I’m not quite ready to say “good-bye” to blooming flowers, sunny days, or the bright colors of the summer season.

Out the Window: A Poppystamps Project

In order to fit in the pieces I wanted to include on the card, I decided to “cut” the window/shutter combination at the top. Rather than leave the raw edge, I scored the pieces and folded them back on themselves. That way, there’s a finished edge along the top.

I didn’t originally plan to have the flowers by the watering can. However, after I had all the pieces of the card in place, I decided a few flowers peeking through the fence would help with the depth of field I was trying to create and visually anchor the watering can.

SCC2: Week Three, Day Four

Today’s class in the Online Card Classes Summer Card Camp 2 was all about trying something new. I CASEd the lovely shabby chic creation by guest artist Debby Hughes. Shabby chic is definitely not a style in which I normally craft my cards!

SCC2: Week Three, Day Five

I even broke out my sewing machine to add the stitching, as without it, the cut patterned paper just didn’t look right for this style. I distressed the panel and card base with Antique Linen Distress Ink and the tag with Frayed Burlap. It’s subtle, but the effect does make a difference. To be honest, I ended up enjoying this process much more than I thought I would! The card is still not full-on Shabby Chic, but it’s definitely done in a style different than my usual.

Under the Sea: A Poppystamps Project

Today, I’m sharing a project created for Poppystamps. For my card, I envisioned the rich, aquatic underwater world. Although I live in the Pacific Northwest, I’m drawn to tropical themes and colors, especially at this time of year!

Under the Sea: A Poppystamps Project

I layered four strips of Key Lime cardstock cut with the Poppystamps Grassland Border die to simulate seagrass. I then added fish, cut with the Memory Box School of Fish die, in a multitude of tropical colors. I finished the card with a sentiment stamped from the Memory Box Wishing You stamp set.

Under the Sea: A Poppystamps Project

This project is also posted on the Poppystamps blog. You’ll want to head on over there to meet the newly announced Poppystamps Design Team.

Supplies: Memory Box Currant cardstock; Memory Box Ocean cardstock; Versafine ink

SCC2: Week Three, Day Two

Today’s class in Online Card Classes Summer Card Camp 2 was all about techniques. I chose to make a card like one of the ones Jennifer McGuire shared.

SSC2: Week Three, Day Three

Again, I’ve made some product substitutions based on what I own. Jennifer used a different Memory Box die that had larger leaves. Her gold embossing was exquisite! I was surprised to hear her say she was “all thumbs,” because if that’s the case, I’m not sure what I am! Suffice it to say, getting coats of gold embossing powder on the vine was no easy feat. I added Stickles to the flowers, berries and butterflies, although I’m not sure they show up in the photo. Jennifer used some embossing powders that gave wonderful zing to those elements. I used the Stickles for an easy substitution.

Poppystamps Design Team Announcement

I’m sharing some exciting news today – I am one of the new members of the Poppystamps Design Team!

Poppystamps is a division of Memory Box, who you probably already know for their high-quality dies and stamps. Our team will be regularly posting creations on the Poppystamps blog. You’ll want to head on over to meet the rest of the Poppystamps Design Team.

Poppystamps Design Team Announcement

I’m sharing a card created with Lorelai Leaf, Lorelai Leaf Outline, and a Memory Box stamp, which I masked except for the “hello.”