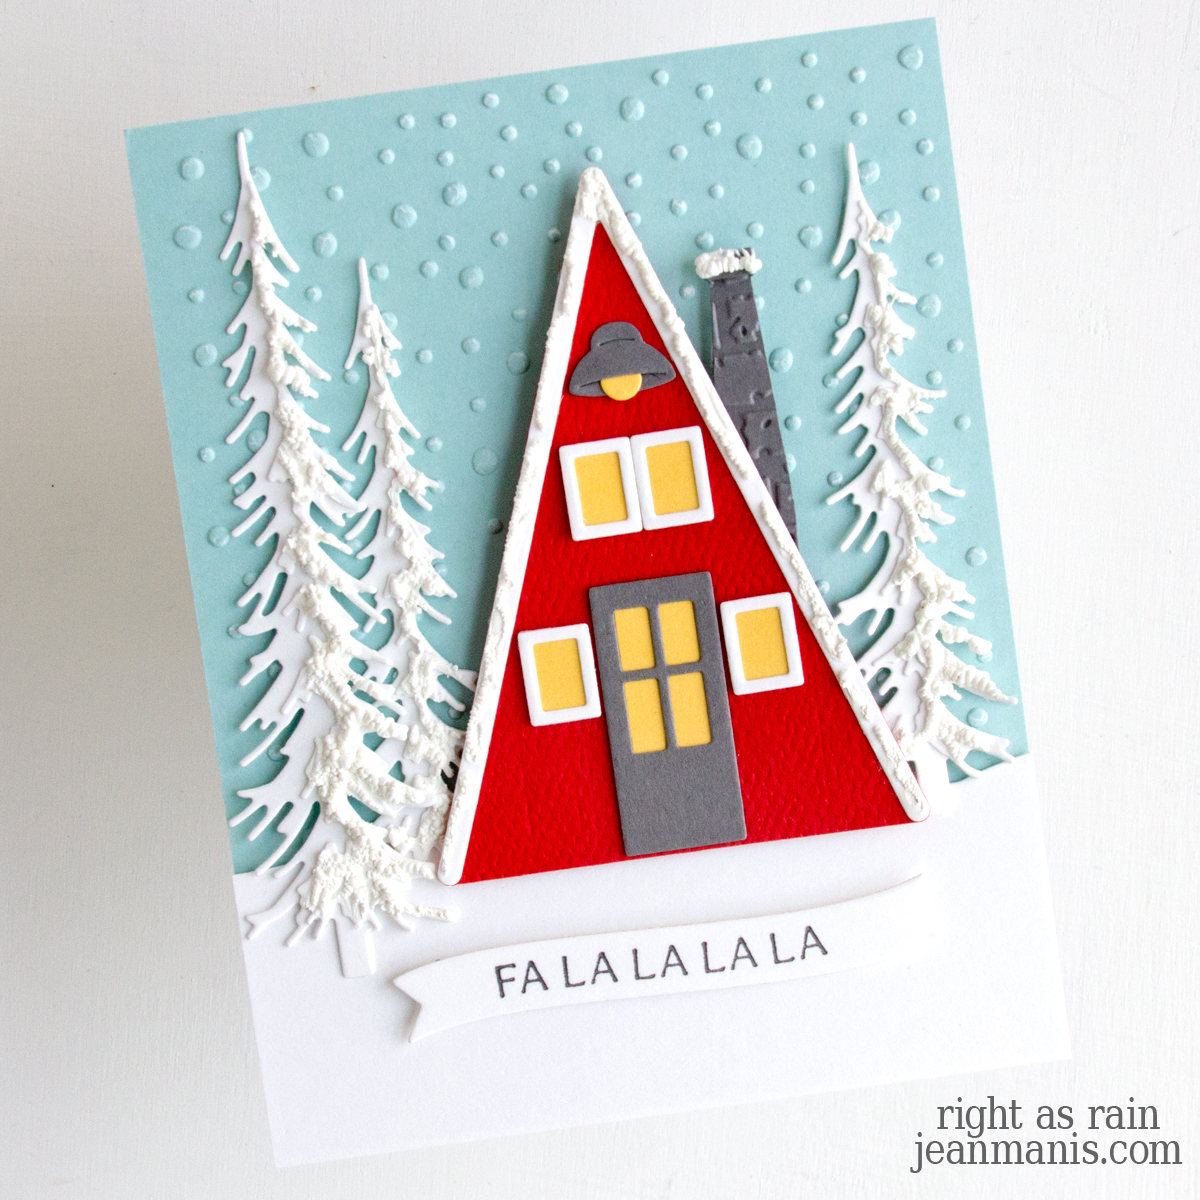
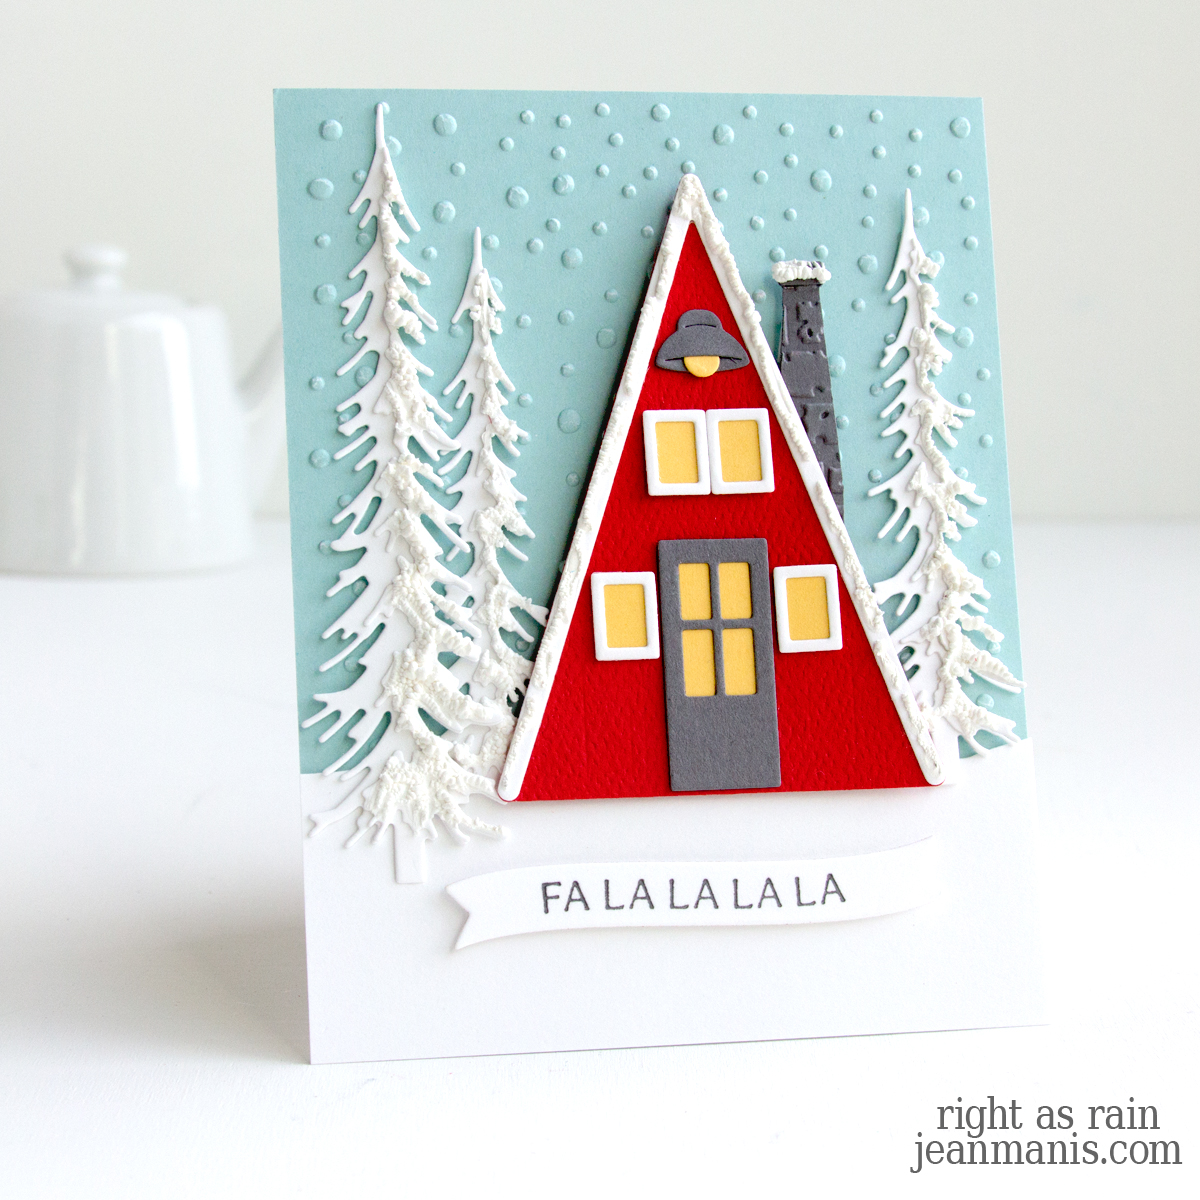
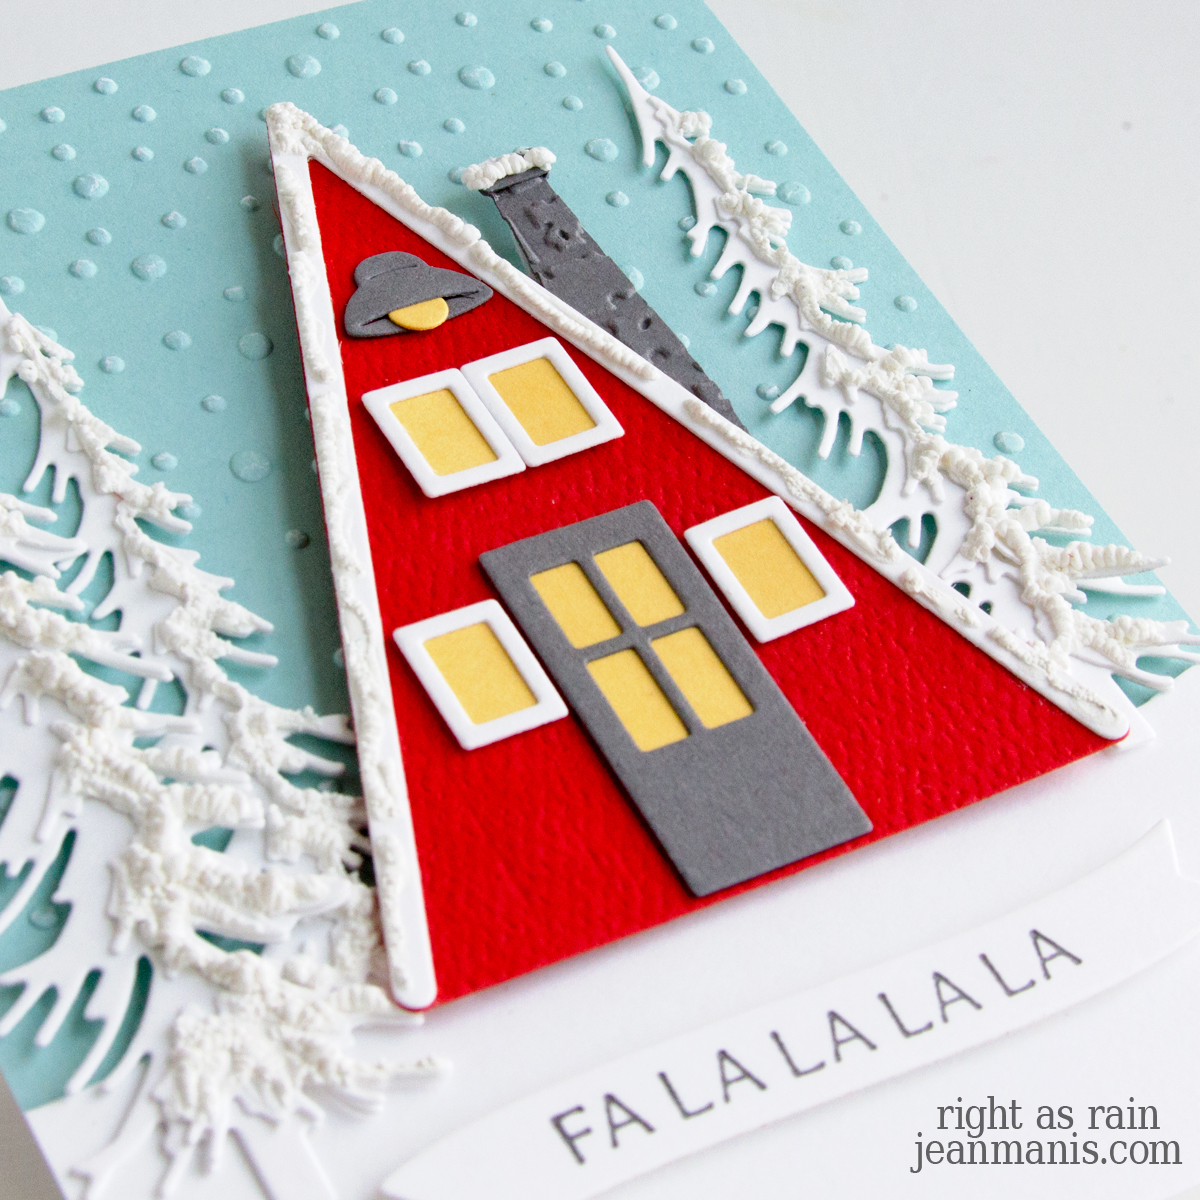
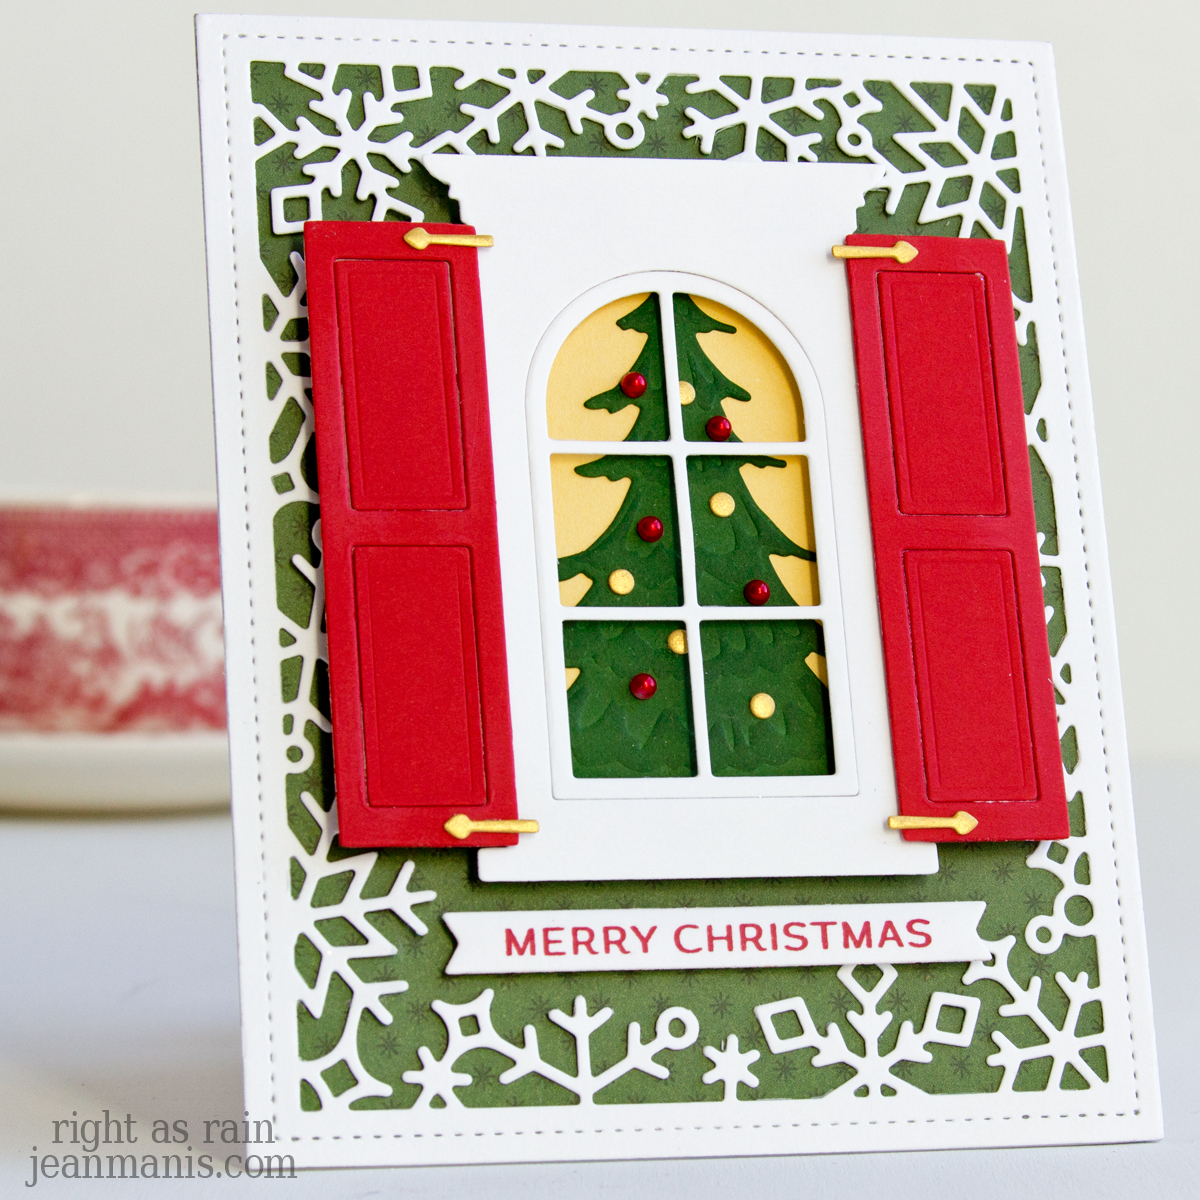
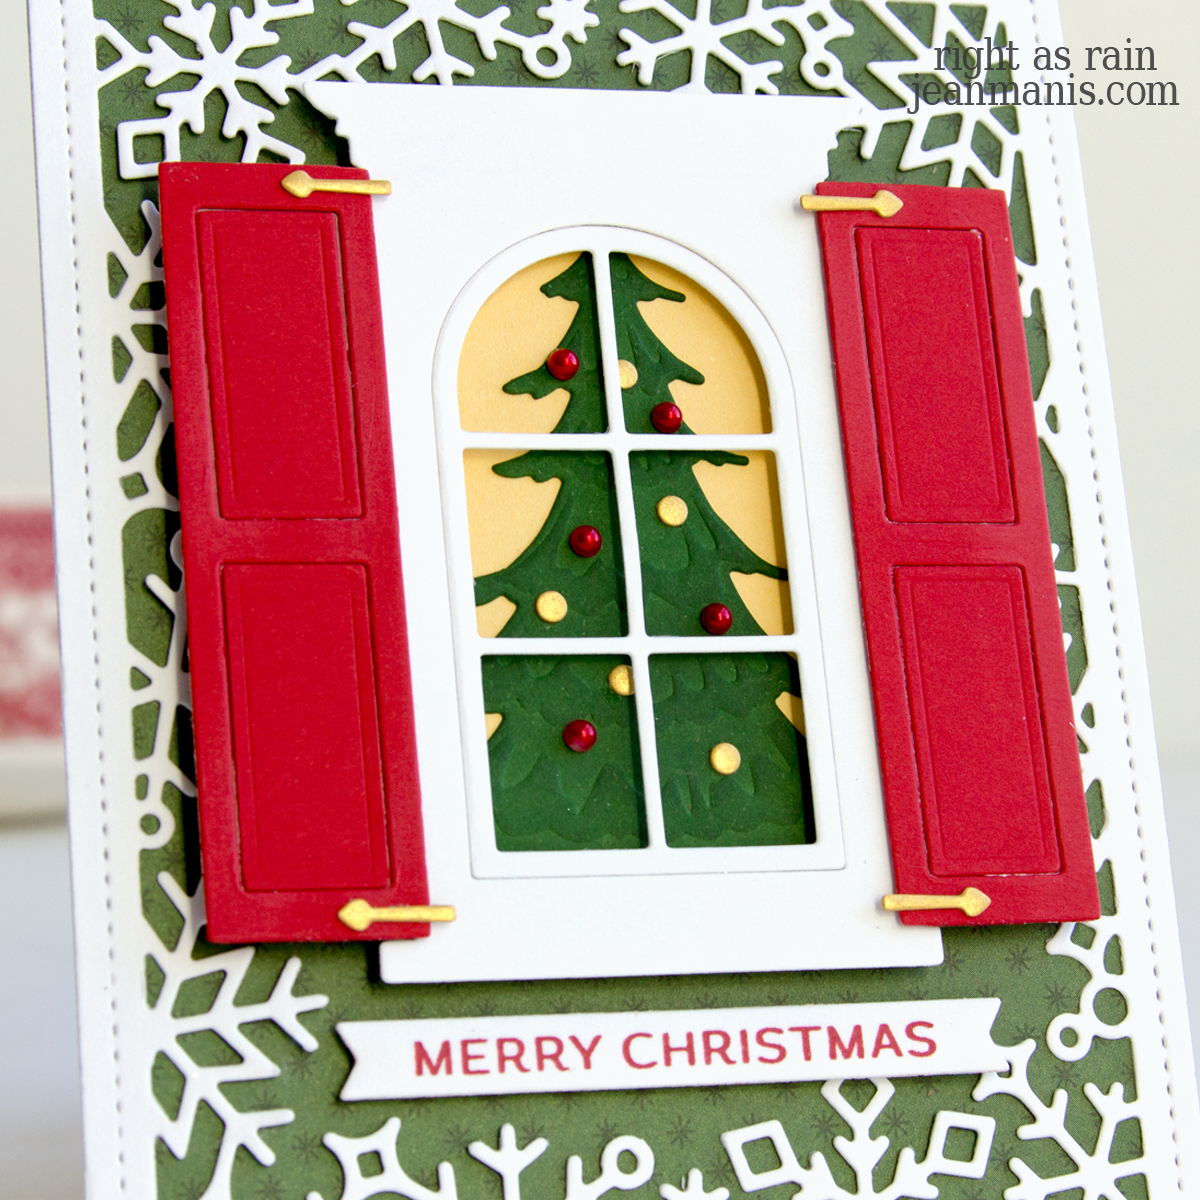
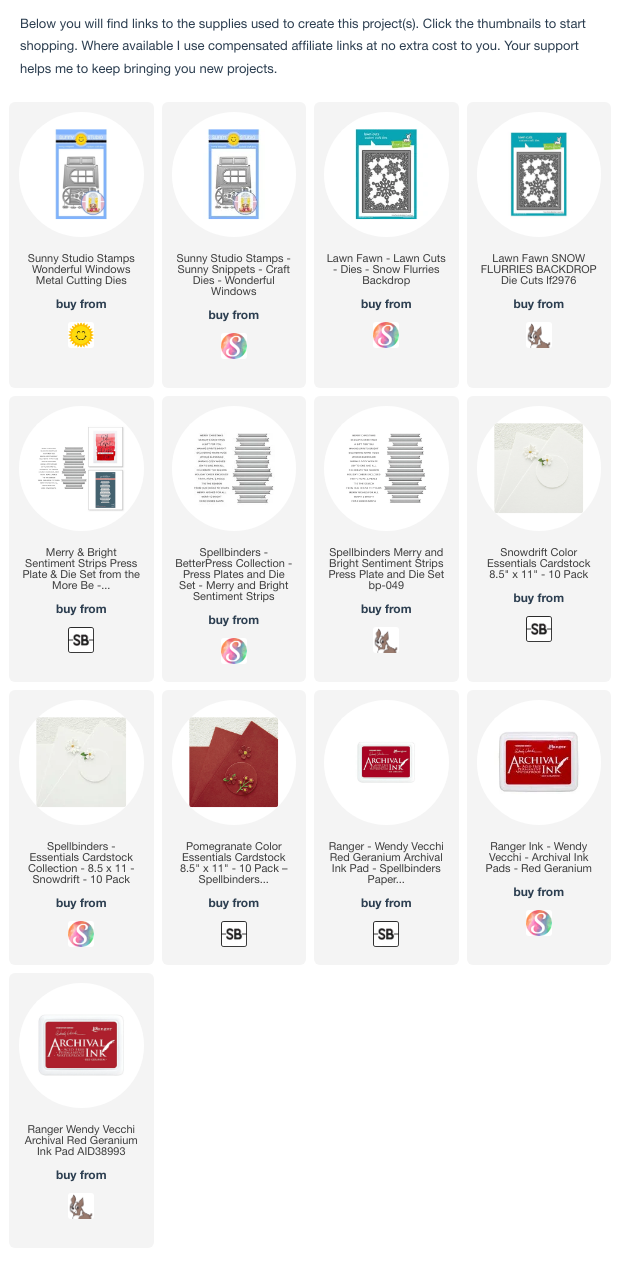
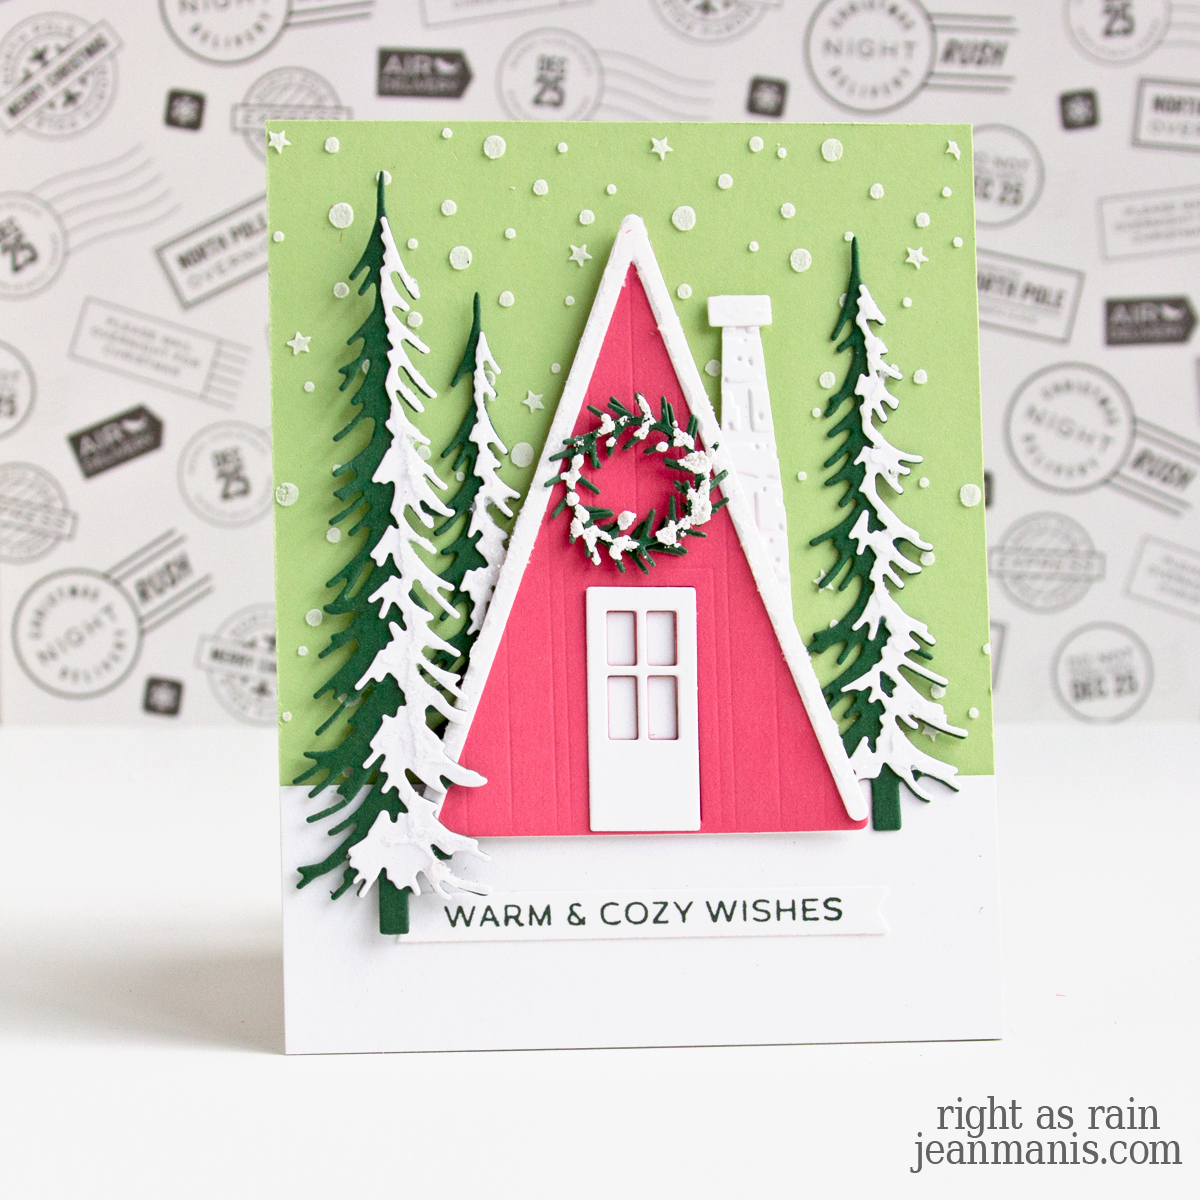
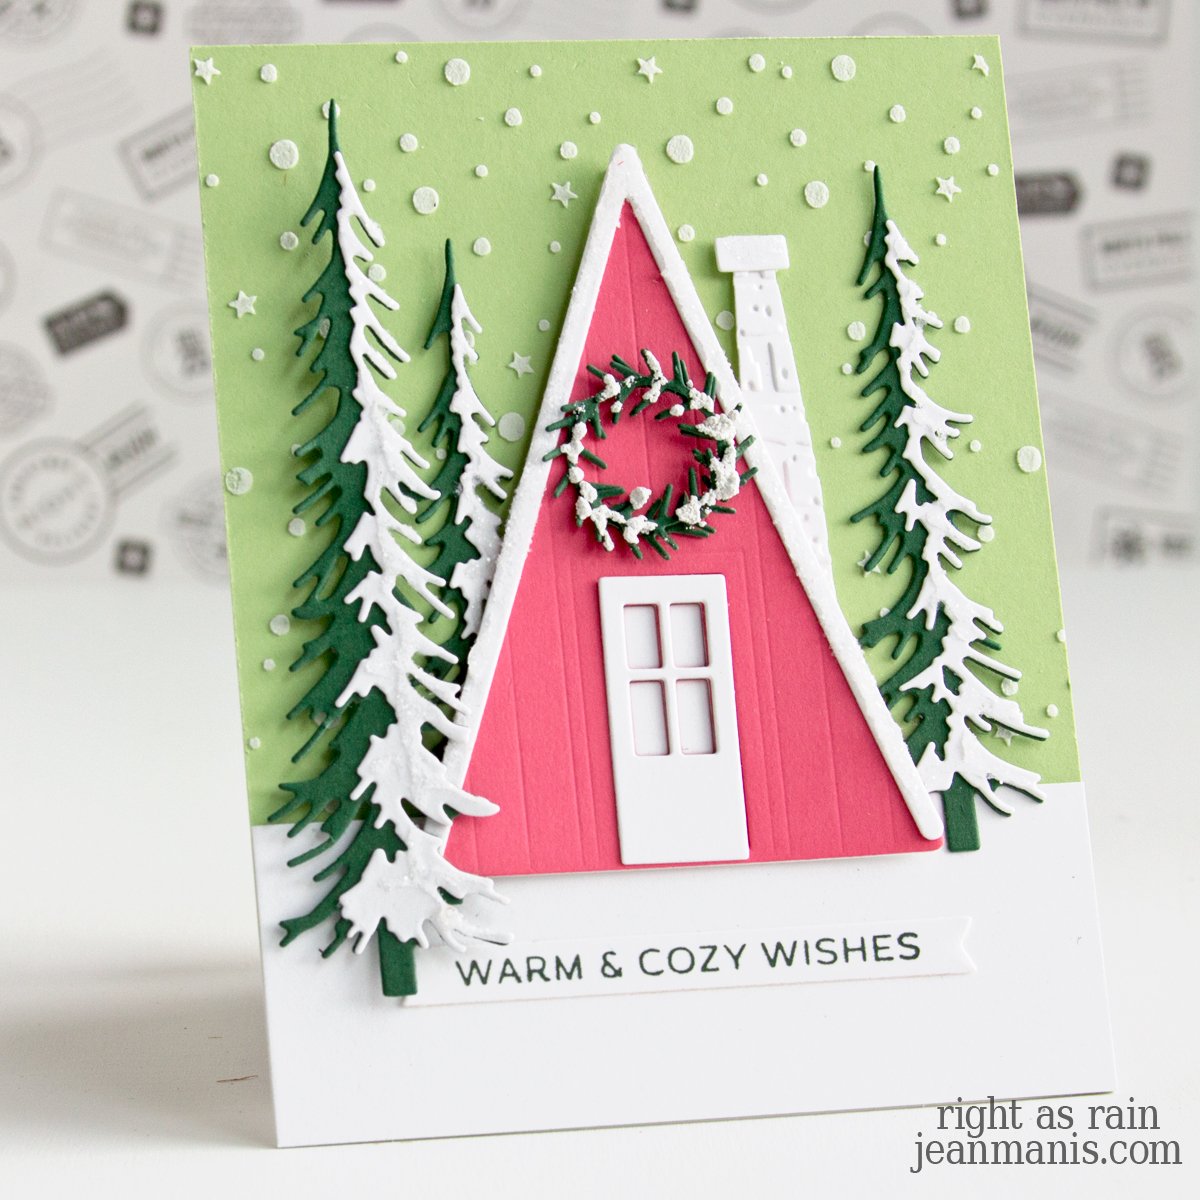
Hello! For the 52 Christmas Card Throwdown Challenge, I crafted a Christmas card that feels both festive and fresh, using the challenge colors of pink, green, and white (the challenge colors). Featuring Memory Box dies, I created a serene forest scene with a cozy A-Frame house nestled among snowy trees.
Working on this card brought back a childhood memory. As a tween, I was convinced that green and pink didn’t belong together—especially when my mother insisted on dressing me in a spruce green sweater and a pink turtleneck for school photos. Now, years later, I see the charm of this unexpected pairing.
-
- To begin, apply embossing paste through the Snow Flurries stencil on a light green cardstock panel. Once dry, add to an A2-size card base. Cut a 1 1/2″ strip of Snowdrift cardstock for the snow and add to the background panel.
- Cut the pieces of the A-Frame house from Snowdrift and Dahlia cardstock. Apply glue and Rock Candy glitter to the top of the chimney and to the roof. Once dry, assemble the house.
- With dies in the A-Frame house set, cut the wreath from dark green cardstock in the Greenery pack. Apply White Puff embossing powder to create a snow effect.
- Cut the trees with dies in the Layered Narrow Pines set from dark green cardstock in the Greenery pack and Snowdrift cardstock. Apply glue and Rock Candy glitter to the Snowdrift pieces. Once dry, assemble the trees.
- Press the Merry & Bright sentiment in Spruce ink on Snowdrift cardstock. Cut with the die in the sentiment set.
- Add the house, trees, and sentiment to the card with dot and foam adhesive.
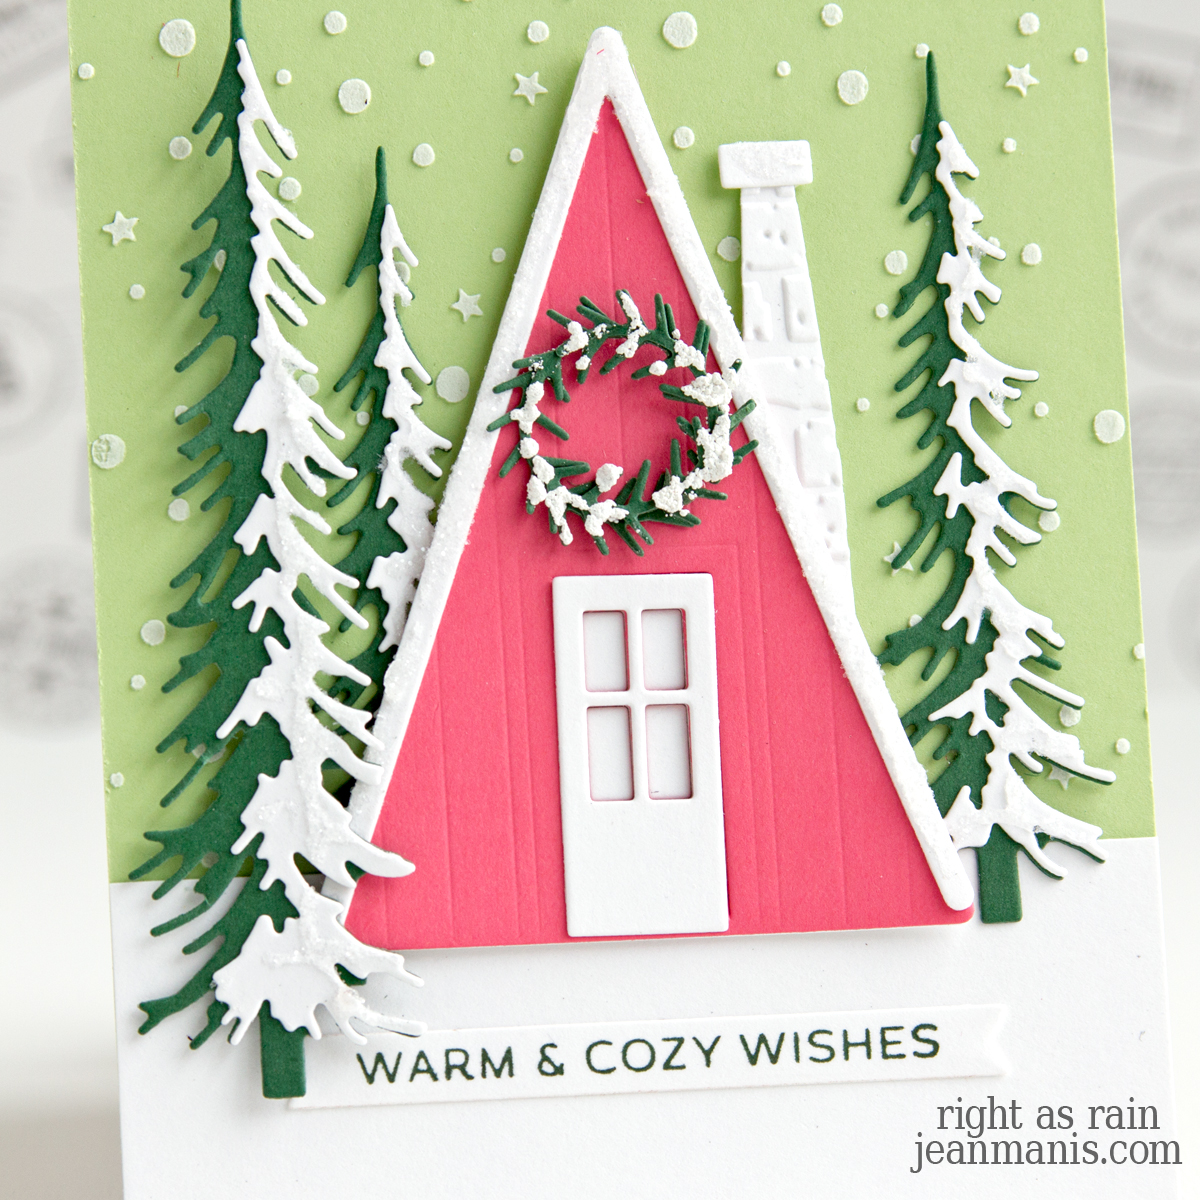
To create the effect of snow on the trees and roof, on the wreath, and on the background, I used different techniques, adding dimension and realism. Adding snow to paper creations is a fun way to bring a wintry feel, making your holiday scenes even more magical.