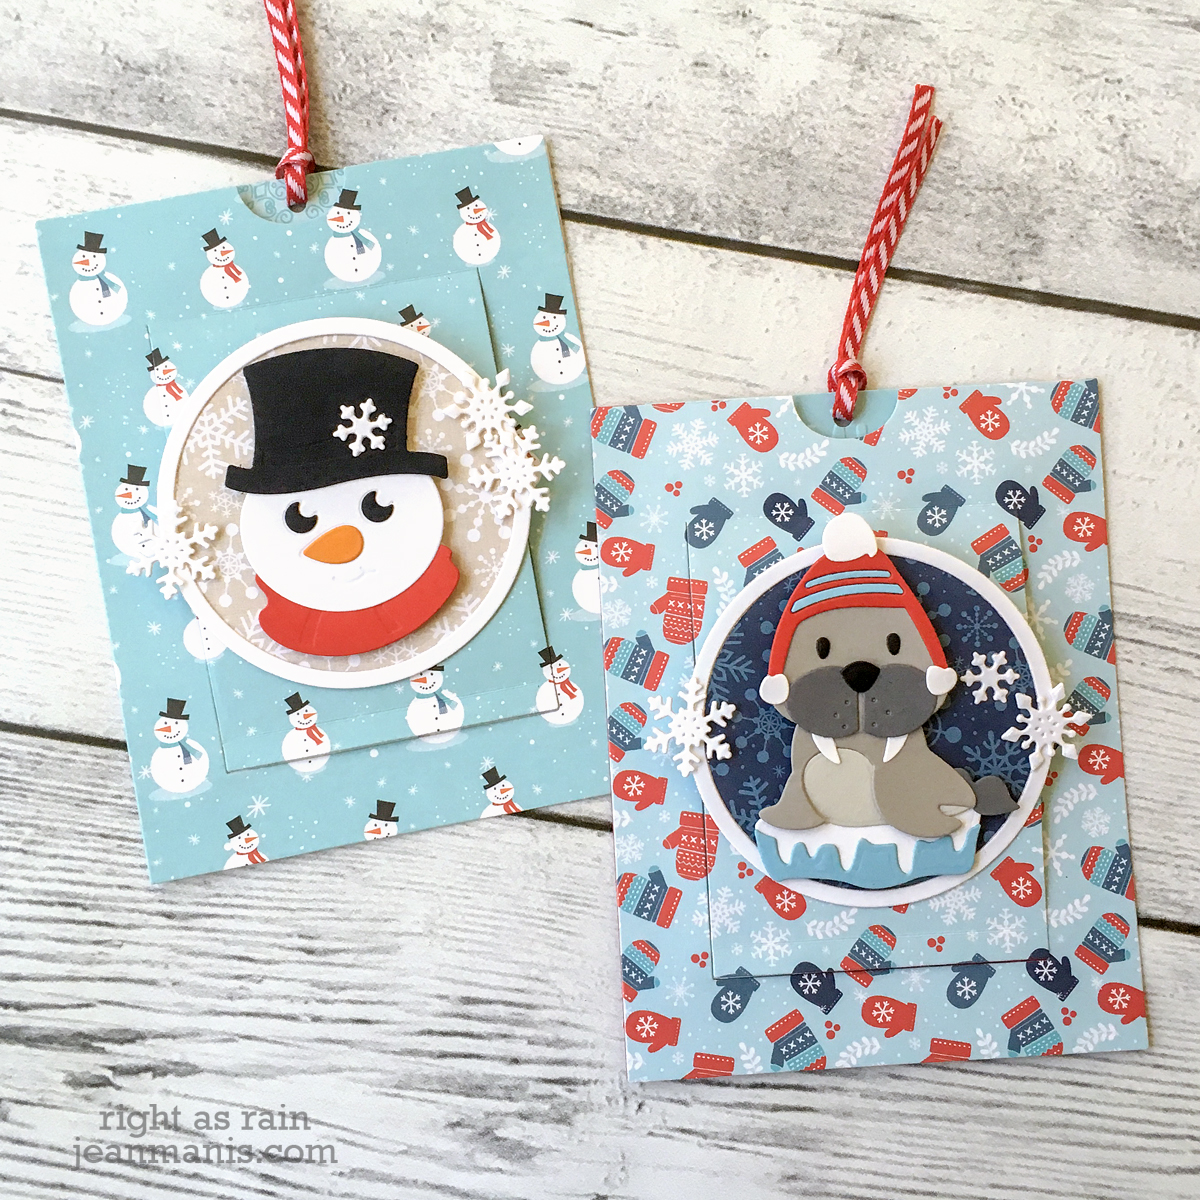
Hello! Today I am sharing two winter-themed slider cards created with Spellbinders die sets including the Festive Wreaths Slider Card die set, one of the past club kits that is currently on sale!
Sale Details: Save up to 40% off select past club kits at Spellbinders. Click Here to view eligible items. Club members must Log In to view club member discounts. Orders are processed in the order that they are received. If you purchase an item that is out of stock, the item(s) will be removed from your order and you will not be charged for that item(s). Offer is for individual consumer use only; not for distribution; excludes clearance items, tax, & shipping. Not valid on any previous web, phone or retail purchases; cannot be redeemed for cash; cannot be combined with any other offer; void where prohibited; limited to stock on hand. Offer only available 10-15-19 to 10-20-19 at 11:59 PST.
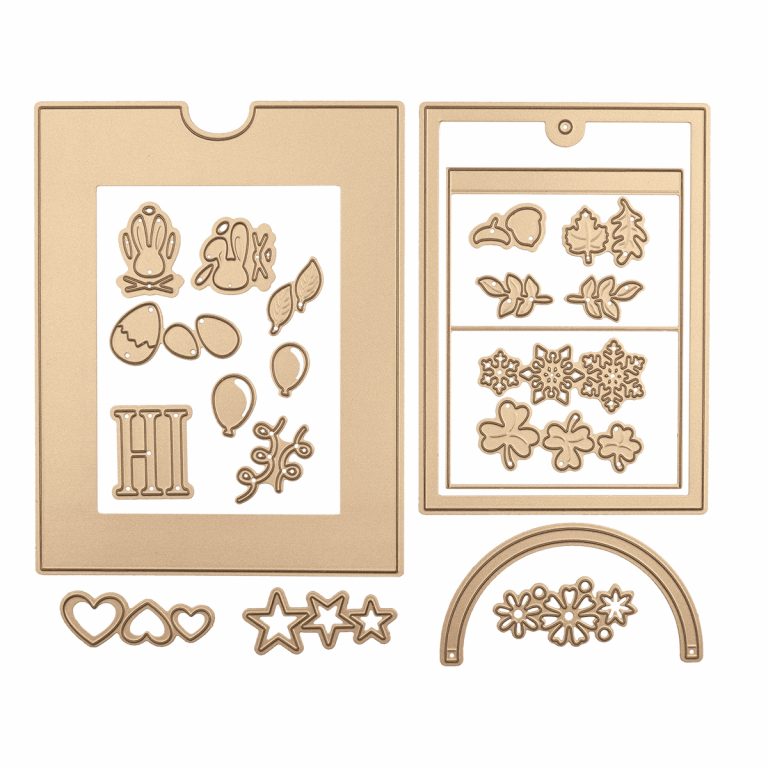
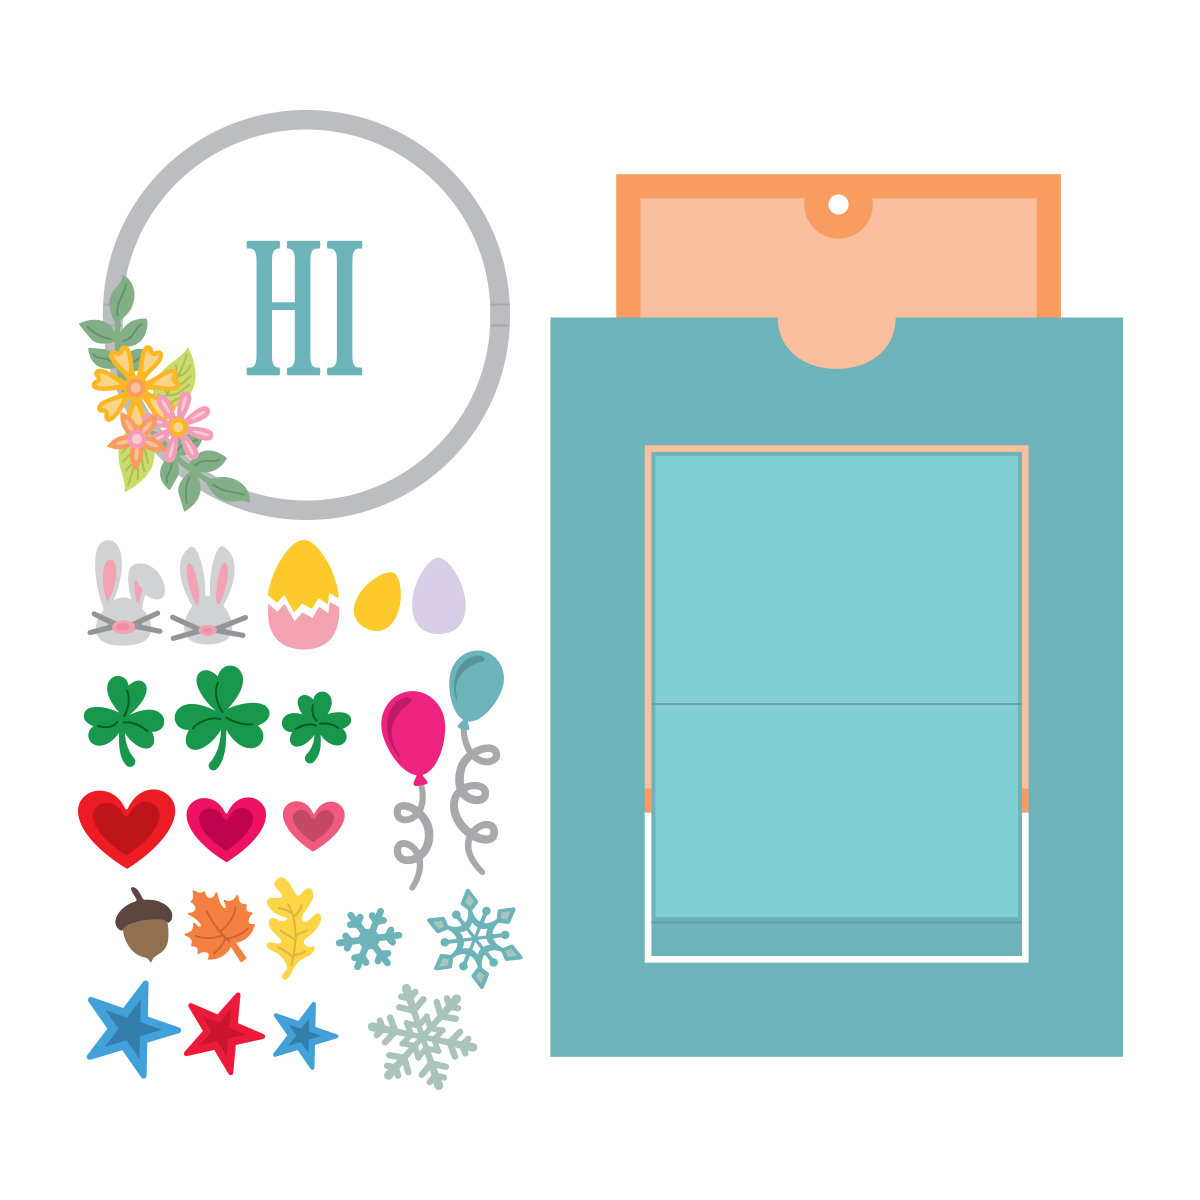
This amazing 21-piece set includes all of the pieces with which to construct the slider card, in addition to a number of smaller dies with which to customize the slider card for a variety of occasions and seasons. Given the time of year, I used the set’s snowflake dies on my projects.
My cards are similar, as both use Die D-Lite sets as the focal image and the same patterned paper. There are a couple of differences upon which I’ll elaborate.
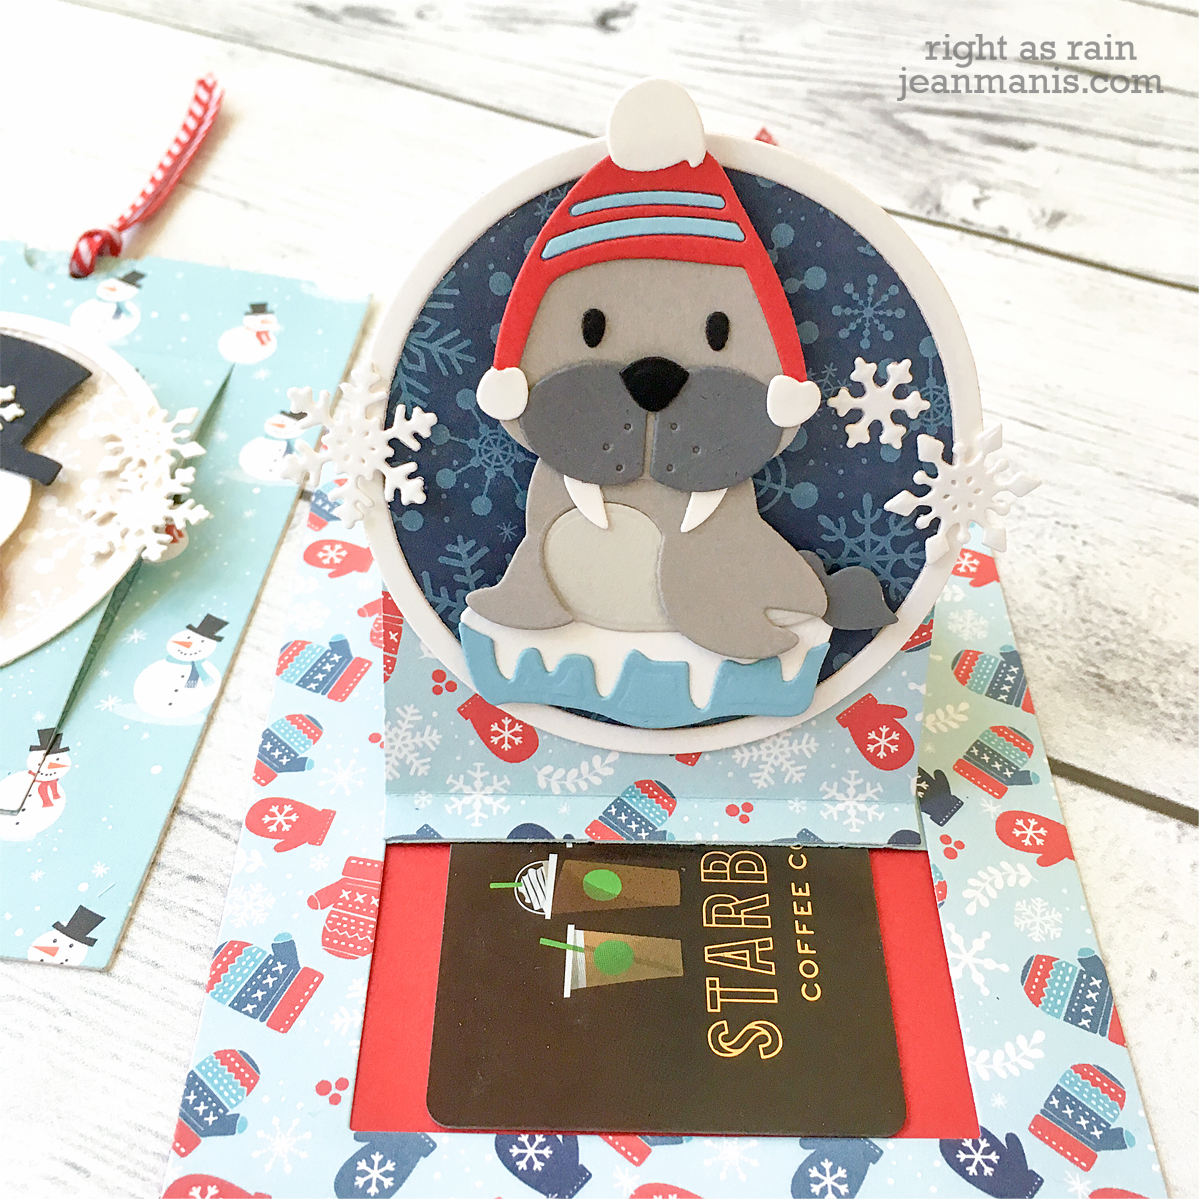
My first card showcases the Die D-Lites Woliver set.
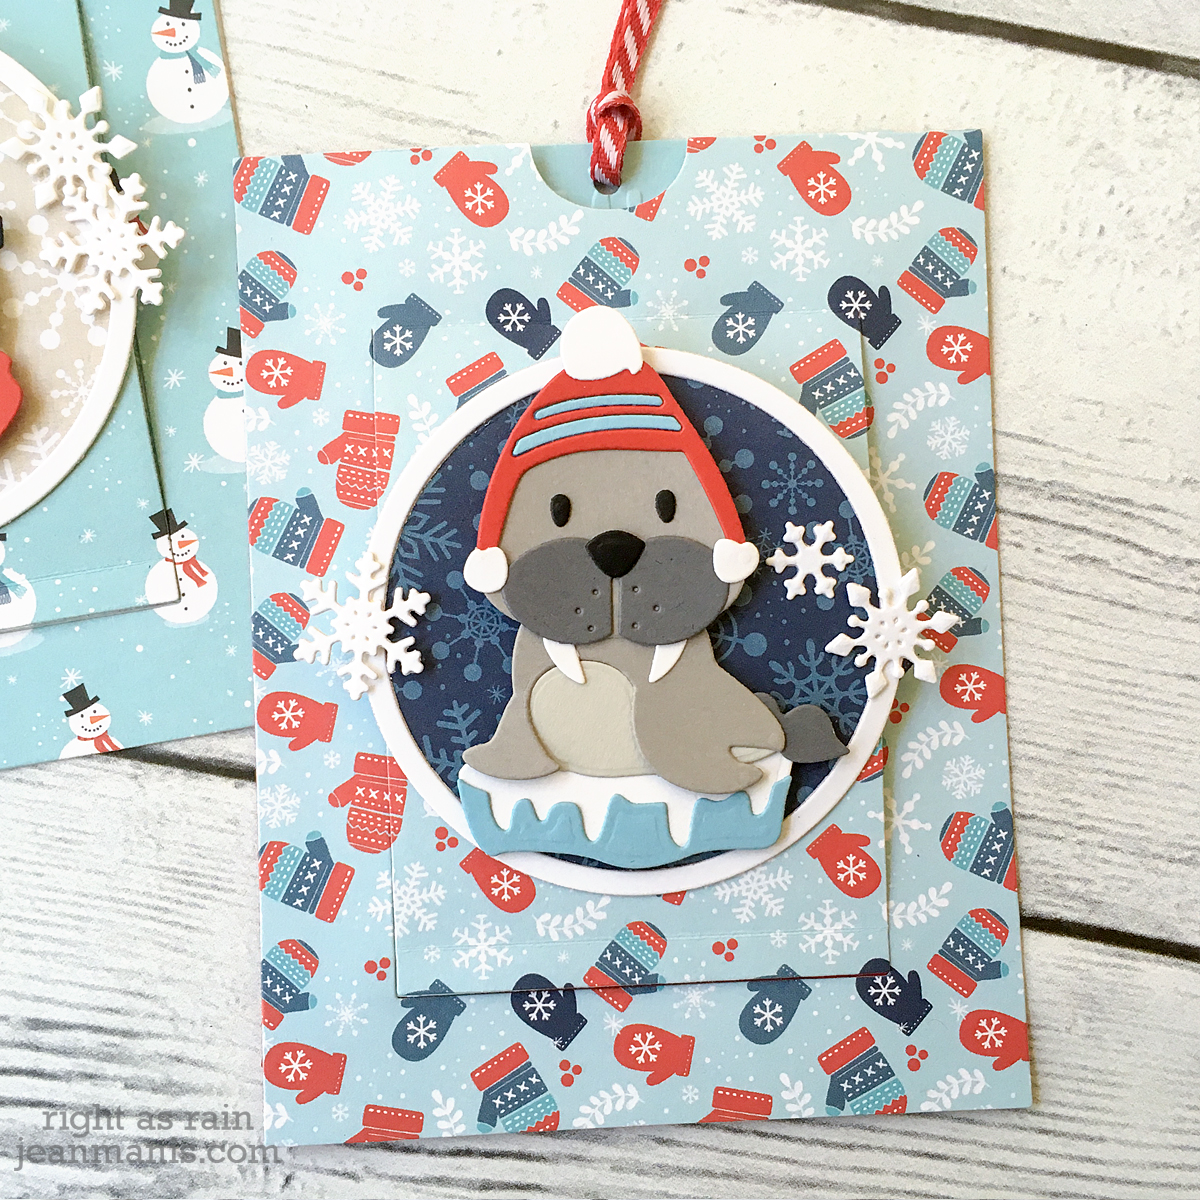
I die-cut and constructed the walrus from solid cardstock. I constructed the slider card from both patterned paper and solid cardstock. Snowflakes adorn the circle frame.
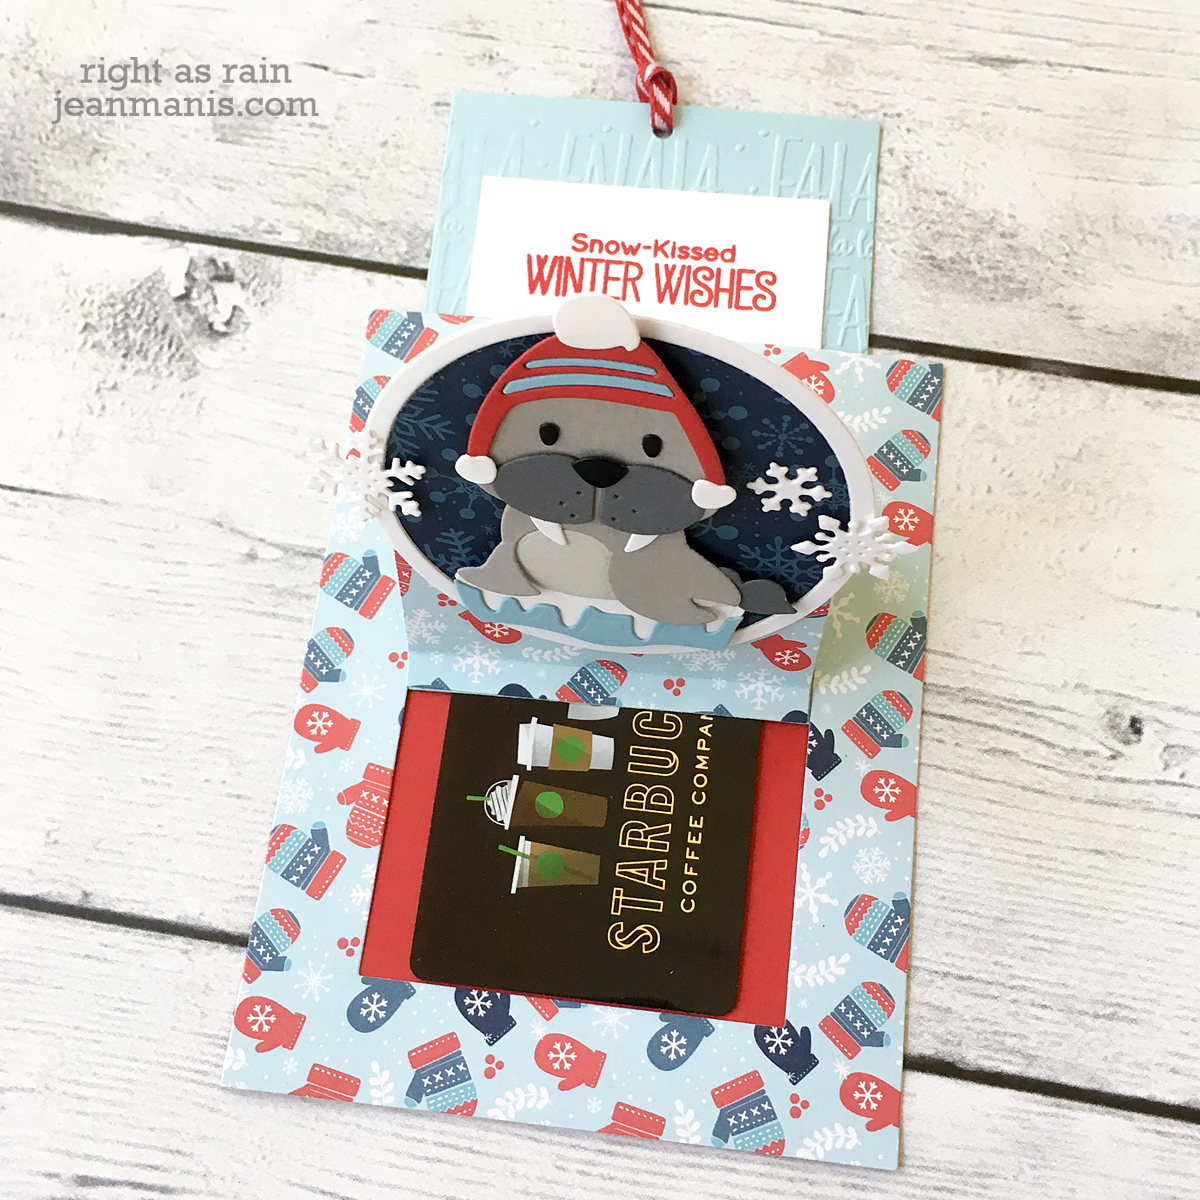
To make things easy for myself, I heat-embossed the sentiment and cut it out with a rectangle die. I then added the sentiment to the piece that is pulled to slide the easel up (alternately I could have stamped the sentiment on to the piece that is pulled). A sentiment can easily be included in the top portion (or in the bottom portion, in lieu of something else).
I dry-embossed the piece that is pulled up with the Falala Bold embossing folder from a soft-blue cardstock that coordinates with the patterned paper.
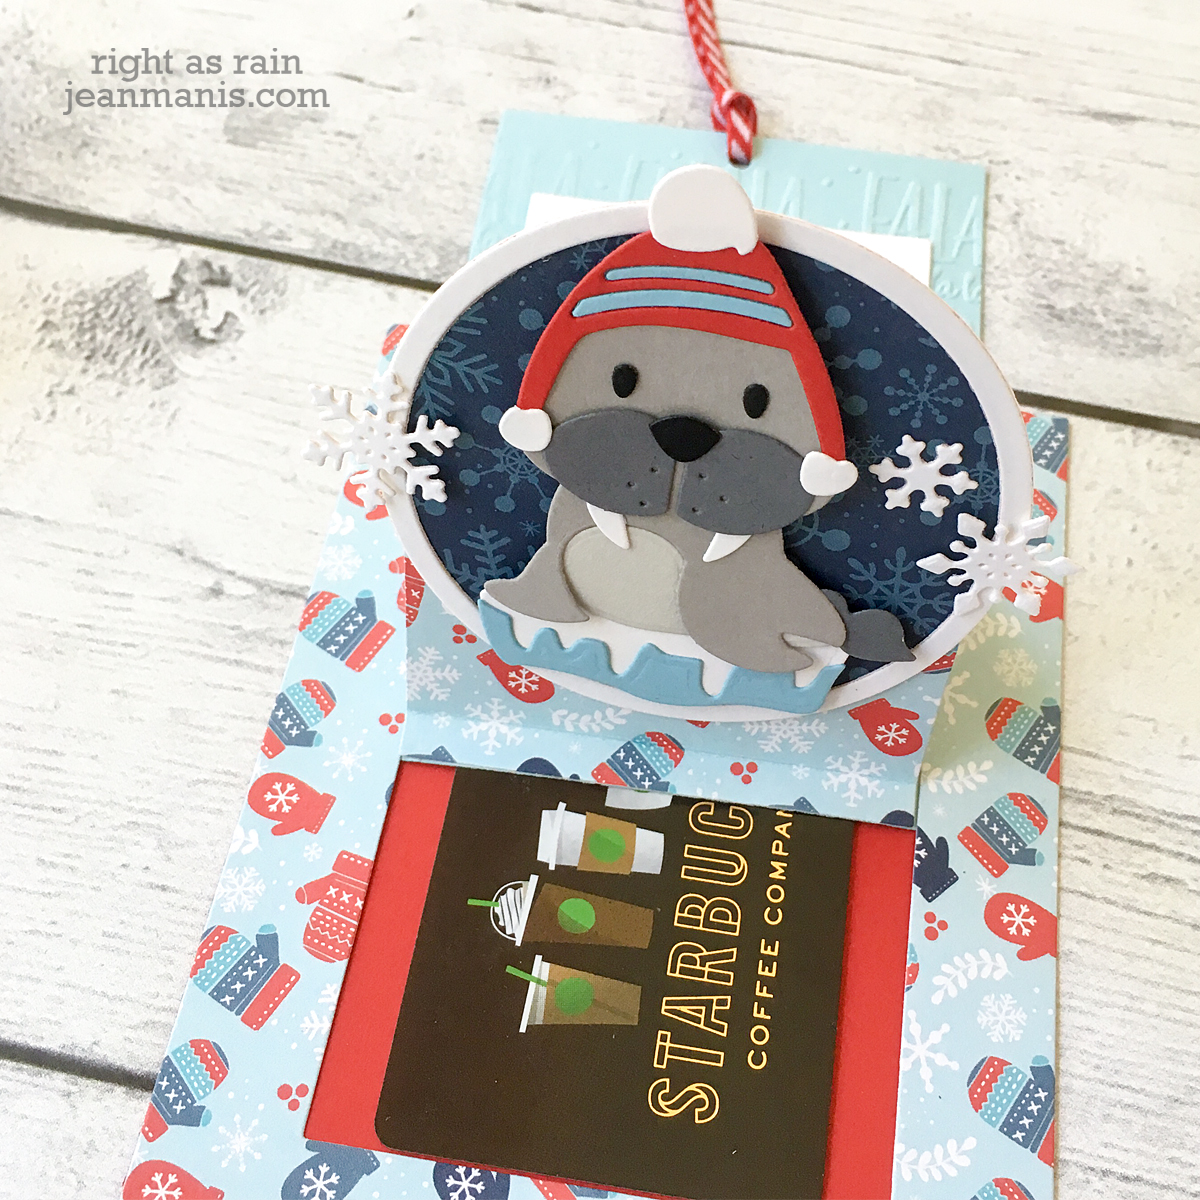
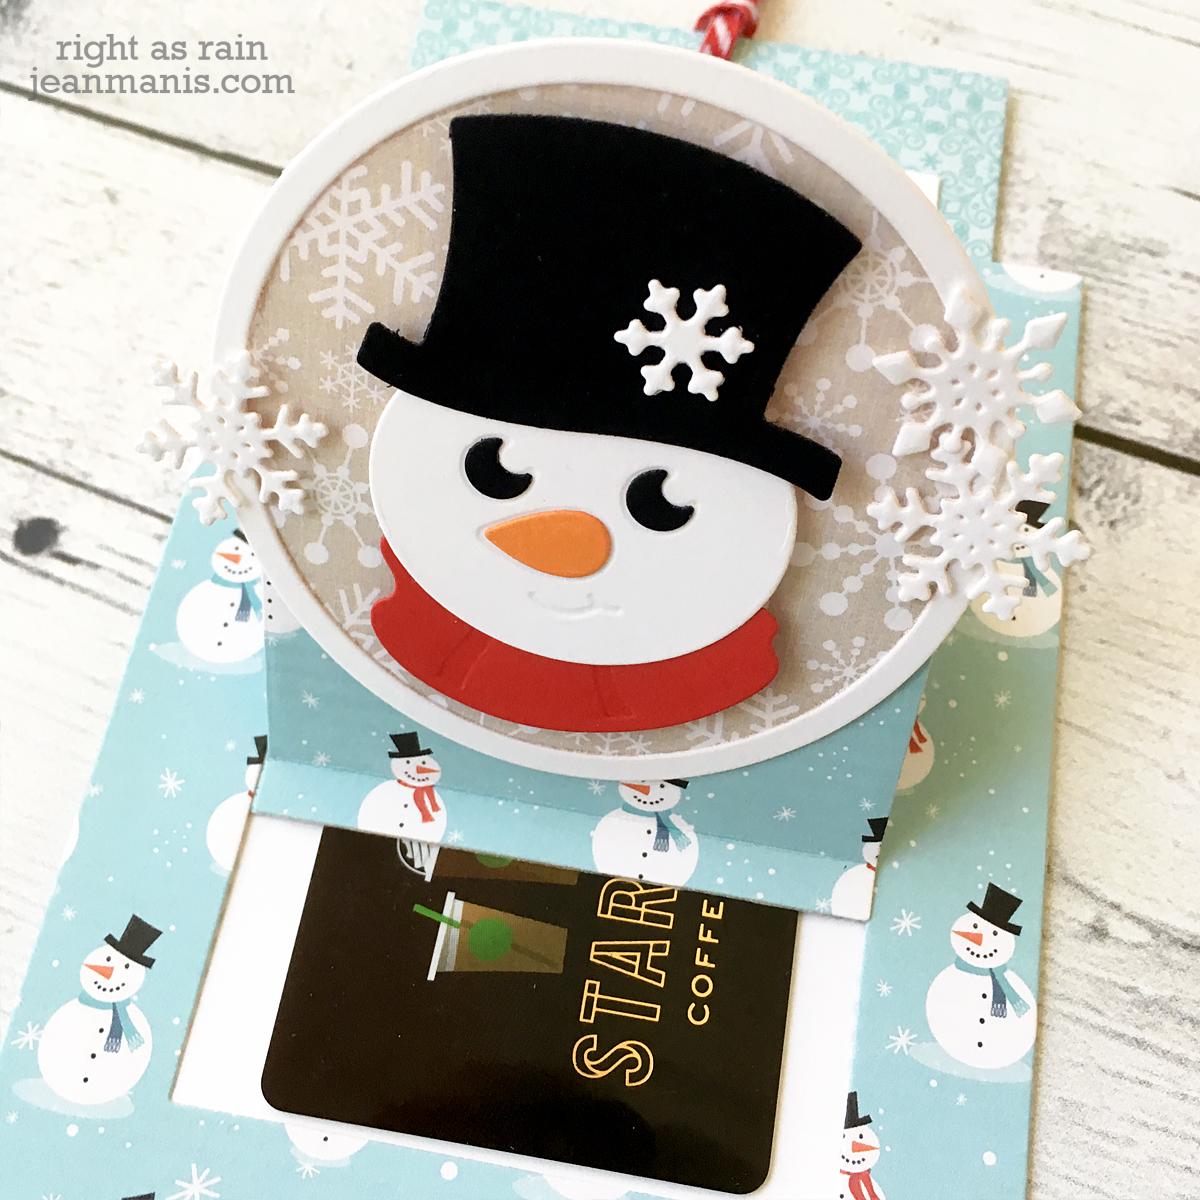
The area revealed easily fits a gift card (adhered with a temporary adhesive dot to the card back). I used a Starbucks gift card because that’s one of my favorite gift cards to receive!
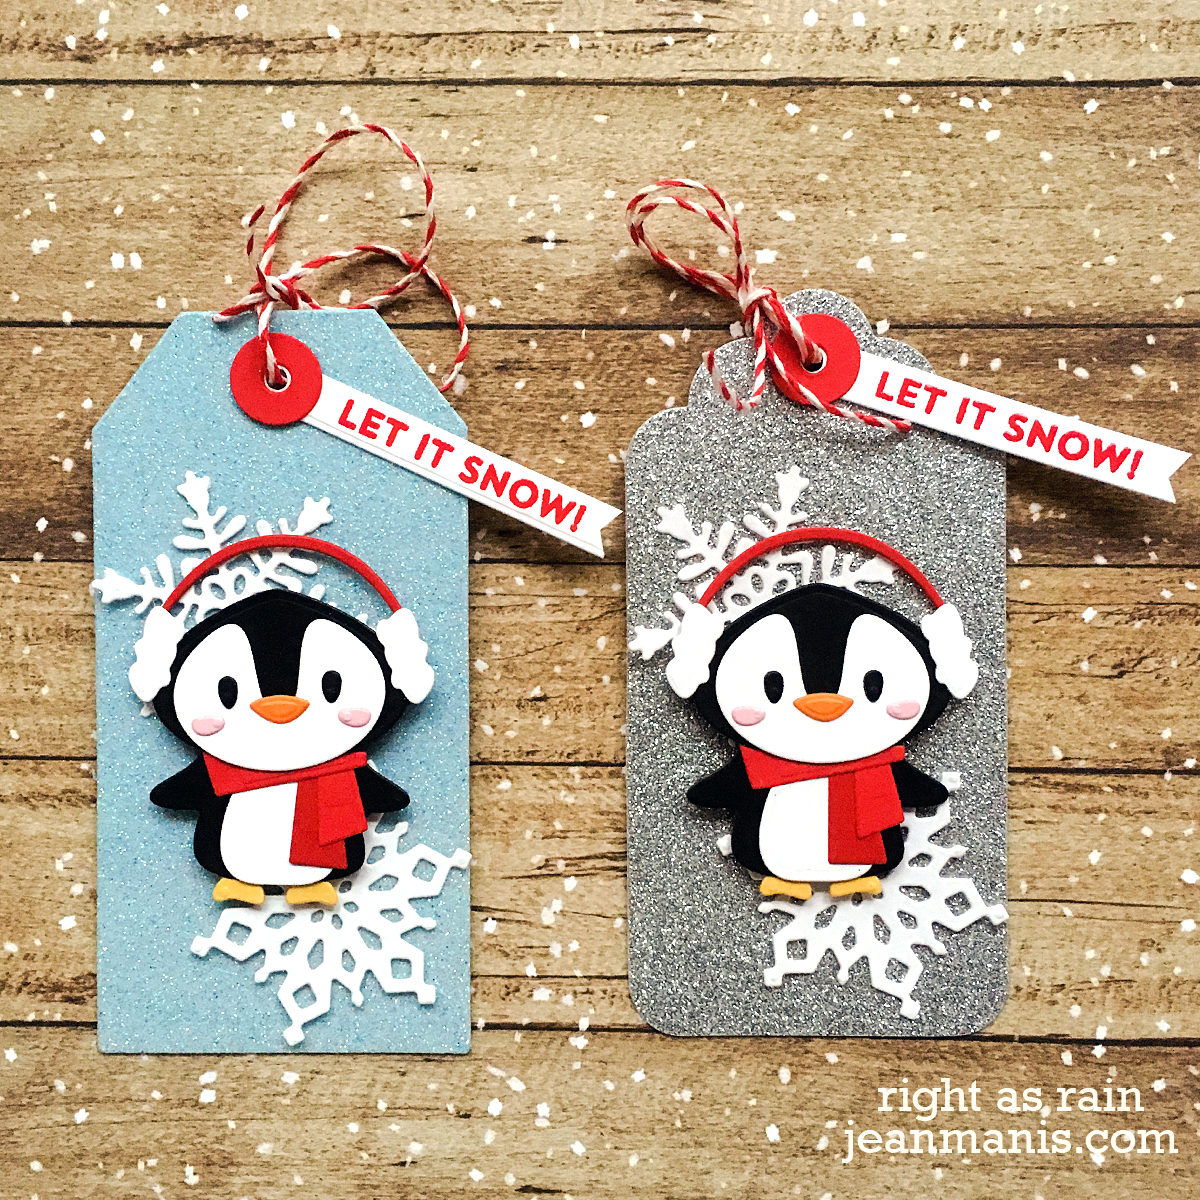
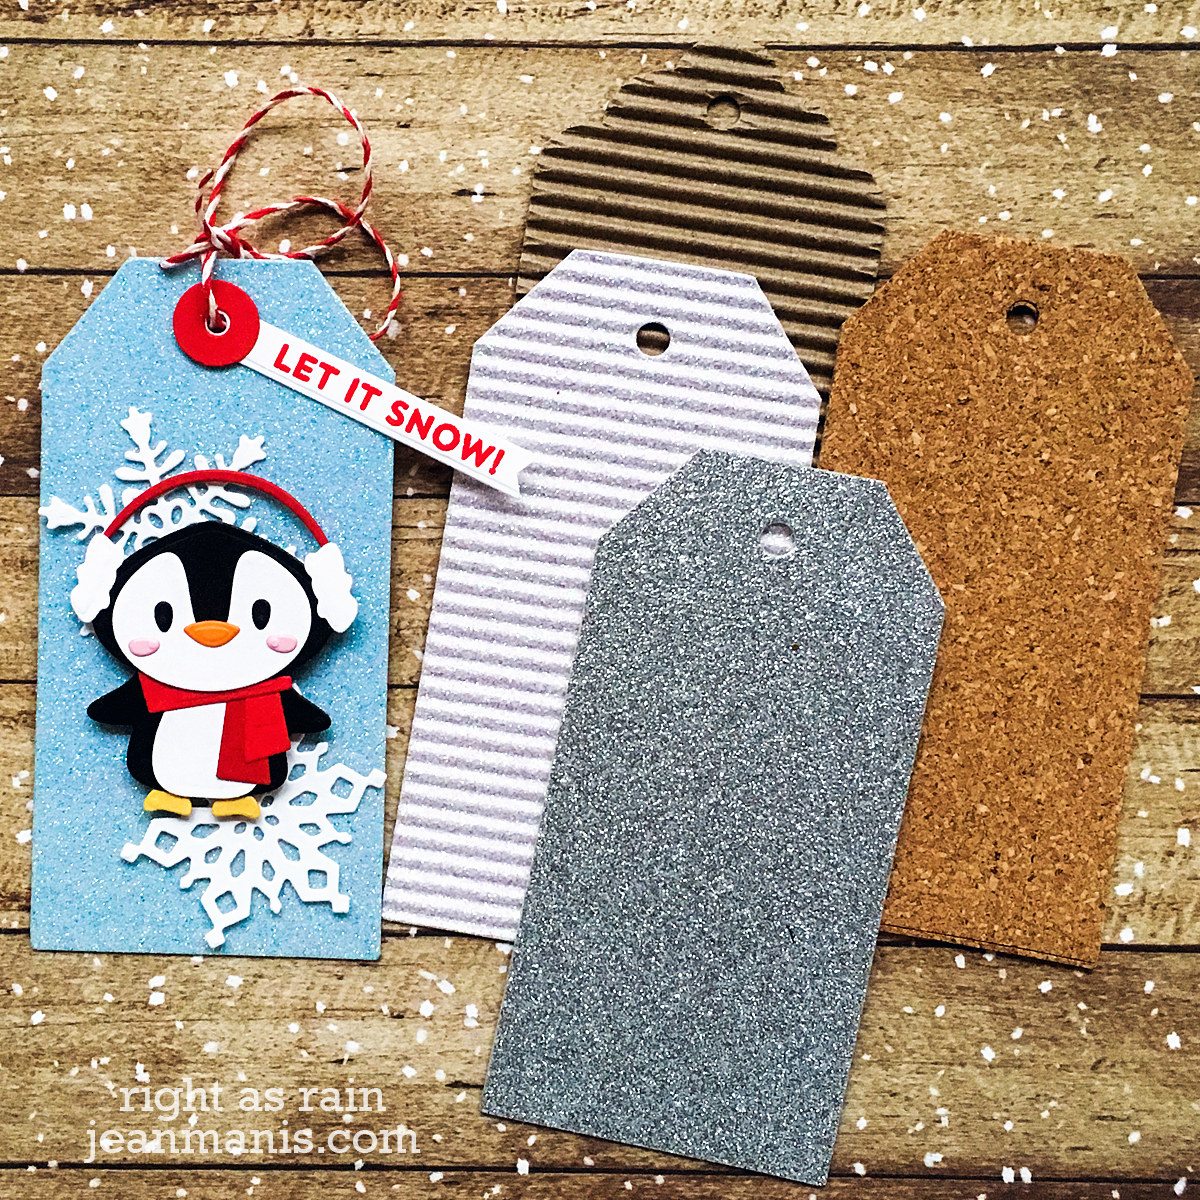
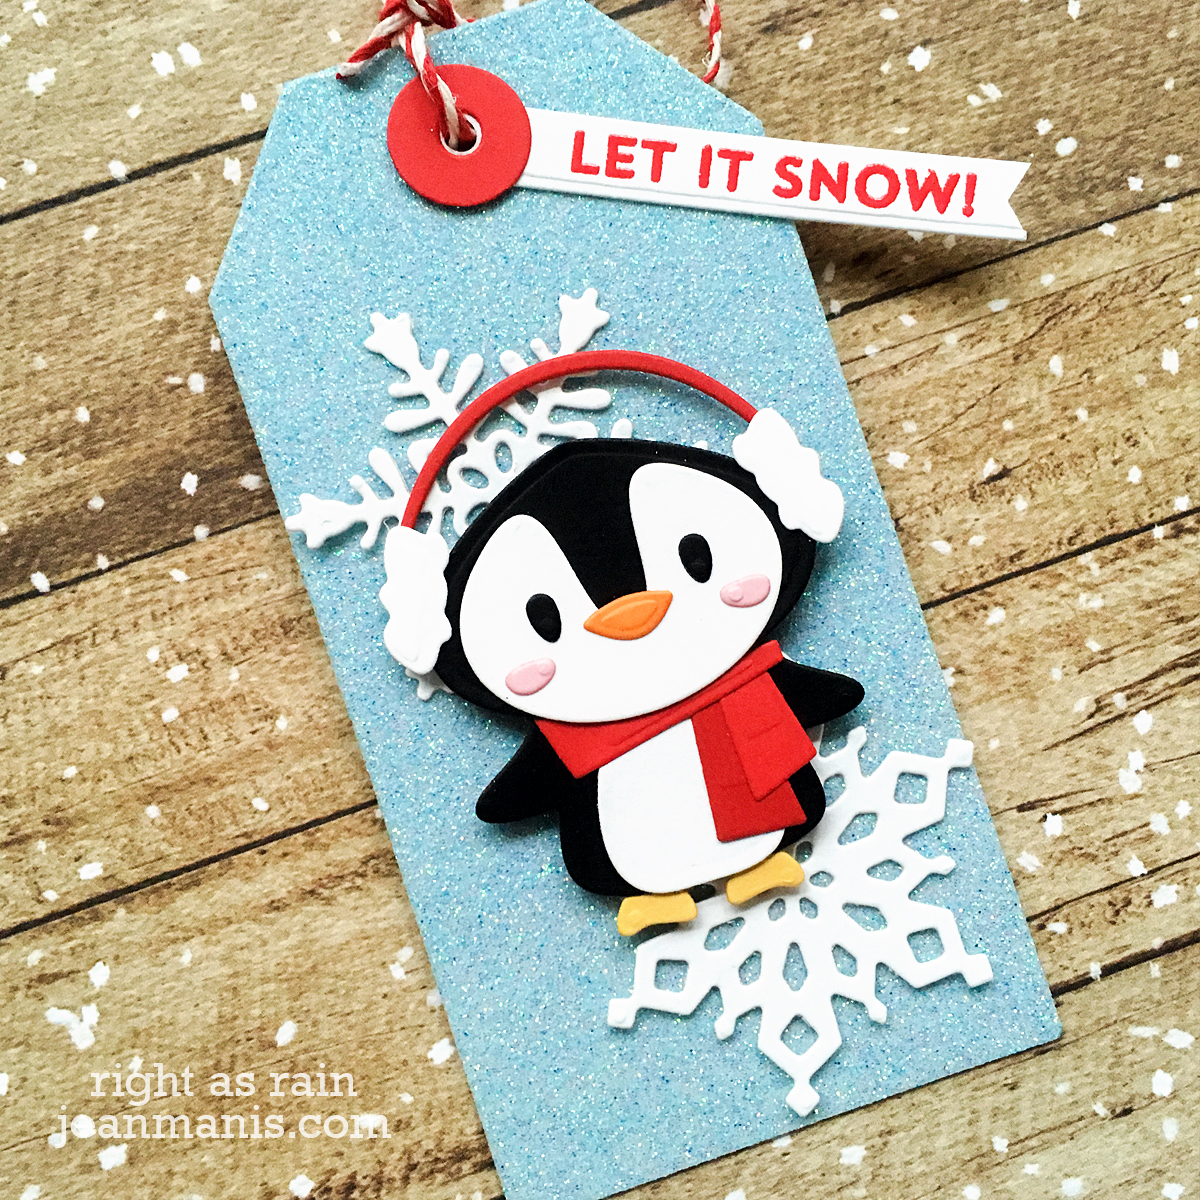
My second card features the Die D-Lites Snowman.
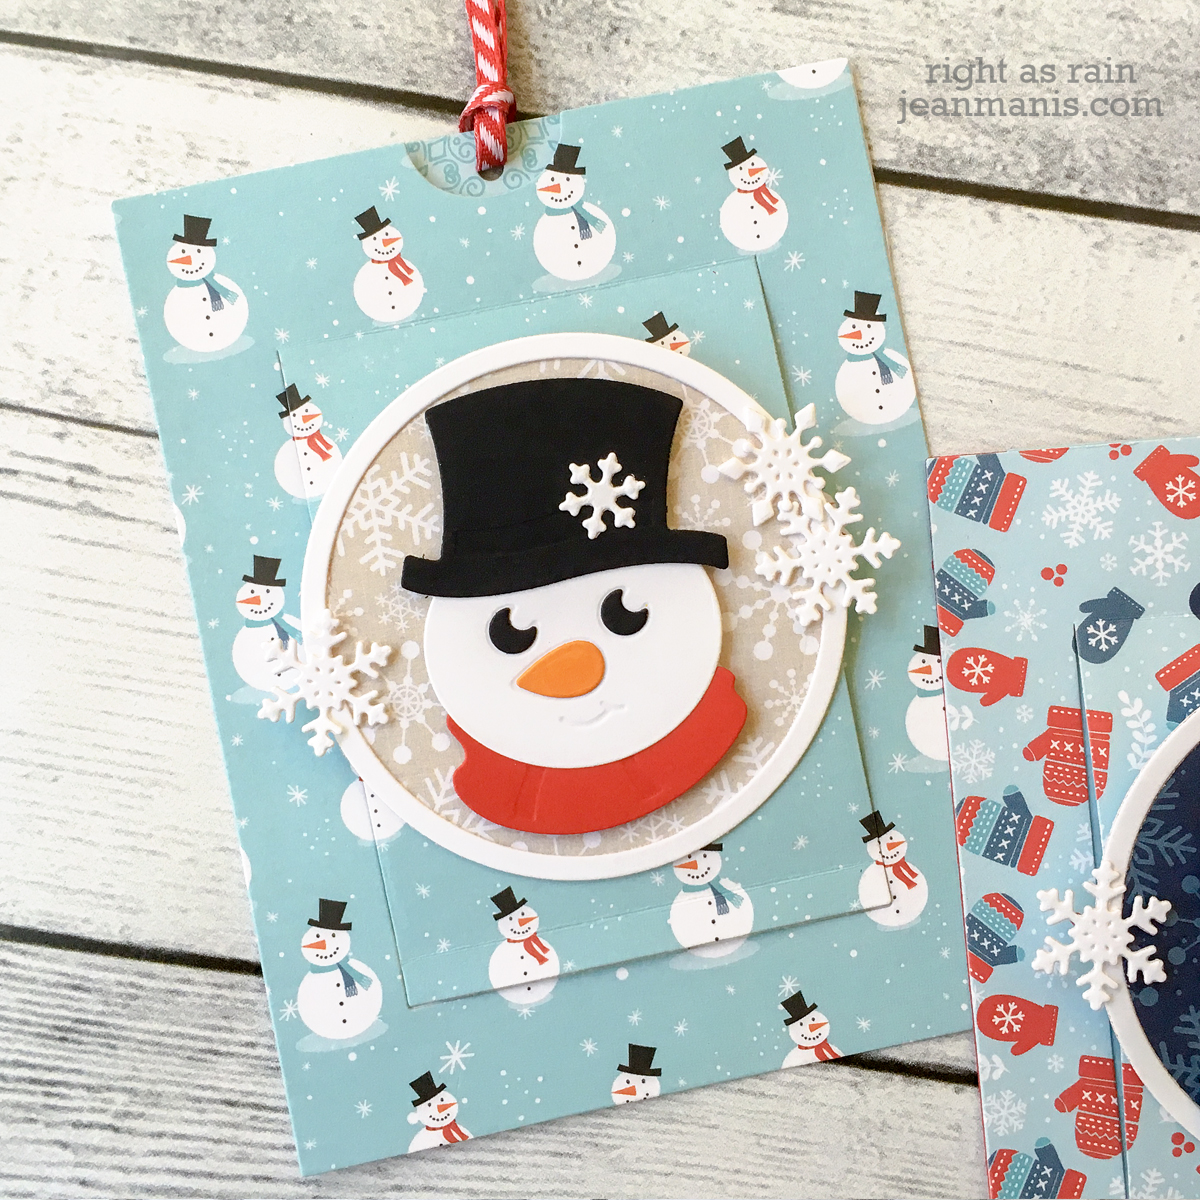
I die-cut and constructed the snowman. I constructed the slider card from both patterned paper and solid cardstock. The snowflakes adorn the circle frame and the snowman’s hat. Just as before, to make things easy for myself, I heat-embossed the sentiment and cut it out with a rectangle die. I then added the sentiment to the piece that is pulled to slide up the card.
Thanks so by for stopping by today! Be sure to check out this blog post on the Spellbinders blog with more project ideas, directions for assembly, and a video!
Supplies: