Hello! I am delighted to be participating in a blog hop sharing projects created with the Spellbinders December 2020 Club Subscriptions. You should have reached me from the blog of Jennifer Snyder. (The entire list of participants is included at the end of my post.) For the hop, I created two CAS holiday cards using this month’s Small Die of the Month kit (“Daydreaming”) and Large Die of the Month kit (“Look Behind the Curtain”).

I previously shared projects using these dies here and here.
To celebrate this release, Spellbinders is giving away a $50 gift certificate to 3 lucky blog readers – selected from the comments on the Spellbinders blog. Giveaway closes on Sunday, December 13th, 11:59 pm MST. The winner will be announced in this blog hop post the following Tuesday. The winner is responsible for shipping cost, duties and taxes. Please note: store credit (gift certificate) cannot be applied to Club Subscriptions; store credit can be applied to shop past Club products, Club extras, and regular releases.
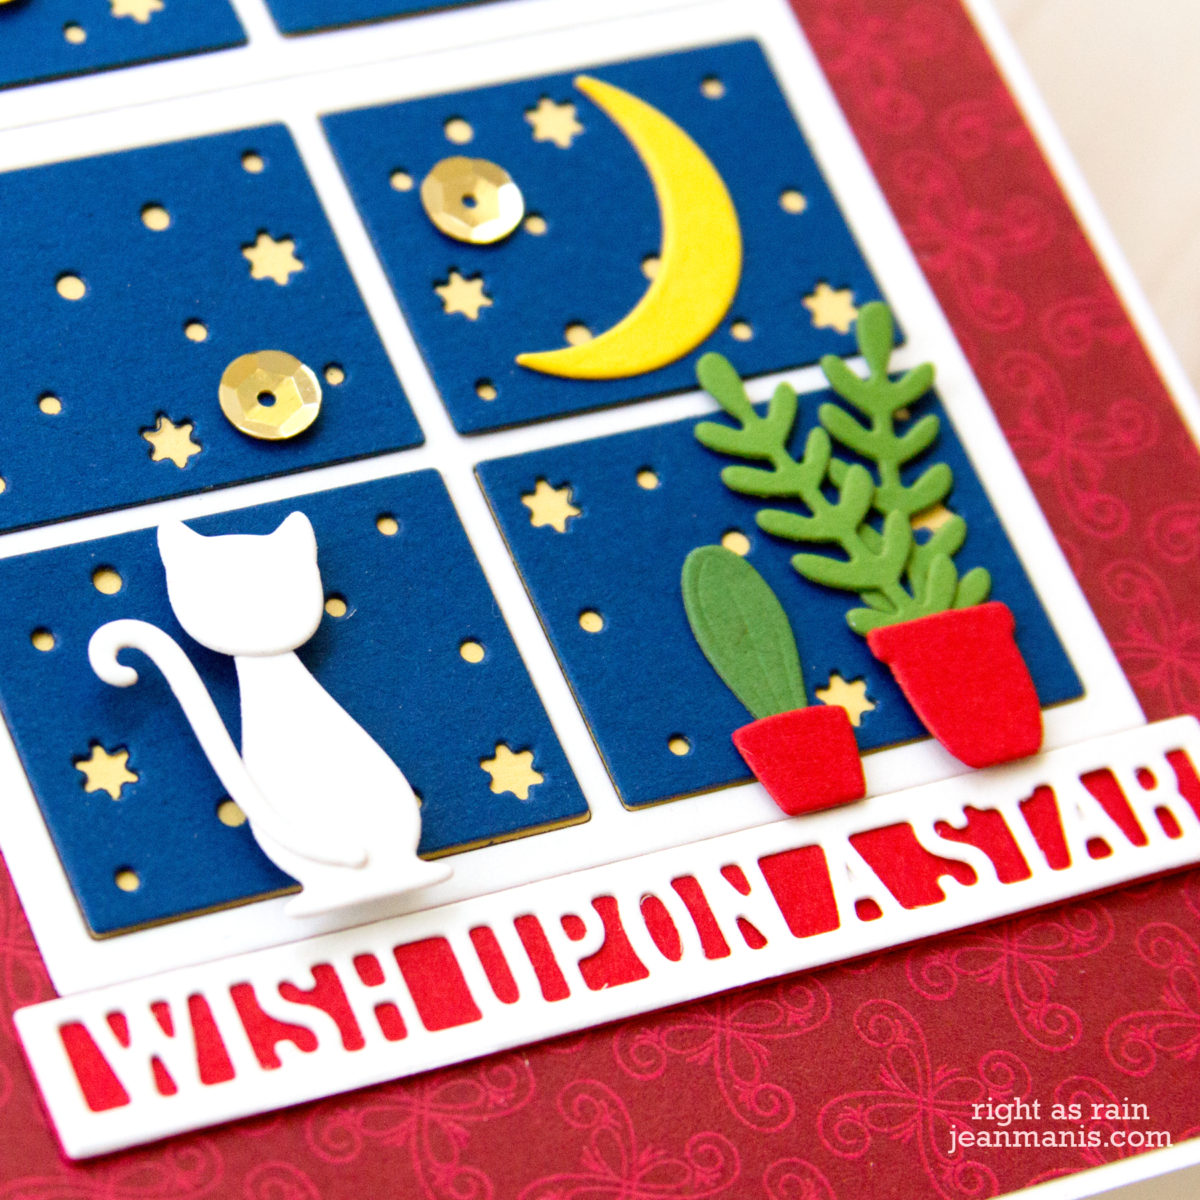
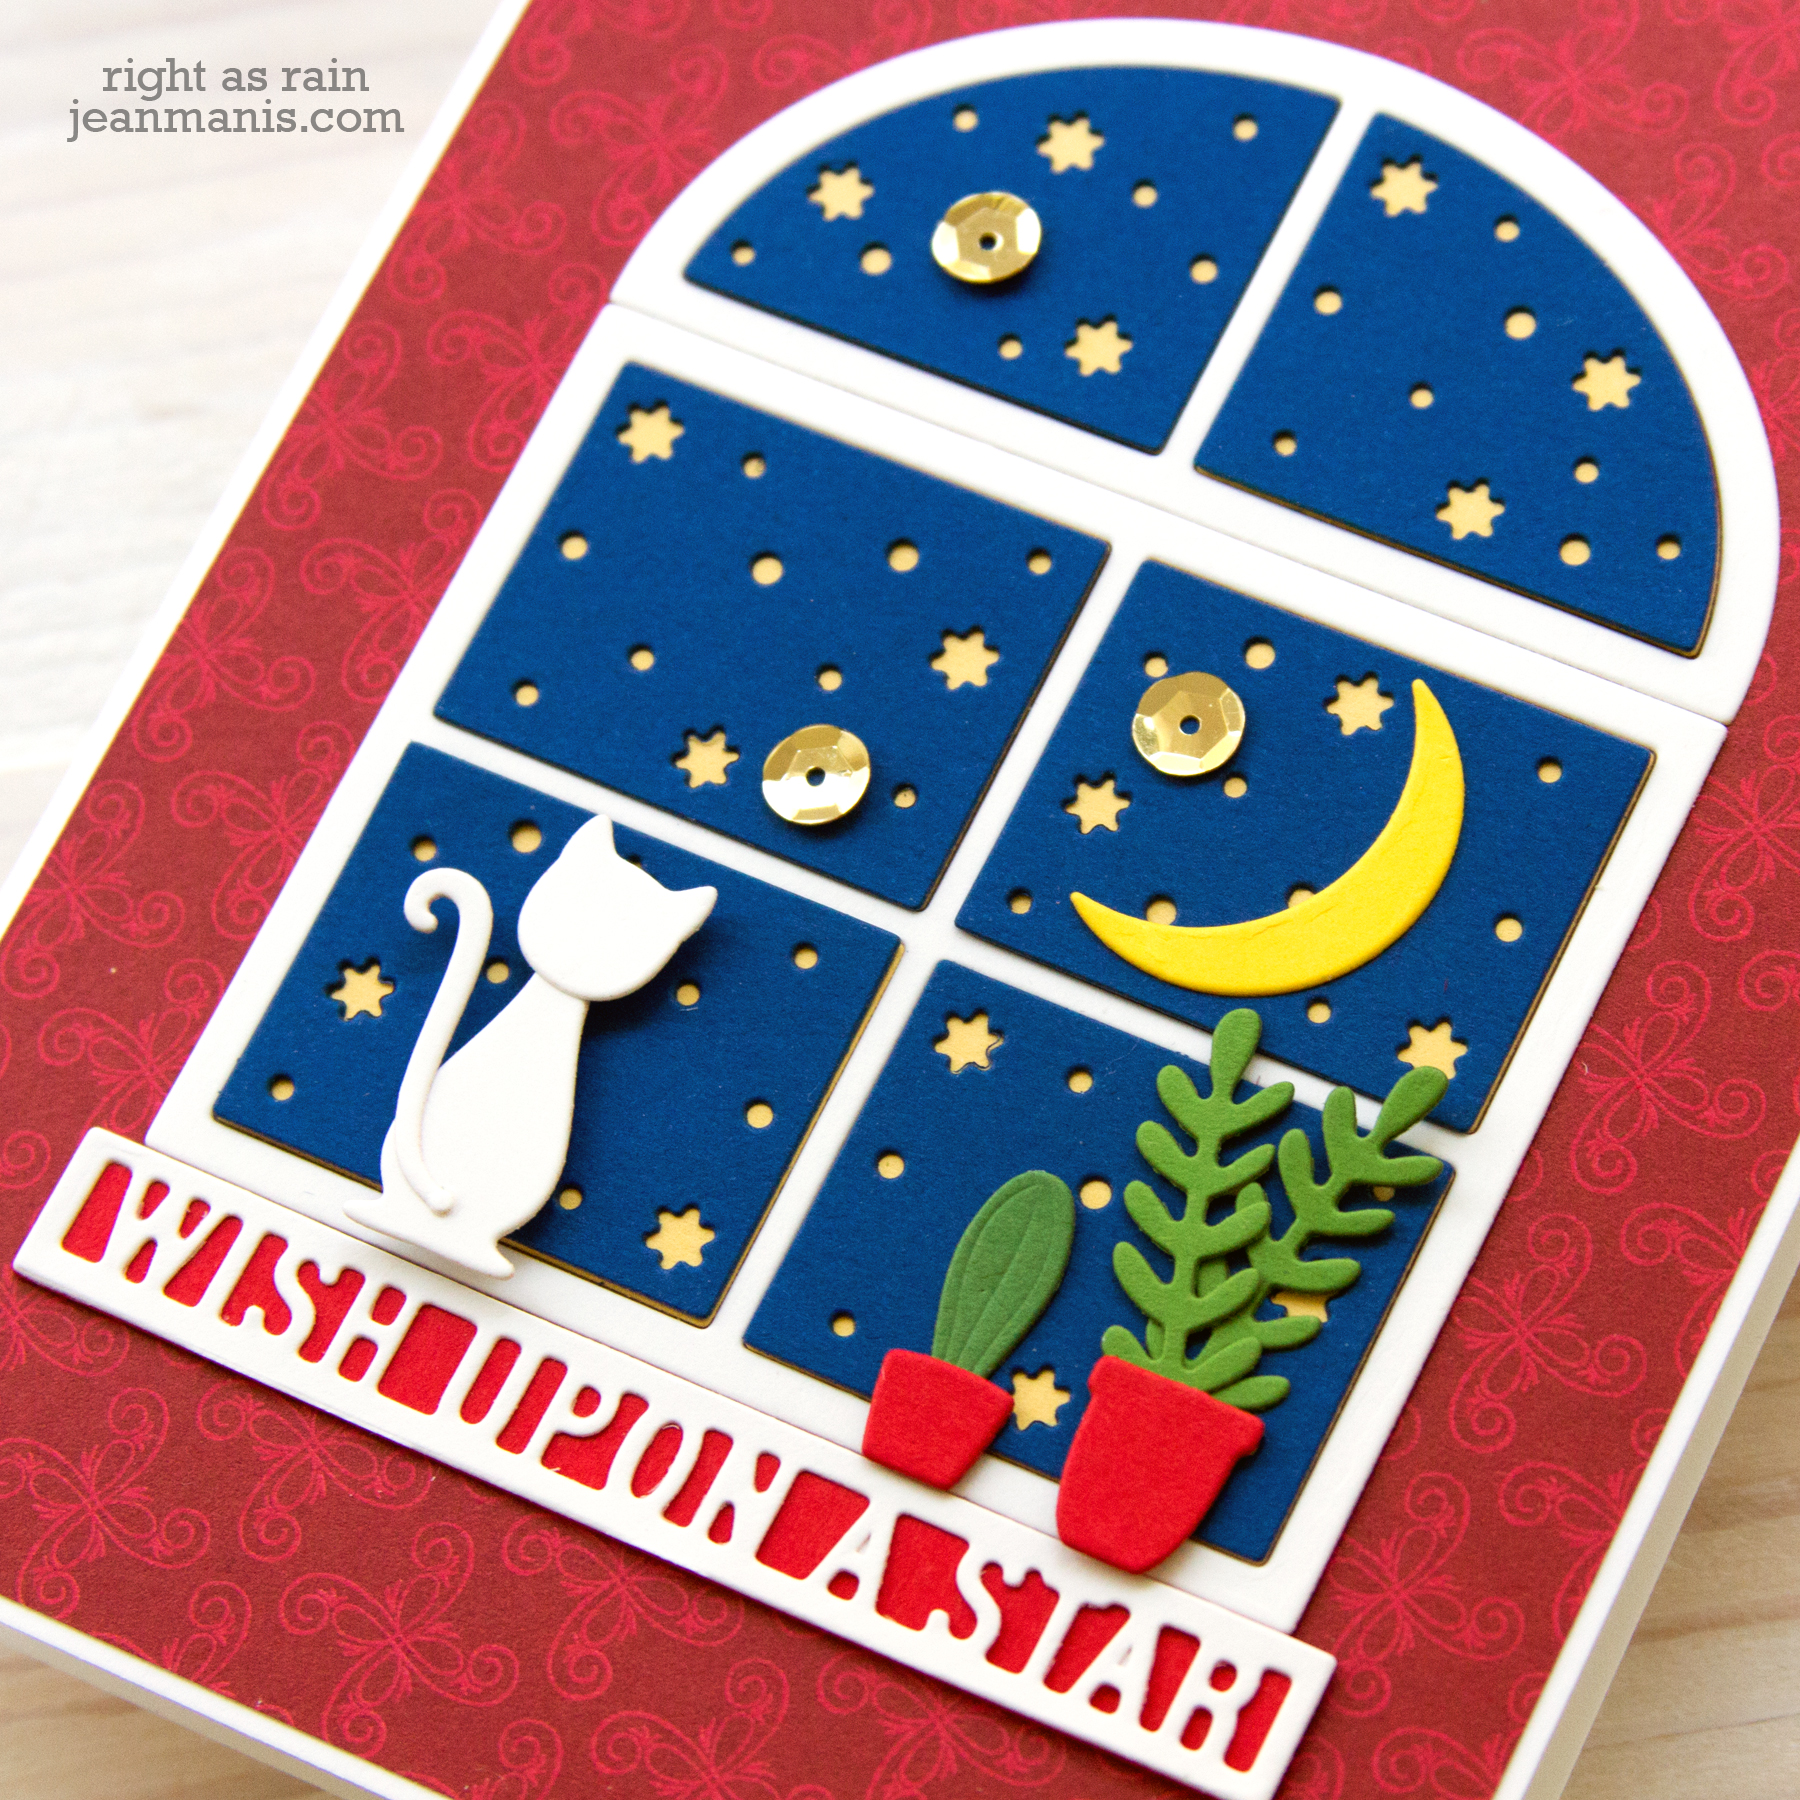
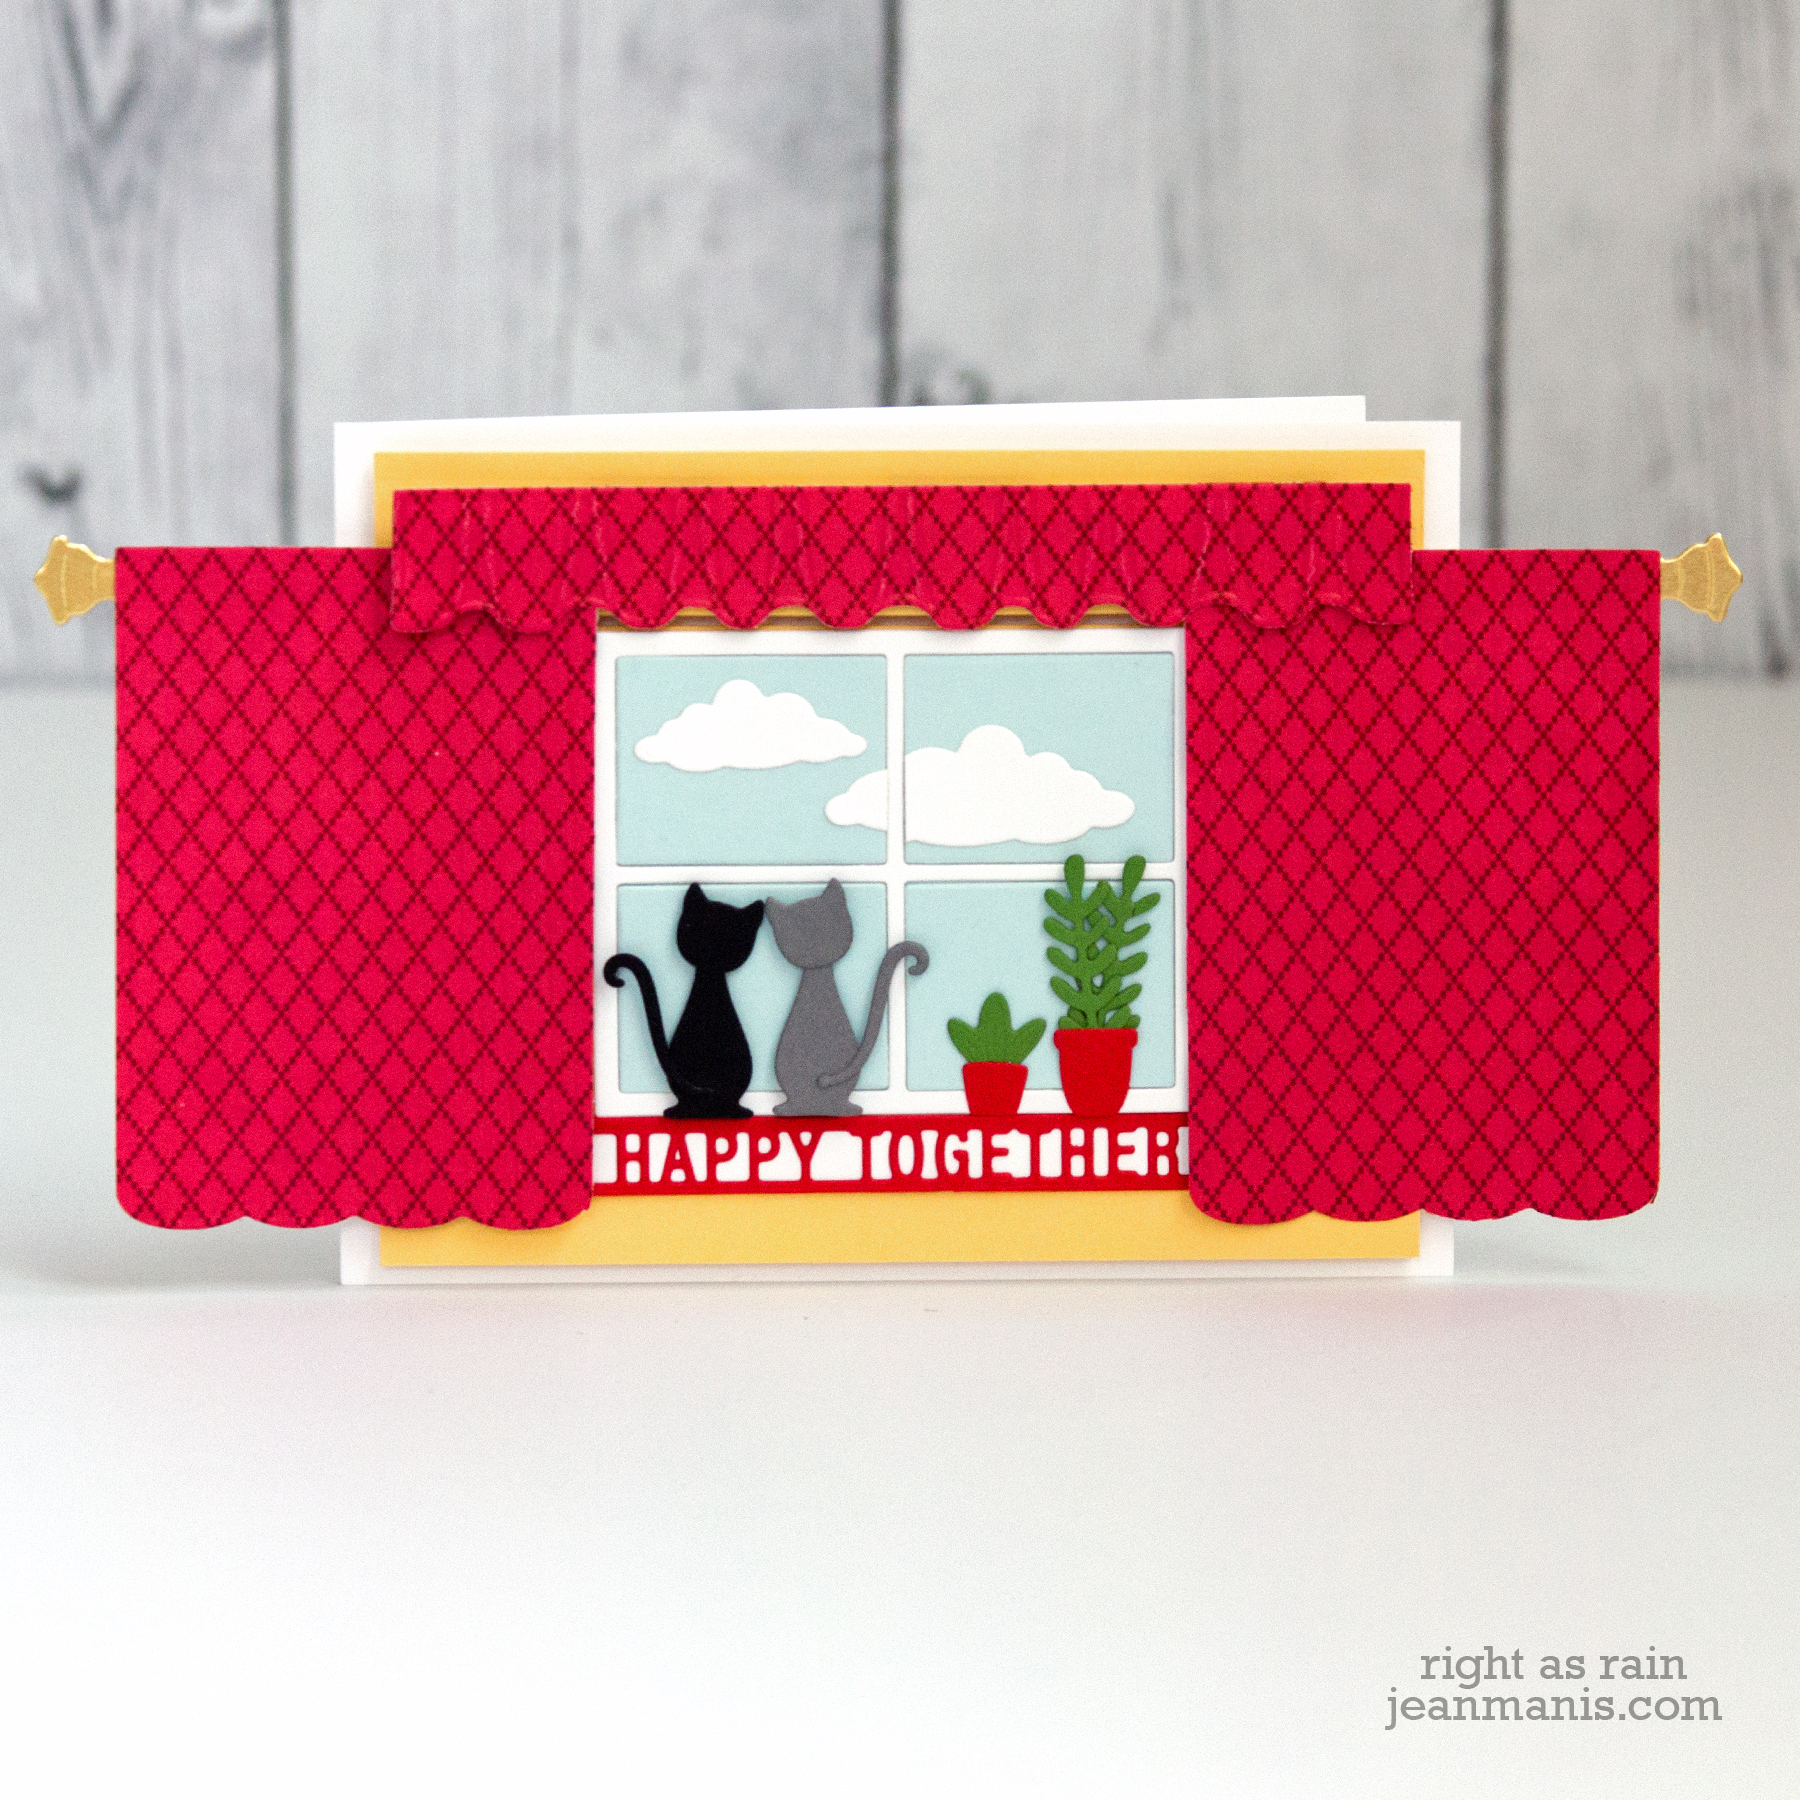
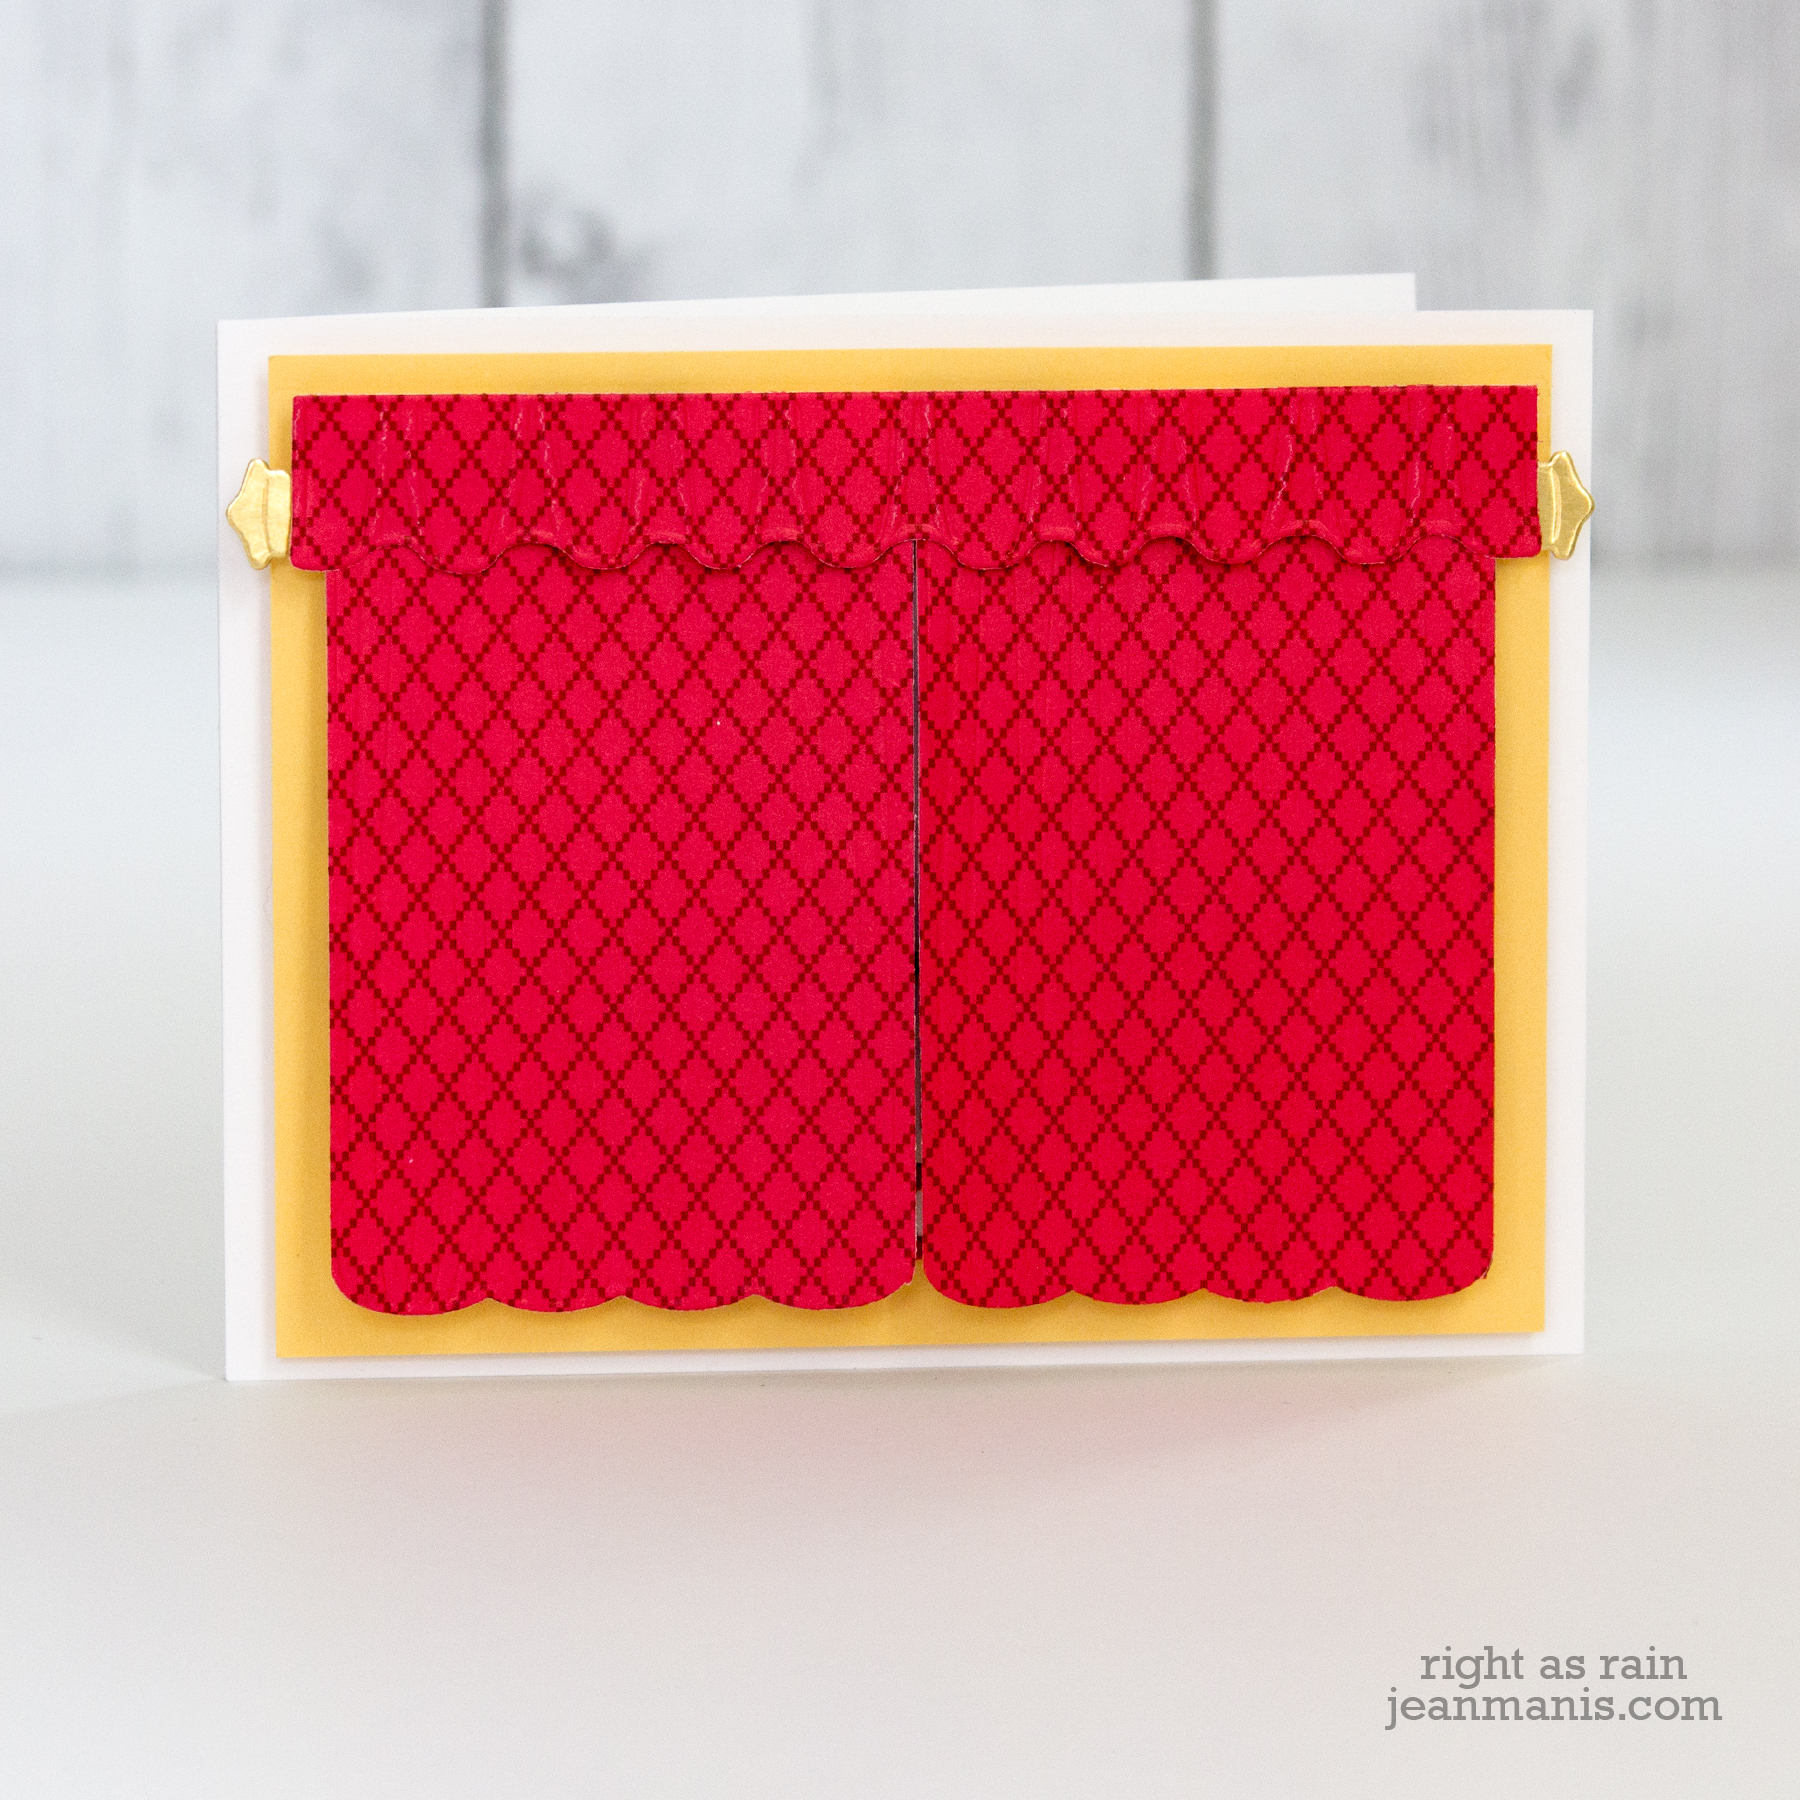
I used the same approach on both cards: patterned paper as the scene through the window, the Small Die of the Month window oriented horizontally on a card base glimmer foiled with a Holiday Series 2 sentiment, and a curtain created with the Large Die of the Month curtain panel (cut in two) .
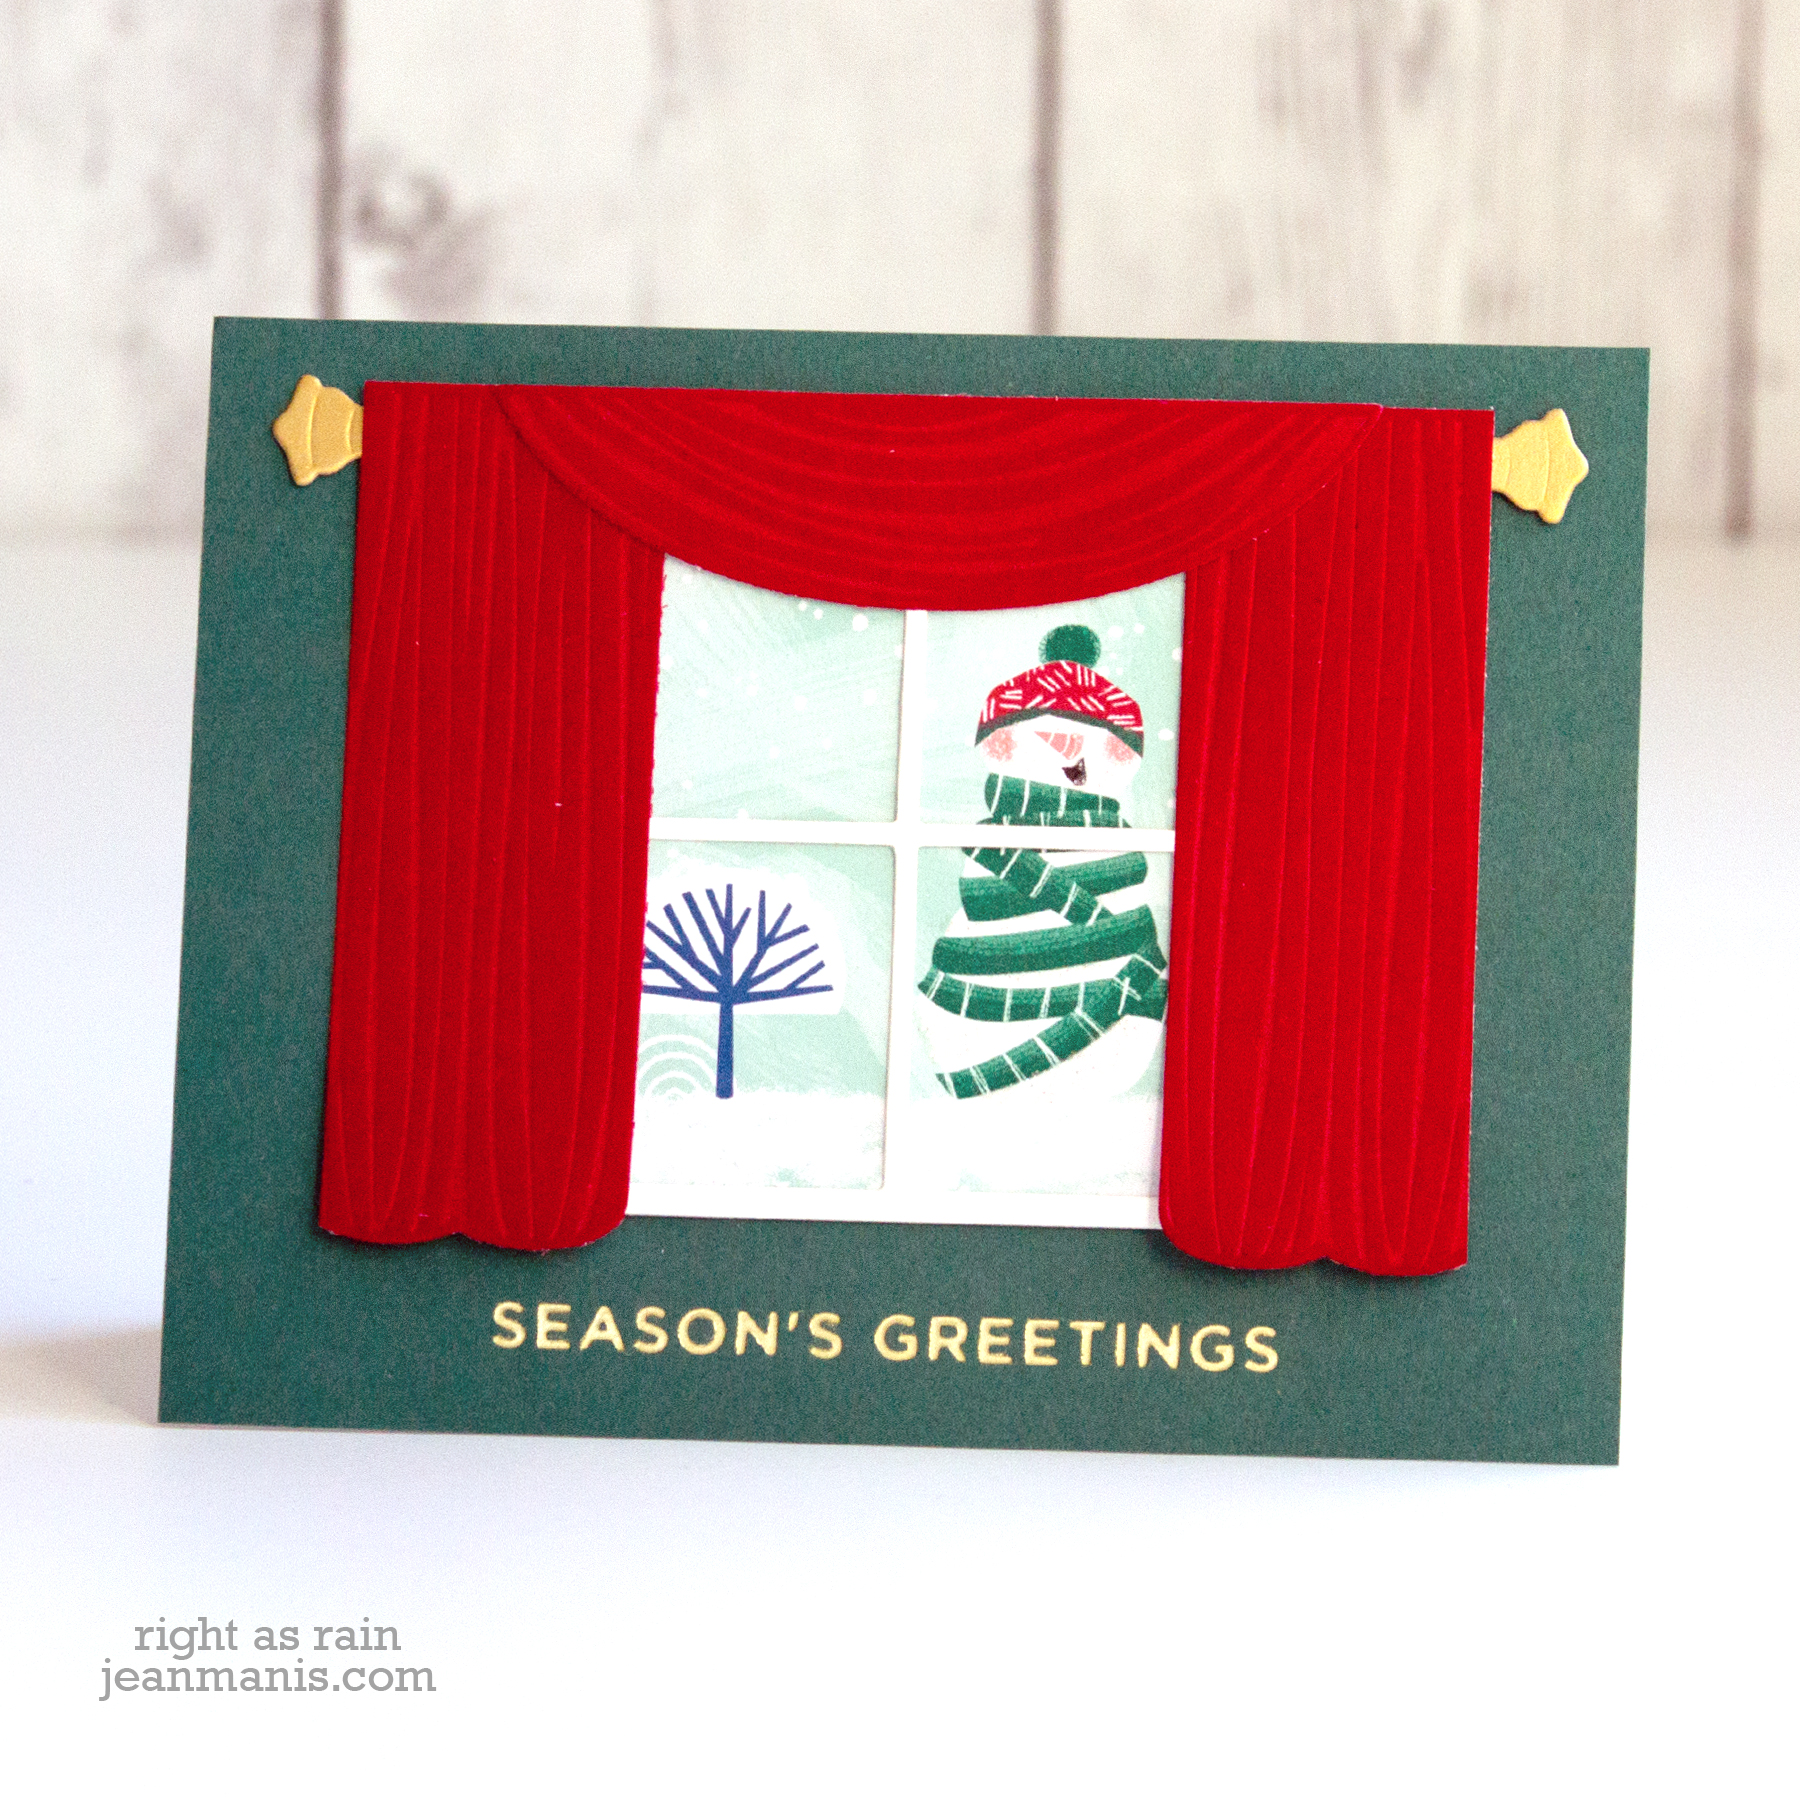
The Large Die of the Month set includes dies to create a moving curtain panel. Figuring that a lot of people might be short on time during the holidays, I wanted to show how to create cards without an operable curtain. With the Large Die of the Month set, I cut one curtain panel and cut it into two pieces. I framed the window scene with the panels and the curtain valance. Quick and simple!

On the second scene, I added a cat cut with a die in the Small Die of the Month set along with packages cut with dies in the Home for the Holidays set.


Supply List:
Head next to the blog of Sheri Holt.
Blog Hop List:
Spellbinders Blog
Tina Smith
Bibi Cameron
Sandi MacIver
Jill Hilliard
Jennifer Snyder
Jean Manis
Sheri Holt
Joy Baldwin
Hussena Calcuttawala
Kathy Clement
Ilina Crouse
Jenny Colacicco
Michelle Short
Virginia Lu