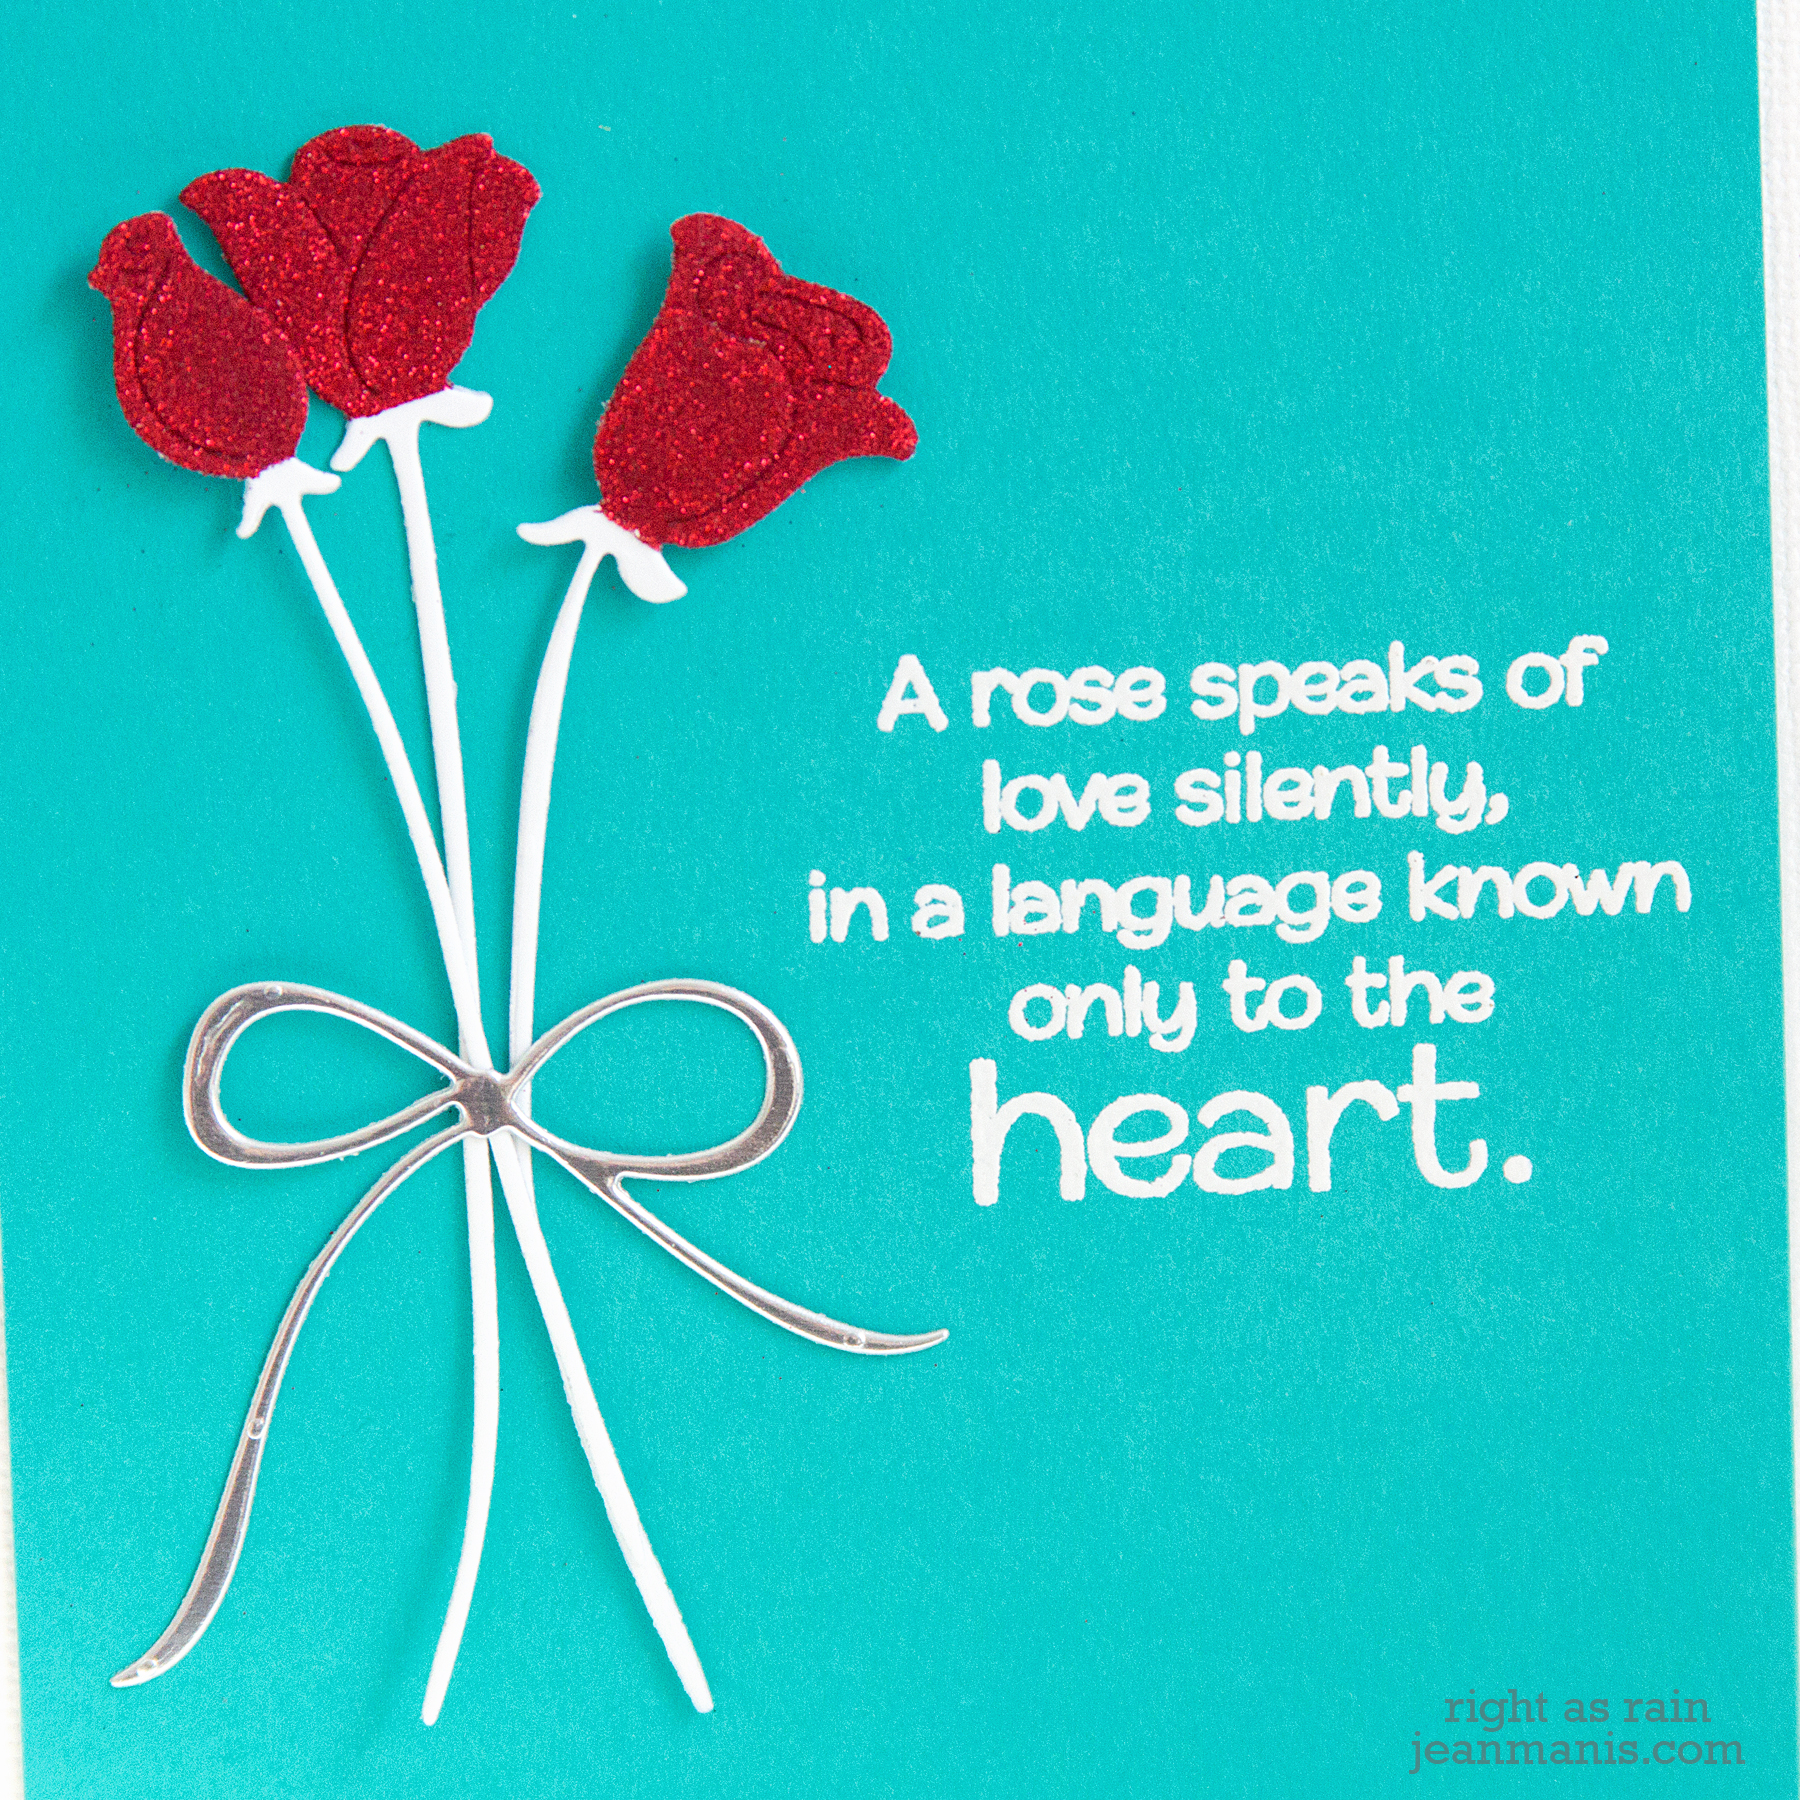
Spellbinders Small Die of the Month Kit – Our Favorite Font Sentiment Set

Hello! Today, I am sharing two cards created with the December Small Die of the Month kit from Spellbinders – “Our Favorite Font Sentiment Set.”Spellbinders Small Die of the Month Kit - Our Favorite Font Sentiment Set
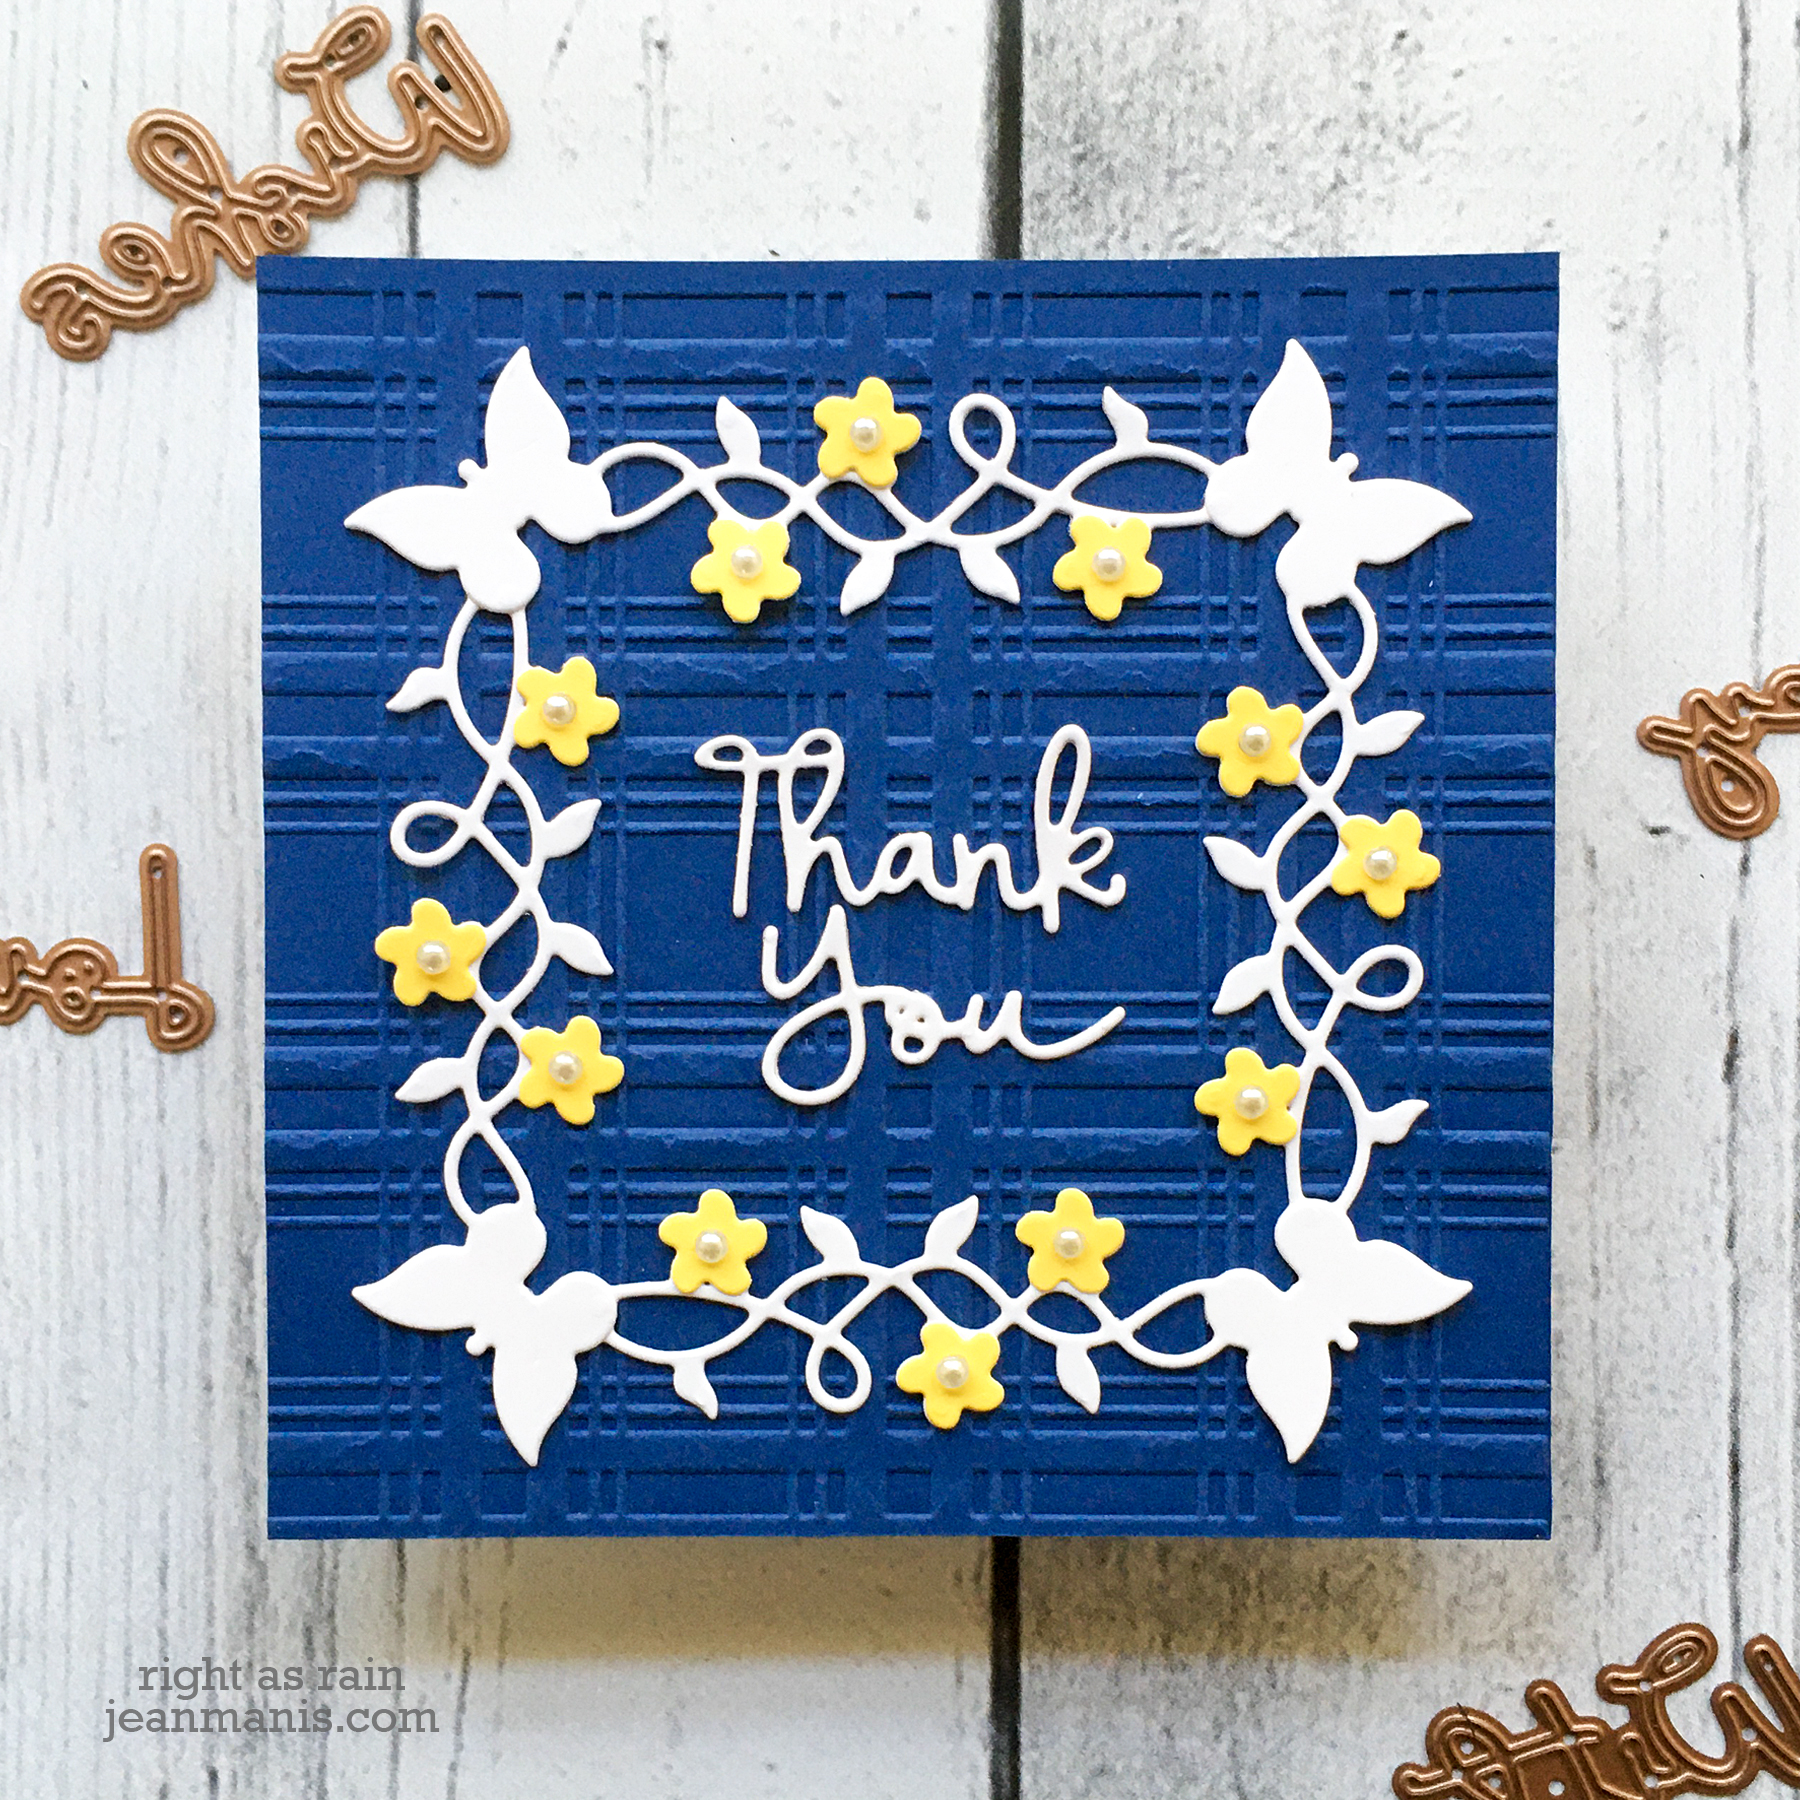
The set includes fourteen word dies, in a versatile font, with which you can create a variety of expressions for a number of occasions such as: “Thinking of You,” “With Sympathy,” “Birthday Wishes to You,” and “Congrats to You,” as well as the more obvious “Thank You,” “Love You,” and “Happy Birthday.”

My first card is a Valentine, which includes several other Spellbinders sets, on which I used the “Love You” sentiment.

Spellbinders Small Die of the Month Kit - Our Favorite Font Sentiment Set

I’ve combined the Tux set (he’s still wearing a scarf but I removed his ear muffs) with the First Crush die set (balloon). I created the heart panel with the largest die in the Nestabilities Class Heart set. The card measures 4 1/2″ square.

Spellbinders Small Die of the Month Kit - Our Favorite Font Sentiment Set

My second card is a Thank You note on which I combined the sentiment with the Butterfly Frame-A-Long die set.

Spellbinders Small Die of the Month Kit - Our Favorite Font Sentiment Set

I dry-embossed the background (measuring 4 1/4″ square) with the Pretty Plaid embossing folder. I created a frame by adhering the butterfly/flower strips together at the corners; I then added the flower overlays, cut from yellow cardstock. I glued pearls to the centers of the flowers for embellishment.

Spellbinders Small Die of the Month Kit - Our Favorite Font Sentiment Set

Love Is In the Air – CAS Valentine

Hello! We have A LOT of snow here in the PNW (very unusual and the amounts we have received are record-setting). Given the situation, I made a snow-themed Valentine using the Scenic Snow Globe from My Favorite Things.

Love Is In The Air - CAS Valentine

  • I created the sentiment on my computer and printed it on the Fog Gray cardstock, which I then cut with a Lil’ Inker square die.
  • I cut the house, tree, snow banks, and snow globe from a variety of cardstock colors. I assembled the house and tree and then set them aside.
  • I applied embossing paste to the globe background with the Falling Hearts stencil.
  • Once the paste was dry, I adhered the house, tree, and snow banks to the globe background, and I adhered the assembly to the card base.

Love Is In The Air - CAS Valentine

Details:

Bee Mine – CAS Valentine

Hello from the snowy Pacific Northwest! We have had more snow in the past few days than we typically have all winter. We are breaking snow records for February. Today I am sharing a CAS Valentine featuring the Paper Smooches Bees Dies and a punny sentiment.

Bee Mine - CAS Valentine

    • I cut and assembled the bees.
    • I created and printed the sentiment on my computer and cut it with a die in the now-retired Avery Elle Scalloped & Pierced Hearts die set.
    • I used a 4 1/4″ square die from Lil’ Inker to cut the patterned paper background (Pebbles 6″ x 6″ pad from several years ago).

Bee Mine - CAS Valentine

Snow Much Love

Hello from the snowy Pacific Northwest! We received almost a foot of snow overnight. Today I am sharing a CAS Valentine created with the Marianne Design Eline’s Penguin and Igloo & Mountain sets (I purchased the sets from 123 Stitch).

I paired the assembled penguins and igloo with a sentiment that I created on my computer and cut with a snow slope die.

Patterned paper from my stash filled in the background.

Hope your week is off to a terrific start!

Love You – Die-Cut Valentine

Hello! Today, I am sharing a CAS die-cut Valentine’s Day card featuring the Baby Envelope Die with a sentiment cut from the Miss Your Swirl die set.

Love You - Die-Cut Valentine

I created the background with patterned paper from my stash to which I added a vellum circle in the center. I wanted to quiet the pattern so that the sentiment would be more visible.

Love You - Die-Cut Valentine

I glued the assembled envelope to the circle and then added the letters and the hearts (cut with the Gingerbread Boy die set).

Supplies: