Penny Black – Glittered Red Roses

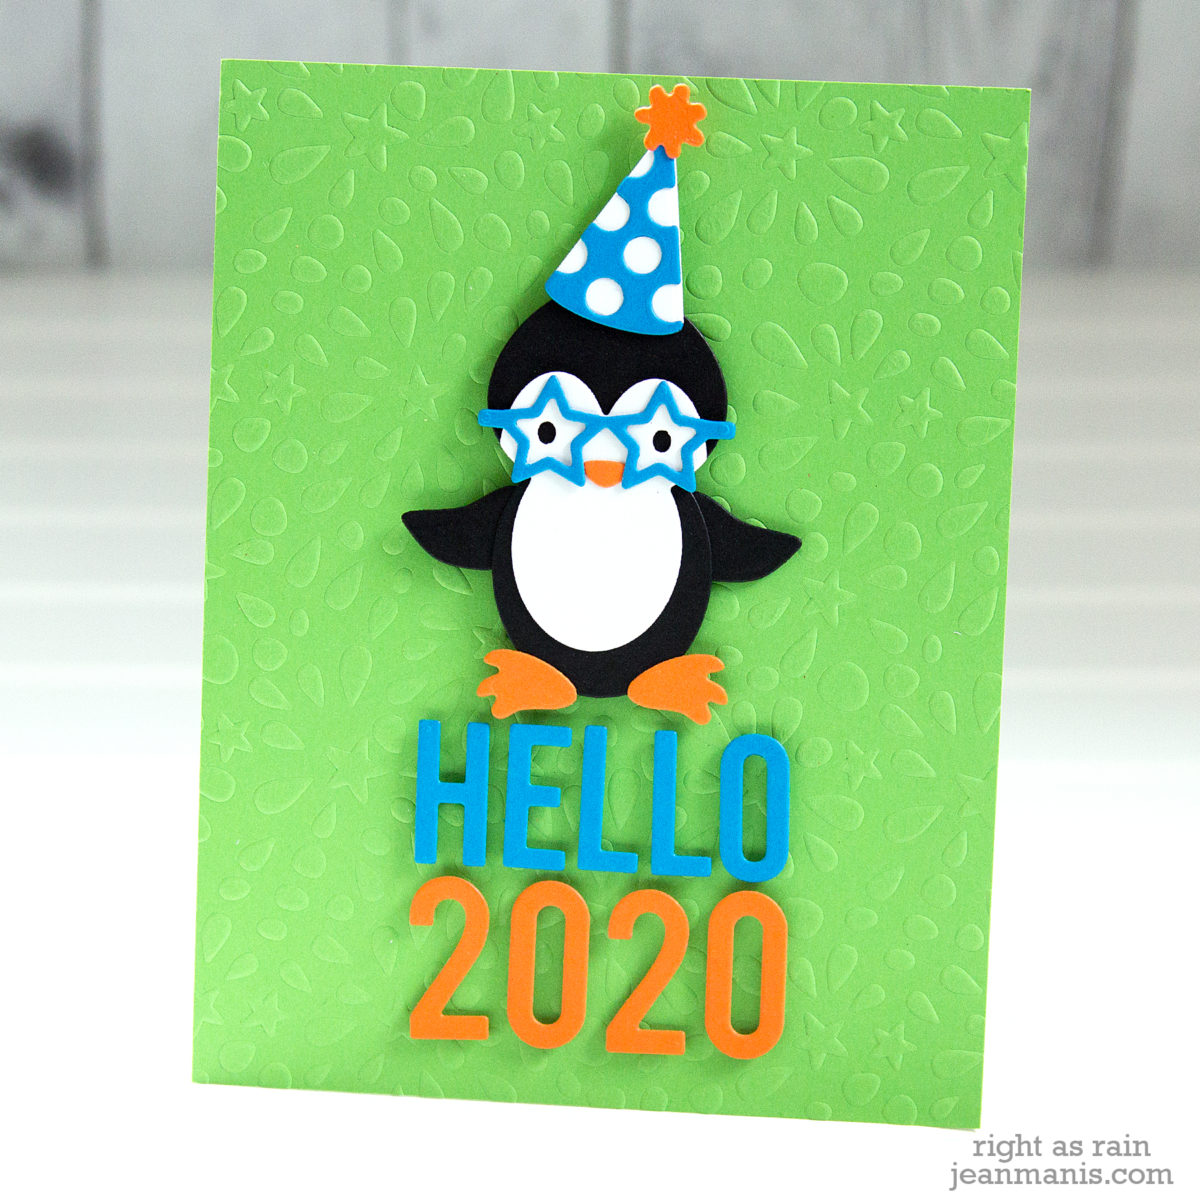
Hello! I’m moving on to Valentine’s Day with my cardmaking. Today, I am sharing a  CAS card created with supplies from the just-released Penny Black “Share the Love” collection.

Penny Black - Glittered Red Roses

  • I cut the #51-593 Red Roses from white cardstock. I applied double-sided adhesive to the cardstock on the ends. I was able to line the rose dies up so only the blossom portion was cut from the double-sided adhesive portion.
  • I exposed the adhesive on the front side of the roses and applied red microfine glitter.
  • I cut the bow/ribbon (die included in the Red Roses set) from silver cardstock.
  • I heat-embossed the sentiment from the #30-667 Love Language stamp set in white on a teal cardstock panel.
  • I trimmed the heat-embossed panel and added it to a card base covered with a white linen cardstock.
  • I added the assembled Red Roses to the card with foam adhesive, adhering the silver bow/ribbon with glue.

Penny Black - Glittered Red Roses

Penny Black "Share the Love" Release

Supplies:

Happy New Year

Hello! Today, I am sharing a New Year greeting created with die cuts. I combined the Elizabeth Craft Designs Penguin and Party Accessories die sets to create a penguin ready to celebrate!

Happy New Year

  • I dry-embossed the background with the Echo Park stencil.
  • I cut and assembled the penguin, glasses, and hat.
  • I die-cut the Hello with the MFT Happy Greetings die set (still available at a few stores) and the 2020 using the Simon Says Stamp Simple Numbers die set (retired).
  • I added the penguin, letters, and numbers to the card base with foam adhesive.

Happy New Year

Wishing you and yours all the best this upcoming year!

Supplies:

The Stockings Were Hung

Hello! Today I am sharing a CAS Christmas card (the last of 2019) featuring the Elizabeth Craft Designs Hang the Christmas Stockings die set.
The Stockings Were Hung
Twas the night before Christmas, when all through the house
Not a creature was stirring, not even a mouse;
The stockings were hung by the chimney with care,
In hopes that St. Nicholas soon would be there.
  • I cut the stockings from silver, gold, and copper foil. The additional pieces (cuffs, toe, heel, overlay) were cut from white flock.
  • I assembled the stockings and added them to a patterned paper rectangle, on which I heat-embossed the Snow Globe Sentiments sentiment (most used Christmas sentiment set last year and this year!).
  • I added Kaiser Craft jewels to the stockings to simulate hangers/pegs. The card base was cut from gold brushed cardstock.

The Stockings Were Hung

Merry Christmas!

Supplies:

Dashing through the Snow

Hello! I have “Jingle Bells” running through my head, and I’m sharing a CAS Christmas card, depicting a one-horse open sleigh dashing through the woods, created with several older Memory Box dies.

Dashing through the Snow

  • I cut Night of Navy cardstock with a circle die and applied transfer gel through the Carta Bella snow stencil on to the circle. I set the circle aside to dry. I mentioned in this post that I wanted to try the flock with the snow stencil.
  • I cut a slightly larger circle from vellum.
  • I cut two white circles and then cut the circles with the Memory Box Horse Sleigh Landscape die and the Country Landscape border dies.
  • I heat-embossed the Snow Globe Sentiments sentiment on a dark red cardstock (Gina K) panel. I adhered the panel to a white linen-finish cardstock base.
  • I ran the stenciled panel through my Minc with white flock. I then assembled the circles, using foam adhesive for the sleigh portion.
  • I adhered the assembly to the card base.

Dashing through the Snow

For more inspiration using these same two Memory Box die sets, here’s a card from several years ago.

Supplies:

CAS Christmas Ornament

Hello! Today I am sharing a CAS Christmas card on which I’ve combined several older Poppystamps dies.

CAS Christmas Ornament

  • I used the Poppystamps Viviro Ornament die set to cut the snowflake “string” for the ornament. I trimmed off the ornament part of the die-cut in order to use a different ornament.
  • I heat-embossed the Hero Arts sentiment on red cardstock and cut it with the Poppystamps Pinpoint Shaker Ornament die.
  • I adhered the two pieces together.
  • I dry-embossed the light-blue background with the Taylored Expressions Cable Knit folder.
  • When I added the dry-embossed panel to the patterned paper base, the transition was too harsh, so I added a white mat.

CAS Christmas Ornament

Supplies: