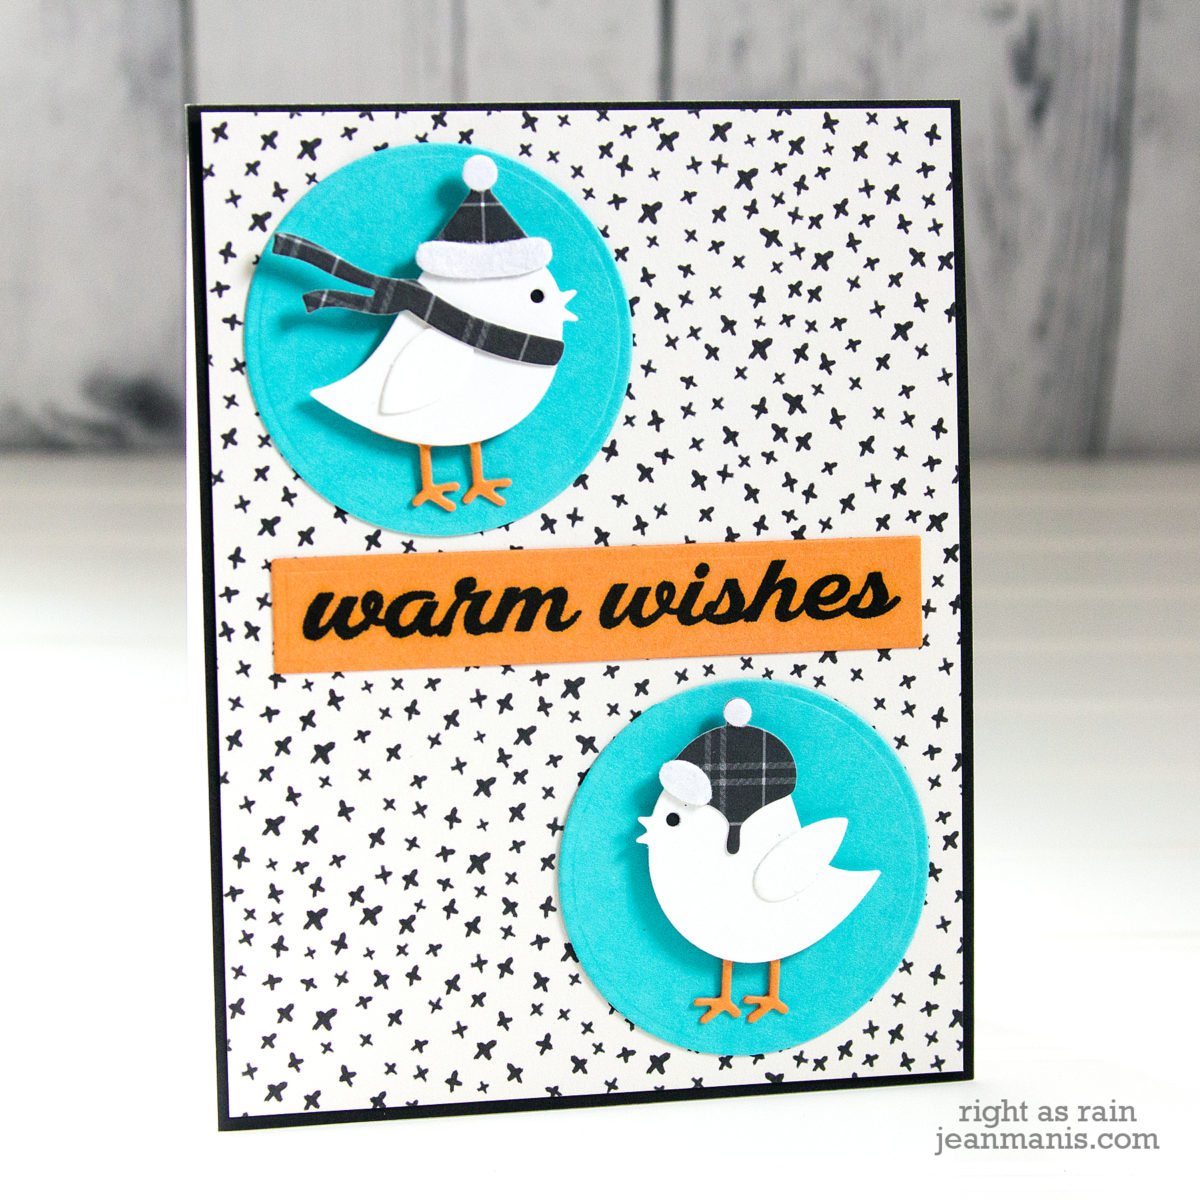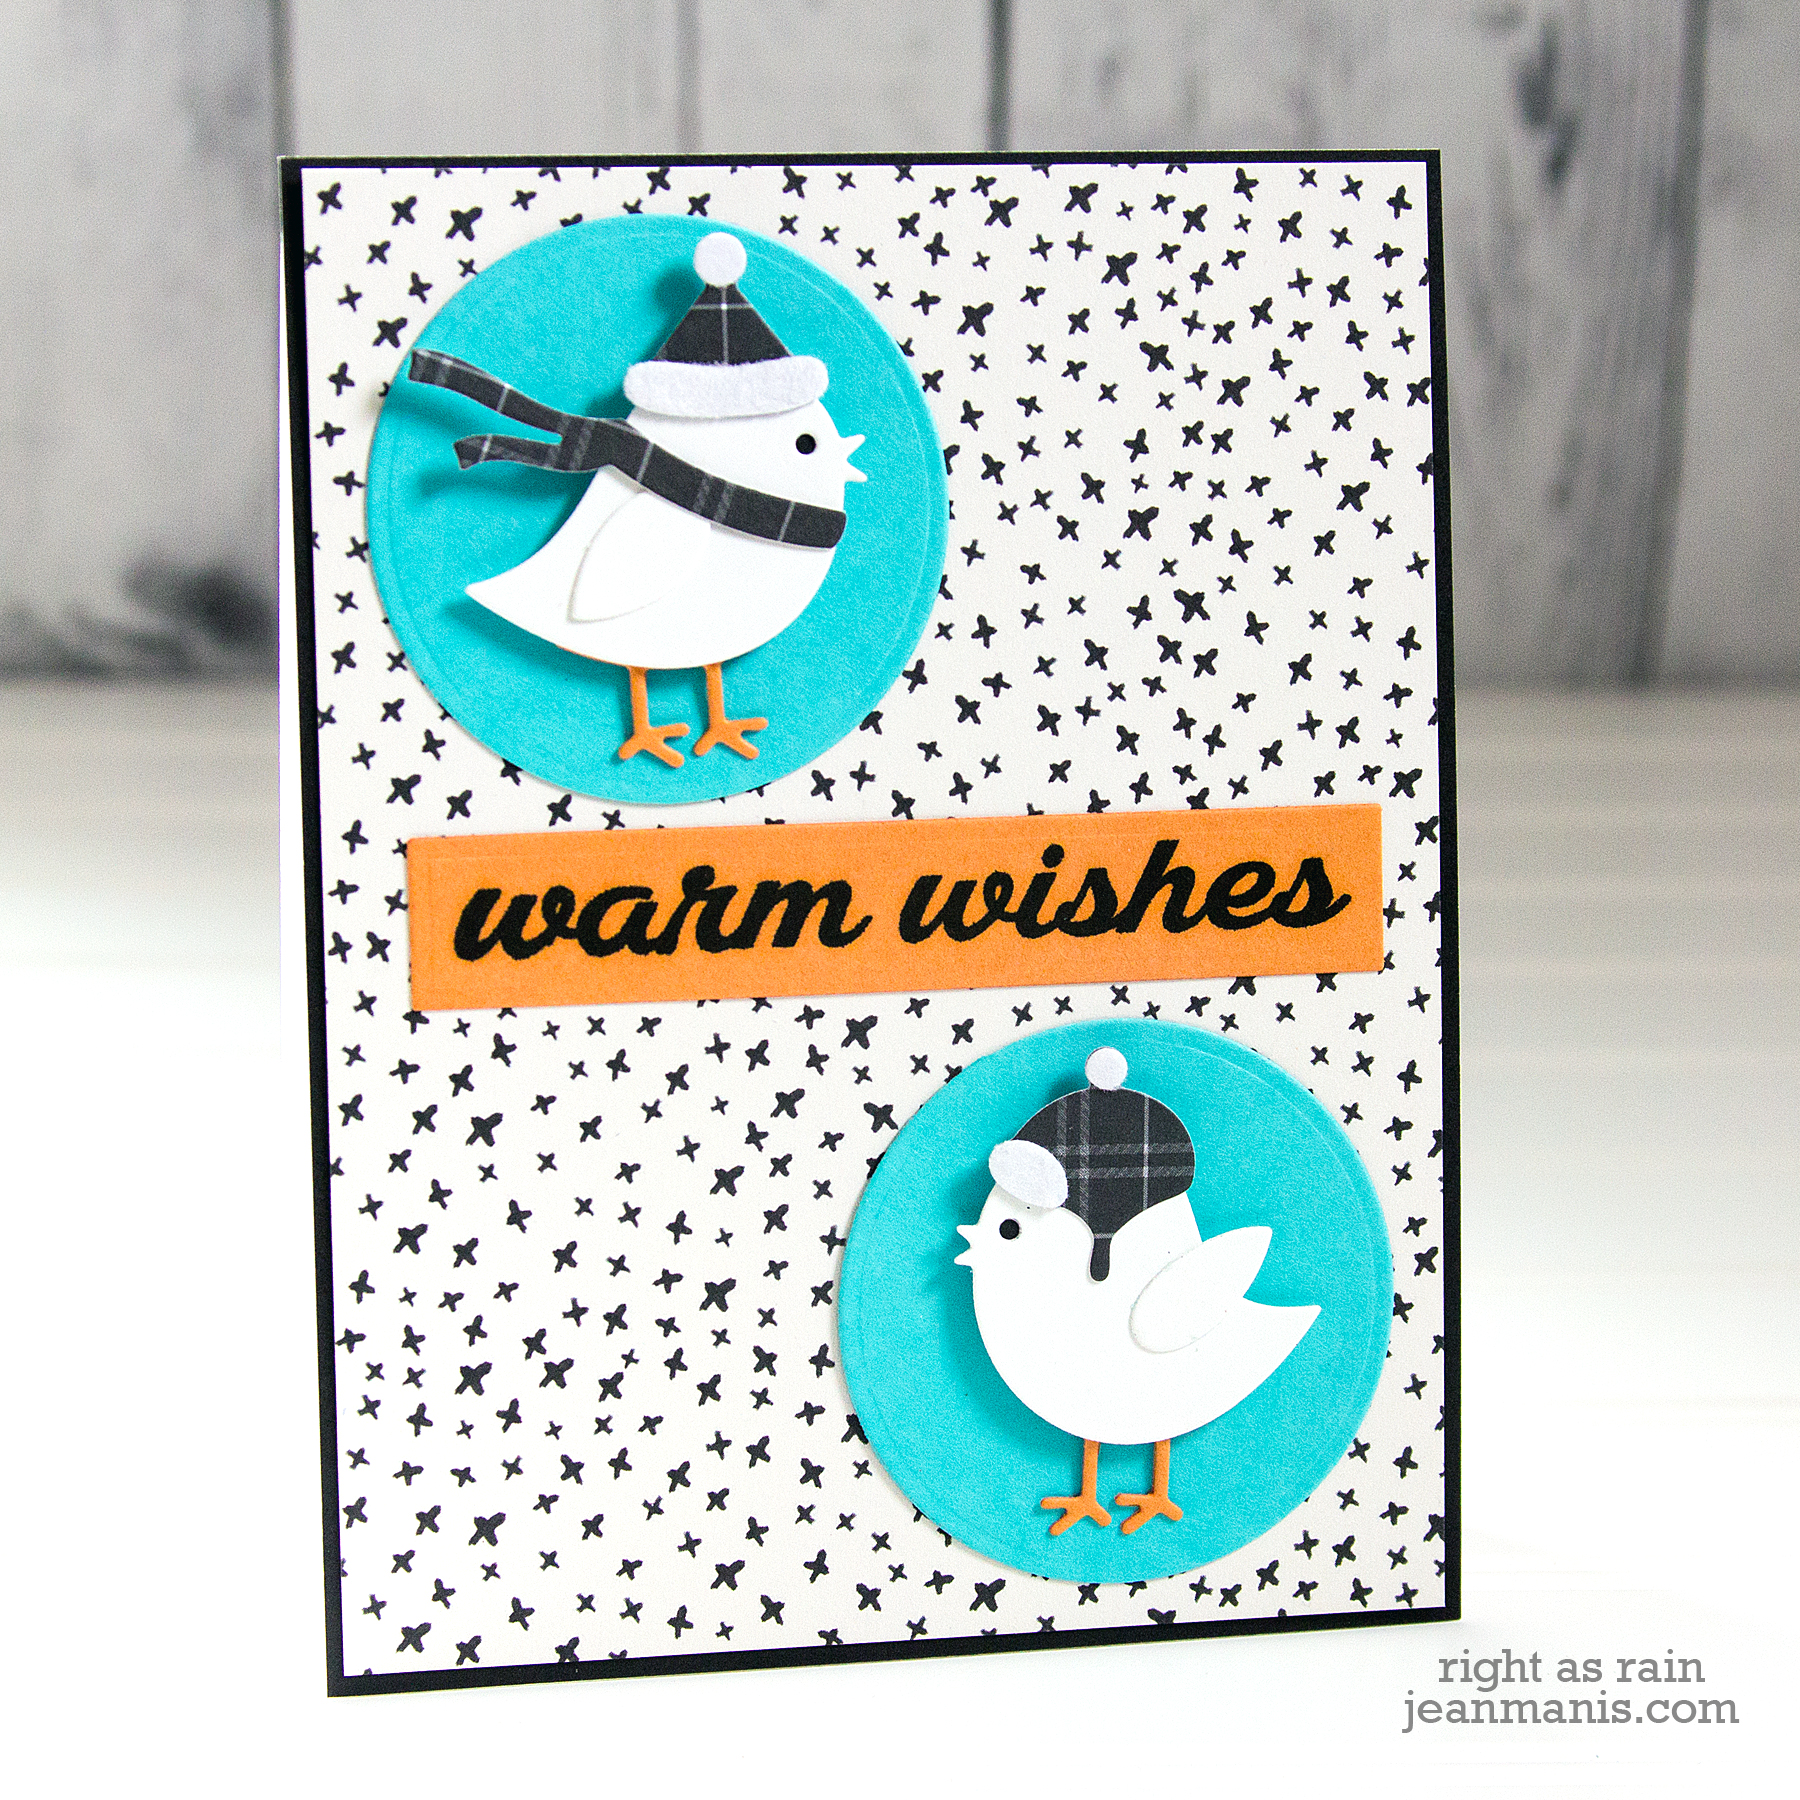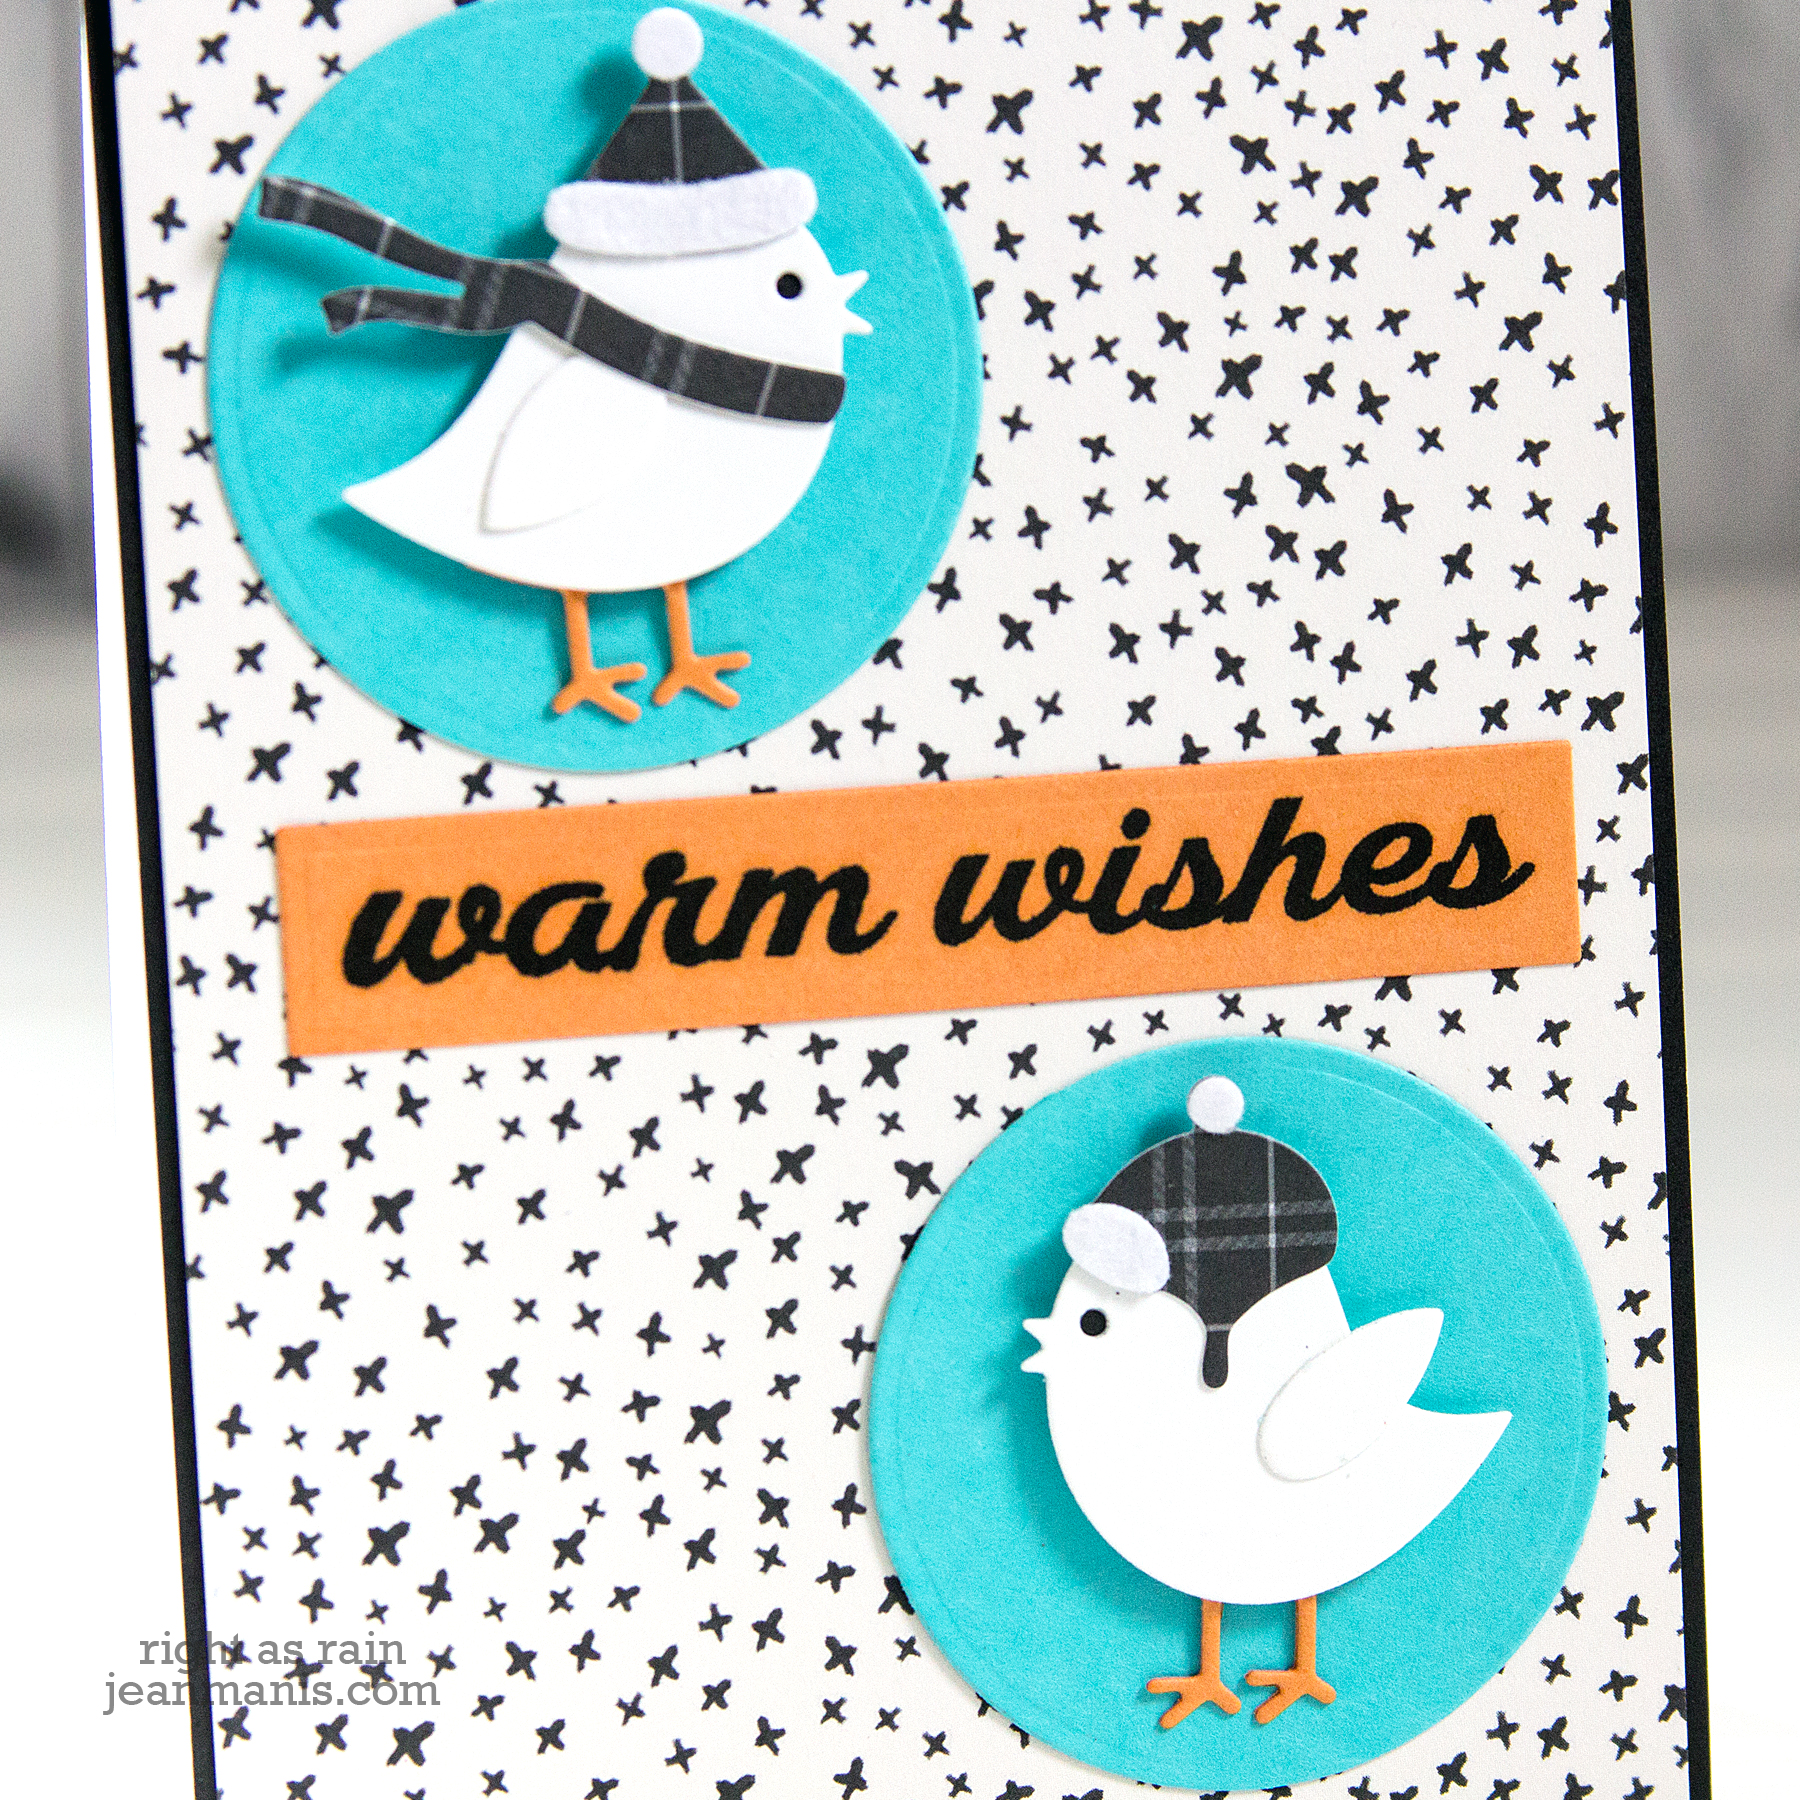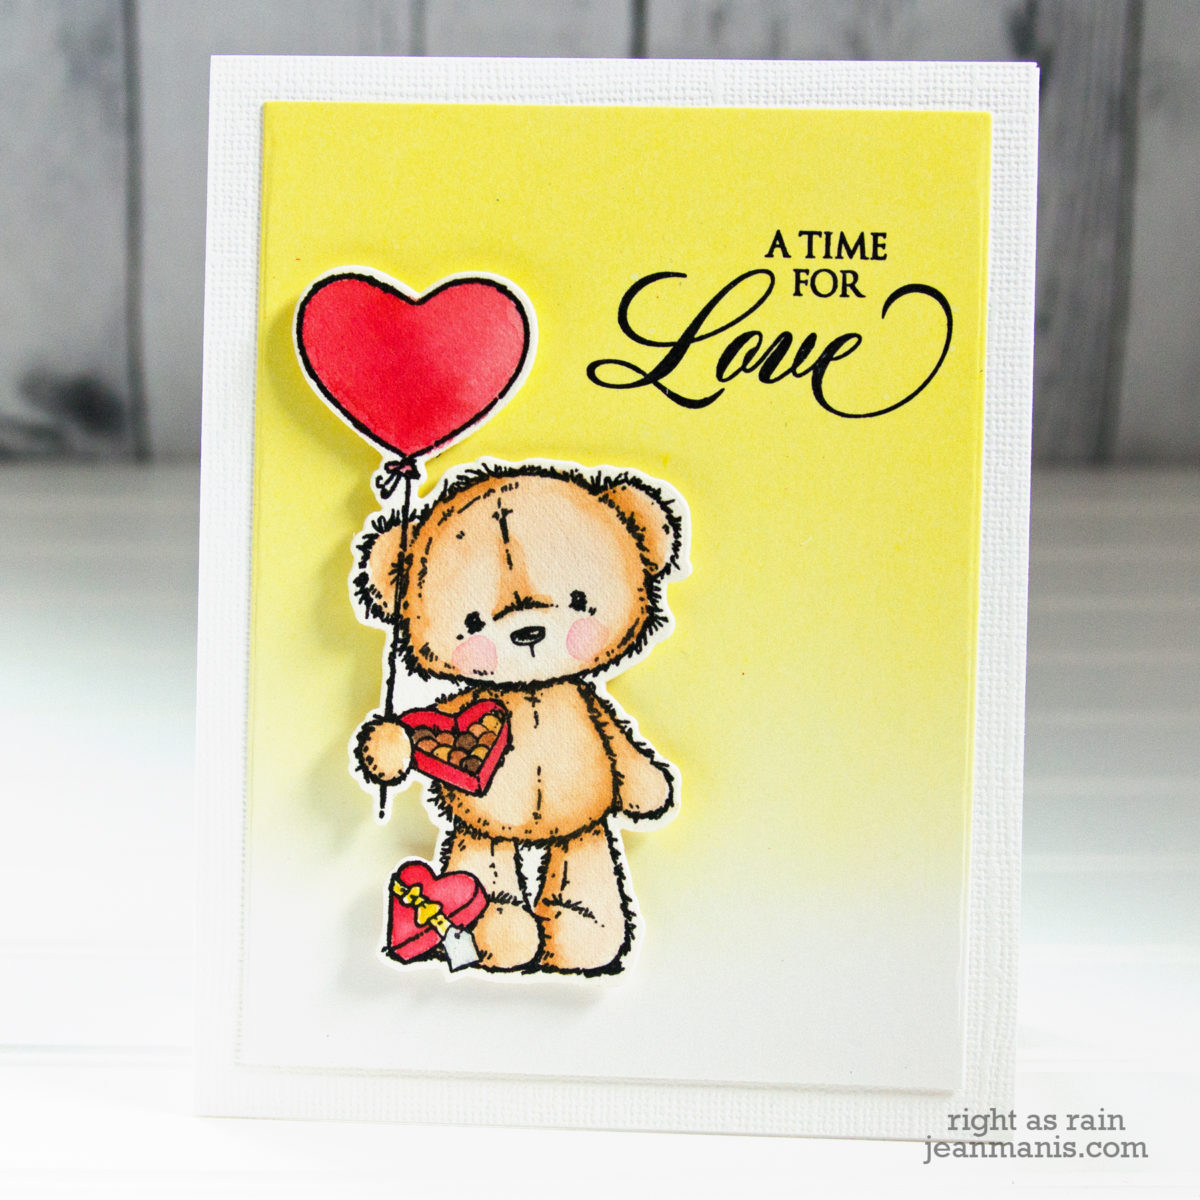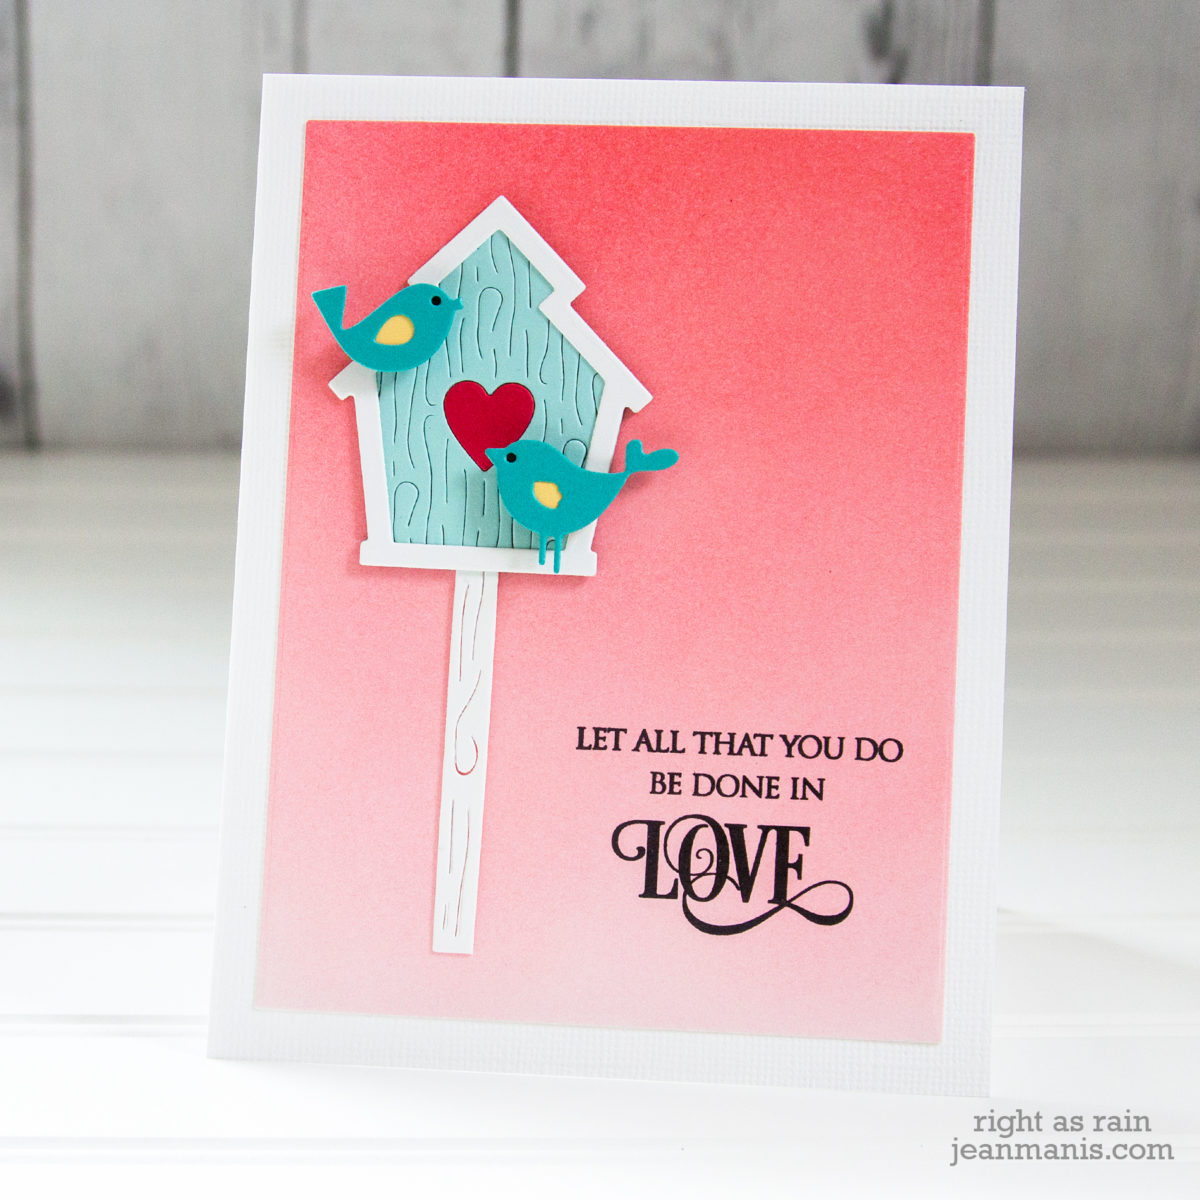
Hello! Today I am sharing a CAS Valentine card created with Penny Black supplies, both old and new.
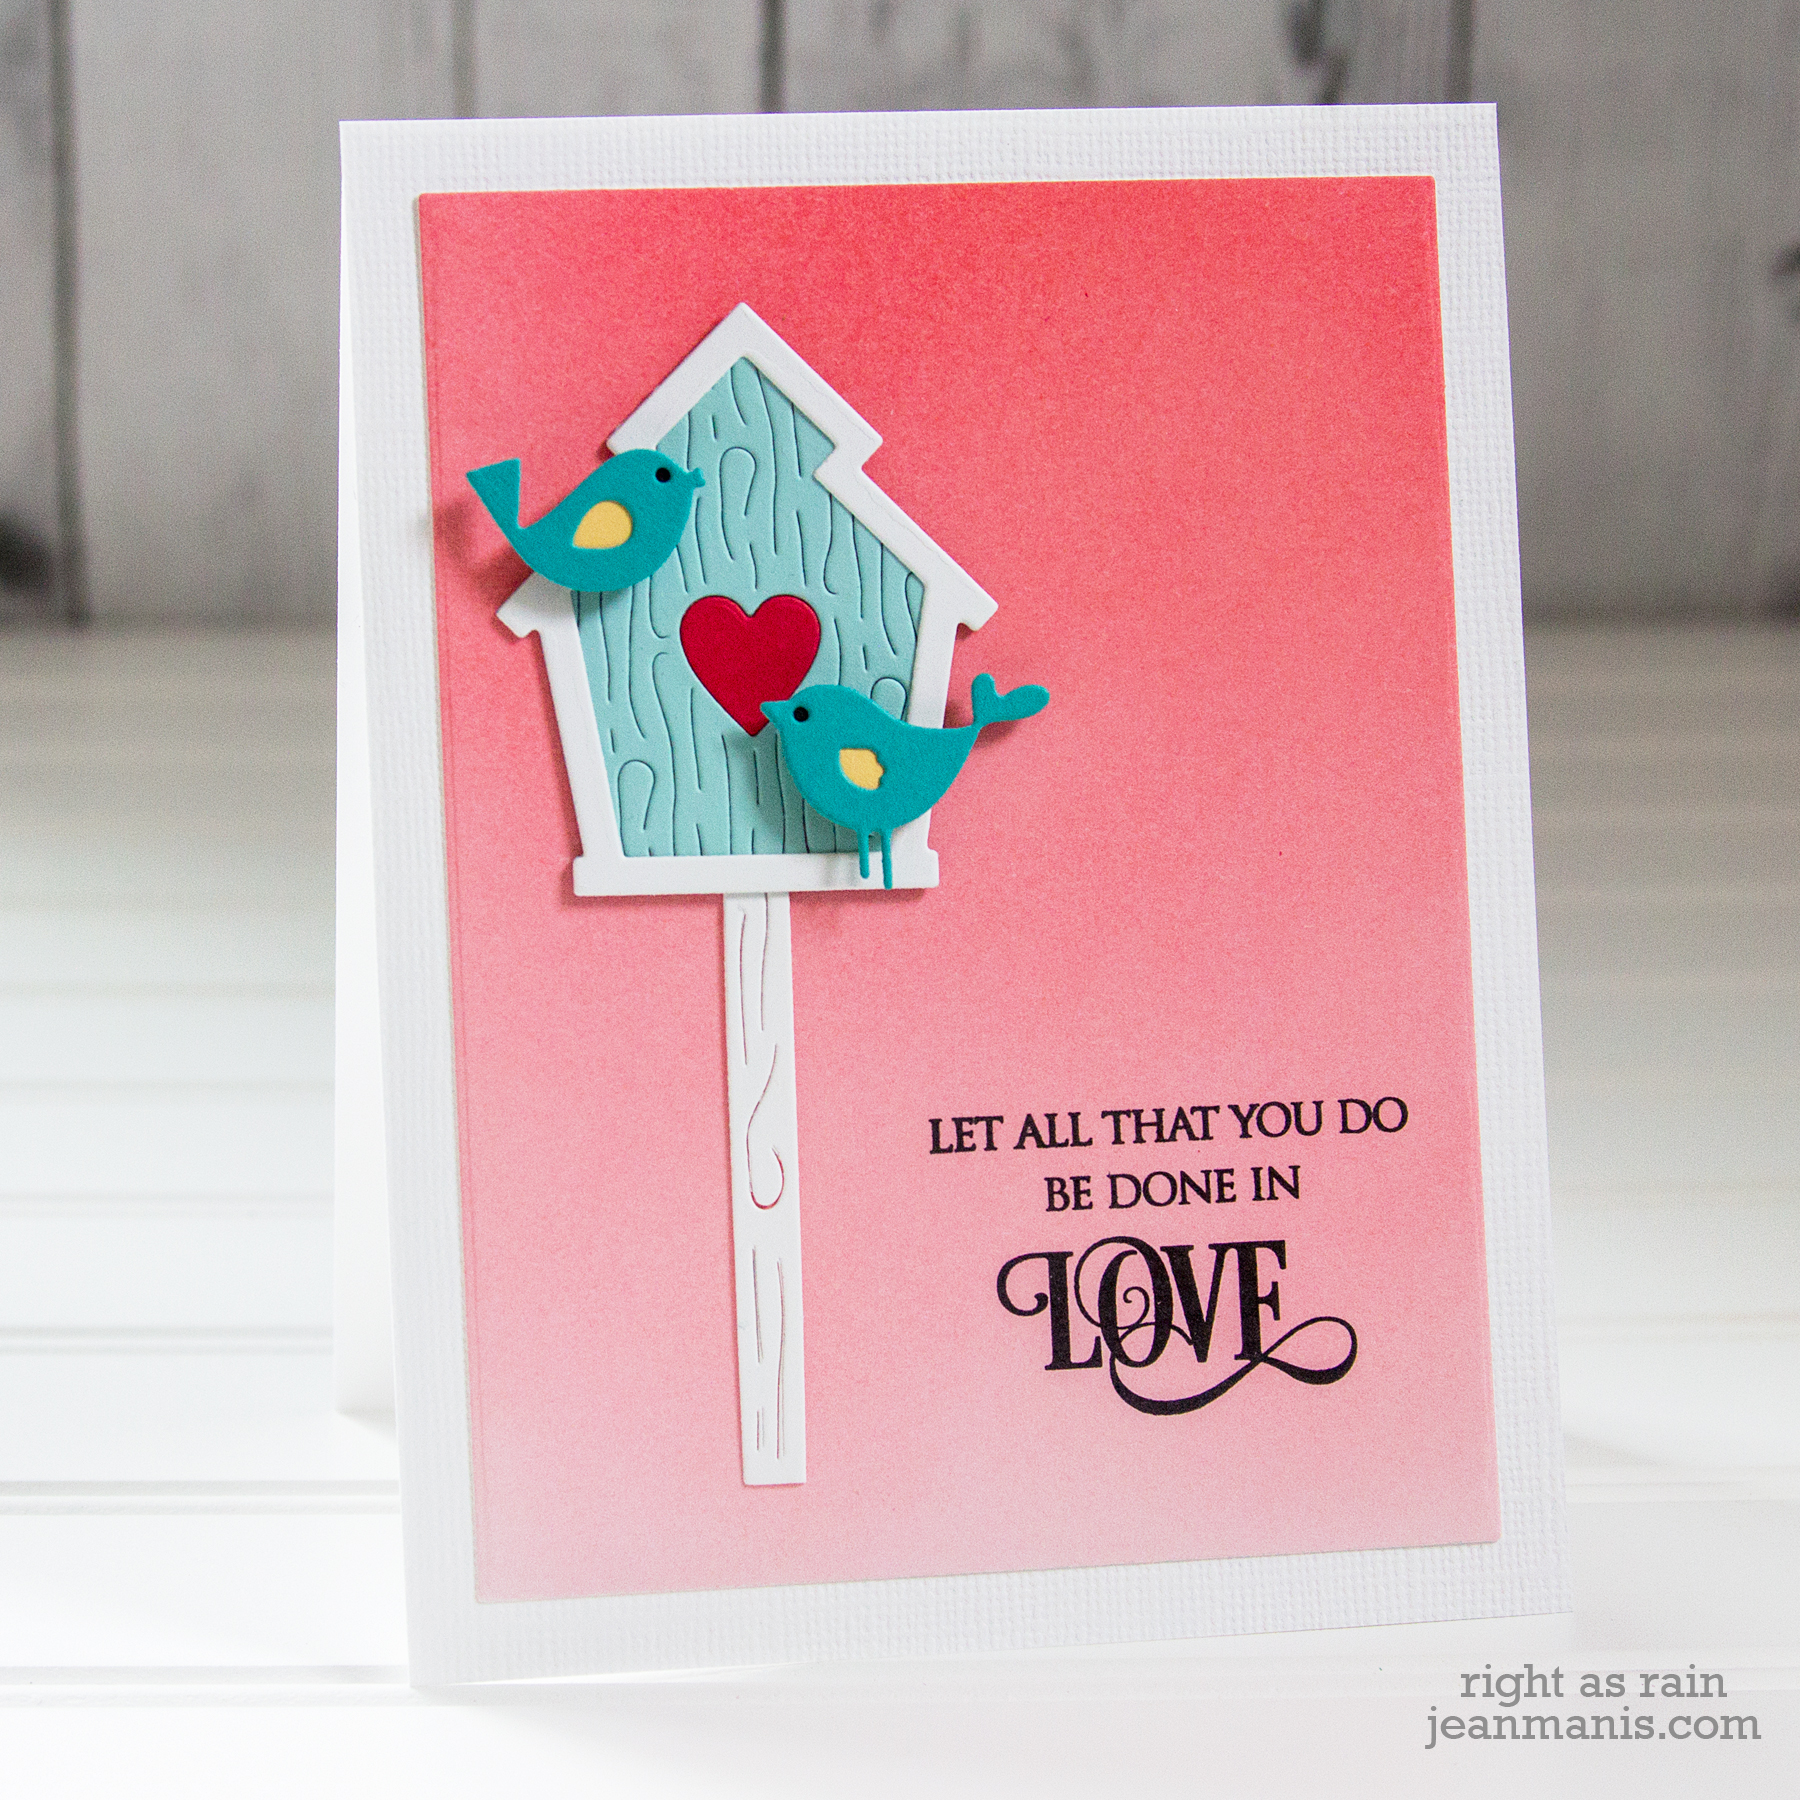
- I die-cut the #51-503 Rustic Birdhouse die and assembled it. I really like the woodgrain that the die creates.
- I die-cut the birds using the #51-094 Tweets and #51-050 Tweet Things sets. I backed the birds with cardstock from behind.
- I applied Distress Ink to the background and stamped the #30-667 Love Language sentiment in the corner.
- I added the birdhouse to the base and added the birds with foam adhesive.

Supplies: