Paper Smooches Water Wise – Take Two

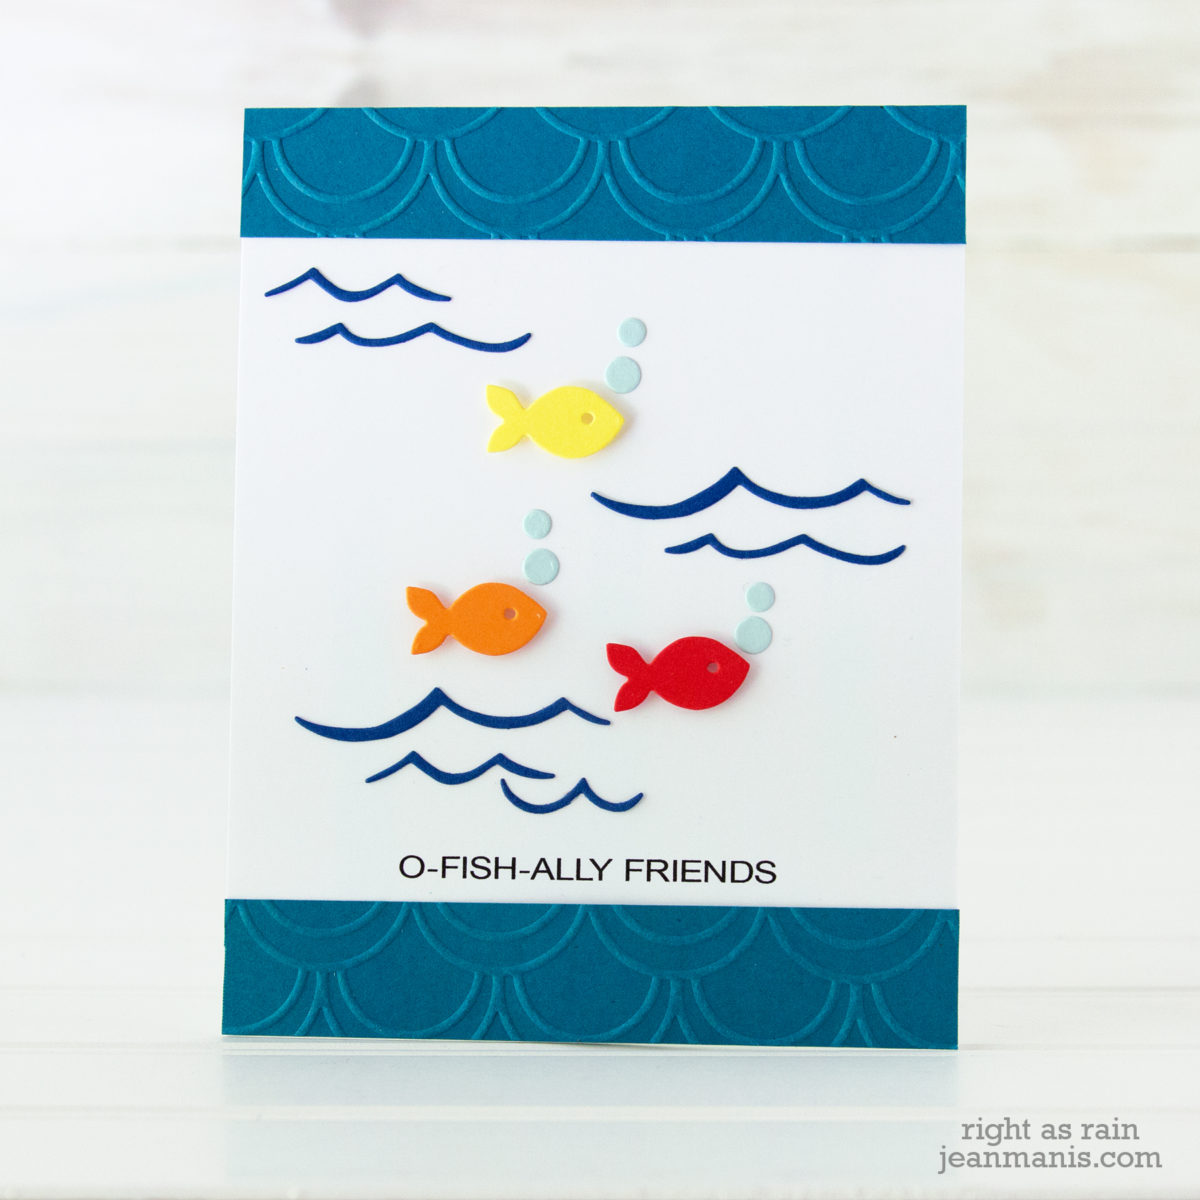
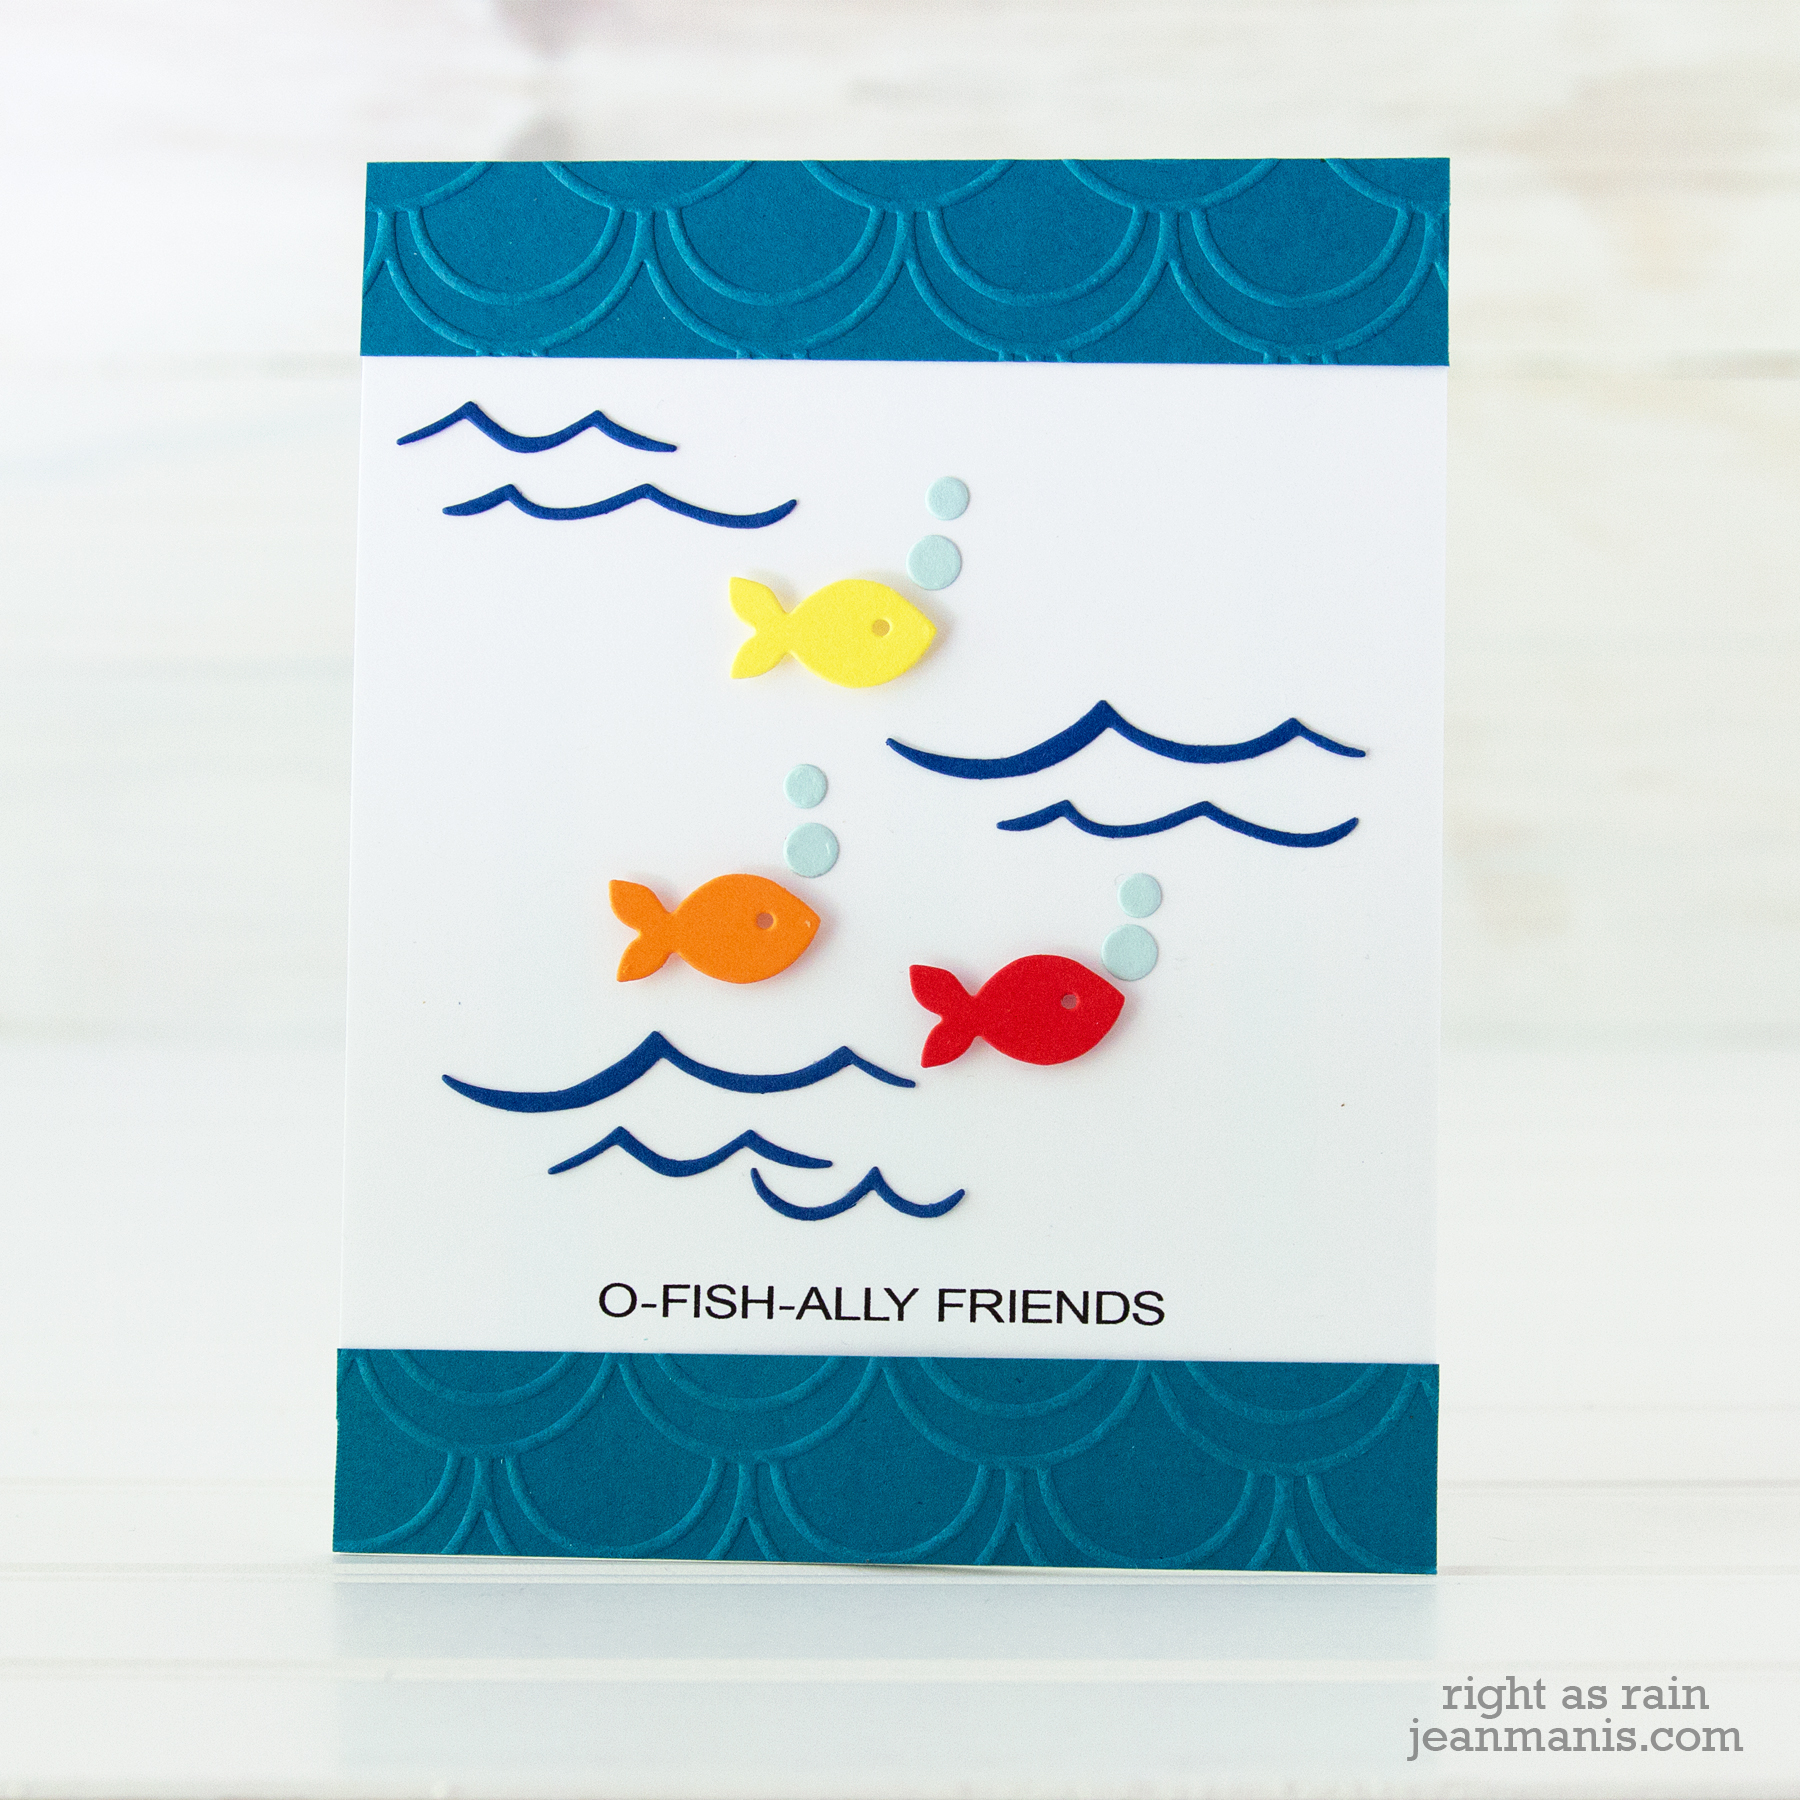
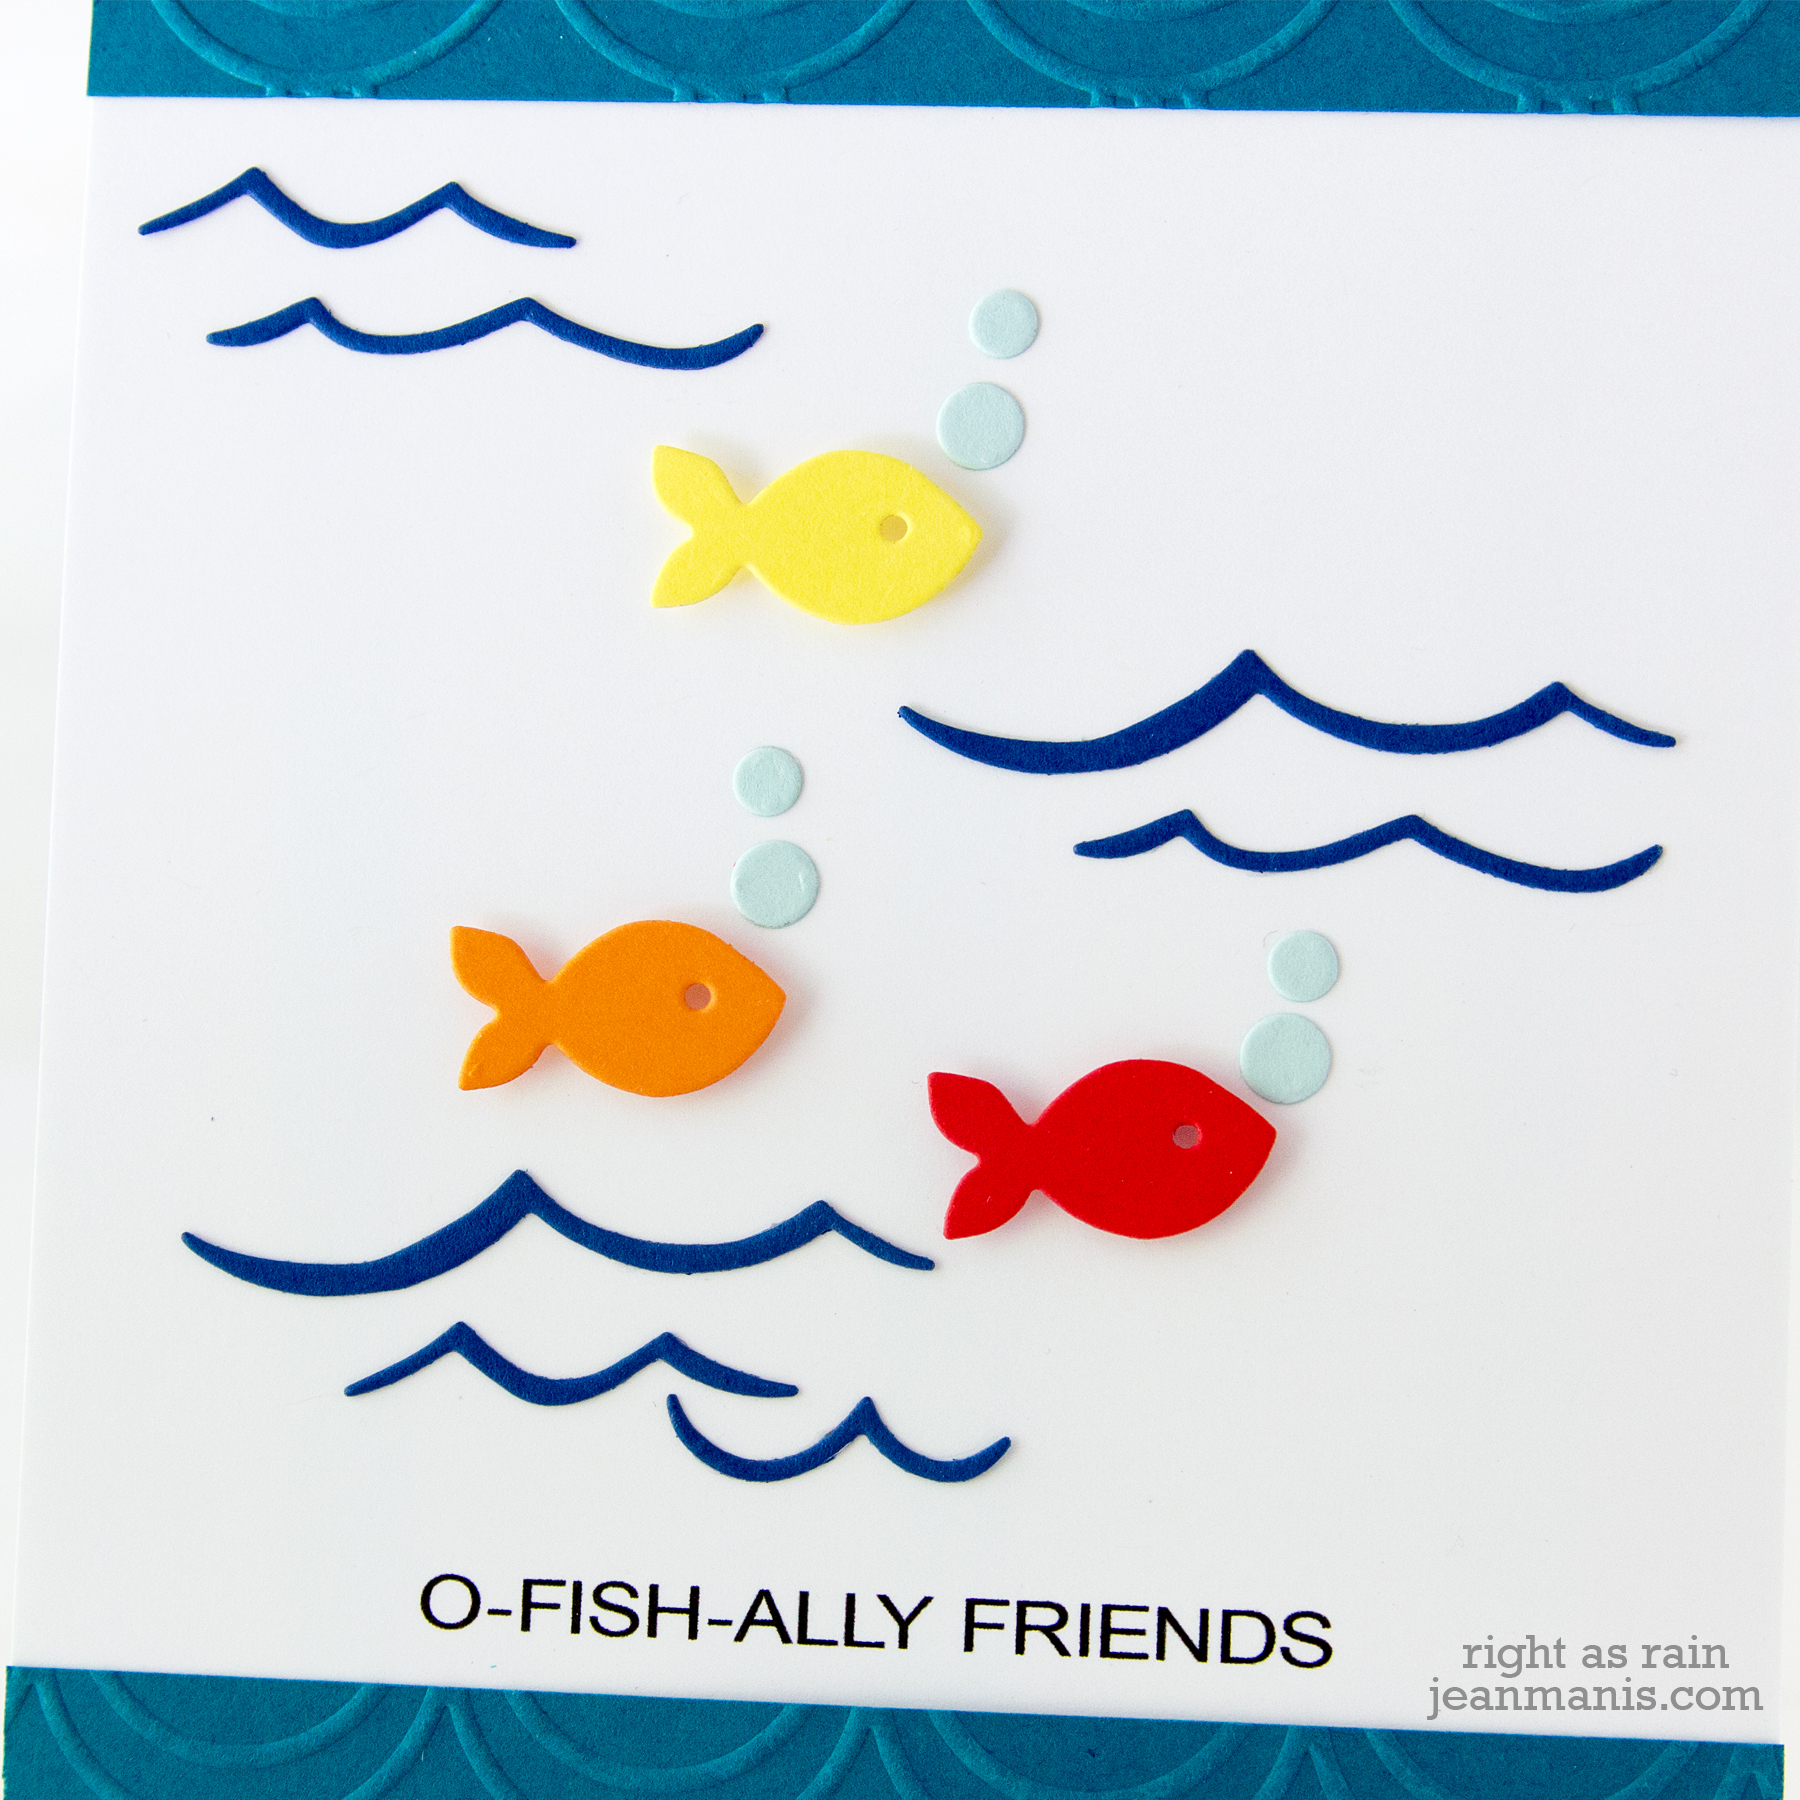
Hello! Today I am sharing another card featuring the Paper Smooches Water Wise die set combined with a sentiment from the Simon Says Stamp Vacation TimeĀ set. Last week I shared a card with the Water Wise dies and a card with the same Vacation time sentiment.

Paper Smooches Water Wise - Take Two

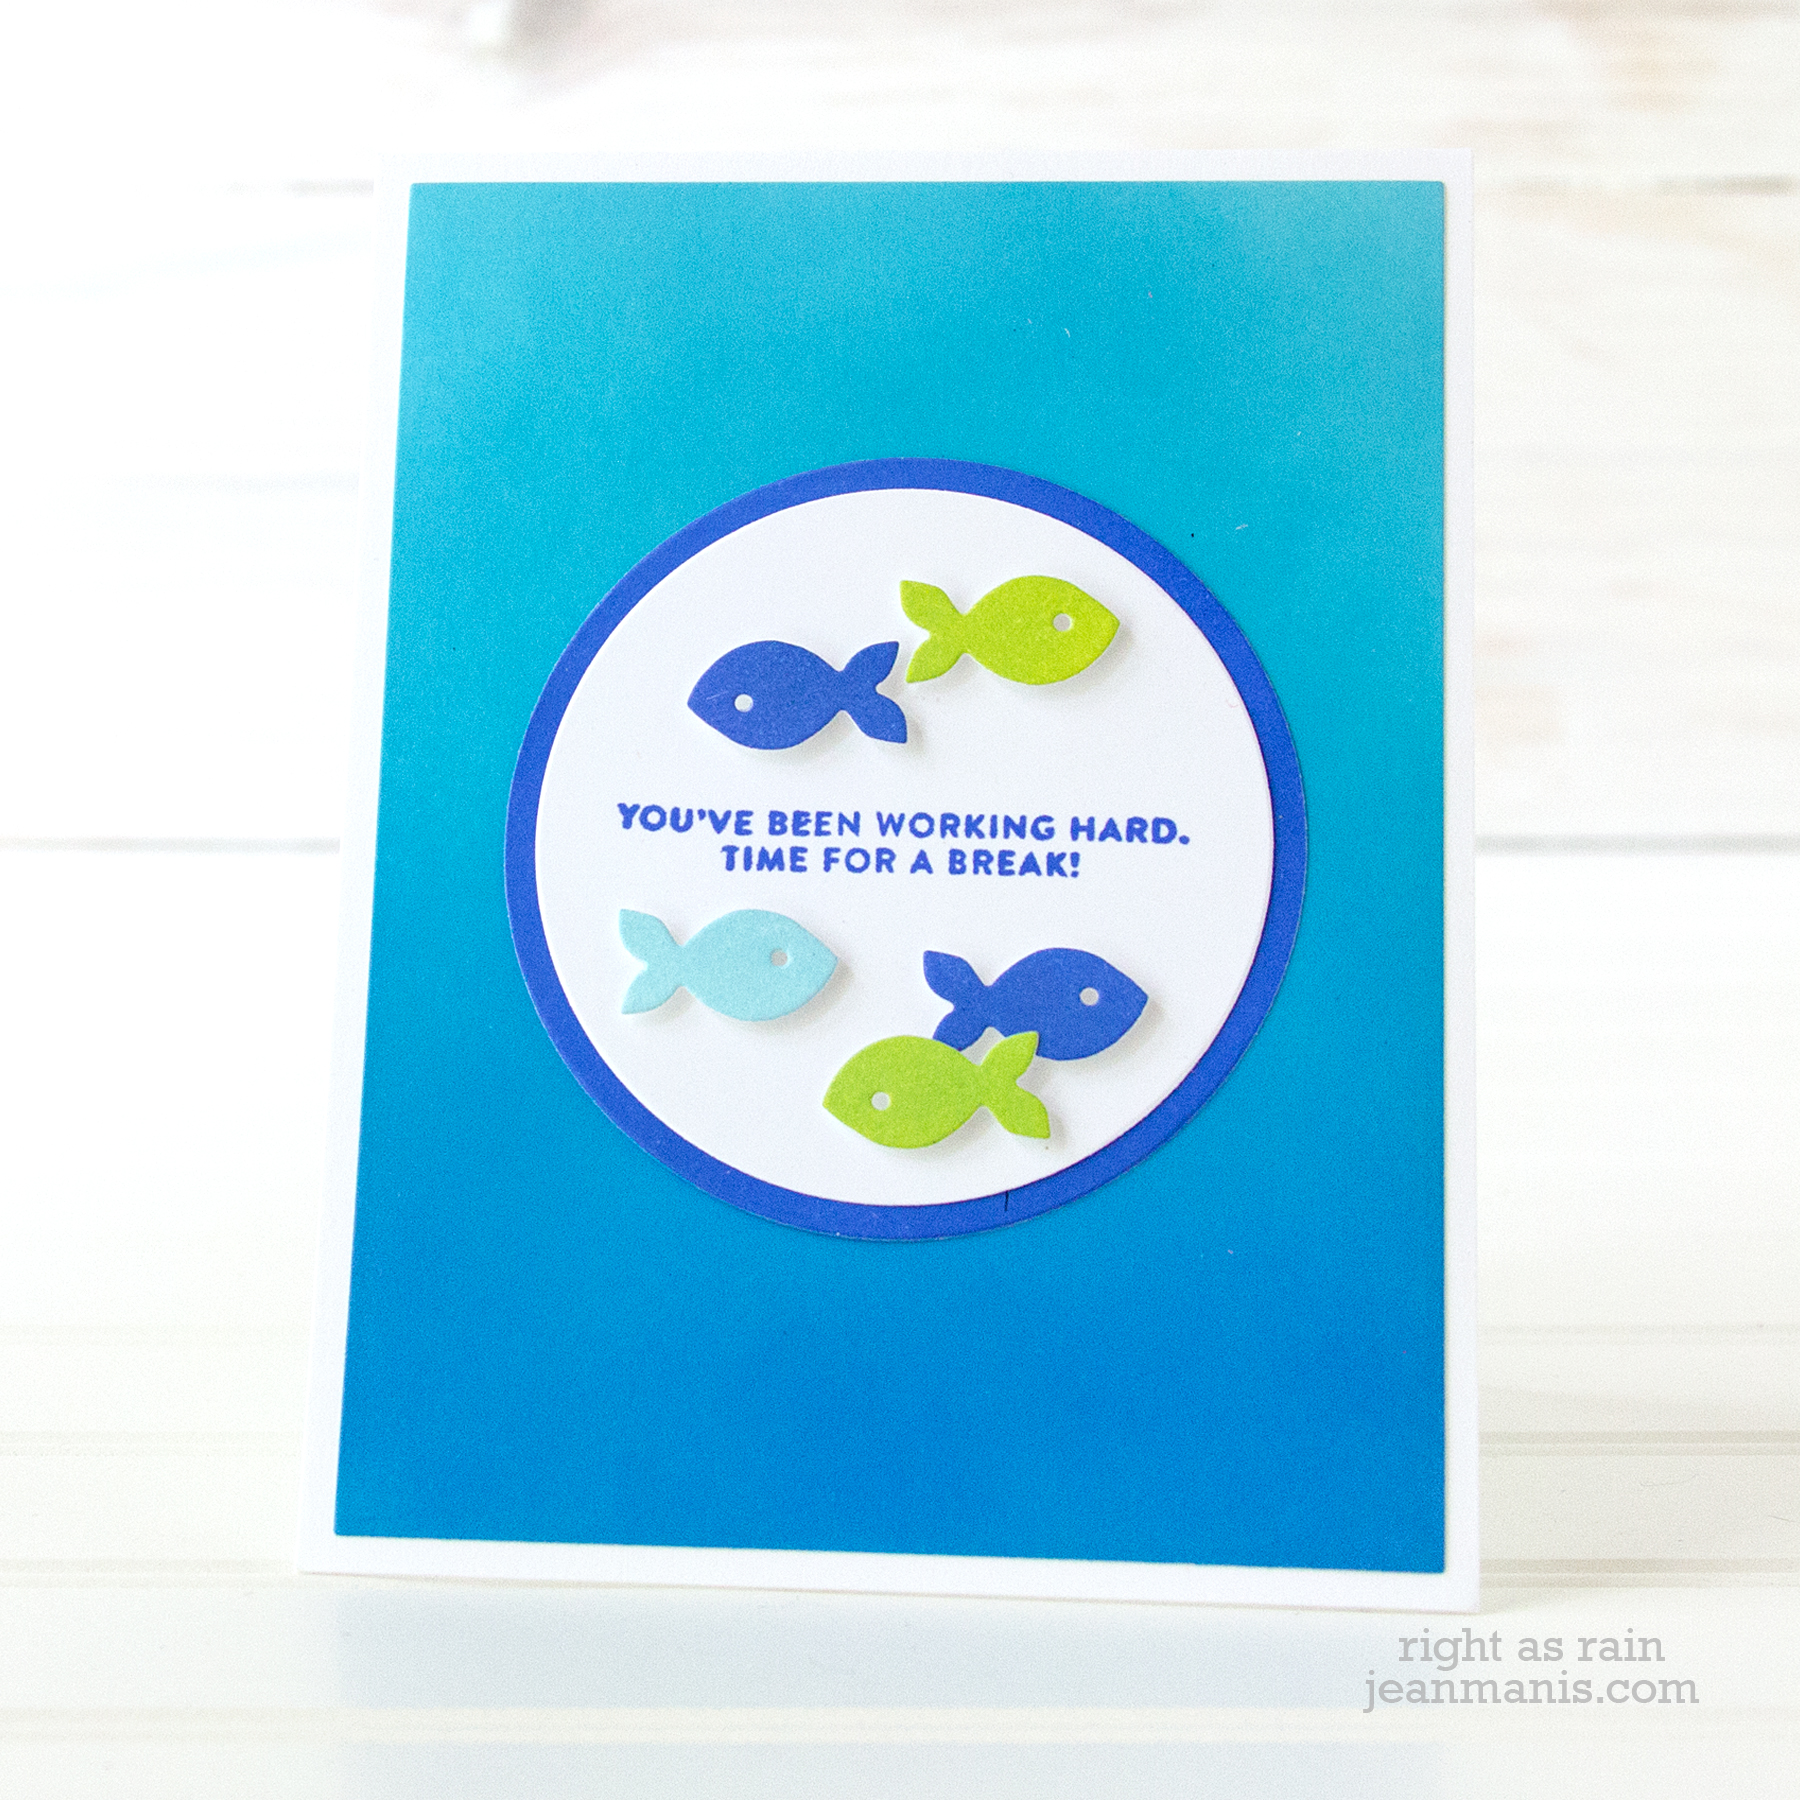
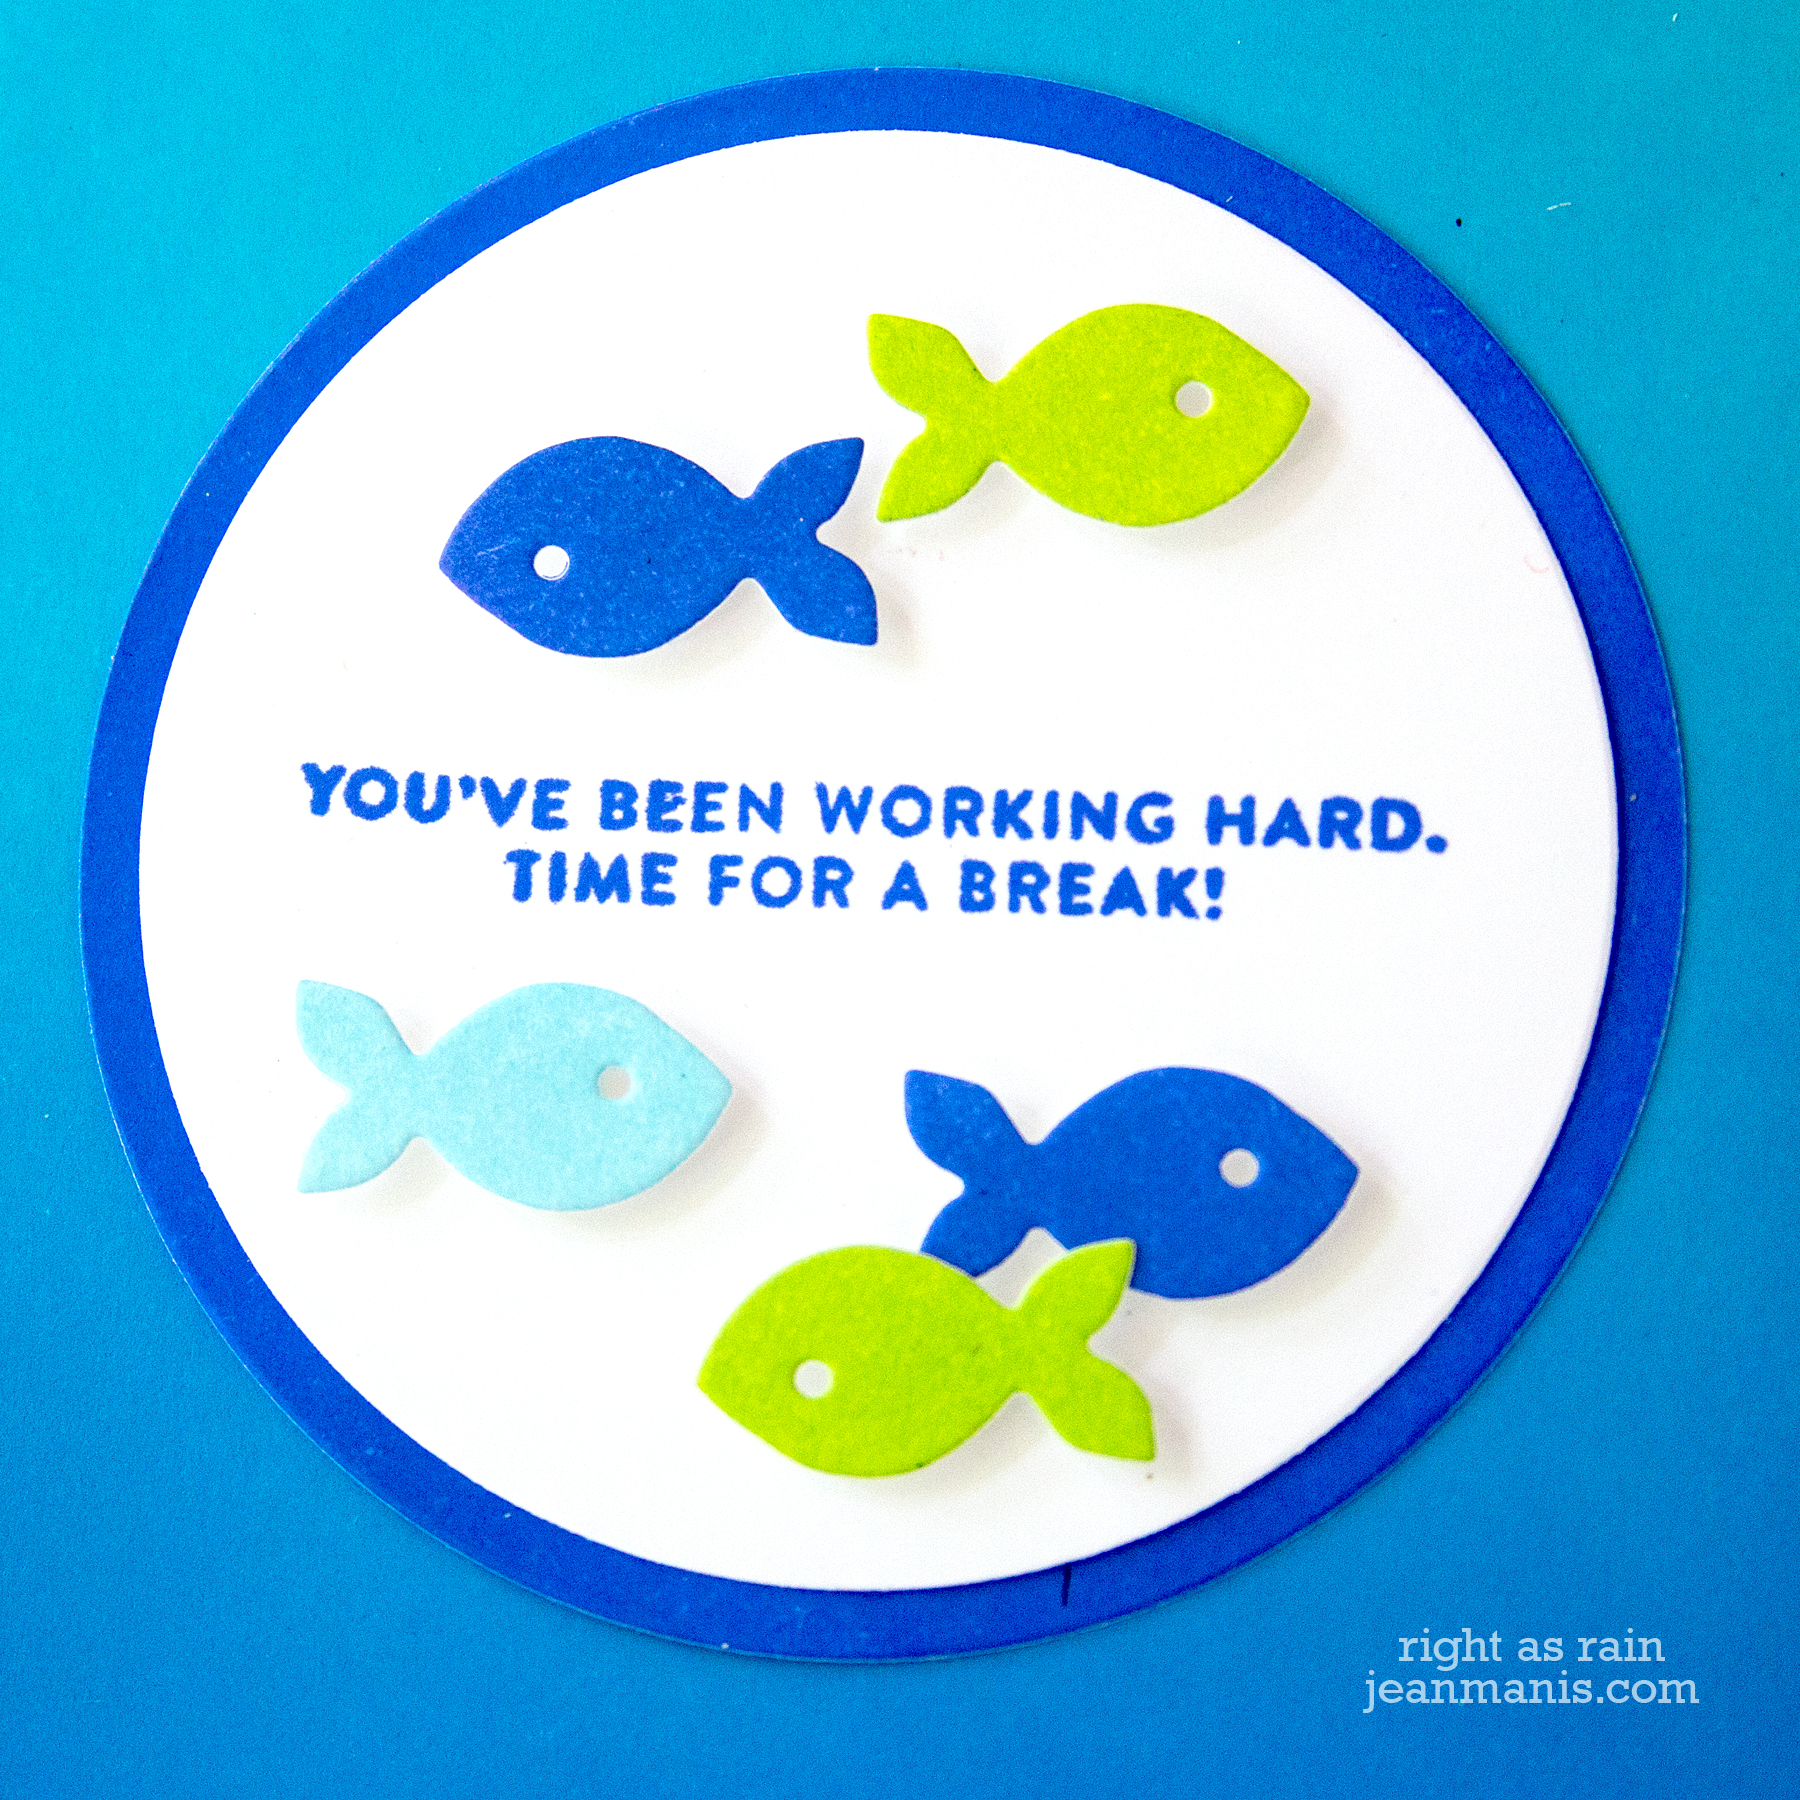
  • I created an ink blended background with Distress Oxide inks.
  • I cut the fish from cardstock to which I had applied Distress Oxide inks.
  • I stamped the sentiment and cut it out with a circle die.
  • I cut the circle frame from cardstock to which I had applied Distress Oxide ink.
  • I added the fish to the circle with foam adhesive and adhered the circles to the card base.

Paper Smooches Water Wise - Take Two

I’ve got just about all of my supplies packed for my upcoming move. I have not packed up my Distress Oxide inks or my white cardstock. Those will be the last thing I pack!

Supplies:

Simon Says Stamp – Time for a Break

Hello! Today, I am sharing a CAS friendship card featuring Simon Says Stamp products – the Abstract Triangle stencil and a sentiment from the Vacation Time set.

Simon Says Stamp - Time for a Break

  • I applied Distress Oxide inks through the Abstract Triangle stencil.
  • I cut the stenciled panel with a 4″ square die at an angle to the pattern.
  • I heat-embossed the sentiment and cut it with a skinny die in the A-2 Matting Basics set.
  • I added the panel to a square card base and popped the sentiment up with foam adhesive.

Simon Says Stamp - Time for a BreakThanks for visiting!

Supplies:

Paper Smooches – It’s O-fish-al!

Hello! Today I am sharing a CAS friendship card on which I’ve combined the recently released Paper Smooches Water Dies with a computer-generated sentiment.

Paper Smooches - It's O-fish-al!

  • I cut the fish, air bubbles, and waves from colored cardstock.
  • I printed out the sentiment on white cardstock, which I trimmed.
  • I added dry-embossed cardstock (created with the retired Lifestyle Crafts Tide embossing folder) at the top and bottom of the panel.
  • I added the waves and air bubbles with liquid adhesive and popped the fish up with foam adhesive.

Paper Smooches - It's O-fish-al!

Thanks for stopping by!

Supplies:

Lawn Fawn Butterfly Kisses

Hello! Today I am sharing a card created with the adorable Lawn Fawn “Butterfly Kisses” set. I bought the set as soon as it was released. Recently I had some time to Copic color (something that always takes a lot less time than I think it does.) I figured it was time to use the set since Lawn Fawn’s summer release is just around the corner! (I can’t believe that we are already through half of May!) I combined two of the critters from the “Butterfly Kisses” set with other Lawn Fawn products.

Lawn Fawn Butterfly Kisses

  • I stamped and colored the fox, the bear, the butterfly net, and several butterflies from the Butterfly Kisses set.
  • I cut the Leafy Tree Backdrop from Paper Bag cardstock.
  • I cut Noble Fir cardstock with one of the Meadow Border dies. I trimmed the piece and attached it to the front of the Leafy Tree frame.
  • I cut Icy Mint cardstock with the Stitched Cloud backdrop. I attached the piece behind the Leafy Tree frame.
  • I stamped the sentiment and cut it with the short Extra Sentiments banner die. I attached it to the grass.
  • I cut the flowers with the Spring Sprig die set from cardstock colored with Copic markers (I find that Copic-colored cardstock goes better with the Copic-colored images than solid cardstock). I attached these to the tree with liquid adhesive.
  • I added the Copic-colored images to the scene.

Lawn Fawn Butterfly Kisses

Supplies:

Paper Smooches Silhouette Flower Bouquet

Hello! Today I am sharing a CAS friendship card featuring Paper Smooches Silhouette Flowers. While this is an older die set, it’s a recent purchase for me. The card design is similar to the one here.

Paper Smooches Silhouette Flower Bouquet

  • I cut the flowers, foliage, and dragonfly from white 80 lb cardstock and colored them with Distress Oxide inks.
  • I used sticky notes to mask the flowers from the stems, and vice versa, while applying the inks.
  • I colored white cardstock with Tumbled Glass ink and cut it with the Mason Jar die set.
  • The background was colored with Scattered Straw ink.
  • I stamped one of my favorite Paper Smooches sentiments from the Lovely Thoughts set onto the background and added the assembled bouquet with foam adhesive.

Paper Smooches Silhouette Flower Bouquet

Supplies: Paper Smooches Mason Jar and Silhouette Flowers die sets; Paper Smooches Lovely Thoughts stamp set