Happy Birthday Card – Echo Park Balloons Stencil

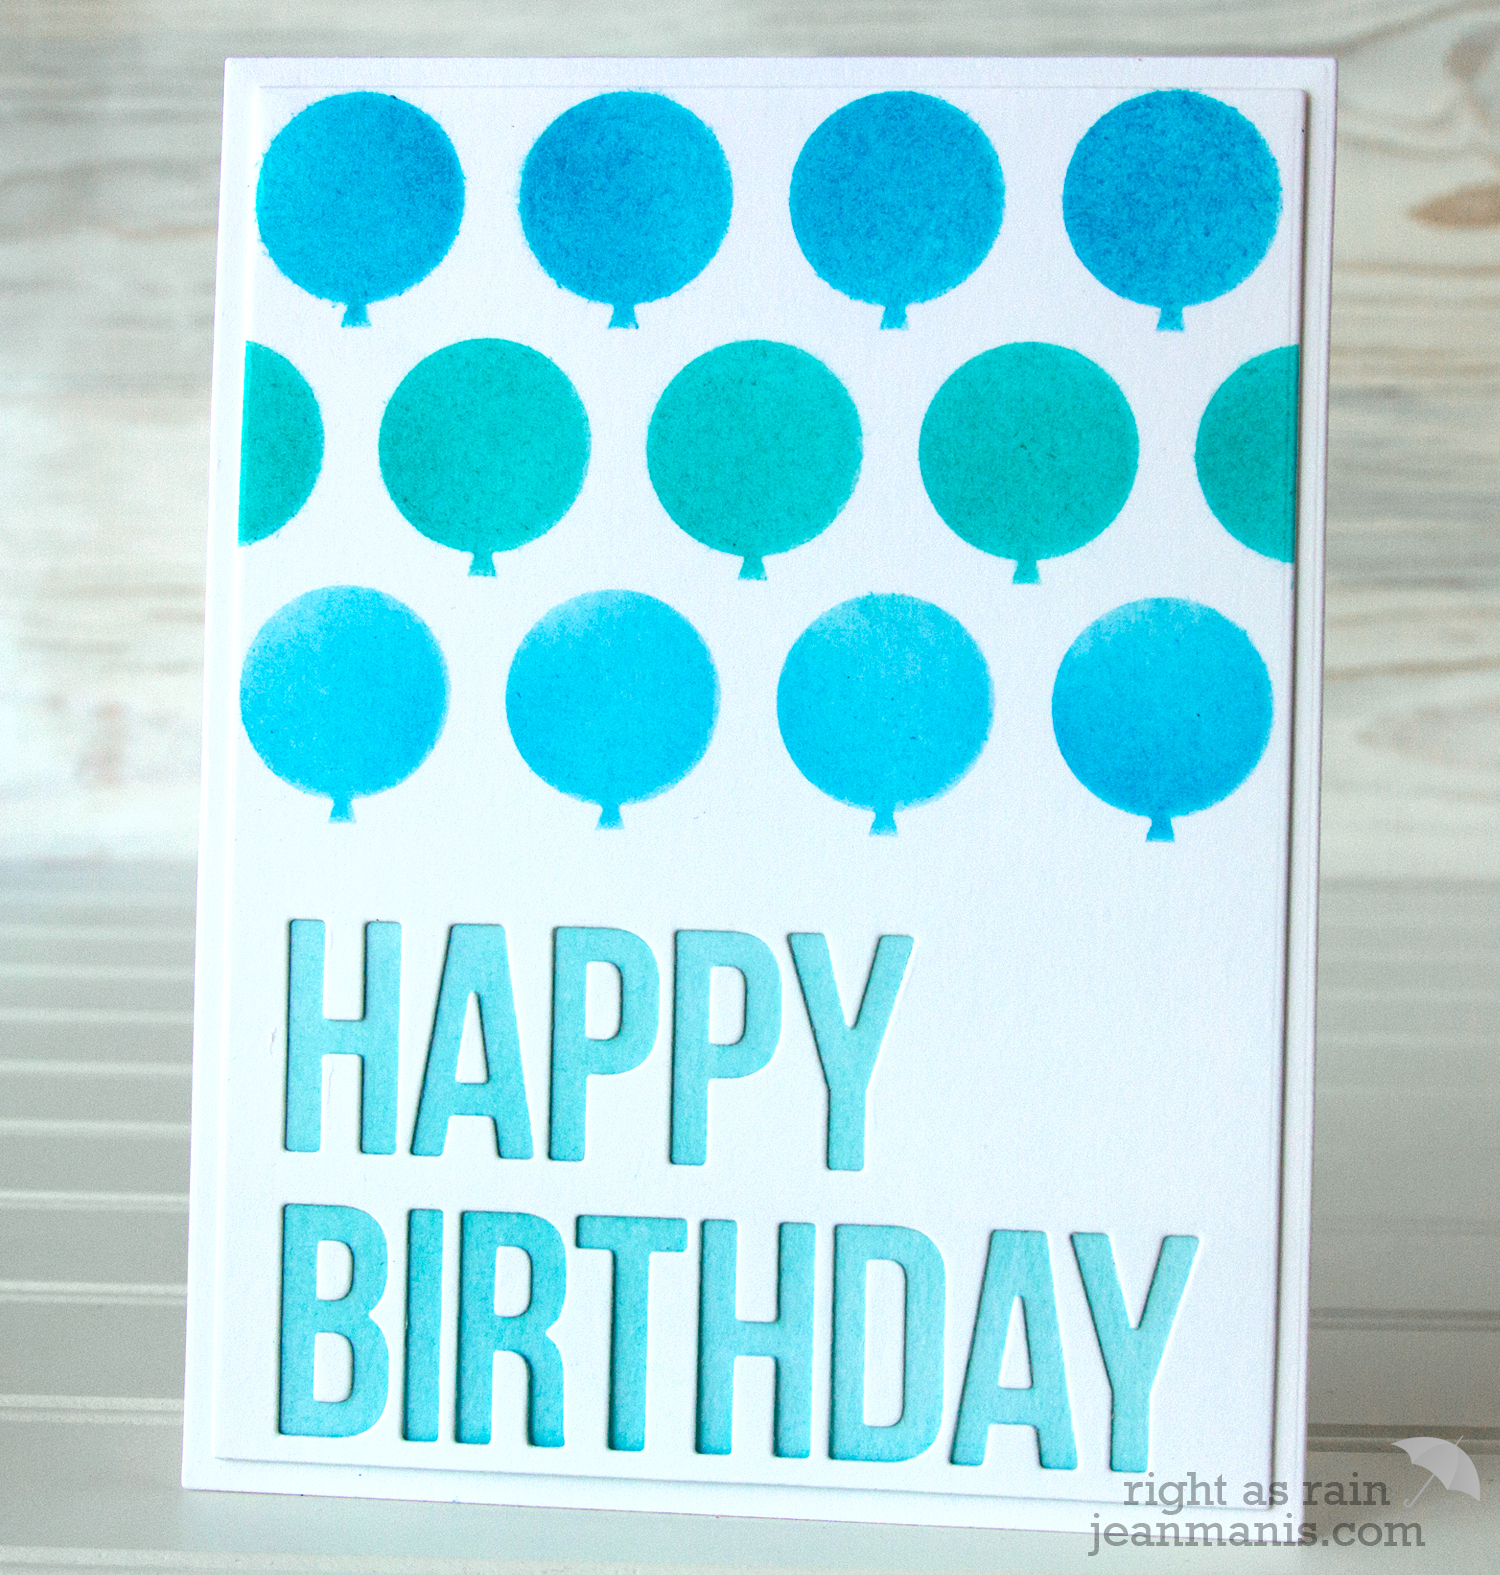
Hello! Today, I am sharing a CAS birthday card featuring the Echo Park Balloons Stencil,  provided to me by Paper-Garden.ca.

Happy Birthday Card - Echo Park Balloons Stencil

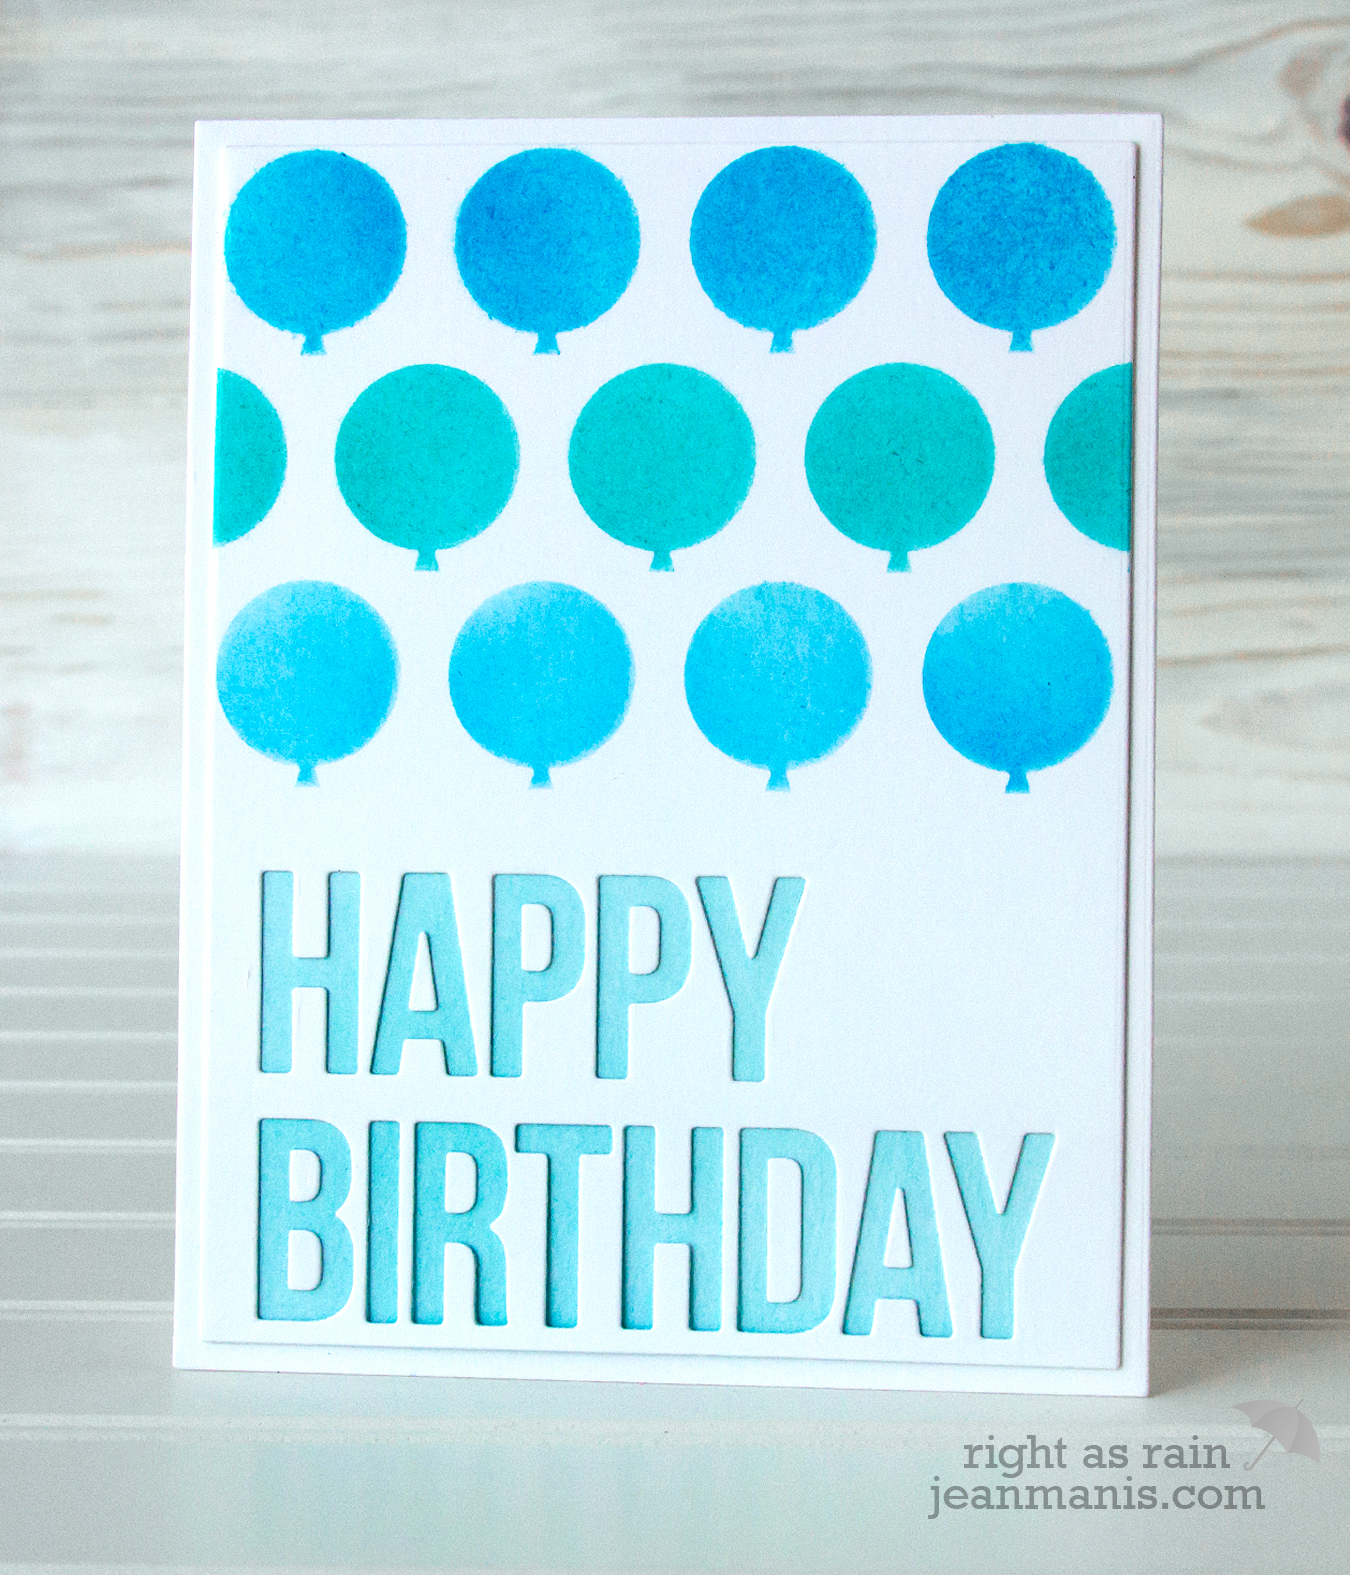
I recently shared a card created with the Echo Park Snowflakes #1 stencil, on which I used embossing paste. For this card, I applied Distress Inks with a Inkylicious Ink Duster brush. The top row of balloons is inked with Mermaid Lagoon, the middle row with Peacock Feathers, and the bottom row with Salty Ocean. I also applied Tumbled Glass to a separate piece of cardstock. I adhered that inked panel to the back of the stenciled panel so that the letters, which I knocked out with the My Favorite Things Happy Birthday to You die, would easily show through.

Happy Birthday Card - Echo Park Balloons Stencil

I plan to use this stencil again for another birthday or celebration card by coloring embossing paste with acrylic paint.

Let It Snow – Stencil and Die-cuts

Hello! Today I am sharing a CAS winter-themed card created with several Memory Box die-cuts and the Echo Park Snowflakes #1 Stencil,  provided to me by Paper-Garden.ca.

I like the Echo Park stencils because of their 6″ x 6″ size – it’s easy to create either a vertical or horizontal card. This particular stencil features a variety of snowflakes in a random pattern. When designing my card, I carefully considered which snowflakes would be visible in the scene.

Let It Snow - Echo Park Snowflakes #1 Stencil

I applied Wendy Vecchi embossing paste through the stencil and set it aside to dry for thirty minutes. Once dry, I applied Tumbled Glass Distress Ink over the embossing paste and directly to the cardstock with a sponge applicator. For the most part, the embossing resisted the ink. There was a little bit of ink on the snowflakes, which I simply removed with a wet paper towel.

I die-cut the Memory Box Let It Snow from a red cardstock rectangle, (the die does not cut the outer edges), and placed it over the embossing paste snowflakes background. I added Memory Box Playful Penguins and a snow bank to finish off the scene.

Let It Snow - Echo Park Snowflakes #1 Stencil

Other ways I considered using this stencil – apply Tumbled Glass Distress Ink or silver metallic ink, heat-emboss embossing paste with a metallic powder, or dry-emboss the cardstock (like an embossing folder) and add ink to the raised snowflakes.

Hero Arts – CAS Winter Trees

Hello! Today I am sharing a CAS card created with an older Hero Arts rubber stamp – Winter Trees. I bought the stamp five years ago and had only used it once.

Hero Arts Winter TreesI stamped the Hero Arts Winter Trees image with Lucky Clover Distress Oxide ink on my MISTI. (I think it would be fun to stamp in a number of different Distress Oxide ink colors.) I heat-embossed the Hero Arts Christmas Messages sentiment (my most used this season) with silver embossing powder.


Merry Monday #270 – Christmas Tic-Tac-Toe

Hello. Today, I am sharing a card created for the Merry Monday Christmas Challenge #270 – Tic-Tac-Toe.

Merry Monday #270 - Christmas Tic-Tac-ToeI used the first column – stamping, die cut and red on my CAS holiday/winter card. I am transitioning from Christmas-specific cards to winter cards (still snow, snow people and the like!).

Merry Monday 270 - Christmas Tic-Tac-Toe

I cut the MFT Cocoa Cup from TE Cherry Pop cardstock and added a snowflake, from the Lawn Cuts Mini Snowflakes set, and a peppermint stick, from the  CottageCutz Peppermint Latte set. I heat-embossed the Hero Arts sentiment on Stampin’ Up  Marina Mist strip. The background panel was dry-embossed with a Stampin’ Up  folder.

Merry Monday 270 - Christmas Tic-Tac-Toe

Supplies:

Lawn Fawn – Die-Cut Christmas Village Scene

Hello. Today, I am sharing a CAS holiday scene created with Lawn Fawn supplies. I had in mind a town in the American Southwest (think Taos or Santa Fe) while making my card, hence the mountain background.

Lawn Fawn - Die-Cut Christmas Village Scene

All of the colored cardstock is from Memory Box. I used the last of my red for the Village Border. I cut the Stitched Hillside Backdrop Landscape  before stamping it with one of the sentiments in Merry Messages on the MISTI. I added a snowbank on the left-hand side to cover up the section of the Village Border, which would have been exposed.

Lawn Fawn - Die-Cut Christmas Village Scene

I haven’t participated in a Lawn Fawn challenge in a long time, but checked out the one which just started and decided to join in!

Supplies: