Hollyhock Bouquet

In most cases, I create cards with the end in mind, or at least a vague idea. Such was not the case with this card, which grew to be quite tall!

ImpressionObsessionHollyhocks

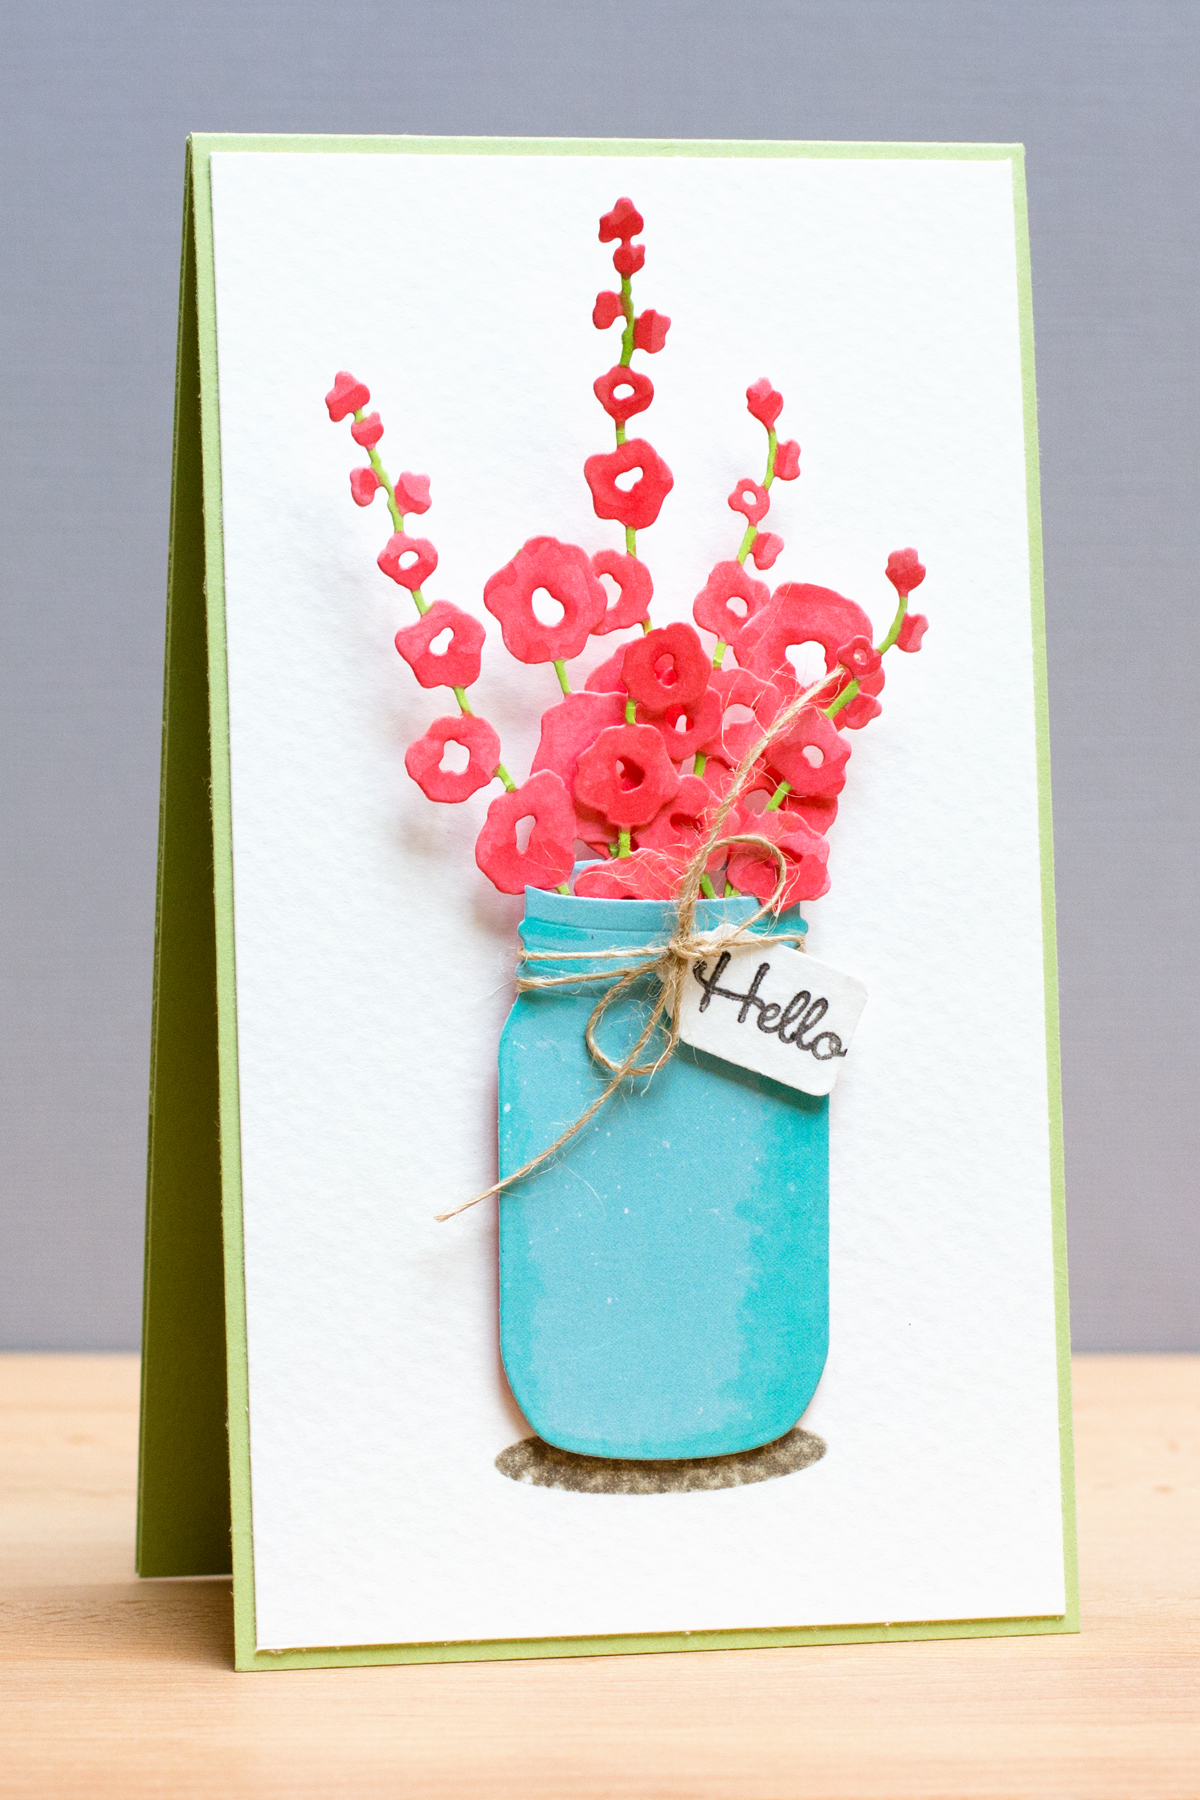
My inspiration for this card comes from Dina Kowal. She’s both a designer for Impression Obsession, as well as a member of their design team. She shared a card recently combining the Hollyhock and Mason Jar dies.

I cut white cardstock with the Hollyhock die several times,  and colored the flowers with Copics. I’ve never colored die cuts with Copics before, but I have to say it’s certainly easy and you can get the colors you want! I used the Mason Jar die to cut a piece of patterned paper that I colored with a Copic to add shading along the sides. I added a shadow under the mason jar with an Amuse Studios set. The sentiment comes from the Hero Arts “All Occasion Messages” set. The sentiment says “Hello Friend.” I simply cut it in two, as I find myself frequently needing a little sentiment to fit onto tiny tags (this tag was cut with a punch). The background paper is Strathmore 140lb coldpress watercolor paper. For this card, I wanted something off-white with a little bit of texture. I buy the Strathmore paper in a big pad and cut it down to size.

Supplies:

Just Cut Tulips

I’ve been watercoloring with Distress Inks a lot lately – stamped images, die cuts, whatever I can find that will take the ink.

IOTulips

You have to give a little visual leeway with this card in terms of whether the tulips are really in the watering can (that right-hand tulip leaf is sticking out!). I got to this design the long way round. At first, I planned to put the watering can, which is cut from Strathmore 140 lb cold-press watercolor paper and colored with Broken China and Vintage Photo, directly on top of the stamped and colored tulips. But when I watercolored the cast shadow, it was a mess. (I’ve subsequently practiced painting cast shadow bases!)

The dry-embossed card base, with the circle cutout, is my design fix for the poorly painted cast shadow. By the way, the Bazzill 100 lb. cardstock is becoming my go-to supply – even dry-embossed and holding the watercolor panels, it’s standing strong.

Supplies:

Paper Smooches: Welcome Spring

Today, I’m sharing a card based on a photo I recently took of the view outside. It was a beautiful day in the Pacific Northwest – the birds were chirping, the sun was out, and the trees were  in bloom (they still are although this tree’s blooms were battered down by some recent rain).

PaperSmoochesSpring

Although I’ve recently been doing a lot of watercoloring, for this card, I stamped and heat embossed patterned paper to capture the spring colors. I stamped the tree pieces and butterflies on a variety of papers until deciding on these colors and patterns.

I dry-embossed the hill, which was cut with the Border die out of Easter Grass cardstock, using the Sizzix Plaid embossing folder to introduce some texture. The Blueprints set has a stitched die with which I cut the blue paper and the green hill at the same time to give a clean finish to the edge.

I’m linking this card up to the current Paper Smooches SPARKS Challenge – “Anything Goes.”

Penny Black: Live for Today

It’s a beautiful day in the Pacific Northwest, and I’m sharing a spring-themed card created with Penny Black supplies.

Penny Black: Live for Today

To begin, I cut a watercolor paper panel and applied Distress Inks to it and then sprayed it with water. After drying it, I added some more ink from my craft sheet. It took several applications of ink and water, followed by drying, to get the panel to my liking. After the panel was dry, I stamped it with the Penny Black Star Ivy [#40-310] background stamp from the brand-new Bloom release and heat-embossed it with white powder.

I stamped and heat embossed one of the sentiments from Penny Black’s Life’s Messages [#40-237] set. I’m particularly fond of the messages on this image.

I cut the bird and branch out of watercolor paper with the Perched [#51-031] die cut. In the same manner as I did for the panel, I applied Distress Inks, sprayed it with water and dried it. I finished everything off with a piece of May Arts twine.