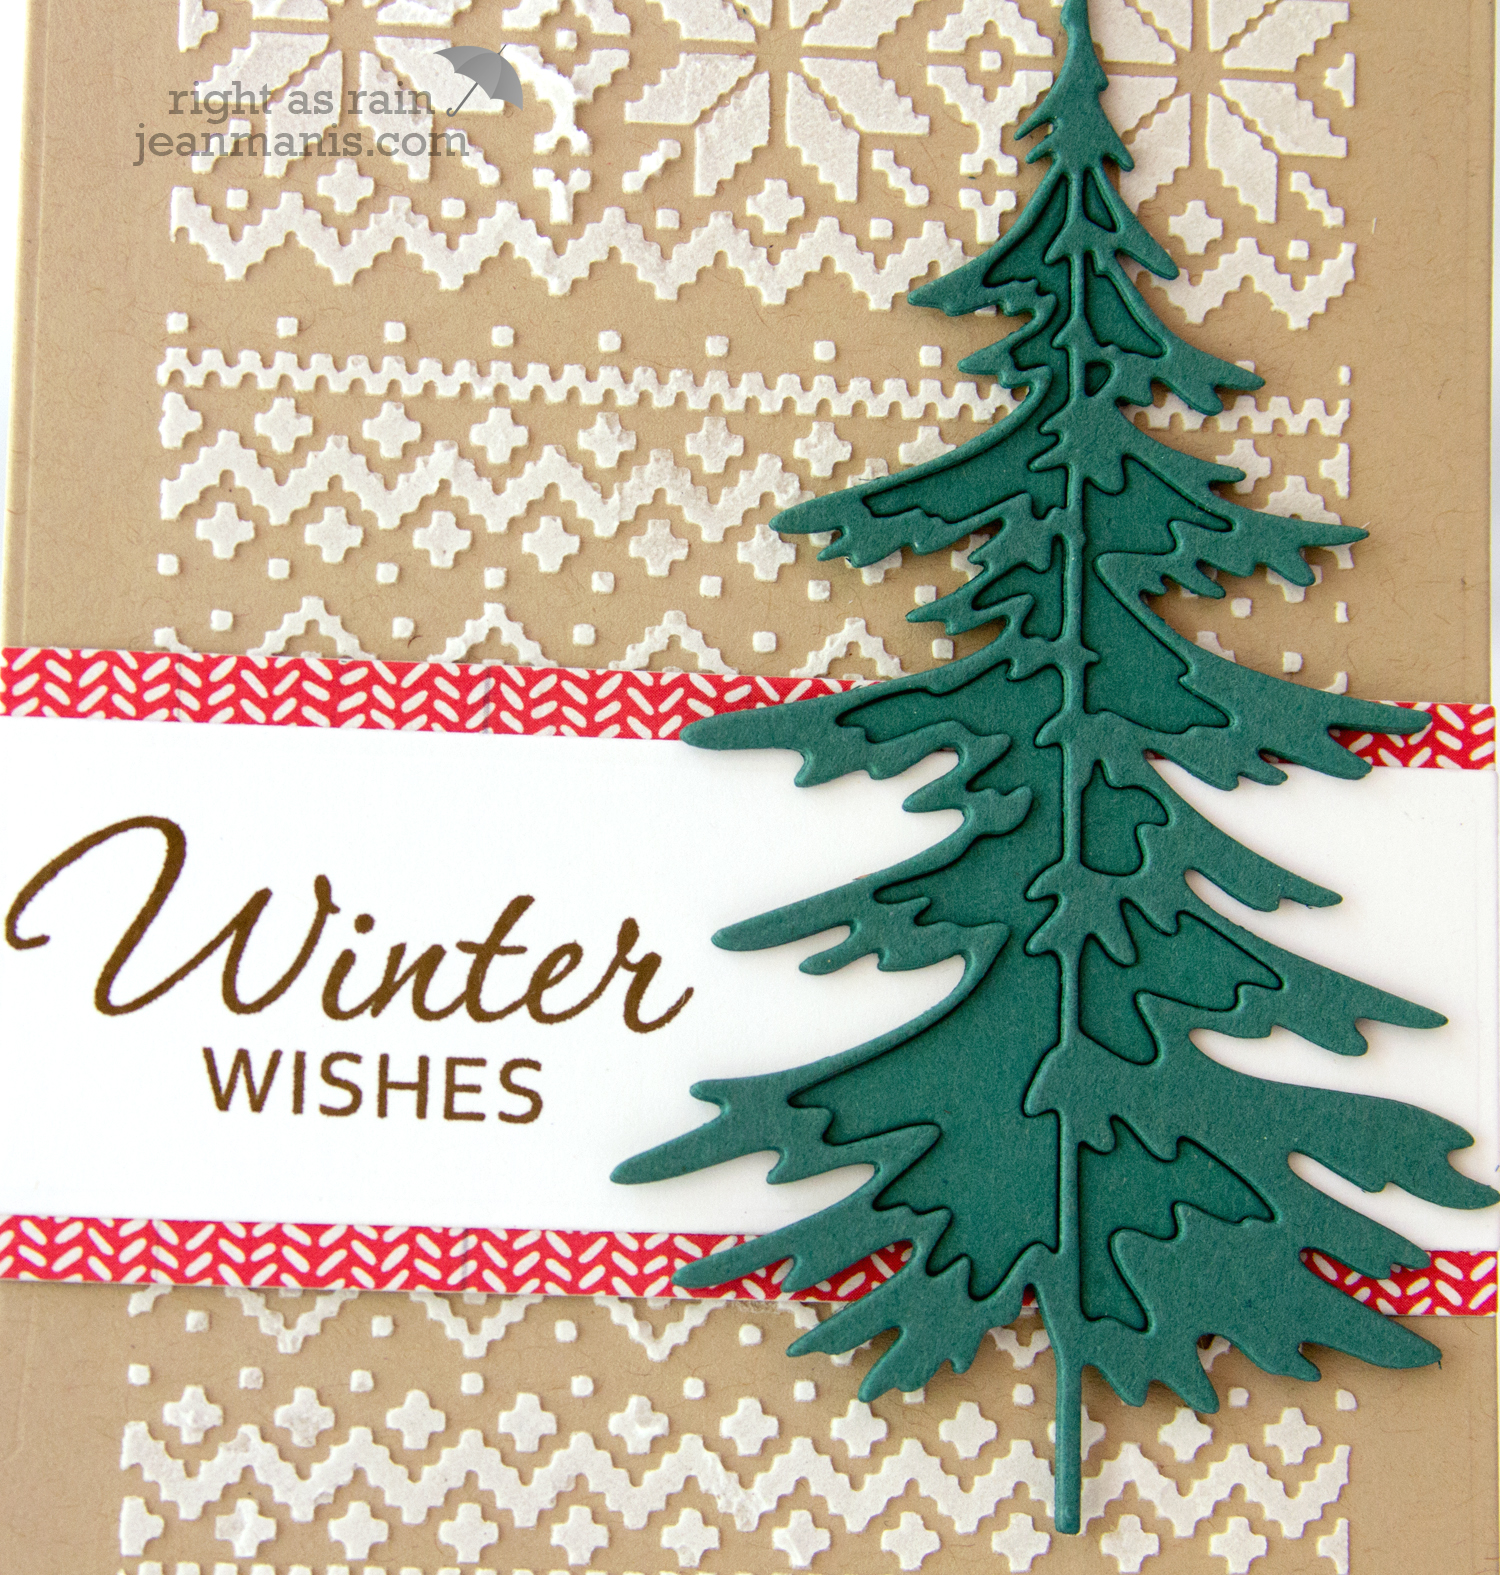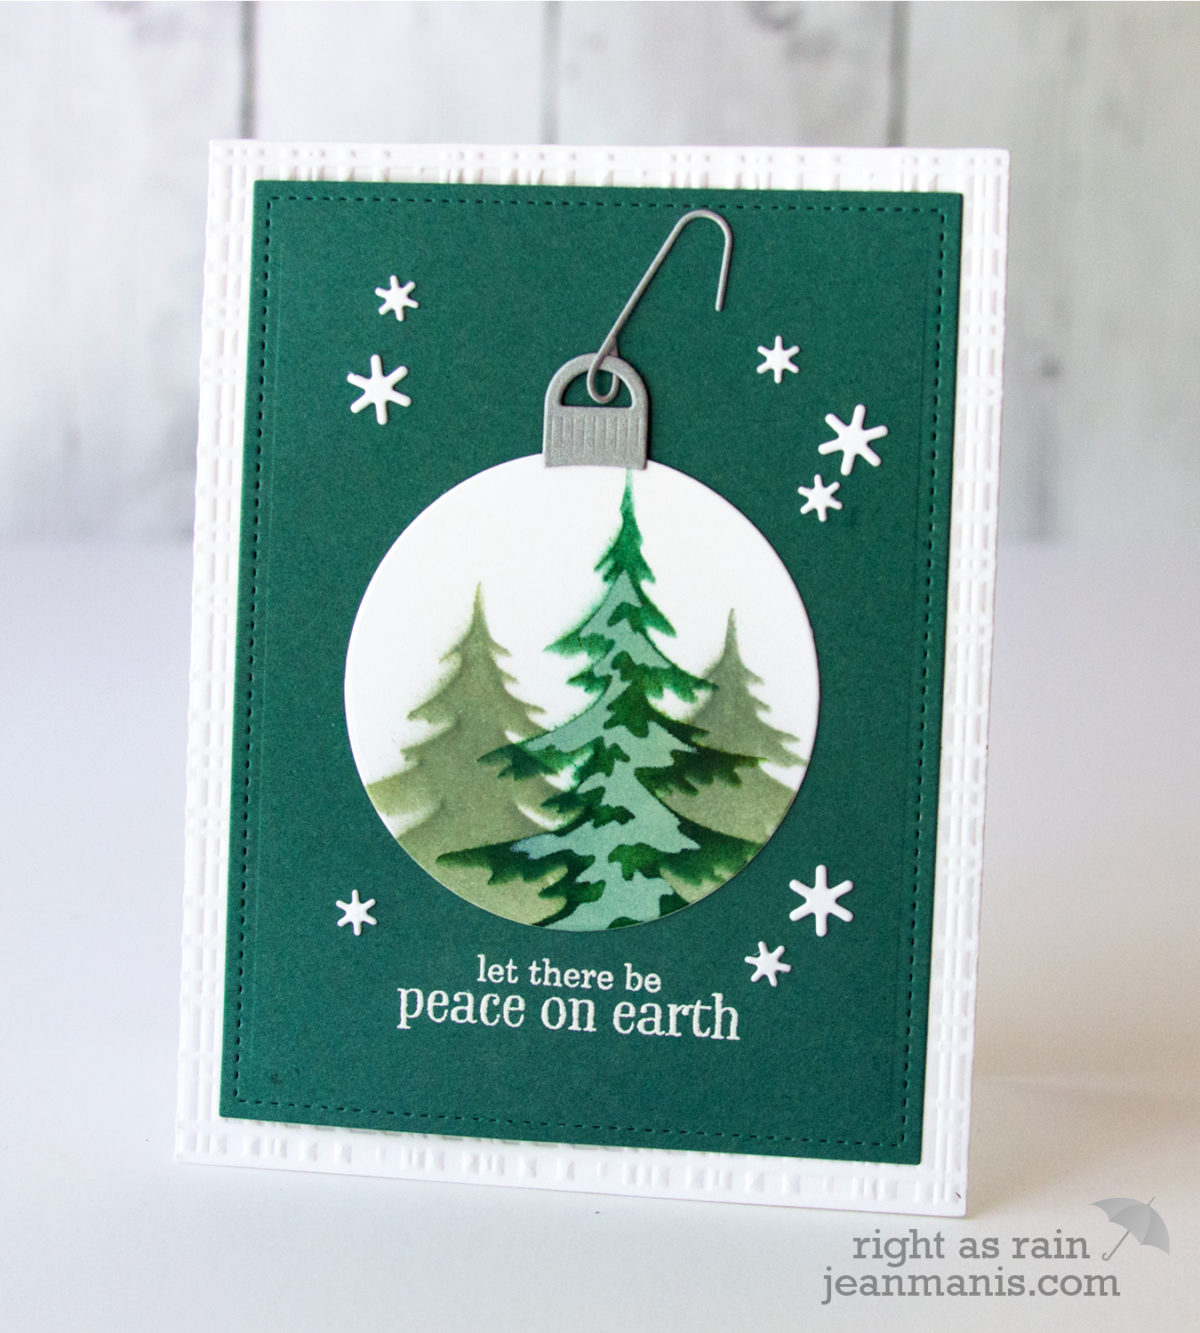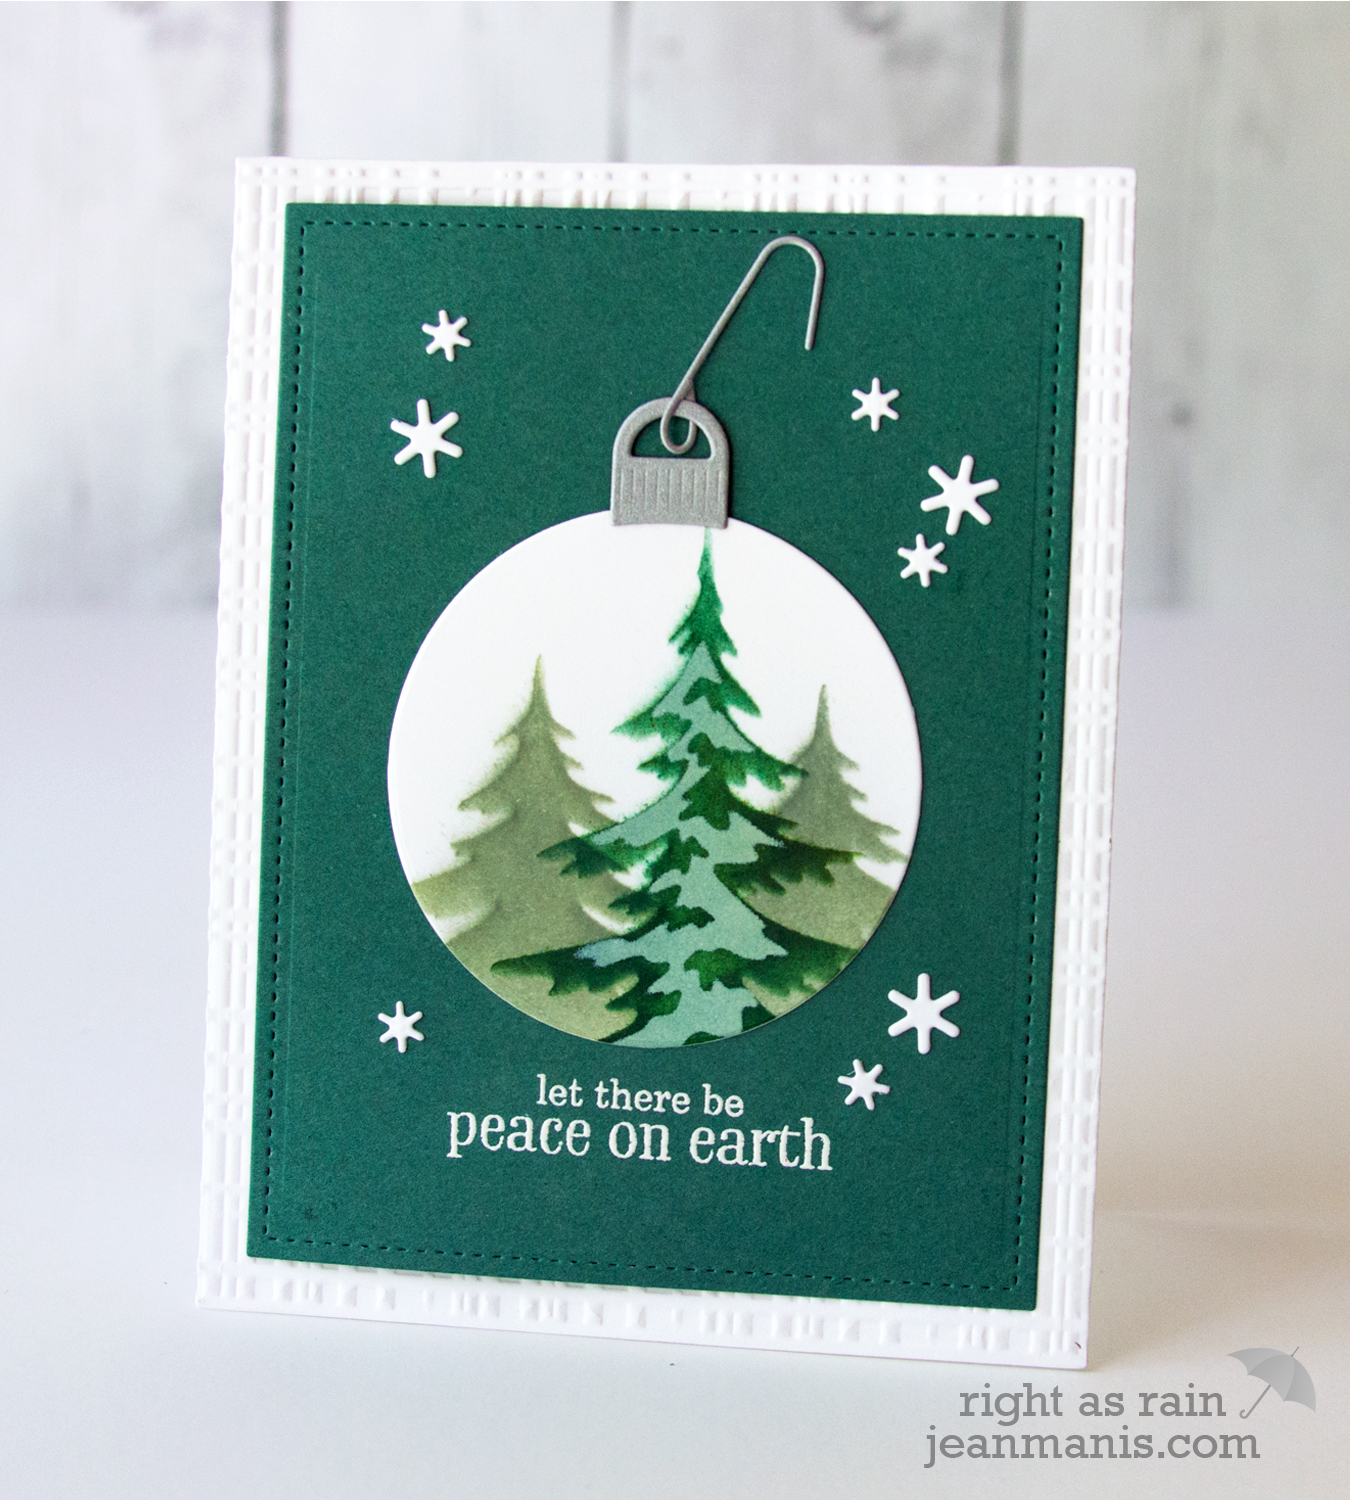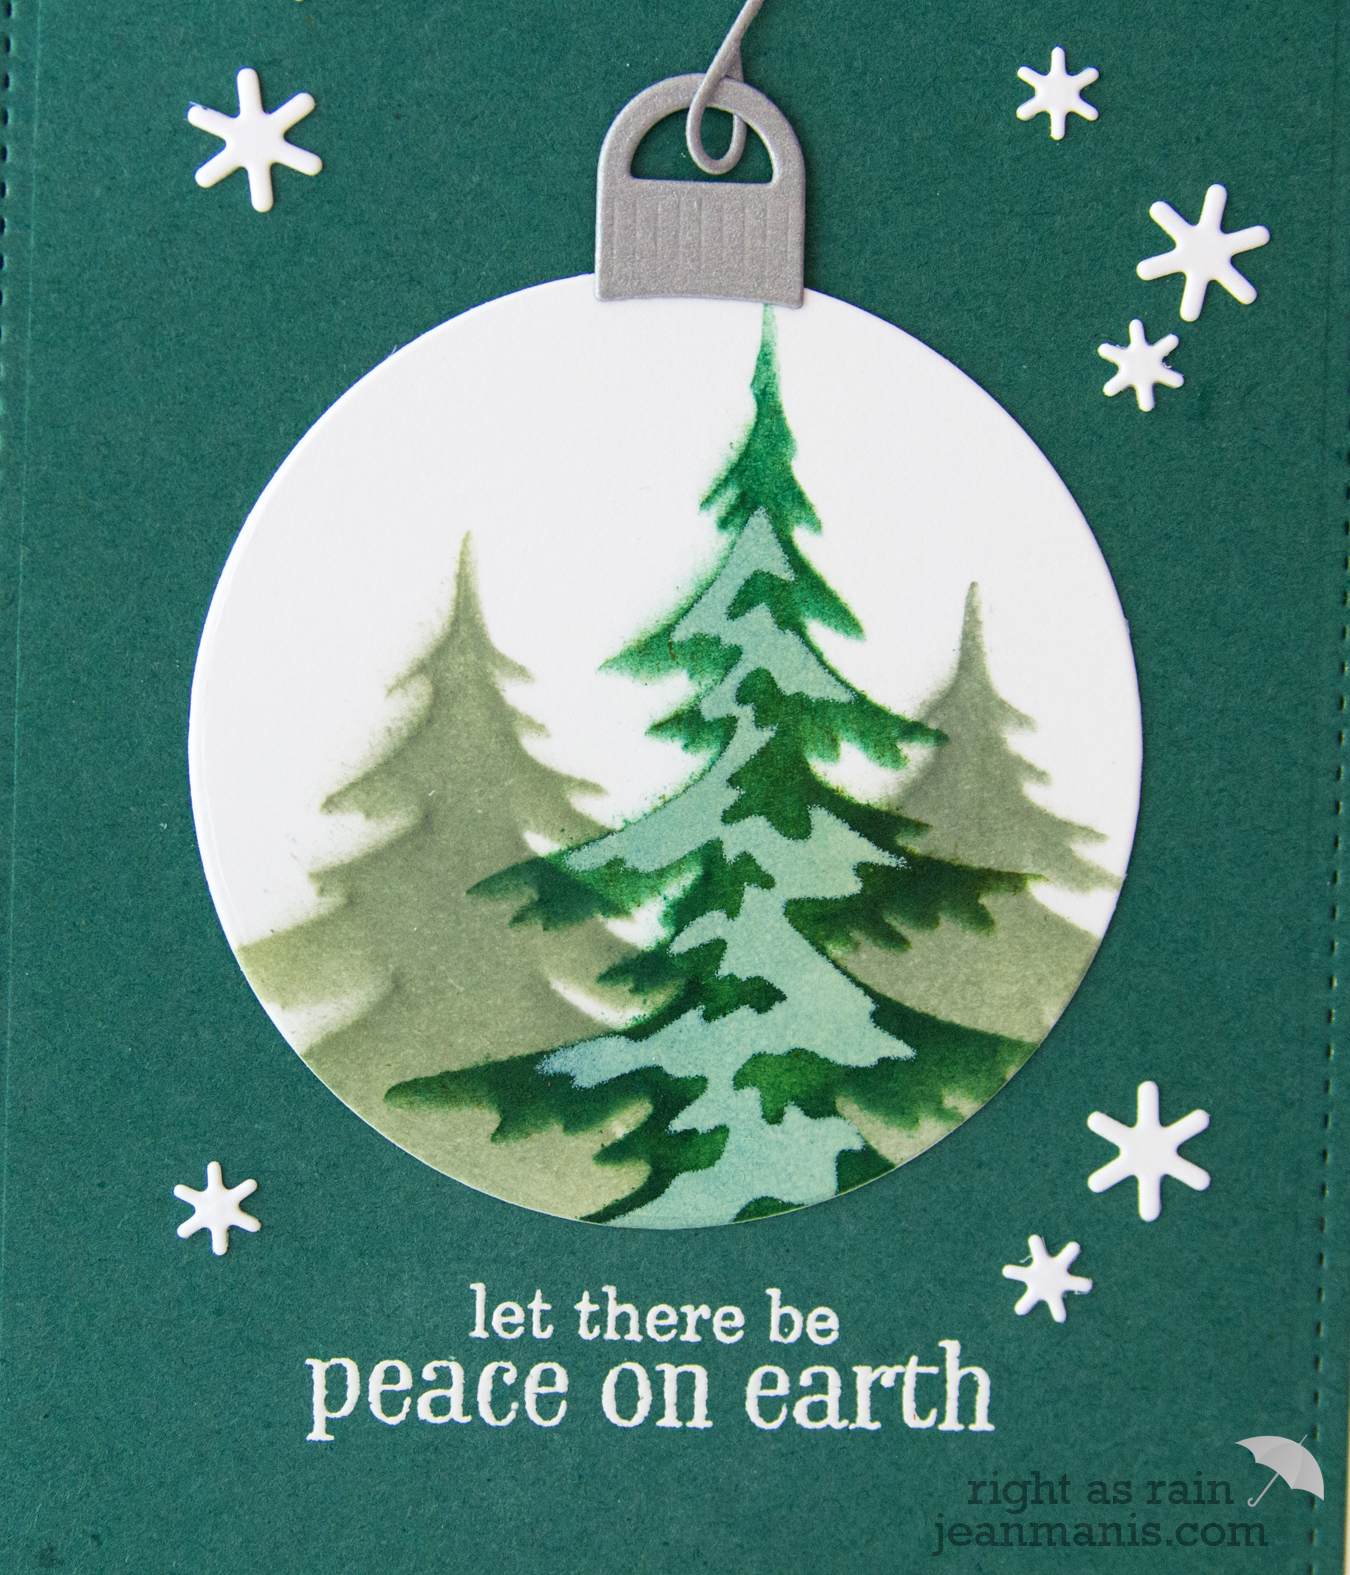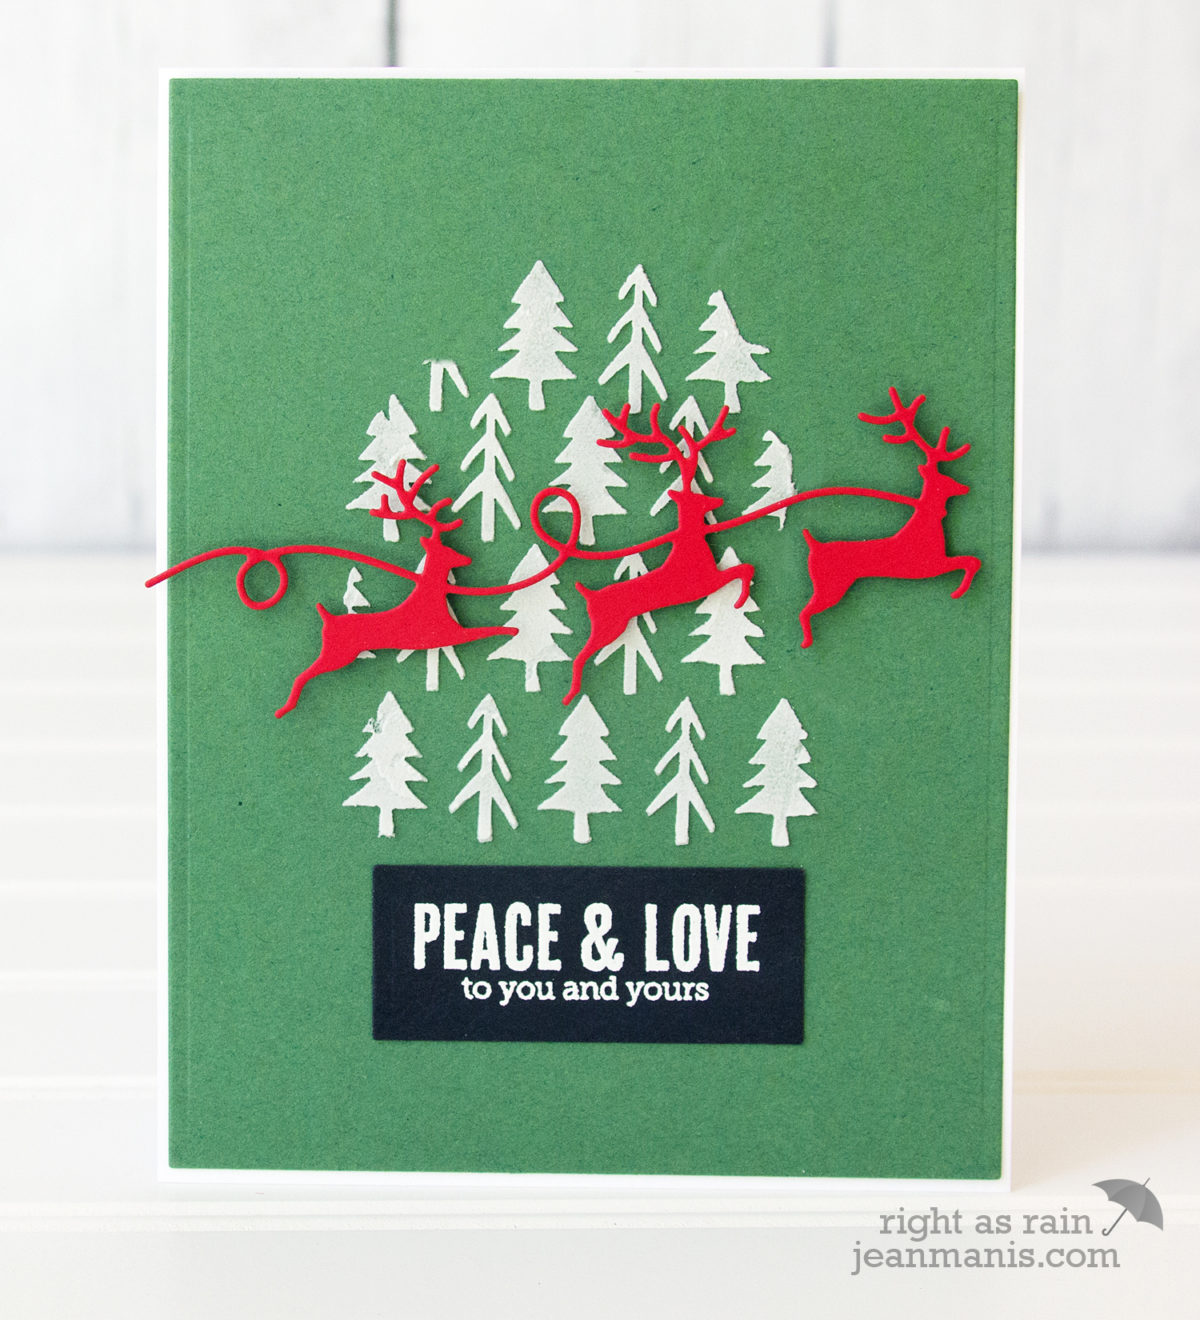
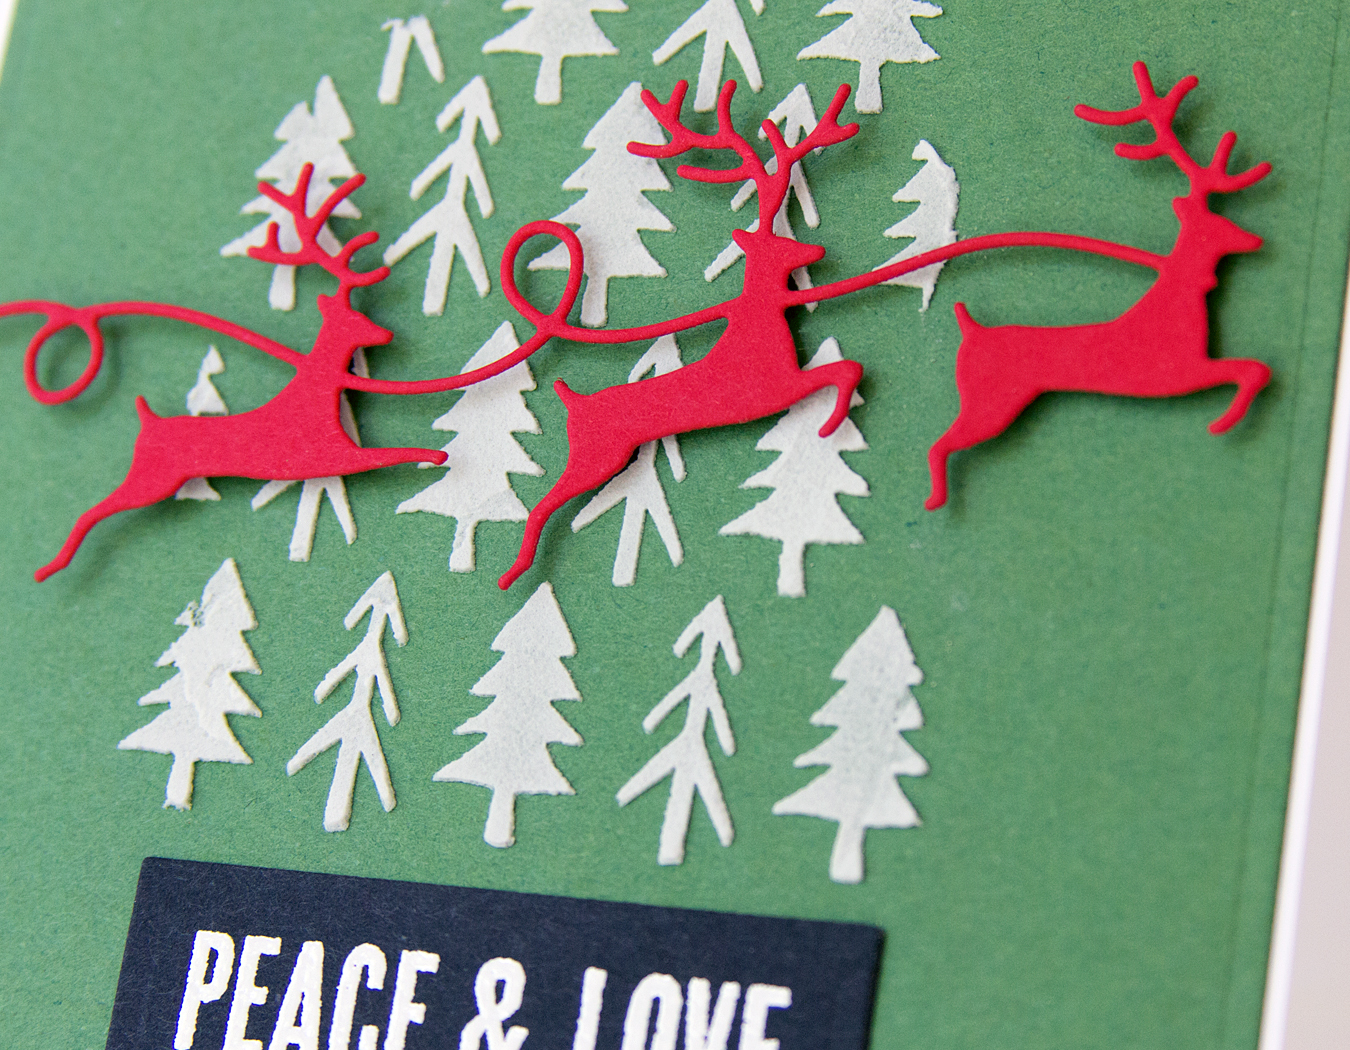
Hello! Today, I am sharing a CAS holiday card showcasing the Memory Box Reindeer Parade die.
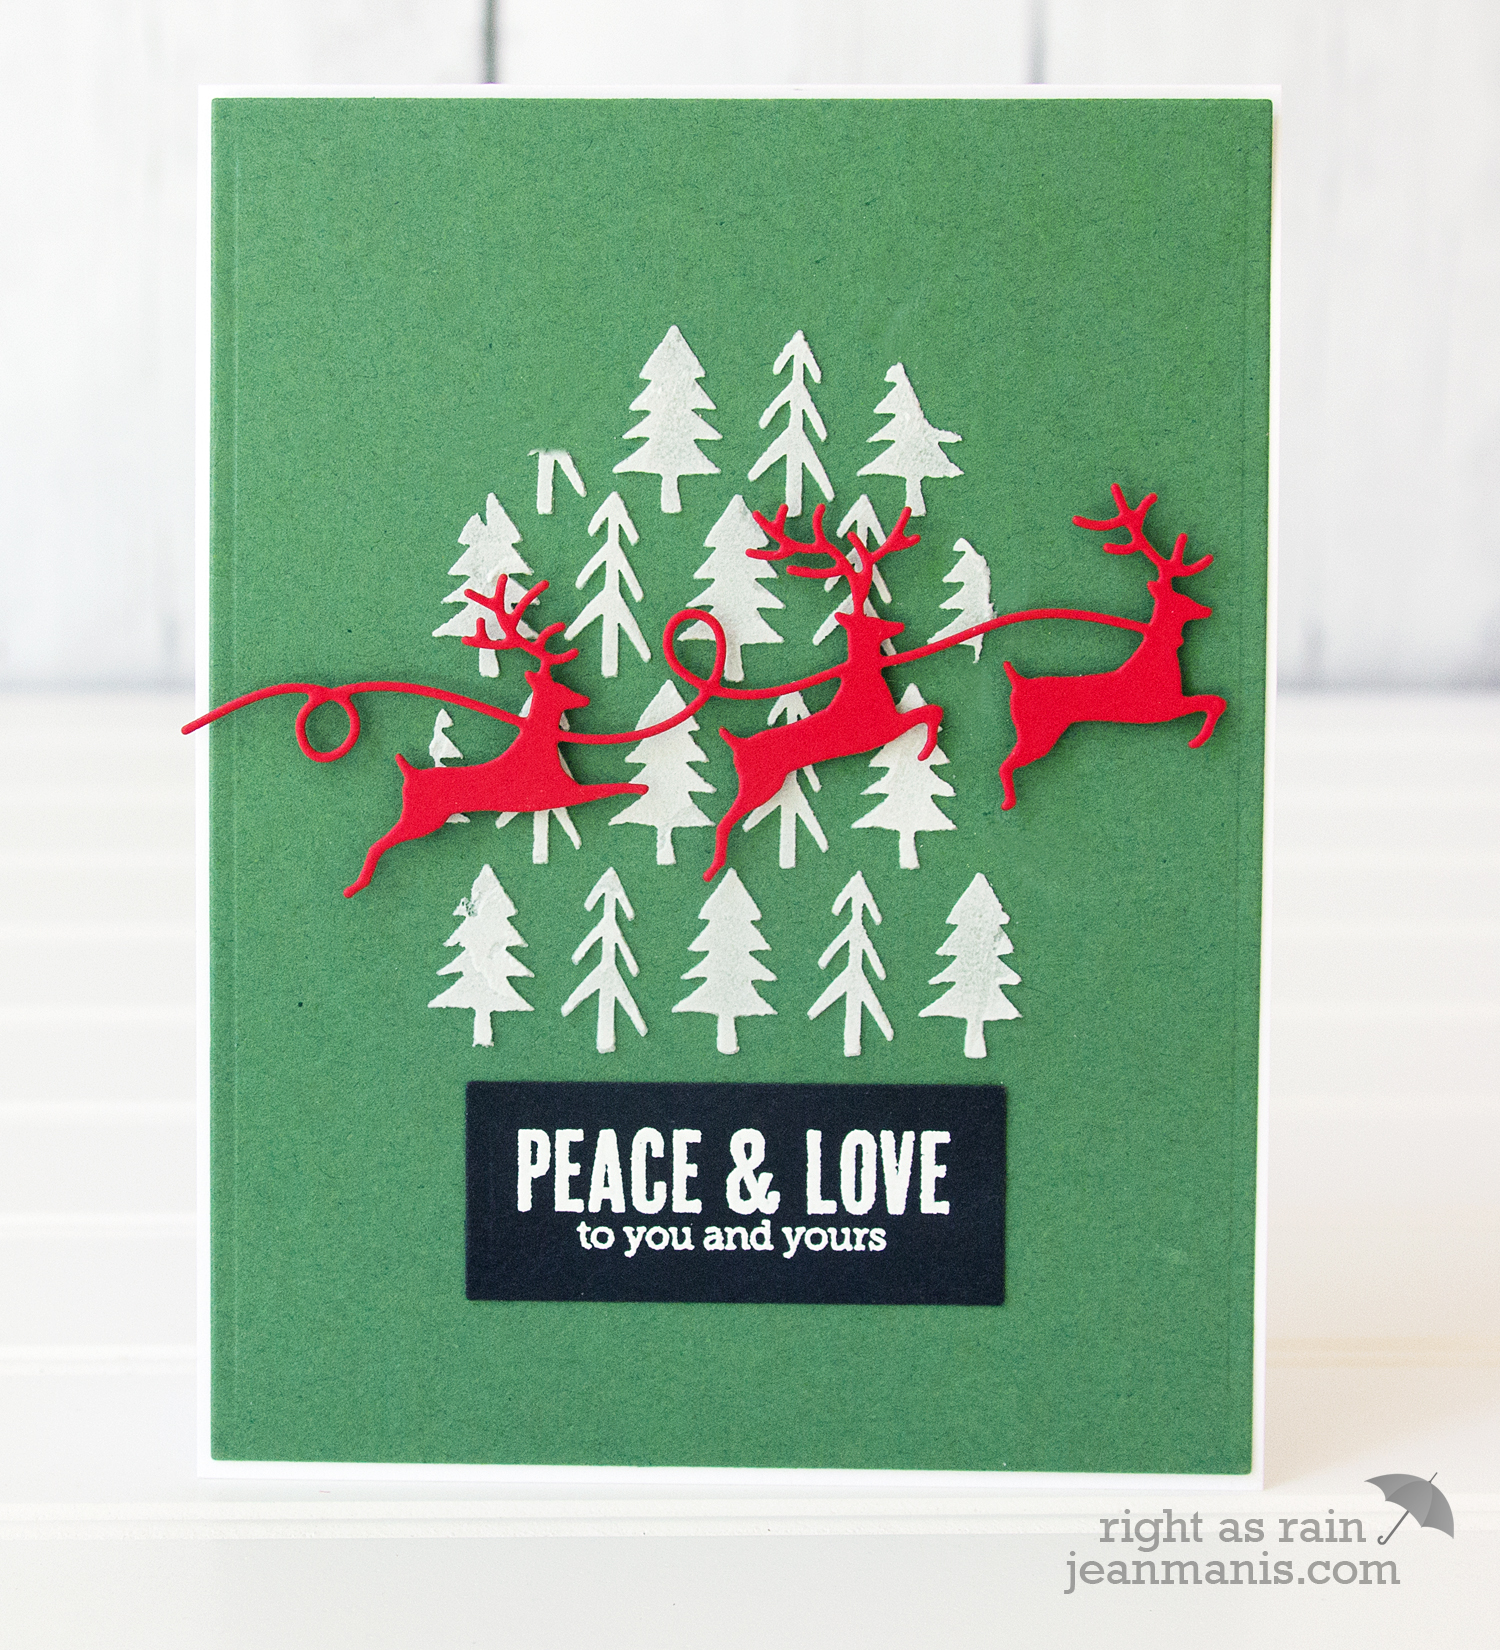
I played around with this design for awhile, and in the end, I partially embossed the Tim Holtz trees stencil (included in the Mini Stencils Set 32). Other ideas included stenciling a die-cut circle or rectangle, but I wanted the trees to be more organic. To simplify the construction of the card, I separately heat-embossed the Christmas Messages sentiment on a die-cut rectangle.
Supplies: