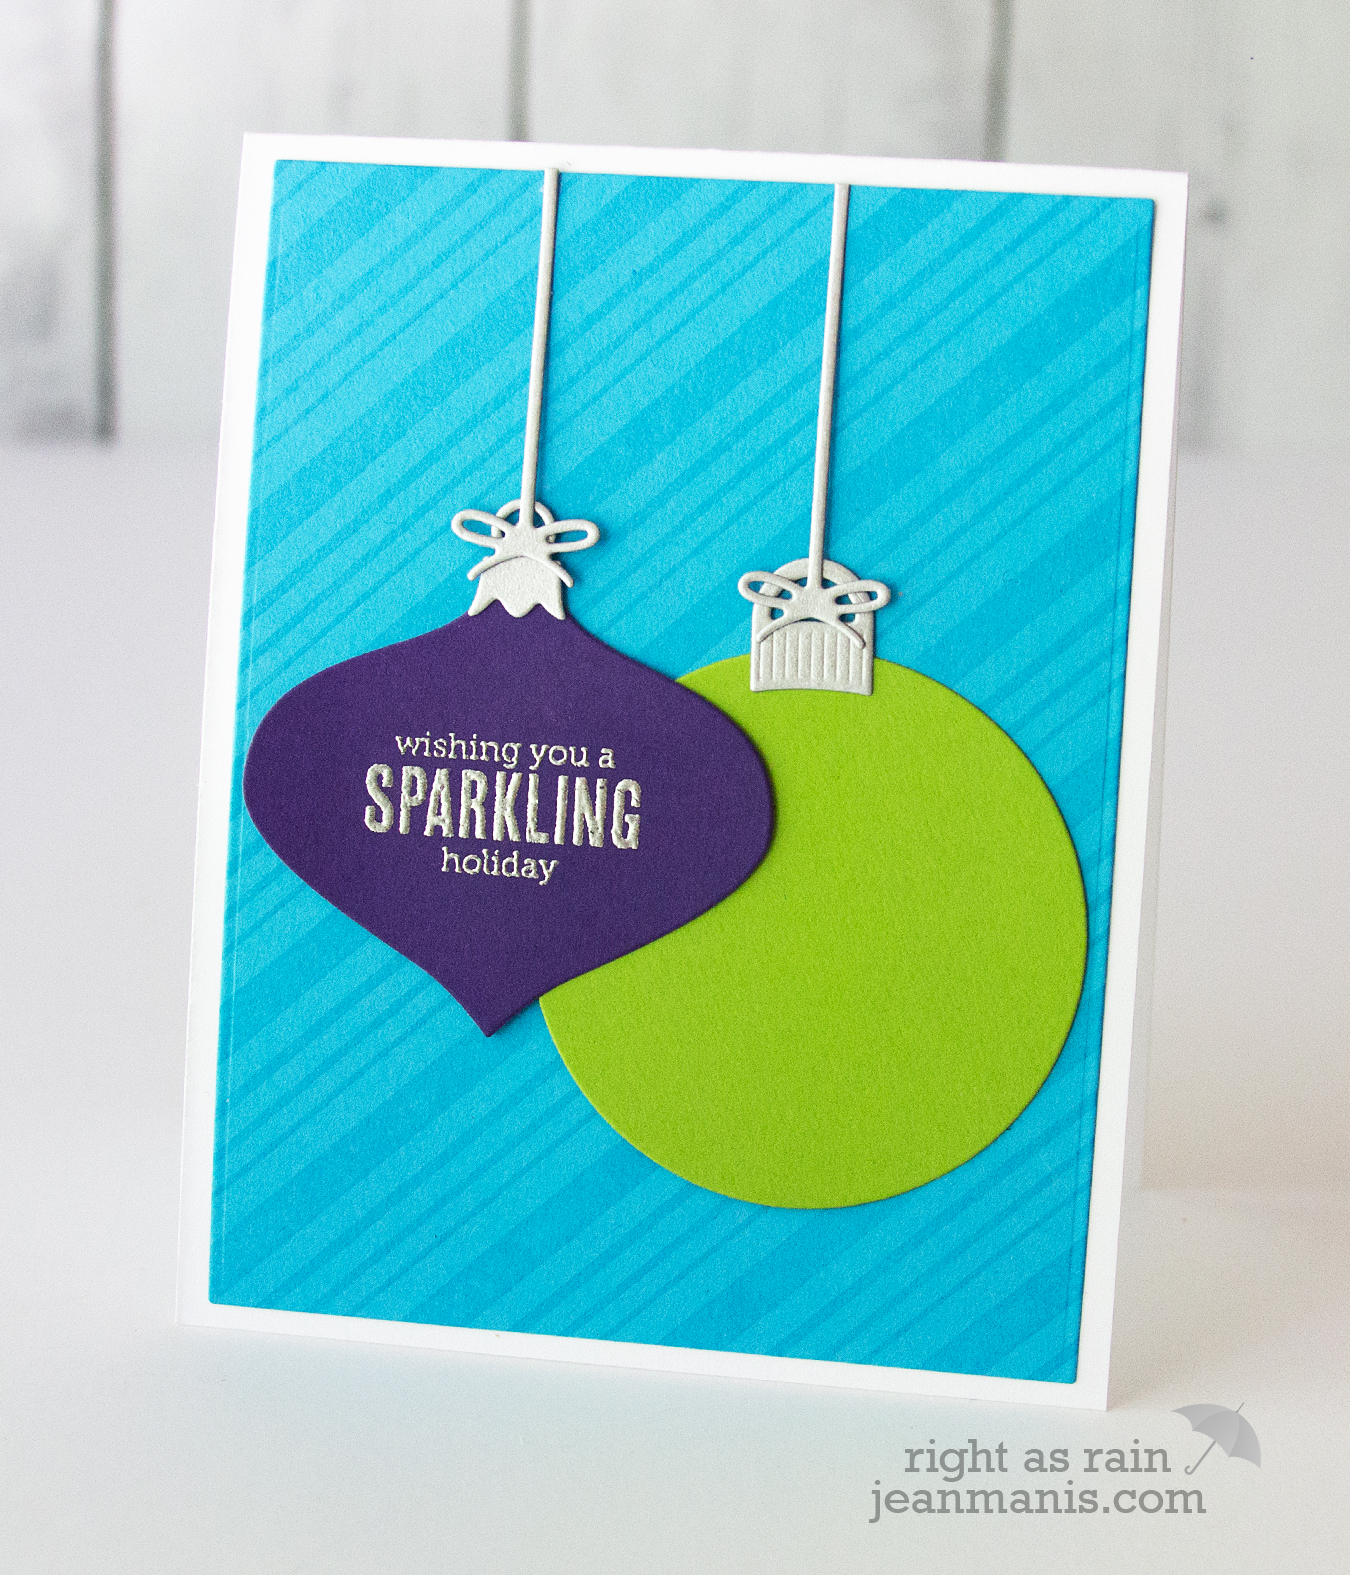
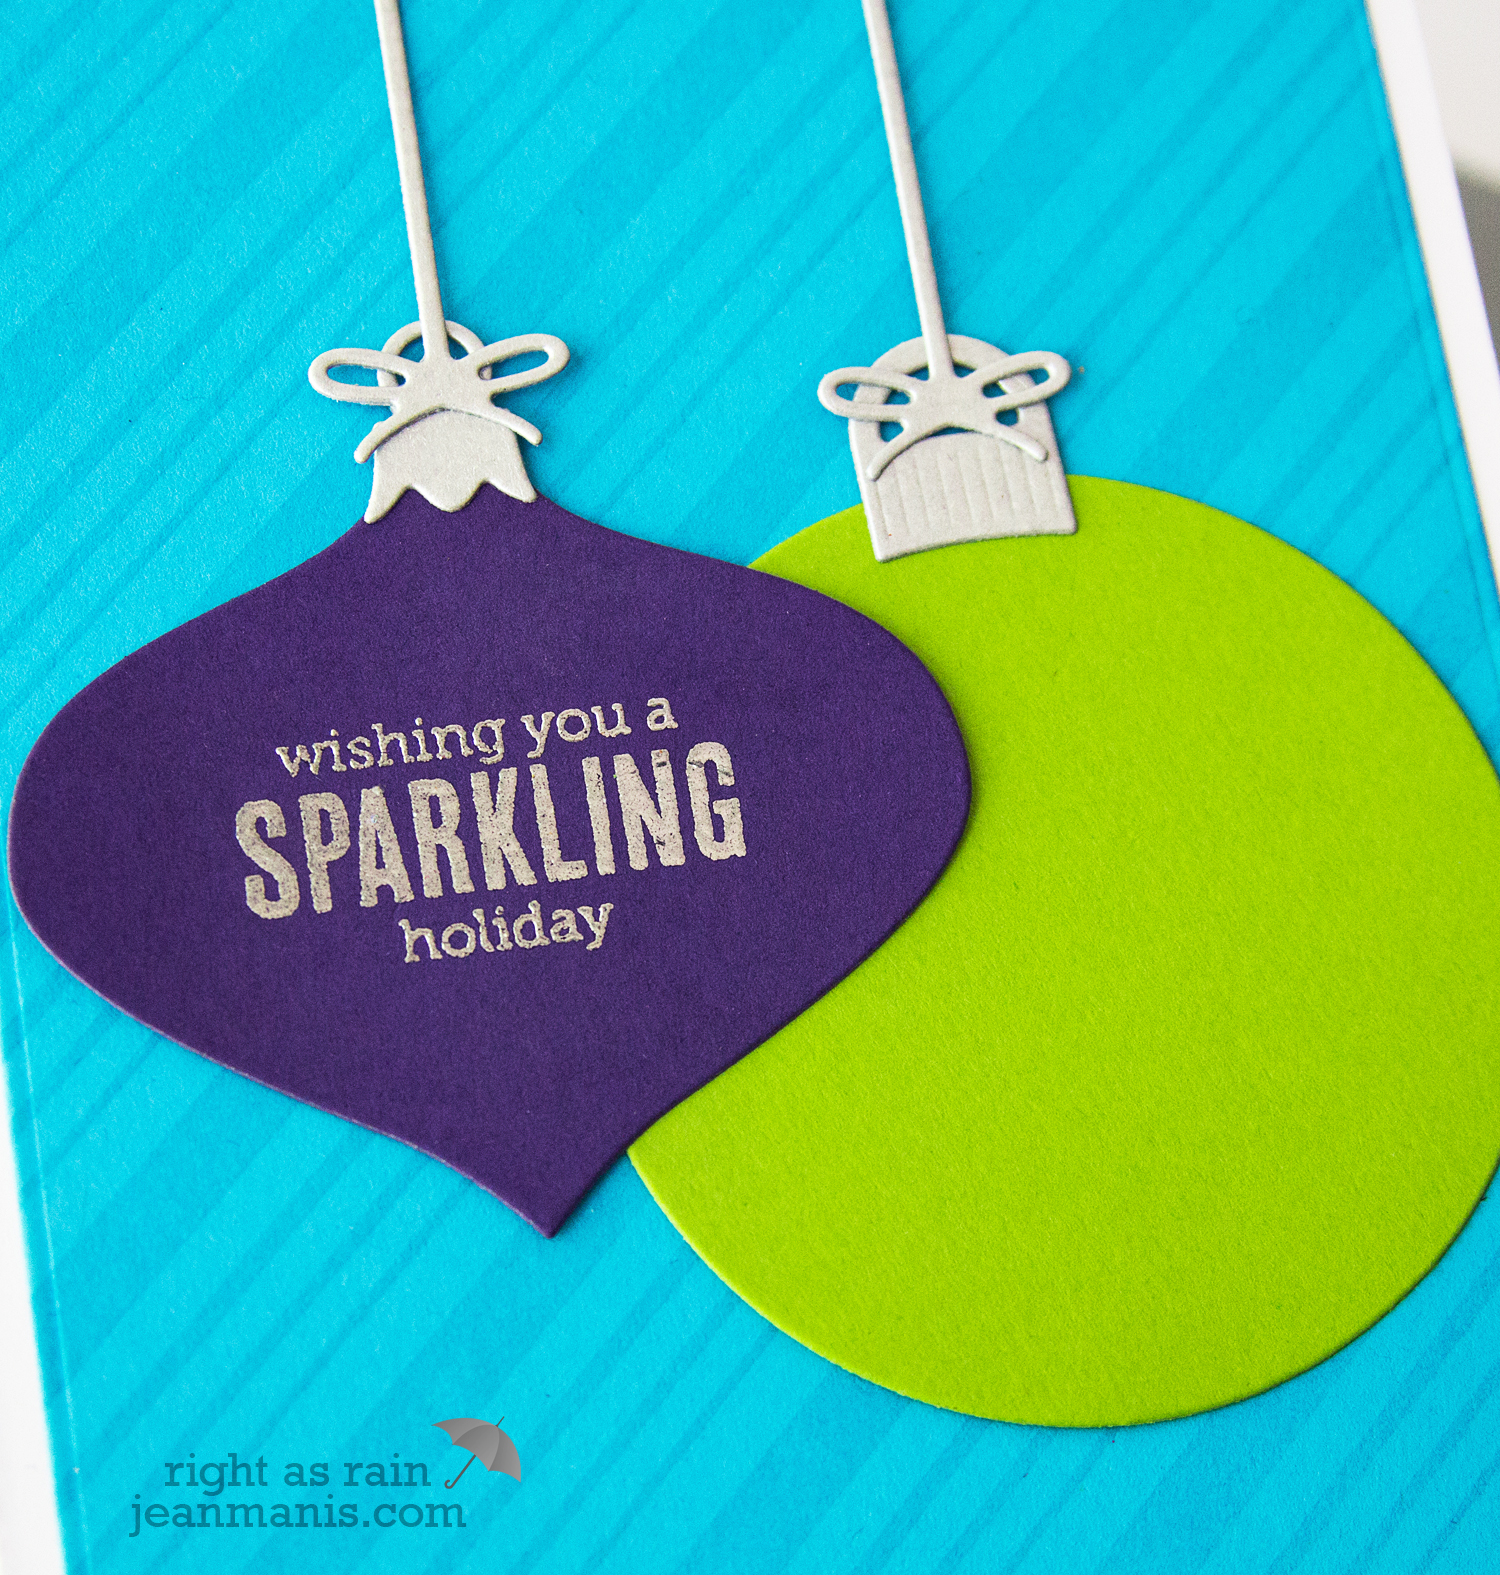
CAS3: You Make Me Happy!

Today, I’m sharing a CASE of a card by Tami Hartley from the Online Card Classes CAS3 class. I’m still in the process of going back through the class  material trying designs and techniques I missed. There’s so much information and inspiration packed into these classes!

Happy

Tami’s card was a single layer crafted on cardstock. I made a few modifications, creating my panel out of watercolor paper and adhering it to a cardstock base. The background was created with a combination of inks, both Hero Arts and Distress. The Hero Arts inks do not move a lot on watercolor paper. After applying the Hero Arts inks, I filled in with a wash of the Distress Inks. Once the panel was dry, I stamped the Penny Black Dots in Space with Mint Julep ink and then stamped the Raindrops in Pool. Next, I applied some Picket Fence paint to the area where I was planning to stamp the sentiment. I used my finger to fade out the white paint. Once that I was dry, I stamped the sentiment from On Fun. I’m looking forward to creating more watercolor backgrounds, testing the Hero Arts inks on different papers, and layering background stamps.

Supplies:

CAS3: Day Nine

I took the day off yesterday from the Clean & Simple Cardmaking 3 class. Well, technically, I tried a few things that didn’t work out the way I’d planned. One of those “fails” is incorporated into today’s card, which is based on the one shared in class by Debby Hughes.

CAS3: Day NineI made a few changes with the way I created my card. Rather than stamp and color a butterfly, as Debby did, I die cut a butterfly (Memory Box Vivienne Butterfly) that I inlaid into the panel. I backed the front panel with a heat-embossed and watercolored panel using the Penny Black Sweetness stamp (that was a project from yesterday which didn’t go according to plan). The butterfly was also cut from watercolor paper onto which I had scribbled some Distress ink. The front panel was stamped with a sentiment from the Hero Arts “Enjoy Today” set. I adding embossing paste with a Simon Says Stamp stencil.

I made the white panel three times. The first time I added some spray drops, as Debby did, and I didn’t like the effect at all. The second time, I got embossing paste in places I didn’t want! Third time’s a charm I guess!

CAS 3: Day Five

Okay, confession time – this isn’t a single layer card! I decided that I’d “cheat” a bit today to get the technique, shown by Jennifer McGuire in today’s Clean & Simple Cardmaking 3 lesson, under my belt without all of the work.

DayFive

I cut the panel out of Distress Watercolor paper, heat embossed the sentiment (from the Hero Arts Fancy Basics set) and then applied Salty Ocean and Peacock Feathers Distress Inks with a brush. As instructed, I ironed the sentiment to remove the embossing when the panel was dry. I added some stitching to the panel with Lil’ Inker dies to give it a more finished look. Unfortunately, because the watercolor paper is thicker than cardstock, you can really see the lines from the edge of the die. I’d have to redo my embossing sandwich in order to eliminate those lines. Live and Learn!

I applied the watercolor panel to a panel that was heat-embossed using the Hero Arts Five-Line background stamp. I wanted a little texture for that base panel.


CAS3: Day Two

In today’s Clean & Simple Cardmaking 3 lesson, we received more wonderful inspiration using the techniques shown yesterday. I CASEd Heather Campbell‘s card, again using the inlaid die cut technique.

DayTwo

The Thanks die is from Paper Smooches, and the hexagon die is from a Hero Arts set. I really like this technique, although I do find it to be challenging!

Card Concept Challenge #4

I’m playing along with the Card Concept Challenge – Use a Floral Theme with a CAS card. I was inspired by the coral color in the inspiration image, as well as the floral motif.

CardConcept4

I colored watercolor paper with three colors of Distress Ink. I simply smooshed the ink onto my craft sheet and lifted the color with a brush that I had dipped in water. (I tried this technique on cardstock and it did not work nearly as well as with the watercolor paper!) After the paper dried, I stamped the Blooming Meadow stamp with Versamark ink and heat set it with white embossing powder. I added a sentiment heat embossed with gold powder on vellum and attached the panel to a kraft card base.

Supplies: