I’m sharing a card created with one of the techniques shown in the Day One lesson of the Online Card Classes Background Check class.
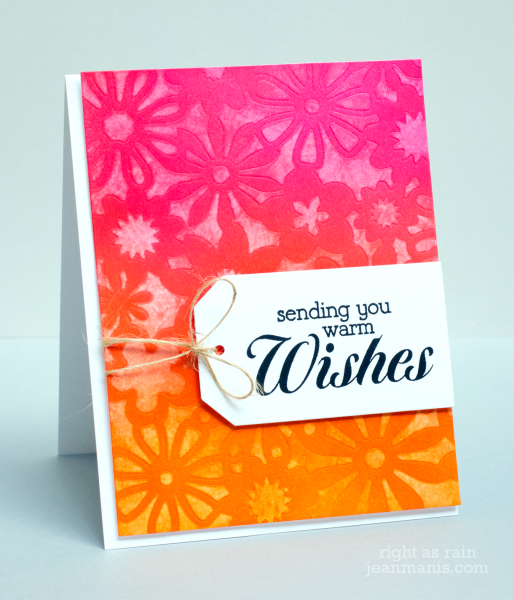
I inked the cardstock panel with three Distress Inks, ran it through the Big Shot with the My Favorite Things stencil (adding some dimension) and then dabbed at the open areas of the stencil with a baby wipe to life off some of the ink. The card design is based on one used by Jennifer Rzasa in an earlier Online Card Classes course.
Supplies: Hero Arts sentiment from a retired set