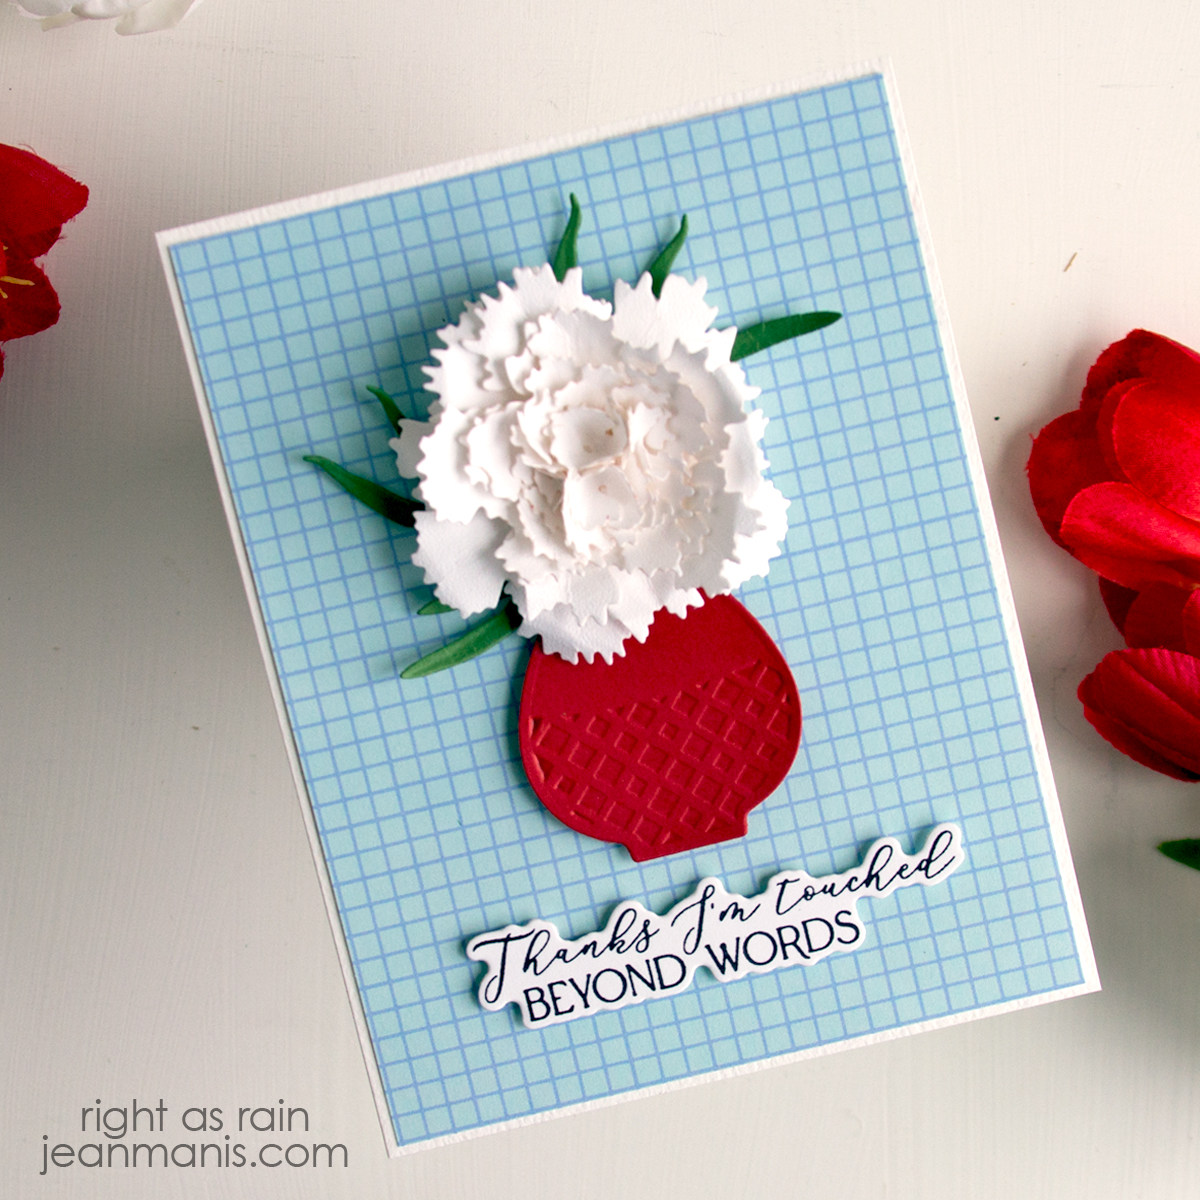
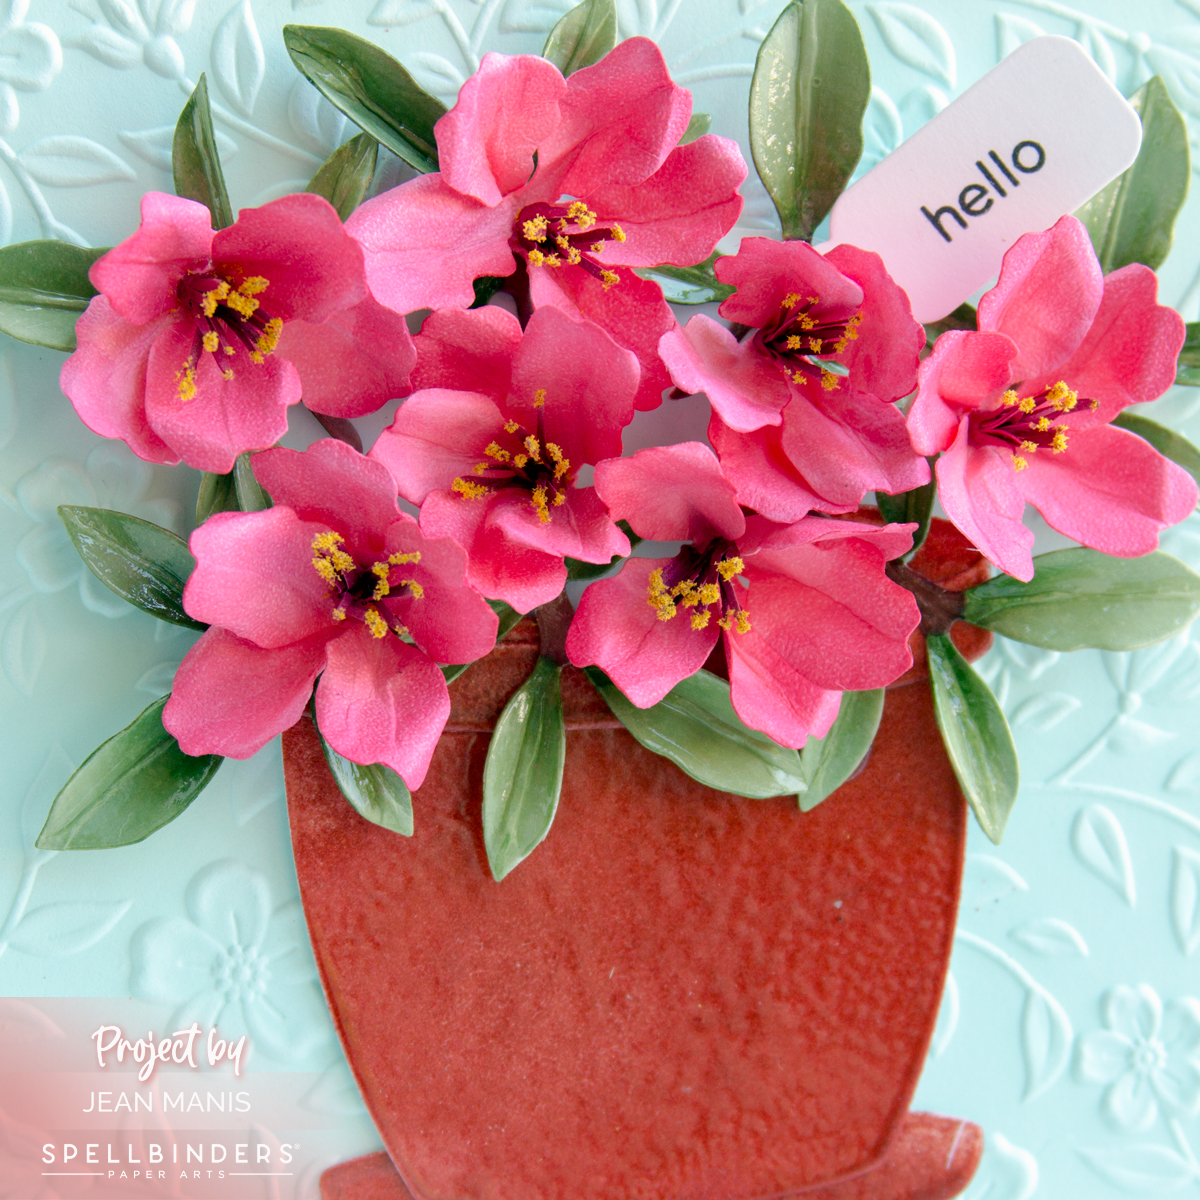
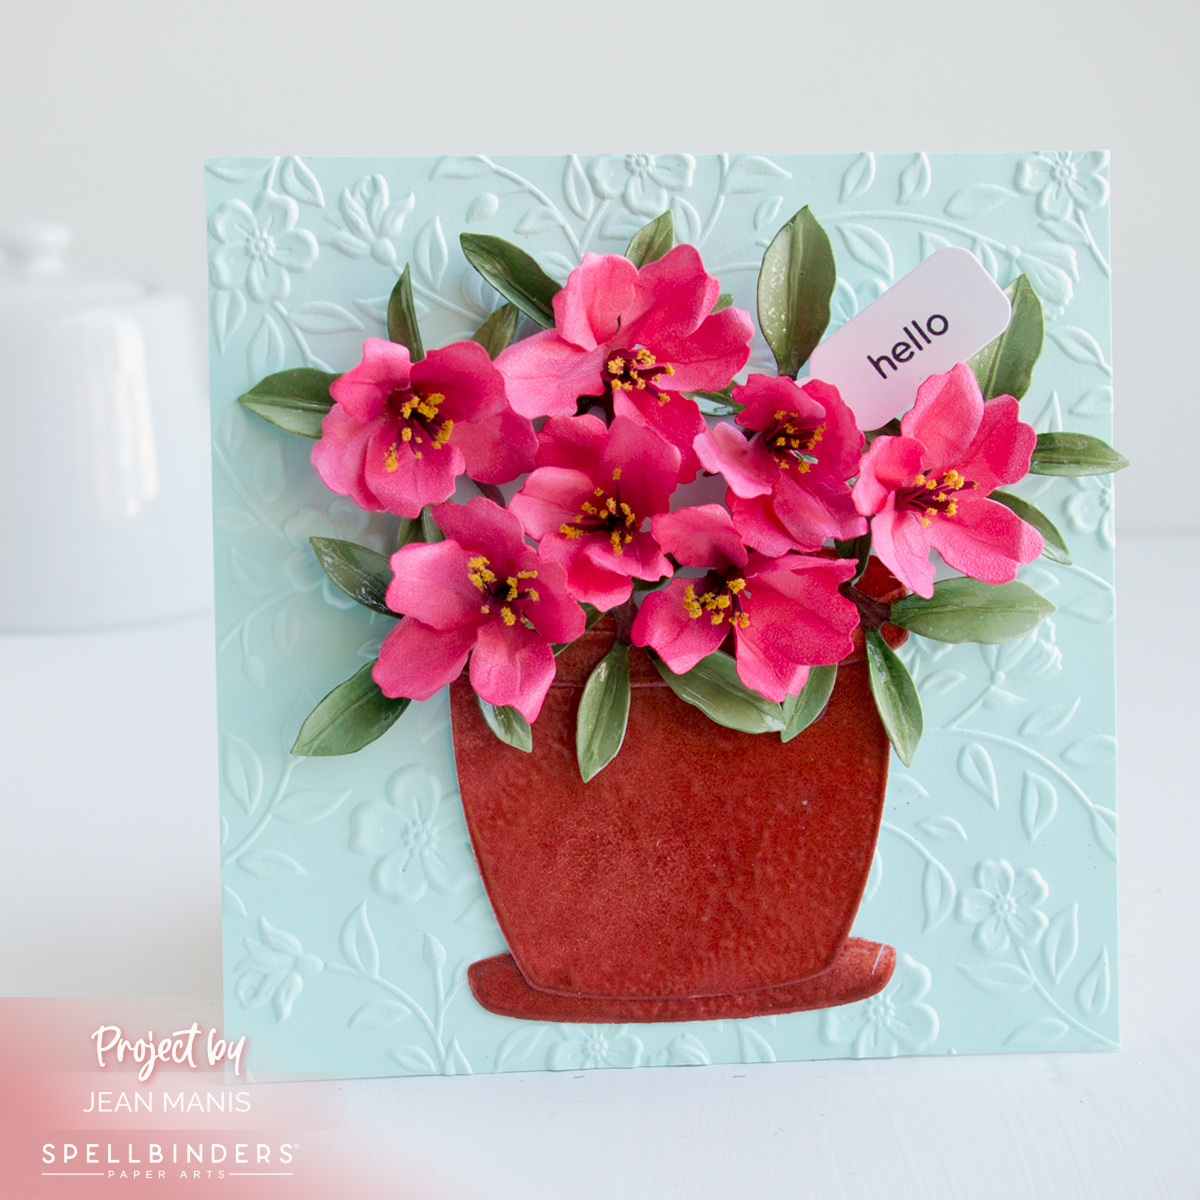
Hello! Today, I’m excited to share a card that captures the beauty of azaleas nestled in a charming garden pot. Following Susan Tierney-Cockburn’s step-by-step video, I was able to assemble the azaleas and pot, available as a set at Spellbinders. This project was a delightful learning experience.
-
- As explained in the video, with dies in the Azalea and Garden Pot set, cut the leaves from watercolor cardstock. To color the leaves, I used Copics E27, YG63, and YG67. Form the leaves with Susan’s tools and then paint on glaze. Set aside to dry. I don’t know what brand glaze Susan used on hers; I used JudiKins Diamond Glaze.
- With dies in the Azalea and Garden Pot set, cut the petals and stamens from Susan’s Garden Specialty Cardstock and color. To color, I used Copics RV23, RV25, and R39. Following Susan’s directions, I cut the stamens, glued them, and added pollen. I formed the flowers with tools in the kit and then glued the petals and stamens.
- With dies in the Azalea and Garden Pot set, cut the pot from Classic White cardstock and color by heat-embossing Fired Brick Distress Embossing Glaze. I added several coats. Assemble pot.
- Dry-emboss a 5 1/2″ square panel of Seaside cardstock with the Flowers and Foliage folder and add to a card base.
- Stamp the sentiment on Classic White cardstock and cut with a die in the Assorted Tags set, masking the “there” so that only “hello” is stamped.
- Add the pot, leaves, and flowers to the prepared card base. Tuck the sentiment tag into the finished arrangement.

While there are numerous steps involved in creating this card, Susan Tierney-Cockburn’s tutorial breaks down the process into manageable parts, making it achievable even for beginners like me.