Let It Snow – CAS Die-cut Winter Card

Hello! Today, I am sharing a CAS winter-themed card featuring the Elizabeth Crafts Skis die-cuts. I am transitioning from Christmas cards to winter-themed ones (I like many holiday cards so much, it is a tough transition!).

CAS Winter-themed Die-cut Card

I created the background with the Taylored Expressions Buffalo Plaid Background stamp. I used the Impression Obsession Fir Tree Border for a layer between the base and the stamped ski slope. The sentiment is from an older Hero Arts set.

Spellbinders – Great, Big, Wonderful World by Sharyn Sowell

Hello! Ready for some happy cardmaking inspiration? Spellbinders has recently introduced the Great, Big, Wonderful World Collection by Sharyn Sowell. This collection is all about friendship and connection. The products  could be used to create cards and project for a variety of occasions including (but not limited to) Valentine’s Day.

Spellbinders - Great, Big, Wonderful World by Sharyn Sowell

I created four cards of similar design with the collection. My cards use the Peaceful Garden and Love & Flowers die sets, as well as sentiments from the Fun Stampers Journey Chosen Family stamp set, cut with the corresponding die set.

Spellbinders - Great, Big, Wonderful World by Sharyn Sowell

Spellbinders - Great, Big, Wonderful World by Sharyn Sowell

  • I die cut the silhouette images from both white and black cardstock. In all cases, I cut two silhouettes and adhered them together to add depth.
  • I combined patterned papers in spring colors for the card backgrounds. (Without thinking about it, I ended up pairing pink with blue and yellow with blue.) I stitched the patterned paper to the card bases. On the Love & Flower card, I added ribbon since more of the transition between the two patterned papers was visible, given the narrower silhouette.
  • I white heat-embossed the Chosen Family stamp set sentiments on black cardstock and stamped the sentiments in black ink on white cardstock. I cut the sentiments with their corresponding dies.
  • I adhered the silhouette images to the card bases and popped up the sentiments with foam adhesive.

Spellbinders - Great, Big, Wonderful World by Sharyn Sowell

Spellbinders - Great, Big, Wonderful World by Sharyn Sowell

Spellbinders - Great, Big, Wonderful World by Sharyn Sowell

Supplies:

Simon Says Stamp – Wrap It Up Challenge Tag

Hello! I couldn’t resist playing along with the Simon Says Stamp challenge with a CAS tag in one of my favorite color combinations – kraft, white, and red – using my favorite papercrafting techniques – diecutting, heat-embossing, and stenciling! The challenge features holiday wrapping projects created with Tim Holtz products. I used Tim Holtz dies, stamps, and stencils on my project. Let’s take a look.

Tim Holtz - SSS Wrap It Up Challenge Tag

    • I started by die-cutting the Santa and Snow Globe with the Tiny Snowglobes set.
    • I assembled the Santa with Nuvo glue. I used a toothpick to apply the glue.
    • I heat-embossed the Festive Overlay sentiment with Red Geranium embossing powder on the Lawn Fawn Kraft cardstock.
    • I cut the cardstock with one of the tag dies in the Tag Collection set.
    • I added embossing paste through the Dot Fade stencil to the globe to simulate snow.
    • While the embossing paste dried, I sponged white pigment ink through the Pine stencil, which is included in the Mini Stencil Set 32.
    • I finished off the tag with Lawn Fawn Peppermint twine (an absolute favorite of mine).

Tim Holtz - SSS Wrap It Up Challenge Tag

Supplies:

Fun Stampers Journey November Bloom Box – Cup of Tea

Hello! Today, I am delighted to share four cards created with the November Bloom Box from Fun Stampers Journey.

Fun Stampers Journey November Bloom Box - Cup of Tea

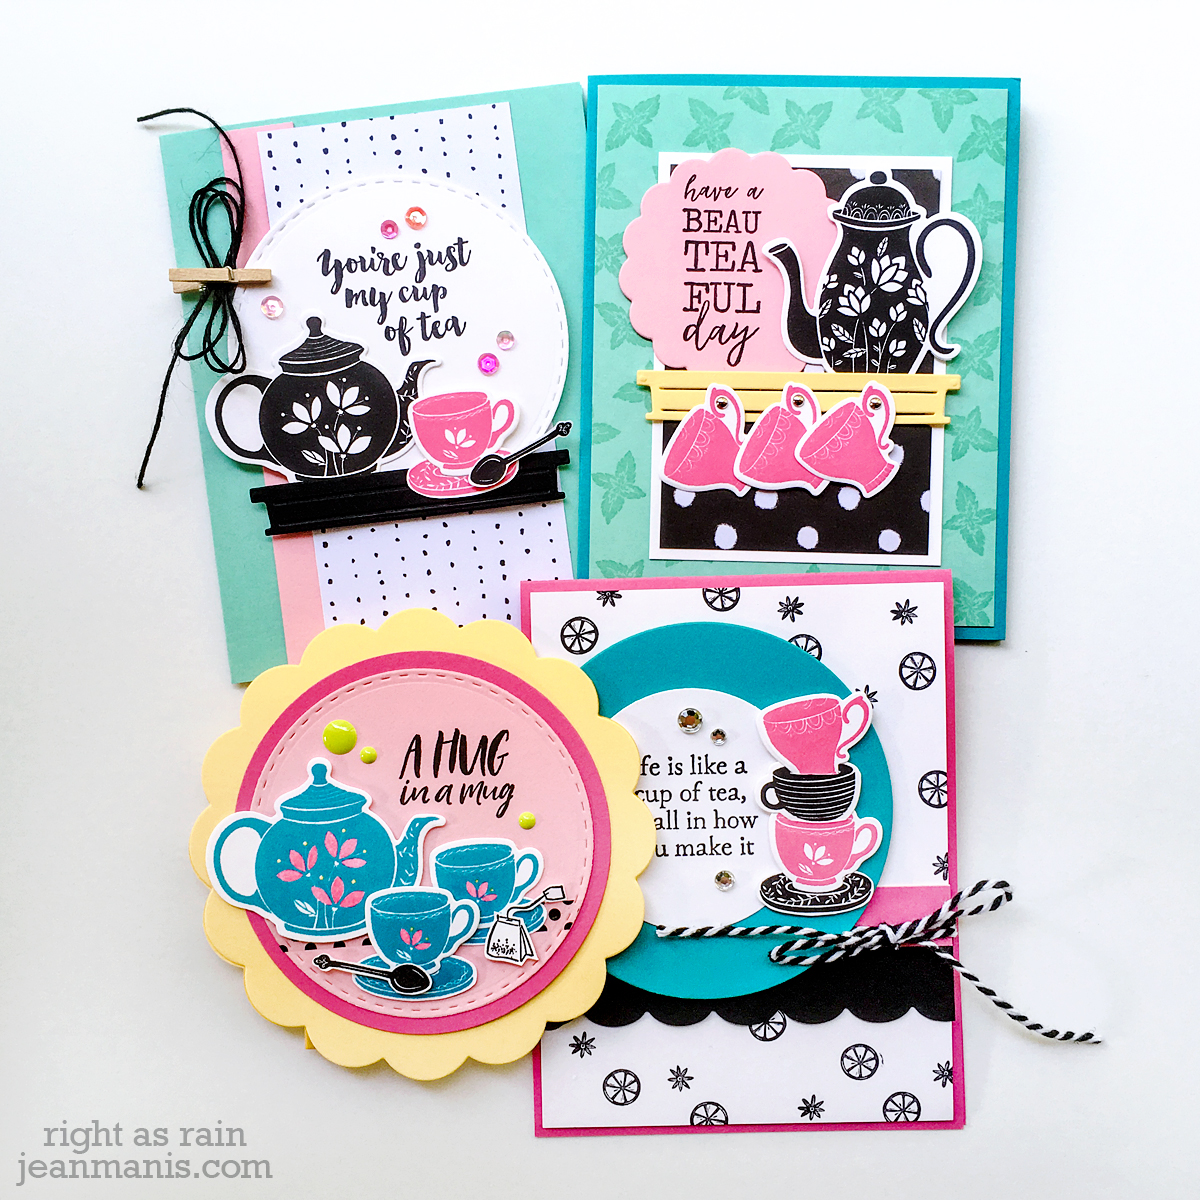
The November Bloom Box includes four pre-designed and kitted cards – the Cup of Tea stamp set, card bases, patterned paper, solid cardstock, ribbon, embellishments, and a step-by-step instruction booklet. (There is a Cup of Tea coordinating die set available for purchase.) All you need to add are a few inks and adhesives. The box has something for everyone – from new cardmakers to seasoned pros. The recipes provided for the cards can be followed exactly or changed up.

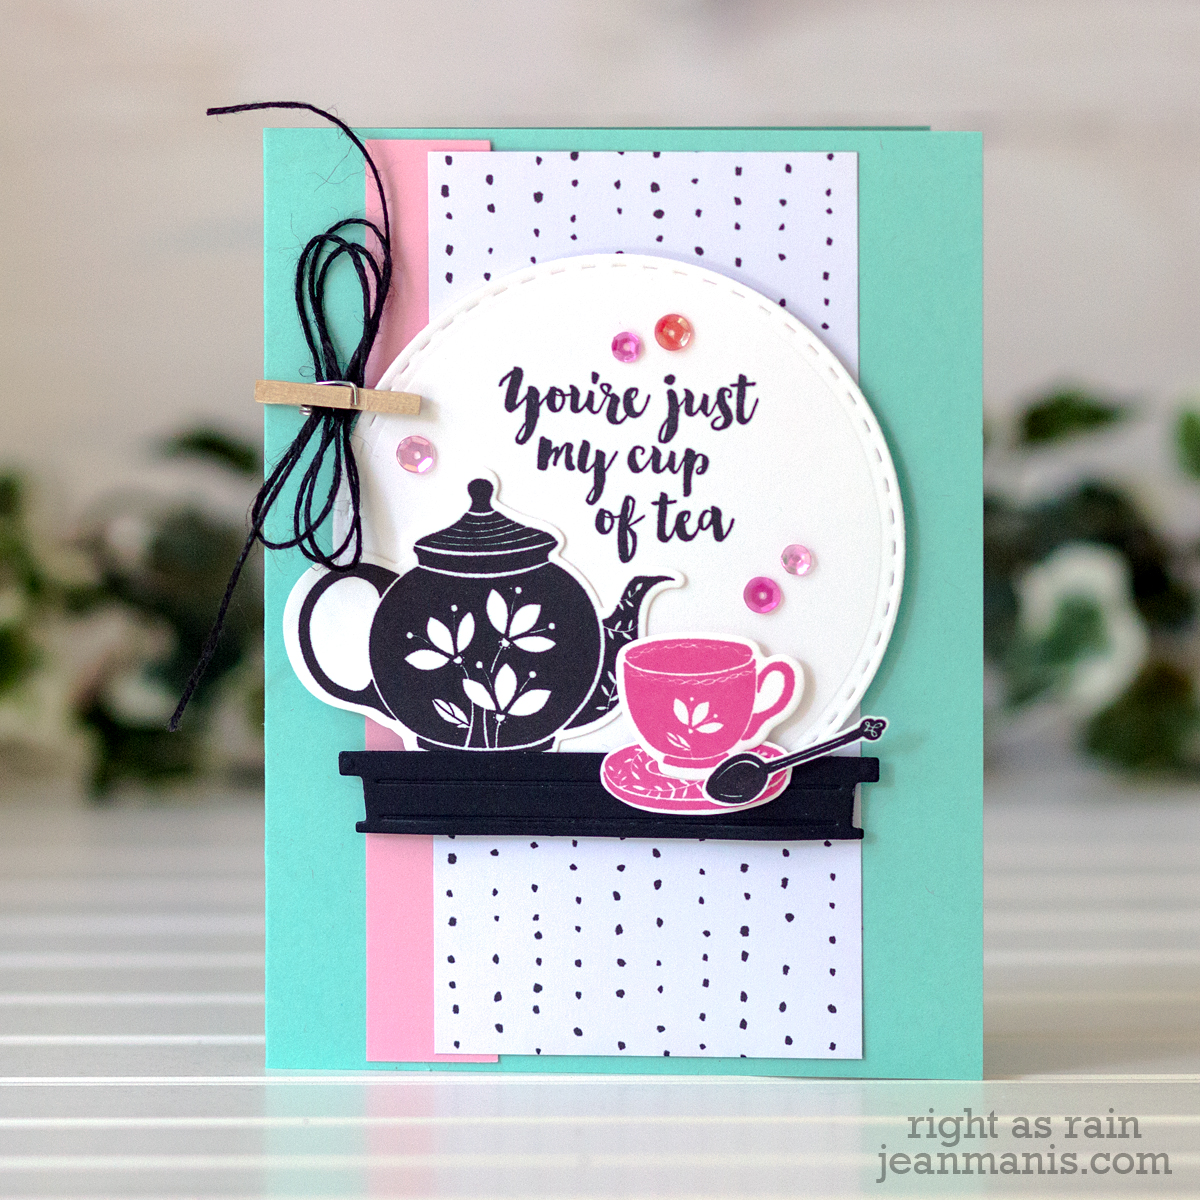
On my first card, I followed the “recipe” in the step-by-step instruction booklet (with just a few tweaks).

Fun Stampers Journey November Bloom Box - Cup of Tea

  • I stamped the tea pot in black ink on Whip Cream cardstock. I used the Cup of Tea die set to cut the tea pot.
  • I stamped the tea cups in Watermelon ink on Whip Cream cardstock and cut them with the corresponding die.
  • I stamped the mint leaf stamp in Cool Pool ink on the Cool Pool cardstock to create a tone-on-tone background. (The booklet called for teal ink to match the card base.)
  • I stamped the sentiment on the Bubble Gum scallop.
  • I followed the directions for assembly.

Fun Stampers Journey November Bloom Box - Cup of Tea

I particularly liked the fun way in which the tea cups hang on the shelf. The shelf and the small brads were provided in the kit. I liked this idea so much I purchased the Window View Die Set separately, which is the set that was used to cut the shelf. This is a fun design that could easily be varied!

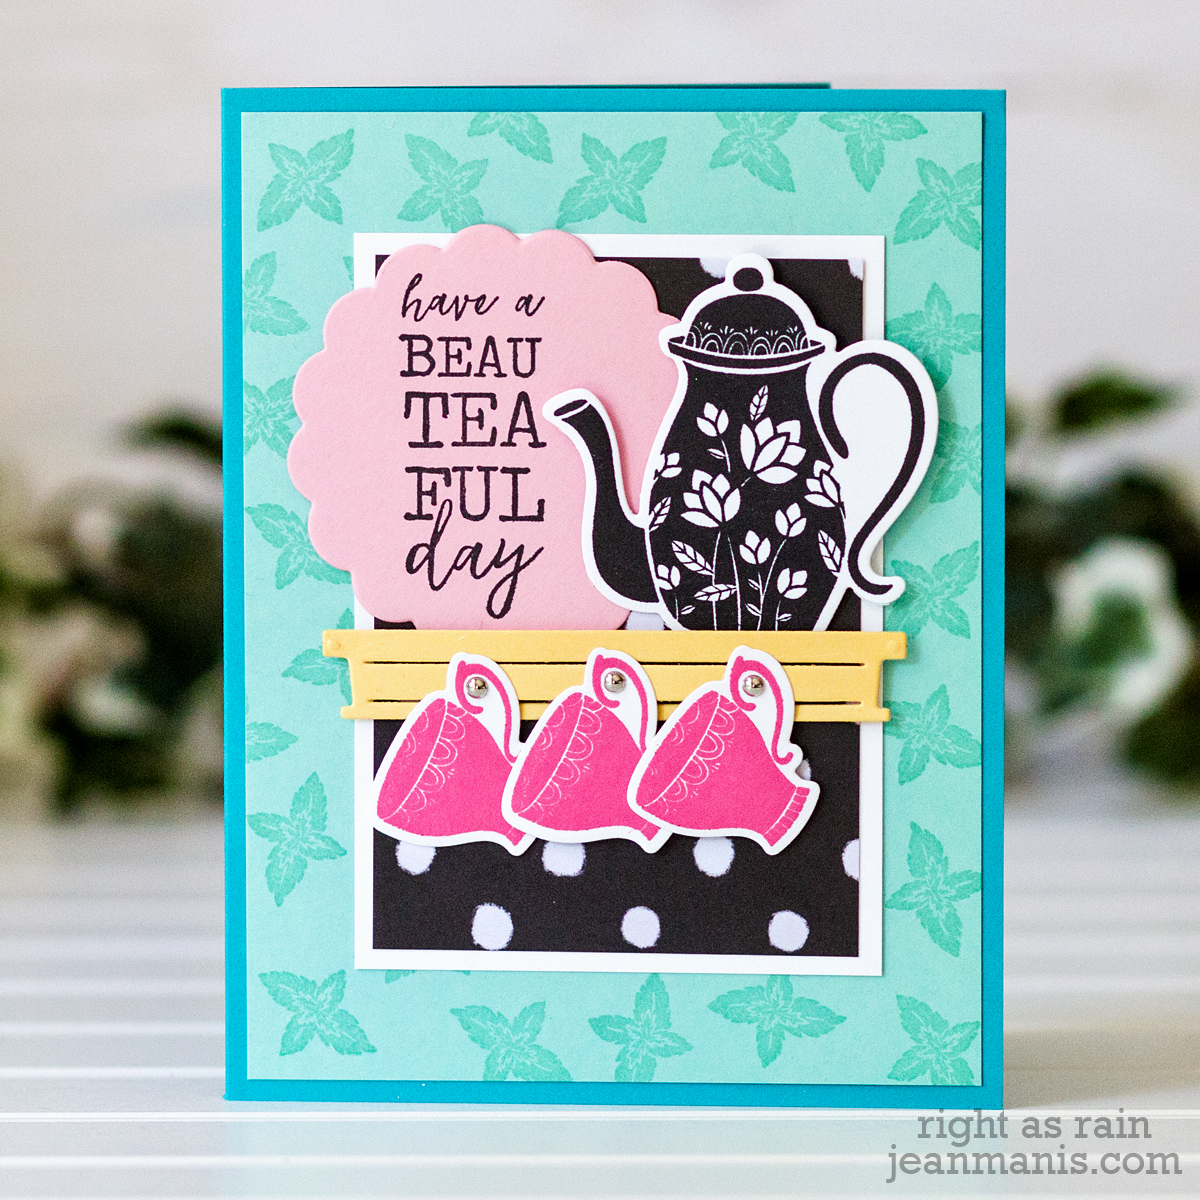
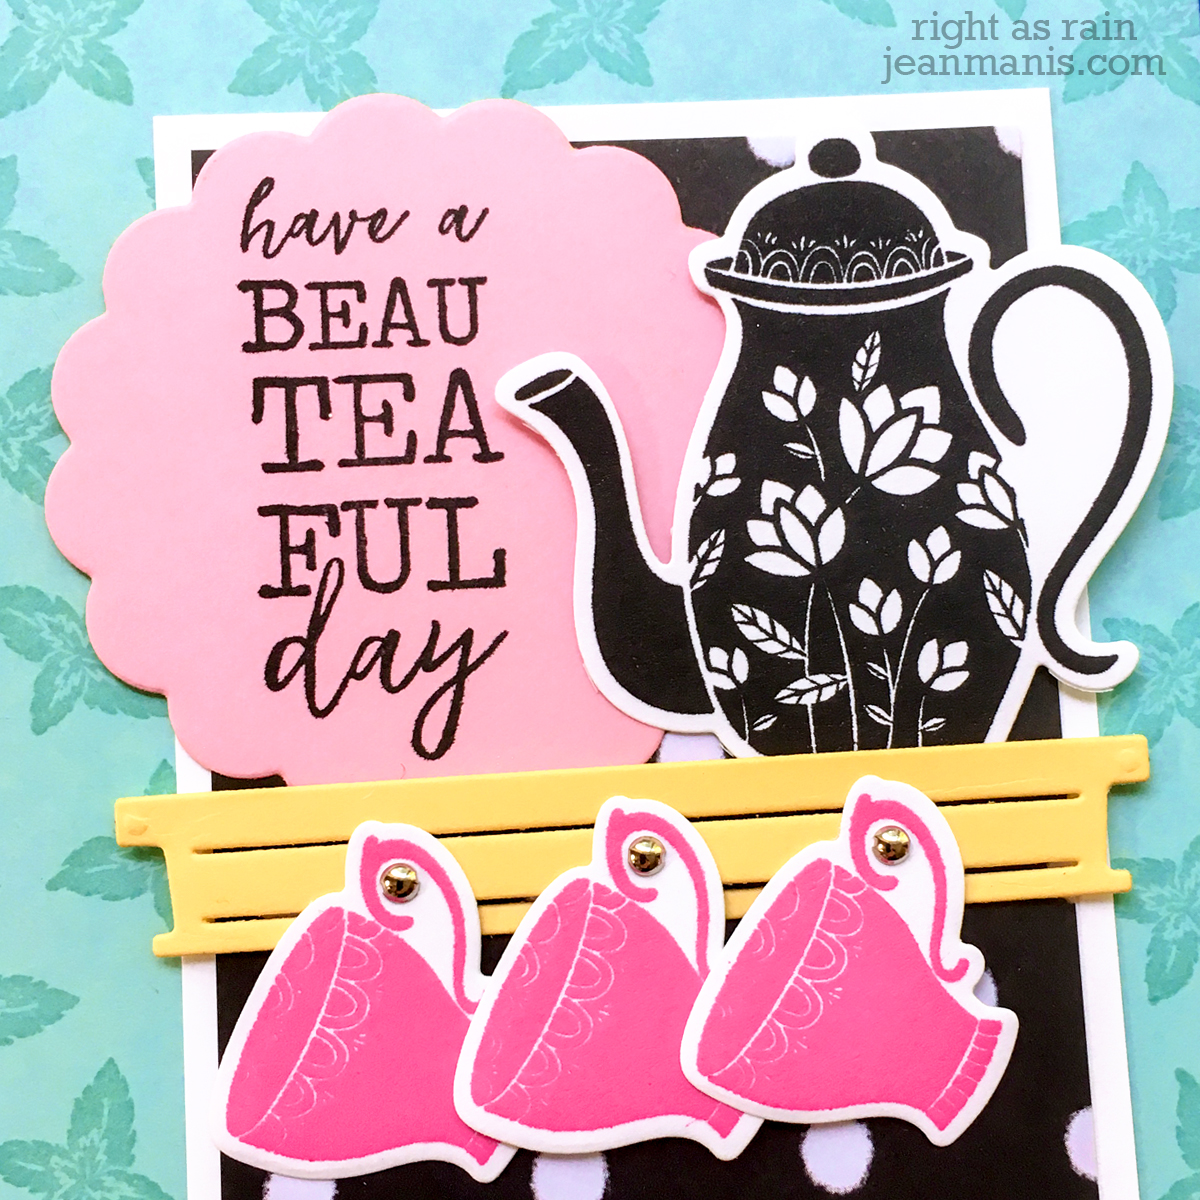
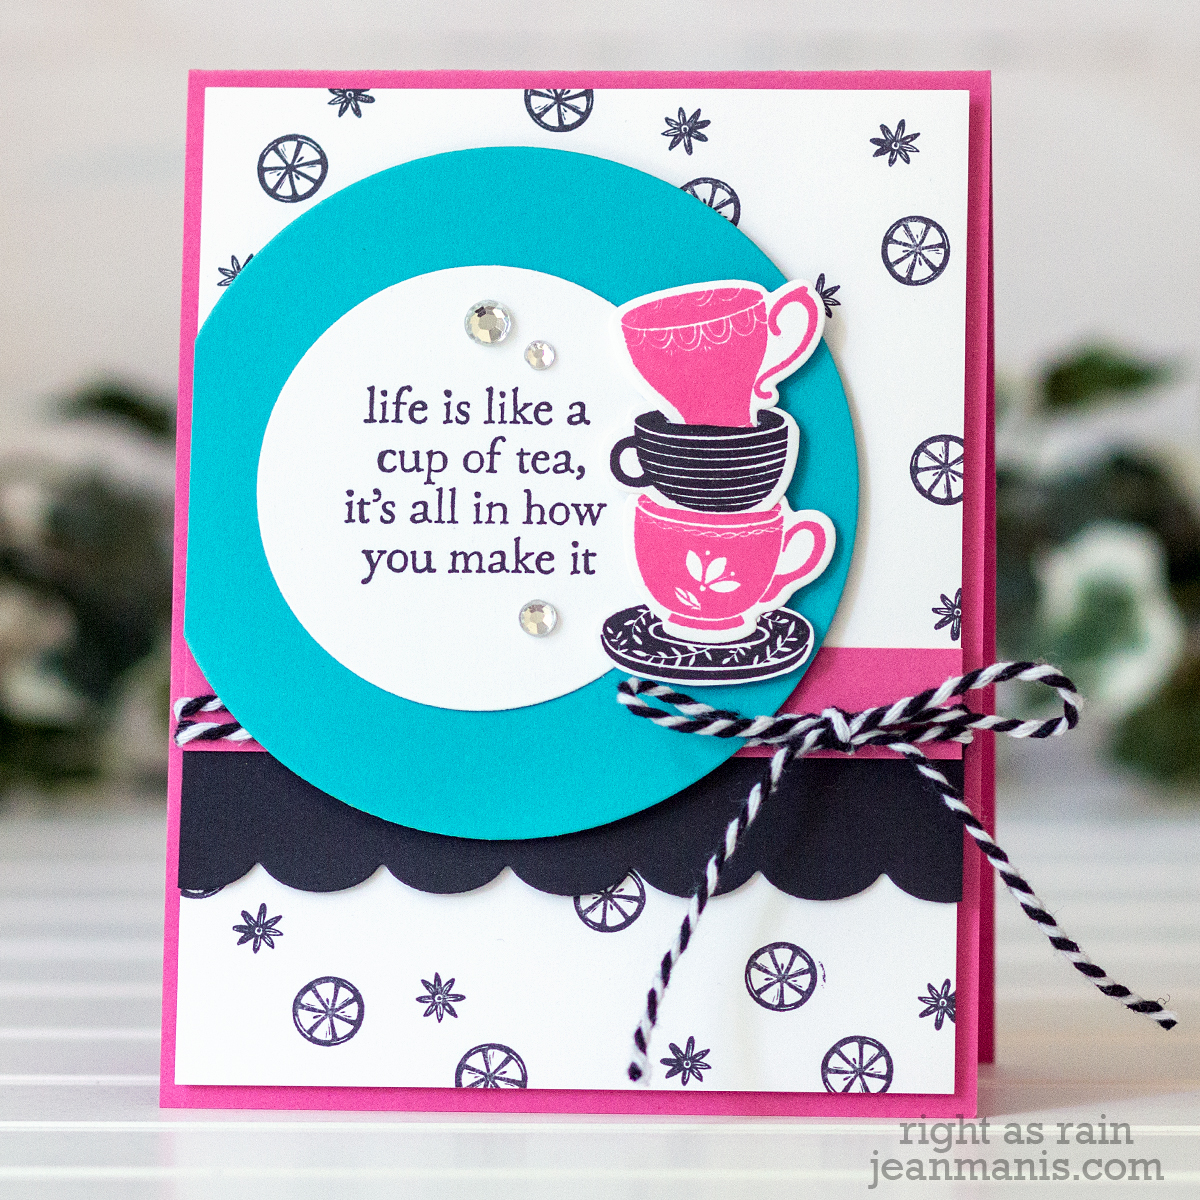
On my next card, I again followed the instruction booklet’s design with a few simplifications.

Fun Stampers Journey November Bloom Box - Cup of Tea

  • I created the card base by scoring the back scallop and adhering the cardstock above the scored line to the card front.
  • I stamped the tea pot and cups on Whip Cream cardstock and used the Cup of Tea die set to cut them. I stamped the saucers, spoon, and tea bag and fussy cut them.
  • I added a small amount of watercolor to the tea pot and cups (the booklet’s instructions called for more watercoloring, but I decided I wanted a cleaner look).
  • I stamped the sentiment on the Bubble Gum stitched circle and added a Deco Strip across the circle.
  • I followed the directions for assembly.

There were a lot of fun details on this card including the addition of the Deco Strip and the Sweet Candy Drops (both provided in the box). I tend to forget about details like these, and I know I will be incorporating these into future projects.

For the next card, I changed the orientation shown in the booklet and made a few simplifications.

Fun Stampers Journey November Bloom Box - Cup of Tea

I liked the shelf idea of the first card and replicated it on this card by cutting Black Licorice card stock with one of the dies in the Window View Die Set. The mini clothes pin and twine was another fun touch which I have never tried before.

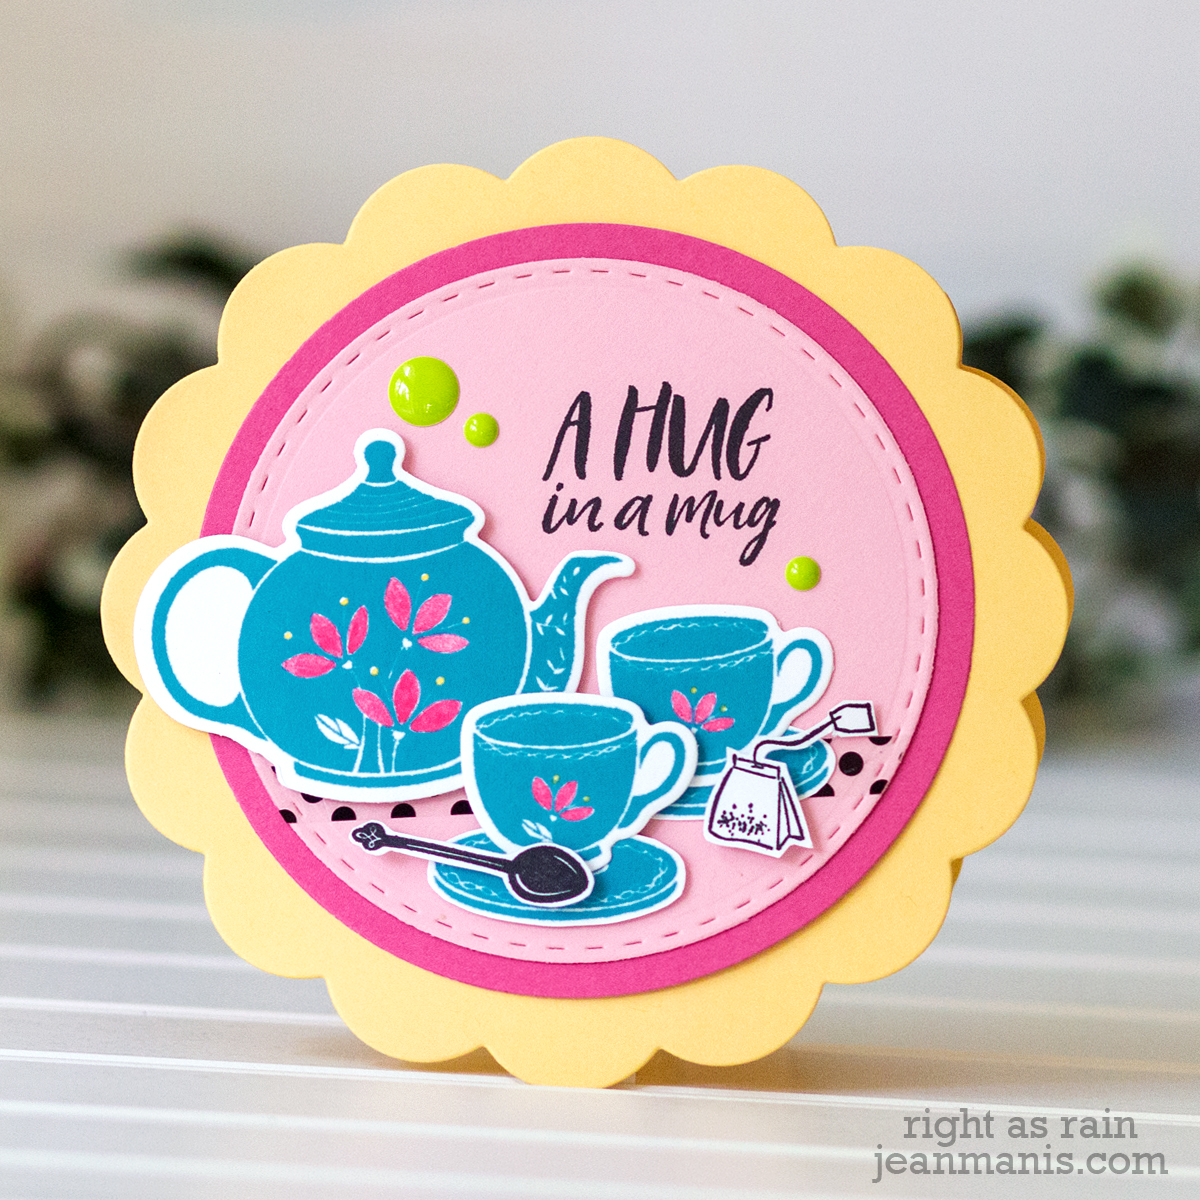
For my final card, I made a few simplifications from the instruction booklet.

Fun Stampers Journey November Bloom Box - Cup of Tea

I used fewer saucers in the stack than the design in the booklet. The booklet shows how to create a slit in the cups in order to stack them. I stamped the background Whip Cream cardstock with just two of the smaller stamps in the Cup of Tea set in black ink (the booklet example used more of the set’s small stamps and in a variety of ink colors). I substituted the pink ribbon in the kit for a strip of Watermelon Fusion cardstock, and used black and white twine rather than the ribbon.

Parting thoughts about the kit:

  • There is a lot of value to the designs shown in the kit. The designs easily lend themselves to modification; I am already thinking of ways in which I can change things up a bit.
  • The kit introduced me to color combinations I might not have otherwise used.
  • A new cardmaker would be able to use the kit to create interesting cards that are anything but beginner in their looks. They could then decide to make future supply purchases based on what they particularly liked about the various designs such as circle dies, scallop dies, scallop edgers, and so forth.
  • In my own cardmaking, I plan to more often stamp a background with small stamps and add more jewels/drops/sequins for textural interest.

Fun Stampers Journey November Bloom Box - Cup of Tea
Supplies:

Spellbinders Fun Stampers Journey Holiday Tag

Hello! Today I am sharing a holiday tag combining products from Spellbinders and Fun Stampers Journey. Let’s take a look.

Spellbinders Fun Stampers Journey Holiday Tag

  • I heat-embossed the FSJ Vintage Notes Stamp on Black Licorice cardstock with gold embossing powder.
  • I cut the background with the Shortie Tags die.
  • I heat-embossed the Charming Tag Sentiment with gold embossing powder on Whip Cream cardstock and cut it with a rectangle in the Matting Basics B set. I adhered the sentiment to the bottom of the tag.
  • I cut the ornaments in the Charming Boughs set from Whip Cream cardstock, the ornament tops from Brush Gold cardstock, and two ornament fronts from Cranberry Bliss and one from Noble Fir.
  • I assembled the ornaments with liquid adhesive.
  • I added gold twine to the ornaments and to the top of the tag. I adhered the ornaments to the tag with foam adhesive.

Spellbinders Fun Stampers Journey Holiday TagSupplies: