Reverse Confetti October Release Countdown to Confetti Day Two

It’s Day Two of the Countdown to Confetti at Reverse Confetti! Today, Reverse Confetti introduces the Jolly Holiday stamp set with coordinating Confetti Cuts, just in time for holiday paper crafting!

JollyHoliday

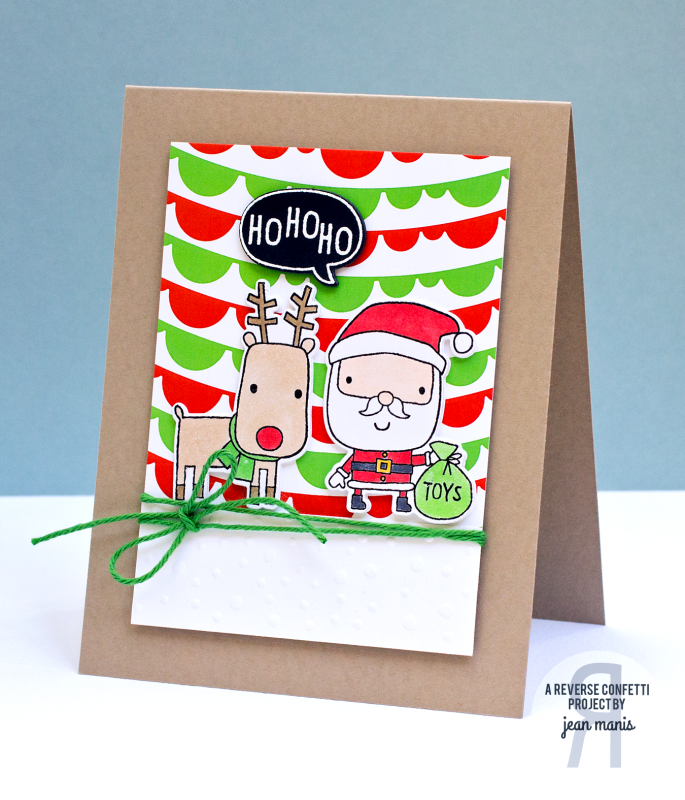
For my project, I used one of the ‘Tis the Season Quick Card Panels as a background for the reindeer and Santa from Jolly Holiday.  I heat-embossed the stamp images on cardstock, which I colored with Copic markers and cut with their corresponding Confetti Cuts dies. I also heat-embossed the Ho Ho Ho conversation bubble and cut it with its companion die.

I used the Confetti Cuts to cut additional cardstock onto which I adhered the colored images and the speech bubble to give extra depth. I dry-embossed white cardstock for a snowy ground and finished the card with the Solid Peapod twine.

There are two $15 gift certificates up for grabs – one for blog commenters and one for Facebook commenters. Increase your chance of winning by leaving a comment on each sneak peek post for each designer. Comments will close at noon CST on October 7th and the winner will be announced at 5pm on October 7th on the Reverse Confetti blog and FB page.

Reverse Confetti October Release Countdown to Confetti Day One

It’s Day One of the Countdown to Confetti at Reverse Confetti! Today, Reverse Confetti introduces the Winter Word Coordinates stamp set with Winter Words Confetti Cuts, just in time for holiday paper crafting!

WinterWordsWreath

For my CAS card, I used the Peace die from Winter Words Confetti Cuts and paired it with a wreath from the Wreaths Confetti Cuts set also being released this month.

I cut the Peace sentiment from gold foil paper. The wreath, flowers and bow were cut from paper which I’d watercolored with Distress Inks. The flowers are part of the Layered Snowflake Confetti Cuts being released and the bow is from the Tagged Tote Confetti Cuts set.


I placed a strip of vellum behind the Peace sentiment to give it a little more visibility.

There are two $15 gift certificates up for grabs – one for blog commenters and one for Facebook commenters. Increase your chance of winning by leaving a comment on each sneak peek post for each designer. Comments will close at noon CST on October 7th and the winner will be announced at 5pm on October 7th on the Reverse Confetti blog and FB page.


AEI♥U Challenge #29 – Think Pink

It’s time for another AEI♥U Challenge! This month’s theme is Think Pink! Here’s my take on the theme:

AEOct2015JM

I stamped Goldie onto white cardstock and colored her with Copic markers. I then cut her out with a companion die. I stamped the sentiment and grass tufts onto the mint blue cardstock and cut the panel with one of the Double Pierced Rectangle dies. The balloons were cut with the two of the dies in the Balloons Elle-ments set and colored with Copic markers. (I first tried using balloons cut from colored cardstock but the pinks didn’t match the color in Goldie’s outfit, and I decided that they needed to match! I also think that the Copic coloring adds a little oomph to the balloons, whereas the colored cardstock was a little dull.)

Oct2015JMCloseup

There’s no limit to how you can interpret this challenge! Check out the inspiration from the rest of the Design Team over on the AEI♥U Challenge Blog!  You’ll also find the InLinkz tool to link up YOUR take on the challenge – we’d love to see your beautiful work in our gallery! There are two $25 Avery Elle Gift Certificates up for grabs for the two best entries!  You have until 12:01 AM on October 27, 2015 to link up your take on the challenge!

Supplies:

Reverse Confetti Birthday Gift Box

Today, I’m sharing an easy-to-create birthday gift box project featuring several Reverse Confetti stamp and Confetti Cuts sets.

GiftBox1

I had in mind gift packaging for a child, and the monkey from Monkey Business was my starting point. To begin, I cut orange cardstock with a pillow box die and stamped on it repeatedly (and in a random fashion) with the monkey, using orange ink for a tone-on-tone background.

GiftBox2

I created a tag from two pieces of patterned paper with the Folded Tags Confetti Cuts (I cut both patterns with the die and adhered them together). I stamped the cake from Later Alligator, colored it with Copic markers and cut it with its coordinating Confetti Cuts die. I added it to the front of the tag and added a stamped sentiment from the Folded Tags Sentiments set to the inside. The tag is tied onto the pillow box with twine.

GiftBox3