Like many of the Tim Holtz projects on which I’ve worked, this month’s 12 Tags of 2013 was not finished in a single sitting! It took a couple of tries for me to be happy with the design and execution. That being said, one of my favorite things about the Tim Holtz projects is that they push you to try new techniques and products.
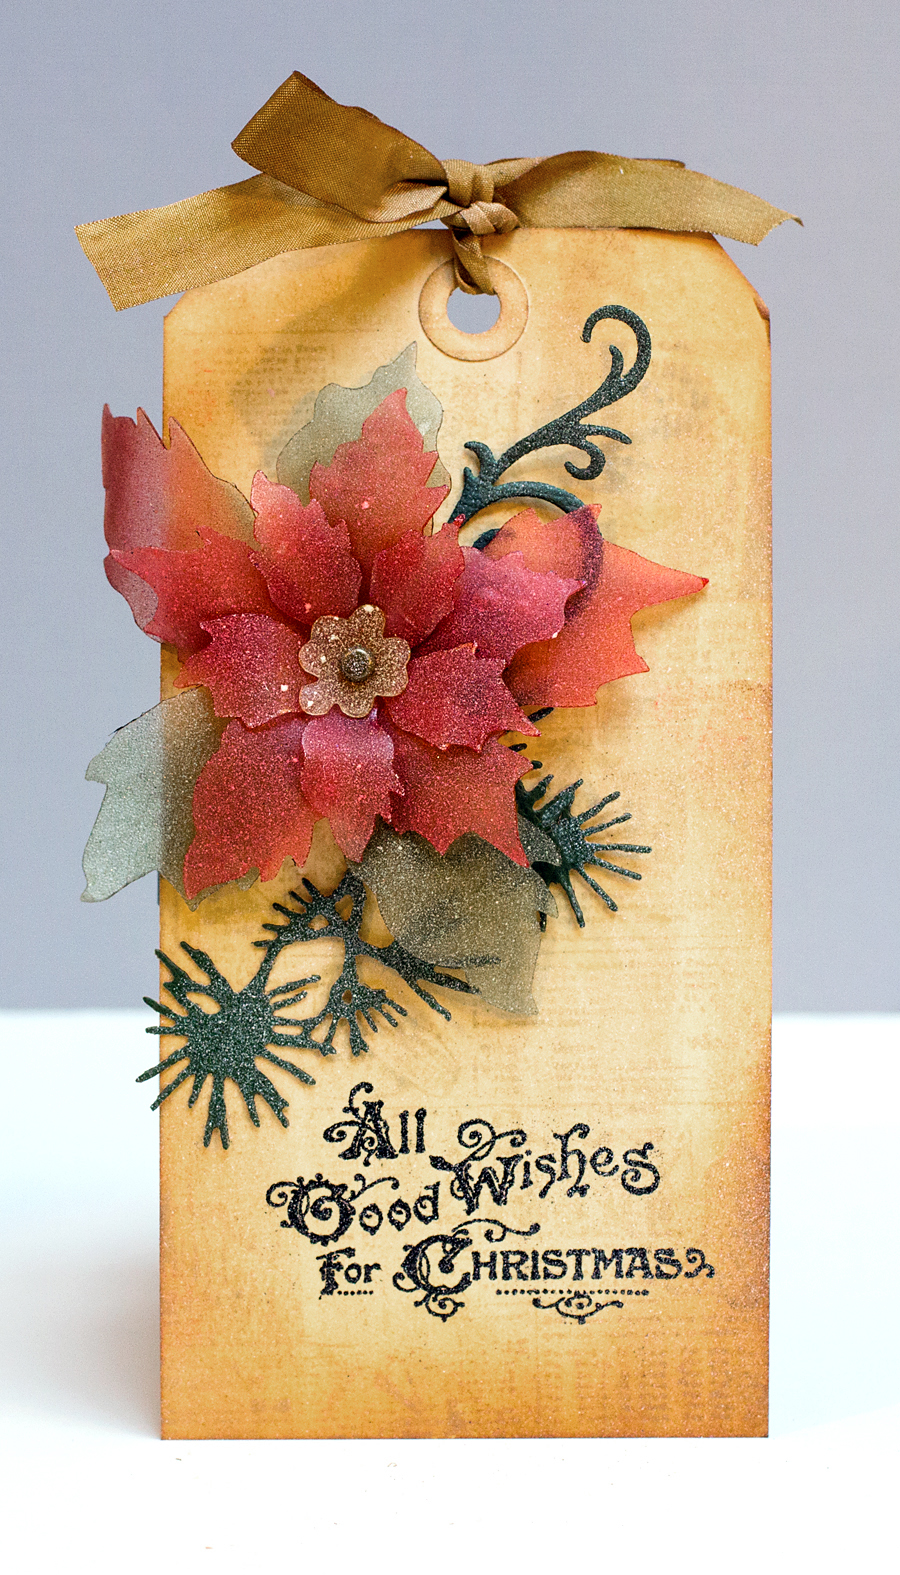
I followed the directions on the December tag post, substituting supplies as needed. The focus of this month’s tag is the frosted film and Clearly for Art used for the die-cut poinsettia. The Clearly for Art product is covered with the film, die cut, colored with inks (on the frosted film side) and then curled with the application of heat. I could have used a few more hands during that process! As Tim explains, “if you don’t like the shape you created, simply reheat it and it will flatten out completely allowing you to reshape it,” which I did more than once!
While Tim’s tag features one of his newest stencils for a background pattern, I stamped my background with the Seasonal Catalog stamp in Vintage Linen for a tone-on-tone look. Tim used a splatter brush from Liquitex to apply Picket Fence paint. I used a toothbrush, since I don’t have that tool. The toothbrush delivers an even dusting of the paint. I would have liked a few more drips and a more random pattern, which the splatter tool appears to provide.
Supplies: