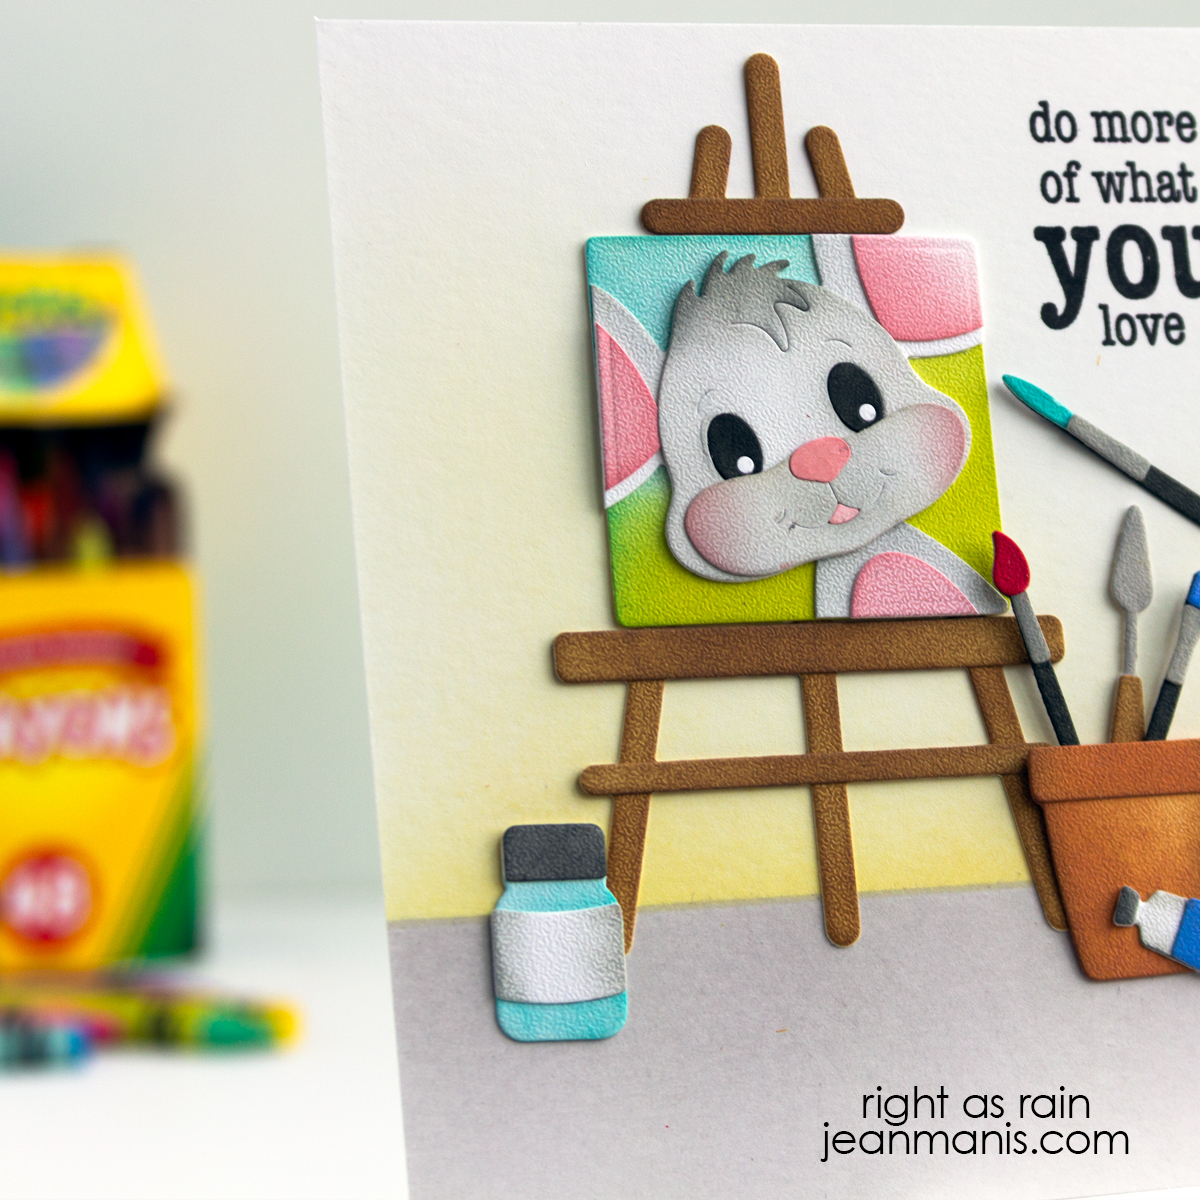
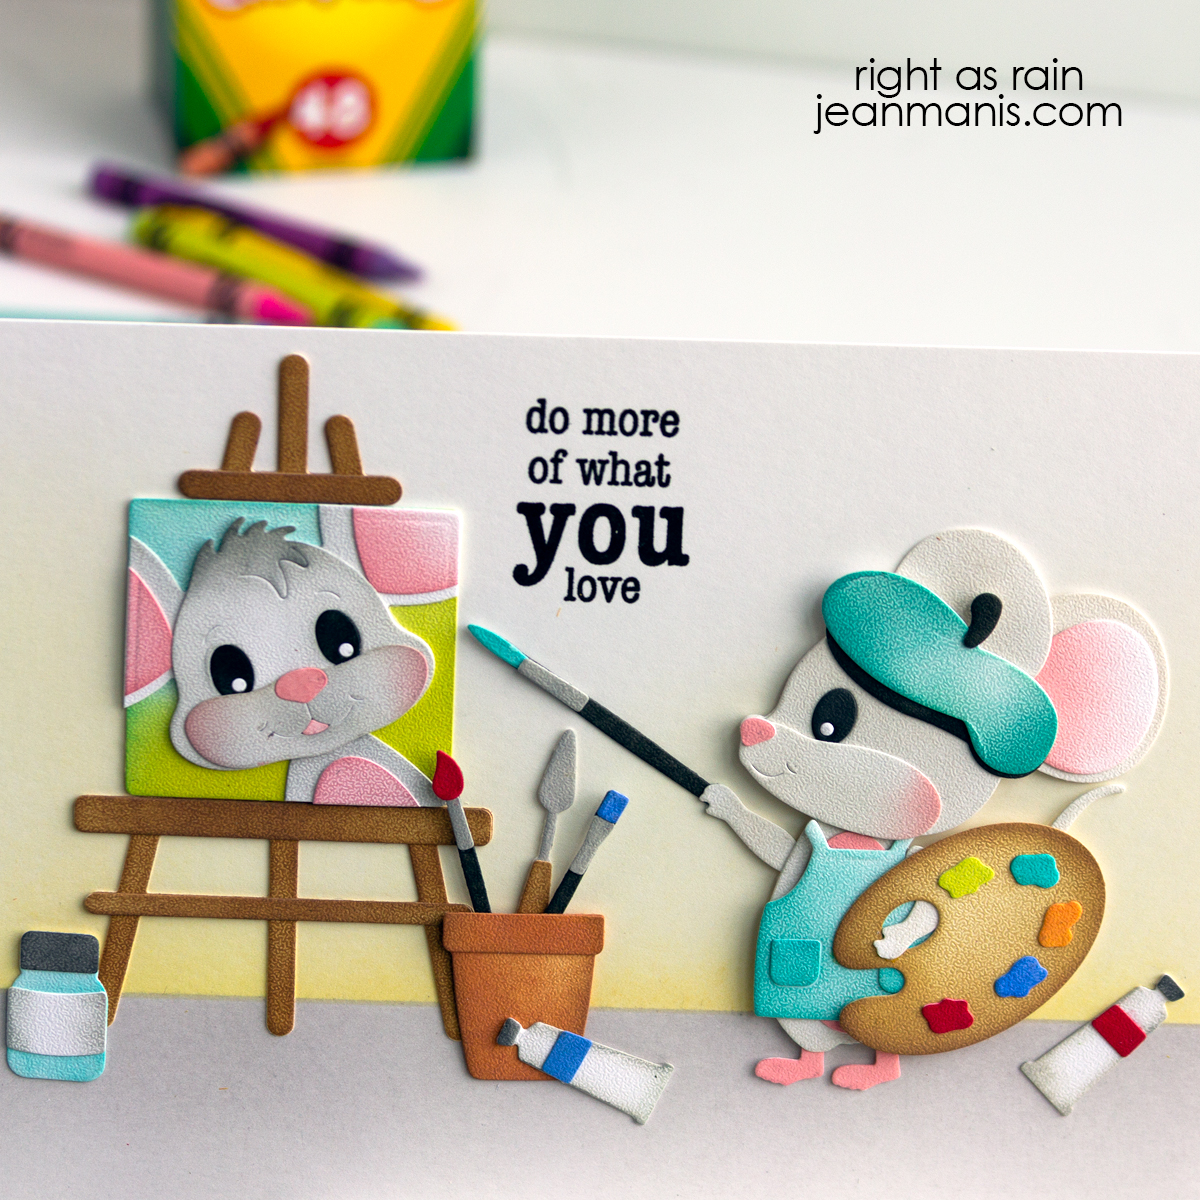
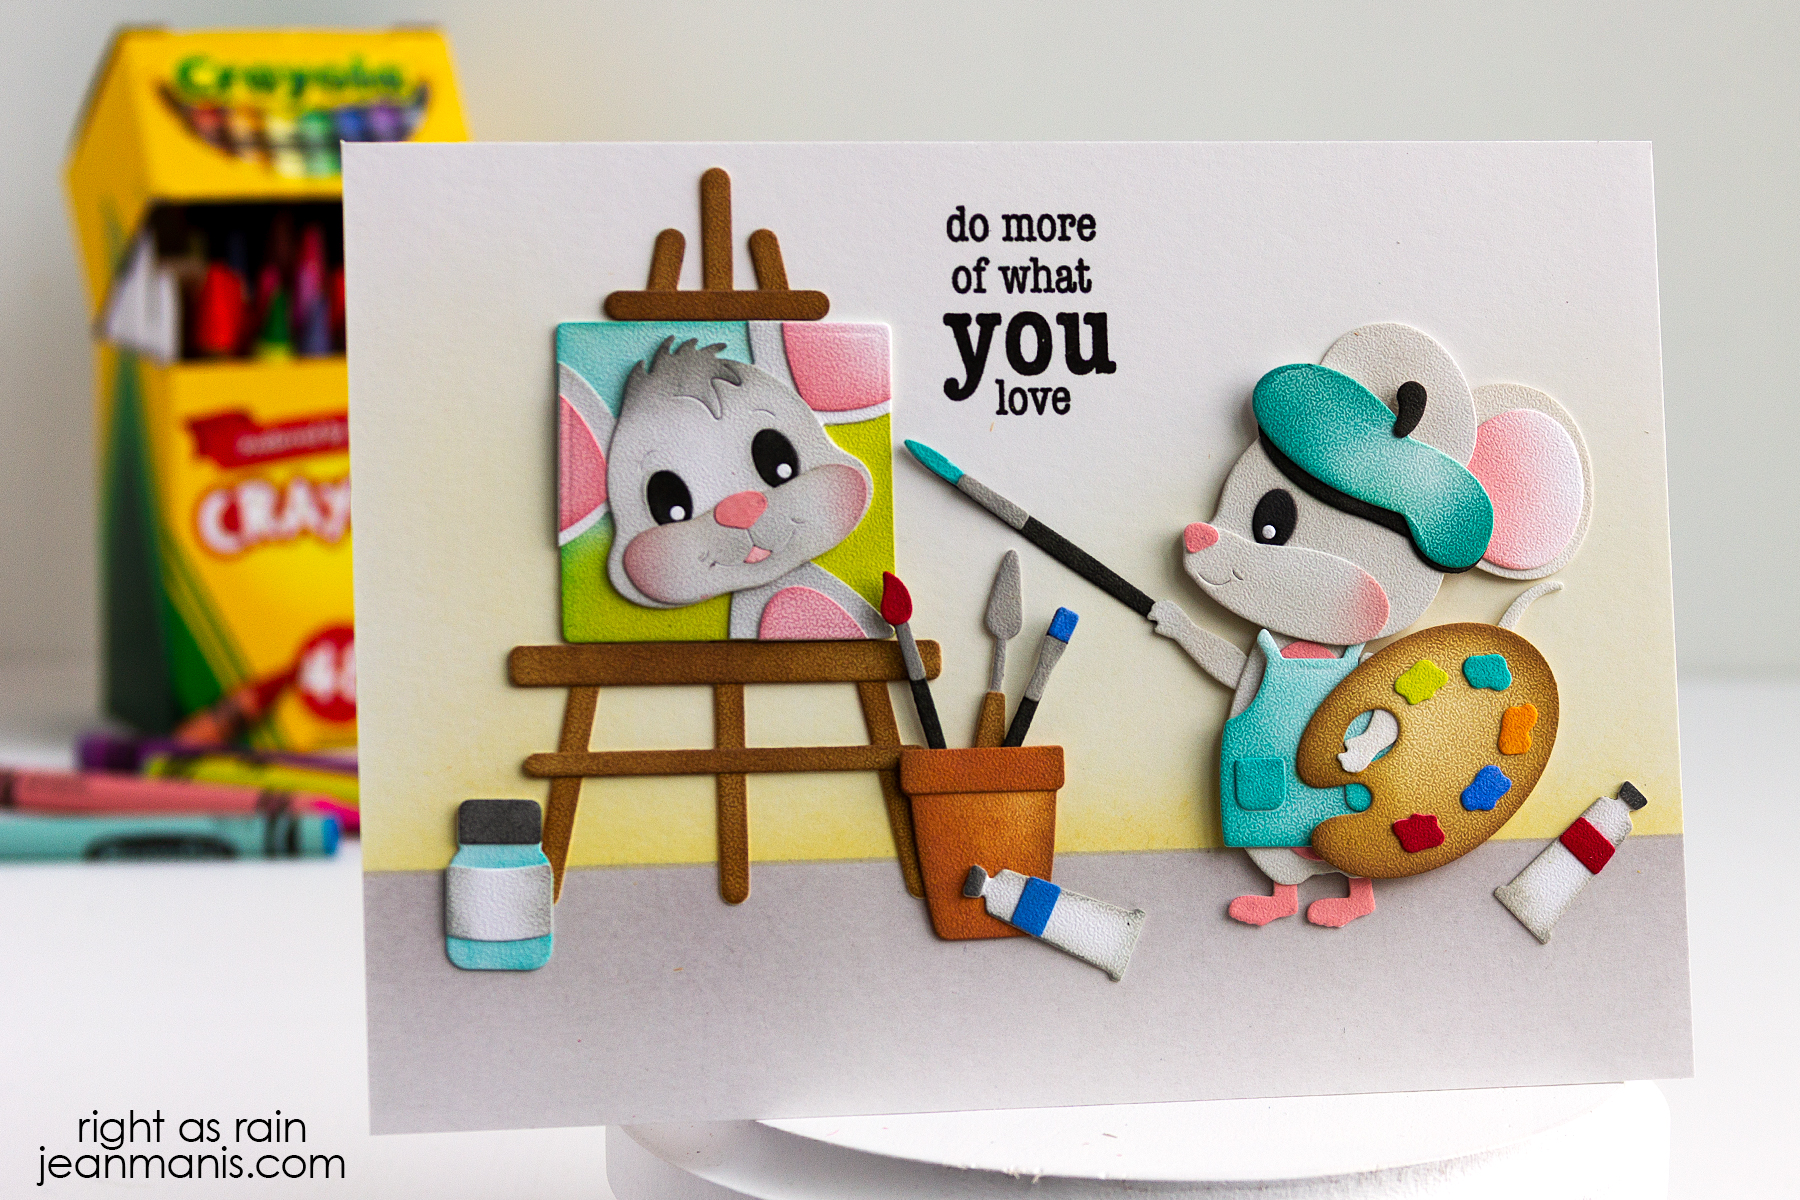
Mixed Media Christmas Card

Hello! Today I’m sharing a Christmas card created with Tim Holtz products. The sentiment and focal items are kept understated to spotlight the background, where the texture and dimension really come through. This mixed media approach is a bit different from my usual clean style, but it’s been fun to experiment.

Tim Holtz Mixed Media Christmas Card

    • Create a monoprint with the Tiny Poinsettia stencil using Decayed Mica Stain. I shared another stencil monoprint card HERE.
    • Once dry, ink the poinsettias with the stencil in place.
    • Apply Twinkle paste through the stencil and set aside to dry. I noticed that the colors change considerably with the application of the paste.
    • Trim and mat the panel with gold cardstock. Add the assembly to a card base covered with seasonal patterned paper (I used Carta Bella from several years ago). The overall size is 4 3/4″ x 6 7/8″.
    • Stamp the Festive Overlay sentiment in Library Green ink on off-white cardstock. Cut with a circle die. Mat with a slightly larger vellum circle. Add to the base.
    • Cut the bells with dies in the Festive Things set. Assemble and add to the prepared base.

Tim Holtz Mixed Media Christmas Card


Spellbinders | When Pigs Fly Charm

Hello! I’m back with another friendship card featuring the Spellbinders November Large Die of the Month. This time, I paired the purse design with the adorable flying pig charm from the Caboodle Offering. The mix adds a whimsical touch to the trendy bag charm theme. For this version, I used different patterned papers for the purse, background, and scarf. You can see my first card with the November Large Die set HERE.

Spellbinders | When Pigs Fly Charm

    • Create a 5″ x 7″ card base and cover with patterned paper.
    • Use the purse die in the Large Die of the Month to cut the purse from patterned paper. Add to the prepared card base.
    • With the Large Die of the Month set, cut the charms, purse hardware, and bow from a variety of cardstock colors and patterned paper. Use the Caboodle die set to cut the pig. Assemble items.
    • Adhere items to the card base.
    • With the Clear Stamp & Die set, stamp the sentiment and cut with the coordinating die. Add to card with adhesive foam squares.

Spellbinders | When Pigs Fly Charm

Spellbinders | When Pigs Fly Charm

Tim Holtz | Vintage Holiday Card

Hello! Today’s card leans into the vintage style of Tim Holtz, which is a departure from my usual look. I used the Tim Holtz sled die as the focal point, cutting it from cardstock that I inked and distressed for a worn, mixed media feel. The snowflake-embossed background adds texture, and the “Merry and Bright” sentiment brings in holiday cheer. I loved playing with layers, texture, and inky color to create that signature Tim Holtz weathered charm.

Tim Holtz | Vintage Holiday Card

    • Dry-emboss and A2-size panel of textured cardstock with a snowflake embossing folder. I used the now-retired Sizzix Tim Holtz Simple Snowflakes 662432 folder. Add to card base.
    • Cut the Vintage Sled from a variety of cardstock colors and textures. Assemble.
    • Stamp the Tiny Text Christmas sentiment in Potting Soil ink on off-white cardstock that has been colored with Antique Linen ink. Cut with a banner die.
    • Add assembled sled to the card base with foam adhesive. Add sentiment to sled with foam adhesive.

Tim Holtz | Vintage Holiday Card


Spellbinders | Bag Charms Friendship Card

Hello! Today I’m sharing a friendship-themed card created with the Spellbinders November Large Die of the Month. This die set builds an adorable purse and a variety of bag charms, which is very on-trend right now! I paired the finished purse with a sentiment from this month’s coordinating Go-To Girl Clear Stamp Set. This card is perfect for sending a little appreciation to a friend who’s always there for you.

Spellbinders | Bag Charms Friendship Card

    • Create a 5″ x 7″ card base and cover with patterned paper.
    • Use the purse die in the Large Die of the Month to cut the purse from patterned paper. Add to the prepared card base.
    • With the Large Die of the Month set, cut the charms, purse hardware, and bow from a variety of cardstock colors and patterned paper.
    • Adhere items to the card base.
    • With the Clear Stamp & Die set, stamp the sentiment and cut with the coordinating die. Add to card with adhesive foam squares.

Spellbinders | Bag Charms Friendship Card


Spellbinders | Brunch-Themed Friendship Card

Hello! Today, I’m sharing a playful friendship card created with the Spellbinders November Small Die of the Month set, which is all about brunch! The set includes the cutest breakfast items, each complete with arms, legs, and sweet expressions. I’ve used the waffle, a strip of bacon, and a sunny-side-up egg. The card is a fun and friendly way to invite someone to catch up, share a meal, or simply brighten their day.

Spellbinders | Brunch-Themed Friendship Card

    • Create a 5″ x 7″ card base.
    • Cut a 4″ x 6″ panel of patterned paper.
    • Cut the focal items from a variety of cardstock colors with the Small Die of the Month set. Assemble. (Note: I trimmed the banner sentiment on either end to shorten it.)
    • With a circle die, cut three circles in coordinating colors and dry-emboss with the Tiny Dots folder. Attach the circles to the patterned paper and trim. Mat the panel on to a slightly larger panel of black cardstock. Add assembly to the prepared card base.
    • Add items to the circles with adhesive foam squares.

Spellbinders | Brunch-Themed Friendship Card