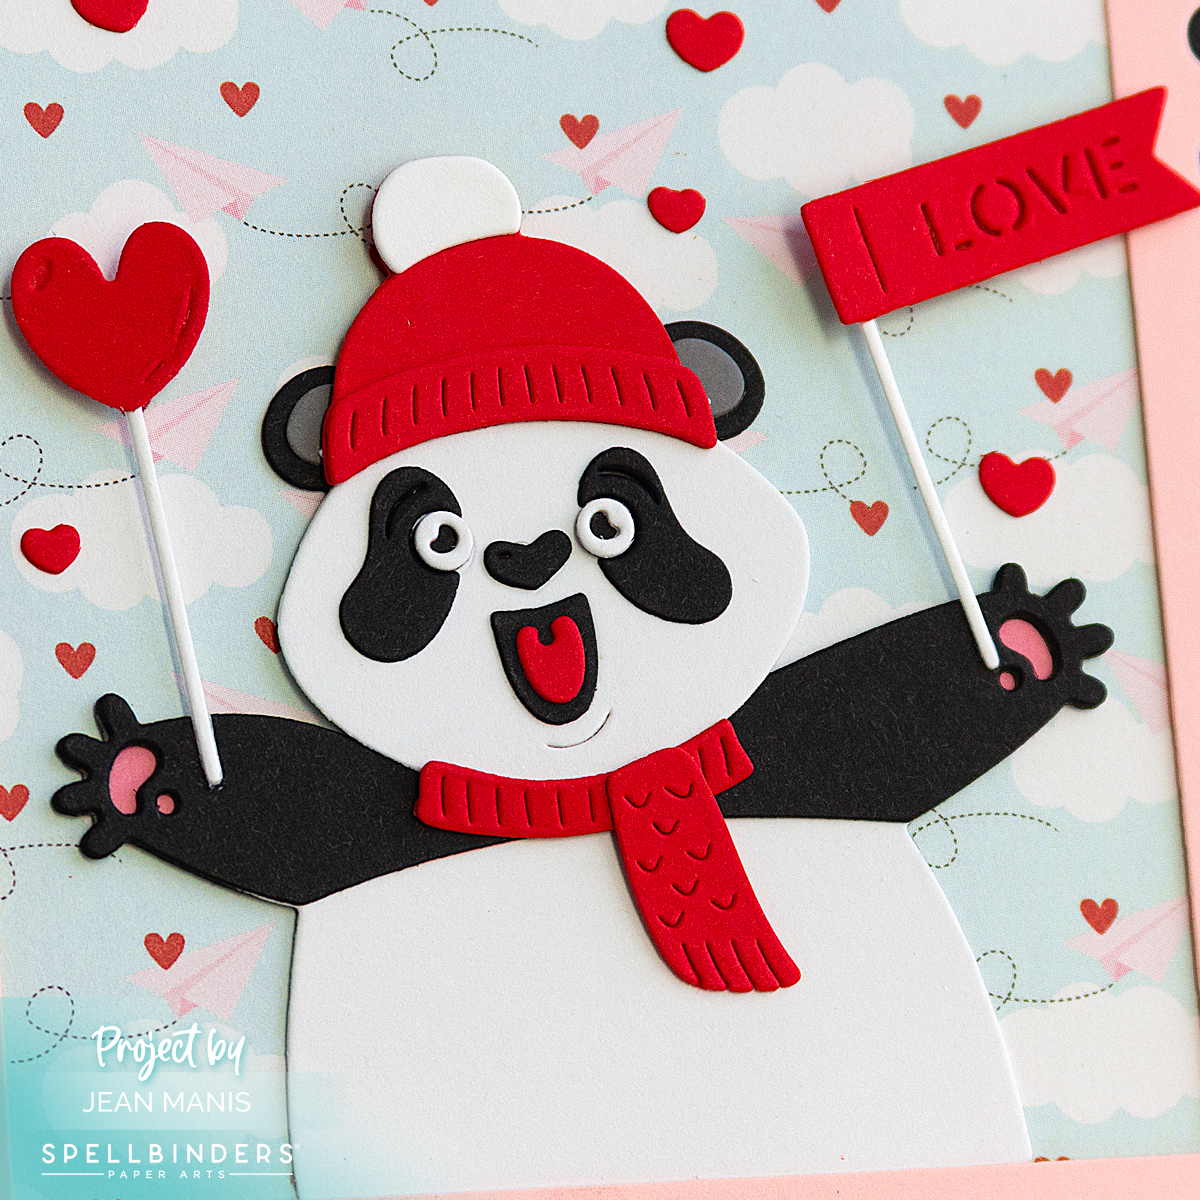
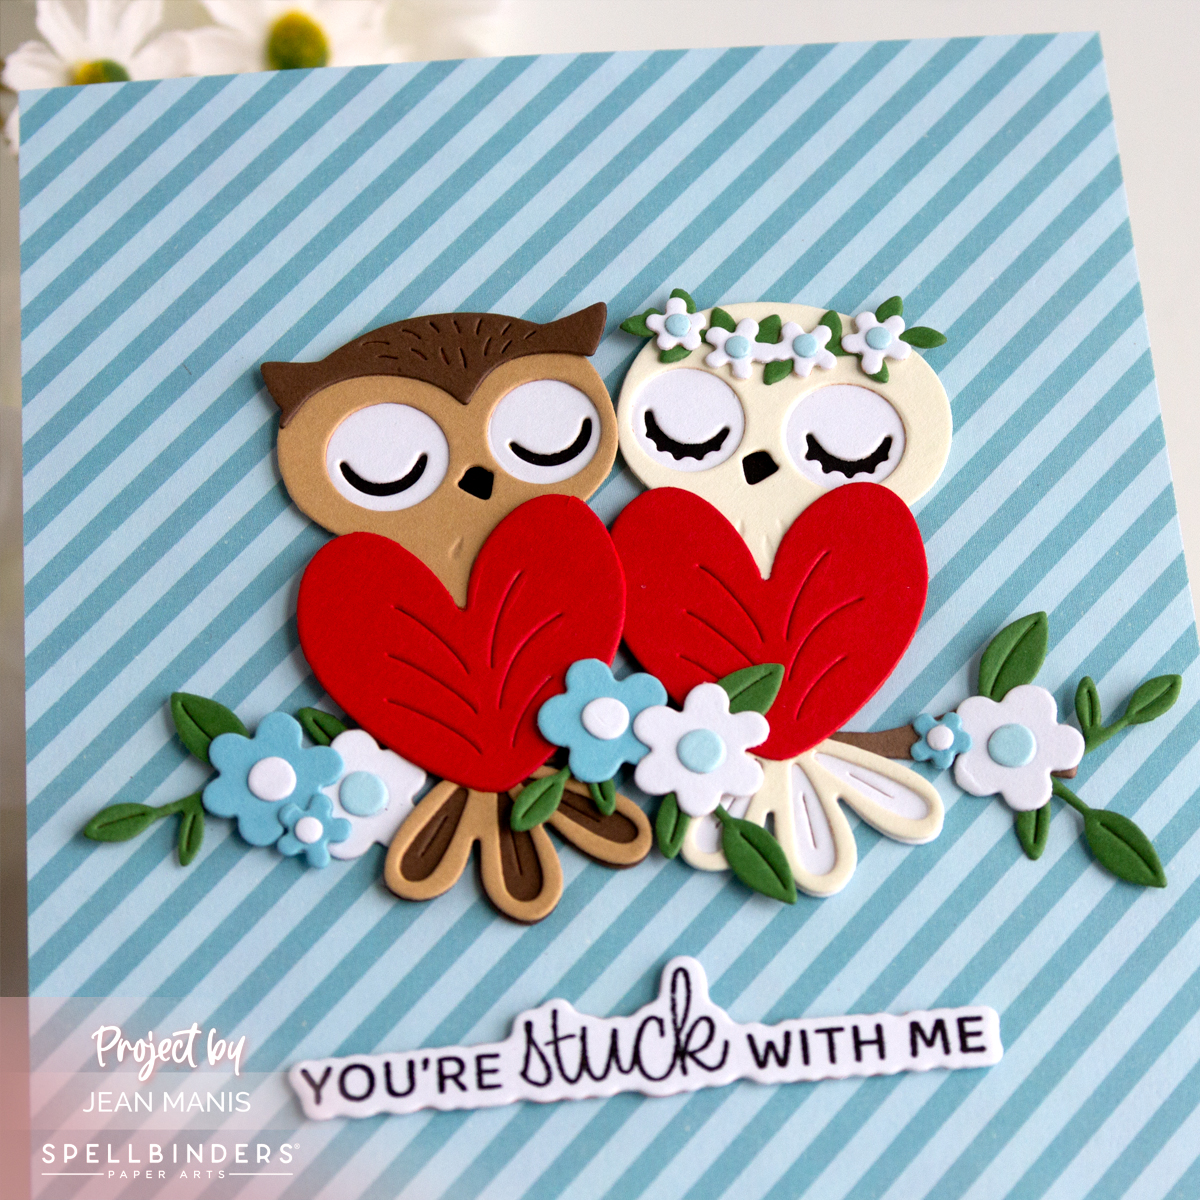
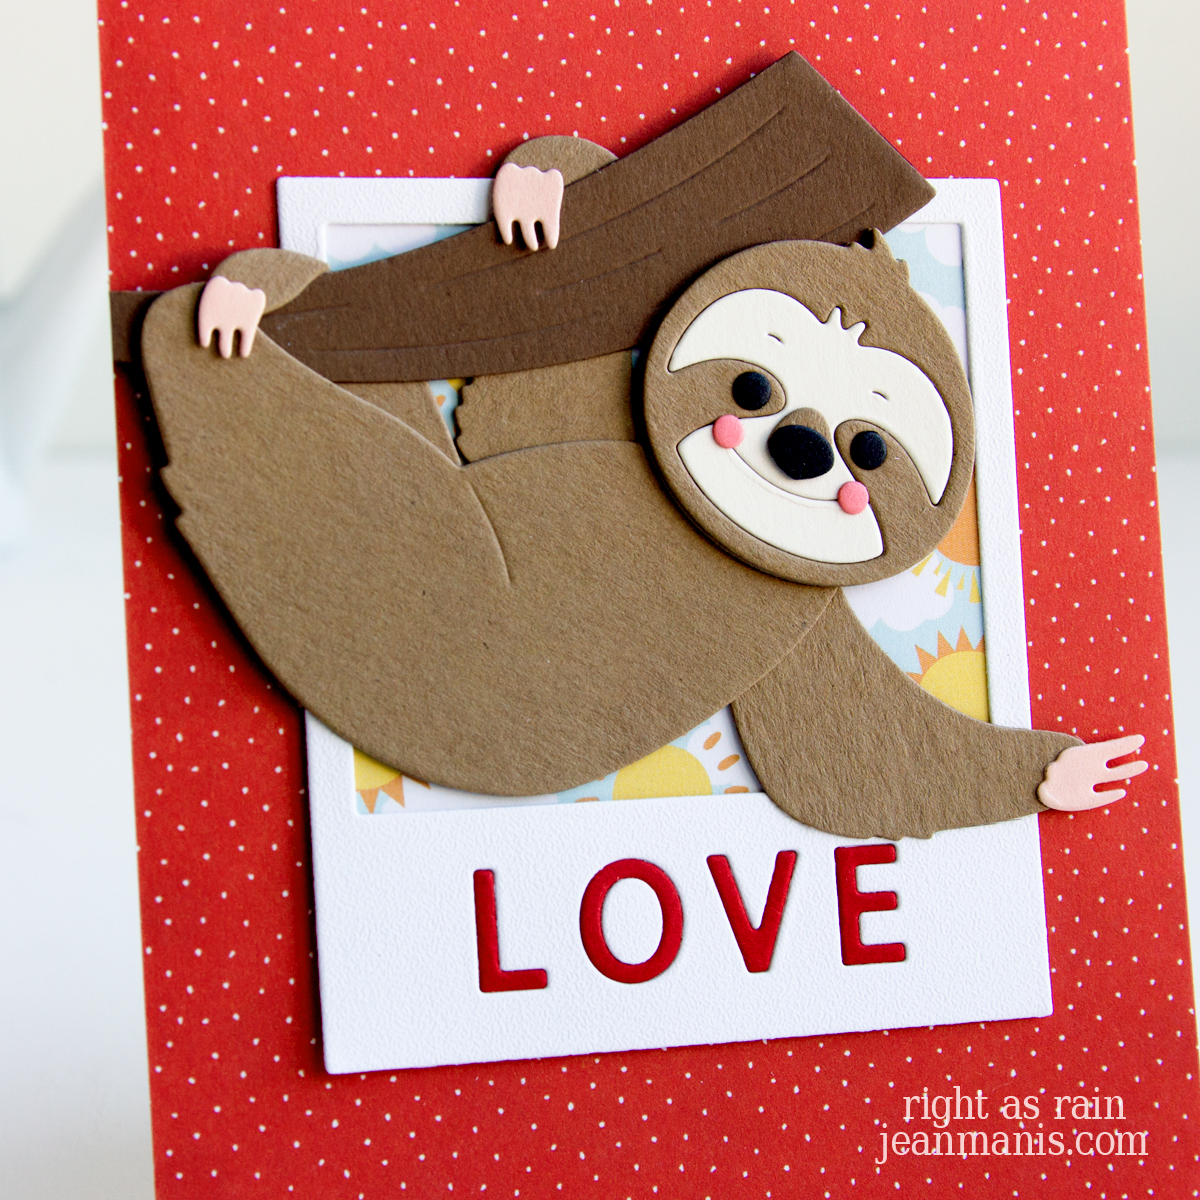
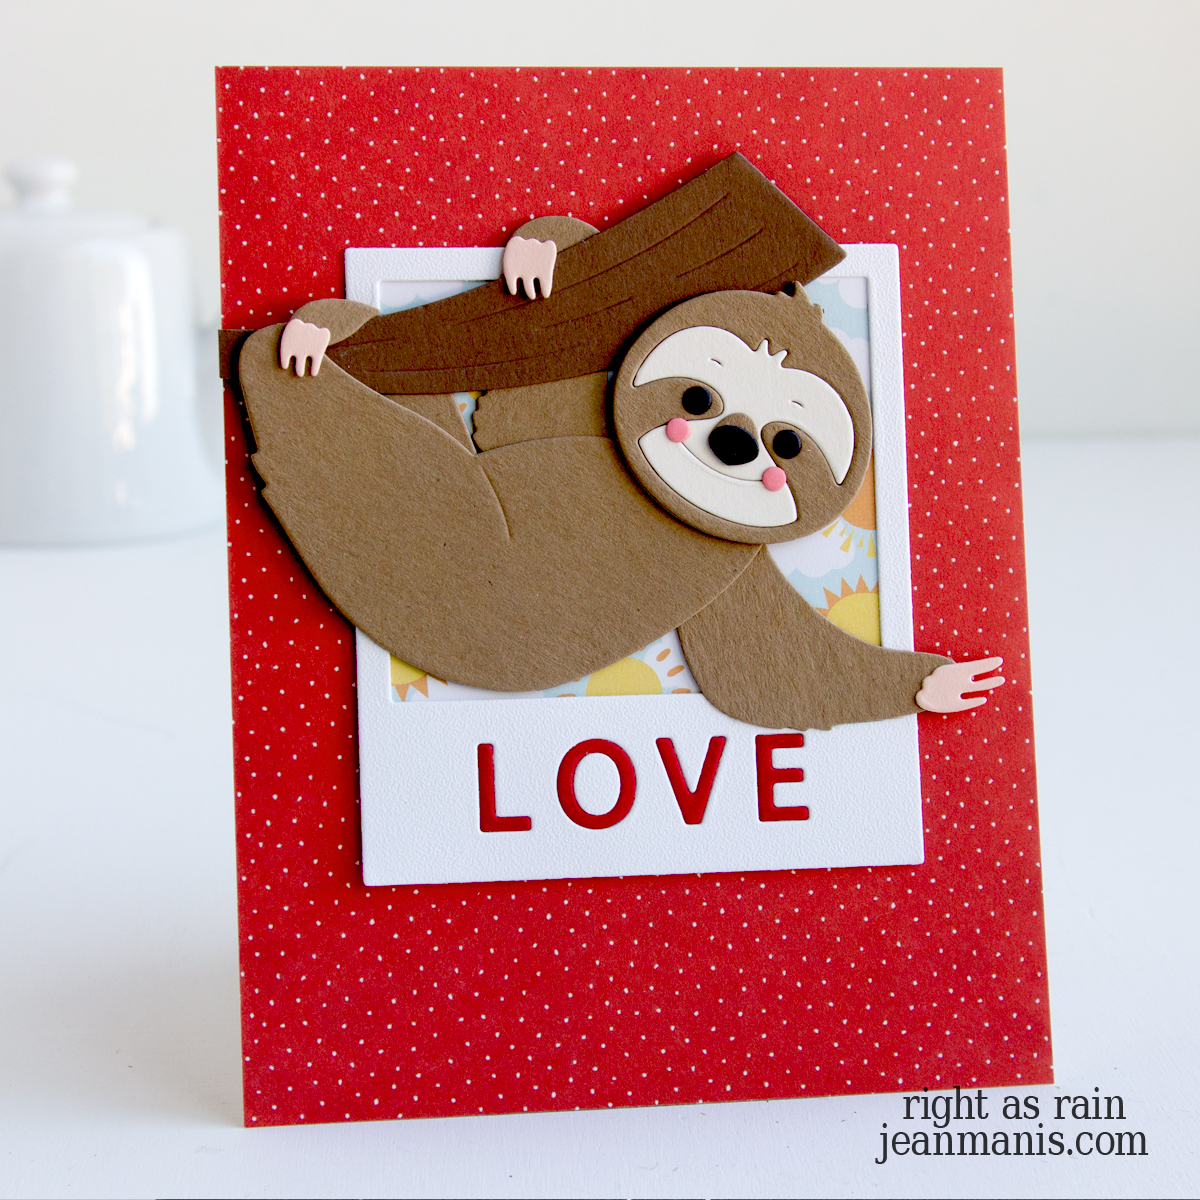
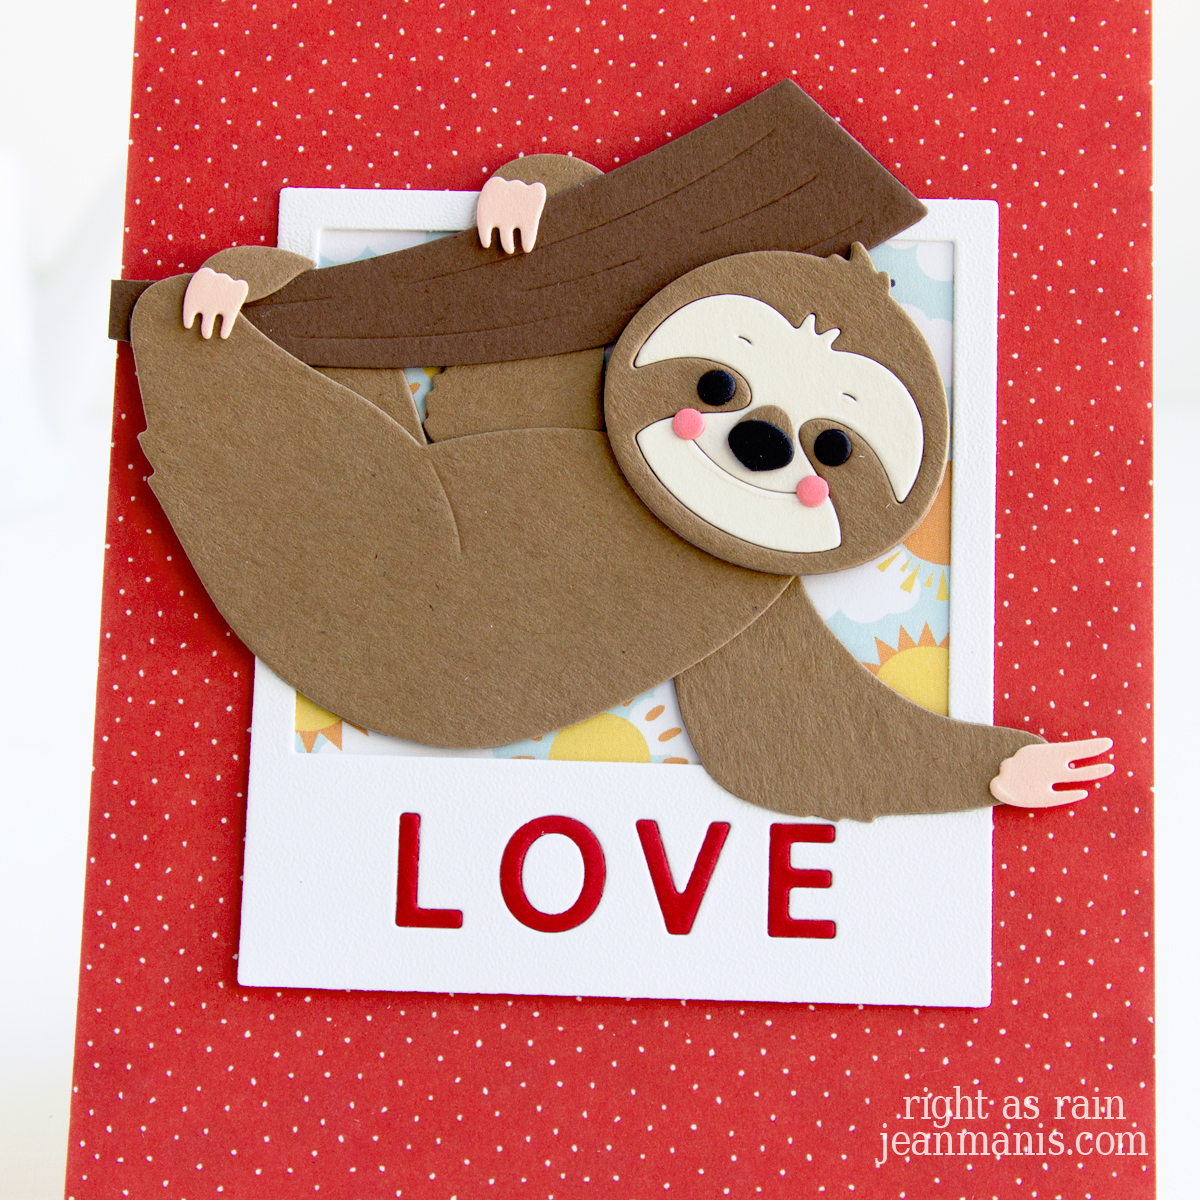
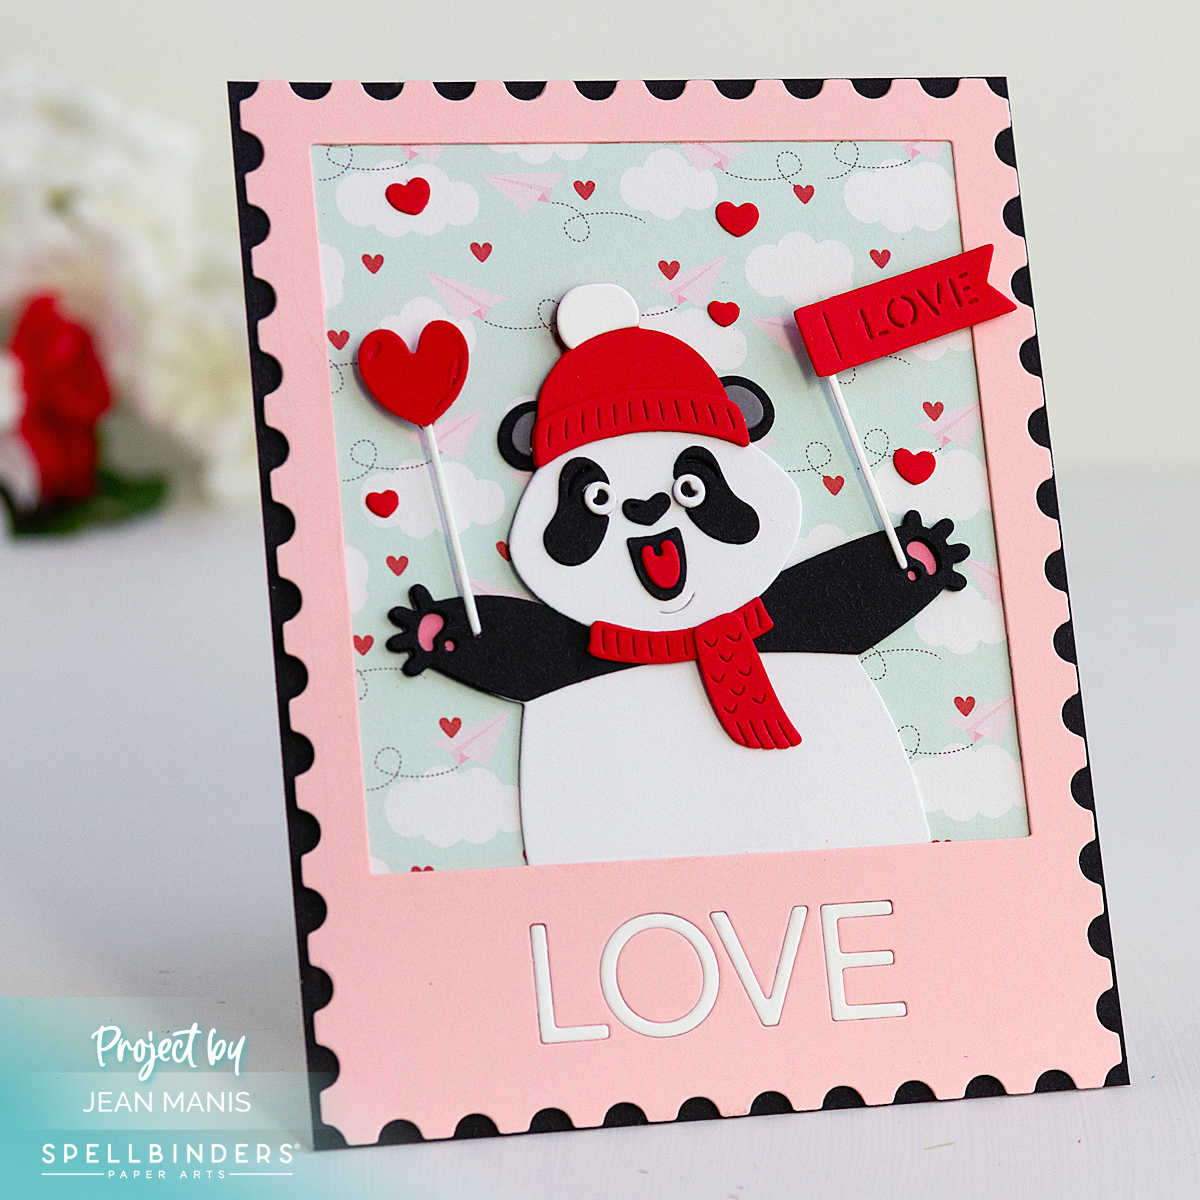
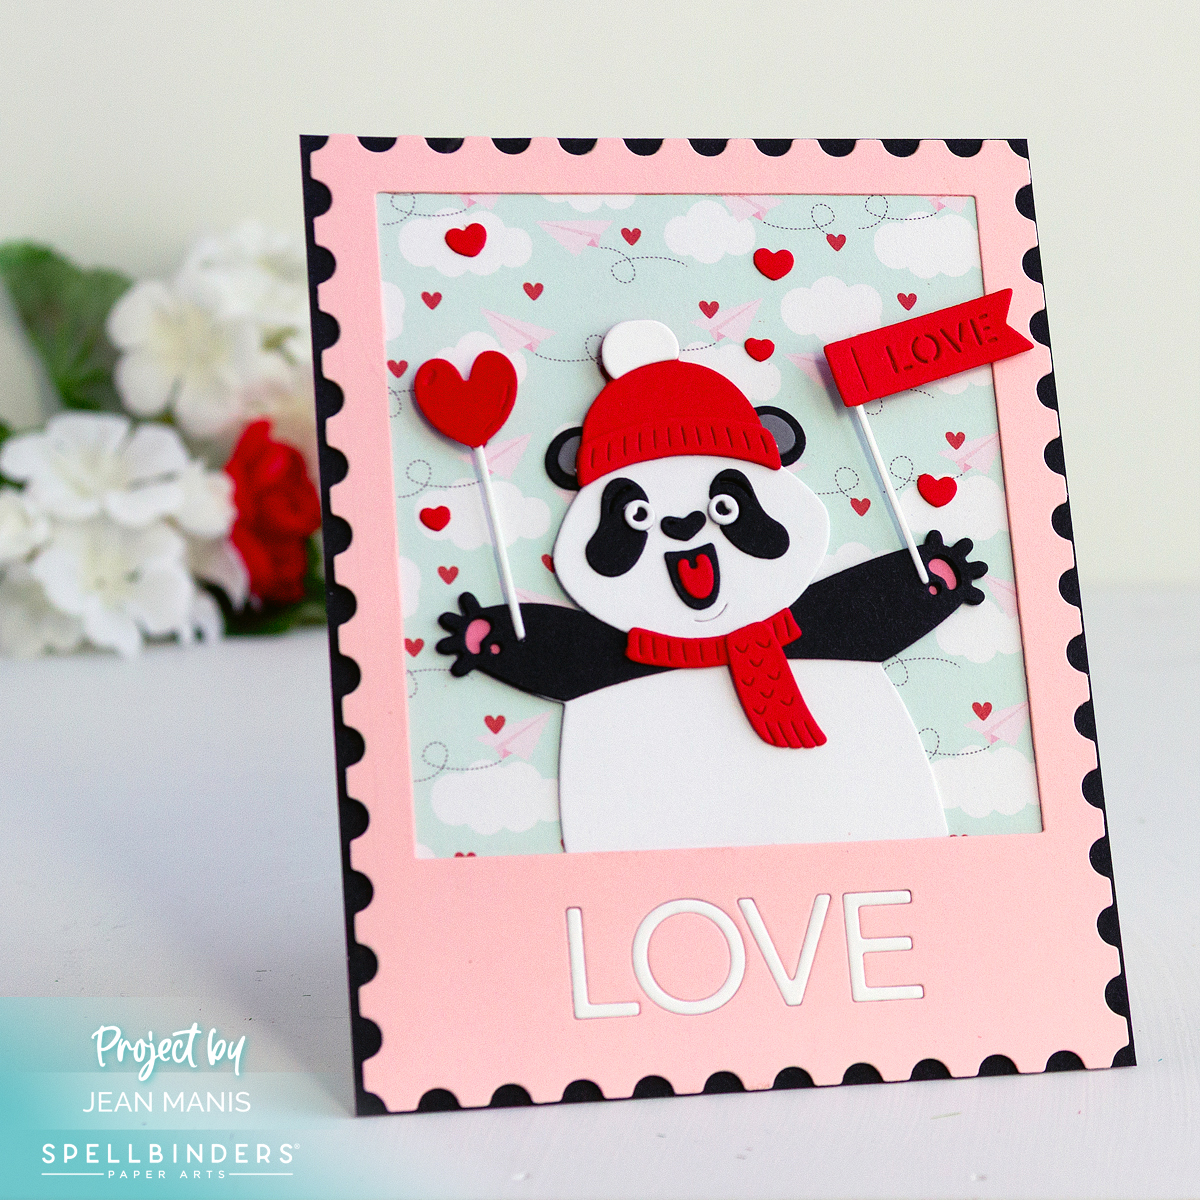
Special Delivery! A Snail Mail Card

Hello! Who says mail delivery has to be boring? My latest card brings a delightful twist to happy mail with a charming little snail on a mission! Using the Snail Mail Post die set—this month’s Small Die of the Month offering at Spellbinders—I crafted a whimsical scene featuring a determined snail, a colorful post box, and cheerful tulips. This snail is ready to spread joy, one letter at a time!

A Snail Mail Card

    • Add patterned paper to an A2-size card base.
    • Cut snail, post box, and tulips with dies in the Snail Mail Post set from a variety of cardstock colors. Assemble.
    • Stamp Message Strips sentiment on Classic White cardstock in black ink and cut with a coordinating die.
    • Cut patterned paper with the sloped line die in the Snail Mail Post set to create the ground. Attach to card base.
    • Add elements to the card with foam squares and dot adhesive.

A Snail Mail Card


Cute & Quick Valentine Card

Hello! This adorable Valentine features a sweet sloth framed with a Polaroid-style die-cut that includes the word “LOVE,” created with Elizabeth Craft Designs die sets. It’s a quick and fun project, perfect for spreading joy to someone special!

Elizabeth Craft Designs | Slow the Sloth

    • Cover an A2-size card base with patterned paper.
    • Cut Slow the Sloth from a variety of cardstock colors and assemble.
    • Cut the Peek-A-Boo frame (now retired) from white and red cardstock. Use the inlay technique to place the letters in the frame.
    • Back the frame with patterned paper and add to the card base.
    • Add the assembled sloth.

I previously shared a friendship card with Slow the Sloth HERE.

Elizabeth Craft Designs | Slow the Sloth

Valentine Card with Colorful Birdhouses

Hello! This Valentine’s Day card features three charming birdhouses in vibrant colors, set against a softly embossed sky filled with hearts. The playful “I ❤️ U” sentiment adds a sweet and simple message, making this card a delightful way to celebrate love. Keep reading to see how I brought this cheerful Valentine design to life!

Valentine Card with Colorful Birdhouses

    • Cover an A-2 size card base with a panel of patterned paper.
    • Use a scallop oval die to cut a white oval and add to the card base. I used a now-retired Spellbinders set.
    • With the Sunny Studio Stamps Build-A-Birdhouse set, cut the birdhouses and birds from a variety of cardstock colors. Assemble.
    • With an oval die, cut teal cardstock and dry-emboss. I used a coordinating die from the aforementioned set and a now-retired Spellbinders embossing folder. With the same oval die, cut an oval from white cardstock. Cut off the top of the oval with a snow hill die.
    • Cut the Speech Bubbles sentiment and add to the snow hill.
    • Add the assembled birdhouses and birds to the dry-embossed oval; trim the birdhouse posts as needed. Add the snow hill piece to the front.

Valentine Card with Colorful Birdhouses

I shared a spring-themed card with the same birdhouse die set HERE.


Whimsical Gnome-Themed Valentine Card

Hello! Ready to add a touch of whimsy to your Valentine’s Day? This handmade card features a gnome standing beside a charming mushroom house, accompanied by a friendly snail and a heartfelt “love you” sentiment. Crafted using Spellbinders dies, this card celebrates the season of love with a dash of whimsy!

Gnome-Themed Valentine Card

    • Dry-emboss Sea Glass cardstock A2-size panel with the Tiny Dots folder; add to card base.
    • Adhere strip of dark gray cardstock (Taylored Expressions Poppy Seed) along the bottom as a ground.
    • Cut the house and snail from cardstock with the Mushroom Mansion die set; assemble.
    • Cut the gnome with dies in the Garden Buddies set; assemble.
    • Cut the heart wand and embellishment hearts with dies in the Parcel & Post Heart Decorations set.
    • Cut the sentiment from black cardstock and vellum with dies in the Space Greetings set; assemble.
    • Add assembled items to the card base with dot and foam adhesive.

Gnome-Themed Valentine Card

Looking for more inspiration with these dies? Check out this fall-themed card.


Storybook House Valentine

Hello! After posting this roundup of house-themed cards, I was inspired to craft a storybook house Valentine with a heart serving as the house body. Using Lawn Fawn dies for the roof, door, and windows, I transformed a simple idea into a whimsical creation full of charm. Let me take you through how I made this Valentine’s Day card

Storybook House Valentine

    • The overall card size is 5″ square. I do not own a die that size, but I realized I could use by rectangular die to cut the sky and the ground to form a square. To begin, use a 5″ x 3 3/4″ rectangle die to cut light teal cardstock. Apply modeling paste through the Fall Hearts stencil and set aside to dry.
    • Stamp the Simply Celebrate Hearts sentiment on white cardstock. Cut the top with a die in the Simple Stitched Hillside Borders set and the base with a 5″ x 3 3/4″ rectangle die. Adhere the sky and snowbank to a 5″ square card base.
    • Use a heart die to cut the house base from textured red cardstock. I used a now-retired nesting set from Spellbinders.
    • Use dies in the Build-A-House, Scalloped Treat Box Spring House Add-On, and Scalloped Treat Box Beach House Add-On sets to cut the door, window, roof pieces, and stairs; assemble as required.
    • Add the assembled elements to the heart house with foam adhesive. Add the assembly to the card base.

Storybook House Valentine