Reverse Confetti Happy Fall-idays: Halloween

Welcome to the first day of the Reverse Confetti Happy Fall-idays – an event to provide ideas and inspiration for the holidays! Today we’re featuring Halloween projects! At the end of the post I’ve provided a list of everyone from the Reverse Confetti Design Team sharing ideas for Halloween.

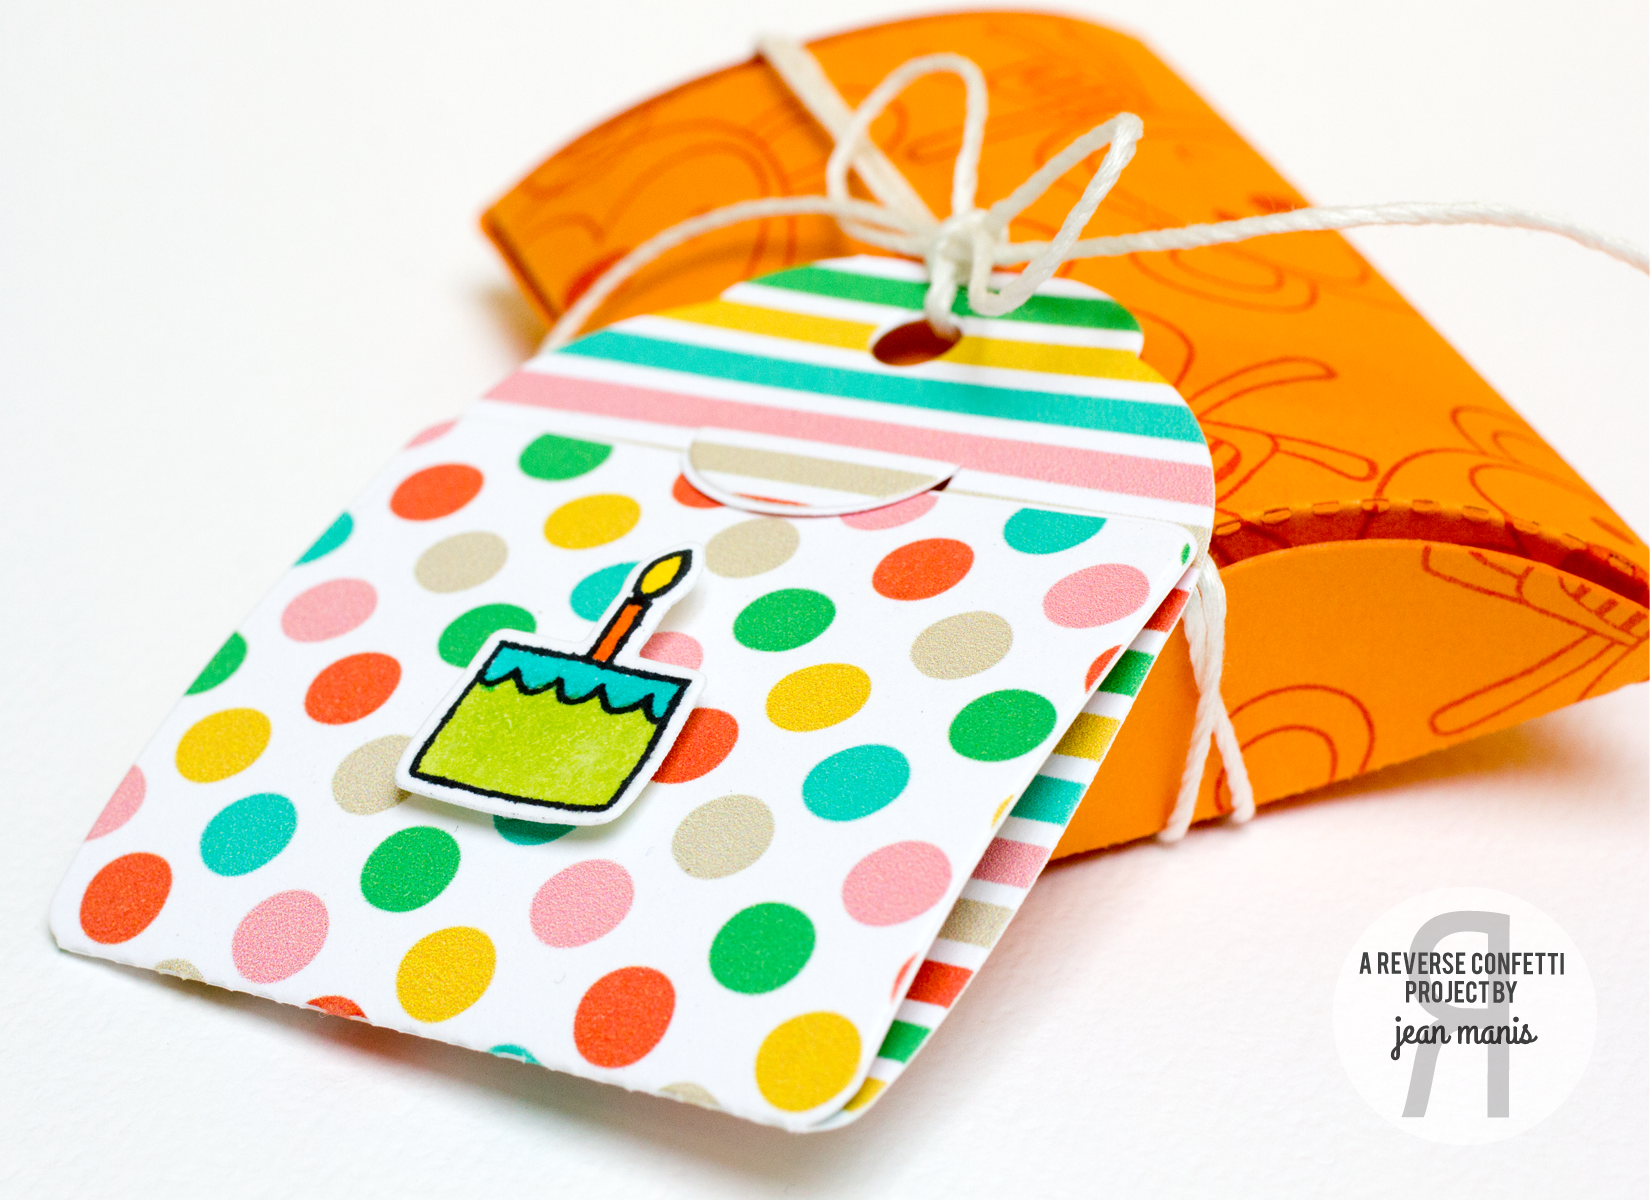
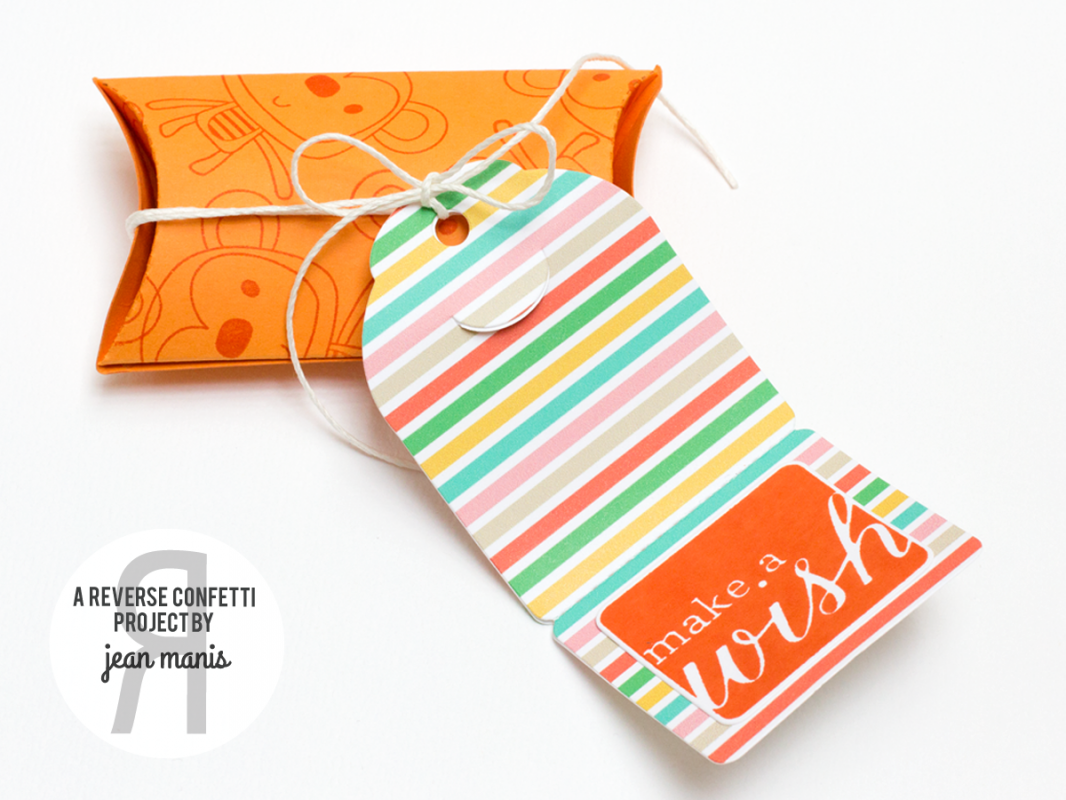
My first project features Halloween treat packaging. I’ve created three different tags in orange, green, black and white.

HalloweenPackaging

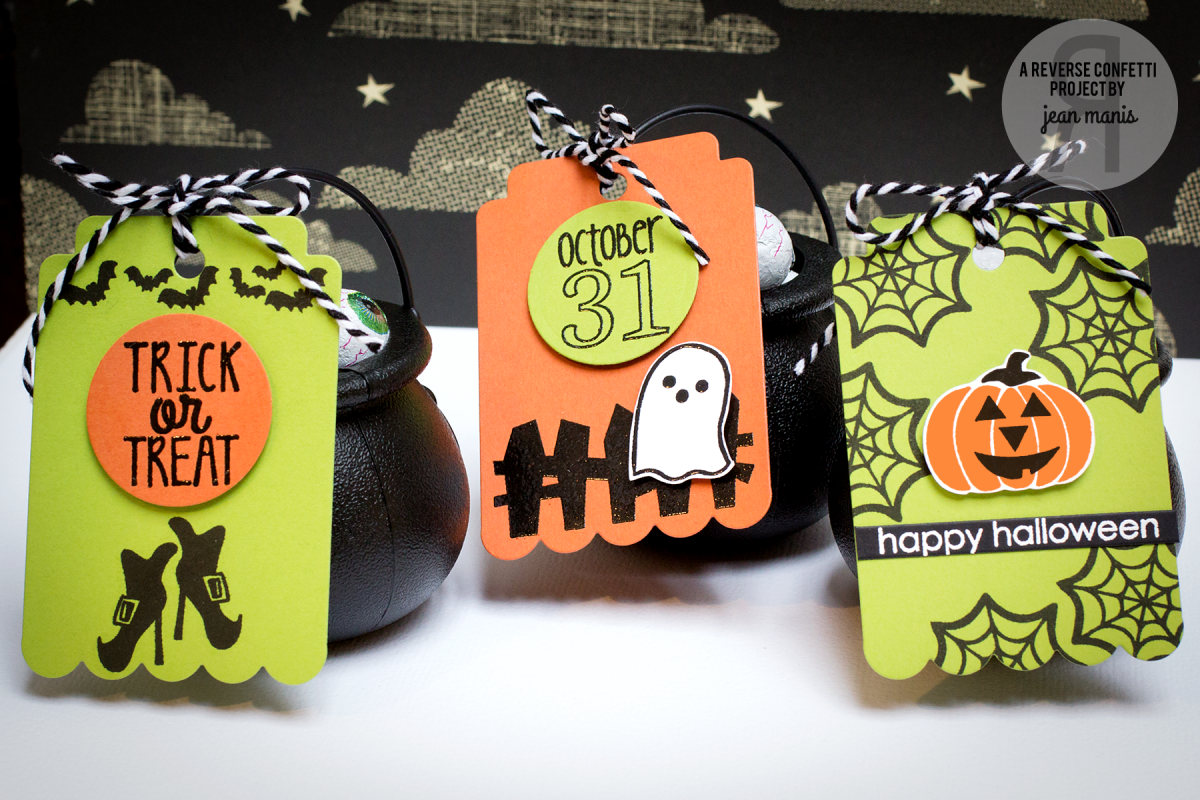
For the tag base, I used the Thanks Tag Confetti Cuts die. I stamped and heat-embossed images and sentiments from Spooky Cuties and Spooky Sentiments.

The tags are tied to tiny cauldrons filled with chocolate eyeballs!

My second project is a Trick or Treat party banner created with one of the Layered Banner Duo Confetti Cuts die.

HalloweenPartyBanner

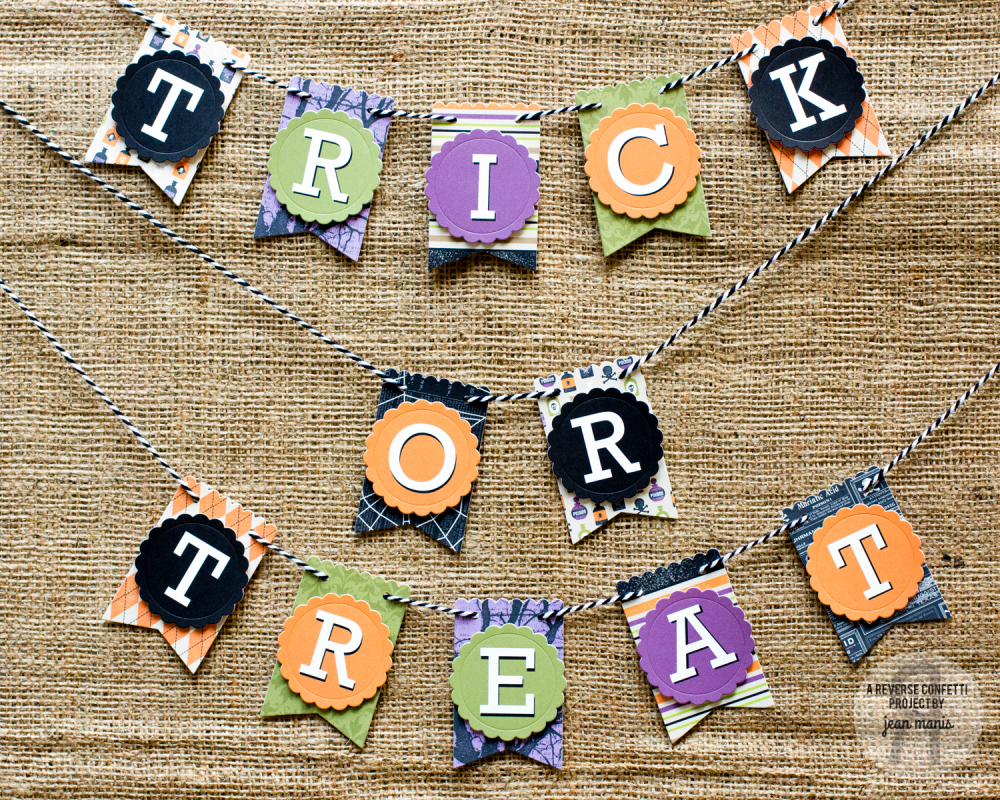
I created the letters on my computer and cut them out with one of the Circles ‘n Scallops Confetti Cuts. I attached the letters to banners cut from patterned paper with the Layered Banner Duo Confetti Cuts die.

I punched holes on either side of the top of the banners and strung them with chunky twine!

There’s lots of inspiration being shared today by the design team, check it out!

Reverse Confetti October Release Blog Hop

The wait is over! REVERSE CONFETTI has just released THREE stamp sets, SIX Confetti Cuts, ‘Tis the Season Quick Card Panels and other crafting goodies! The hop began on the Reverse Confetti blog, and you should have made it here from Lisa’s blog. It would be worth your while to start at the beginning of the hop, so you don’t miss a thing. We have tons of inspiration for you to see using all the new Reverse Confetti stamp sets and dies!

My first project is a CAS holiday card featuring the deer image from the Jolly Holliday set and a ‘Tis the Season Quick Card Panel.

JollyHolidayDeer

I stamped the deer image, colored it with Copic markers and cut it with its corresponding Confetti Cuts die. I heat-embossed the sentiment and adhered the deer and sentiment to a ‘Tis the Season Quick Card Panel. I added twine to complete the card.

I also created two gift boxes using the Frosted Pillow Boxes with tags made with the Layered Snowflake Confetti Cuts set.

GiftBox2

Not only do the Frosted Pillow Boxes simplify gift packaging, you can easily customize the packaging! For my first box, I wrapped the gift in silver tissue paper, created a belly band for the pillow box from patterned paper and crafted the snowflake to match the patterned paper.

For the second package, I stuffed the pillow box with shredded paper and candy, chose a traditional holiday patterned paper for the belly band, and tied on a snowflake cut from glitter paper.

GiftBox

I hope you’ve enjoyed hopping with us today. Be sure and hop with us on the 8th of EVERY MONTH for more REVERSE CONFETTI inspiration! Now it’s time to hop on over to the blog of Amy Rohl. If you get lost along the way, you can find the hop order and list of all the participating designers on the Reverse Confetti blog.

Reverse Confetti Birthday Gift Box

Today, I’m sharing an easy-to-create birthday gift box project featuring several Reverse Confetti stamp and Confetti Cuts sets.

GiftBox1

I had in mind gift packaging for a child, and the monkey from Monkey Business was my starting point. To begin, I cut orange cardstock with a pillow box die and stamped on it repeatedly (and in a random fashion) with the monkey, using orange ink for a tone-on-tone background.

GiftBox2

I created a tag from two pieces of patterned paper with the Folded Tags Confetti Cuts (I cut both patterns with the die and adhered them together). I stamped the cake from Later Alligator, colored it with Copic markers and cut it with its coordinating Confetti Cuts die. I added it to the front of the tag and added a stamped sentiment from the Folded Tags Sentiments set to the inside. The tag is tied onto the pillow box with twine.

GiftBox3

Reverse Confetti – Mixed Media Faith Bookmark

Today, I’m sharing a mixed-media, faith-based bookmark featuring one of the sentiments from the Reverse Confetti God Is Good set.

FaithBookMark

Both Reverse Confetti God Is Good and Walk By Faith stamp sets can be used for Bible journaling. I don’t own a Bible with a journaling margin so decided to make a bookmark.


To begin, I applied three colors of Peerless Watercolors to watercolor paper and then die cut a large tag out of the watercolored paper. I stamped the sentiment and added clouds and a sun die cut with the Weather It Together Confetti Cuts set. The sun was also colored with Peerless watercolors. To finish I added ribbon that I dyed with Distress Stain.

Reverse Confetti August Creative Blog Hop

Welcome! This month’s creative hop focusing on Summer Fun started on the Reverse Confetti blog. You should have made it here from Lisa’s blog. It would be worth your while to start at the beginning of the hop, so you don’t miss a thing. We have tons of inspiration for you!

I’m sharing two summer vacation-themed scrapbook layouts for which I created embellishments using Reverse Confetti stamps and dies. My first layout (letter-sized) chronicles a family vacation on Martha’s Vineyard.

I stamped the journaling with one of the word/phrases from Here’s the Story. I heat-embossed another Here’s the Story phrase on black cardstock and cut it with the banner die in the Tag Me Confetti Cuts set. Its anchored with a die cut from the Documented Confetti Cuts set.

To the right-hand corner, I added a banner cut with the Double Banner Garland Confetti Cuts. The sentiment from Posted Note Sentiments was heat-embossed on red cardstock and cut with the circle die in the Donut You Know Confetti Cuts set. To finish, I added stars cut with the You Are A Star Confetti Cuts set and a red border cut with the Double Edge Scallop Border Confetti Cuts.

The focus of my second layout (letter-sized) is a family vacation on Maui. The Pineapples Aplenty stamp set, with its coordinating Confetti Cuts set, worked perfectly for a visual accent with the journaling.

I stamped the journaling with one of the word/phrases from Here’s the Story. I heat-embossed another Here’s the Story phrase on black cardstock and cut it with the banner die in the Tag Me Confetti Cuts set. Its anchored with a die cut from the Documented Confetti Cuts set.

The sentiment from Posted Note Sentiments was heat-embossed and cut with the circle die in the Donut You Know Confetti Cuts set. To finish I added stars cut with the You Are A Star Confetti Cuts set.

I hope you’ve enjoyed hopping with us today. Comment at each stop along the way for a chance to win a $15 gift certificate. Comments close Monday at noon Central Time; the winner will be announced on Tuesday. Now it’s time to hop on over to Kathy’s blog. If you get lost along the way, you can find the hop order and list of all the participating designers over on the Reverse Confetti blog.