Impression Obsession | Winter Mittens

Impression Obsession | Winter Mittens

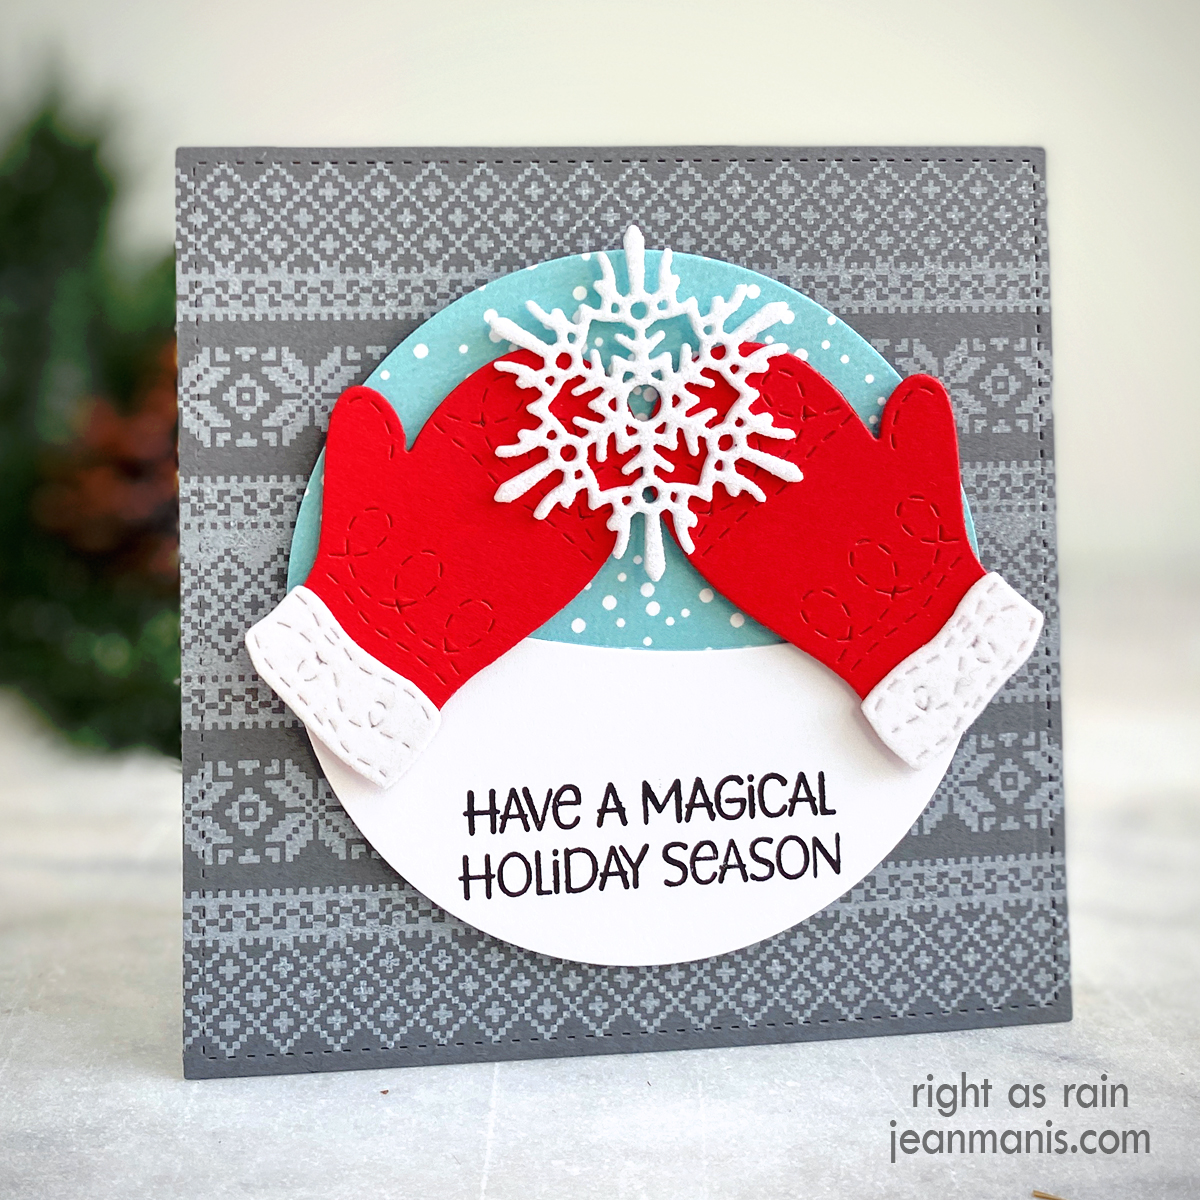
Hello! Today, I am sharing a holiday-themed card featuring Impression Obsession stamp and die sets. Some of the supplies I have owned for years, and others I recently purchased.

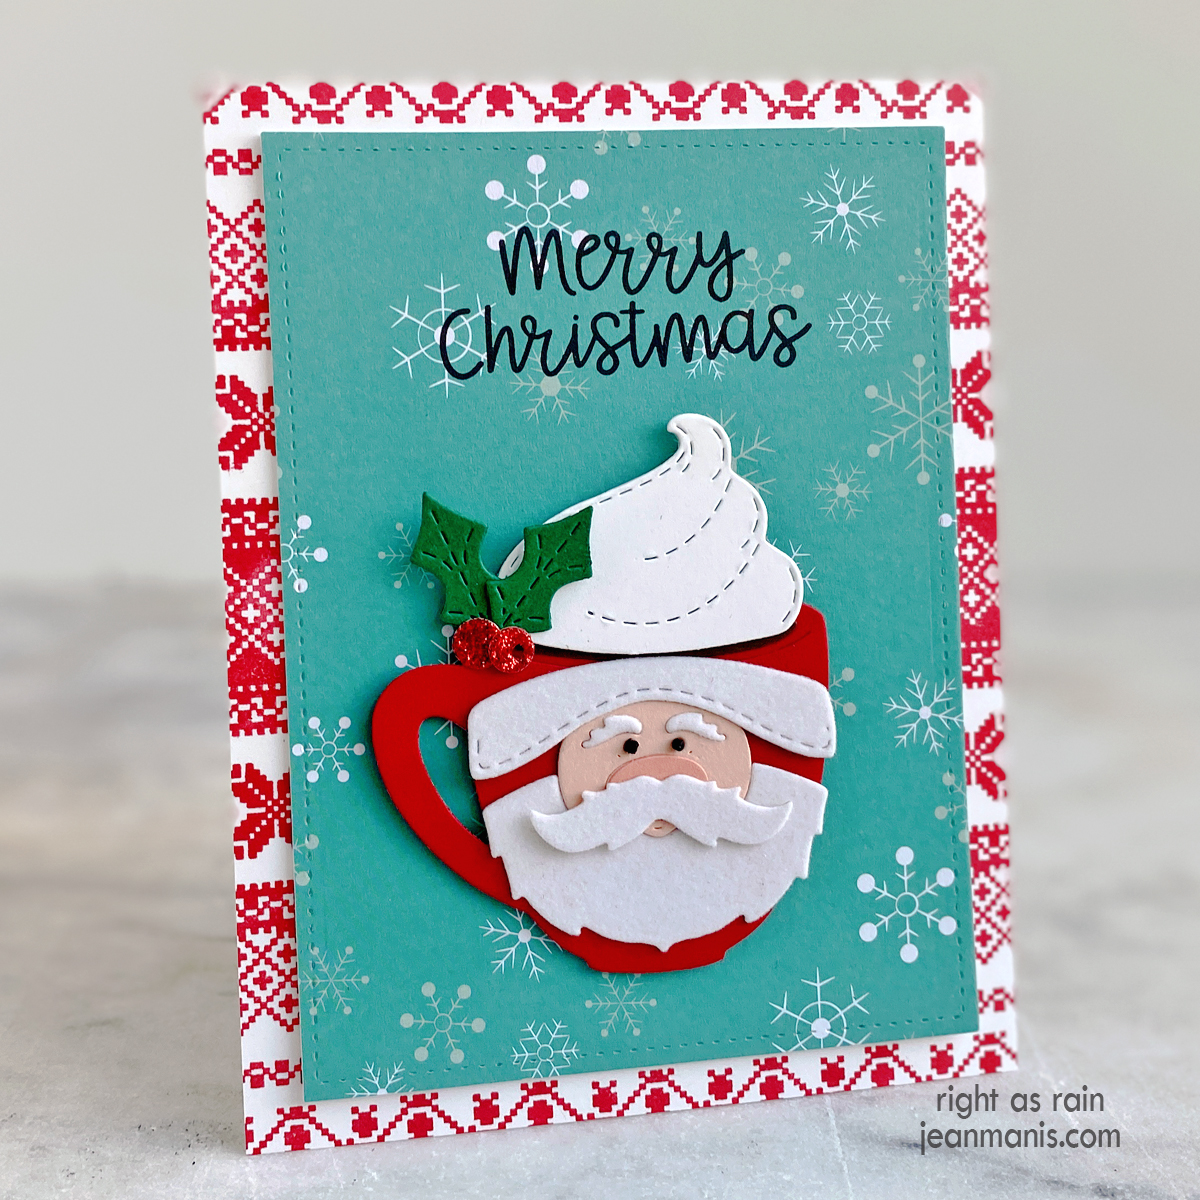
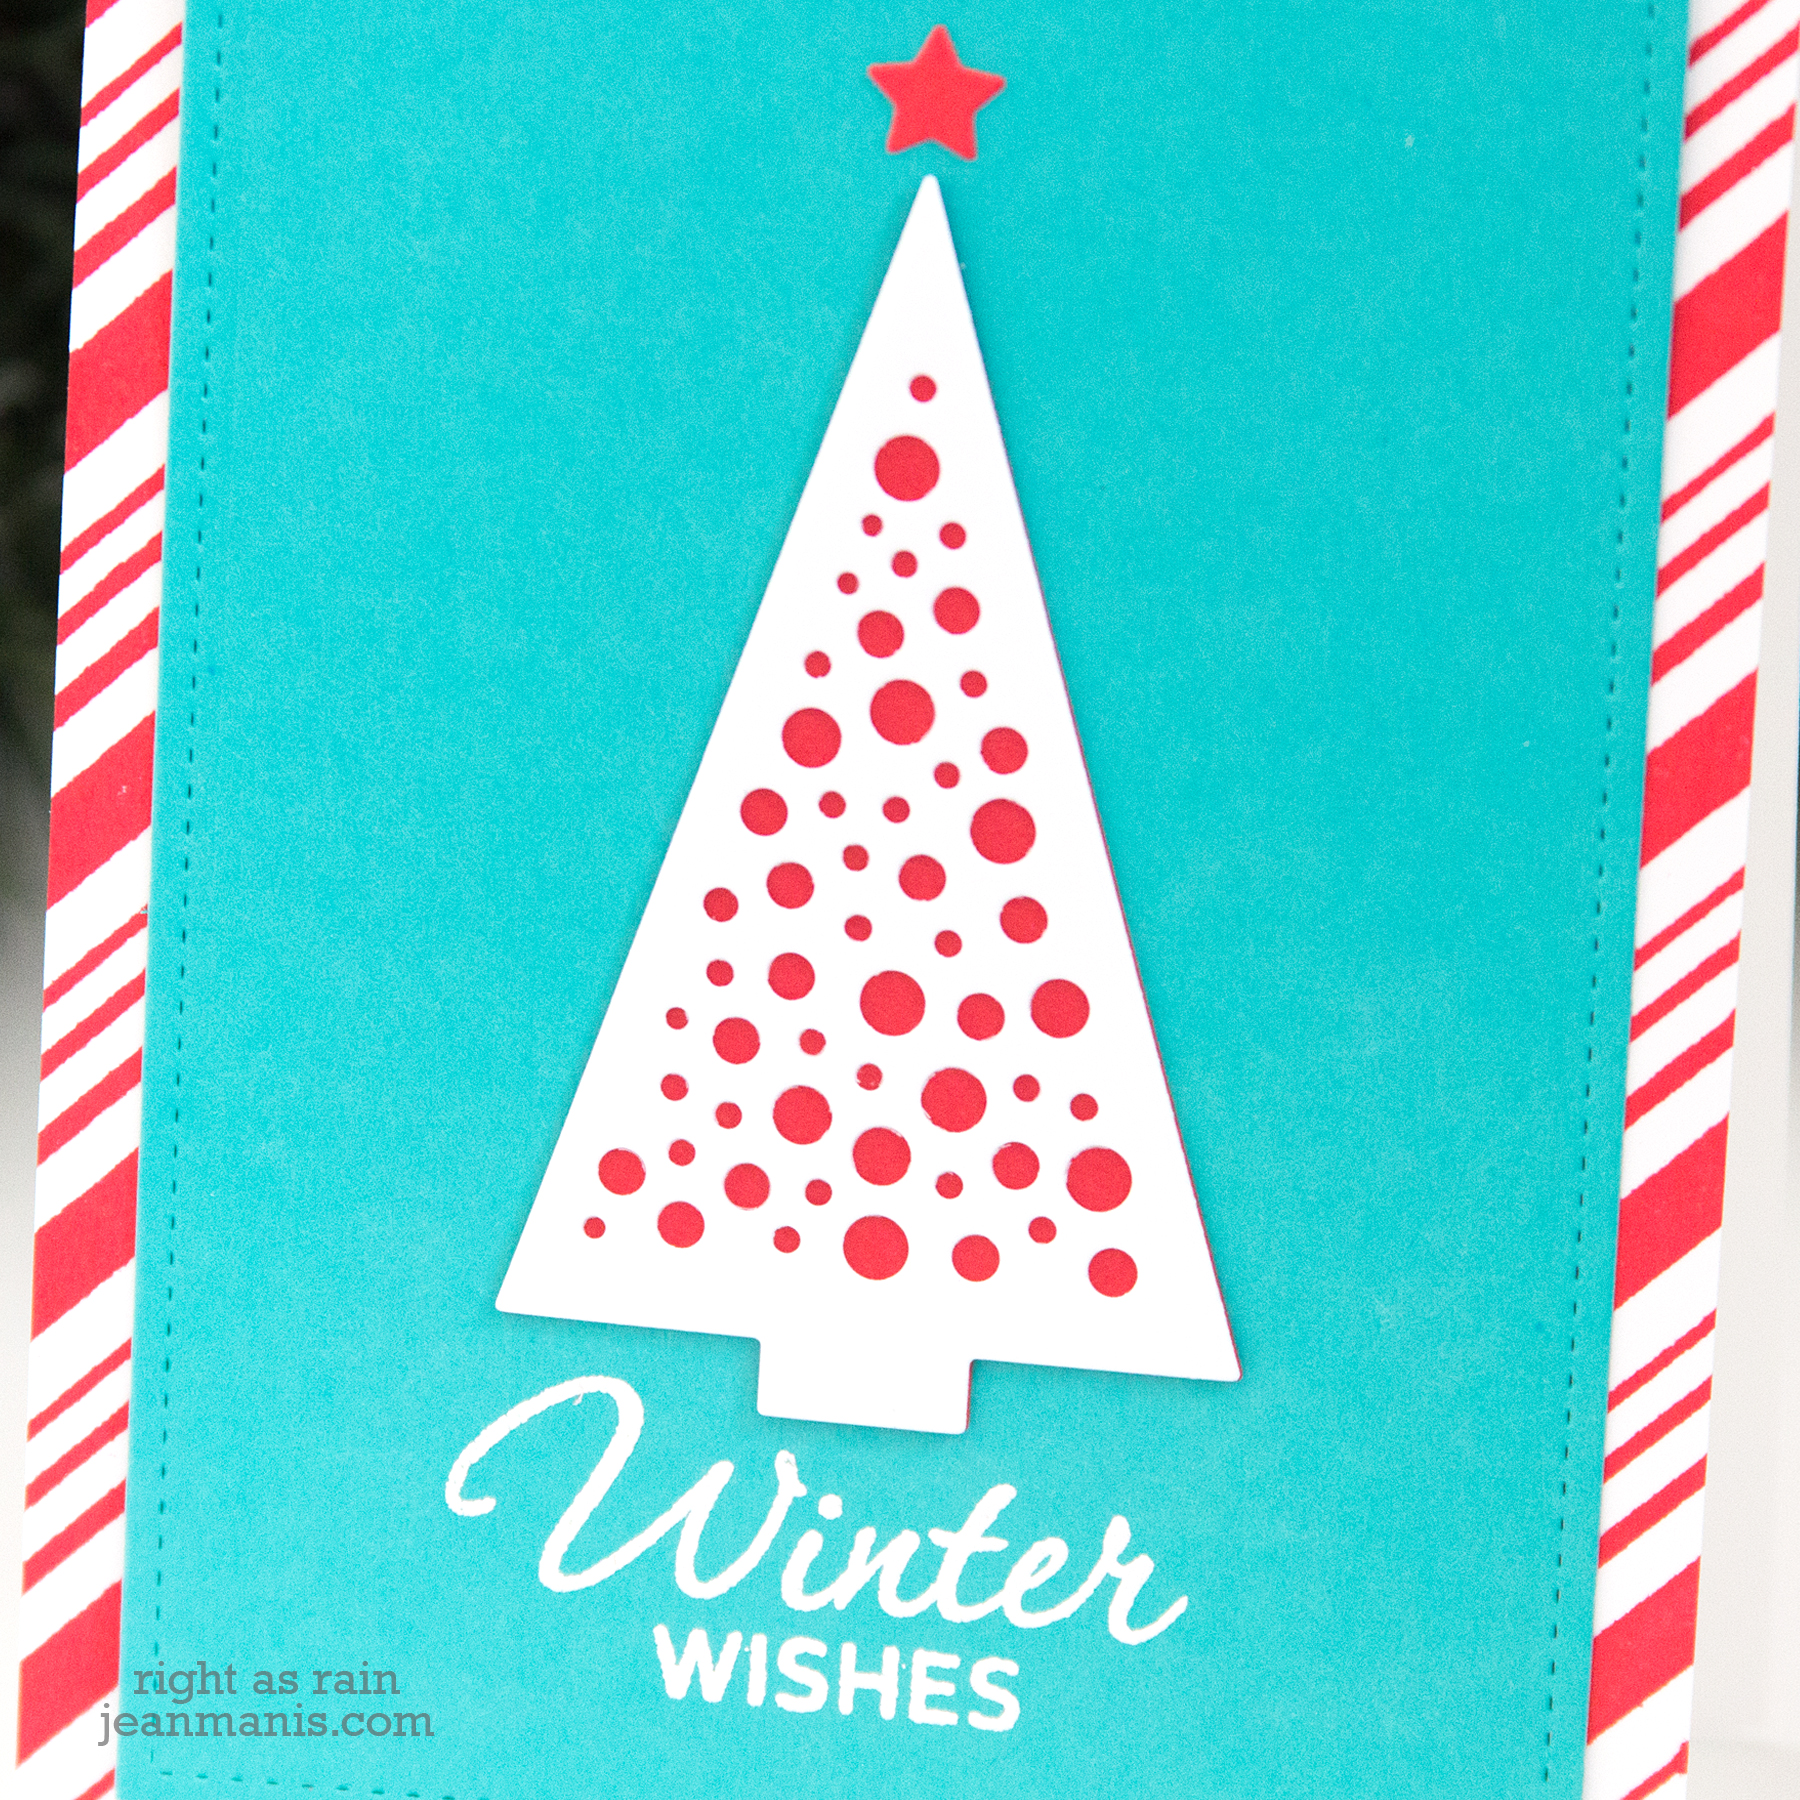
  • To begin, I stamped the Nordic Stripes in white pigment ink on SU Basic Grey cardstock. (As I mentioned in this post on stamped backgrounds, I have been challenging myself to use my background stamps more often. I used the same background stamp on this card.) I used a 4 1/2″ square die to cut the stamped background and added it to a card base.
  • I cut a circle from patterned paper with a 3 1/2″ die. With the In & Out 11 sentiment set, I stamped the sentiment in black on white cardstock. I cut the sentiment with the 3 1/2″ circle die and then with a snow slope die (I used a die in the now-retired MFT Stamps Snow Drifts set).
  • I cut the mittens from red cardstock and white flocked cardstock with the Mittens set. I cut the snowflake with a die in the Small Snowflakes set from white glitter foam.
  • I added the circle assembly to the card with foam adhesive.
  • I added the mittens to the circle with foam adhesive and then added the snowflake to the mittens with glue.

Impression Obsession | Winter Mittens

Impression Obsession | Winter Mittens

These same elements could be used on a non-Christmas, winter-themed card. I wrote about extending the joy of the season with winter-themed cards that can be sent for occasions other than Christmas HERE.


Impression Obsession | Santa Mug

Hello! Today, I am sharing a hot beverage-themed Christmas card featuring the Santa Mug die set from Impression Obsession. I recently posted about the hot beverage theme HERE. This Santa Mug immediately caught my eye when I saw the Impression Obsession September release. Impression Obsession is a company whose products I have been buying for years.

Impression Obsession | Santa Mug

I happily stumbled upon the 52 Christmas Card Throwdown with the theme Christmas Cup.

52 Christmas Card Throwdown

  • Stamp Nordic Stripes in red ink on white cardstock. Cut to A2-size and add to card base. After I wrote about Creating Card Backgrounds with Stamps, I reorganized my background stamps and rediscovered this one!
  • Stamp In & Out 11 sentiment in black on to patterned paper. Cut with die in the Lawn Fawn Small Stitched Rectangle set (3 3/4″ x 5″). Add to card base.
  • Cut Santa Mug pieces from a variety of cardstocks. I used black glitter foam for the eyes. Add assembly to card front with foam adhesive.

Impression Obsession | Santa Mug


CAS Christmas Tree – Impression Obsession Christmas Tree Cutout

Hello! Today, I am sharing a CAS Christmas card created with supplies that I’ve owned for some time. In fact, I first used (it’s possible it was the only time I used) the Impression Obsession Christmas Tree Cutout die in this post for Ellen Hutson in 2014. I like revisting my supplies and finding new designs on which to use them.

Impression Obsession Christmas Tree Cutout

  • I white heat-embossed one of my favorite sentiments (from the now-retired Hero Arts Operation Write Home Winter Wishes set) on Taylored Expressions Blue Raspberry cardstock. I cut the panel with a stitched rectangle die.
  • I cut the Impression ObsessionChristmas Tree Cutout tree using the outline die from Poppy Parade cardstock and again with both the outline die and detail die from white cardstock. I glued the two together.
  • I stamped the Hero Arts Candy Stripes background with Lady Bug ink.

Impression Obsession Christmas Tree Cutout

I like the whimsy of the Christmas tree, reinforced with the colors and the striped card background. Thanks for stopping by!

Supplies:

Newton’s Nook Argyle Stencil – Three Versions

Hello! I recently had some time to play with the Argyle stencil set from Newton’s Nook. I am sharing three CAS holiday cards created with the stencil set, which includes two stencils – one to make the diamonds and another to create the stitching. On the three cards, the diamonds are identical (inked with red and green). The stitching is achieved with three different products – gold ink, gold gel, and gold-foiled (using transfer gel).

Since my focus was to experiment with the different products for the stitching, I kept the design of the focal point the same – an ornament (combining two Impression Obsession die sets, now retired) with the PTI “Joy” word die. I used this same focal point recently on this card.

On the first card, I inked the diamonds with red and green inks. The stitching was inked with Color Box gold metallic ink. The sentiment was cut from Red Flock and added to the white ornament, with brushed gold ornament hanger and cord.

Newton's Nook Argyle Stencil Gold Inked

On the second card, I inked the diamonds just as before. I then cut the panel to A2-size before applying gold gel paste. Once dry, I added the ornament with brushed gold sentiment, hanger, and cord.

Newton's Nook Argyle Stencil - Gold Gel

On the third card, I inked the diamonds just as before. I then cut the panel to A2-size before applying the Transfer Gel. Once dry, I ran the panel through my Minc with Gold Foil. I added the ornament with shiny gold sentiment, hanger, and cord.

Newton's Nook Argyle Stencil - Gold Foiled

The version with the gold ink stitching is easiest to create (little dry time) and the results are the most subtle. The version with the gold gel paste is subtle, but less so than the inked version. I’ve used other gold embossing pastes before; I really liked the ease of this product’s application and the results. The third version required an additional step, that of running the panel through the laminator. That being said, the results are the most noticeable.

I really like having the time to explore products as I’ve done with these three cards.

Thanks so much for visiting!

Supplies:

Fourth of July – Die-cut MFT Birdhouse

Hello! Today I am sharing a card showcasing the Birds of a Feather and Birdhouse die sets from My Favorite Things. This design is the same as the card I shared here. I changed out the colors and created a sentiment on my computer to make a Fourth of July card. I love red, white, and blue, patterned paper, and die-cutting – this card covers all three!

Fourth of July - Die-cut MFT Birdhouse

  • I die-cut the birds, birdhouse, and floral pieces from Neenah Solar White,  SU Daffodil Delight, SU Garden Green, SU Real Red, FSJ Black Licorice, and patterned paper in my stash.
  • I assembled the pieces with Tonic Nuvo glue and added them to a panel cut from SU So Saffron (on which I had printed the computer-generated sentiment) with a now-retired MFT Blueprints set.
  • Although the Birdhouse set includes a post, I wanted my sentiment to go below the birdhouse, so I added a string of cardstock cut with the IO Vintage Ornament die to hang the birdhouse from the top of the card.

Fourth of July - Die-cut MFT Birdhouse

Hope your week is off to a terrific start!

Supplies: