
Hello! Today, I am exploring the use of cover plate dies to create backgrounds for handmade cards. This post is a continuation of my series on card backgrounds that includes Paper Based Backgrounds, Embossing Folder Backgrounds, Stenciled Backgrounds, and Stamped Backgrounds.
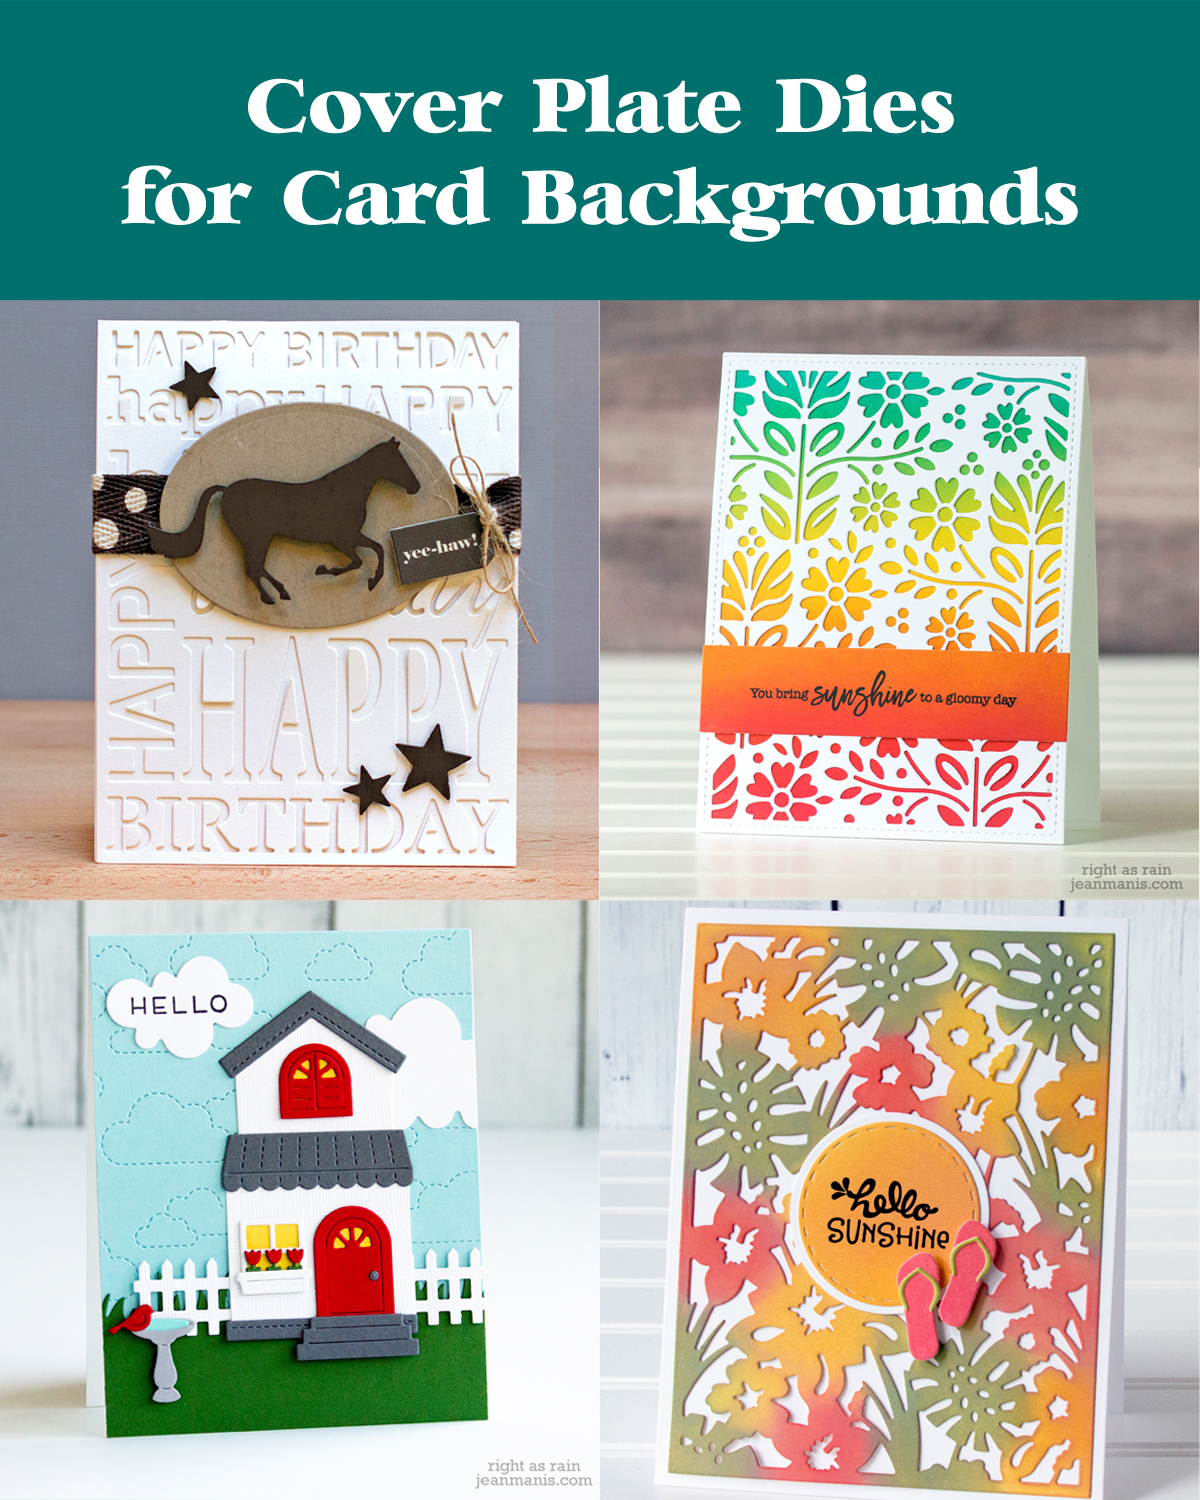
Cover plate dies (which I will also refer to as cutting plates) come in a diverse range of styles and add depth, texture, and visual interest to handmade cards.
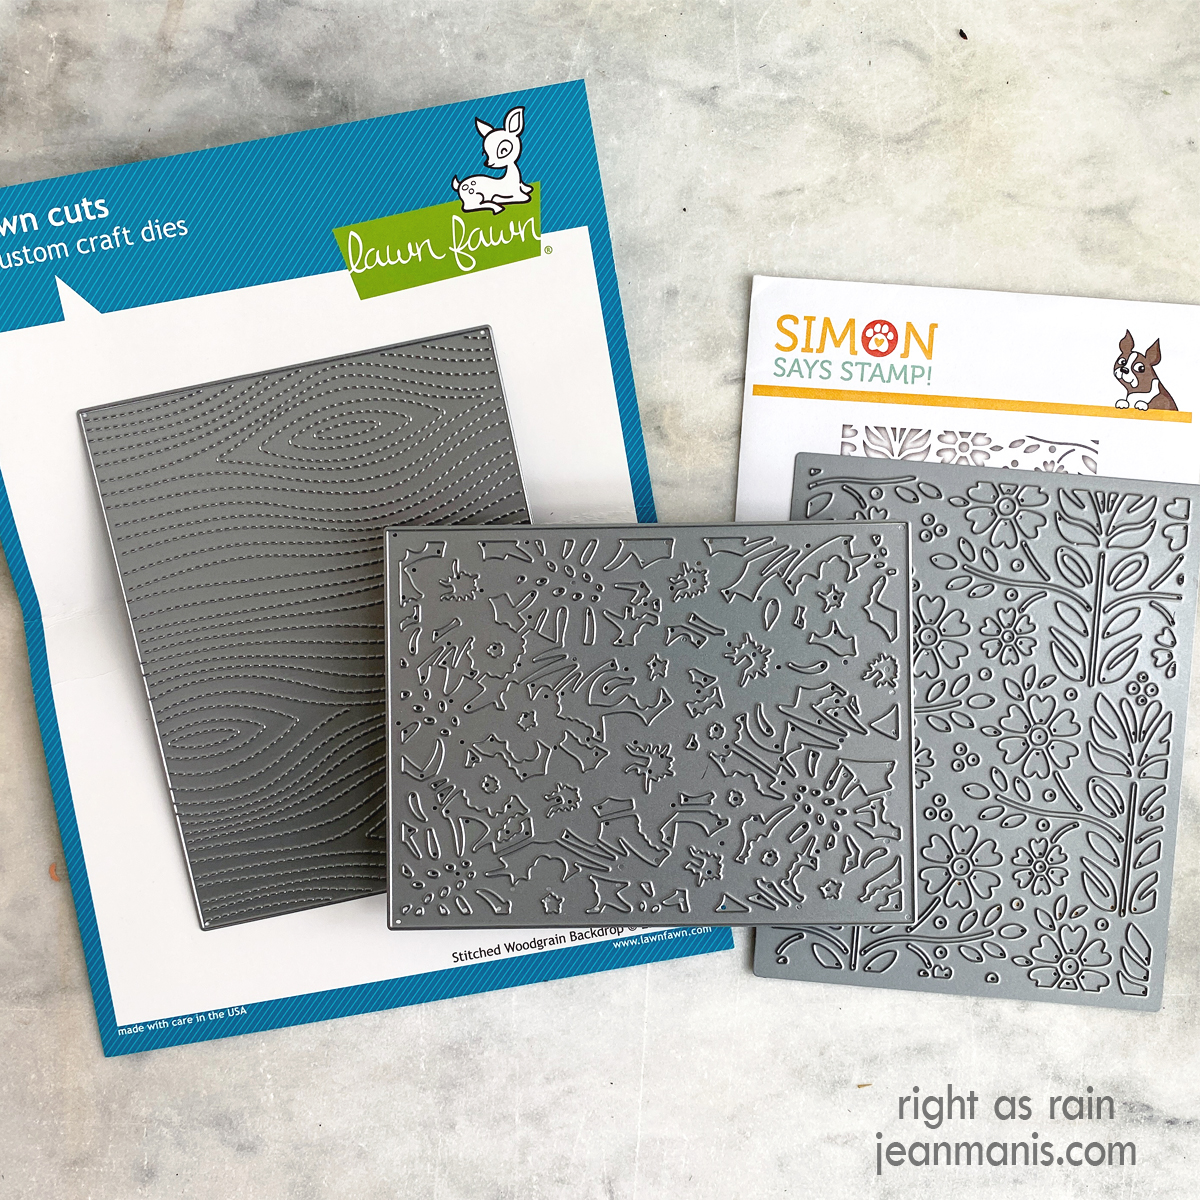
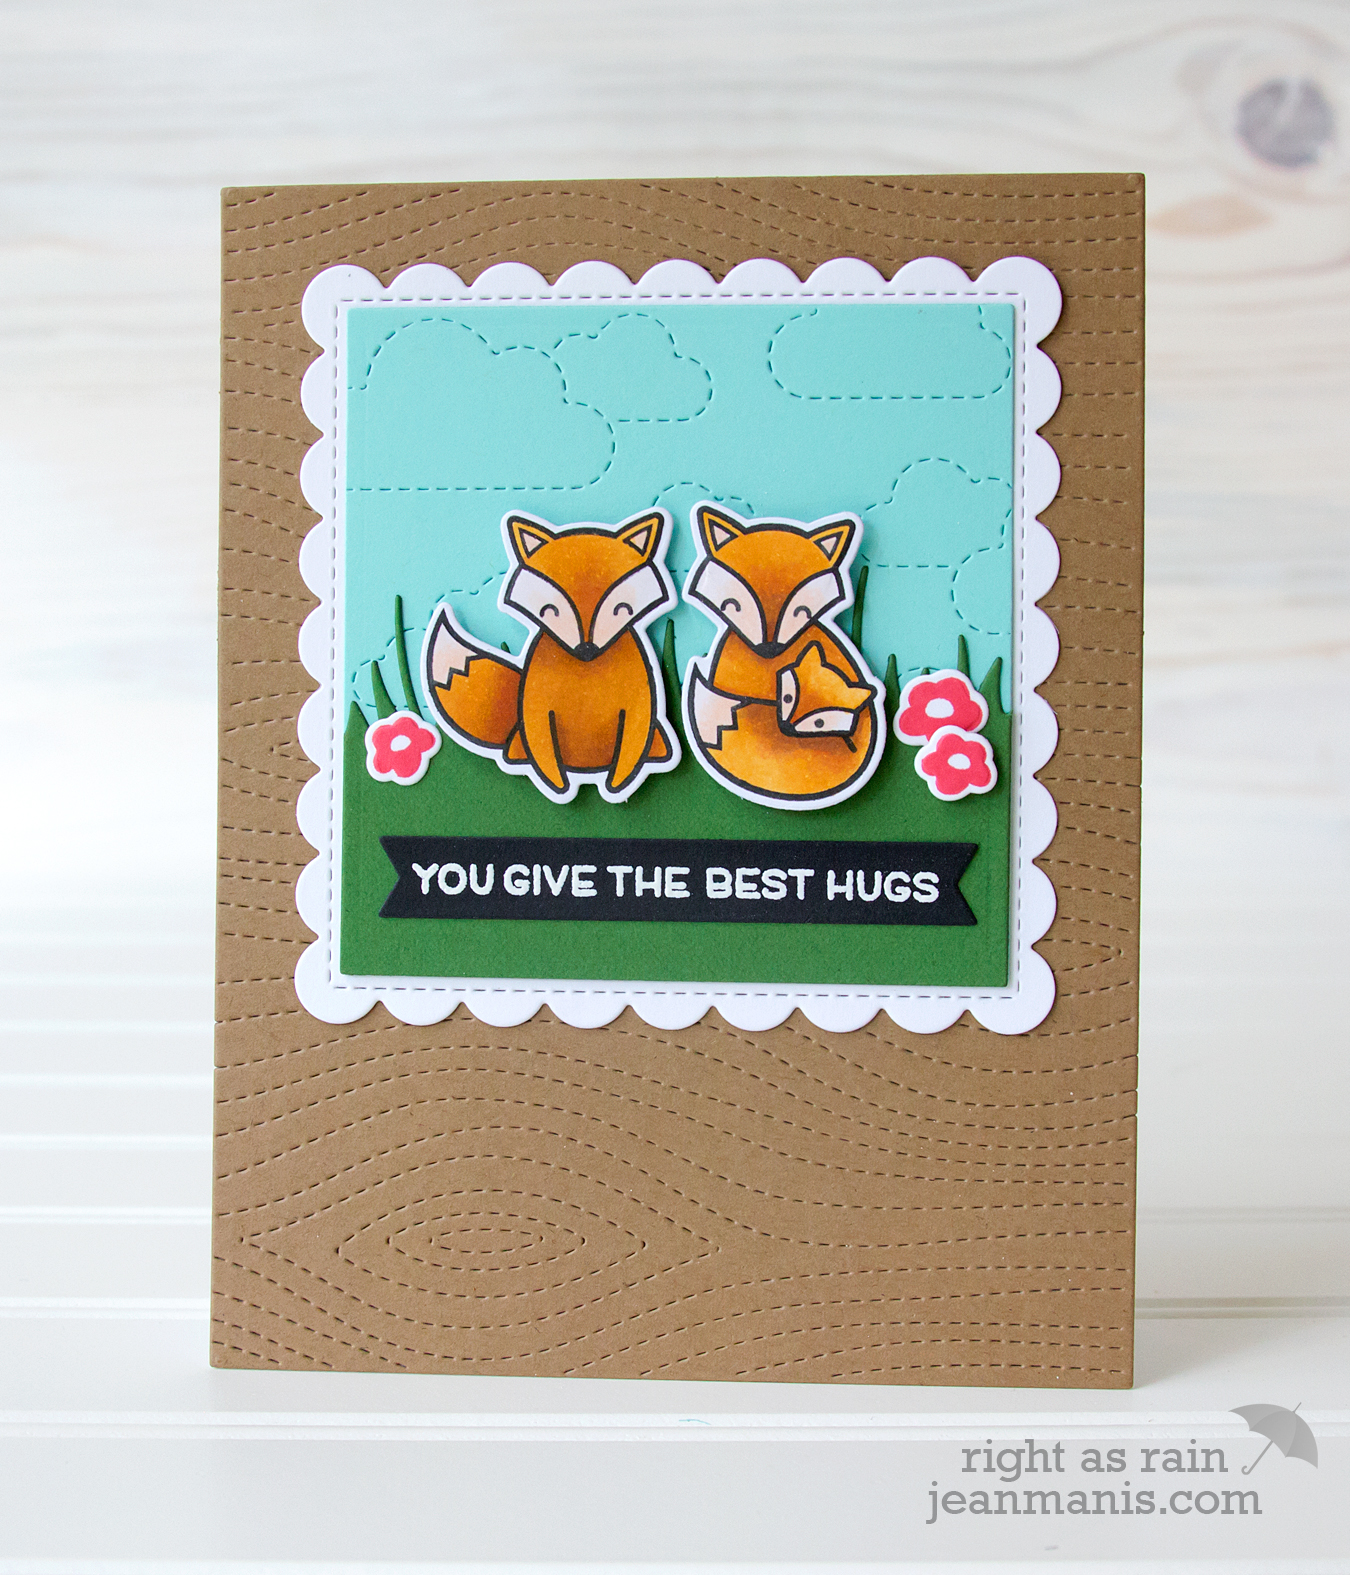
Some cover plate dies puncture the cardstock to create a subtle, textured effect. With these dies, the design is pressed into the paper, leaving a subtle impression without fully cutting through. My most often used cover plates are this type including the Lawn Fawn Stitched Cloud Backdrop shown below.
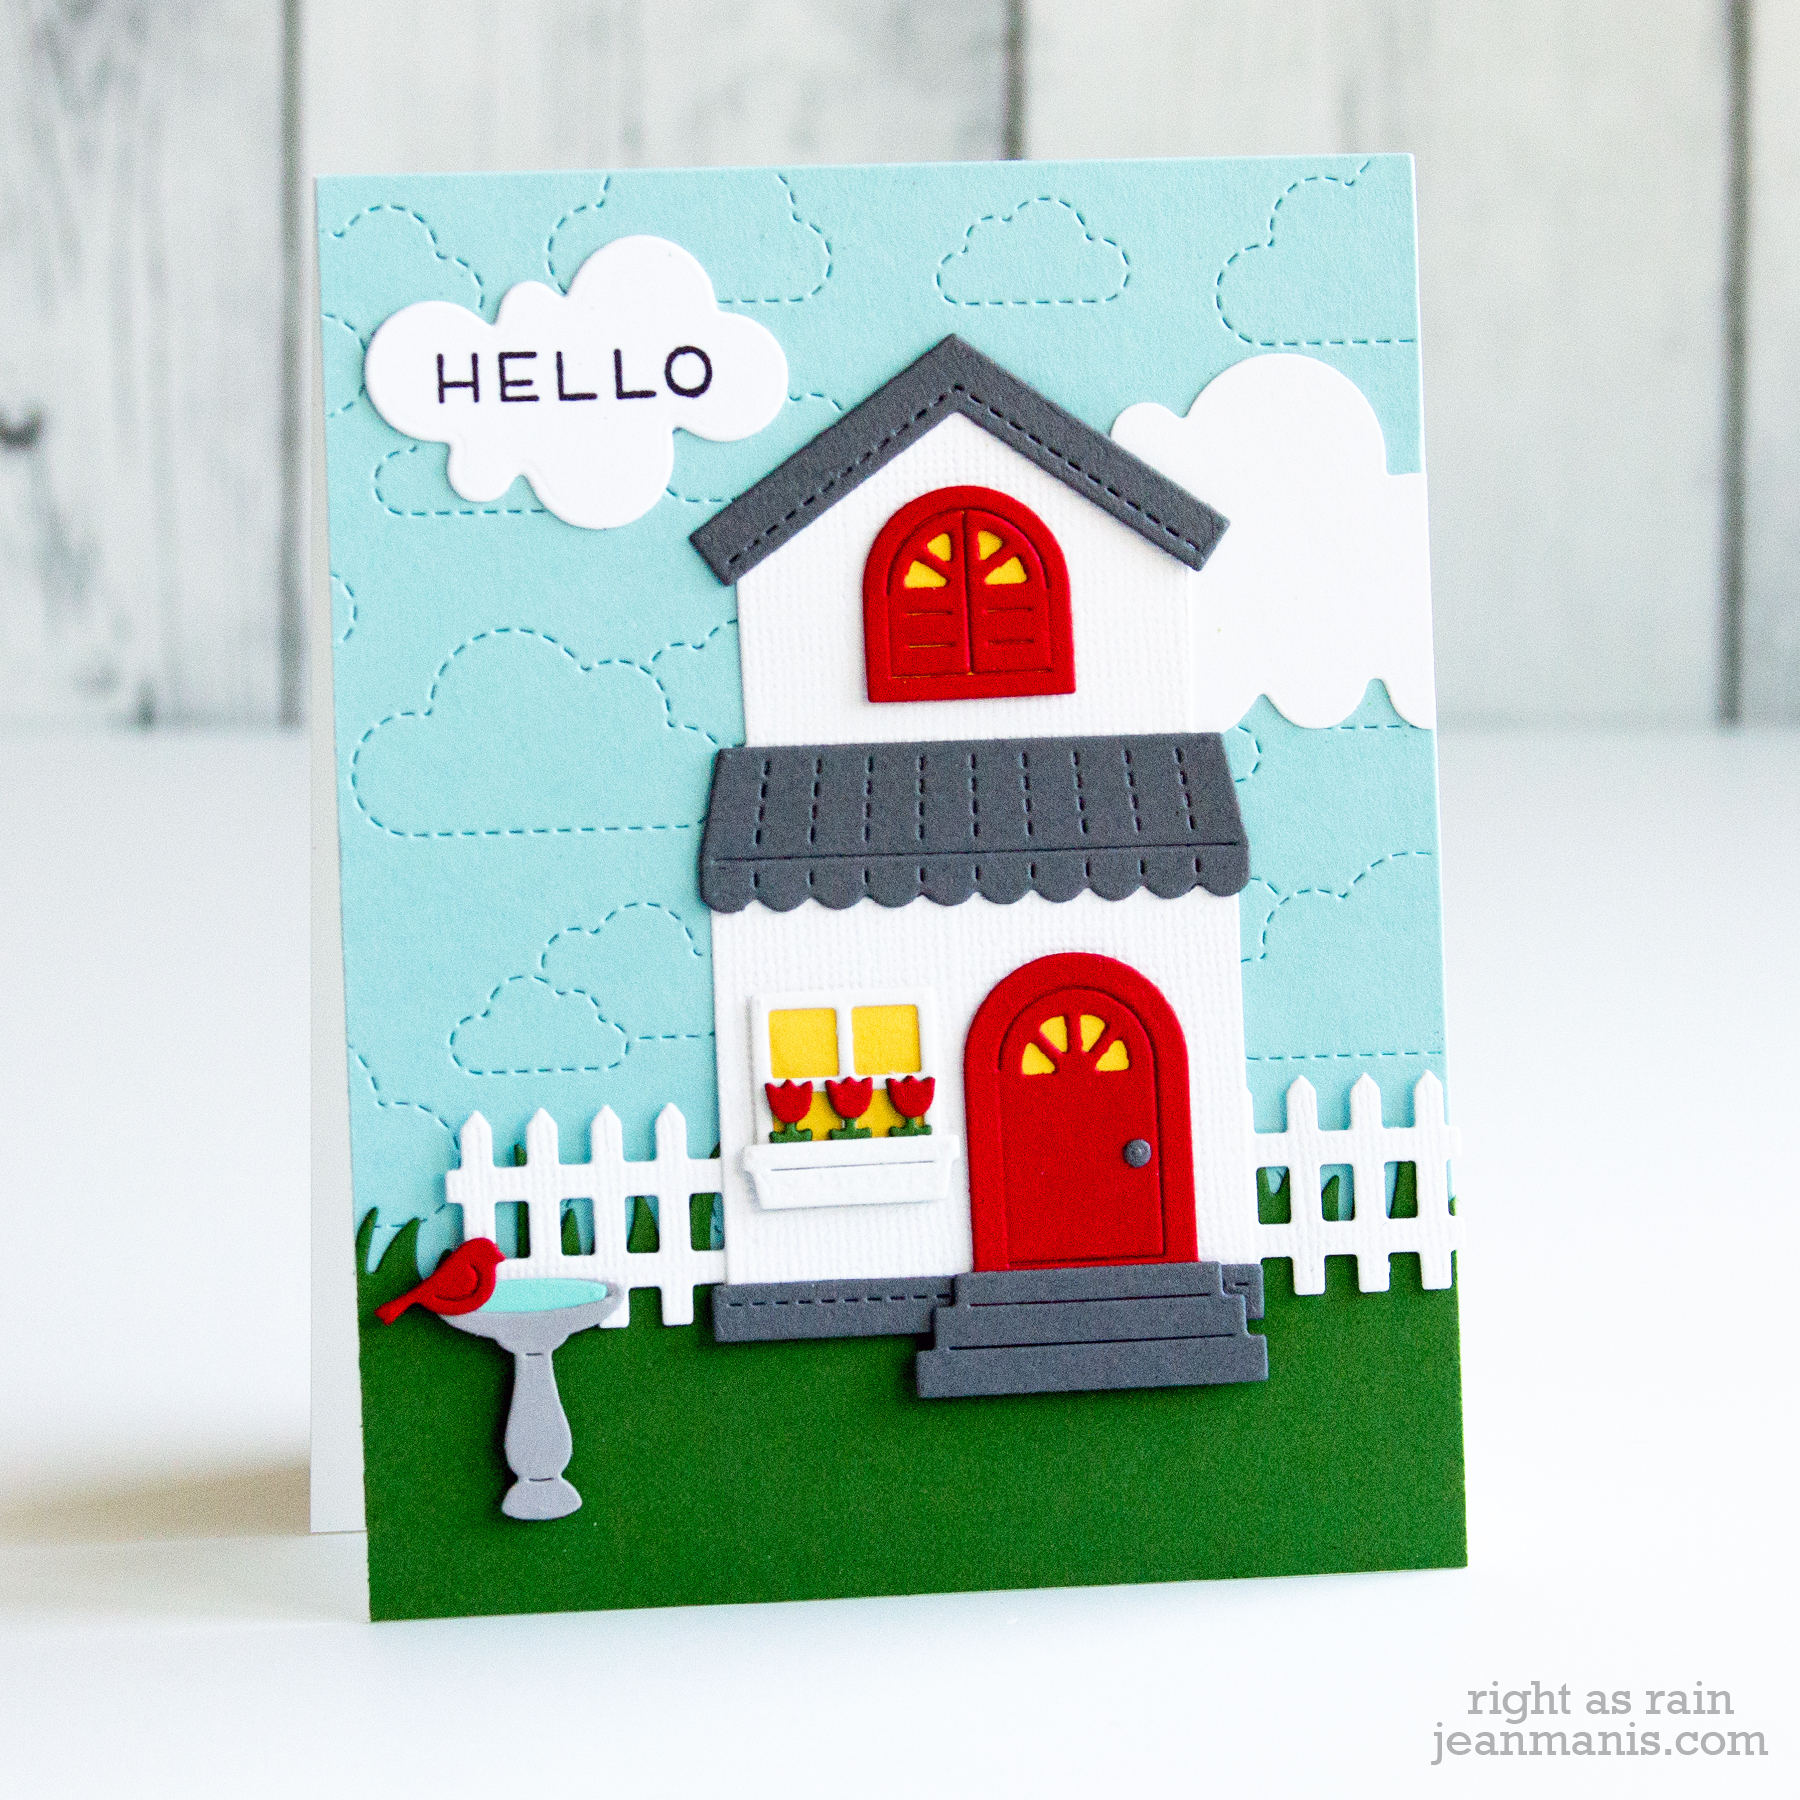
The Lawn Fawn Woodgrain Backdrop adds rustic and nature-inspired texture to a card background, as on the card below which also includes the Stitched Cloud Backdrop.
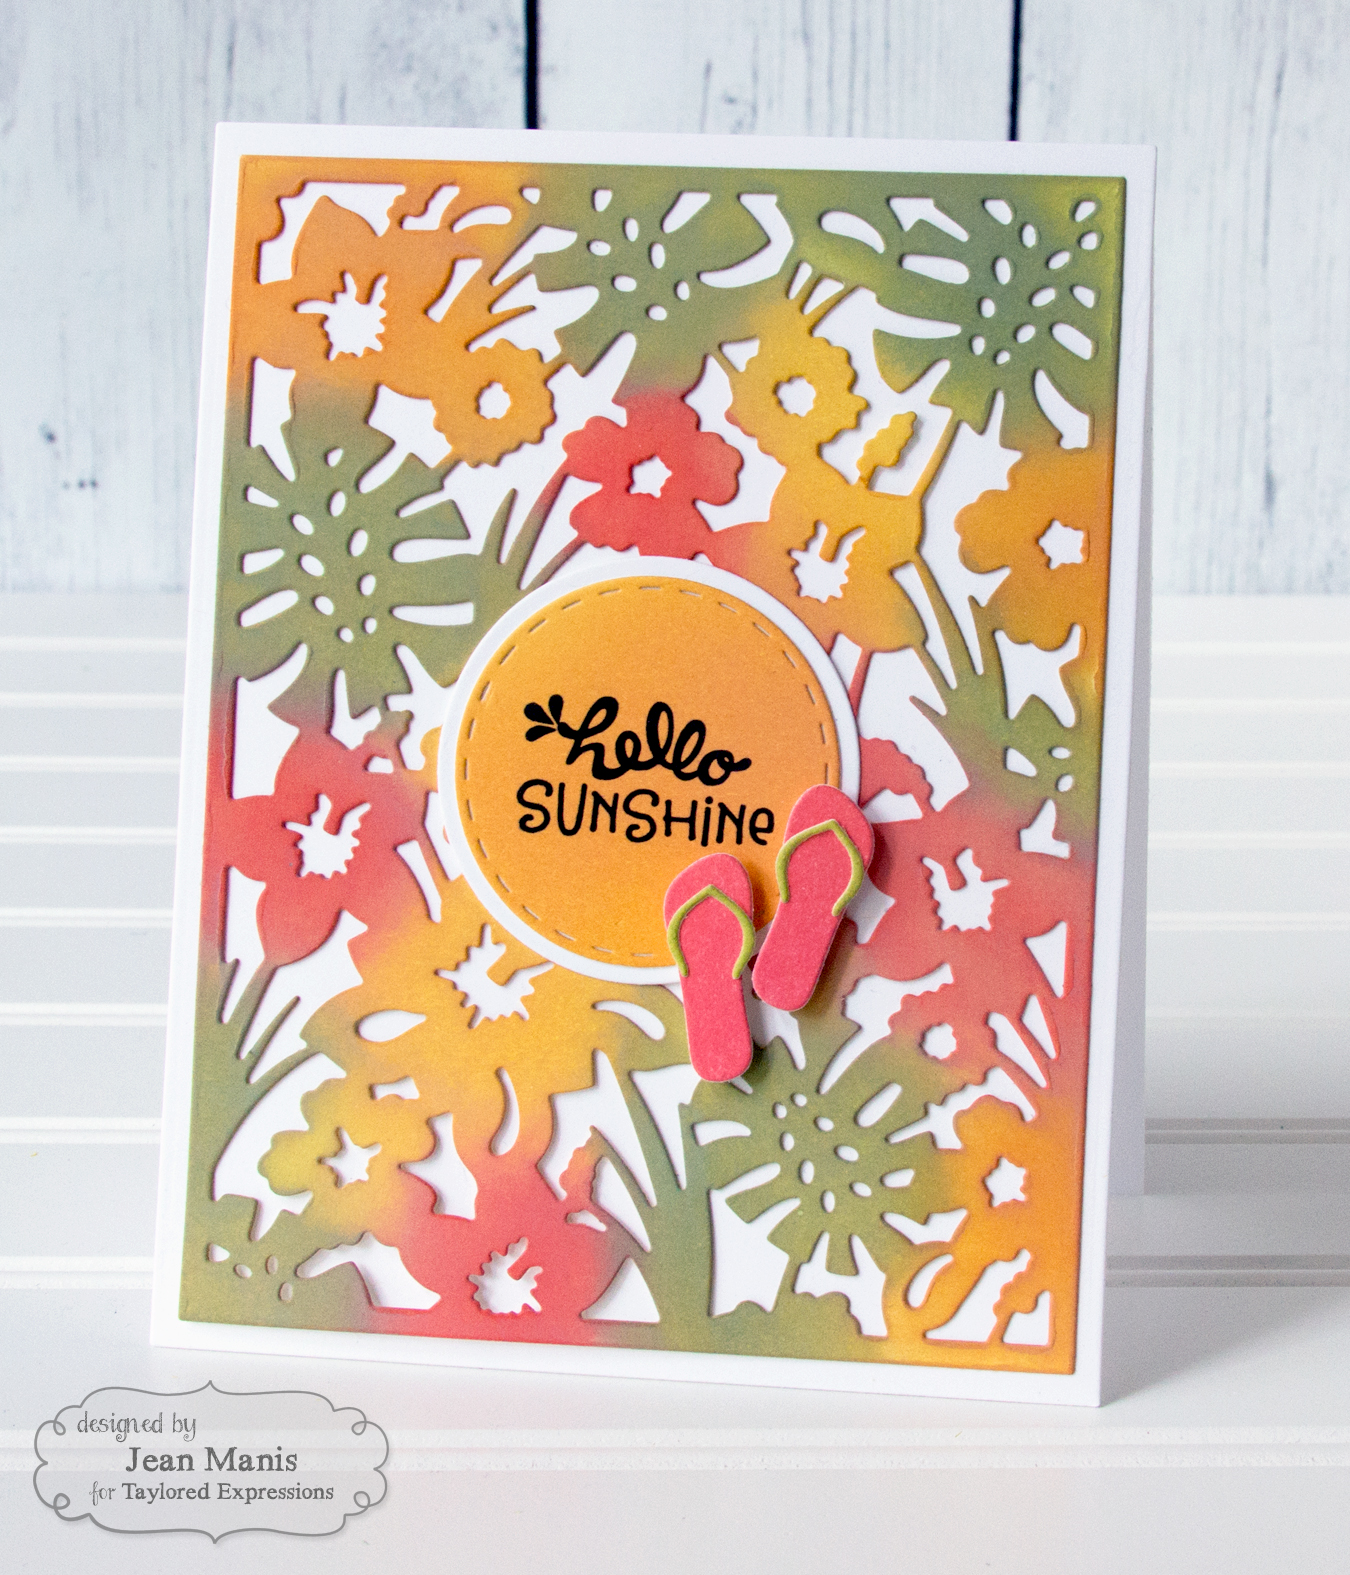
Other cover plate designs cut out designs, such as the Taylored Expressions Tropical Blooms Cutting Plate shown below, which was cut from white cardstock and colored with Distress Oxide inks.
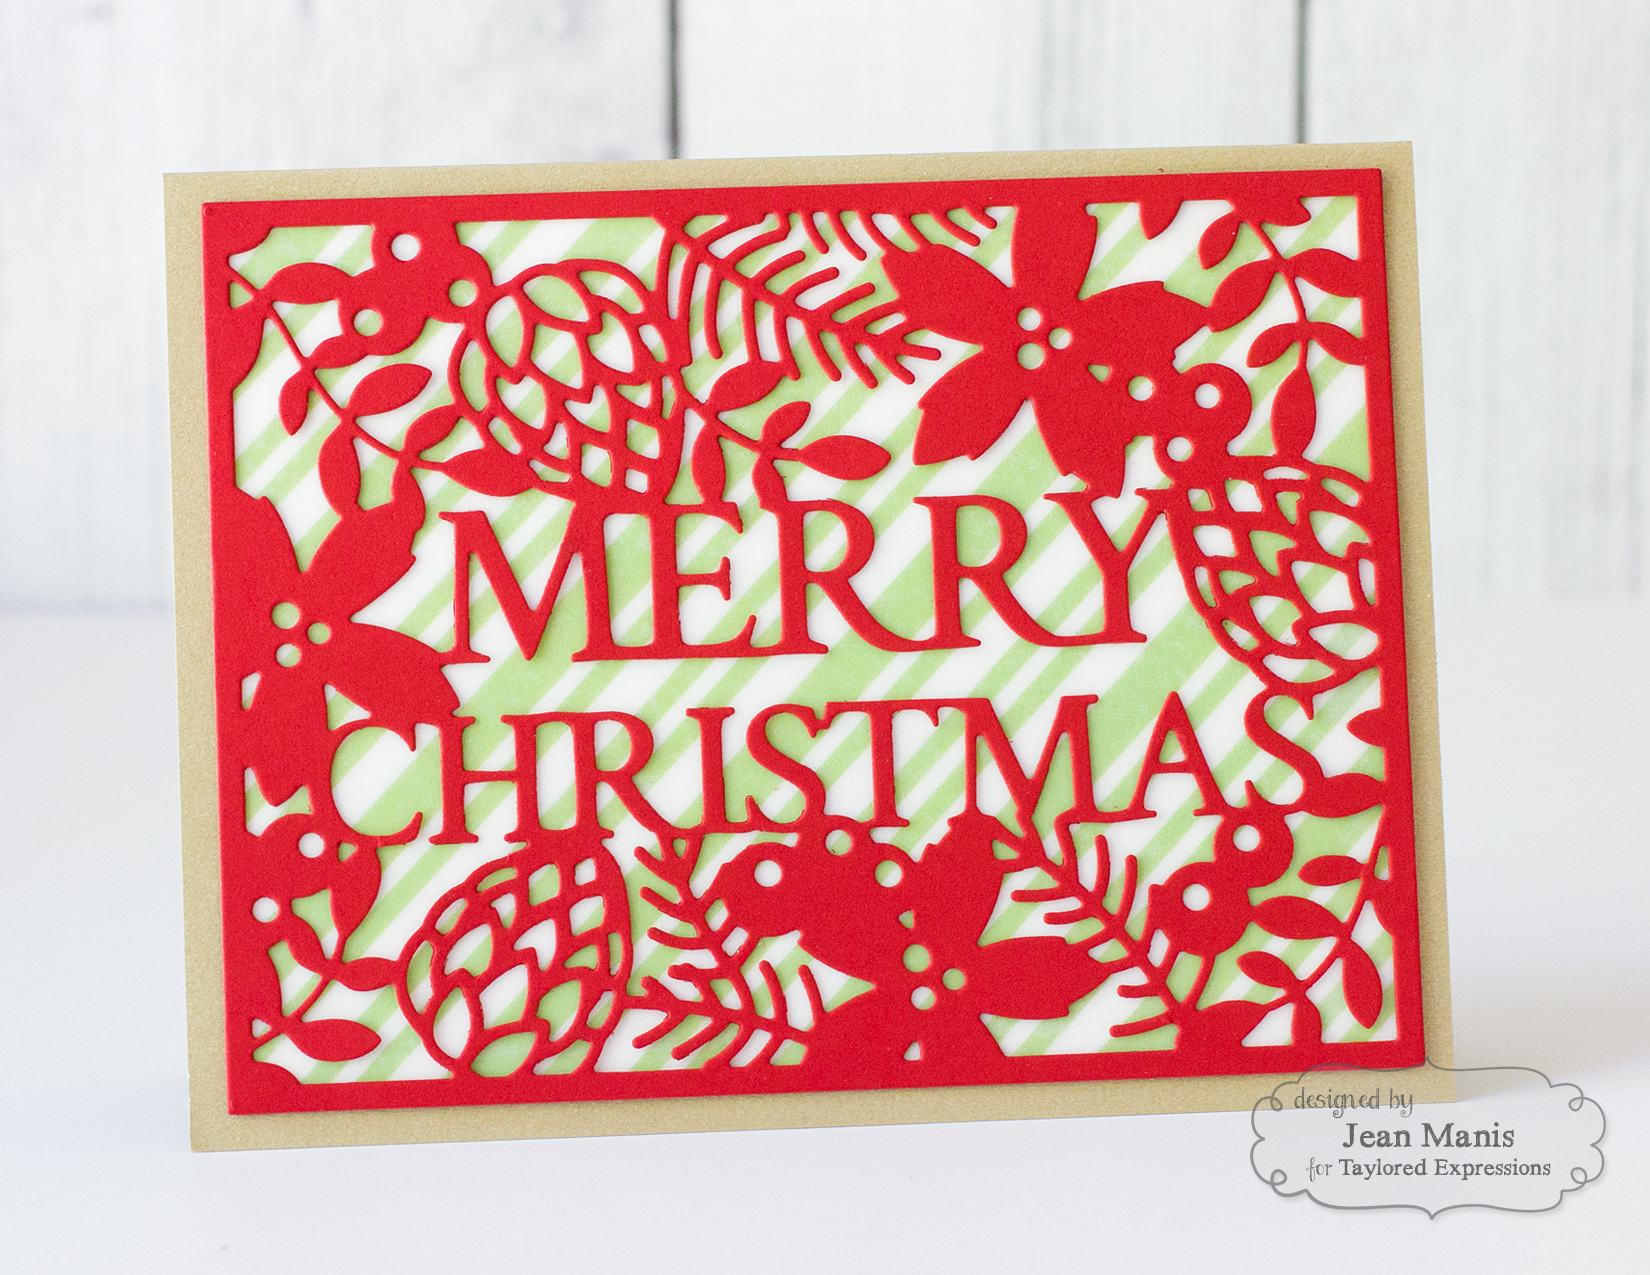
Cover plate dies can include a sentiment, as in the Taylored Expressions Merry Christmas Cutting Plate shown below, cut from colored cardstock and added to a patterned paper background.
A cover plate background cut from the same color cardstock as the card base adds texture and does not take away from the focal point.
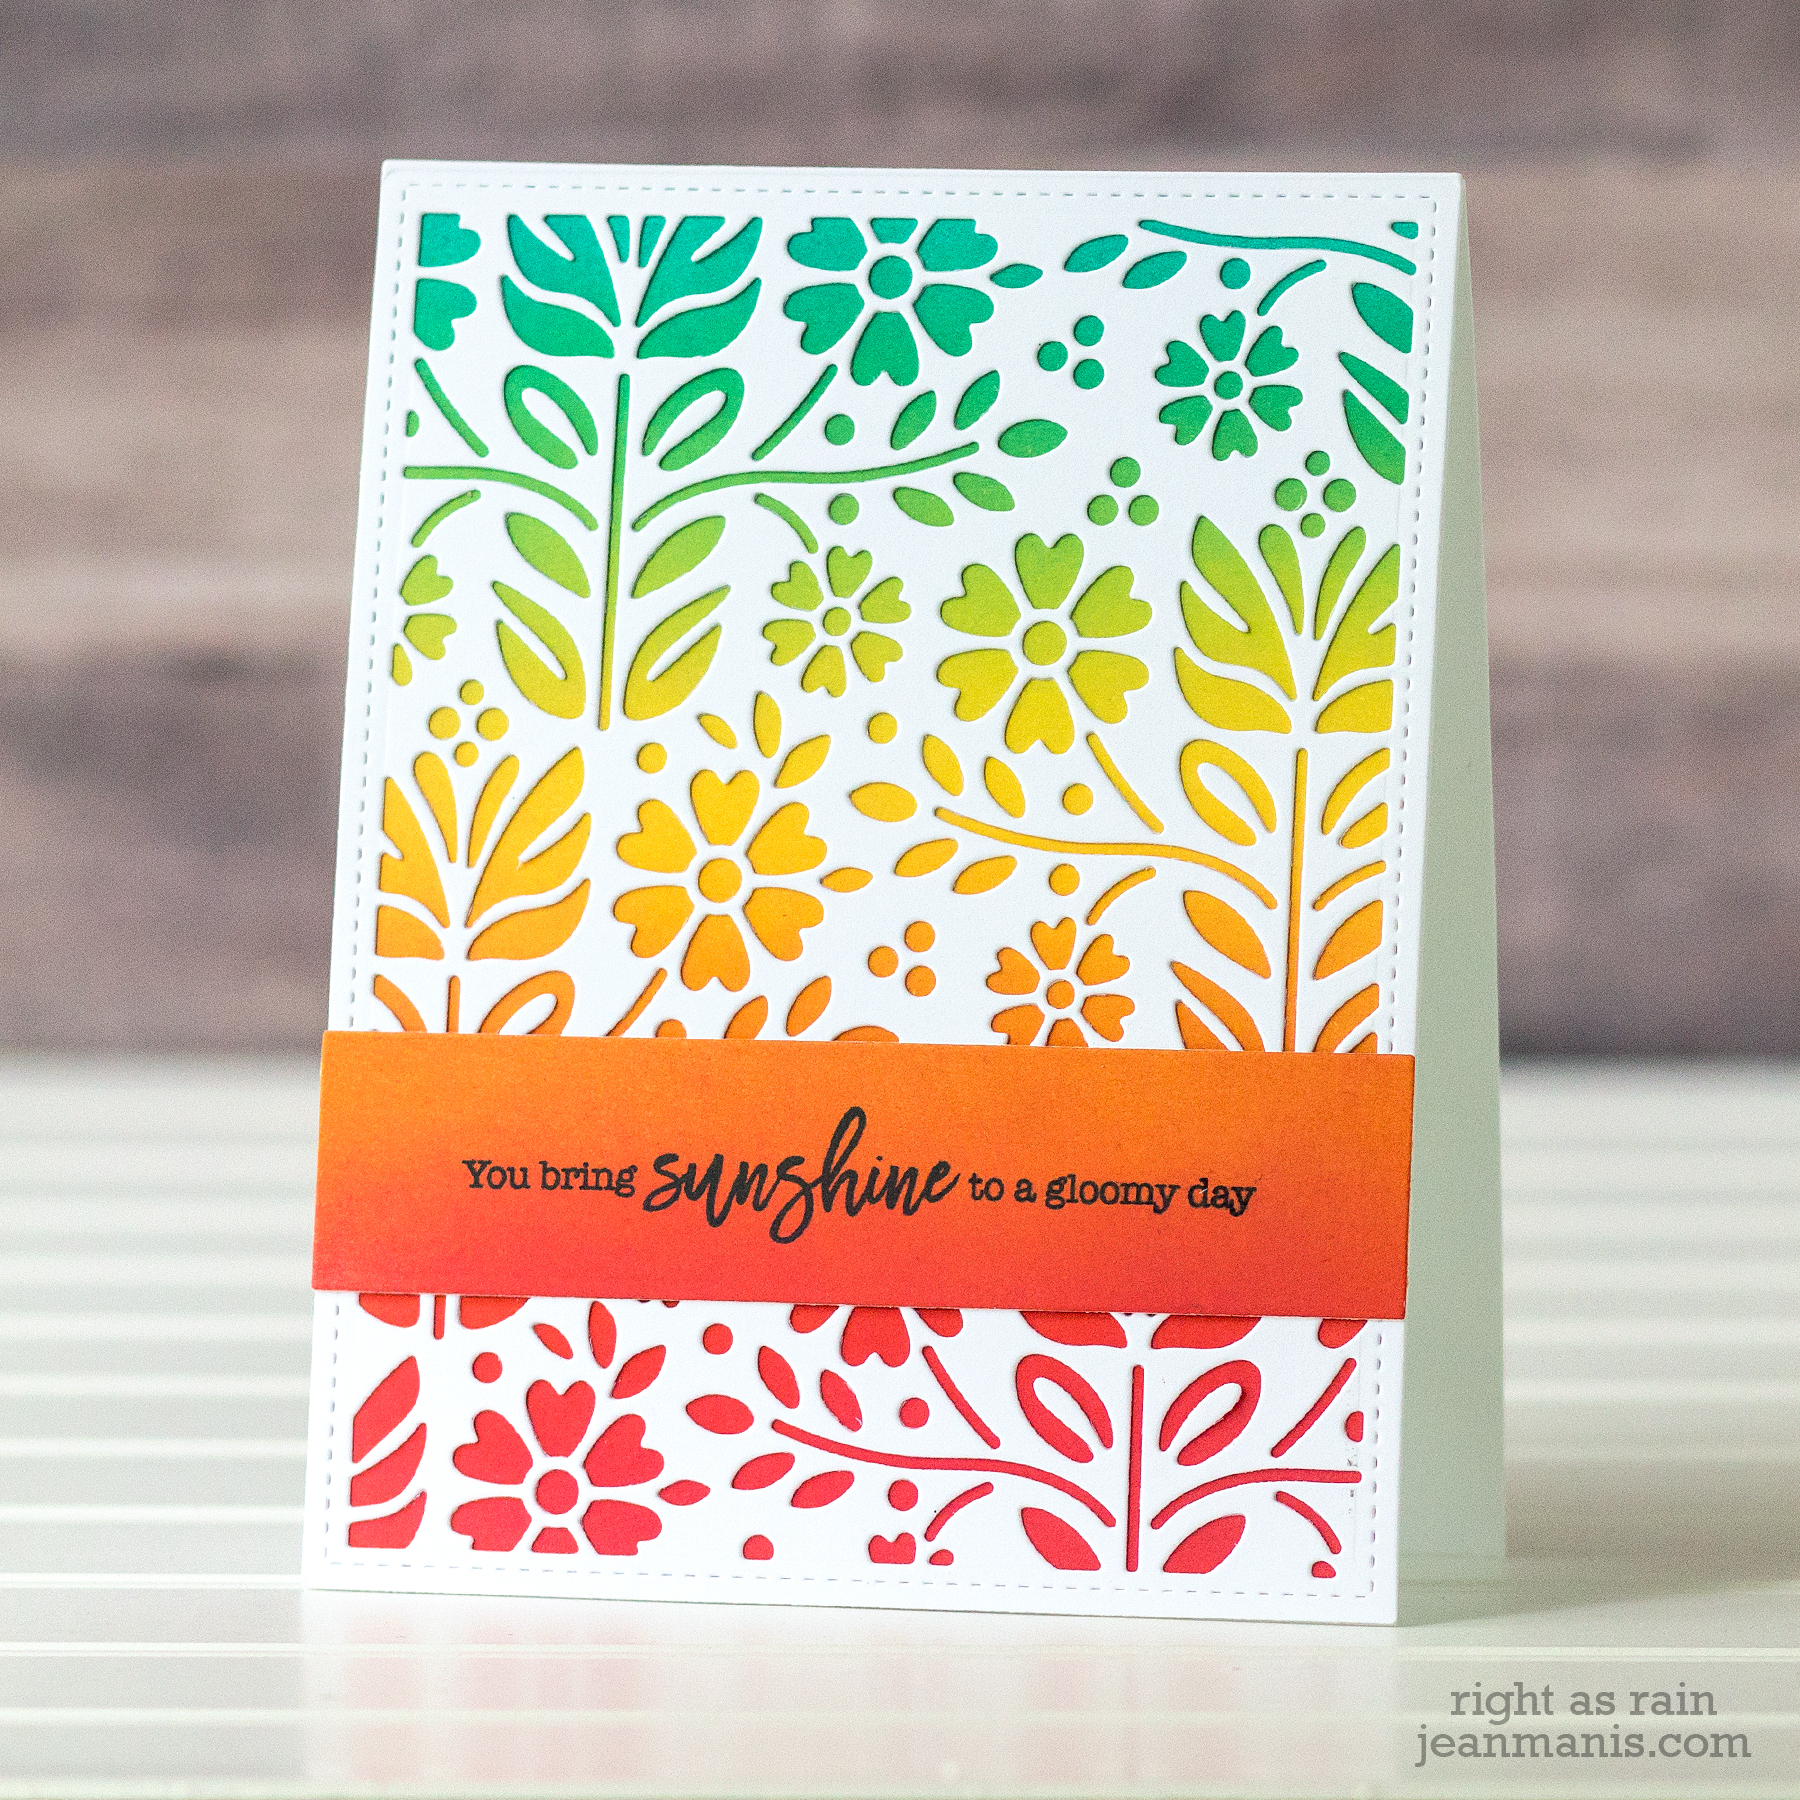
Cover plate backgrounds cut from solid-colored cardstock can be added over an inked panel to reveal the image, such as the Simon Says Folk Dance die shown below. Note: This particular die does not cut an outside border; an A2-size die was used to cut the panel.
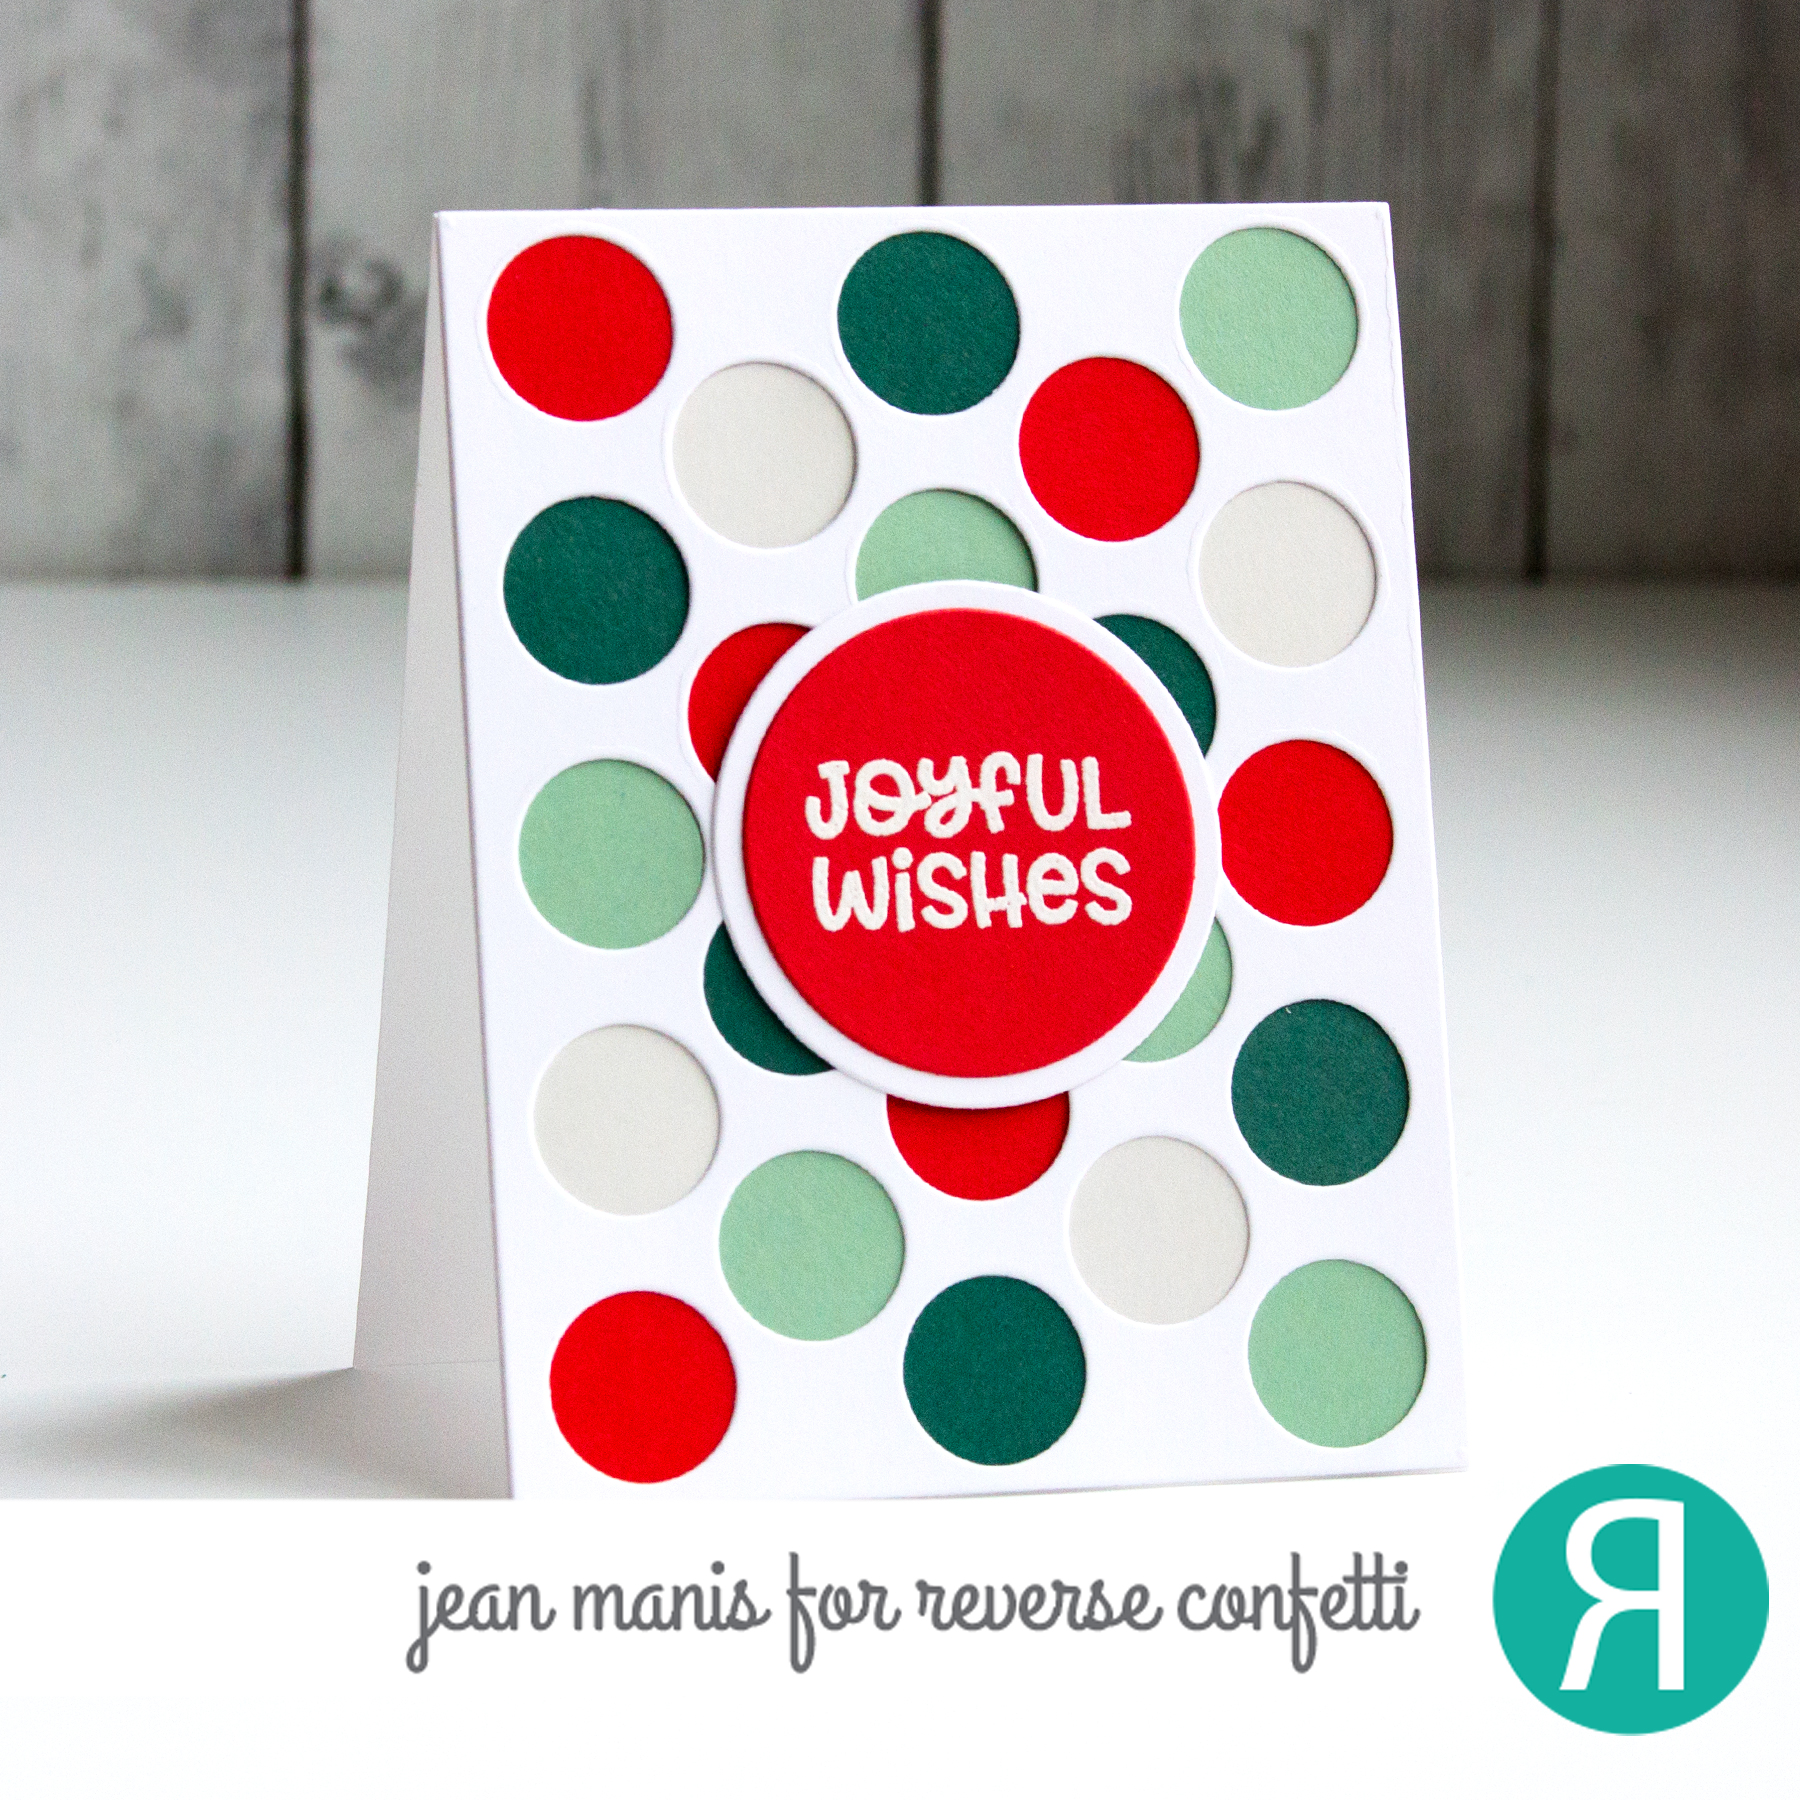
Solid cardstock can be added to the back of the die-cut openings, as with the Reverse Confetti Big Polkas Cover Panel.
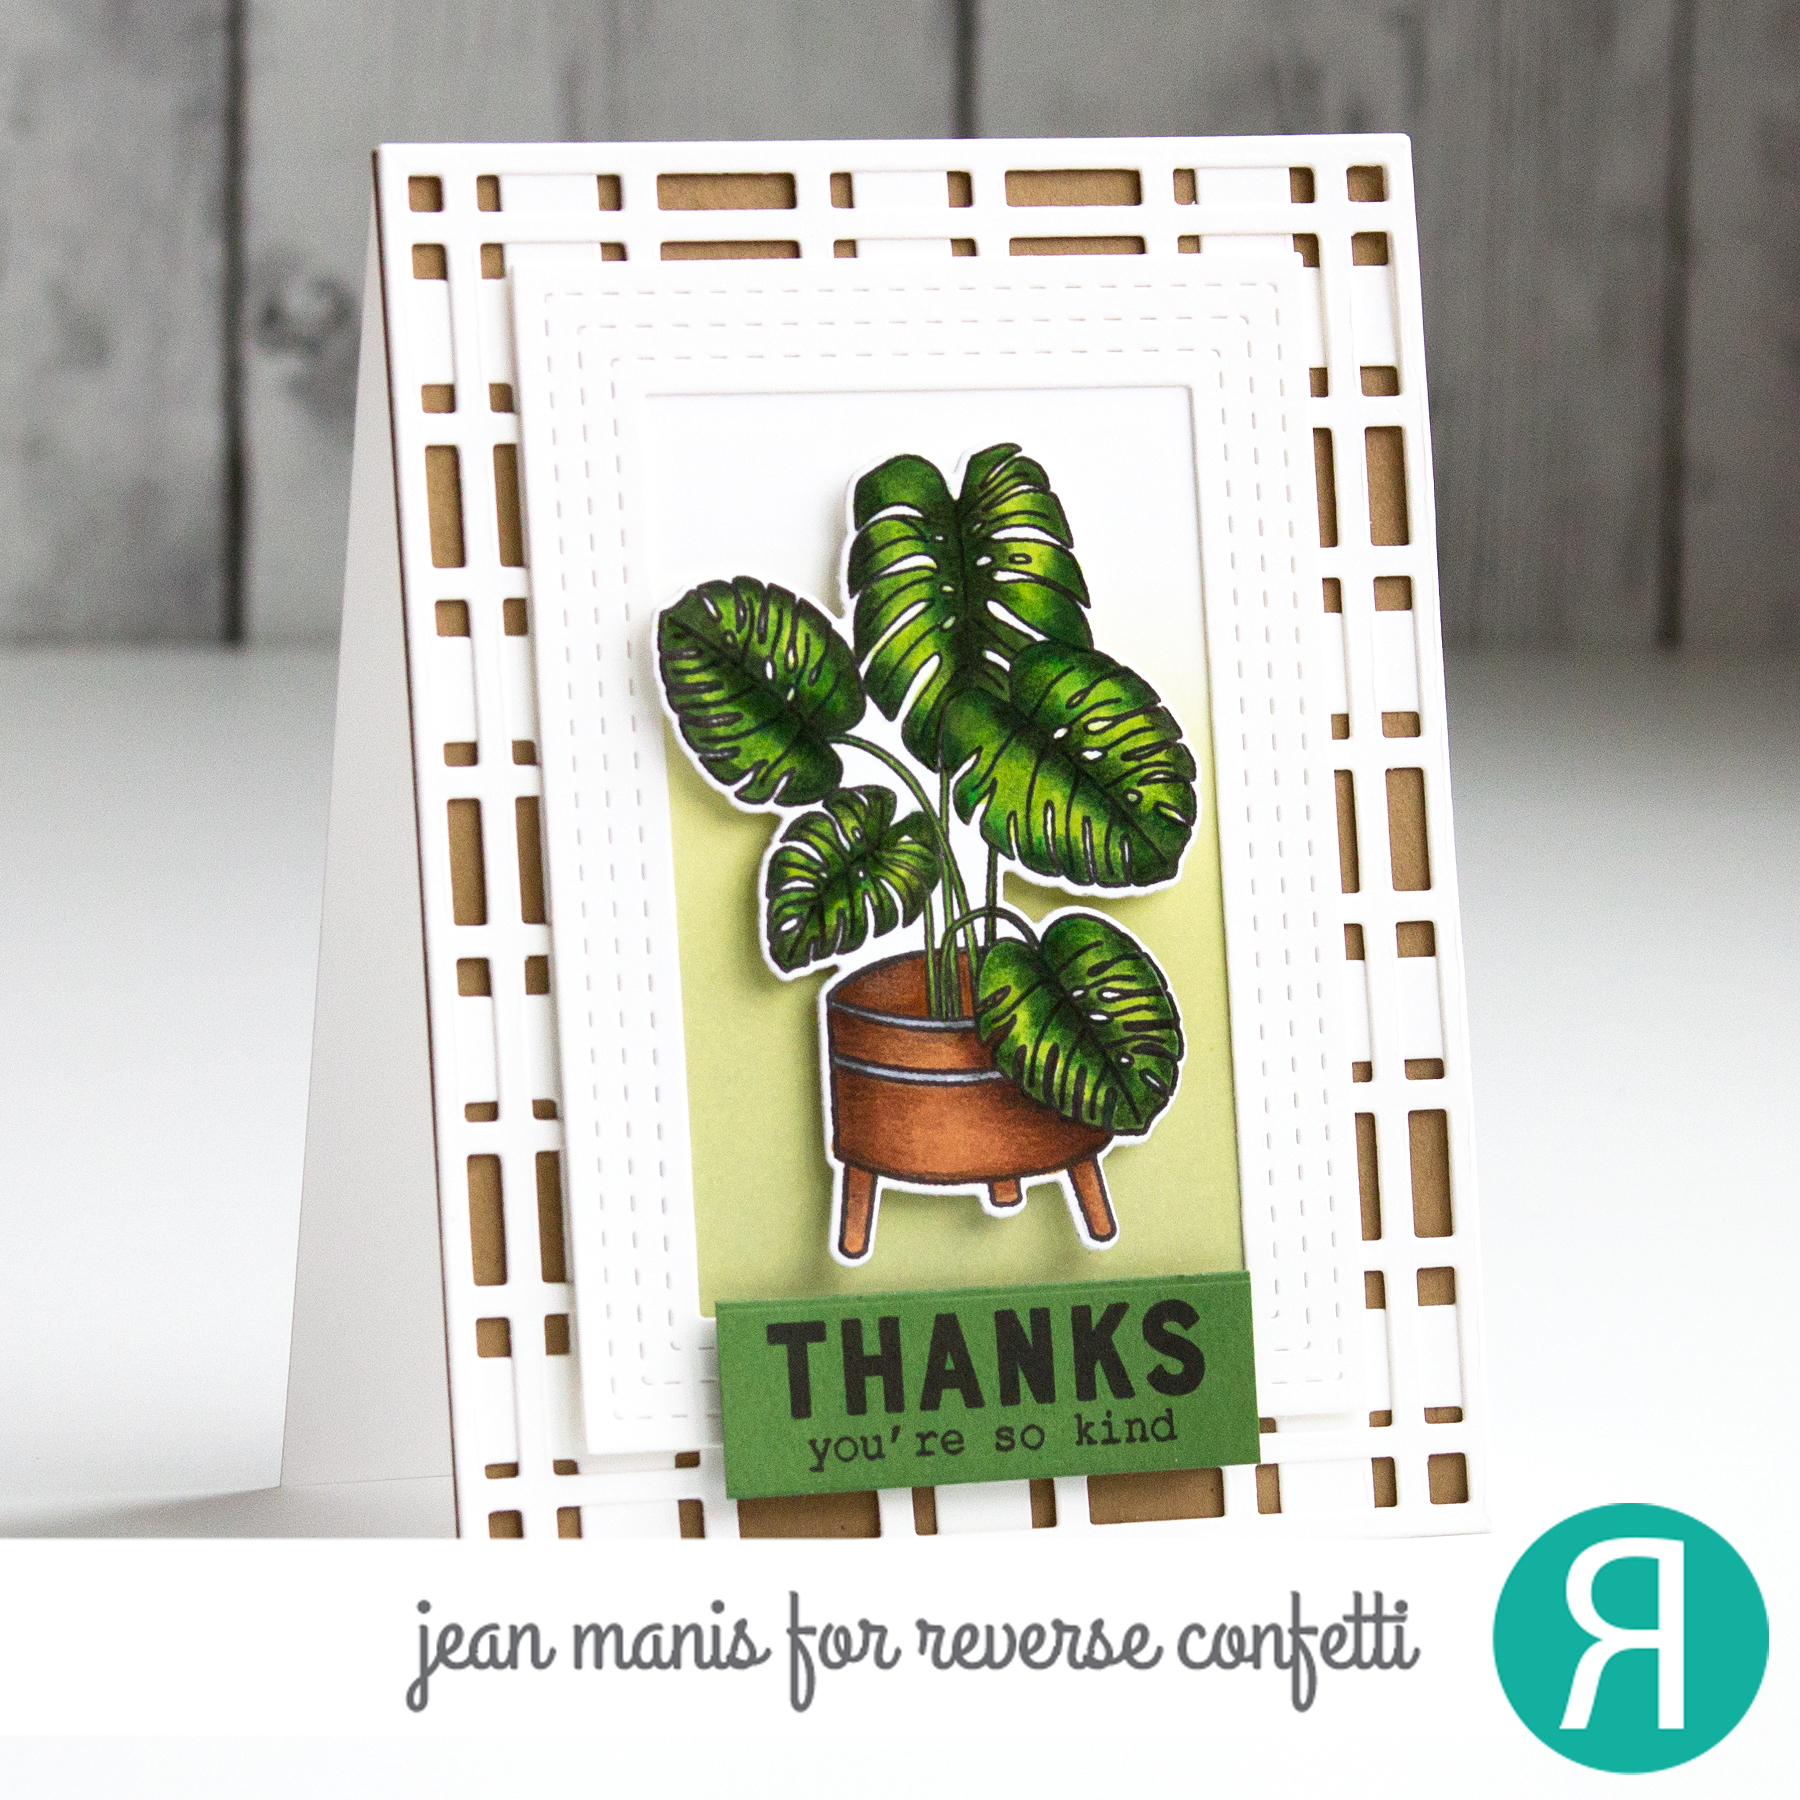
Add textural interest with geometric dies that can be used alone or layered to create a plaid look, as with the Reverse Confetti Plaid Lines Small and Plaid Lines Big Cover Panel dies.
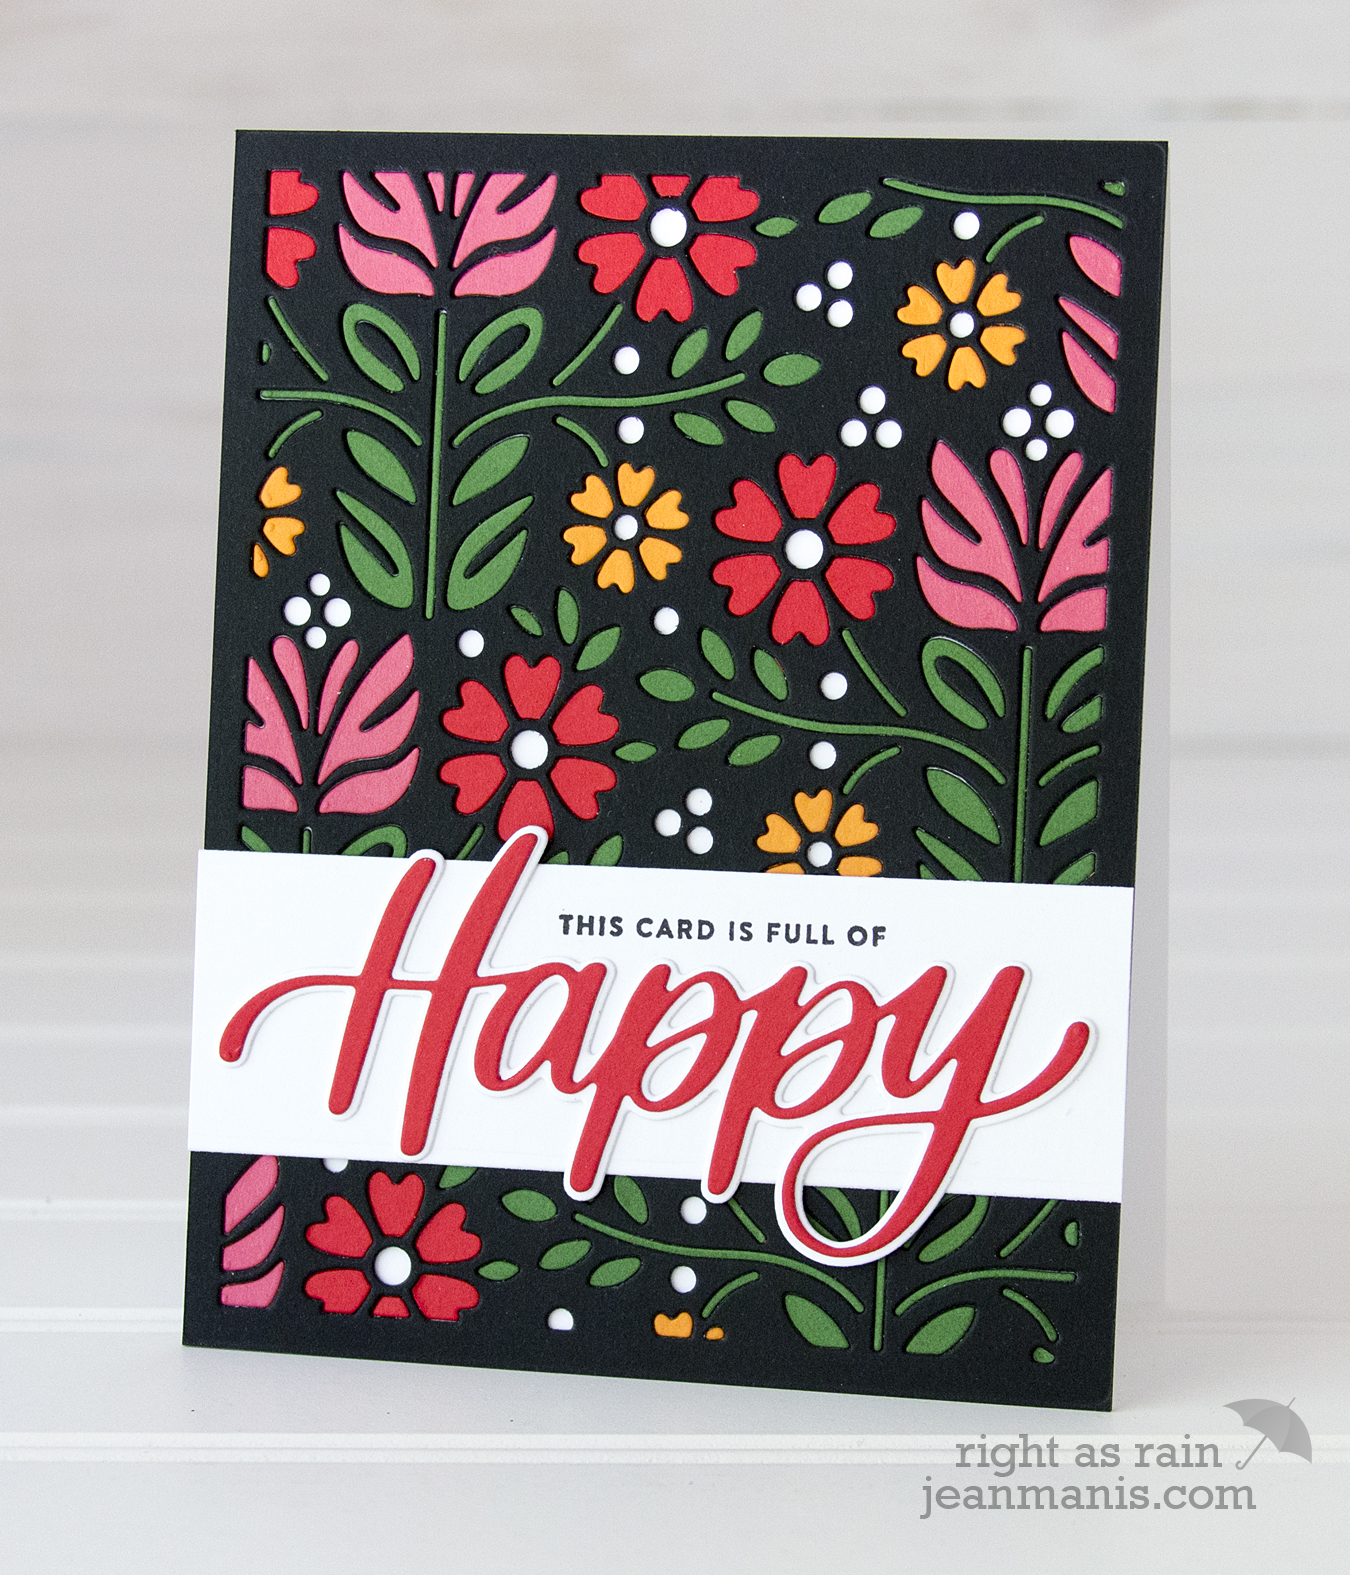
The inlay technique can be used to fill in part or all of a background. In this case, the die is first used to cut the frame. Subsequent cuts are made of the additional cardstock colors and the cut pieces are added to the frame.

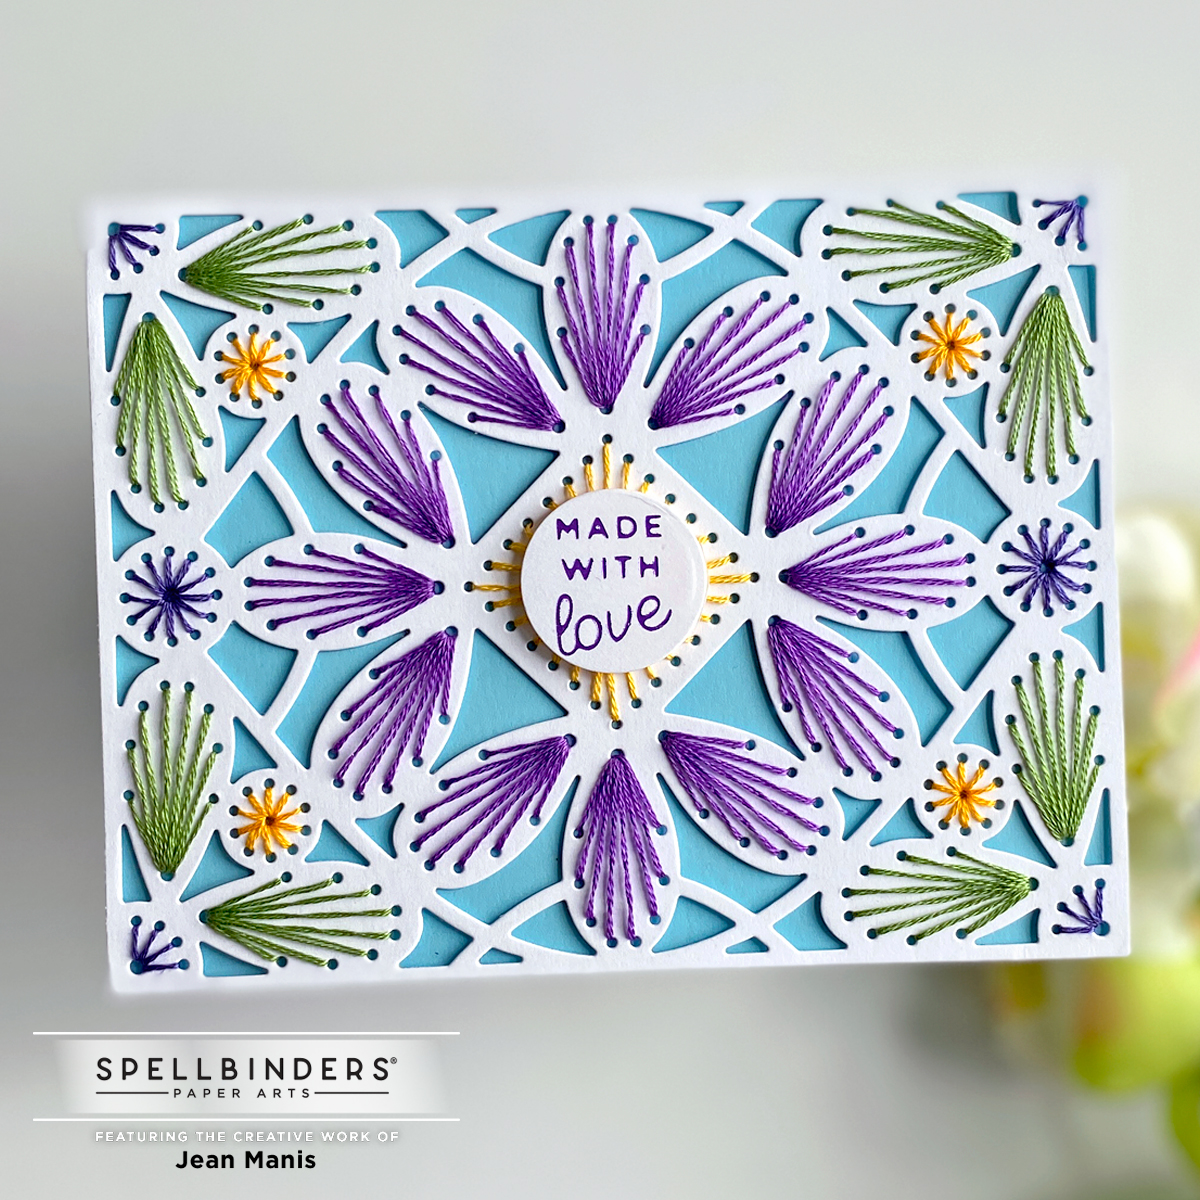
A stitched cover plate die can be used to cut holes that act as a guide for stitching with floss or used without any actual stitching, in which case the dots and embossed lines act as faux stitched details.
Considerations and Limitations Cover plate dies present limitations in terms of size and orientation, which can impact their suitability for specific card designs. For example, a 4 1/4-inch wide by 5 1/2-inch cover plate with a pattern oriented from top to bottom (such as rainfall) would not work on a landscape-oriented scene. Additionally, many cover plate dies cost $20 or more making them a pricey background option.
Insights As I mentioned earlier, my most used cover plate dies are those that puncture the cardstock to create a textured background. In terms of my favorite way to use cover plate dies, the inlay technique creates a stunning background that becomes the focal point; only a sentiment is needed to finish it off.
Do you frequently use cover plate dies for backgrounds? Are any on your “to buy” list?
Since I make square cards, cover plates don’t work for me unless they have a repeating pattern then I can shift it over to complete the square. I love the inlaid technique and you do that well! Great ideas!
Gorgeous examples of using coverplate dies, Jean!! I love using them & have a fair few with more on the wish list – LOL. Thanks for the inspiration!
Lovely cards, Jean.