Girl with Balloons Birthday Card Idea

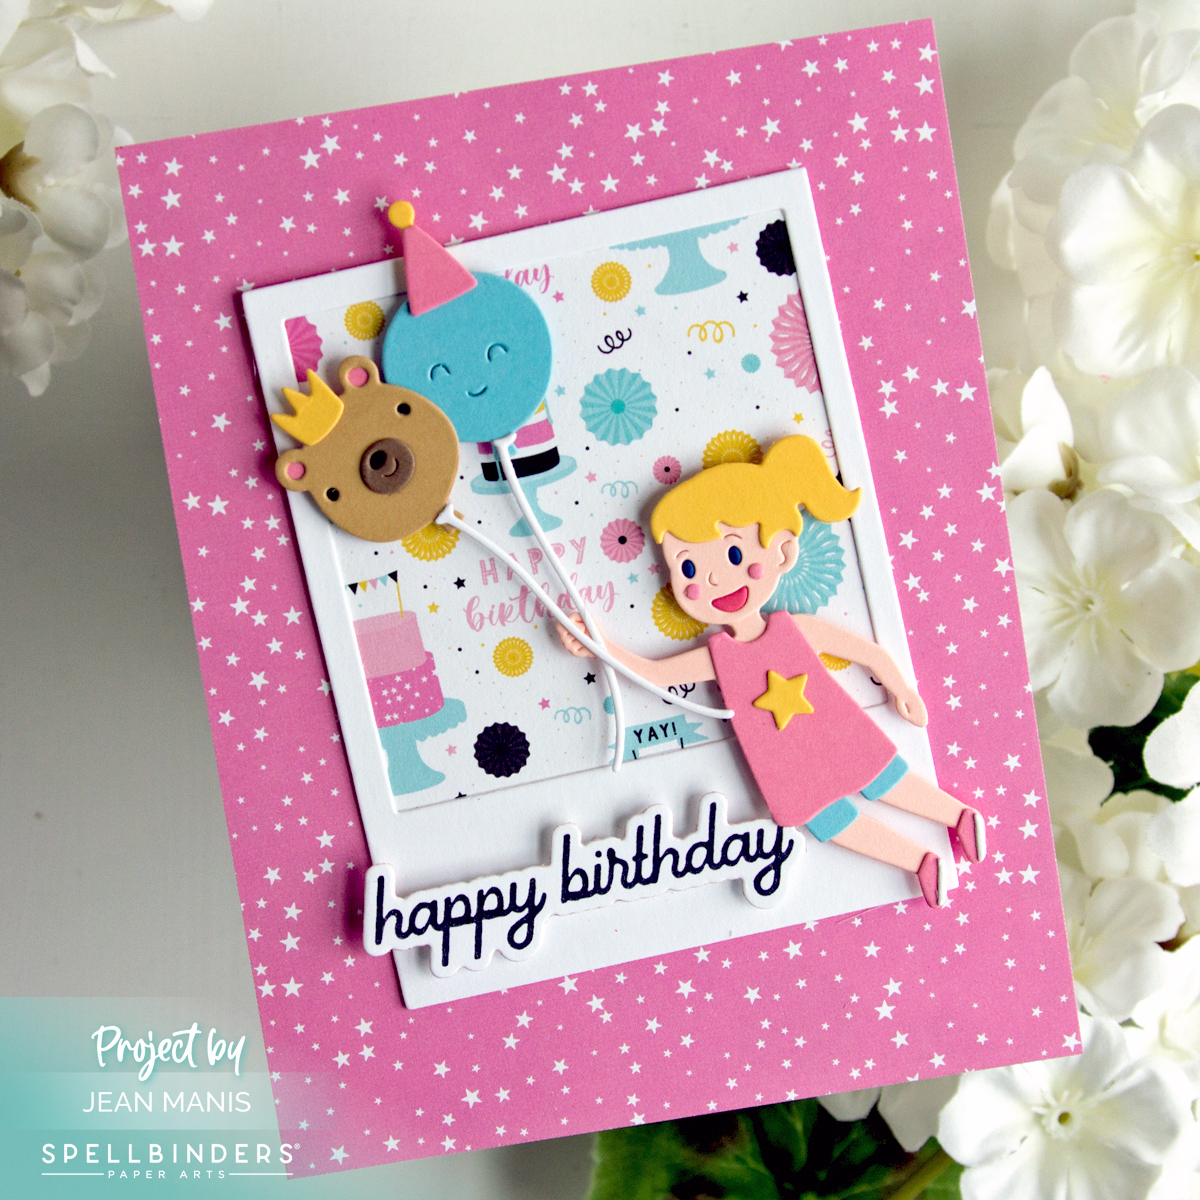
Hello! Today I’m sharing a birthday card featuring a sweet girl being lifted off the ground by two playful balloons—one shaped like a bear and the other a smiling face with a party hat. This cheerful card is a creative mashup of several die sets from Spellbinders, including one where the original girl held a kite. I swapped it out for balloons to create a fun, floating effect! I finished the design with patterned paper that reinforces the birthday theme and color palette, adding extra charm and visual interest.

Girl with Balloons Birthday Card Idea

    • Cover A2-size card base with patterned paper.
    • Cut the Memory Frames and back with a coordinating patterned paper. Add the frame assembly to the prepared card base.
    • Die-cut the girl with dies in the Up and Away set. I coordinated her clothing with colors in the patterned paper. Assemble. Find inspiration for the Up and Away set HERE.
    • Cut the balloons with dies in the Go Kart Go die set. Assemble.
    • Press the Soaring Sentiments in black in and cut with the coordinating die set.
    • Add elements to prepared card base with foam adhesive.

Girl with Balloons Birthday Card Idea

Spellbinders Surprise Bundle

This exclusive 12 Piece surprise box features an assortment of past products, including: a Card Kit, Dies, Stamps, Embellishments & more. This bundle is valued over $250!

Hero Arts Color Splash Sale

This limited time sale features select products up to 25% off. Offer only available May 6-13, 2025 at 11:59 MST.


Encouragement Card: Fridge Door Scene

Hello! Today I’m sharing a handmade encouragement card that’s perfect for busy moms navigating the chaos of end-of-school season. Created with  Spellbinders die sets, this card features a refrigerator door covered in magnetic alphabet letters that spell “just breathe,” along with tiny notes and photos that reflect the hustle of everyday life. When opened, the card reveals shelves stocked with kitchen staples like ketchup, mustard, and jam—reminding the recipient that even in the busiest seasons, they are thought of and supported.

Spellbinders May 2025 Large Die of the Month

The “Spell It Out Fridge” die set can be used to make a shaped card with or without the fridge interior.

    • With the “Spell It Out Fridge” die set, cut the fridge door front from cardstock and use other dies in the set to cut the magnets, notes, photos, and fridge magnets.
    • Cut the fridge interior panel. Trim off the left-hand side flap and add the fridge door front. Use dies in the “Spell It Out Fridge” die set to cut the fridge door shelves. Assemble.
    • Cut the fridge foods with dies in the Spell It Out Fridge Staples set. Assemble.
    • Add assembled items to the fridge door front and interior.

Spellbinders May 2025 Large Die of the Month

I opted to add the fridge door shelves on the right-hand side. A message can be written on the left-hand side or below the door shelves. Alternately, put the fridge door shelves on the left-hand side and add the personalization on the right!

Find more inspiration and a video tutorial HERE.

Spellbinders Surprise Bundle

This exclusive 12 Piece surprise box features an assortment of past products, including: a Card Kit, Dies, Stamps, Embellishments & more. This bundle is valued over $250!

Hero Arts Color Splash Sale

This limited time sale features select products up to 25% off. Offer only available May 6-13, 2025 at 11:59 MST.


Spellbinders | Congrats, Grad!

Hello! Send your congratulations with a handmade graduation card that’s as smart and spirited as the grad! Using the Spellbinders “Classroom Chronicles” die set, which is the May 2025 Small Die offering, I created a cheerful apple character in a graduation cap, seated on a stack of books labeled “Congrats,” “Student,” and “Wisdom.” Patterned paper adds to the schoolhouse charm, and I personalized the design with die-cut letters from the Large Die offering to spell out “Henry.” Whether for a preschool promotion or a college send-off, this fun design works for grads of all ages!

Spellbinders May 2025 Small Die Kit Club

    • To begin, cover an A2-size base with patterned paper that has been attached to vellum with double-sided adhesive to quiet the pattern.
    • With the Small Die of the Month set, cut the apple, accessories, and books from solid cardstock. Assemble and add to the card front.
    • With the Large Die of the Month set, cut the letters from black glitter foam. Glue to the card front.

Spellbinders May 2025 Small Die Kit Club

Find more Small Die inspiration in this post.


Encouragement Card for Dog Lovers

Hello! If you’re looking for the perfect card to brighten someone’s day, this encouragement card might be just the thing. Featuring a charming pug dressed in glasses and bandana, this design, created with Spellbinders supplies, brings instant smiles. Whether you’re sending support to a dog-loving friend or simply want to say, “hang in there,” this card delivers a heartwarming message with personality.

Encouragement Card for Dog Lovers

Encouragement Card for Dog Lovers

The large die-cut pug takes center stage, filling the card with playful charm—it’s an easy design to make, but one that leaves a big impact.


Spellbinders | Susan’s Azaleas

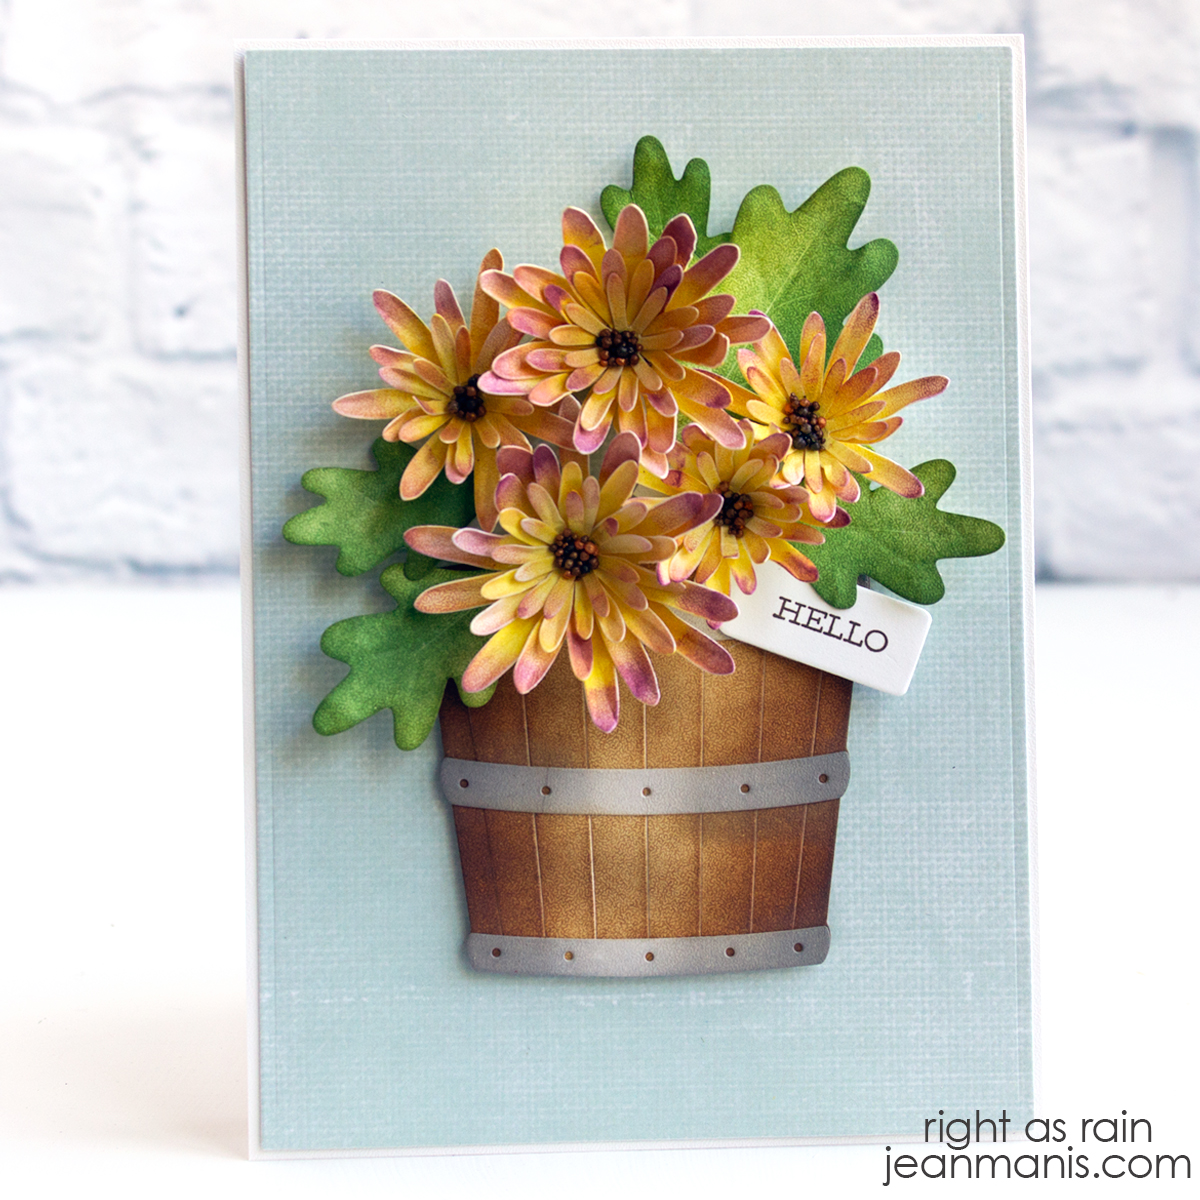
Hello! Today, I’m excited to share a card that captures the beauty of azaleas nestled in a charming garden pot. Following Susan Tierney-Cockburn’s step-by-step video, I was able to assemble the azaleas and pot, available as a set at Spellbinders. This project was a delightful learning experience.

Spellbinders | Susan's Azaleas

    • As explained in the video, with dies in the Azalea and Garden Pot set, cut the leaves from watercolor cardstock. To color the leaves, I used Copics E27, YG63, and YG67. Form the leaves with Susan’s tools and then paint on glaze. Set aside to dry. I don’t know what brand glaze Susan used on hers; I used JudiKins Diamond Glaze.
    • With dies in the Azalea and Garden Pot set, cut the petals and stamens from Susan’s Garden Specialty Cardstock and color. To color, I used Copics RV23, RV25, and R39. Following Susan’s directions, I cut the stamens, glued them, and added pollen. I formed the flowers with tools in the kit and then glued the petals and stamens.
    • With dies in the Azalea and Garden Pot set, cut the pot from Classic White cardstock and color by heat-embossing Fired Brick Distress Embossing Glaze. I added several coats. Assemble pot.
    • Dry-emboss a 5 1/2″ square panel of Seaside cardstock with the Flowers and Foliage folder and add to a card base.
    • Stamp the sentiment on Classic White cardstock and cut with a die in the Assorted Tags set, masking the “there” so that only “hello” is stamped.
    • Add the pot, leaves, and flowers to the prepared card base. Tuck the sentiment tag into the finished arrangement.

Spellbinders | Susan's Azaleas

While there are numerous steps involved in creating this card, Susan Tierney-Cockburn’s tutorial breaks down the process into manageable parts, making it achievable even for beginners like me.