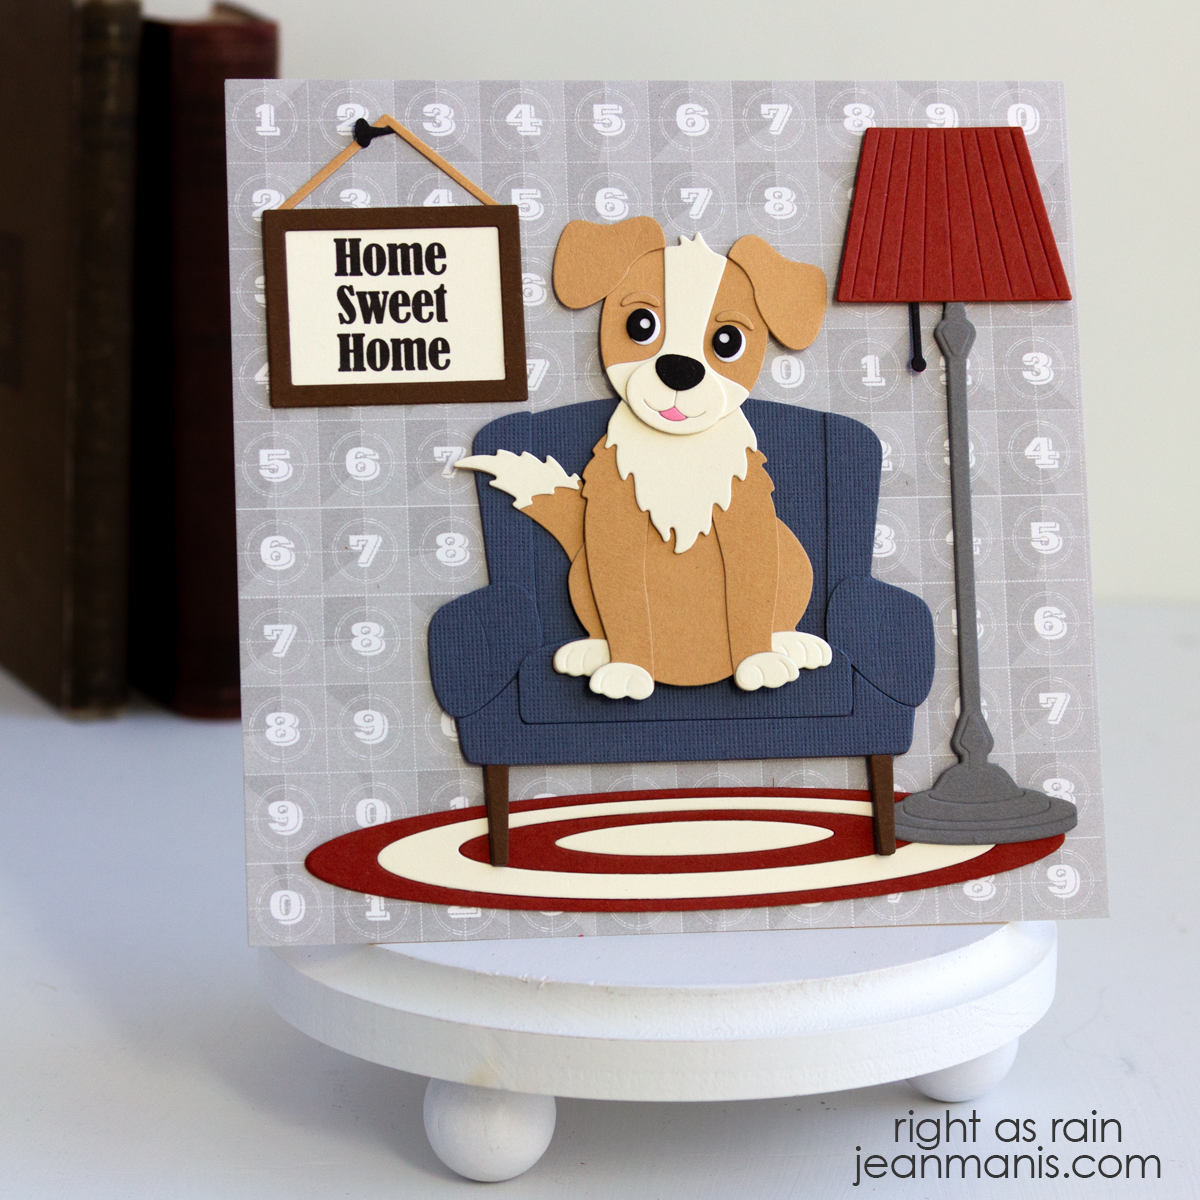
Lucky Ride: Gnome Leprechaun

Hello! St. Patrick’s Day is almost here, and I couldn’t resist creating a playful card to celebrate! This festive design features a gnome, dressed like a leprechaun, cruising along in a cheerful little car. I used a combination of Spellbinders products to bring this whimsical scene to life, and I love how it captures the lighthearted spirit of the holiday.

Lucky Ride: Gnome Leprechaun

    • Create an A-2 size card base from yellow cardstock. Add a 1 1/2″ strip of dark gray cardstock along the bottom for the road.
    • Using dies in the Gnome Drive Holiday (this is the base kit that includes the car) and Gnome Drive Spring sets, cut the pieces for the shamrocks, gnome, lucky horseshoe, and car from a variety of cardstock colors. Assemble.
    • BetterPress the All Seasons Spring sentiment with black ink and cut with the coordinating die.
    • Add elements to card base and embellish with clouds cut with the On Cloud Nine die set.

The Gnome Drive Spring set also includes dies to create an Easter-themed card. You can see an example HERE – a guest post I wrote for the Spellbinders blog.

Lucky Ride: Gnome Leprechaun

Now through March 19, save up to 30% on select Spellbinders die sets!

March 2025 Sale


Spellbinders | Monkey on the Move

Hello! Today, I am sharing a card that features an adorable monkey cruising along in a car, with colorful balloons trailing behind. Created with a mix of Spellbinders products, including a die set and embossing folder from the Little Smiles Collection, this cheerful design is perfect for kids—or anyone young at heart.

Spellbinders | Go Kart Go

    • Cover an A2-size card base with patterned paper.
    • Use dies in the Essential Stylish Ovals set to cut textured white cardstock and Beeswax cardstock. Dry-emboss the Beeswax cardstock oval with the Wishing Stars folder. Cut a dark gray cardstock rectangle with a Essential Stylish Ovals die to create the road. Add pieces to card base.
    • Cut monkey, car, and balloons with the Go Kart Go set from a variety of cardstock colors. Assemble and add to card base.
    • Stamp the sentiment with a stamp in the Message Strips set on Classic White cardstock. Cut with a cloud die in the On Cloud Nine set. Cut an additional cloud. Add to card.

Spellbinders | Go Kart Go


Hello Card with Floral Die-Cuts

Hello! If you’re a subscriber of the Large Die of the Month kit club at Spellbinders, or considering joining, you’re in for a treat! This month’s set–“Family & Friends Vignettes”– is packed with creative possibilities, including a versatile arch design, a playful dog, and even a fun dinosaur. For today’s project, I focused on the floral elements in the set, creating a “hello” card with a die-cut cluster. Whether you’re drawn to florals, critters, or something a bit more whimsical, this kit offers many ways to bring your creative vision to life!

Spellbinders | March 2025 Large Die of the Month

    • Create an A2-size card base from textured cardstock and add a 4 1/8″ x 5 3/8″ patterned paper panel (49 and Market – Vintage Artistry Countryside).
    • Use the “Family & Friends Vignettes” set to cut the arch and floral elements from a variety of cardstock colors. Assemble floral elements.
    • Dry-emboss the inner arch with the Tiny Dots folder. Adhere to the outer arch.
    • Assemble floral elements on the arches and add to the card base.
    • Cut Hello Smile sentiment from vellum and Fern cardstock. Assemble and add to card base.
    • Embellish with Clear Enamel Dots.

Spellbinders | March 2025 Large Die of the Month


Fishing-Themed See You Soon Card

Hello! The Fairways & Fish Tales die kit at Spellbinders is packed with both fishing and golf-themed elements, making it a fantastic choice for creating masculine and outdoor-inspired cards. My card showcases the fishing side of this set. With die-cut figures of two men fishing on a dock and a dry-embossed background for texture, this card captures the peacefulness of a day by the water. Whether you are already receiving the Small Die of the Month kit or are considering subscribing this month, I hope this project inspires you to explore all the creative possibilities it offers!

Spellbinders Small Die of the Month kit

Spellbinders Small Die of the Month kit


Hello Card with Stenciled Rainbow Birdhouses

Hello! Sometimes, a simple design with a pop of color is all you need to make a cheerful card! Today, I’m sharing a quick and easy hello card featuring a row of stenciled birdhouses inked in a vibrant rainbow of colors. To keep things simple, I used a stamped and die-cut “Hello” sentiment—an effortless way to add dimension to an otherwise single-layer card.

Hello Card with Stenciled Rainbow Birdhouses

    • Add Mowed Lawn ink to the base of a white cardstock panel to create the grass. I used vellum to mask the sky and create the straight line.
    • Mask the grass and ink the birdhouse posts with the Newton’s Nook Birdhouse Line Stencil. The stencil includes three rows with etching to aid with alignment.
    • Move the stencil and ink the birdhouses. Move the stencil again to ink the birds and birdhouse openings.
    • Trim stencil panel and add to a black cardstock base.
    • Stamp the I’ve Got You Covered sentiment and cut with the coordinating die. Add to card with foam adhesive.

Hello Card with Stenciled Rainbow Birdhouses