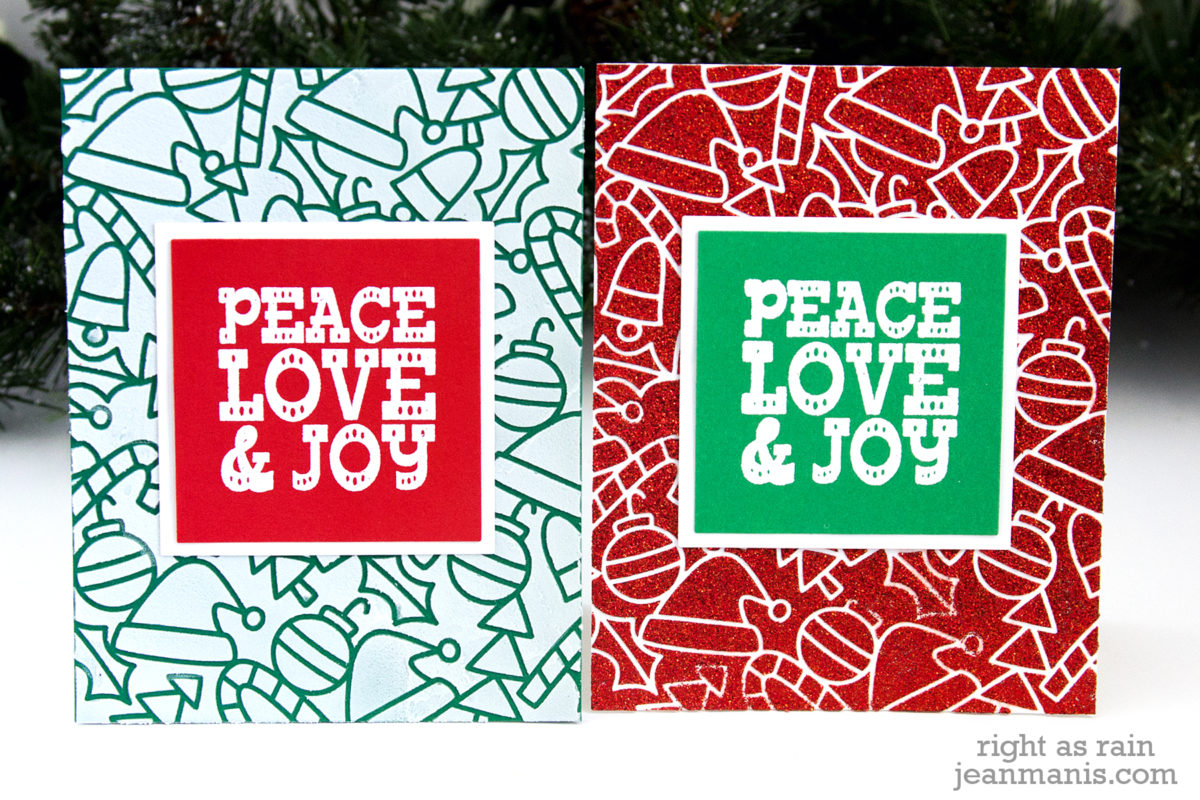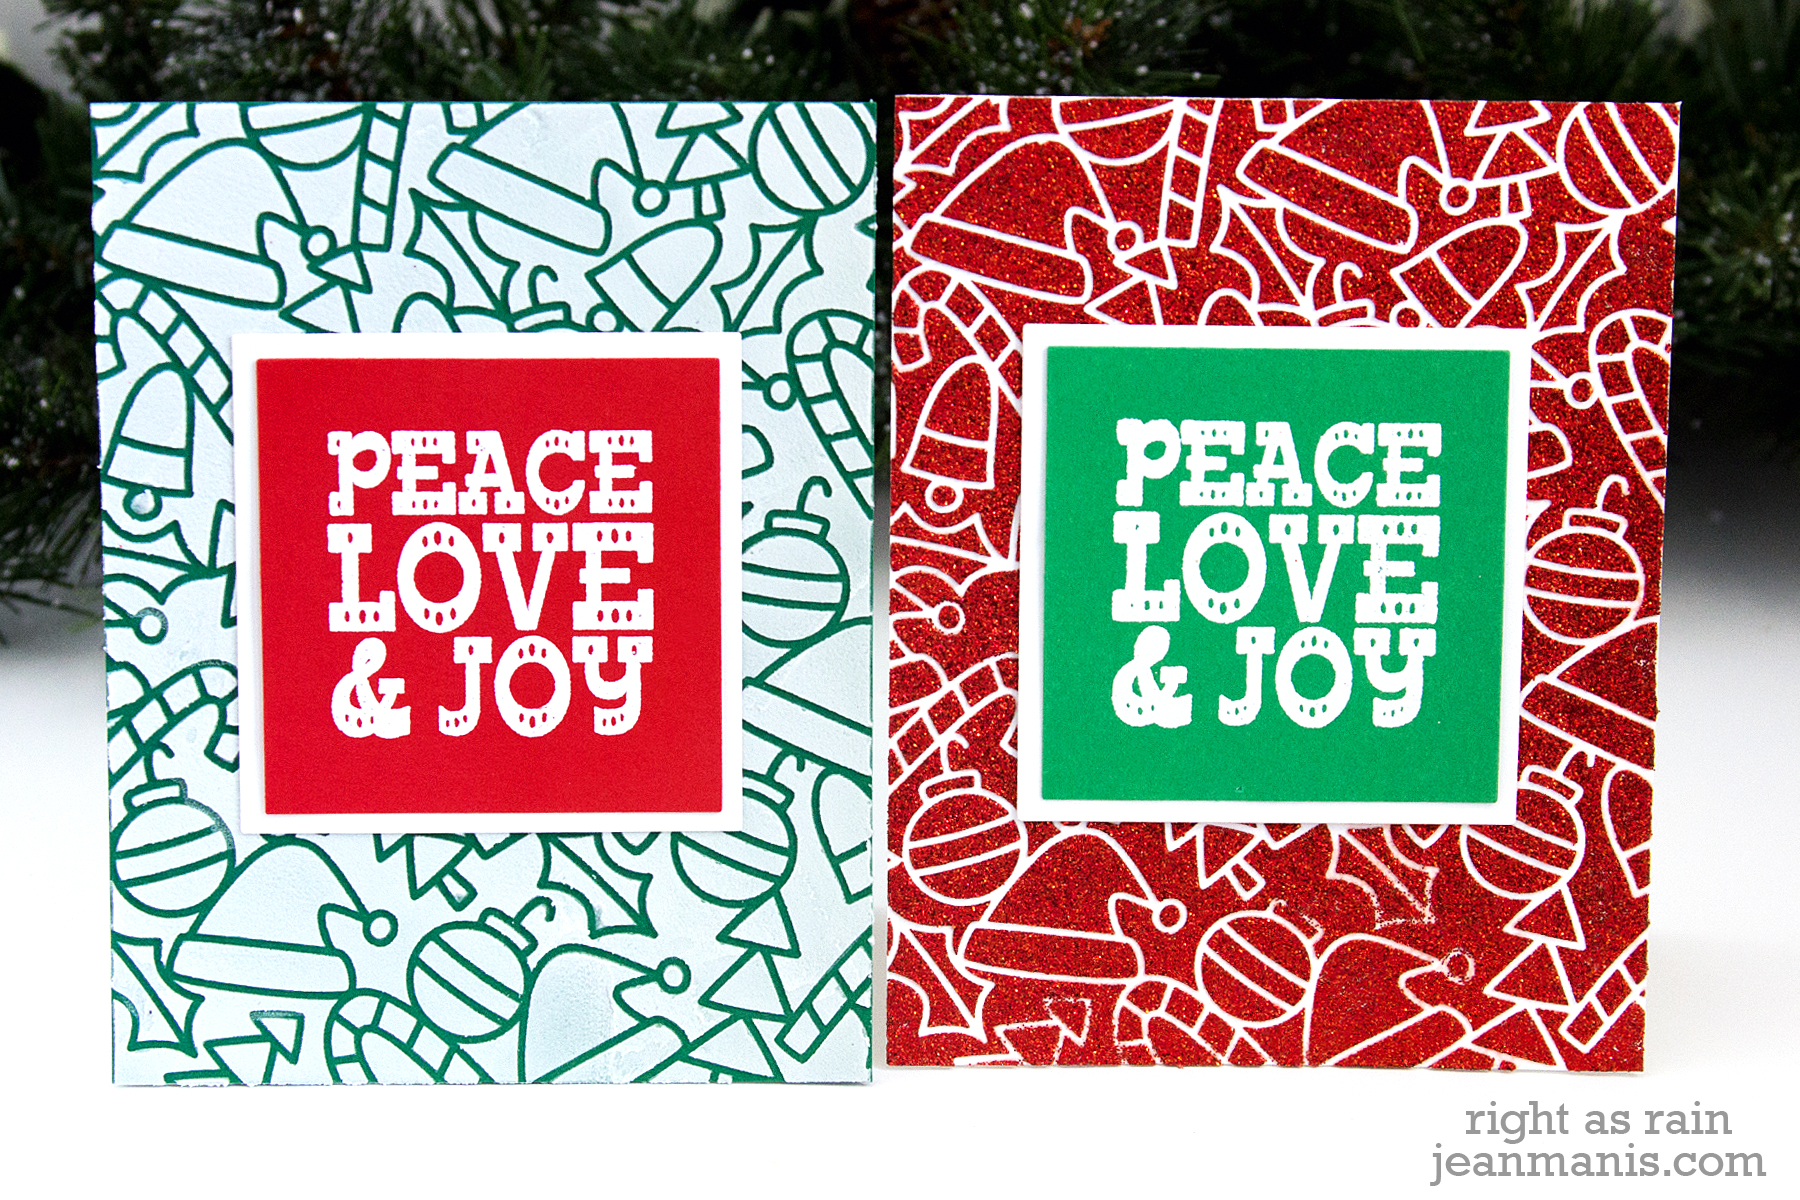
Hello! Today I am sharing a CAS Christmas card on which I’ve combined several older Poppystamps dies.

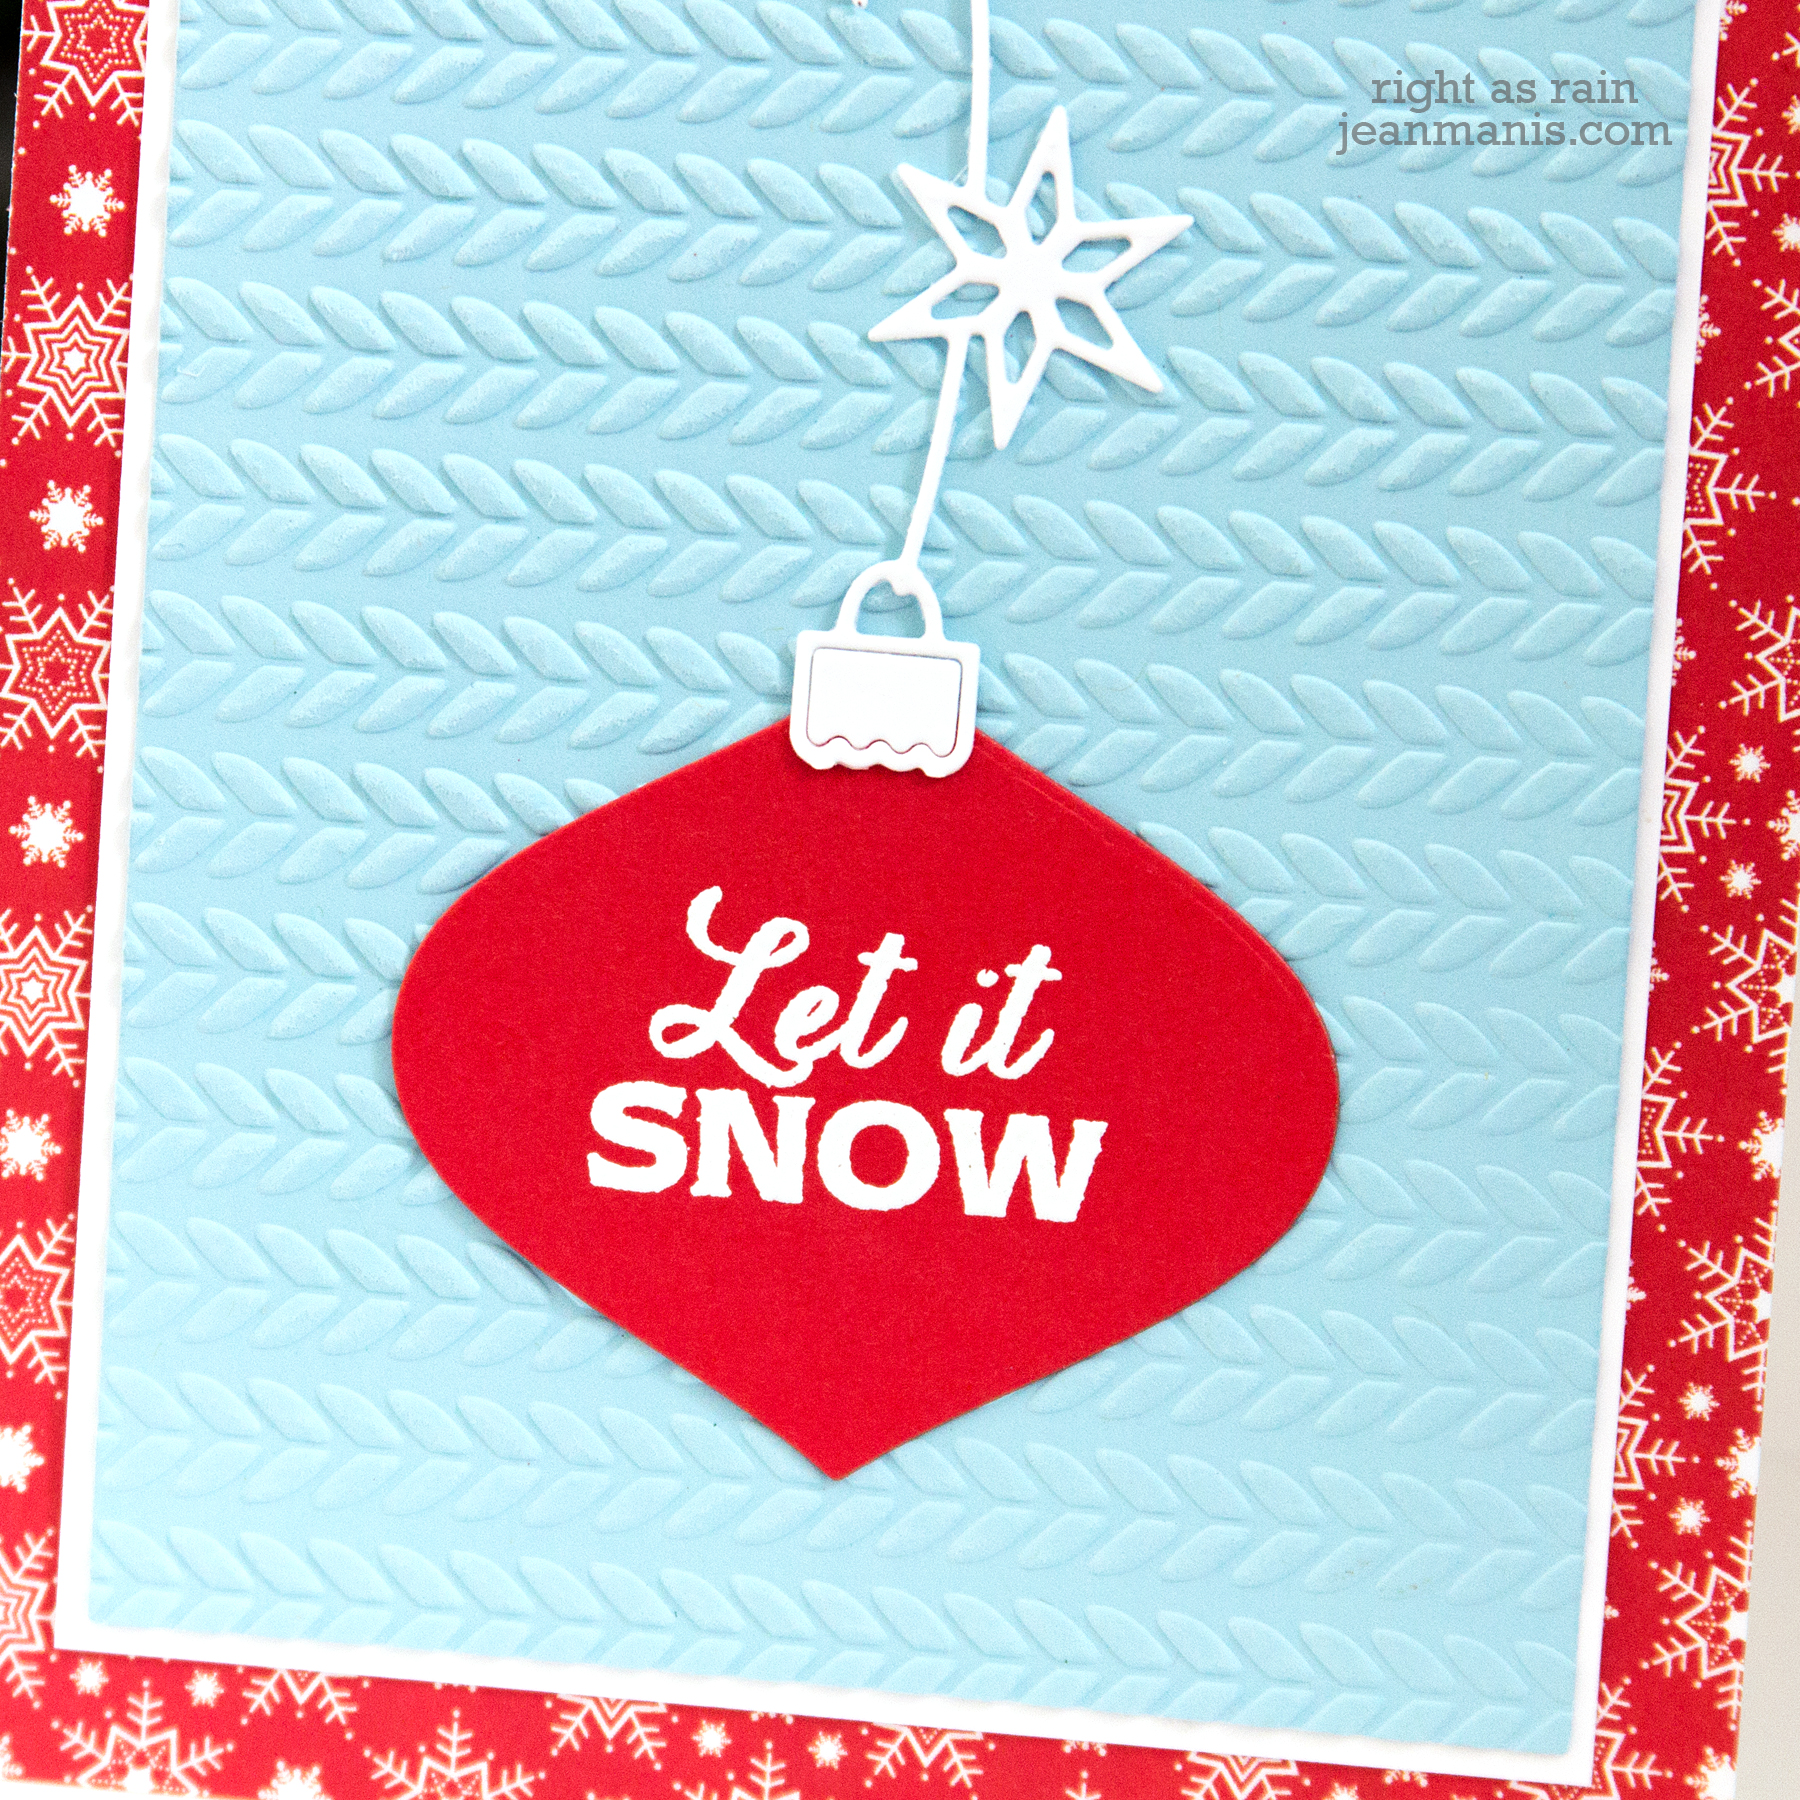
- I used the Poppystamps Viviro Ornament die set to cut the snowflake “string” for the ornament. I trimmed off the ornament part of the die-cut in order to use a different ornament.
- I heat-embossed the Hero Arts sentiment on red cardstock and cut it with the Poppystamps Pinpoint Shaker Ornament die.
- I adhered the two pieces together.
- I dry-embossed the light-blue background with the Taylored Expressions Cable Knit folder.
- When I added the dry-embossed panel to the patterned paper base, the transition was too harsh, so I added a white mat.
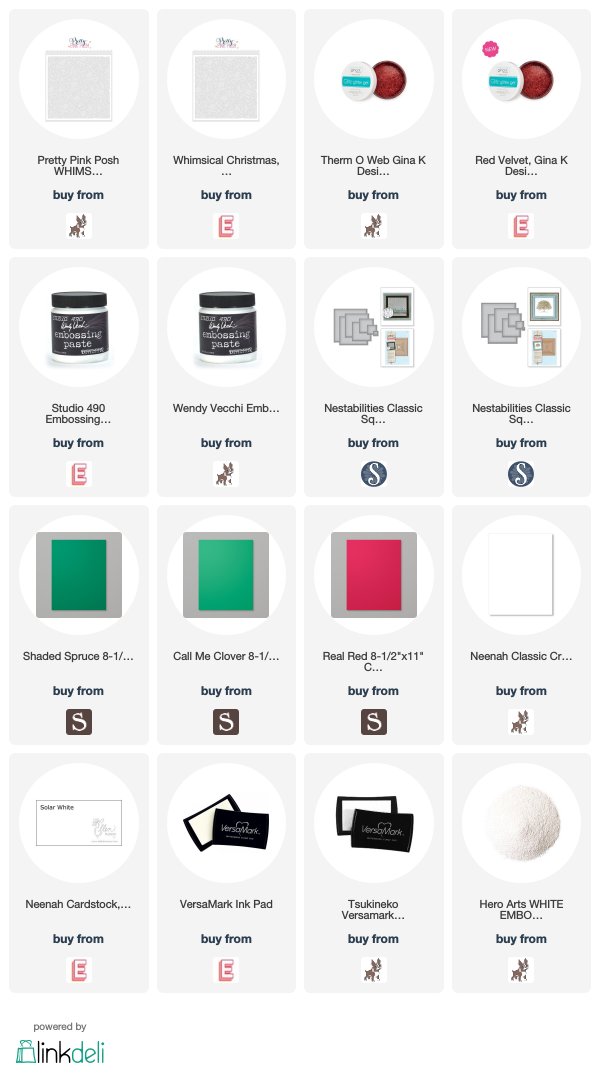
Supplies: