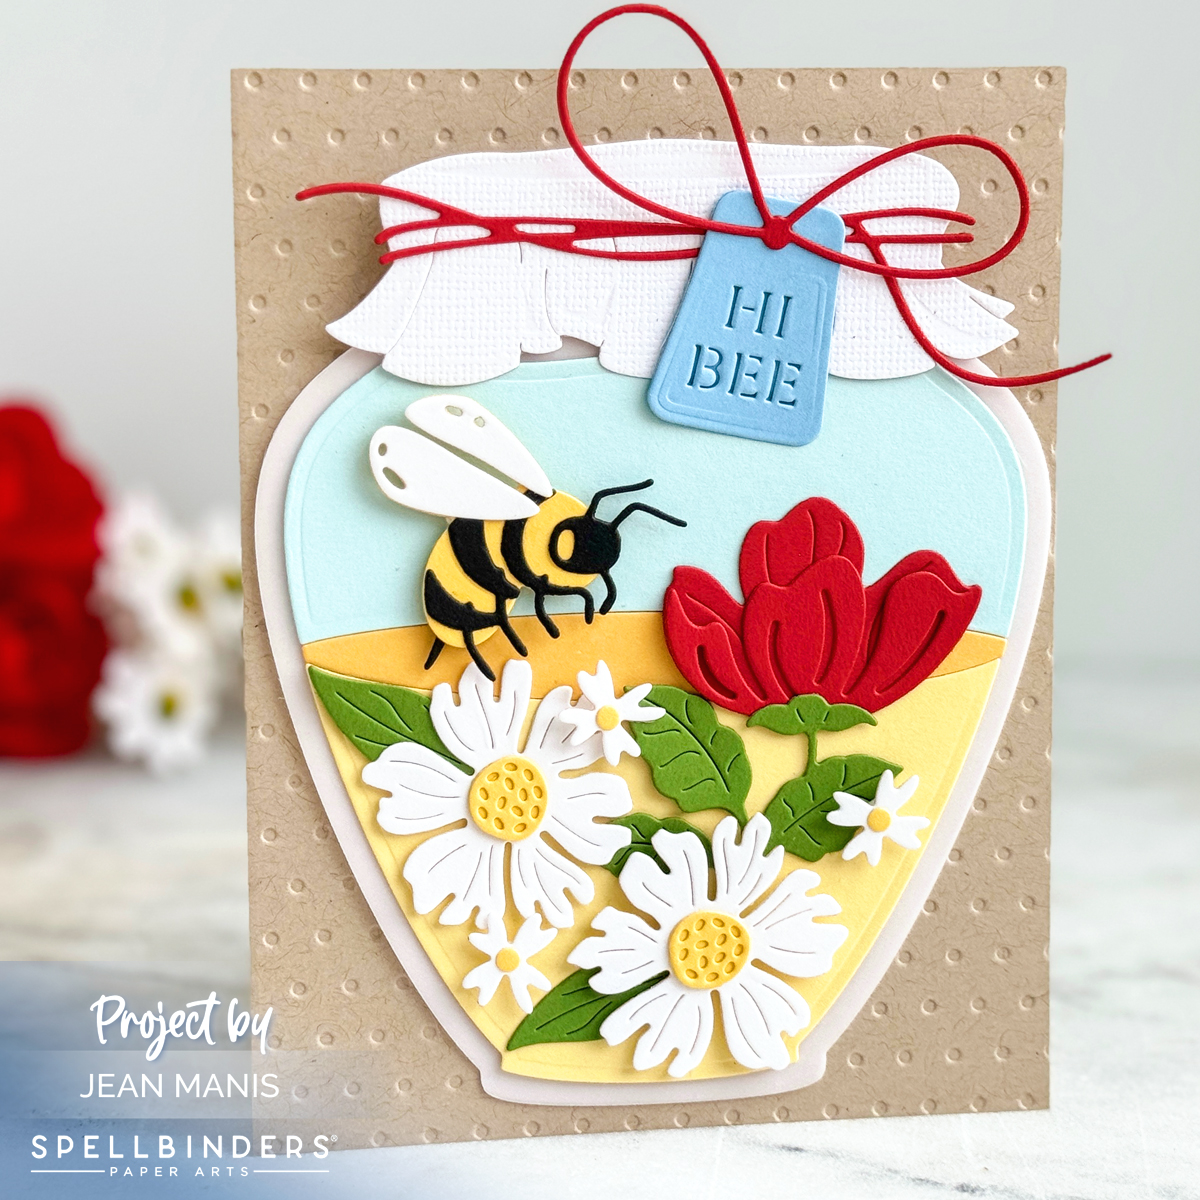
Hello! Today, I am delighted to share a whimsical birthday card brought to life with the Spellbinders Dancin’ Birthday Monster die set and Monster Birthday Sentiments stamp set, part of the Monster Birthday Collection, paired with other previously released Spellbinders supplies. Let’s take a look!
-
-
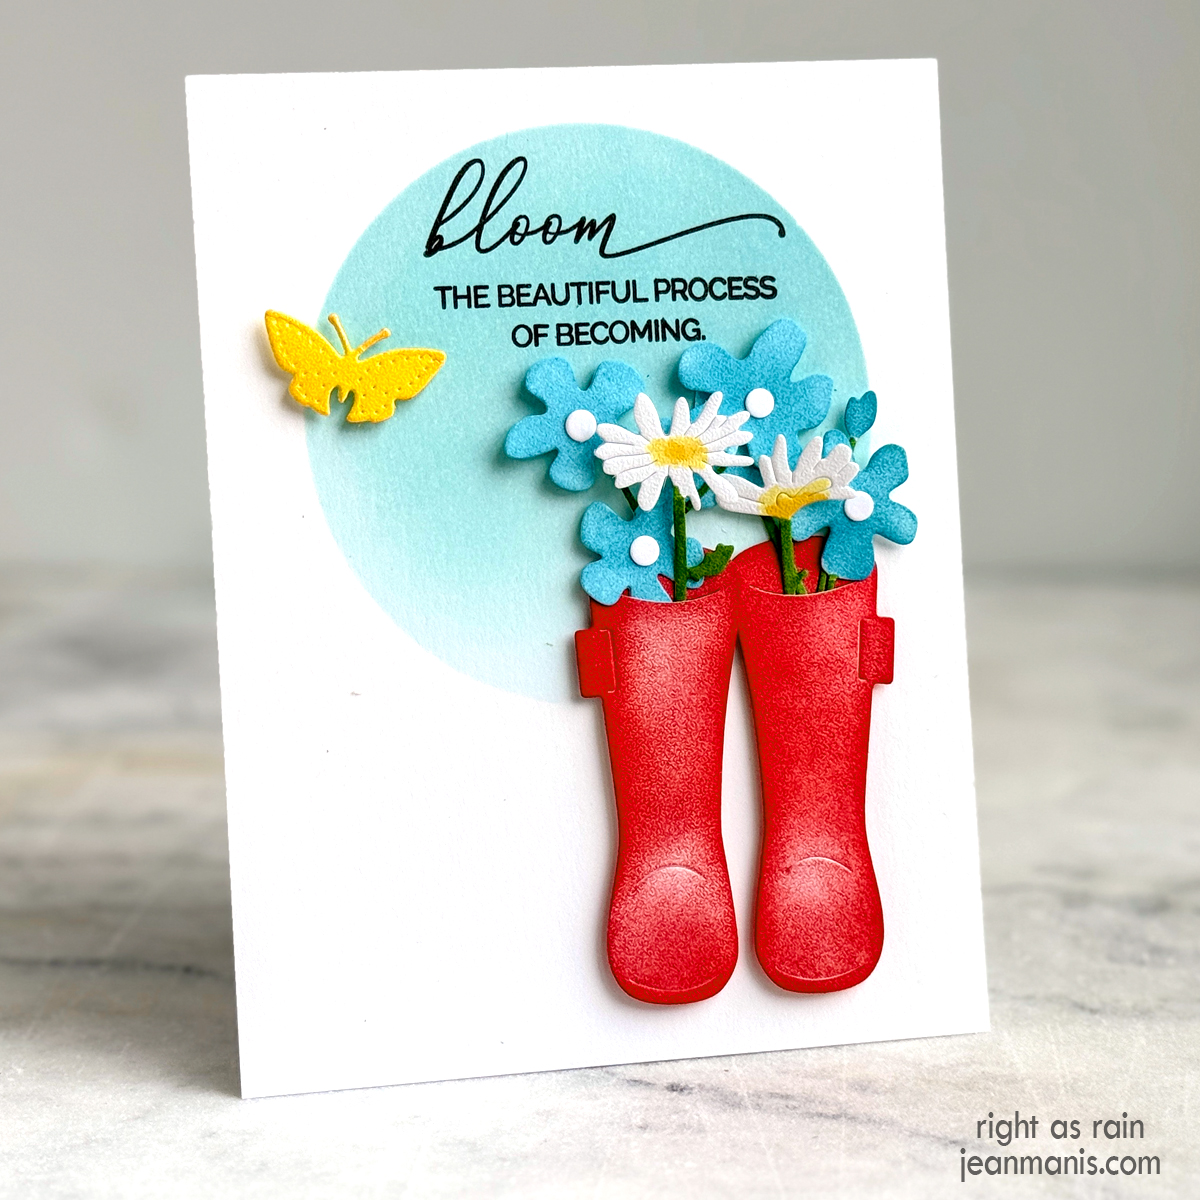
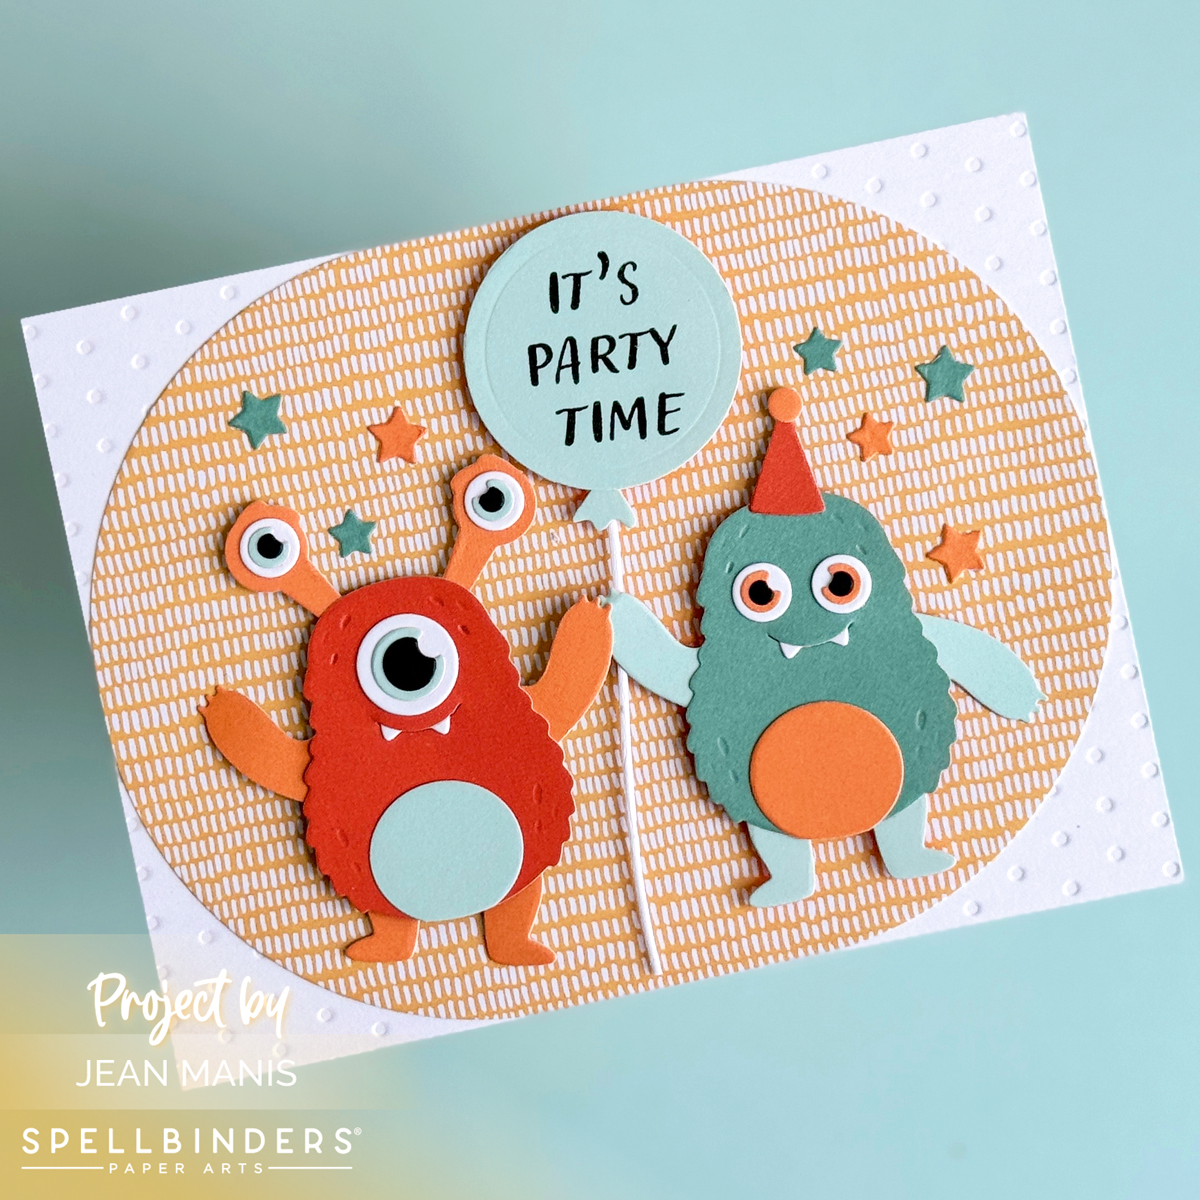
- With the Tiny Dots embossing folder, deboss an A2-size Snowdrift cardstock panel. Add to card base.
- With the largest die in the Stylish Ovals set, cut a piece of patterned paper from the Echo Park Birthday Wish Boy Collection pad. Add to card base.
- Stamp Monster Birthday Sentiments sentiment in black ink on to coordinating Echo Park solid paper. Cut with the smallest balloon die in the Color Block Balloons set. Cut string from Snowdrift cardstock. Assemble and set aside.
- Cut monsters from Snowdrift cardstock, Onyx cardstock, and Echo Park solid paper. Assemble.
- Add monsters and balloon to card base, using foam adhesive as needed.
- Embellish with stars cut from Echo Park solid paper with dies in the Merry Mug Creations die set.
-