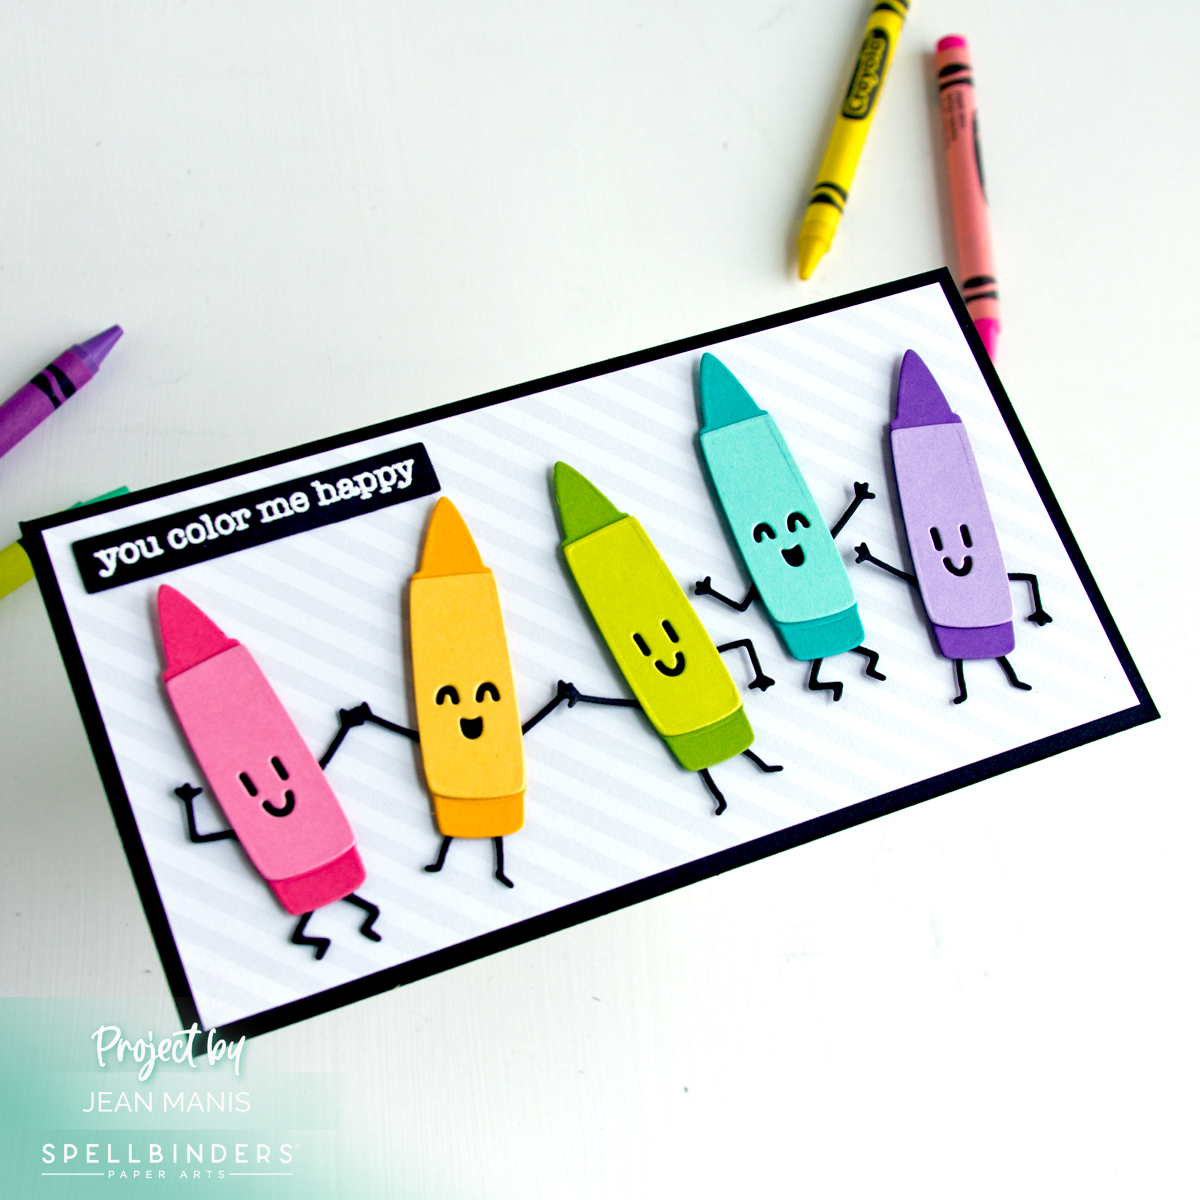
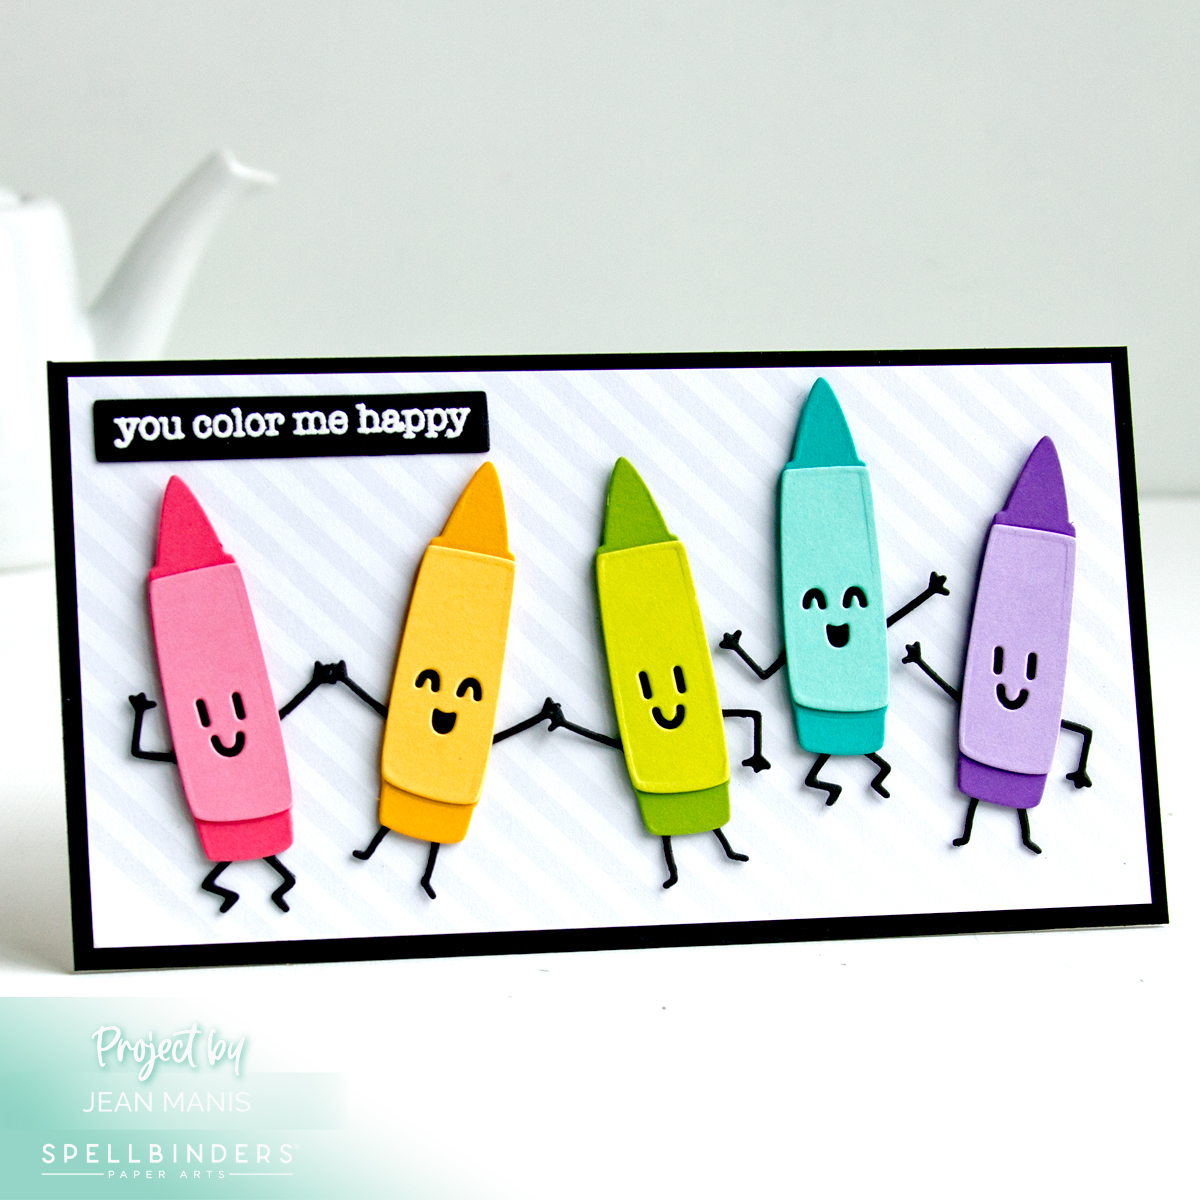
Springtime Charm: Birdhouse Scene Card

Hello! Today, I am sharing a spring-themed “Hello” card combining several Sunny Studio Stamps die sets. It has been a delight to hear the return of the birds singing now that it is spring.

Sunny Studio Stamps Birdhouse Card

  • Cut a mini-slimline panel (3 1/2″ x 6 1/2″) of Waterfall cardstock and add to card base.
  • Cut a strip of green cardstock (I used now-retired SU Cucumber Crush) with the grass die in the Picket Fence set.
  • Cut fence with the Picket Fence set from Snowdrift cardstock.
  • Cut birdhouses and birds with dies in the Build-A-Birdhouse set from a variety of cardstock colors. Assemble.
  • Cut clouds from Snowdrift cardstock with dies in the Fluffy Clouds set.
  • Cut sentiment from white glitter foam (glitter side down) with the Art Impressions Journal Letter set.
  • Add clouds and fence to card base. Add birdhouses and birds. Lastly affix grass and add sentiment.

Sunny Studio Stamps Birdhouse Card


Lawn Fawn | Sailing with the Car Critters

Hello! Today I am sharing a whimsical, nautical-themed card that uses the Lawn Fawn Car Critters stamp set in a novel way. Strips of cardstock mimic a cruise ship, proudly named the SS CUBBY. Through five die-cut windows, the Car Critters take center stage, offering a twist on their traditional use. This mini slimline card not only showcases the versatility of the Car Critters set but also demonstrates how simple techniques, like using strips of paper, a circle die, and an alpha die set, can yield a unique card.

Lawn Fawn | Sailing with the Car Critters

  • Stamp Car Critters on Arches Cold Press watercolor paper with VersaFine ink; heat set.
  • Color bears with watercoloring mediums of choice.
  • Create card base for a mini-slimline measuring 6 1/2 x 3 1/2 inches from Snowdrift cardstock.
  • Create portholes by cutting a Snowdrift cardstock panel, measuring 6 1/2 inches wide, five times with a 3/4 inch circle die.
  • Adhere the watercolored bears to the back of the porthole section.
  • Add strips of cardstock to card base to resemble cruise ship along with the porthole section.
  • Die-cut Journal Letters from Snowdrift cardstock and foam. Adhere foam to the back of the letters. Adhere letters to card front.

Lawn Fawn | Sailing with the Car Critters

I used the Car Critters in a car in this post.


Sending Hugs from the Sea | Spellbinders Small Die Kit Club

Hello! Today I am sharing a mini-slimline, underwater scene card created with the Spellbinders June 2023 Small Die Kit Club – “Dancin’ Octopus & Friends”- with which I paired the sentiment of “Hey” (included in the kit) and “Sending Hugs.” Octopuses are visually interesting creatures with their distinctive and otherworldly appearance, tentacles, and vibrant coloration. This card would work for a number of occasions, whether to connect with a friend, brighten the day of someone feeling under the weather, or “just because.” Keep reading to learn how I created the card.

Spellbinders June 2023 Small Die Kit Club

Spellbinders June 2023 Small Die Kit Club

    • Create background by applying Distress inks – Salty Ocean, Mermaid Lagoon, and Blueprint Sketch – on Distress Watercolor cardstock. Trim to mini-slimline size of 6 1/2 x 3 1/2 inches and add to card base.
    • Glimmer foil the Sending Hugs sentiment from the Mini Sincere Sentiments set in black  on Snowdrift cardstock. Trim.
    • Cut June 2023 Small Die Kit Club pieces – octopuses and jellyfish – from light gray cardstock and cardstock to which Distress Oxide inks have been applied. Assemble. Note: The bottom layers of the octopus and jellyfish can move, hence the name “Dancin’ Octopus & Friends.” For my design, I did not leave that layer free to move.

Spellbinders June 2023 Small Die Kit Club

    • Add octopuses to card, trim edges as necessary. Add jellyfish and sentiment.

Spellbinders June 2023 Small Die Kit Club

Head to the Spellbinders blog for a tutorial with the Small Die Kit Club – “Dancin’ Octopus & Friends.”


Spellbinders | Flower Mini Quilt

Hello! Today I am sharing a quilt-themed, mini slimline card showcasing the Flower Mini Quilt die set from Spellbinders in the Home Sweet Quilt Collection by Becca Feeken. I previously shared three cards on the Spellbinders blog created with products from the same collection including the Flower Mini Quilt set. Scroll down for information about the Christmas Clearance Sale that runs until 12/26/2022 Midnight MST.

Spellbinders | Flower Mini Quilt

  • Cut frame from Snowdrift cardstock with Flower Mini Quilt dies (solid/outline shape and corresponding stitched insert). Reserve Snowdrift pieces as shown in design. Back frame with Snowdrift panels cut using the outline shape die. The frame measures 3 inches square. Repeat process for second quilt square.
  • Cut light blue, blue, light teal, and teal cardstock with the Flower Mini Quilt stitched insert die. Inlay and adhere pieces into the frames switching the light blue for the light teal and the blue for the teal on the second quilt square.
  • Tape quilt squares together on the back.
  • Stamp Let’s Celebrate sentiment in black on Snowdrift cardstock and cut with die in the Assorted Tags set. Attach to silver cord and tie around the quilt squares.
  • Add assembly to a white textured card base measuring 3 1/2 inches wide by 6 1/2 inches tall.

Spellbinders | Flower Mini Quilt

Spellbinders | Christmas Clearance Sale


Spellbinders | Advent Calendar Day Four

Hello! Today I am sharing a mini-slimline birthday card created with the Day Four surprise in the Crafty Advent Calendar from Spellbinders– a versatile “Happy Birthday” sentiment die set. Follow along on the Spellbinders blog for daily inspiration.

Spellbinders | Advent Calendar Day Four

Spellbinders | Advent Calendar Day Four