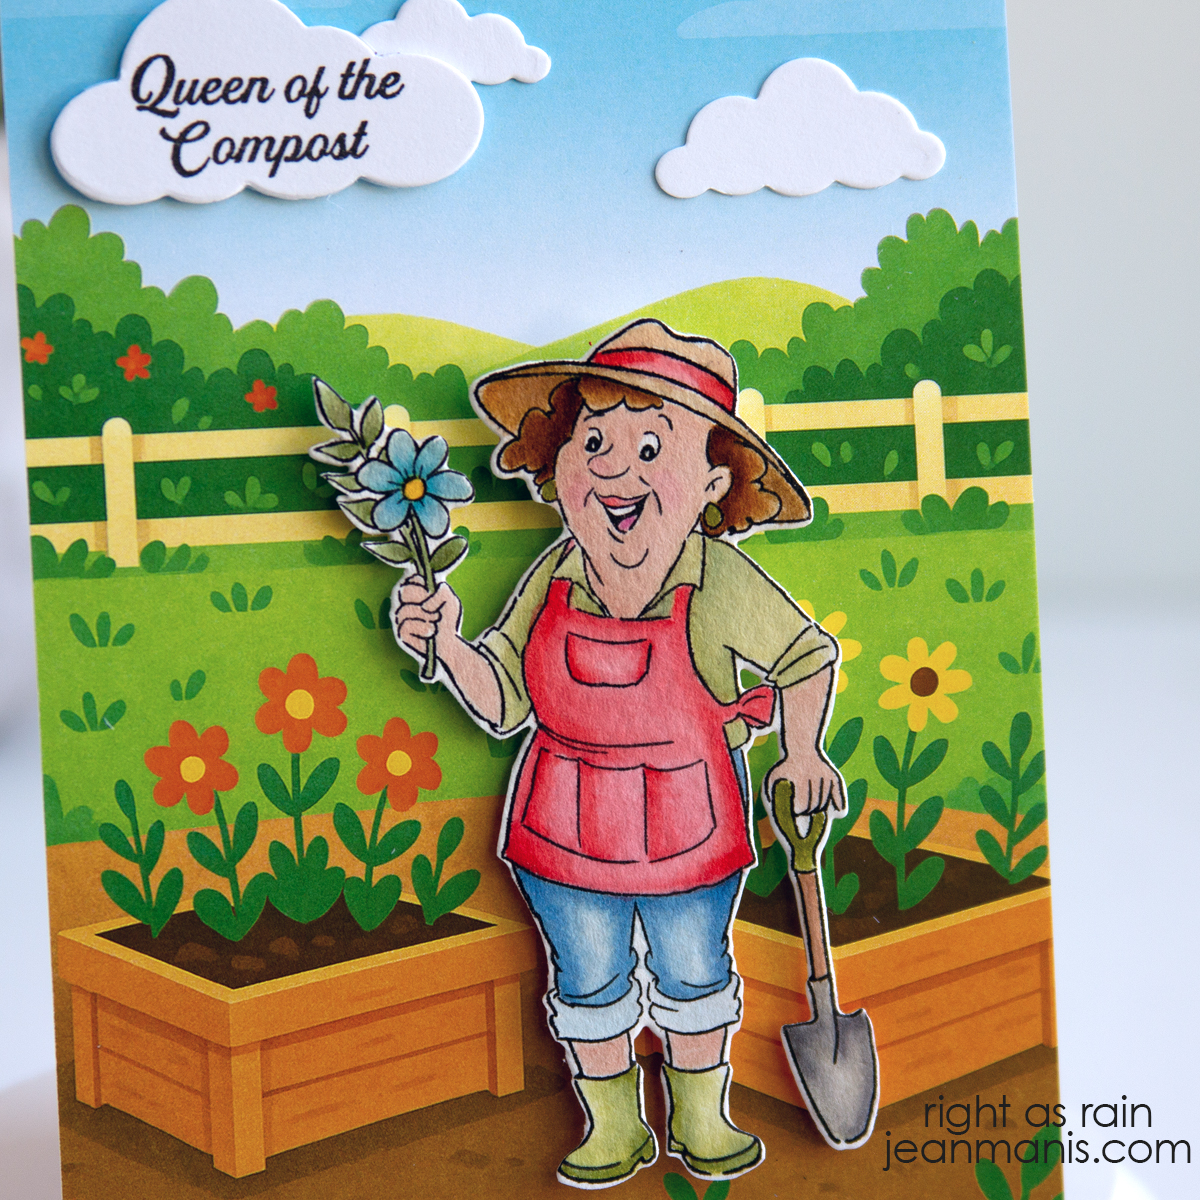
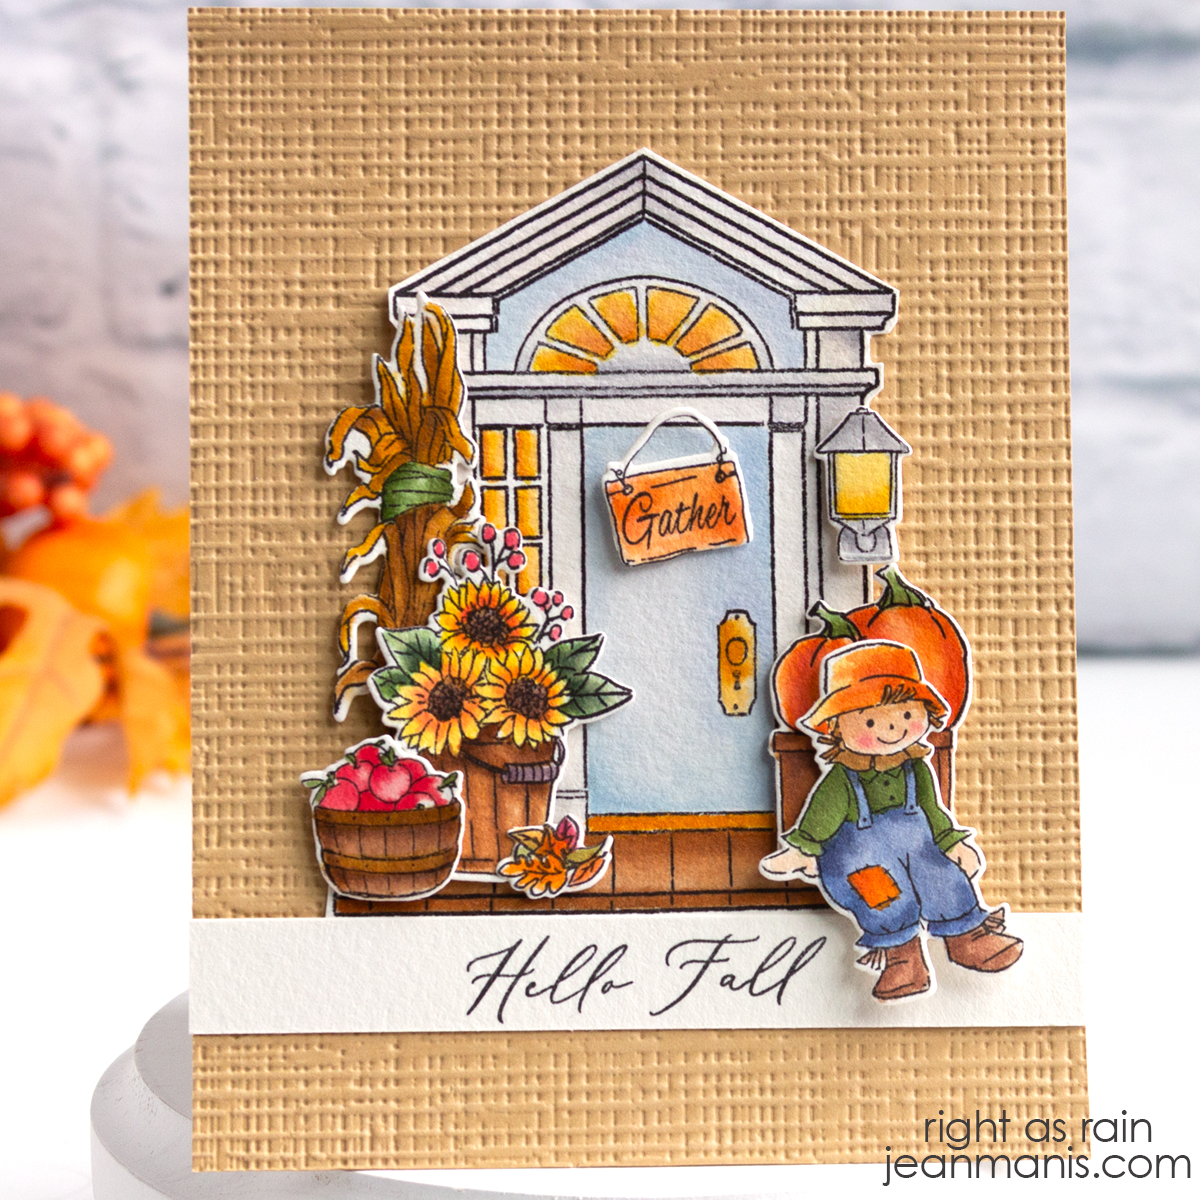
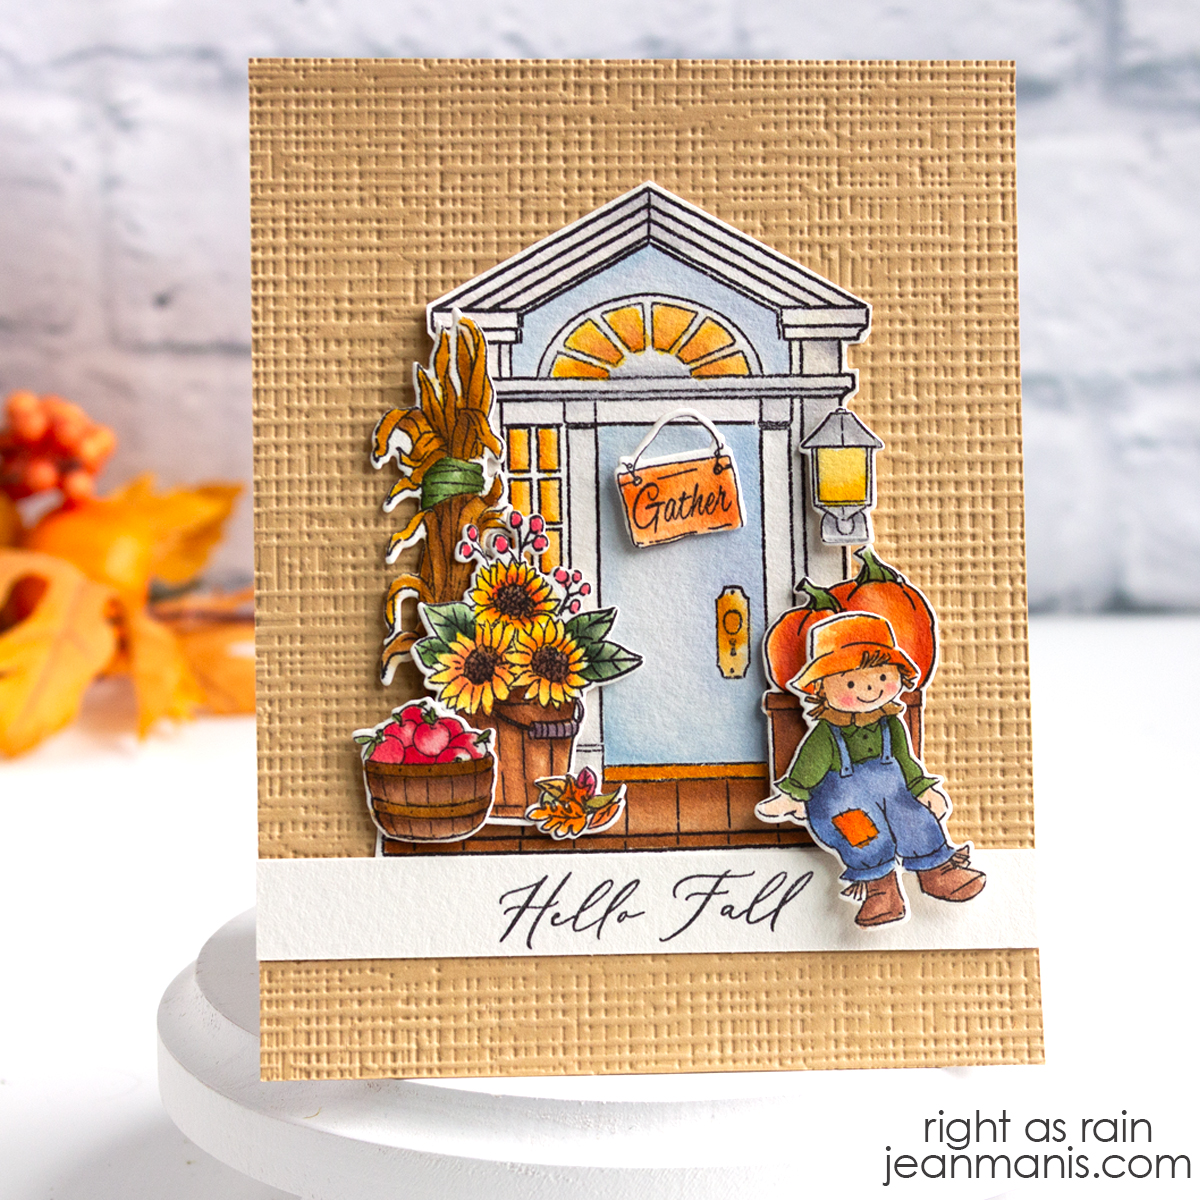
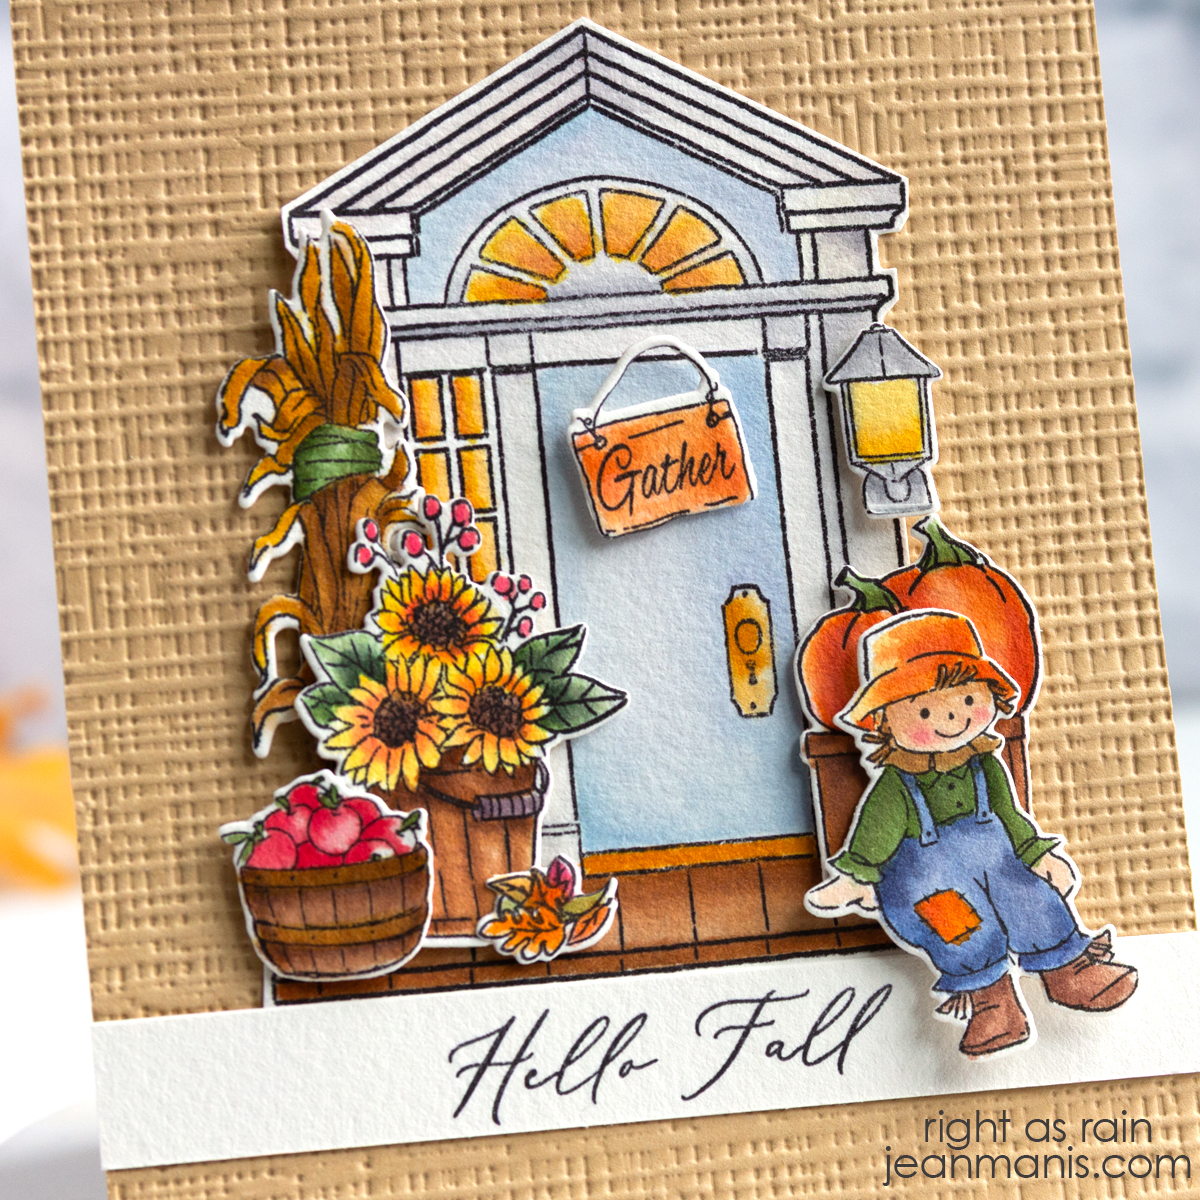
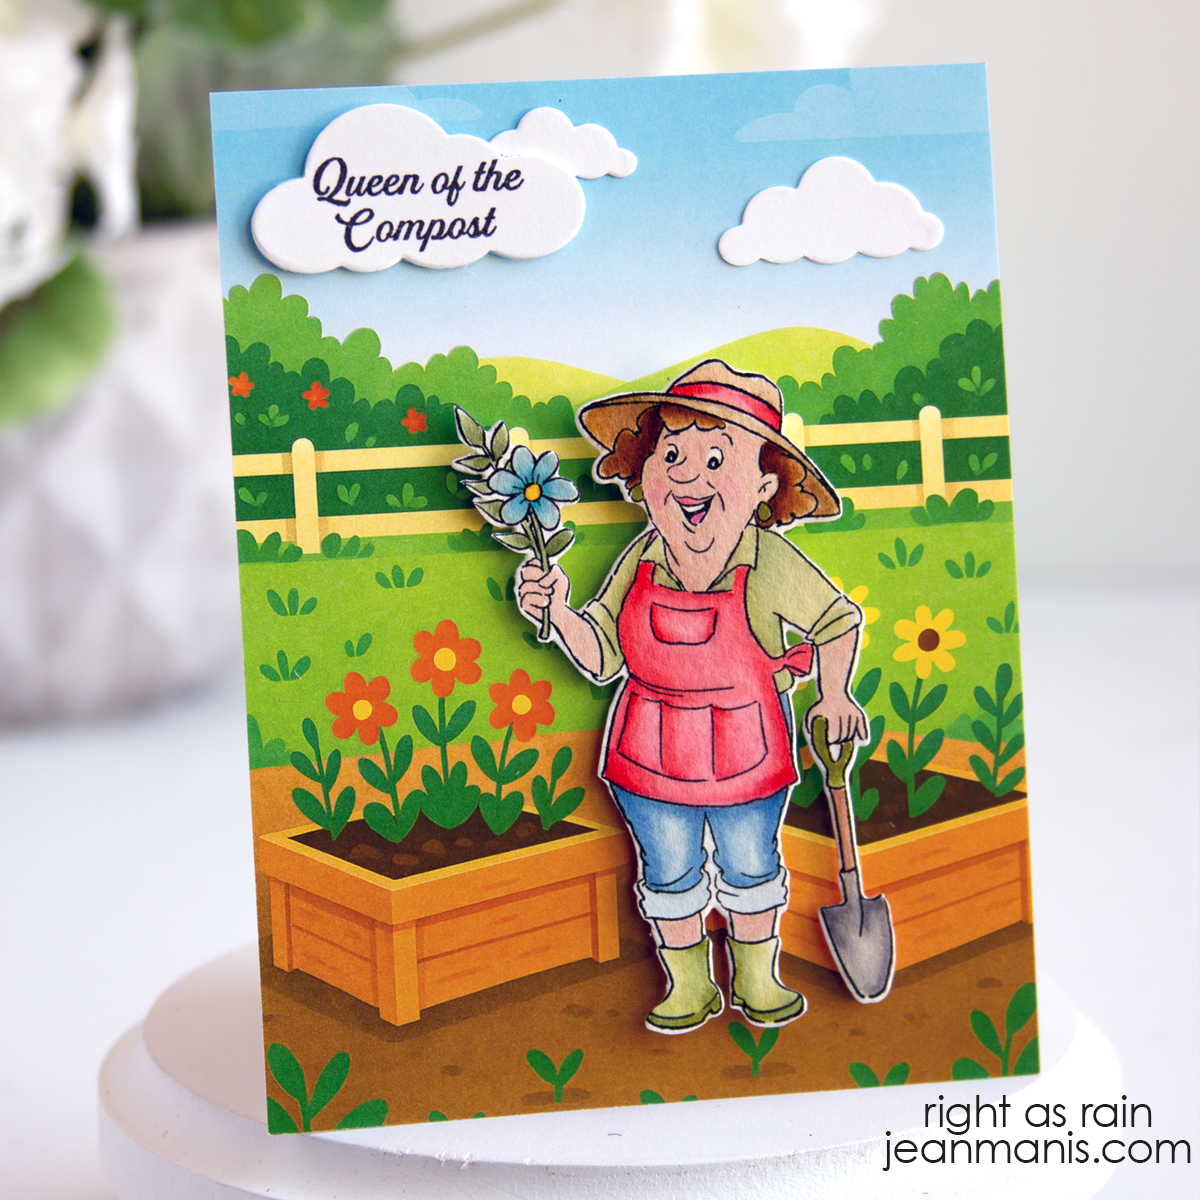
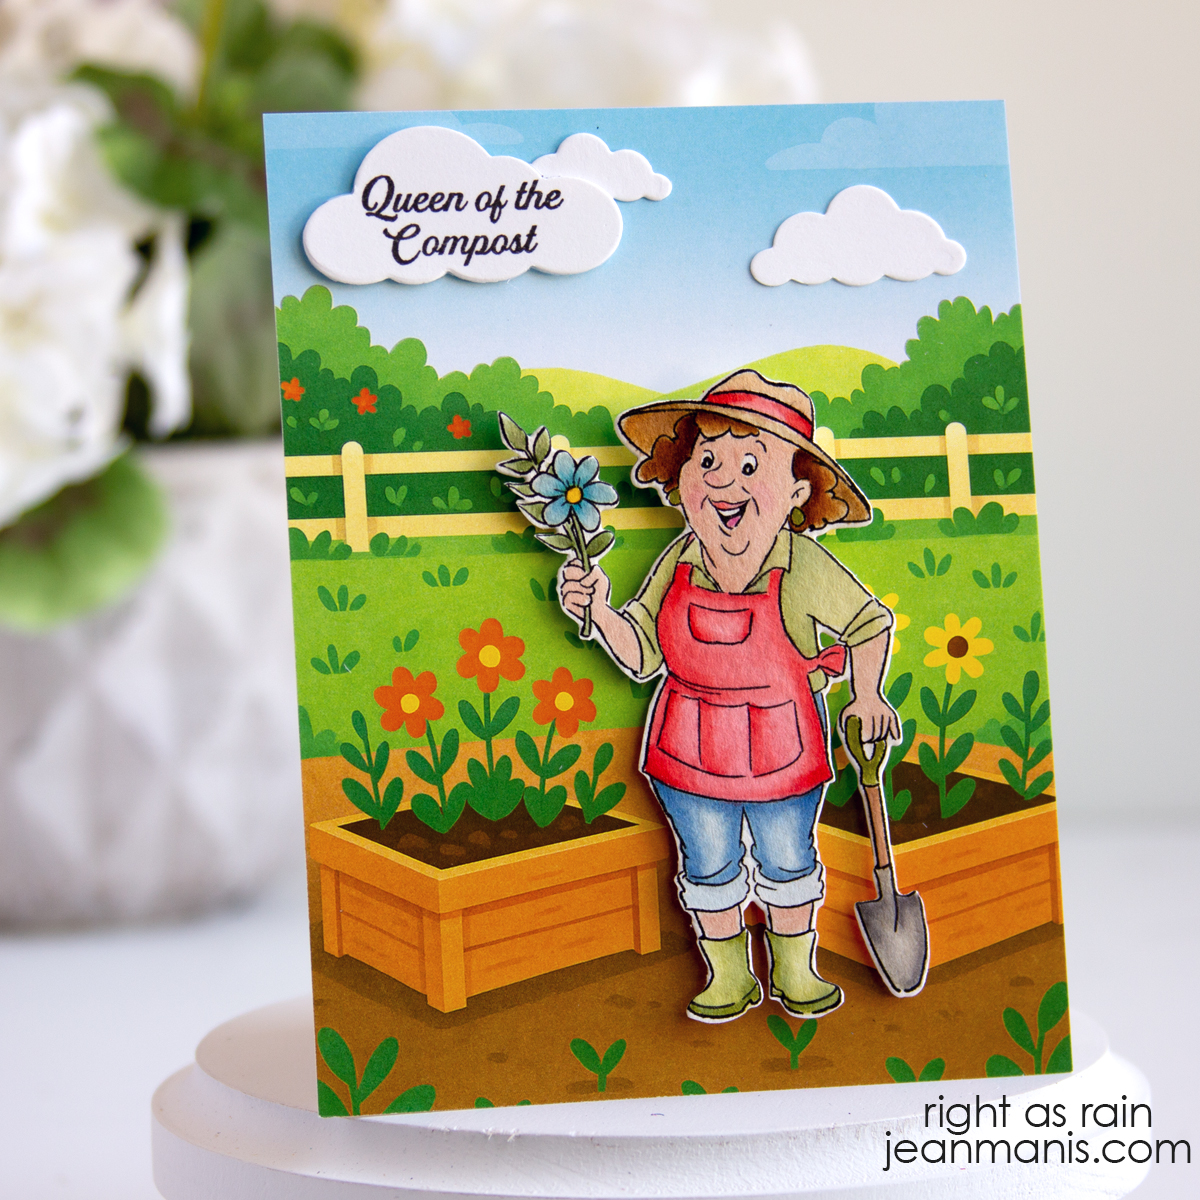
Springtime Charm: Birdhouse Scene Card

Hello! Today, I am sharing a spring-themed “Hello” card combining several Sunny Studio Stamps die sets. It has been a delight to hear the return of the birds singing now that it is spring.

Sunny Studio Stamps Birdhouse Card

  • Cut a mini-slimline panel (3 1/2″ x 6 1/2″) of Waterfall cardstock and add to card base.
  • Cut a strip of green cardstock (I used now-retired SU Cucumber Crush) with the grass die in the Picket Fence set.
  • Cut fence with the Picket Fence set from Snowdrift cardstock.
  • Cut birdhouses and birds with dies in the Build-A-Birdhouse set from a variety of cardstock colors. Assemble.
  • Cut clouds from Snowdrift cardstock with dies in the Fluffy Clouds set.
  • Cut sentiment from white glitter foam (glitter side down) with the Art Impressions Journal Letter set.
  • Add clouds and fence to card base. Add birdhouses and birds. Lastly affix grass and add sentiment.

Sunny Studio Stamps Birdhouse Card


Art Impressions Whimsical Friendship Card

Hello! Today I am stepping into a world where imagination takes flight with a friendship card showcasing the Art Impressions Mushroom Cubbies stamp and die set. It has been awhile since I had the time to watercolor stamped images, and I found myself immediately absorbed in the activity! I have written about my journey with watercolor stamped images HERE.

Art Impressions Whimsical Friendship Card

    • Create the background with the Lawn Fawn Stitched Cloud Backdrop from Sea Glass cardstock. Add to an A2-size card base.
    • Heat-emboss the Mushroom Cubbies “Lots of Bugs and Kisses” sentiment on Noble Fir cardstock. Cut with the grass die included in the Sunny Studio Stamps Picket Fence Border die set. Add to card base.
    • Stamp the images in the Mushroom Cubbies set with Versafine on Arches Cold Press watercolor paper and heat set. Color the images with watercoloring mediums of choice (I used Tombow + Zig markers). Correct any mistakes with Copic Opaque White, which I used on the mushroom cap white spaces. Tombow Markers: Poppy Red (856), Dark Jade (177), Light Green (195), Saddle Brown (977), Redwood (899), Process Blue (452), Navy Blue (528), N95 (Cool Gray 1), N65 (Cool Gray 5), Light Apricot (850), Tan (942), Sand (992), N15 (Lamp Black), N25 (Black); Zig Markers: Yellow (50), Bright Yellow (52).
    • Once dry, cut the images with the dies included in the set. The die for the mushroom house cuts the windows and door. I backed those with yellow cardstock. Add images to card front with dot and foam adhesive.

Art Impressions Whimsical Friendship Card


Art Impressions Hedgehog Birthday

Hello! Today I am sharing a birthday card featuring the Art Impressions Hedgehogs stamp set. I recently shared a round-up of birthday cards HERE and mentioned that following Christmas cards, birthday cards are the type I send most frequently.

Art Impressions Hedgehog Birthday

    • Cover an A2-size card base with Bazzill Canvas Texture cardstock.
    • Cut a 4 x 5 1/4-inch bright green cardstock panel (I used Stampin’ Up Granny Apple Green) and dry-emboss with the Floating Balloons 3D folder. Add panel to prepared base.
    • Stamp Hedgehogs image with VersaFine ink on Arches Cold Press watercolor paper; heat set. Color the image with watercoloring mediums of choice (I used Tombow markers). Set aside to dry. (You can read more about watercoloring stamped images HERE.)
    • Once dry, cut the hedgehog image with die in the Hexagon Double Stitched set.
    • Stamp Hedgehogs image on Masking sheet and fussy-cut.
    • Cover watercolored hedgehog image. Using a vellum sheet, add Hickory Smoke ink for the ground and Tumbled Glass ink for the sky.
    • Add hexagon panel to card front.
    • Stamp Hedgehogs sentiment in black ink on white cardstock and cut with a 1 1/2″ circle die. Add to card front with foam adhesive.

Art Impressions Hedgehog Birthday


Art Impressions Winter Wonderland

Hello and Merry Christmas! Step into a picturesque scene of a cozy house nestled in the snow, created with the Art Impressions Snowy Window stamp and die set.

Art Impressions Snowy Window

  • Stamp Snowy Window images (scene and snowman) with VersaFine ink on Arches Cold Press watercolor paper; heat set. Color the images with watercoloring mediums of choice (I used Tombow markers). Set aside to dry. (You can read more about watercoloring stamped images HERE.) Once dry, cut the snowman with the die included in the Snowy Window set.
  • Cut a 4 x 5 1/4 inch patterned paper panel (I used a now-retired My Favorite Things die). Use a square die to cut a window in the panel. Attach patterned paper frame to the watercolored image. Add assembly to an A2-size card base. Add the snowman to the scene with foam adhesive.

Art Impressions Snowy Window

Art Impressions Snowy Window

The window set stamps at Art Impressions are a lot of fun to color. I shared a card created with the Birdhouse Neighborhood set HERE.


Art Impressions | Fourth of July Front Porch Delight

Hello! Today, I am sharing a card on which I have used the newest Art Impressions Front Porch stamp and die set – Patriotic. As I shared in this post, there is an entire Art Impressions Front Porch Series. This card showcases a charming front porch decorated for the Fourth of July with a sleeping dog in a chair, fluttering flag bunting, and a container of fireworks ready to light up the night sky.  Read on for step-by-step instructions on how to create the card.

Art Impressions | Fourth of July Front Porch Delight

Stamp Front Porch and Front Porch Patriotic images with VersaFine ink on Arches Cold Press watercolor paper; heat set.

Art Impressions | Fourth of July Front Porch Delight

Color images with watercolor markers (Tombow and Zig) using the watercolor paletteNo. 4, and No. 1 brushes. Once dry, cut with coordinating dies. Note: the Front Porch door die cuts the window panes. I chose to fussy-cut the door, as I had watercolored the window panes. For the flag, bunting, and doormat, I used the Tombow Navy marker (brush tip) directly on the watercolor paper.

Art Impressions | Fourth of July Front Porch Delight

Create a panel, measuring 4 x 5 1/4 inches, of dry-embossed Chamomile cardstock background (I used an older Stampin’ Up folder) and add a 1 1/4 inch strip of dark gray to the bottom to represent the ground. Add assembly to a card background of white Bazzill canvas cardstock (which has been added to an A2-size card base). Add elements to card with foam adhesive.