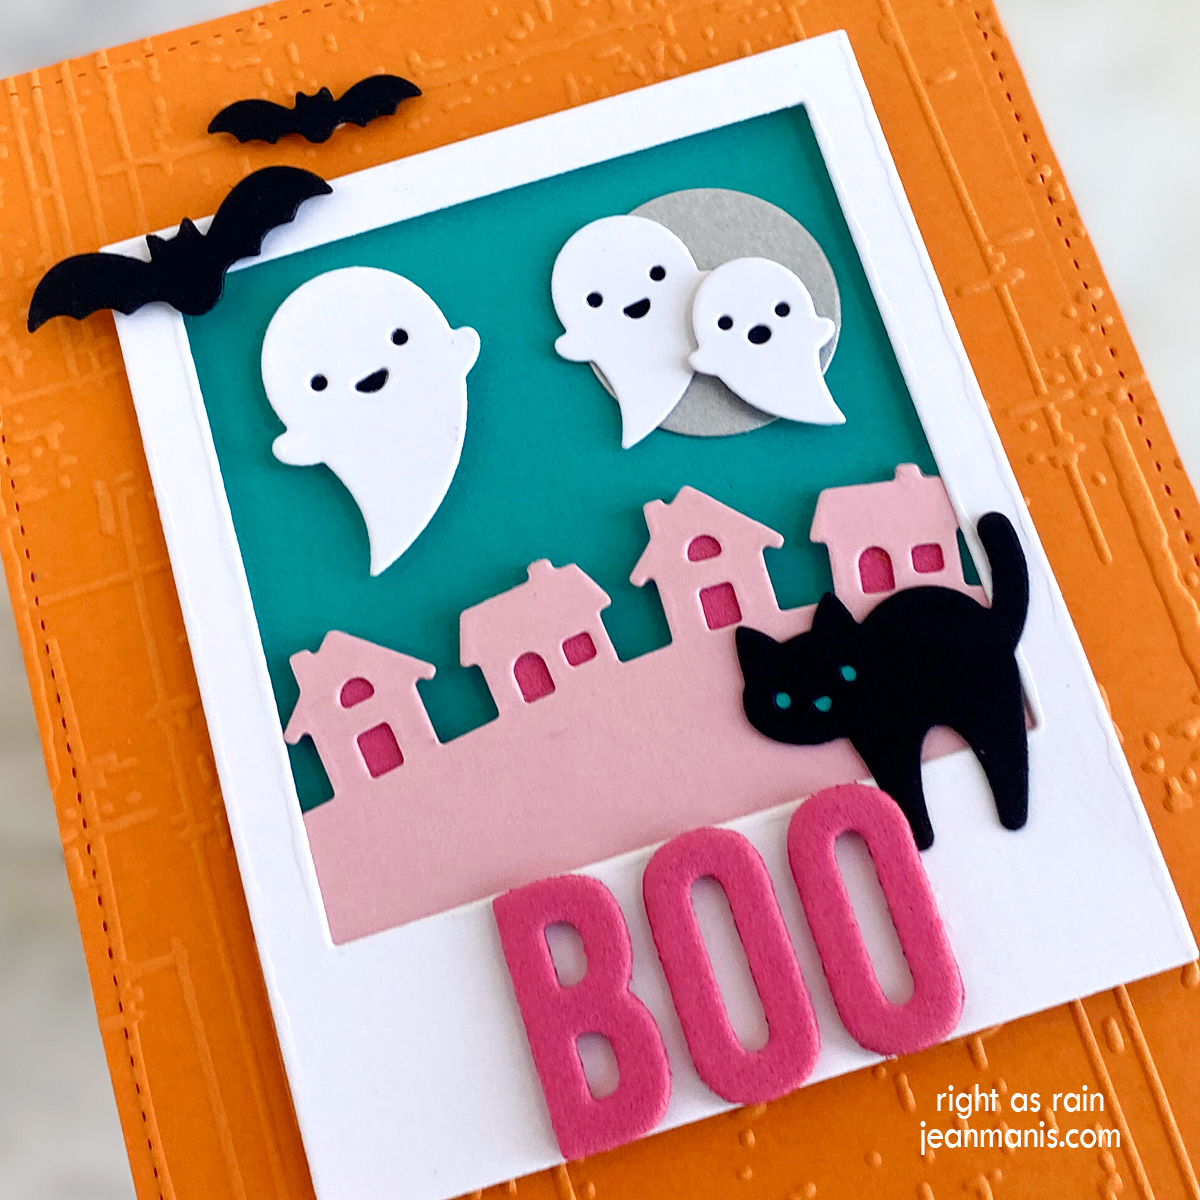
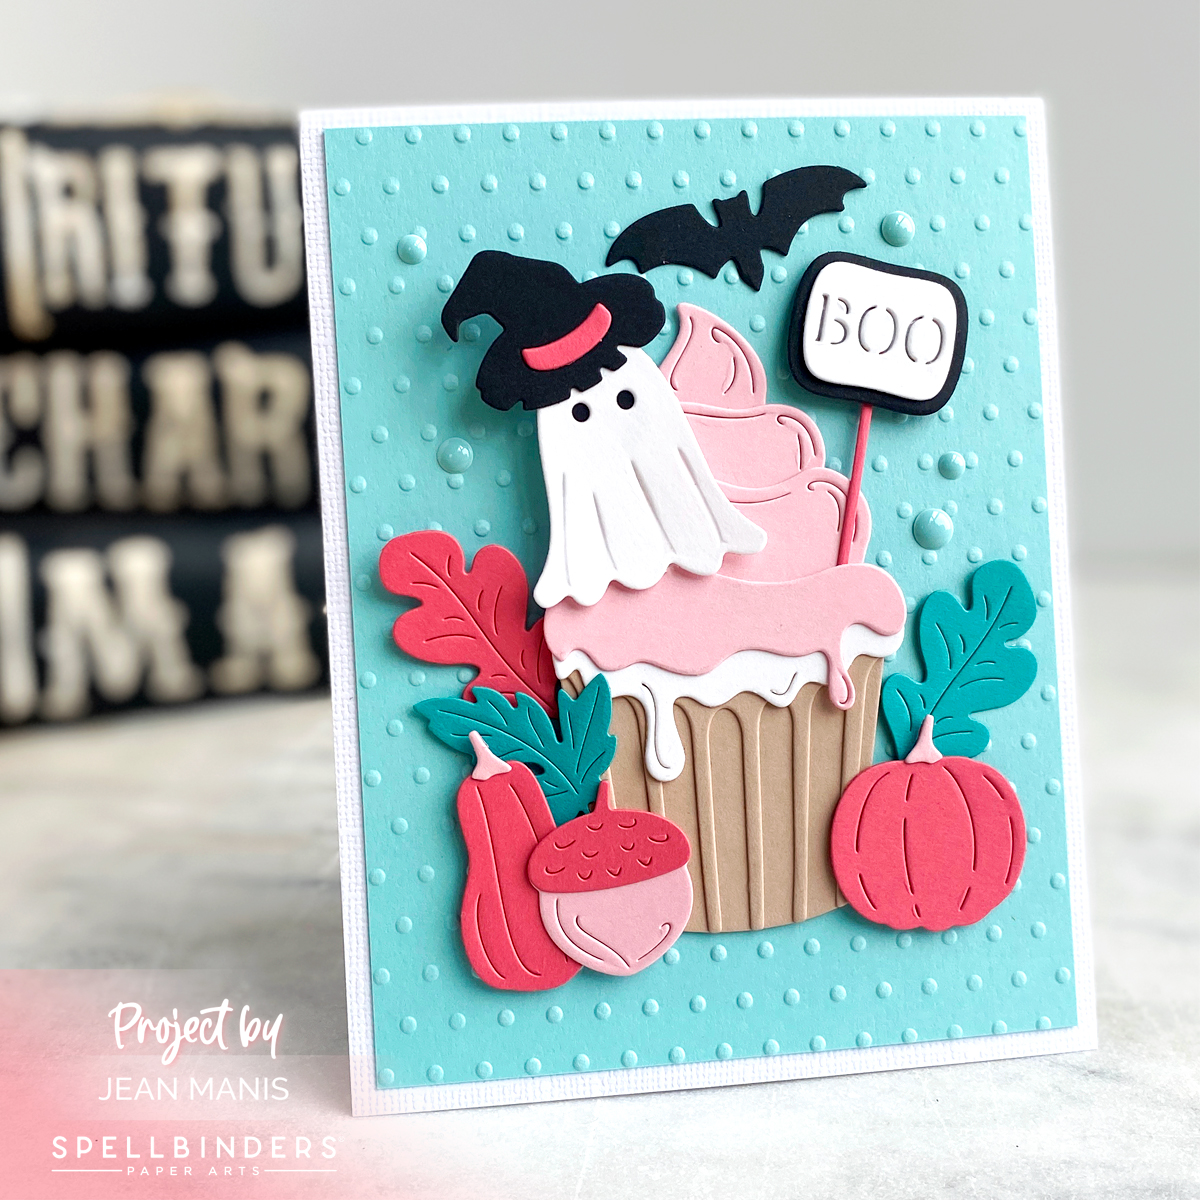
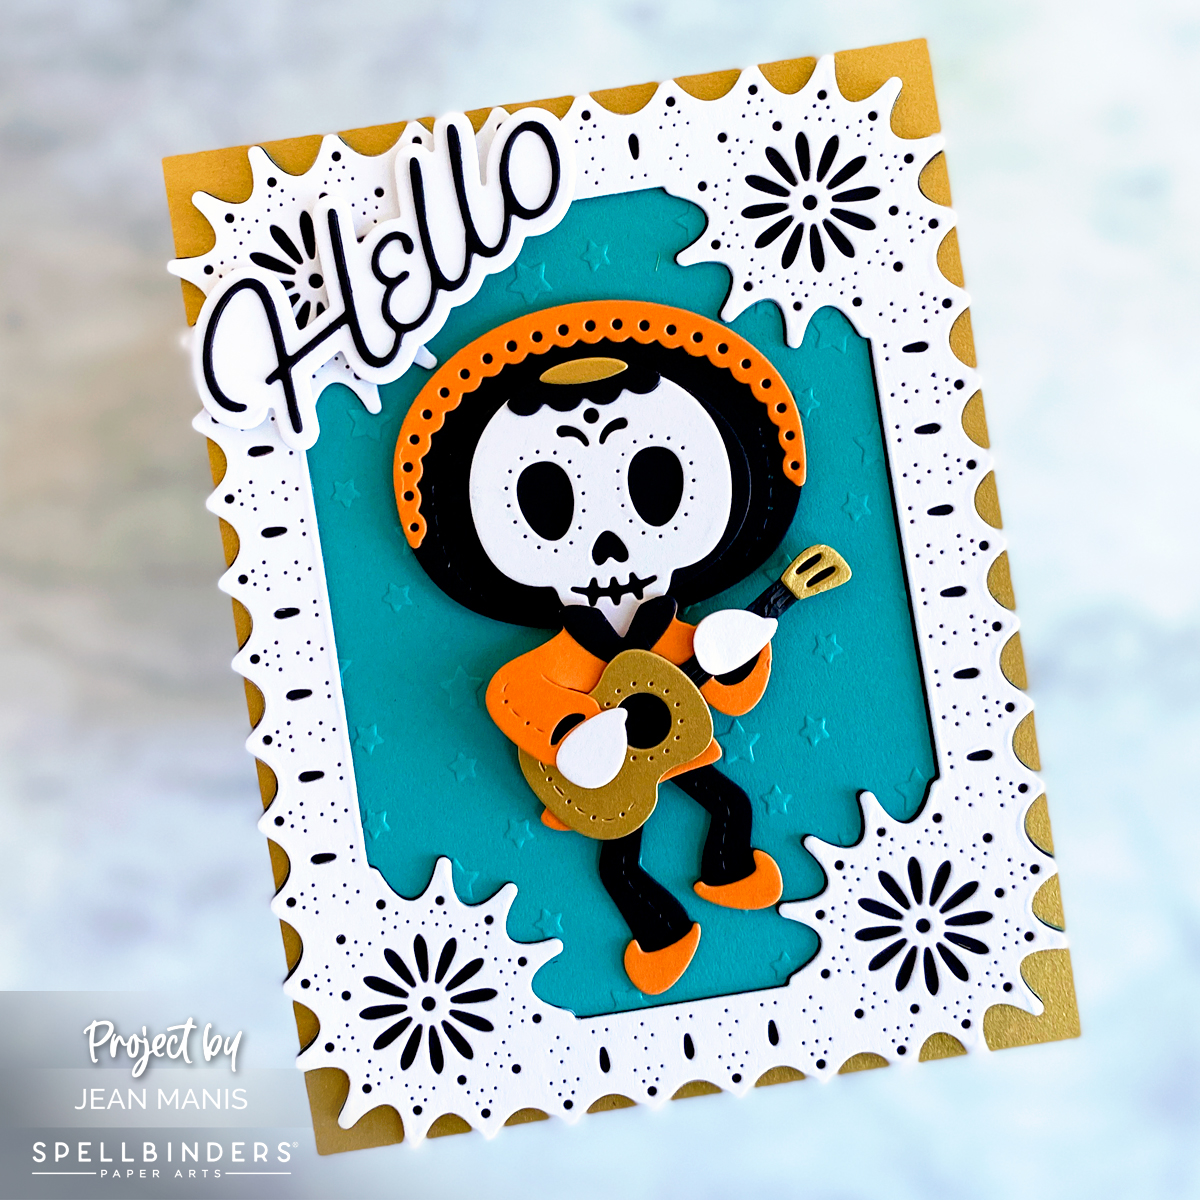
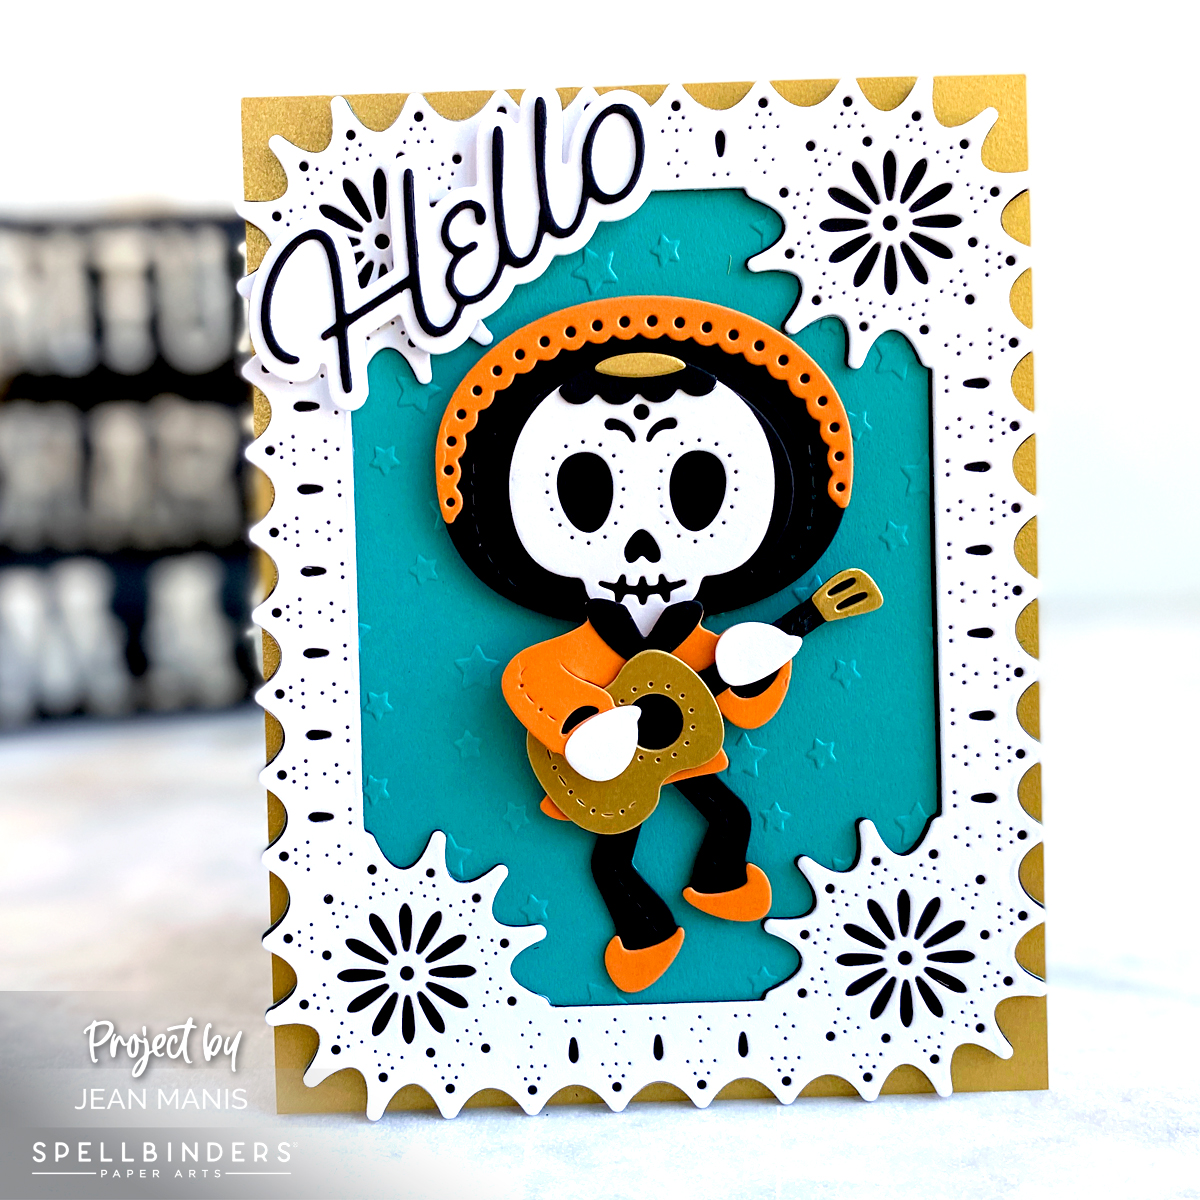
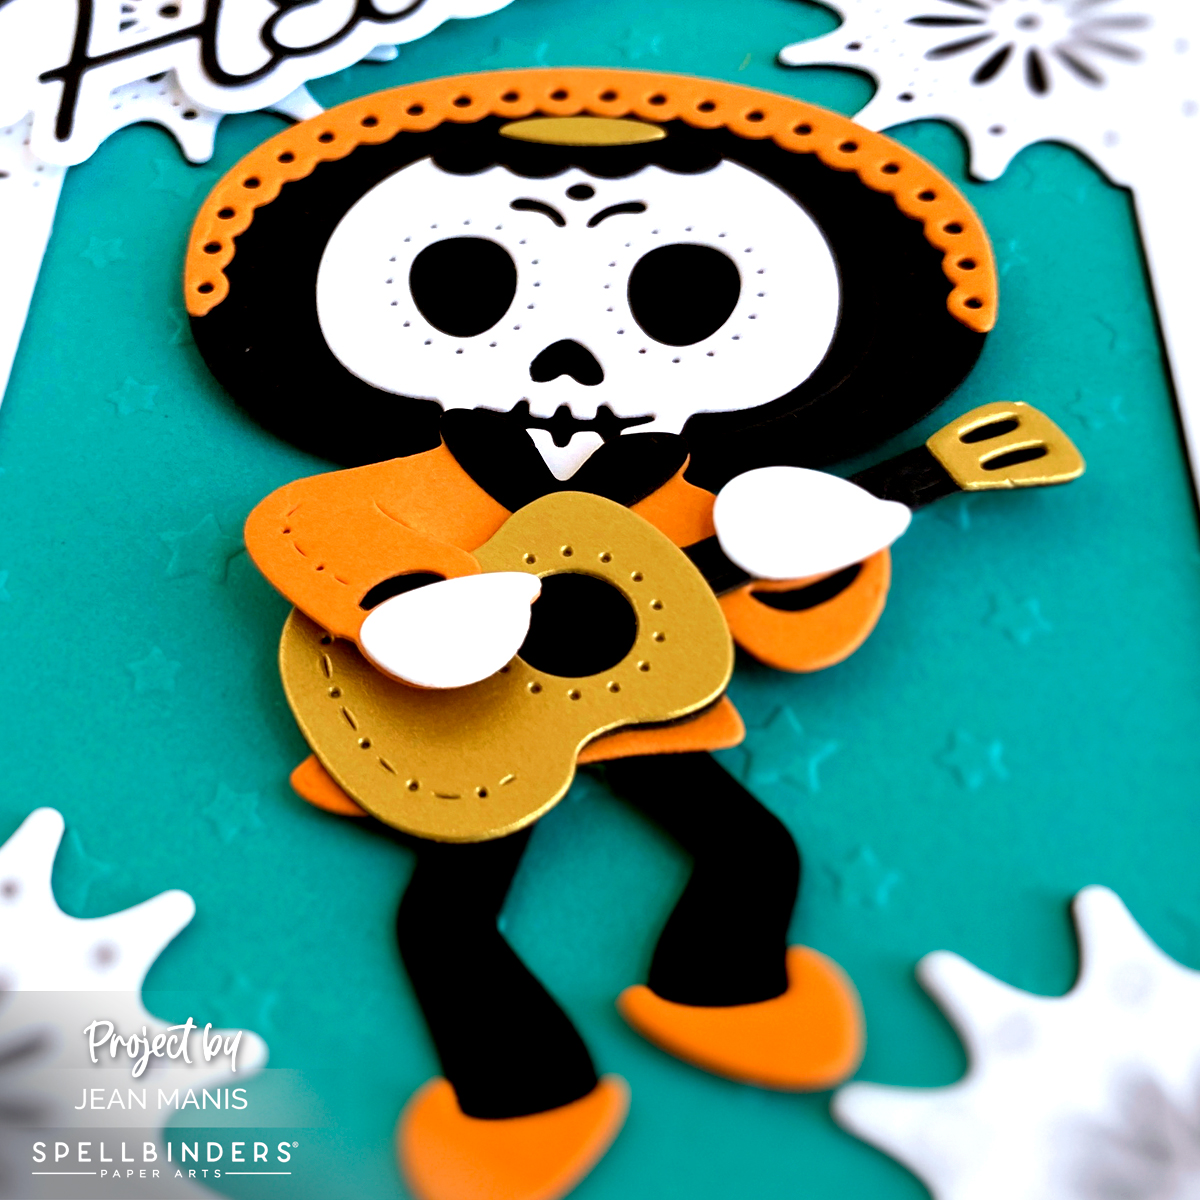
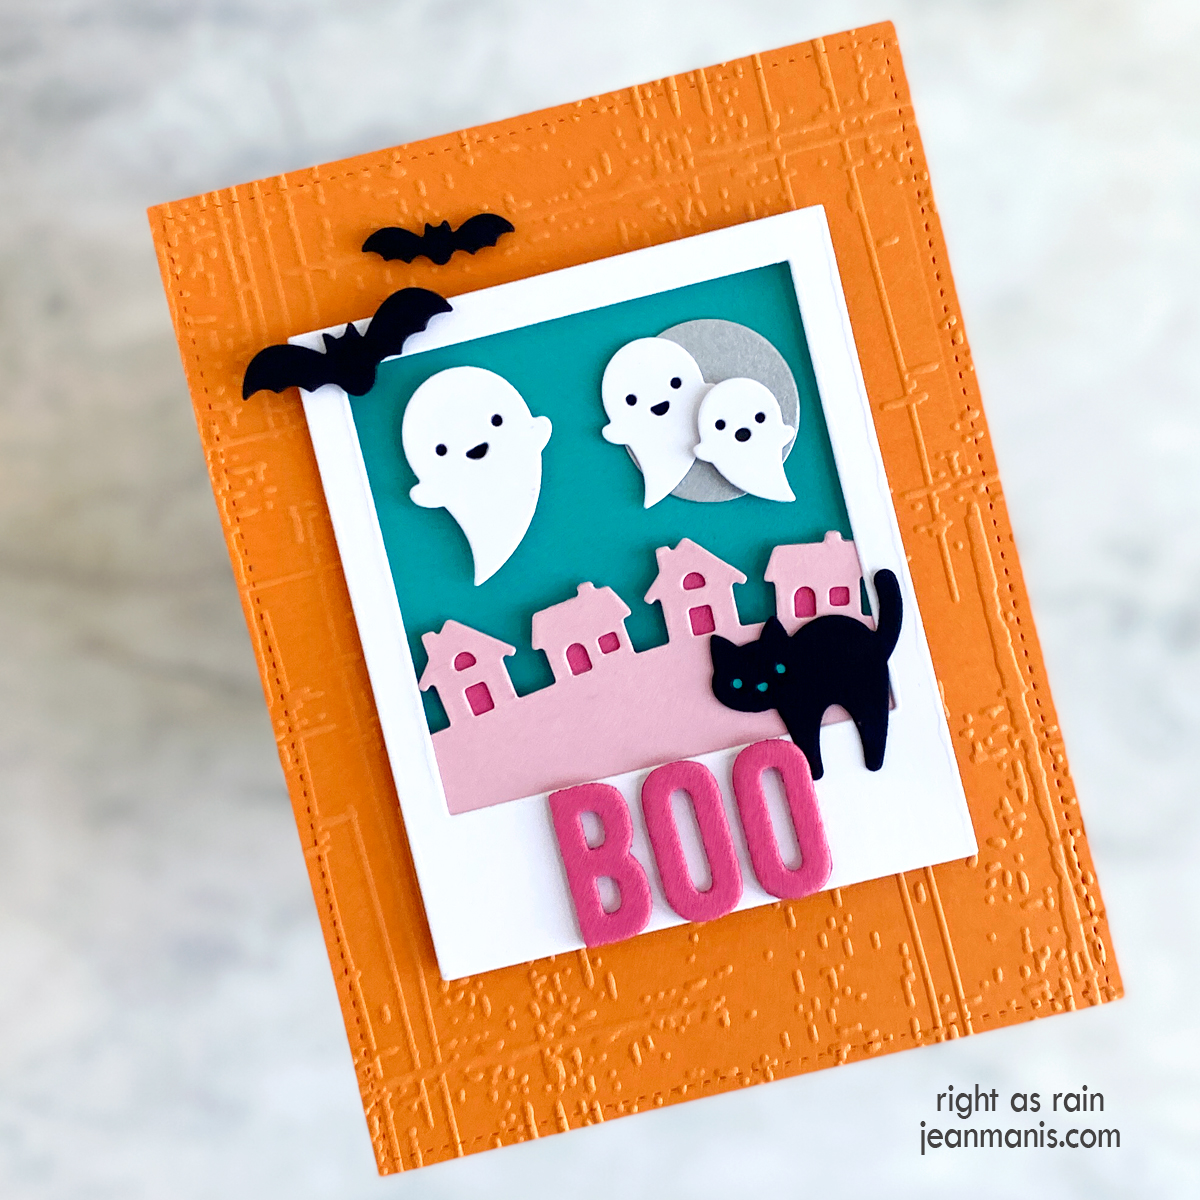
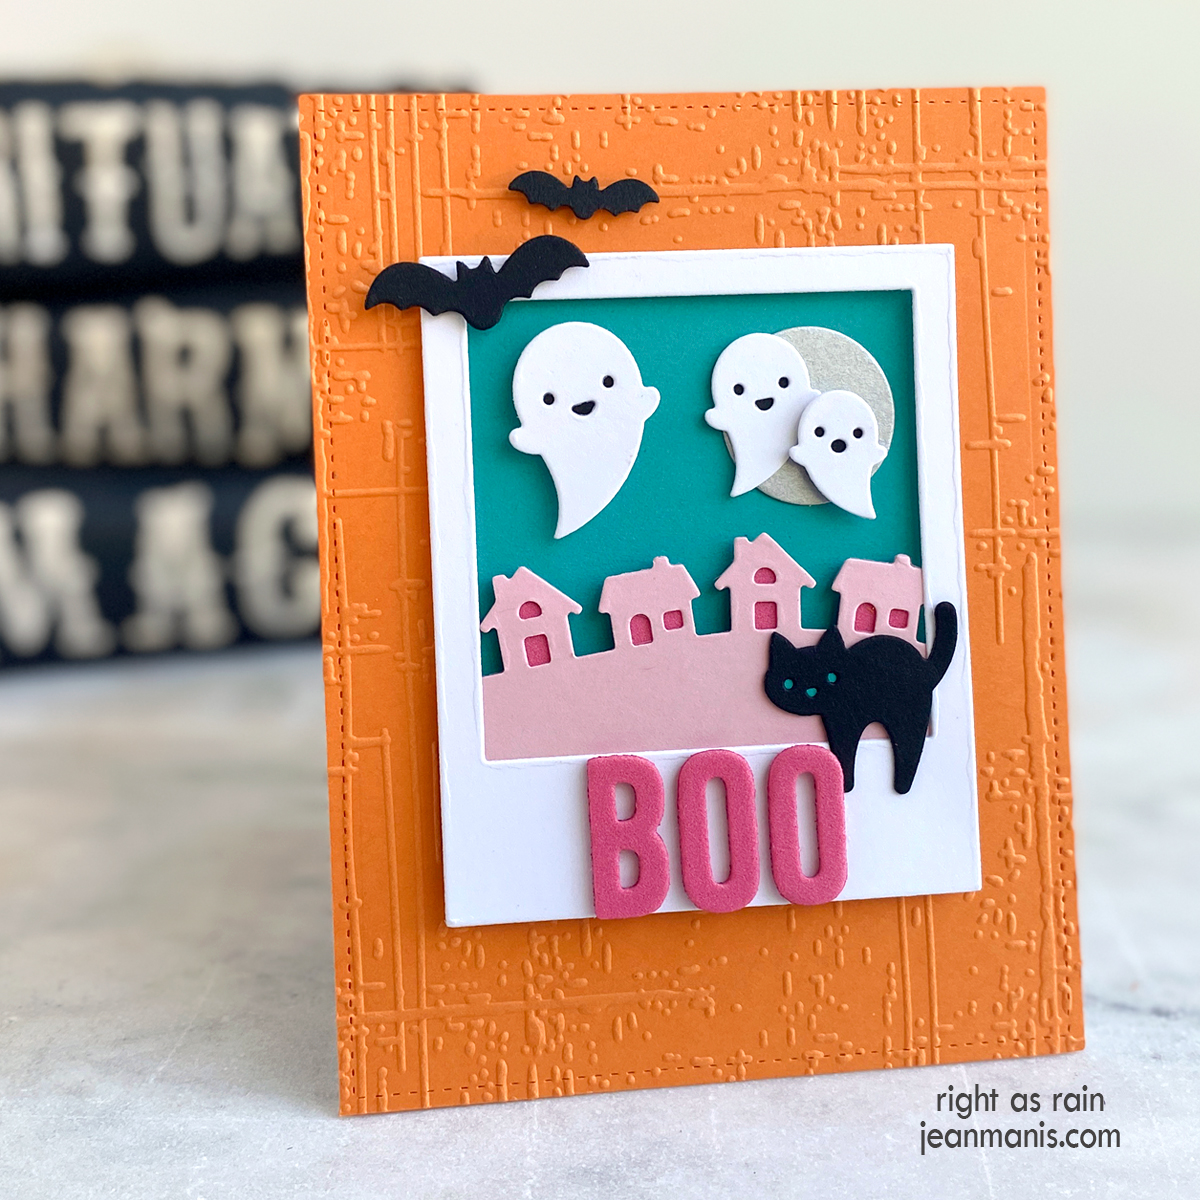
Elizabeth Craft Designs | Halloween Hay Ride

Hello! Today I am sharing a fall/Halloween card created with a combination of Elizabeth Craft Designs die sets. I am eagerly awaiting the fall- and Halloween-themed releases from the various manufacturers.

Elizabeth Craft Designs | Halloween Hay Ride

  • I colored Soft Finish Cardstock with a variety of Distress Oxide Inks from which I cut the Hay Ride and witch hat elements as well as the background grassy hill.
  • I attached the grassy hill to the stamped background panel. The sentiment is from a discontinued Taylored Expressions stamp set.
  • I glued the pumpkins, leaves, and hat to the hay wagon before adding the wagon to the background with foam adhesive.
  • To embellish, I added a single pumpkin and leaf to the lower-left corner.

Elizabeth Craft Designs | Halloween Hay Ride

You can see more information about the Elizabeth Craft Designs release that includes the Hay Ride set in this video and this one.


Rubbernecker Halloween Gnomes

Hello! Today, I am sharing a Halloween card featuring the Gnome Couple die set at Rubbernecker.

Rubbernecker Halloween Gnomes

  • I die-cut the Gnome Couple from colored cardstock and assembled the pieces.
  • I die-cut the Window 4-Pane and cut a panel of soft yellow cardstock with which to back the window.
  • I stamped the Reverse Confetti Spooktacular greeting on to a panel and added a strip of gray cardstock to the bottom.
  • I added the female gnome to the yellow cardstock and adhered the window frame to the panel with foam adhesive. I adhered the window to the card base.
  • I added the mail gnome to the card base with foam adhesive.

Rubbernecker Halloween Gnomes

Check out additional inspiration with the  Gnome Couple die set here, here, and here.


Spellbinders – Halloween Village Scene

Hello and happy almost equinox! Around here, in the Pacific Northwest, we have chillier temps early morning, spider webs on the plants, and leaves changing colors. Halloween is one of my favorite holidays, about which I have talked before. I put together several Spellbinders die sets to create a Halloween village scene.

Spellbinders - Halloween Village Scene

  • I created the card base with Shaded Lilac, Broken China, and Hickory Smoke inks using vellum to mask.
  • I cut a 2 inch circle from orange cardstock and added Spiced Marmalade to it. I trimmed the circle and added it to the card base.
  • I used dies in the Silent Night Make a Scene set to cut the village houses Onyx cardstock. I added cardstock behind the windows. Some were added to the base with foam adhesive.
  • I die-cut the ghosts with dies in the Open House Boo! set, backing their eyes with Onyx cardstock. I used the same set to create the sentiment. The ghosts were added with foam adhesive.

Spellbinders - Halloween Village Scene


Penny Black Halloween Camper

Hello! Today, I am sharing a Halloween-themed card created with Penny Black die sets. The 51-645 Campers die set was released this summer and I used it on a camping-themed card here. I wanted to test-drive it (pun intended) for a different season.

Penny Black Halloween Camper

Penny Black Halloween Camper


Spellbinders Halloween Cupcake Toppers

Hello! Today, I am sharing a papercrafting project – cupcake toppers created with the Spellbinders Open House Boo! set, part of their Halloween Collection. The cupcakes are pumpkin spice!

Spellbinders Halloween Cupcake Toppers

  • Die-cut bats, ghosts, and cat with dies in the Open House Boo! set from Snowdrift cardstock and glitter cardstock (Stampin’ Up black glitter). Die-cut sentiments twice each for dimension. Assemble pieces as required.
  • Die-cut 2-inch circles (with the detail and outline dies) from colored paper (Echo Park Halloween Magic) using the Essential Circles set (back with Onyx cardstock circles).
  • Attach elements  to circles; attach circles to wooden skewers. Add to cupcakes!

Spellbinders Halloween Cupcake Toppers

Spellbinders Halloween Cupcake Toppers

Looking for more inspiration? I previously shared cards created with these products here.